Lecture 5: Primary impressions for dentures
1/24
There's no tags or description
Looks like no tags are added yet.
Name | Mastery | Learn | Test | Matching | Spaced |
|---|
No study sessions yet.
25 Terms
Why take first impressions? (6)
study cast articulations
occlusal analysis
special tray construction
surveying casts for denture design
aid patient discussion
pre and post treatment record
prepare your bay:
what do/need you need to do to prepare to take the primary impression
equipment
after taking impression
mirror and probe
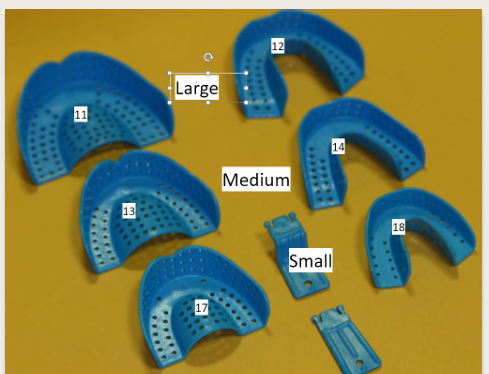
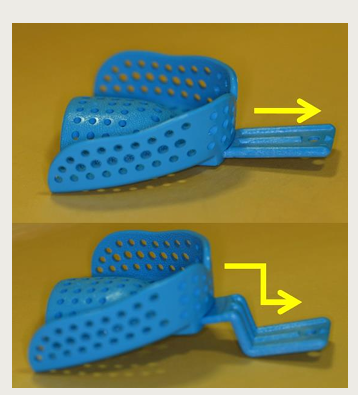
stock impression tray - best fit
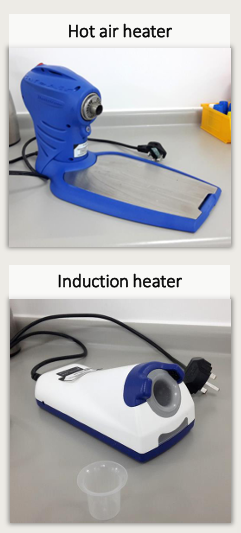
wax knife , pink wax and heaters (hot air and induction)
alginate (mixing bowl and spatula)
alginate adhesive (in dappens pot) with brush
disinfectant (small bowl in bay or access to shared container)
disposable kidney dish to carry impression
gauze and paper towels
plastic storage bag (biro to label it)
lab card
What are things to do to prepare the patient? (6)
Explain the procedure
Check mouth: (mobile painful or poorly positioned teeth, oral health problems that take priority over impressions e.g lost fillings, mouth ulcers, check if they’re a denture wearer)
gain consent
confirm medical history e.g allergies (adhesive e.g)
sit patient upright and practice nose breathing for when taking impression
How do you know if you selected the right sized stock tray? (4)
it is comfortable for the patient
contacts teeth occlusally on both sides
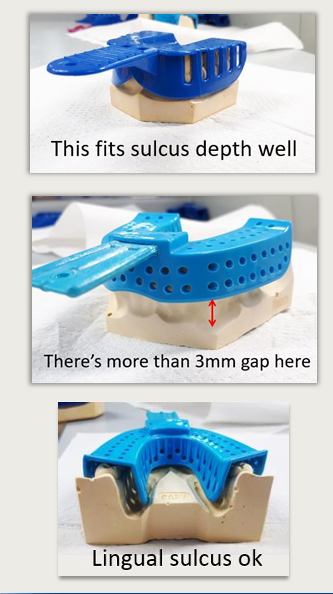
covers teeth and soft tissues leaving 2-3 mm gap from sulcus depth
allows slight movement side-to-side - (alginate should be minimum 2-3 mm thick to minimise tearing )
What can you also do with wax to choose the correct size tray
taking an imprint of the teeth using a sheet of wax
edentulous or dentulous handles?
straight handle - dentate
step handle - edentulous
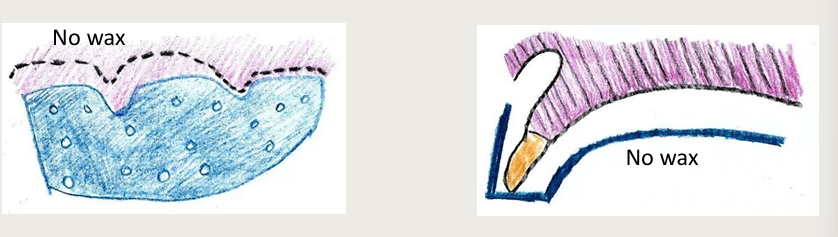
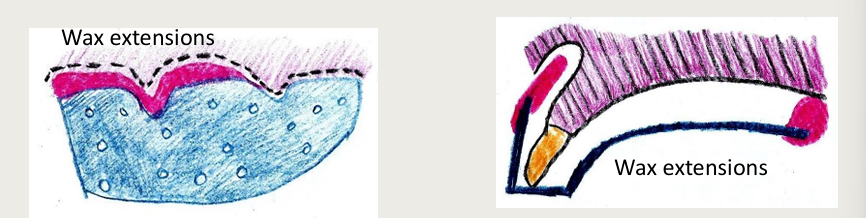
How do you modify the tray? (2 areas)
extend tray border with wax (to reach depth of the sulcus adequately)
overlap tray edge with warm wax inside first and then fold over and overlap onto the outside to create a double layer
recounter with warm wax knife to allow safe for frenal attachemnt
can also add wax to the middle of the hard palate area to pre-fill that space and reduce the amount of alginate needed in palate
MAKE SURE TO CUT FRENAL ATTACHMENT SPACE - LABIAL AND BUCCAL

why should the tray border extend into the sulcus? (2)
to push the alginate where we want it to go,
to support alginate when it has set to avoid casting errors
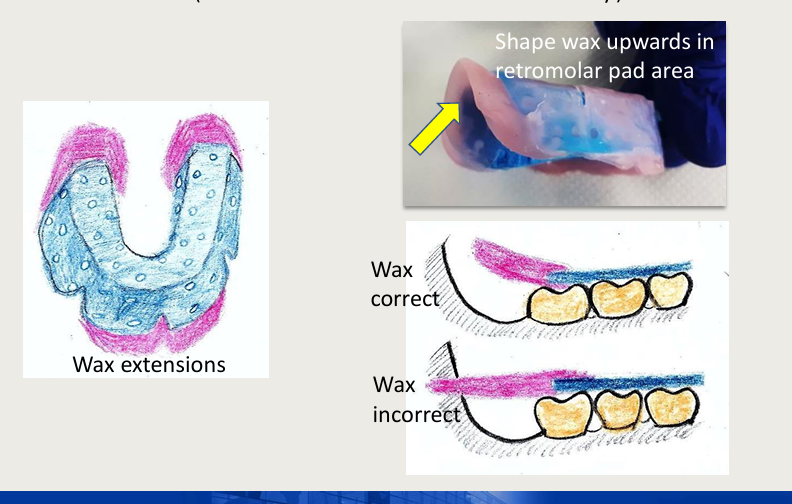
Where would the wax be added here?
Where should you modify a lower stock tray?
add wax in the labial sulcus and retromolar pad area (the wax must be shaped upwards to follow the normal anatomy of the area)
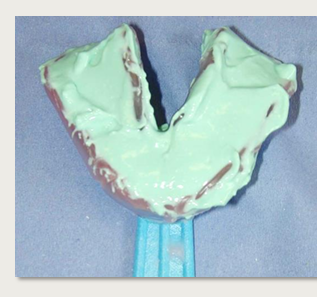
What could you do when taking impressions of someone with large edentulous areas?
use silicone putty to pre-fill large edentulous areas (optional) - need silicone adhesive
remember to trim away excess silicone carefully with scalpel, if too bulky or teeth too close (you need at least a a
2-3mm gap between the abutting tooth and alginate
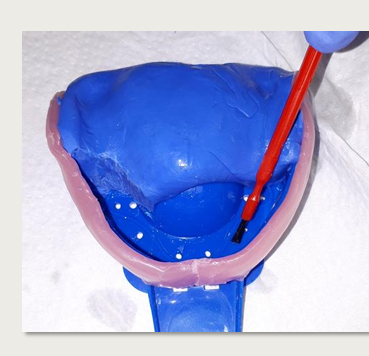
After modifying the tray, what do you add next?
alginate adhesive
How can you work safely with the alginate adhesive?
minimise patient exposure and don’t use if the patient is allergic (holes in the tray adequate for retention)
apply thin layer just before impression to inside of the tray, wax and exposed putty - allow to dry
only re-retry tray in mouth if adhesive dry and re-apply adhesive if retaking impression
After applying adhesive, what next?
consistency, fill up till where? avoid what? (3)
mix the alginate and load the tray
aim for medium consistency - not too sloppy (start new mix if unsuitable)
fill tray up to the top
avoid overfilling - especially the upper tray posteriorly where overflow likely
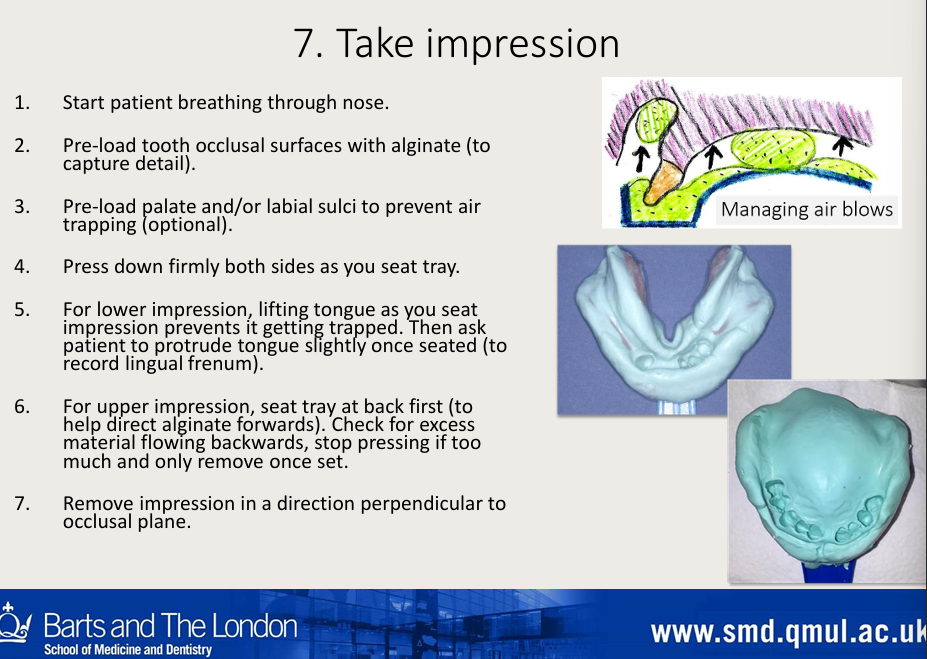
when taking the impression:
the patient must be told to what?
where might you put alginate material and why?
how do you press?
what might you do for a upper and lower impression
how do you remove the tray?
could ask the patient to go oo ee oo ee to get the soft tissue details
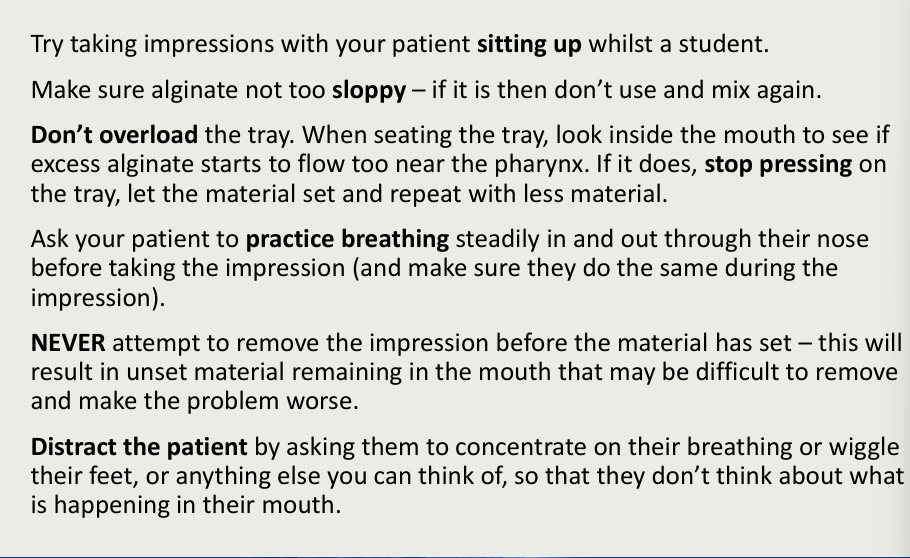
What might you do for a patient with a gag reflex? (6)
sitting up the pt
alginate not too sloppy
don’t overload the tray
practice breathing through nose
never remove the impression before material has set
distraction
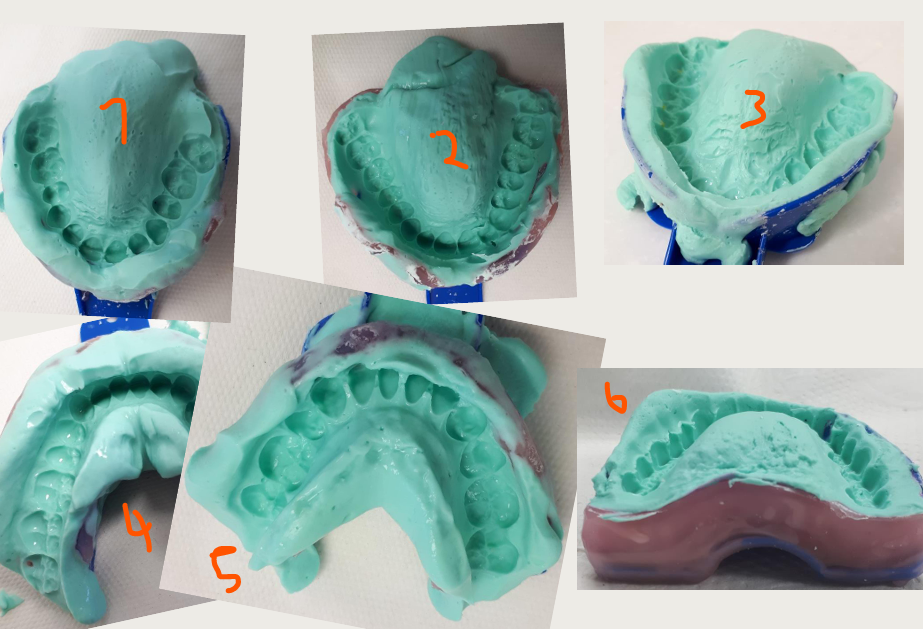
errors with these impressions?
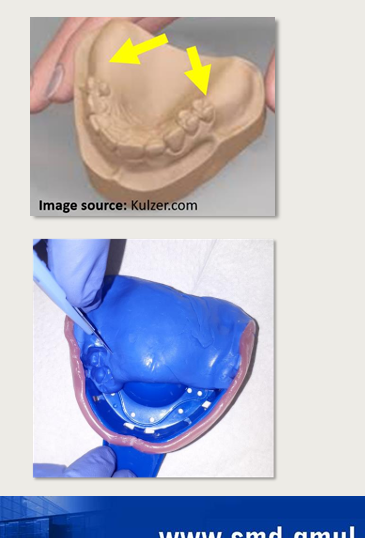
too much alginate at he back, (supposed to have a wider sulcus at the back and thinner at the front), lost shape of the sulcus on one side
not all the detail of posterior teeth recorded, lacking alginate over the wax, no rolled borders, streaky palate - so no detail recorded the tray has dragged
shallow air space on the palate, missing detail of some posterior teeth -short impression - maybe needed mroe wax or tray not right size, ant - alginate is flat - not recording sulcus - not enough alginate, or not pushed up enough at the front
missing some of the back tooth, not lifted tongue so thin alginate lingually, ant sulcus is bulky, lines ant - possible not enough alginate to full sulcus depth
labial sulcus/bone not recorded, maybe started setting before pushed into the mouth
lumpy alginate, some teeth detail missing, - started setting before placing into mouth
What do you do with the impression after it has been taken?
disinfection, wrap and store
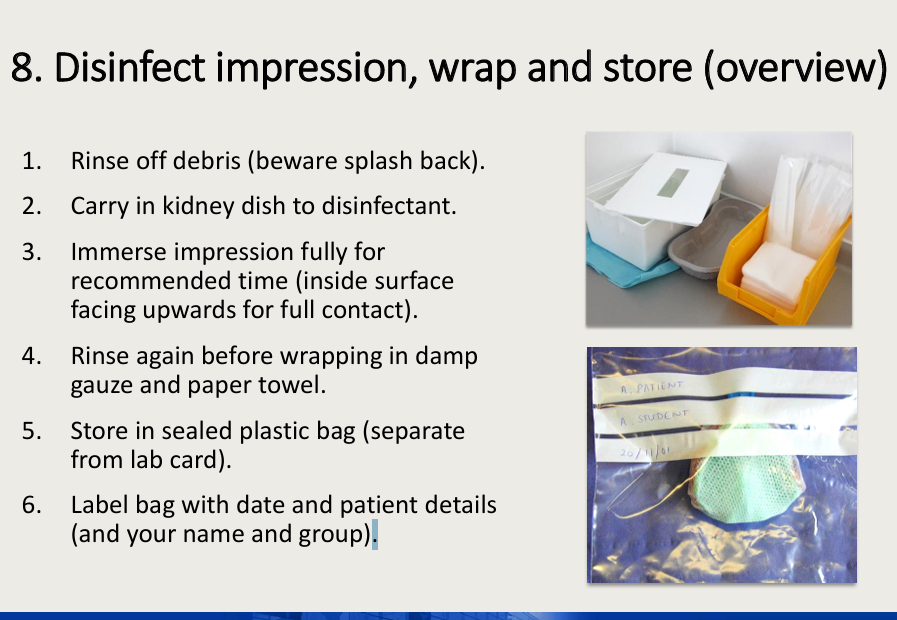
tips for during disinfection?
hold impression low down in sink away from you
carry in a kidney dish
prevent splashing by using basket inside the box
impression placed surface upwards
do not put hands into the disinfection solution
immerse for correct time
remove by lifting basket
rinse impression after disinfection as this can react with plaster/stone for casting
damp gauze and couple damp towels
seal in plastic bag - name, group, mrn and date if it was disinfected or no
cast alginate soon after appointment
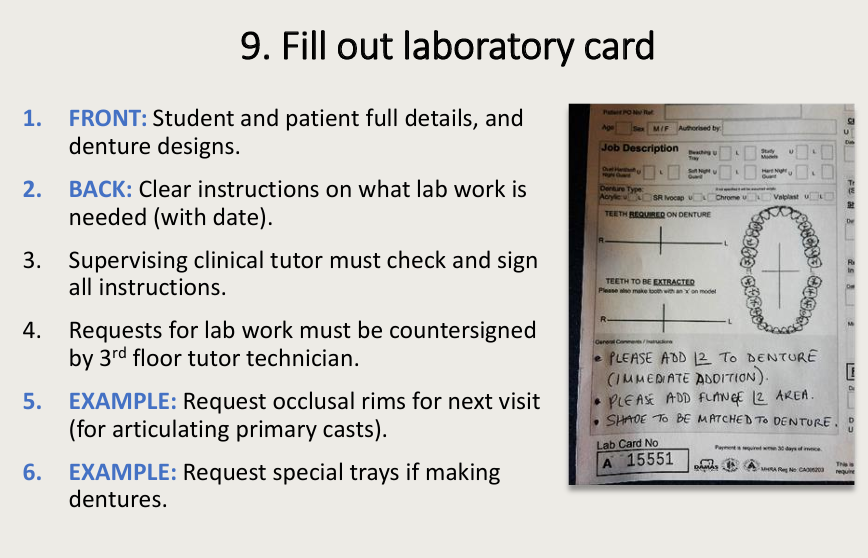
What do you have to fill in?
laboratory card
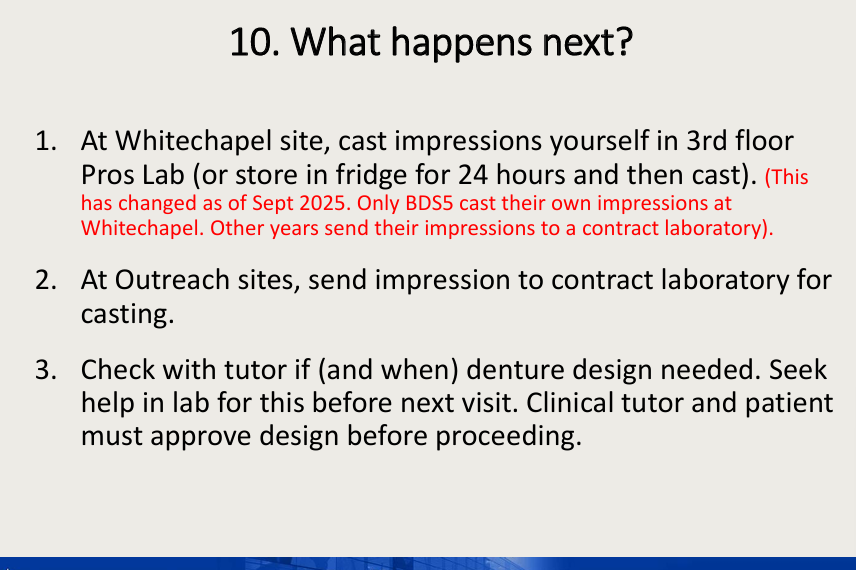
in hospital what are the steps for getting the work done?
contract laboratory, approve denture design with tutor and patient
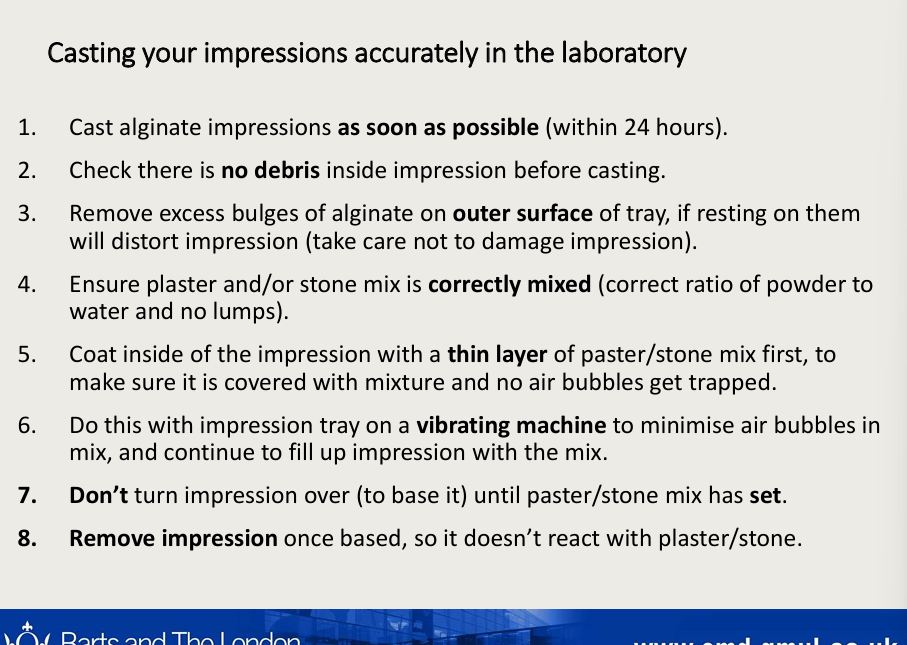
How do you cast? (did this last year)
dont turn over until oyu have to base as you want the plaster/stone to set upside down as then youll get water going up whihc will make the teeth weaker if it set bottom up :)… remember that when we added plaster first we added 3 legs then set then we based it
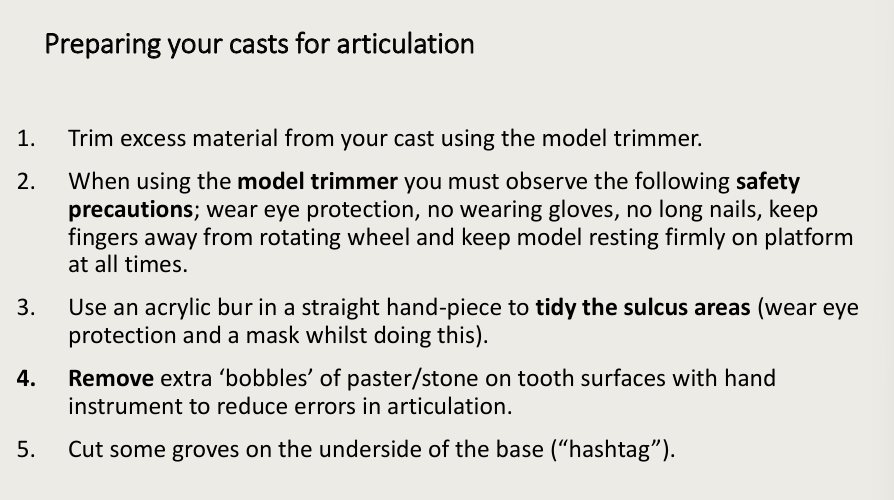
How do you prepare your casts for articulation? (did this last year)
model trimmer, acrylic bur, hand instruments, groove (using acrylic bur)
How is the face bow useful?
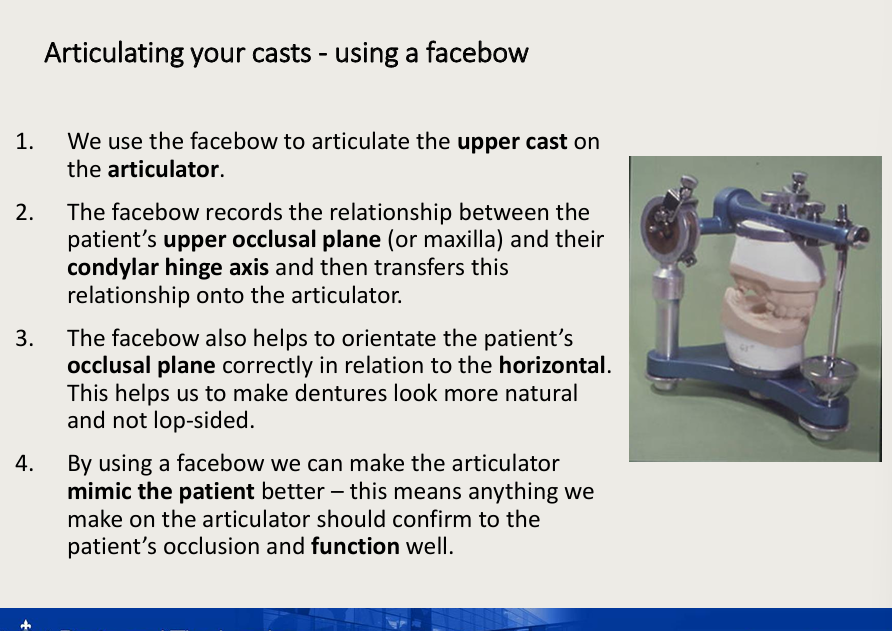
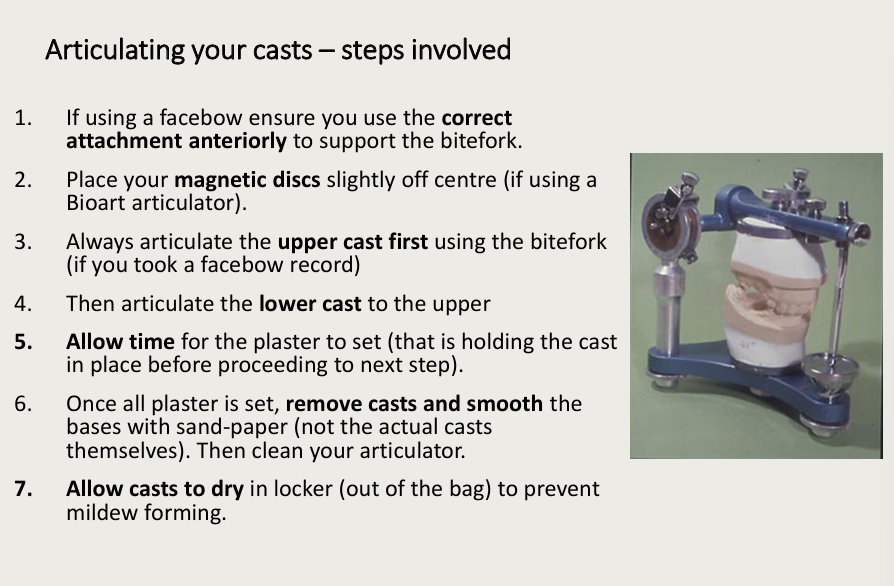
steps in articulating
magnetic disc and sand paper