ANATOMICAL CONSIDERATIONS - PRIMARY IMPRESSIONS
1/55
There's no tags or description
Looks like no tags are added yet.
Name | Mastery | Learn | Test | Matching | Spaced | Call with Kai |
|---|
No analytics yet
Send a link to your students to track their progress
56 Terms
what material are most dentures made of
acrylic resin
what are the two main stages of making dentures
denture construction
denture provision
what steps is denture construction made up of
denture construction
record the shape of the ridges and supporting tissues via primary and secondary impressions
establish the correct placement of teeth
registration
make a wax template/ wax block and try it in
when do primary and secondary impressions take place
at visits 1 and 2
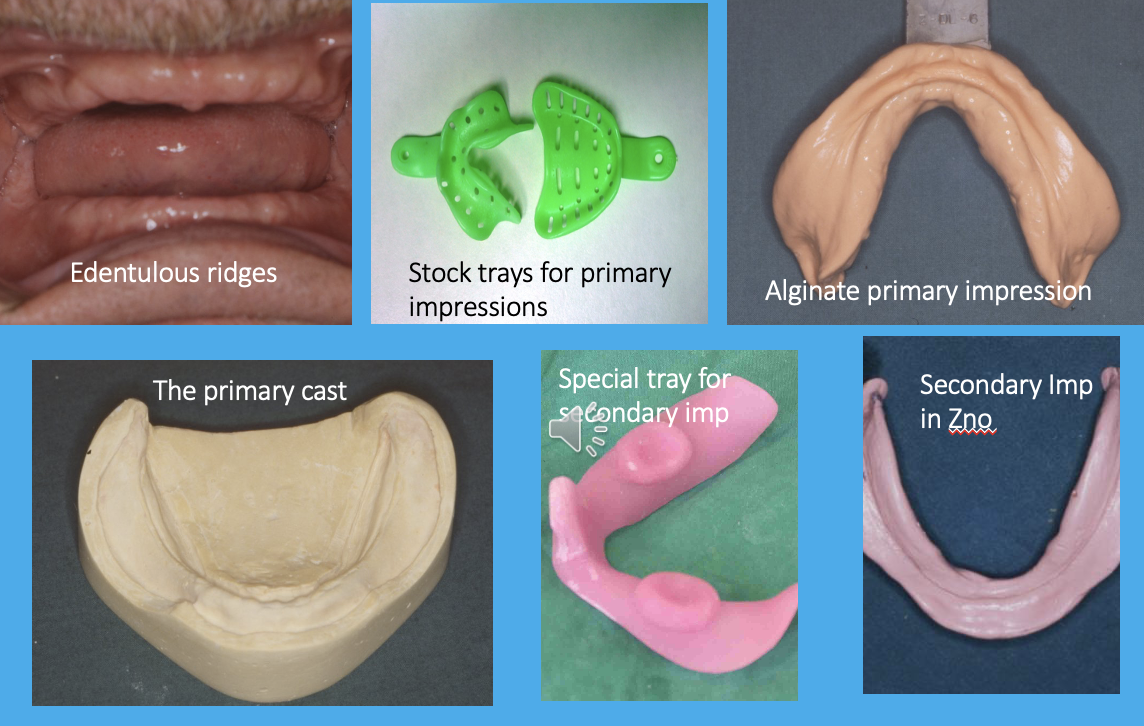
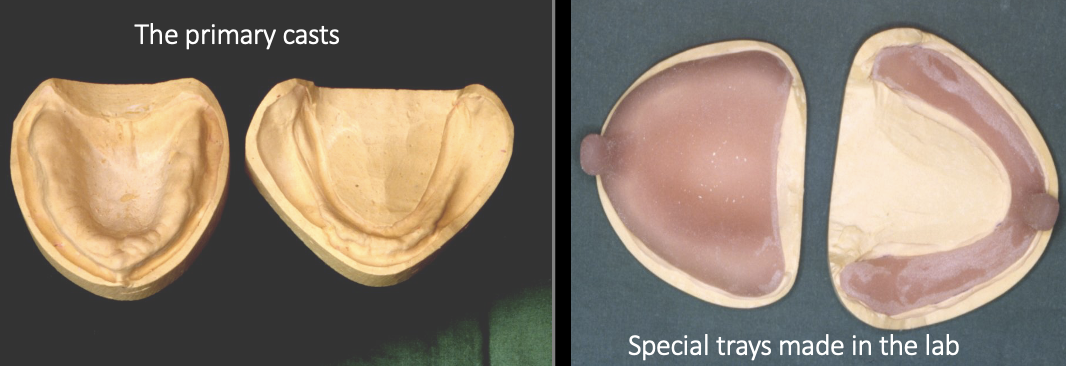
what is the process of taking primary and secondary impressions
take primary impressions of edentulous ridges using stock trays filled with alginate
a primary cast is made from the primary impression
a special tray is made from the primary cast
a secondary impression is taken using the special trays filled with zinc oxide
image of denture construction steps
notice how the stock trays are perforated but the special tray is close-fitting tray
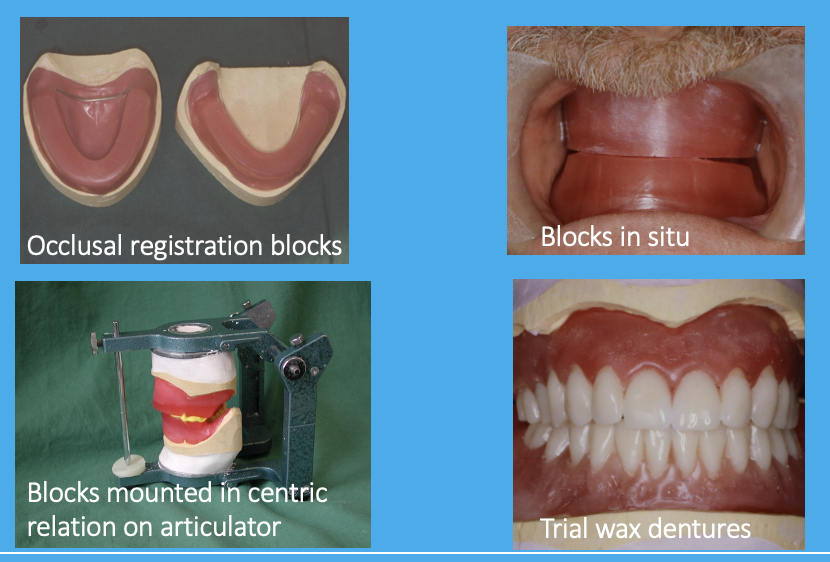
how is the correct placement of teeth established in denture construction
registration - visit 3
wax try-in - visit 4
how many appointments does denture construction require
4
outline the steps of denture provision
denture fit
post-fit review
6-12 months post-fit review
how many clinical stages in total does it take to provide dentures
7 clinical stages
if everything goes to plan, after how many appointments should a patient receive their dentures
5 appointments
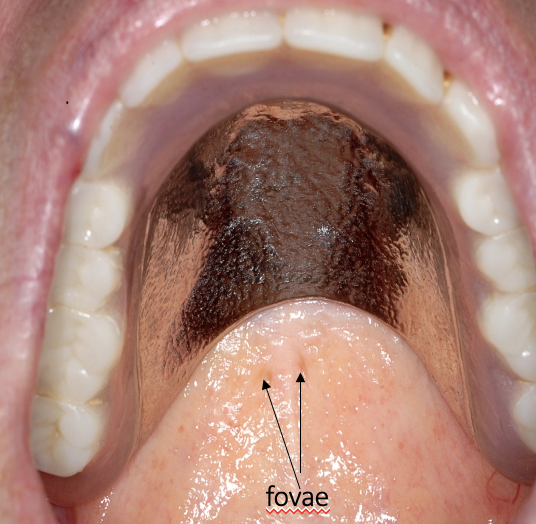
outline the fovae palatini
two small indentations at the junction of the soft and hard palate (maxillary structure)
what is the relevance of the fovae palatini to dentures
these indented regions identify the position of the posterior border of the maxillary denture
the fovae palatini should lie 1-2mm distal to the posterior denture border
describe the placement of these dentures
these dentures are underextended
what is notable about this photo
denture candidiasis is present on the hard palate
appearance: speckled palate
probably caused by patient wearing dentures at night leading to the fungal infection
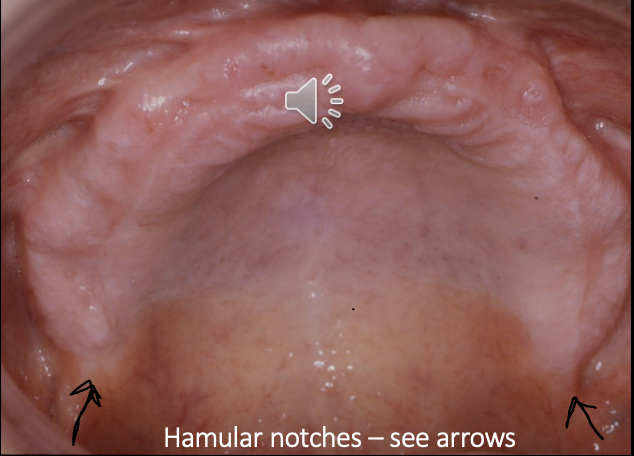
outline the hamular notches
maxillary structures
formed at the junction of the maxilla and the pterygoid hamulus process of the sphenoid bone
what is the relevance of the hamular notches to dentures
the hamular notches are where the back of the maxillary dentures should sit on the lateral sides
what happens if the maxillary dentures are improperly moulded in the hamular notch region
soreness
loss of retention
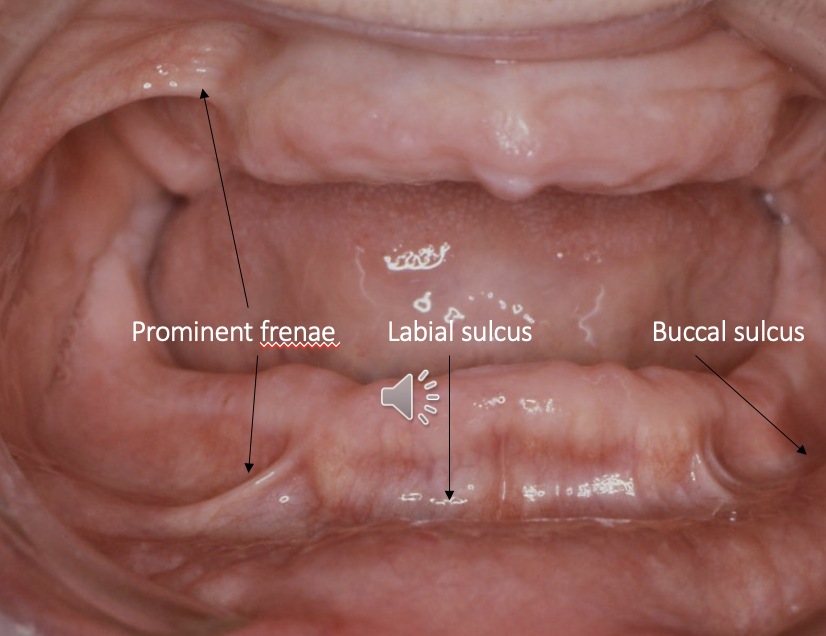
what other intraoral structures do we need to record
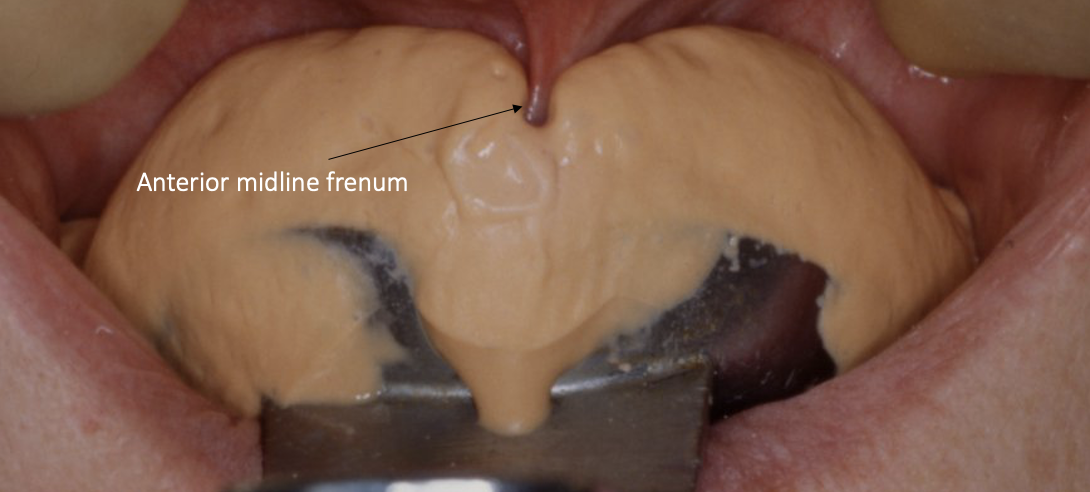
frenae: record any prominent frenae (often found in canine region)
sulci: record the full depth of the labial and buccal sulci
what is the significance of recording maxillary frenae and sulci
if any prominent frenae are trapped within the dentures, it can lead to soreness and infections
trapped frenae also reduce the retention of the dentures in function
why are frenae and sulci relevant to dentures
these structures mark the maximum functional extent of the denture border
the midline frenum is a key reference point when taking impressions to allow correct tray insertion
the ________ the sulcus the ____ resistance to lateral denture movement can be achieved
the shallower the sulcus, the less resistance to lateral denture movement can be achieved
i.e. the more the dentures will move around
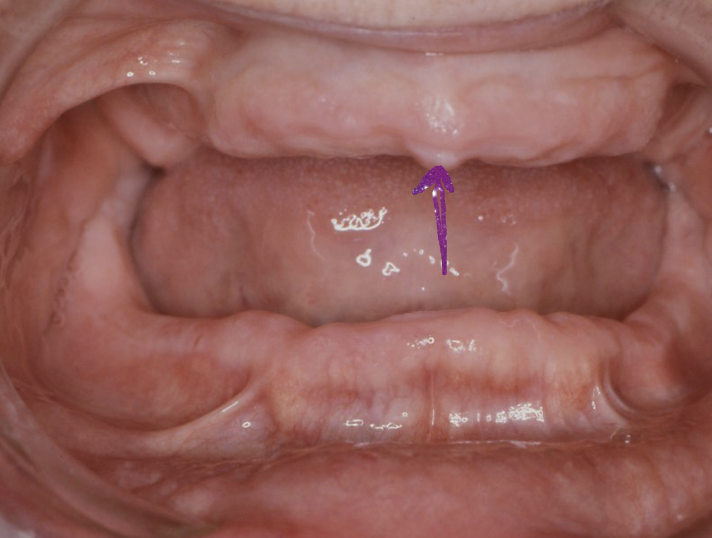
what does the purple arrow represent
incisive papilla
what is the relevance of incisive papilla to dentures
key guide to placement of maxillary central incisors in complete dentures
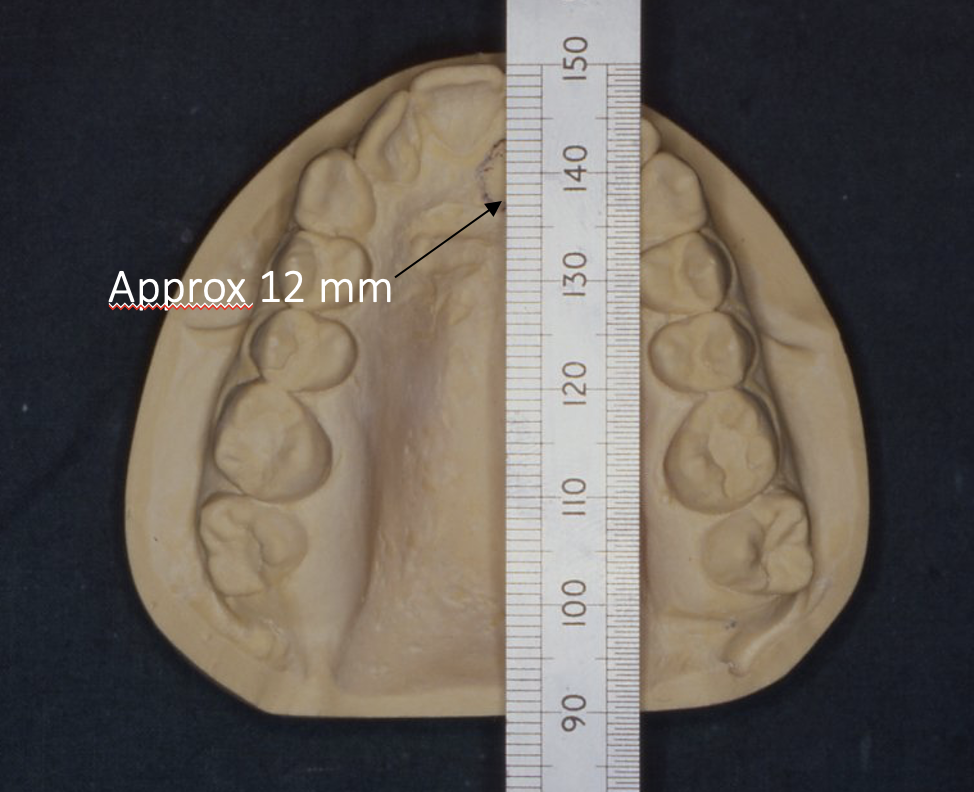
the mean distance between the distal border of the incisive papilla and labial surface of the central incisor is approx. 12mm
outline retromolar pads
mandibular structures
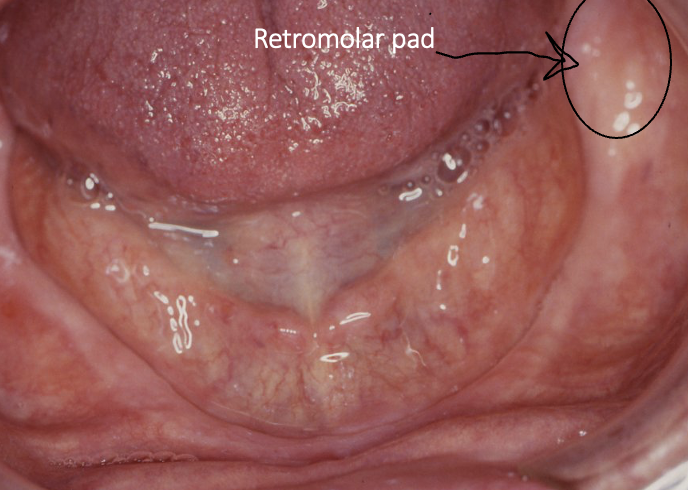
what is the relevance of retromolar pads to dentures
the RMP signifies the posterior border of the mandibular border of lower dentures
ideally the denture should cover ½ to 2/3 of the RMP
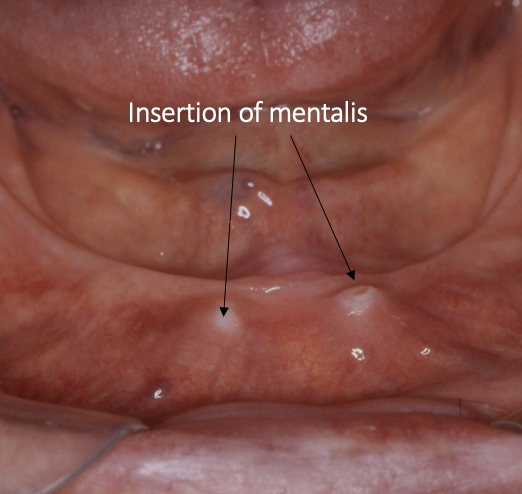
outline the mylohyoid and external oblique ridges
mylohyoid ridge/ internal oblique ridge
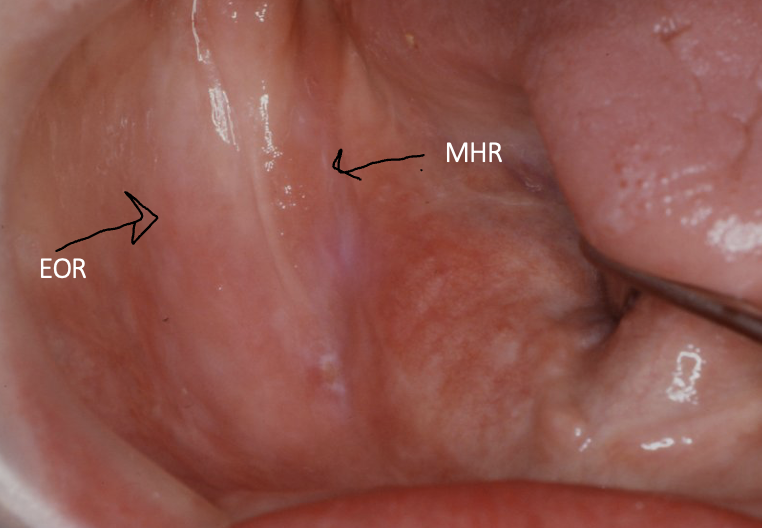
what is the relevance of the MH ridge and EO ridge to dentures
the mylohyoid ridge signifies the lingual peripheral border of the mandibular denture
the external oblique ridge signifies the buccal peripheral border of the mandibular denture
outline the lingual gingival remnant
not seen in every patient, more commonly in newly edentulous patients
thin band of gum tissue
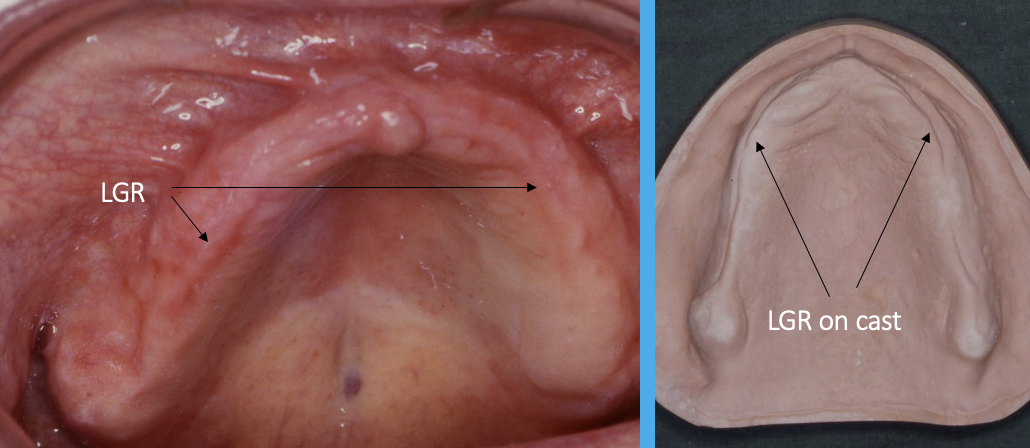
what is the relevance of the lingual gingival remnant to dentures
the LGR is an indicator for the lingual margin of posterior teeth and labial surfaces of anterior teeth
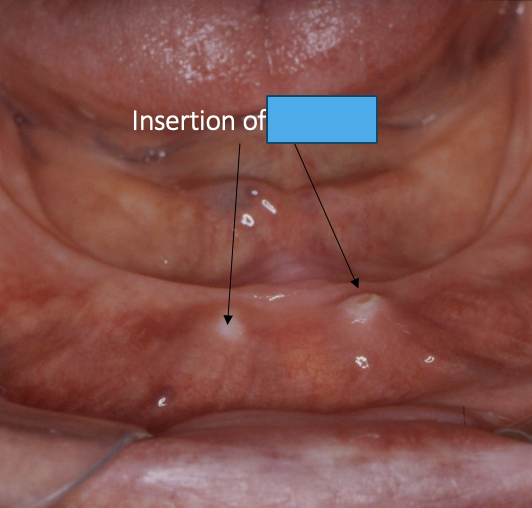
outline the genial tubercles
insertion point for the genioglossus
becomes more significant as the lower ridge resorbs
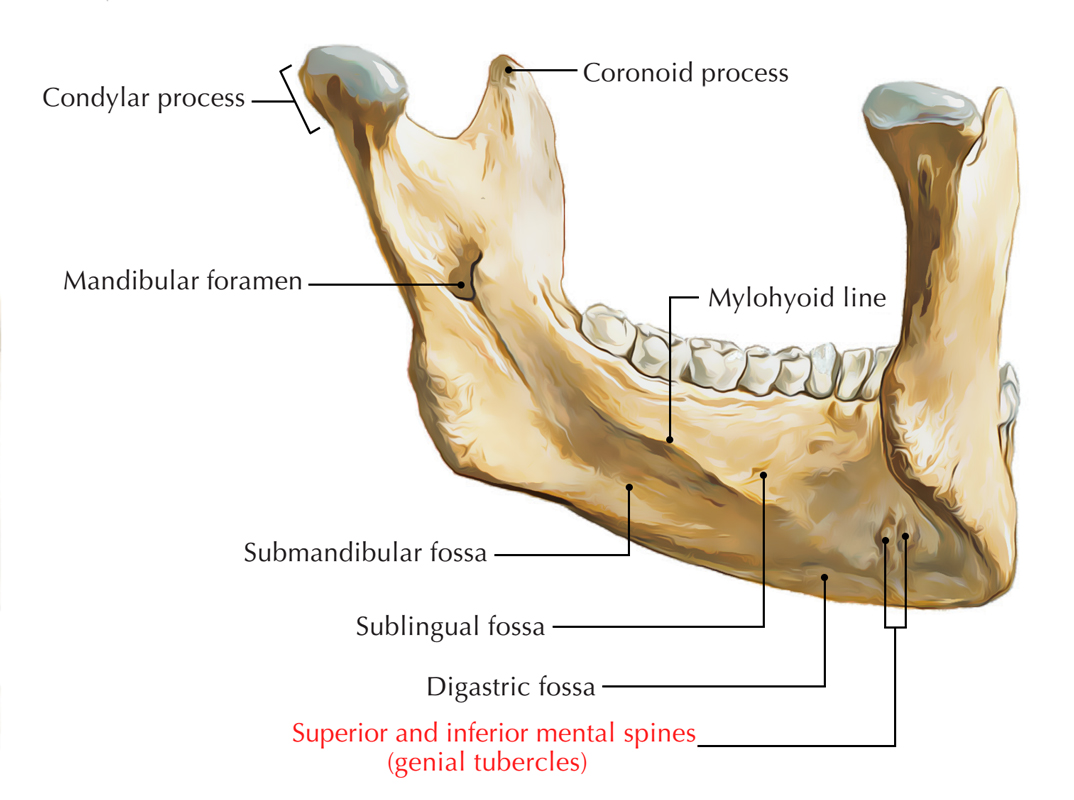
what is the relevance of the genial tubercles to dentures
if the denture rocks on them it can be traumatic for the patient (soreness and poor retention)
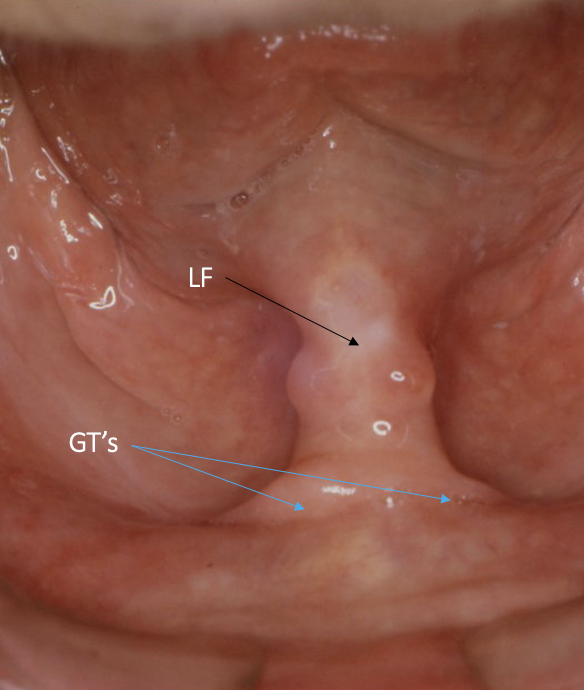

outline the lingual frenum and its relevance to dentures
band of tissue that attaches the tongue to the floor of the mouth
important when taking impressions that the patient moves their tongue from side to side and forwards so the LF is not trapped
what is the relevance of the mental foramen to dentures
as the jaw resorbs, the mental foramen becomes closer to the surface so the mucosa covering it does not provide much protection
the mental nerve therefore is more exposed
patients can get shooting pains as a result of pressure from denture
what are examples of some key information to give to patients to gain informed consent
diagnosis - current problem
prognosis - chance of success of the new dentures
can the patient’s desired be achieved
the number of visits needed
ask the patient if they understand and if they have any questions
document in clinical notes what has been discussed
what information should be given to patients during subsequent visits
explain what is going to happen this visit
ask the patient if they understand/ have questions
re-establish the treatment objectives
write up in notes what has been discussed
what is the purpose of primary impressions
to record the patient’s anatomy to allow the construction of special trays
what is the most popular primary impression material
alginate
what are advantages of alginate
simple technique
cheap to use
bonds to tray with adhesive
viscous during placement so less chance of patient discomfort
elastic when set so does not crumble/ break easily

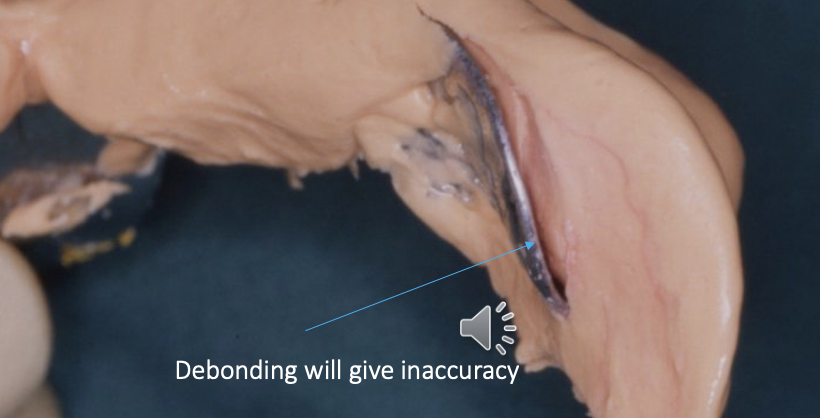
what are disadvantages of alginate
unstable if not cast up quickly
is inaccurate in recording large undercuts/ prominences if not fully supported by the tray
can debond from the stock tray if large undercuts are present
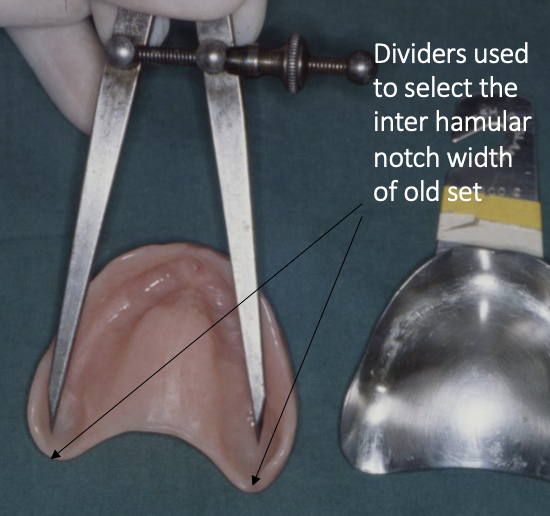
how should you select the stock tray size
if the patient already has a set of dentures, use a set of calipers and take an inter-hamular measurement and compare it to the tray size
if not, just use an educated guess based on patient dimensions
patients may need different sizes for the upper/ lower jaw
what is the next step after selecting a tray size
try in the tray by rotating it into place
ensure it covers the full denture bearing area
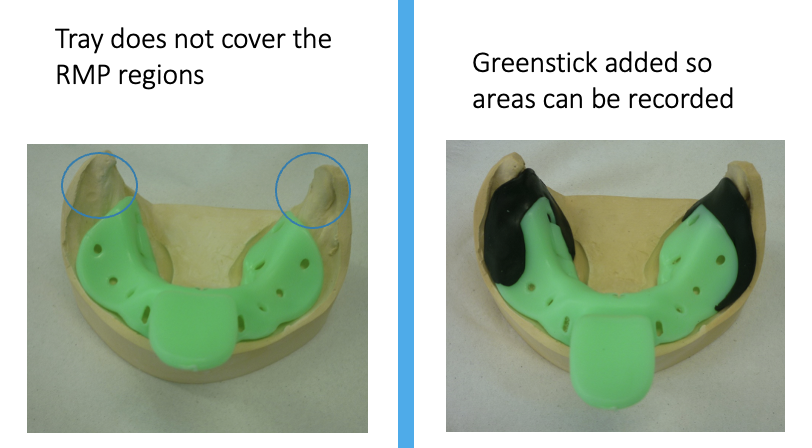
if none of the trays fit quite right, what can be done to adapt it
use a material called greenstick
most commonly used to add material to cover the retromolar pads and palate
how is greenstick used
need very hot water to allow it to soften evenly
need a flame for the ‘stick’ variety then hot water
very difficult to attain the ideal temperature to allow it to work without burning
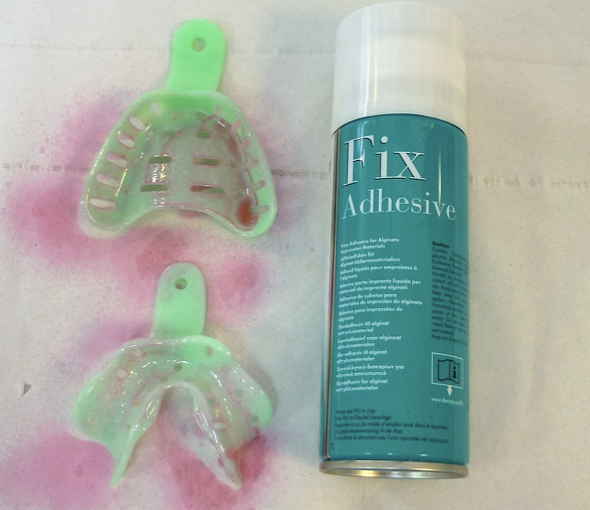
once the right tray size is acquired, what is the next step
spray the adhesive, ensuring copious coverage
leave for 5 minutes before taking the impression
where should you stand when taking impressions
maxillary impression: stand behind the patient’s right shoulder, their maxilla should be at your elbow height
mandibular impression: stand in front of the patient and the mandible should be at your elbow height
» patient should be at a 60°
instructions for a maxillary impression
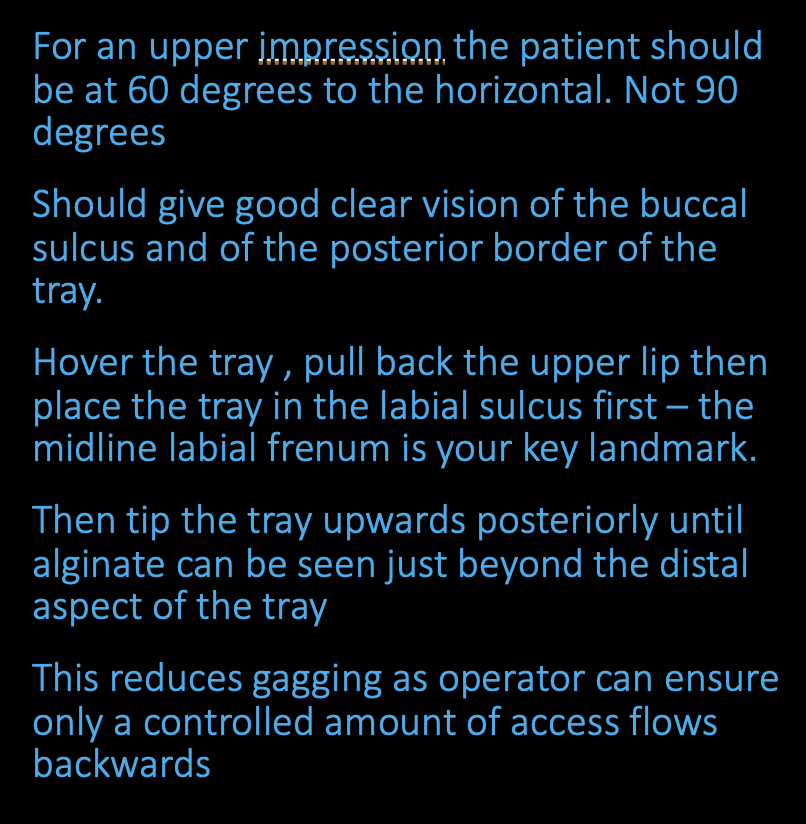
what anatomical landmark should be used as a key reference point when taking a primary impression
the superior/ inferior labial frenum
what else should be done whilst taking an impression
border moulding
functional movements like lifting the upper lip, moving tongue around
what should you check for after taking out a primary impression
check for alginate debonding
if it debonds, then retake the impression
after taking a good primary impression, what is the next step
trim peripheral excess with a scalpel until it is 1-2mm short of the sulcus depth
trim the area of frenal attachment so it can move freely when put back in the mouth
how is a more accurate impression of the periphery achieved
by carrying out a wash impression with a less viscous mix
do not overfill with alginate
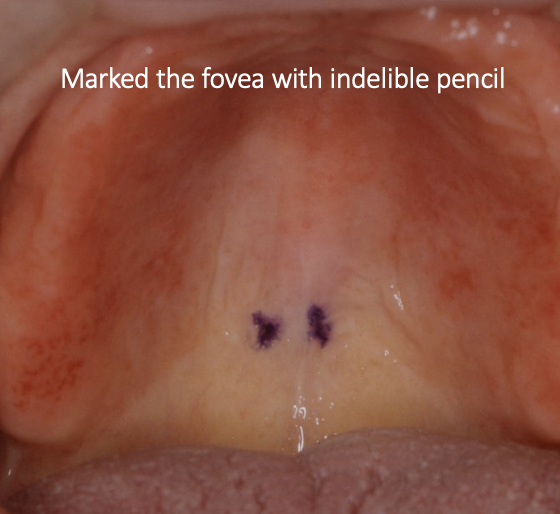
how should you mark the primary impression for the close fitting special tray
use an indelible pencil
mark 1-2mm inside the functional depth of the periphery
this gives the technicians an idea of where you want the special trays to extend to
if the patient likes their old dentures, what can be done to mimic the features in their new dentures
provide an alginate impression of the old set of dentures
what is the last step before sending the impressions to the lab
disinfect in Perform for 10 minutes