in-person lecture: handwriting without tears
1/37
There's no tags or description
Looks like no tags are added yet.
Name | Mastery | Learn | Test | Matching | Spaced |
|---|
No study sessions yet.
38 Terms
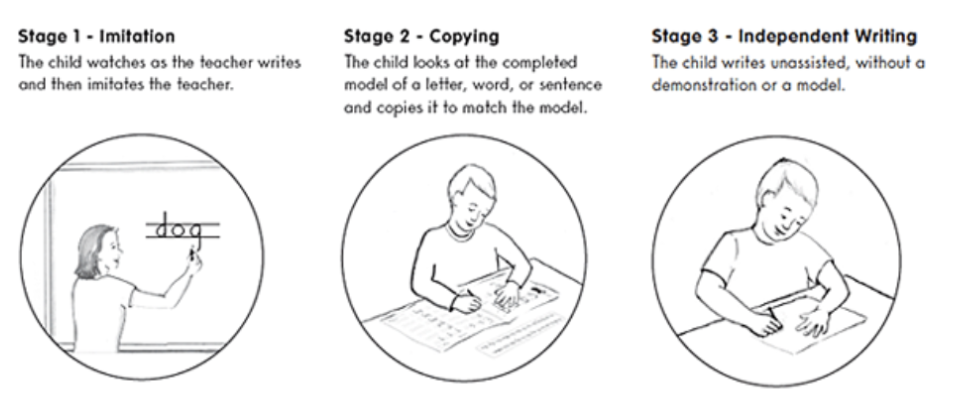
stages of learning
imitation:
child watches as the teacher writes and then imitates the teacher
copying:
child looks at the completed model of a letter, word, or sentence and copies it to match the model
independent writing:
child writes unassisted, without a demonstration or a model
multisensory
engage students in a fun, interactive way-dynamic classroom environment
visual
Large step-by-step visual directions to teach letter formation
Large arm movements and props so students can see easily and follow along
tactile
Use Wet–Dry–Try activities on a slate or blackboard
Finger tracing
Building activities that teach letter formation and promote motor skill development.
auditory
Consistent, child-friendly language
Music and different voices
kinesthetic
Music and movement to teach letter formation, social skills
Develop motor memory through body movement and hands-on activities.
paper type materials
Gray block paper
Double lined paper
Big sheet draw and write pape
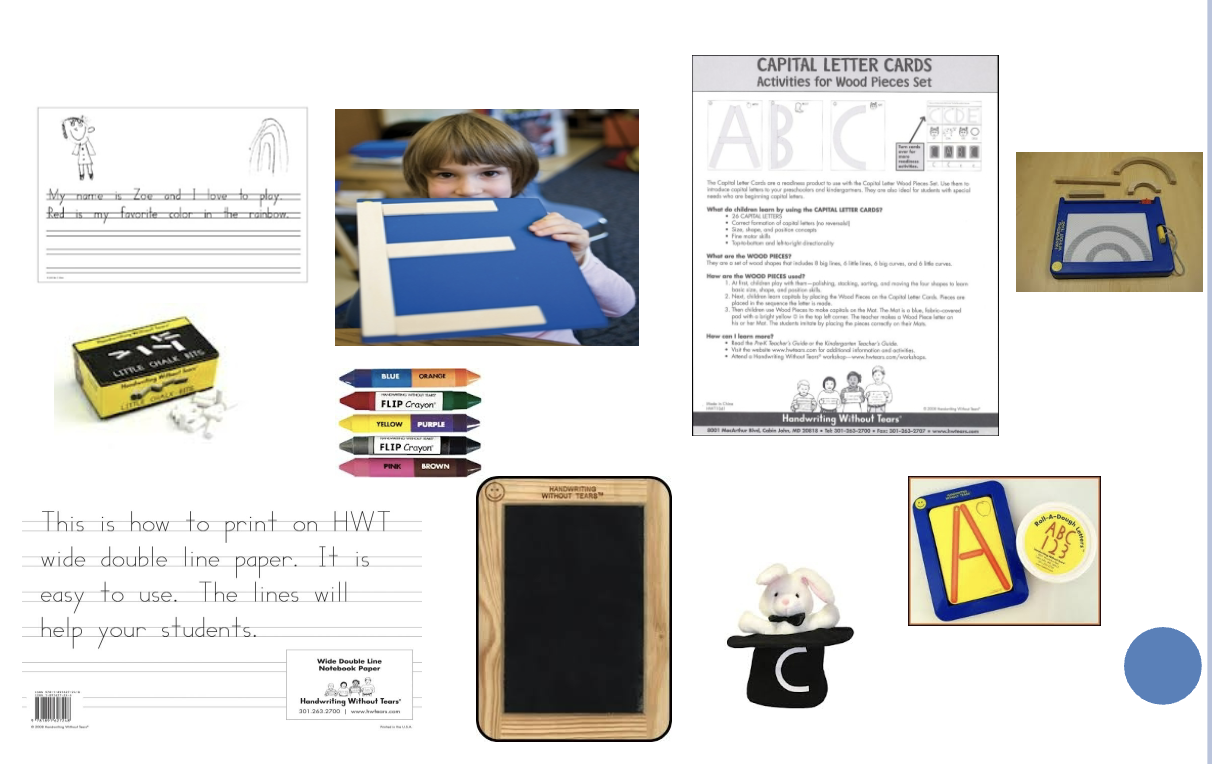
letter play materials
Roll a dough letters
Stamp and see screen
Wood pieces
Capital letter cards for wood pieces
Mat for wood pieces
Magic C Puppets

backboard products materials
Slate chalkboard
Blackboard with double lines
Little sponge cubes

writing utensil materials
Flip crayons
Pencils for little hands
Little chalk bits

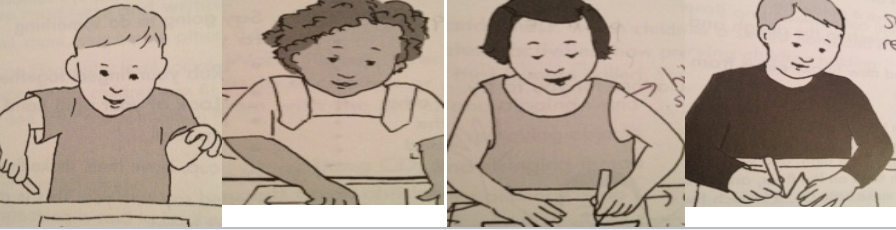
developmental stages in writing
2 yr
3 yr
4 yr
5 yr
2 yr
Arm in the air fisting the crayon - arm writing
Helper hand high in the air- imitation of the other hand
Random contact with the paper —> scribbles
3 yr
Hiked up writing arm fisting crayon - arm writing
Helper hand down on the paper
Copies lines down and across —> circle and cross
4 yr
Hiked shoulder, more appropriate grasp - arm writing
Helper hand down
Shapes emerging
5 yr
Set and ready to learn handwriting
Forearm on the table!
In order to isolate movement of hand for HANDwriting the forearm must be on the table
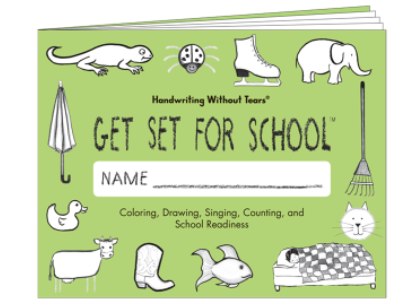
get set for school:
pre-K curriculum
Developmentally appropriate, multisensory approach to readiness skills.
NOT formal handwriting instruction
Structured but informal way of building a foundation of readiness in children
We don’t throw a ball at a child and say learn to catch; we don’t hand a baby a fork to teach feeding, yet we hand a child a pencil and say write
preparing young children
through the use of different multi-sensory experiences
teaches children
through the use of different multi-sensory experiences
Finger play
Hands on letter play
Mat Man
Music
Tactile activities
Movement
teaches children
Manipulating their fingers
Imitation
Following directions
Handedness and bilateral skills
Memory
Tactile discrimination
Body awareness
Drawing pictures of people
Body parts
Working as a group
hands on letter play:
wood pieces
Call them lines (not sticks); we use lines in writing
Capital letter cards
On the mat- teaches the motor plan of left to right
hands on letter play:
roll-a-dough letters
With or without letter cards
Other things to do with the tray- shaving cream, sand, putty, golf tee to write letters- teaches graded movement
hands on letter play:
stamp an see screen
Developed to help children with sequencing
Letter recognition
Directionality
Writing tool- the tool is small to fit into small hands and encourages the use of a mature grasp; placed in the middle for right/left-handed children
hands on letter play:
wet-dry-try
student do NOT start with blank slate
multi-sensory
repetition
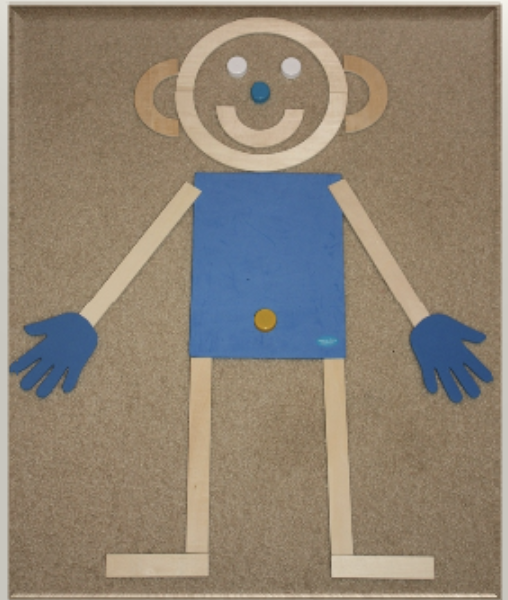
mat man
Teaches body awareness
Helps organize children
Prepares them to draw a picture of a person
Teaches body parts and function
Visual perception -associate parts to whole, figure-ground to find the desired pieces from a collection
Socialization skills -small group task, following instructions
Number awareness-counting legs, eyes, wooden pieces
Shape recognition -building and naming shapes within the picture.
teaching grip
not a natural skill —> needs to be taught
crayon song
air writing
child is shown how to hold the crayon; they then aim to the star and
scribble arounddrop the crayon and do again; repeat multiple times
it is the grip on the crayon we are focusing on!
gives opportunity to practice and build motor plan
create sheets with stamps
HWT believes in using crayons to teach proper grip to very young children; children will naturally transfer this skill when they begin to use pencils
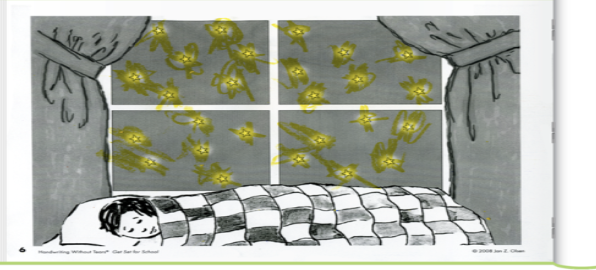
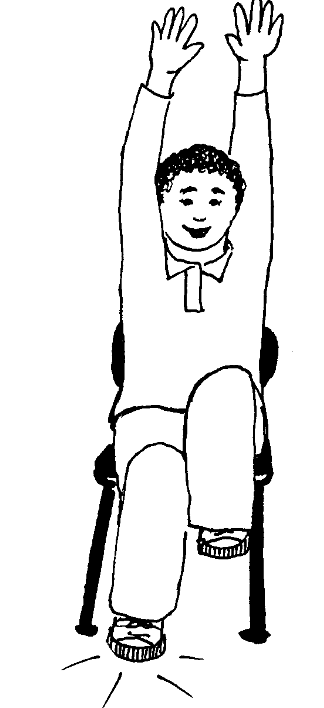
posture
Table/desk Check
Feet flat on the floor
Knees at right angle
Trunk straight or leaning forward to write
Arms can rest comfortably on table; lift your shoulders; push them back
handwriting without tears workbooks
Visually simple
HWT left the detail out of the pictures in the workbooks
Illustrations promote left-to-right directionality-illustrations go left to right across the page to encourage correct visual tracking and writing direction
Black and white
No grade level on cover
Accommodate lefties and righties
Pages provide models on the left and right so that left- handed children can easily see the model they are copying
Cross-curriculum connections
workbookds
Preschool /Get set for school
Crayon only workbook- increased sensory feedback
Letters at the bottom of the book to help children stop – they want to stay on the page
Shapes are taught throughout the book to encourage pre-strokes of letters
Kindergarten workbook/Letters and Numbers for Me
Letter recognition
Correct letter and number formation
First grade workbook/ My Printing Book
Lowercase letters with a review of the capital letters
Second grade workbook/ Printing Power
Reviews both capital and lowercase letters
copying of sentences, words and paragraphs
Third grade workbook /Cursive Handwriting
Starts with pre cursive writing techniques
Upper and lower case letters, words and phrases
Fourth grade workbook/ Cursive Success
full review of the lower case letters and instruction of the capital letters
Stories included for copy work
Fifth grade workbook/Can-DO Cursive
cursive writing skills with proper grammar
Can-DO Print
Fifth graders or older students who prefer printing to cursive, but still need practice
Quick, thorough review of printing
Printing skills are used to write paragraphs, poetry, and thank you notes.
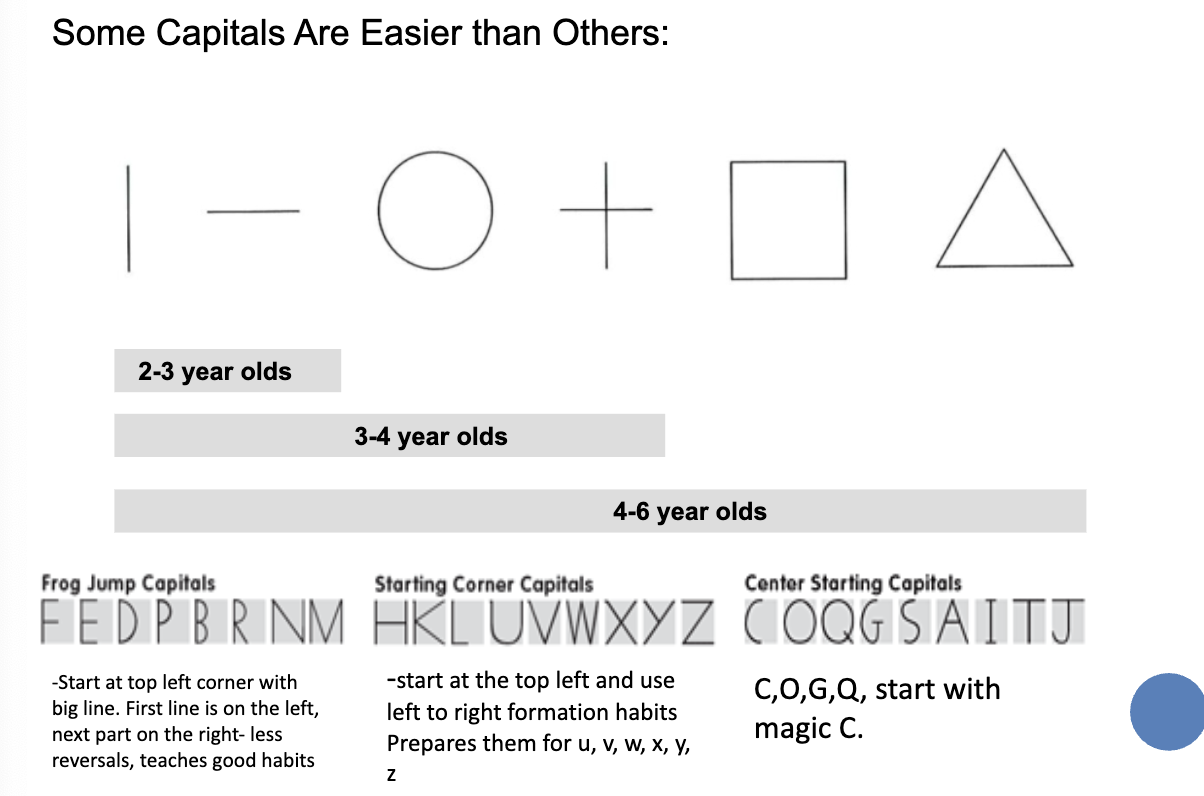
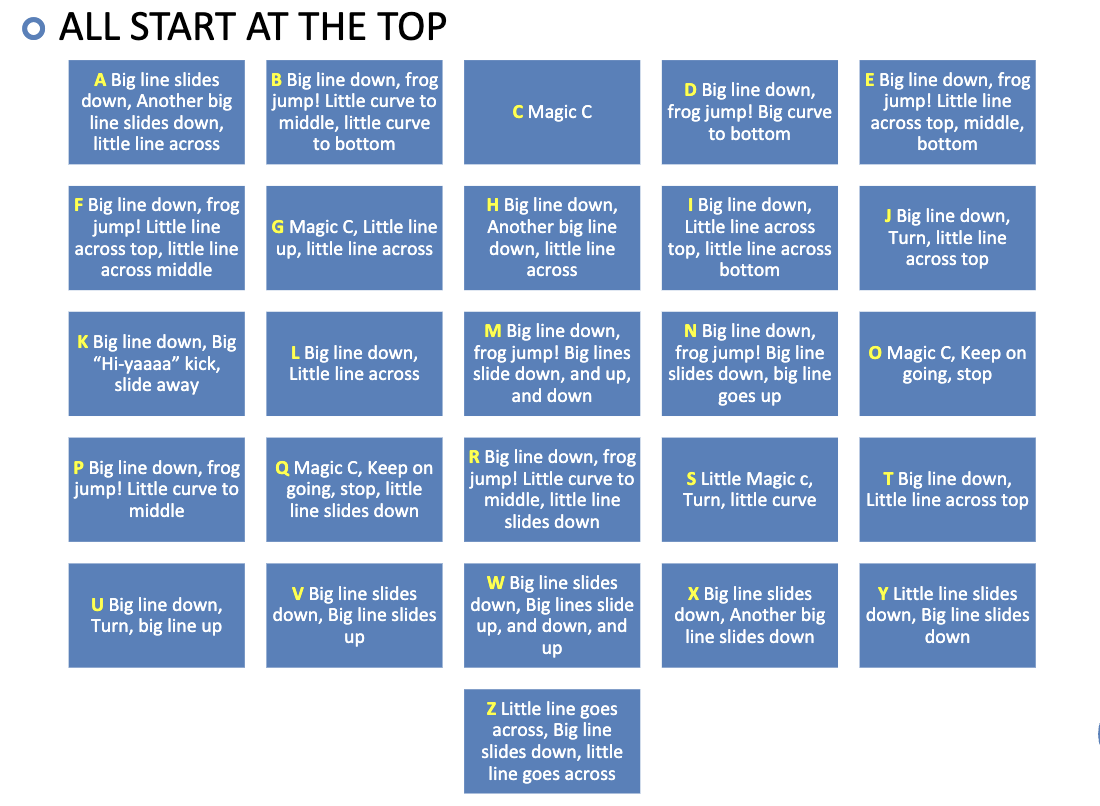
learning the letters:
capitals first
Capitals are easy
All start at top
All same height
All occupy same vertical space
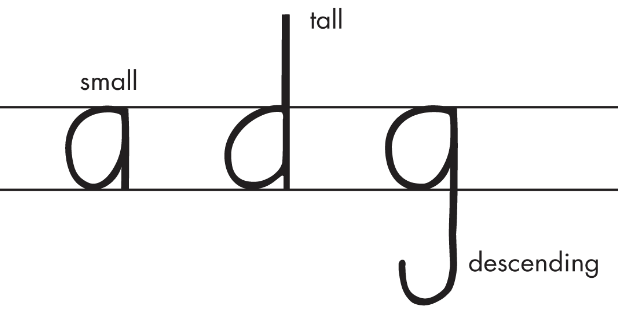
Lowercase are hard
Start in four different places (a,b,e,f)
Not the same size
Small, tall, descending
Kids see capital letters everywhere
STOP, EXIT
frog jump capitals:
start at top left corner with big line;
first line is on the left, next part on the right- less reversals
teaches good habit
F, E, D, P, B, R, N, M
starting corner capitals
start at the top left and use left to right formation habits
prepares them for u, v, w, x, y, z
H, K, L, U, V, W, X, Y, Z
center starting capitals
C,O,G,Q, start with magic C
C, O, Q, G, S, A, I, T, J
directions for capitals
lower case letter order
Taught in 5 groups
All start at the top except d, e.
1) SAME AS CAPITALS AND t
c, o, s, v, w, t (made like capital T just crossed lower)
2) MAGIC C
High frequency letters
Familiar with magic c stroke
a, d, g
3) TRANSITION GROUP
u, i, e, l, k, y, j
4) DIVER LETTERS
Letters dive down, swim up, swim over
Avoid b and d confusion by separating them and teaching them by formation
p, r, n, m, h, b
5) FINAL GROUP
Separate g and q confusion
x and z are infrequently used
f, q, x, z
directions for lowercase
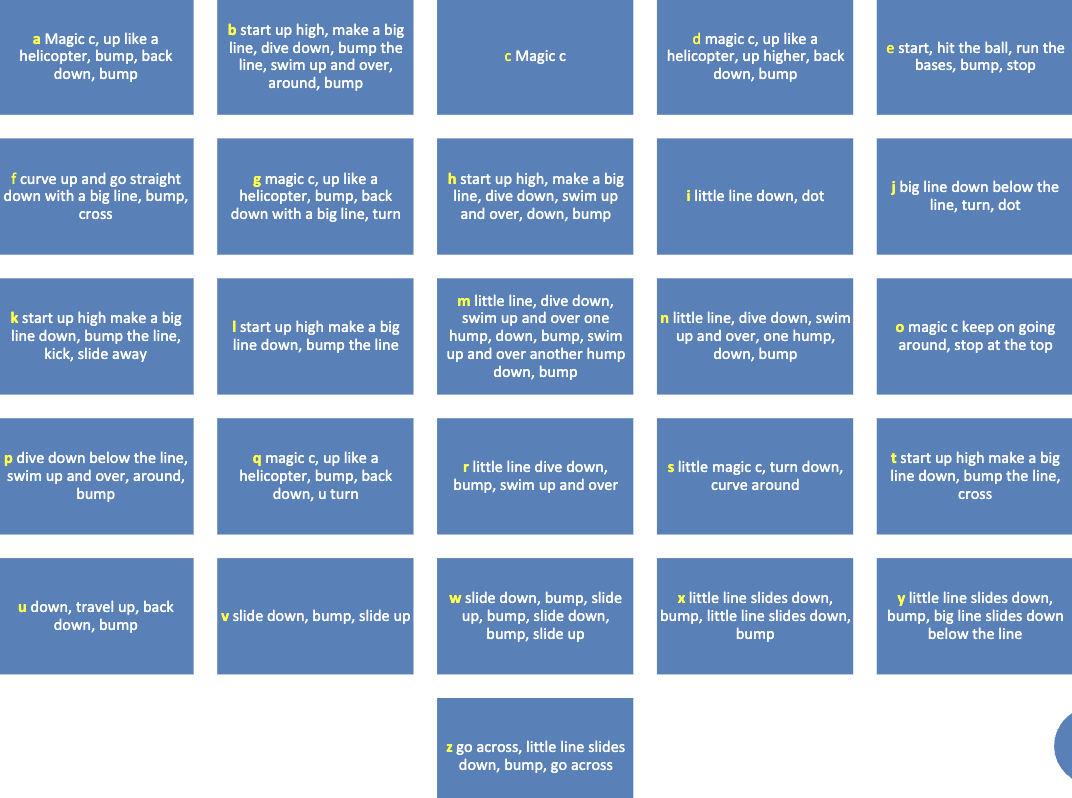
***letter stories
Help children remember formation
b- honeybee
lets make letter h
now lets make another h
i have a surprise
this is an h for honeybee; turn h into b; h —> b
e- run the bases
batter up to the bat
here comes the pitch
hit the ball, wait, then run the bases: first, second, third, stop! it’s not a home run!
f- fire hose squirts
f is like water squirting out of a fire hose; it goes up and then falls down
g- if george falls
inside g lives a little man named George
(draw a little face in g)
he says “ohhhh, if I fall, will you catch me? sure, I will catch you if you fall”
k- karate k
m- stinky m
if m has a big gap people will throw trash in the gap; don’t make a big gap!
(only leave room for an upside-down chocolate kiss)
q- U-turn
the letter q is followed by u
think of quiet, quit, quibble, and quant
at the bottom of q, stop and make a U-turn.
Yy
if you are nervous about going down the slide- first try the small slide!
wow, now I can do the big one!
the hand activity
Used for teaching correct size and placement of capitals and lowercase letters
Make a flat hand for all capitals
Make a fisted hand for small letters (a, c , e, I, m, n, o, r, s, u, v, w, x, z)
Point the index finger up for tall letters (b, d, f, h, k, l, t)
Point the thumb down for descending letters(g, j, y, p, q
Note: Don’t use this activity for children learning sign language because it may create confusion
Can also do this for words

mystery letters
Used for teaching correct letter formation
The secret is making the first stroke correctly before telling children the name of the letter they’re going to make
Ensures that students start the letter correctly and consistently
For F E D P B R N M
Start in the starting corner, Big line down Frog jump to the starting corner, Now make ___
For C O Q G
Start at the top center, make a Magic C, Now make ____
For S A I T J
Start at the top center, Now make ____
HWT double lines
Just 2 lines – a base line and a mid line- We learn to drive on two lain highway!
The bottom (base) line keeps writing straight
The top (mid) line controls the size
Visually Simple
Small letters fit inside the lines. – in the middle space
Tall letters extend above the lines. – to the top space
Descending letters go below the lines. – to the bottom space
Goal is not to keep them on 2 line paper forever – but to get their writing fluid enough so they can write on any style of paper
line generalization
Workbooks provide activities for children to experience different types of lined paper
They begin with the simple double lines, then we teach them to master all lines

learn and check
Teach children to check their letter, word, and sentence skills
Check-letters for correct start, all steps, and bumping the lines
Check words for correct size, placement, and closeness
Check sentences for correct capitalization, word spacing, and punctuation
If they discover a mistake, allow them to erase it and re- doredo
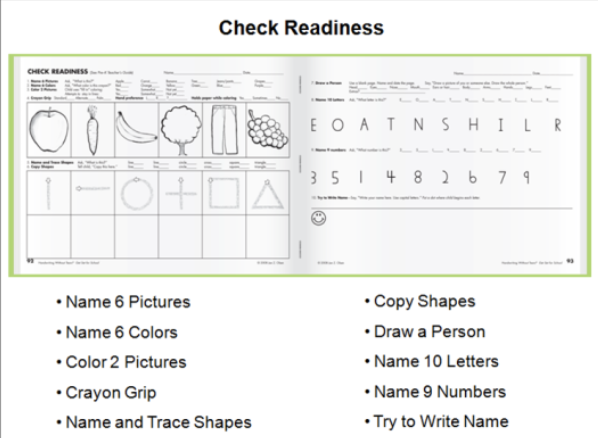
assessment
This is not a test. Can be used mid-year or at the end of the year to track a child’s progress
Can also use as a before after to collect information
Name 10 letters
HWT researched the most popular letters to begin children's names –this list only shows these letters
special needs:
general tips
be very consistent with the child
remove distractions
give frequent break
special needs:
fine motor activities
Use the first 15-20 minutes of a session doing fine motor work
Spend the last 10 minutes of a session forming letter
special needs:
autism
Be very repetitious- photocopy workbook pages so the child can practice the lesson more than once
Tangible hands-on materials
Use the Magic C Bunny to incorporate socialization and interaction
Use as many multisensory experiences as possible
Children who do not respond well to verbal cues (language) tend to do well with the HWT program
you can demonstrate many of the teaching techniques with few or no verbal cues as the child attends visually to the task
Teacher demonstration and child imitation are the keys to successful handwriting
special needs:
down syndrome
Use a modified pencil grasp
Use several multisensory activities and repetitions
If the child has low tone, adapt seating in the classroom and at home; you may also want to work on extra fine motor activities to strengthen the hands
special needs:
poor vision
Use bright colors with a bright contrasting mat (black and white works well)
Enlarge all workbook pages
Use a larger slate for capitals and numbers (11×17)
Double lines can work well for children with poor vision
You may need to enlarge or thicken lines with a marker until the child is comfortable with the chosen size; providing a texture on the lines will also help the child locate the line position
special needs:
cerebral palsy
Help with establishing good positioning
If the child is in a wheelchair, try using a lap tray during writing time for support and stability of the arms and shoulders
If the child only has use of one extremity, clamp down paper and other materials using a clipboard clamp screwed into the lap tray
If the child has problems with muscle tone, try an adapted pencil grip for more control of the pencil
special needs:
asperger syndrome
repetition
simple
cautious of abstract teaching strategies
special needs:
dyslexia
Typically struggle with organization and using language effectively
The HWT teaching techniques help the child develop good habits and make letter writing automatic
Starting at the top with letter formation; learning a left-to-right flow in the sequence of reading and writing
Use the Slate and Gray Blocks to correct letter and number reversals
Introduce Wood Pieces to teach correct formation of all capital letters
Teach letters in groups of similar strokes, as taught in the workbooks
special needs:
dysgraphia
Trouble producing written language due to poor motor planning
Struggle with organizational skills and movements that need to be in an automatic and specific order, such as the formation of letters for writing
Teach the shapes (parts and pieces) of the letters using the Wood Pieces Set and the smiley face mat
Use the Slate and Gray Block Paper to correct reversals. The smiley face will become a consistent reminder of the starting corner
Provide visual models for the child to follow- pictures in the workbooks give additional visual cues
Teach the letters in the recommended groups of similar strokes