Positioning & Parameters
1/63
There's no tags or description
Looks like no tags are added yet.
Name | Mastery | Learn | Test | Matching | Spaced |
|---|
No study sessions yet.
64 Terms
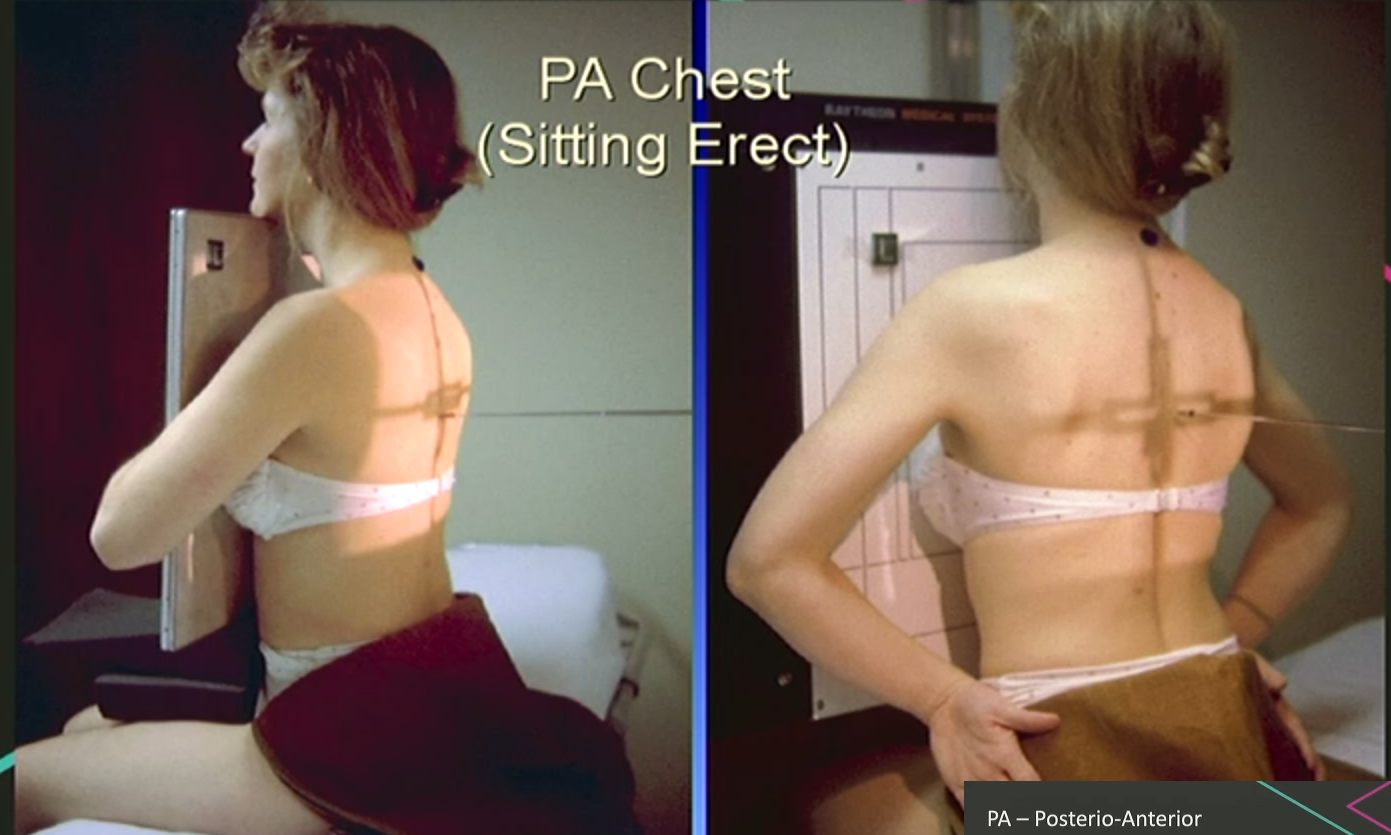
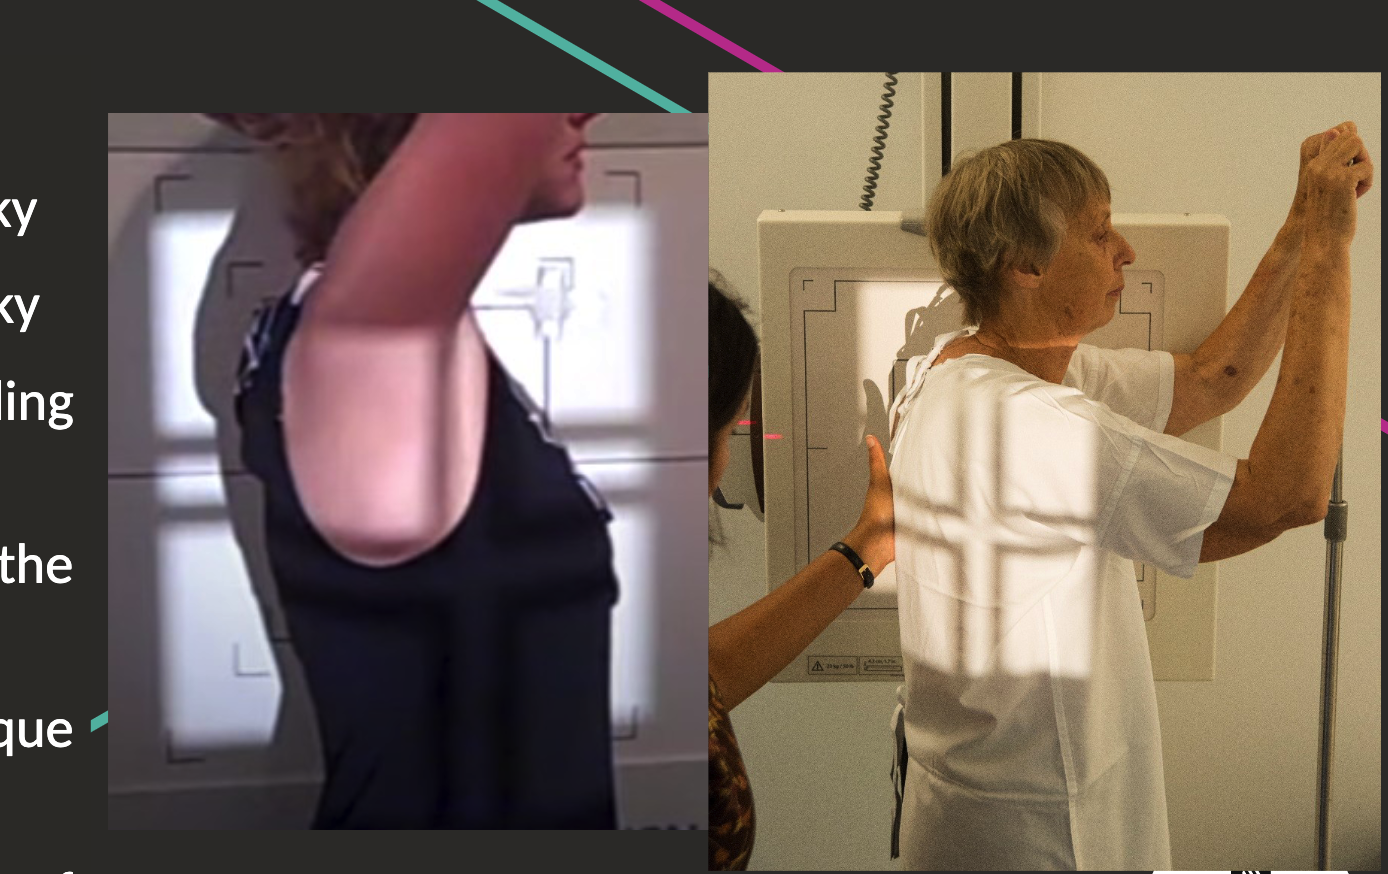
PA Chest positioning
Facing bucky
Hands on hips or around bucky, shoulders forward, chin raised, chest in contact with the board.
Lightbeam/detector 3cm above shoulder edge.
Centre on T7 (base of shoulder blade).
PA Chest Parameters
Large detector and broad focal spot.
180-200cm SID.
110-125kVp (higher for denser/larger patients).
2-6mAs OR AEC.
If using AEC, select the two lateral chambers, NOT middle.
Marker top corner (R/L does not matter, choose one).
Inspiration.
No annotation as PA is convention.
PA variations (seated): Holding detector & sitting against detector
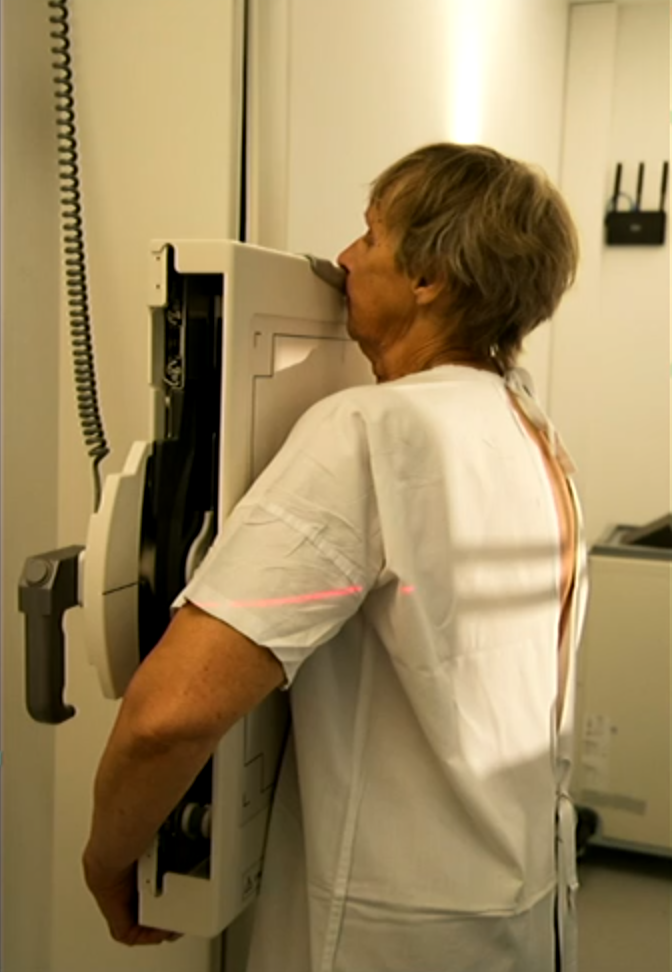
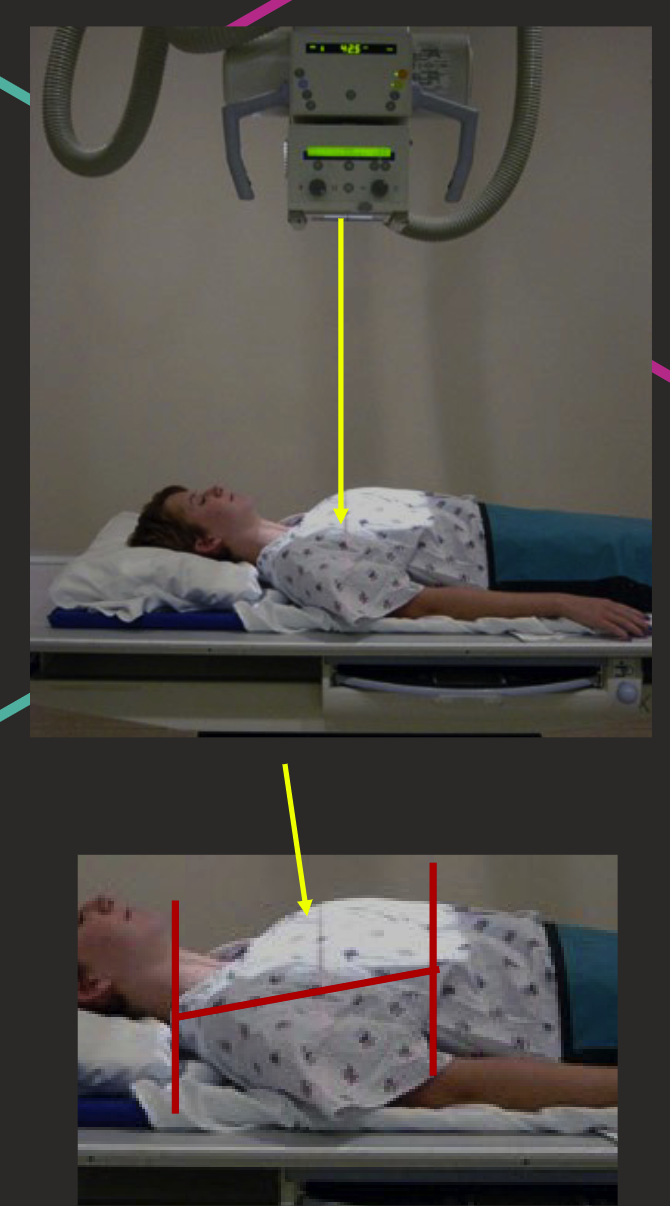
AP Erect Chest Positioning
Sitting upright in bed or wheelchair.
Chin raised, arms to patient’s side (arms on bed rails is good, gets scapulae out of way), IR against patient’s back.
Bending at hinge point (hips).
Top Border C7.
10-15° caudal (downwards angulation).
CENTRAL RAY at T7.
AP Erect Chest Parameters
Large (35cm x 43cm detector), broad focal spot.
180cm SID.
90-100kVp
1-5mAs
Marker top corner (R/L your choice).
Annotated to denote AP/erect/semi-erect
Inspiration.
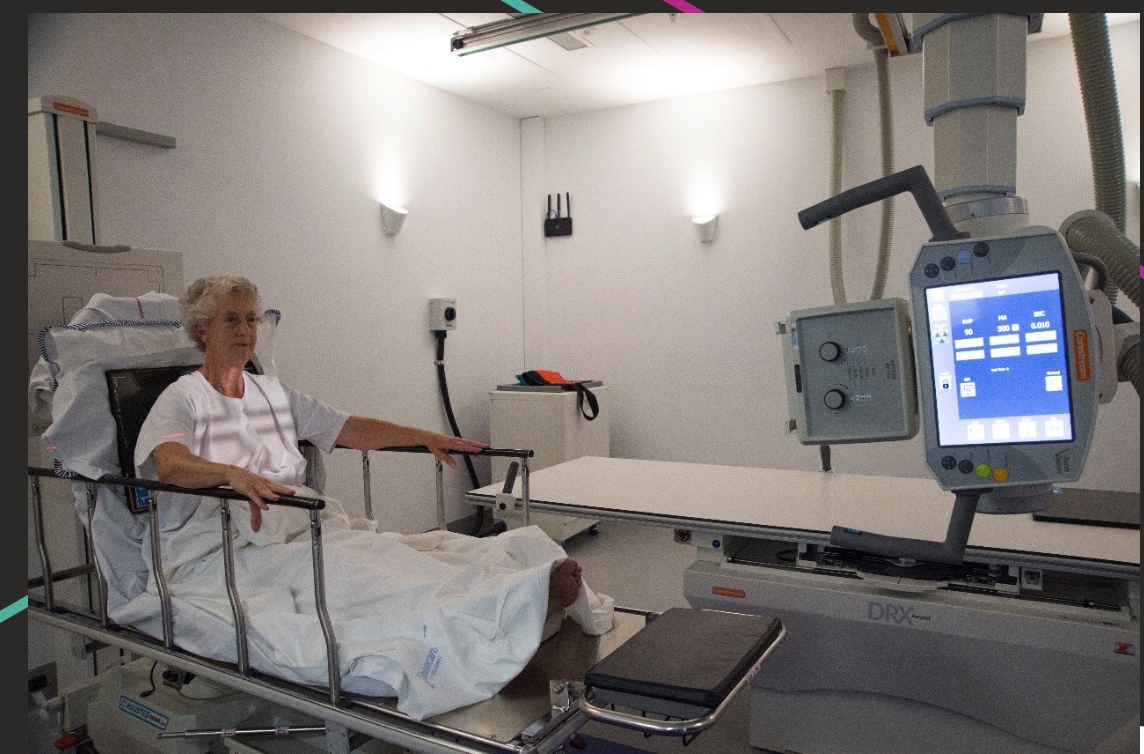
AP Supine Chest Positioning
Lying on their back on bed.
Chin raised, arms by sides.
IR behind patient’s back or in table bucky.
Top border C7.
10-15° caudal angulation (to sternum).
Central Ray approx. T7.
AP Supine Chest Parameters.
Large detector, broad focal.
180cm SID.
90-100kVp.
1-5mAs.
Top corner marker.
Annotated to denote AP/supine.
Inspiration.
Lateral Chest Positioning
Patient’s left side against bucky.
Shoulder in contact with bucky, hands on head or holding handlebar.
Centre T7 on mid-auxillary line (base of shoulder blade).
Lateral Chest Parameters
Large detector PORTRAIT.
Broad focal spot.
180-200cm SID.
100-125kVp.
8-20 mAs or AEC.
For AEC: single central chamber.
Marker on anterior corner (R/L).
Inspiration.
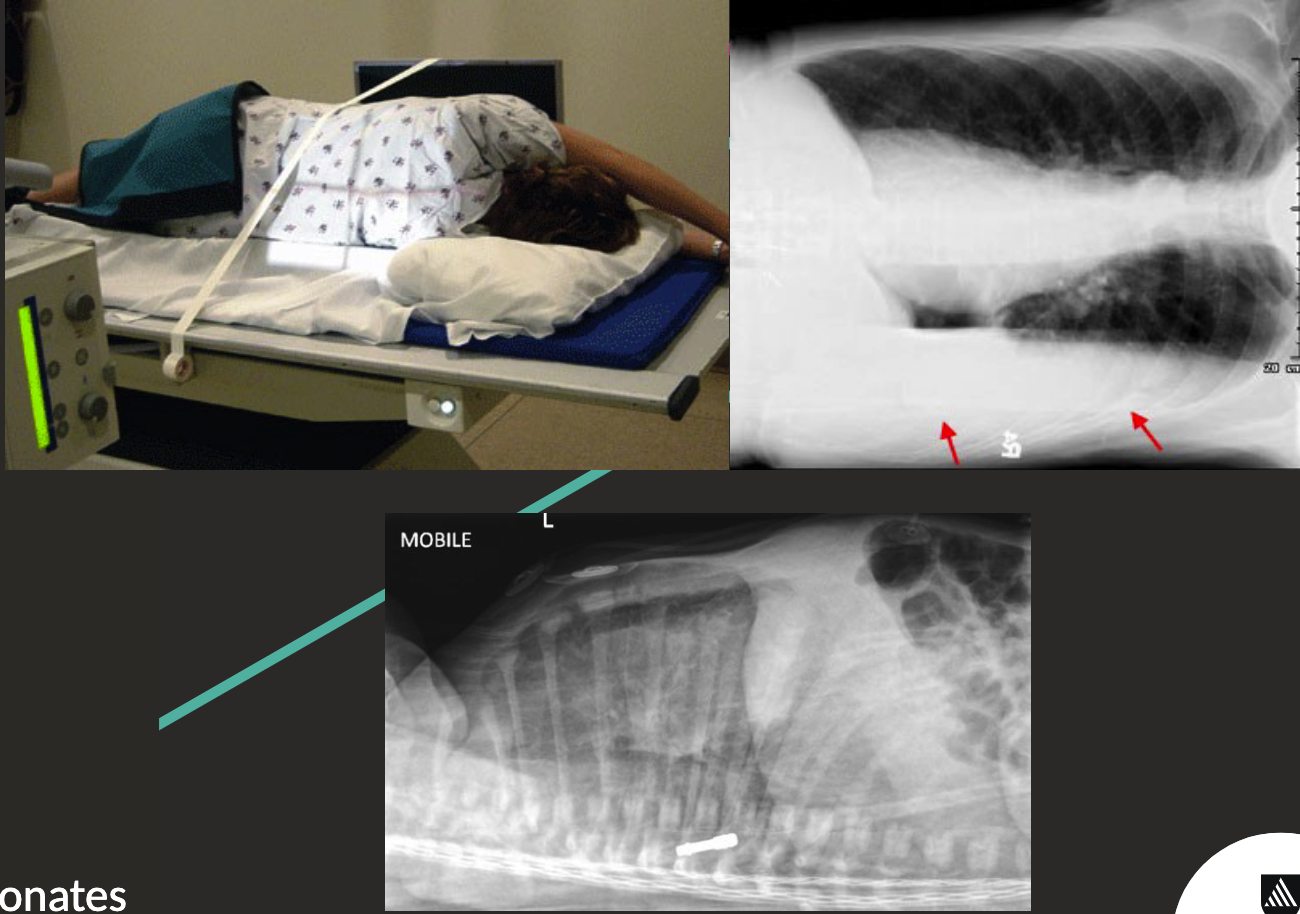
Decubitus Chest Positioning
Patient lying on their side.
Will show like a PA/AP projection.
Side down for pleural effusion.
Side up for pneumothorax.
Can be lateral (top left pictures) or supine (bottom).
ABCS of Image Interpretation
Alignment.
Bones.
Cartilage.
Soft tissue.
ABCDE of Chest X-rays
Airway.
Breathing.
Circluation.
Deformities.
Everything Else.
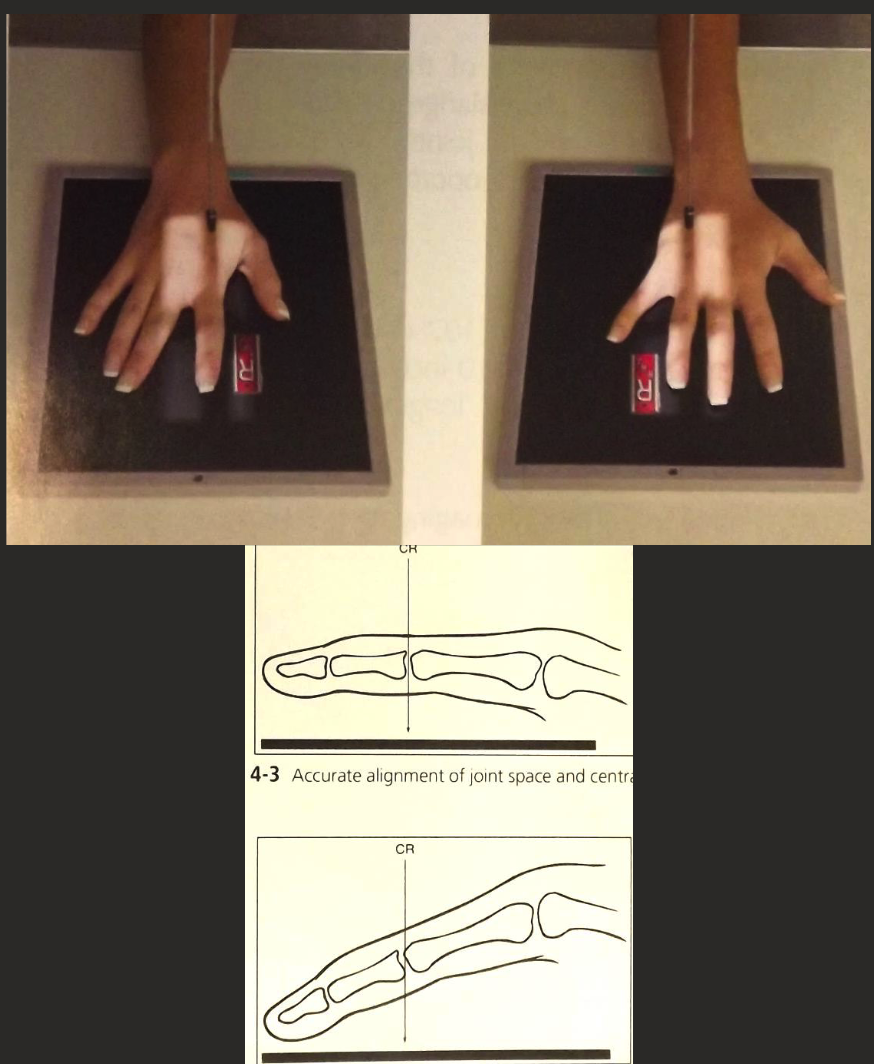
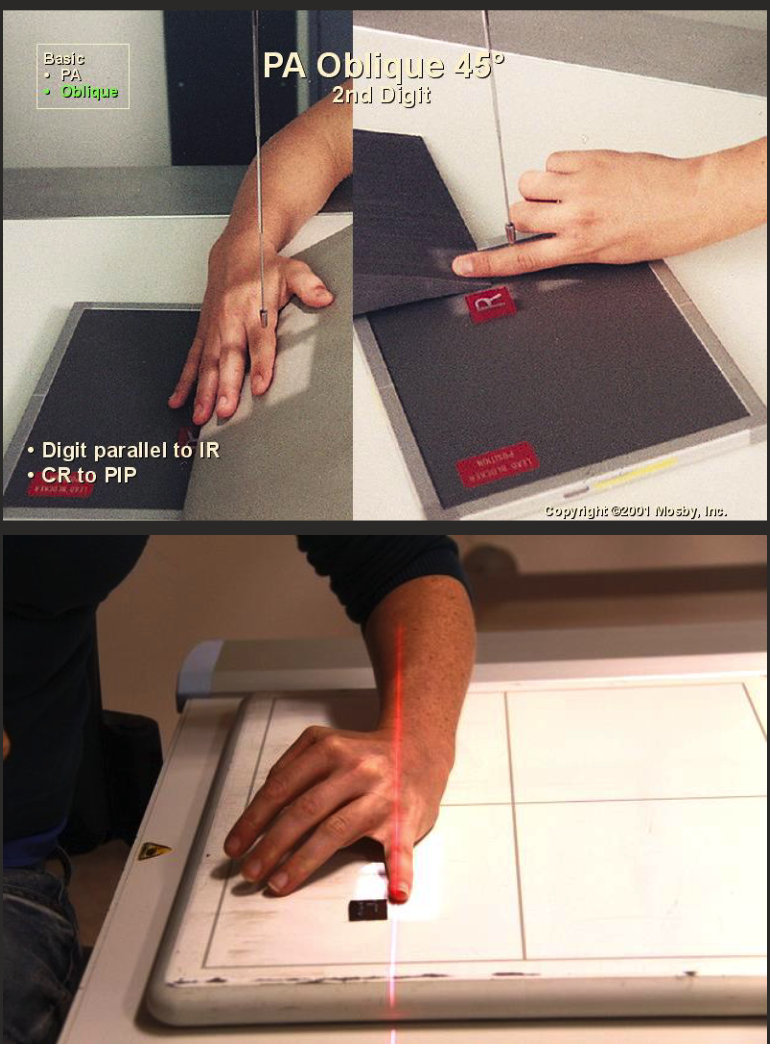
PA Finger Positioning
Finger of interest aligned parallel to edge of IR.
Hand palm down (pronated) on IR with fingers straight (ensure open joint spaces).
CR perpendicular to IR, collimate to digit including skin edge and Metacarpal in collimation.
CR over proximal phalanx.
PA/Oblique/lateral Finger Parameters
Small (18cm x 24cm) detector.
100cm SID.
50-55 kVp.
1-2 mAs.
FINE focus.
Marker positioned distal to main anatomy.
Oblique finger positioning
Finger of interest aligned parallel to edge of IR.
From PA position, rotate (supinate) hand and wrist 45° (radial aspect raised).
CR perpendicular to IR, collimate to digit including skin edge and MC in collimation.
CR over proximal phalanx.
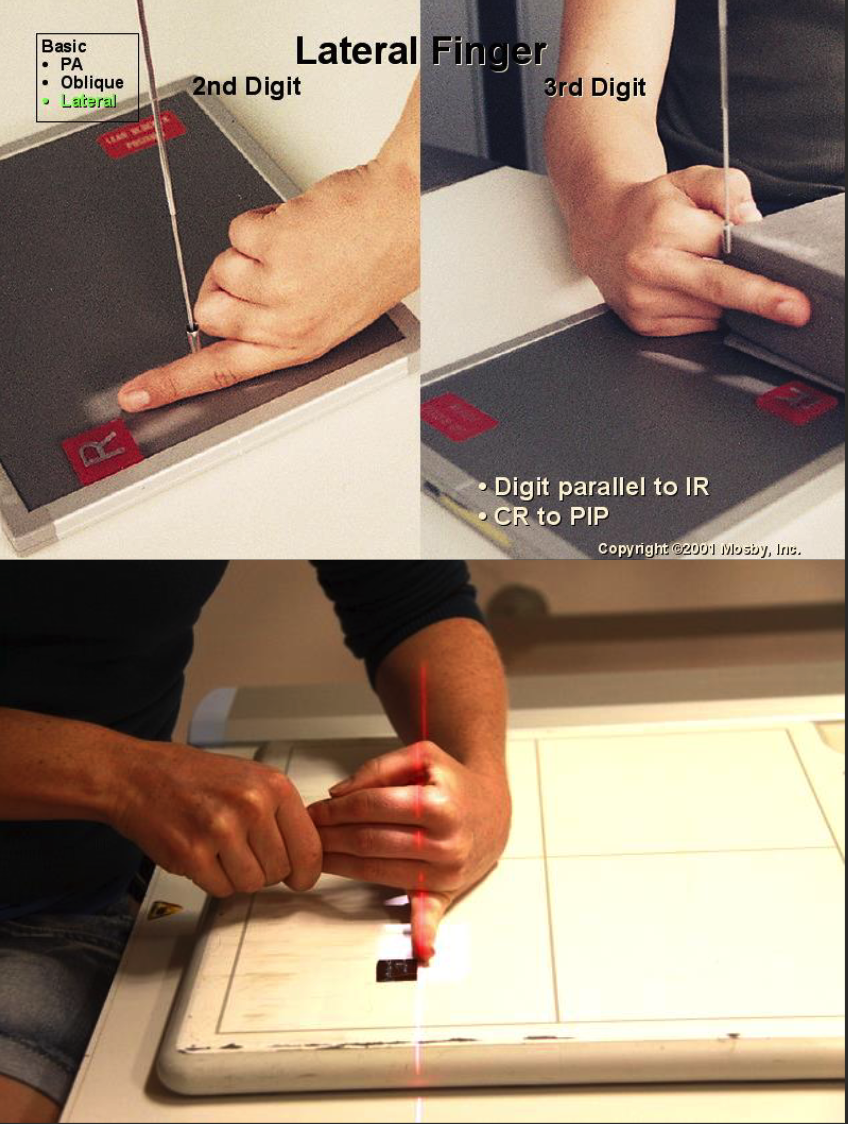
Lateral Finger Positioning
Finger of interest aligned parallel to IR edge.
Hand perpendicular to IR.
2nd digit: Radial aspect in contact with IR (if patient comfort allows).
3rd-5th digit: ulnar aspect in contact with IR.
Fold/extend other digits out of superimposition.
CR perpendicular to IR, collimate to digit including skin edge and MC in collimation.
CR over proximal phalanx.
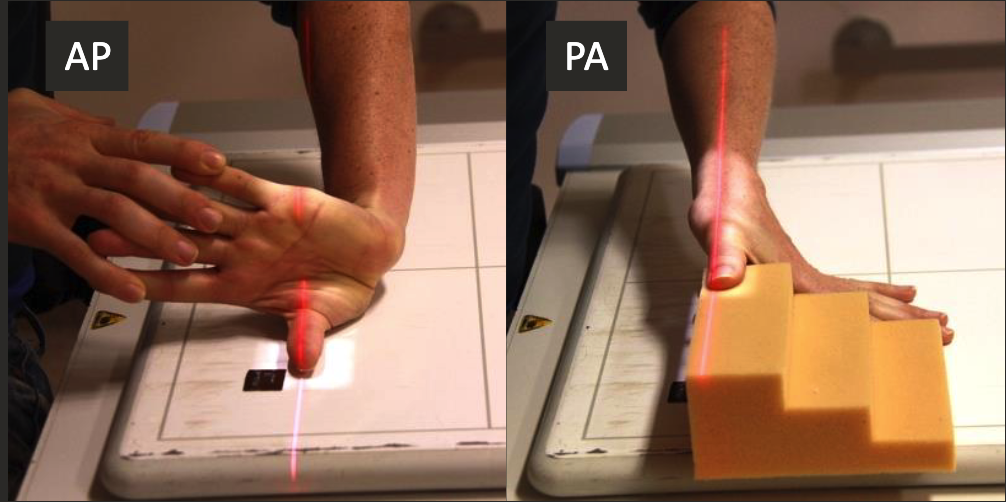
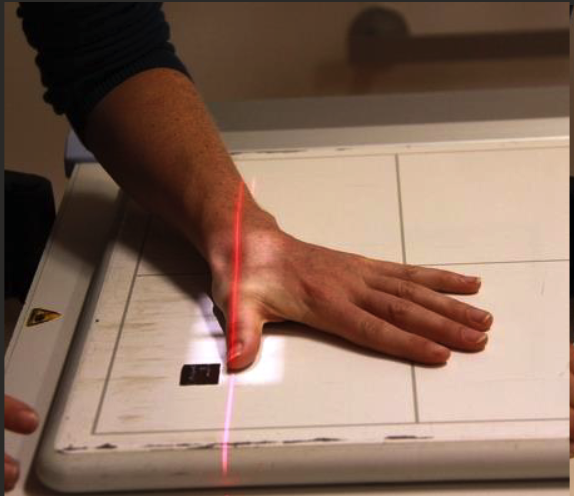
AP/PA Thumb positioning
Thumb aligned parallel to IR edge.
Hand perpendicular to IR, thumb relaxed and parallel to IR.
CR perpendicular to IR, collimate to thumb including skin edge and carpometacarpal joint.
Oblique Thumb positioning
Hand palm down on contact with IR.
CR perpendicular to IR, collimate to thumb including skin edge and carpometacarpal joint.
Lateral Thumb positioning
Hand tented, in fist, or raided on sponge to raise ulnar aspect.
CR perpendicular to IR, collimate to thumb including skin edge and carpometacarpal joint.
CENTRE OVER MCP Joint.
Thumb parameters
Small detector.
SID 100cm
50-55 kVp.
1-2 mAs.
Increase SID, kVp and mAs for PA - air gap with increased OID.
Fine focus.
Distal Marker.
PA hand positioning
3rd digit aligned parallel to edge of IR.
Fingers straight, slightly spread, and parallel to IR.
CR perpendicular to IR, collimate to include skin edge distally and 1-2cm of radius and ulna proximally.
Center at 3rd MCP joint.
Oblique hand positioning
Supinate/rotate hands & wrist 30-45 degrees (radial aspect raised.
Fingers straight and parallel to IR, support with sponge.
Lateral hand positioning
Hand perpendicular or IR, ‘ok sign’ or stacked/superimposed.
Fingers straight, supported by sponge.
Hand Parameters
Medium (24cm x 30cm) detector.
SID 100cm.
kVp 50-55 (up to 60 for lateral).
1-3 mAs (up to 3 for lateral).
Fine focus.
Marker lateral or anterior - distal OR proximal.
Ballcatcher’s (norgaard) view
Collimate to include both hands and wrists.
CR level with 5th MCP joint.
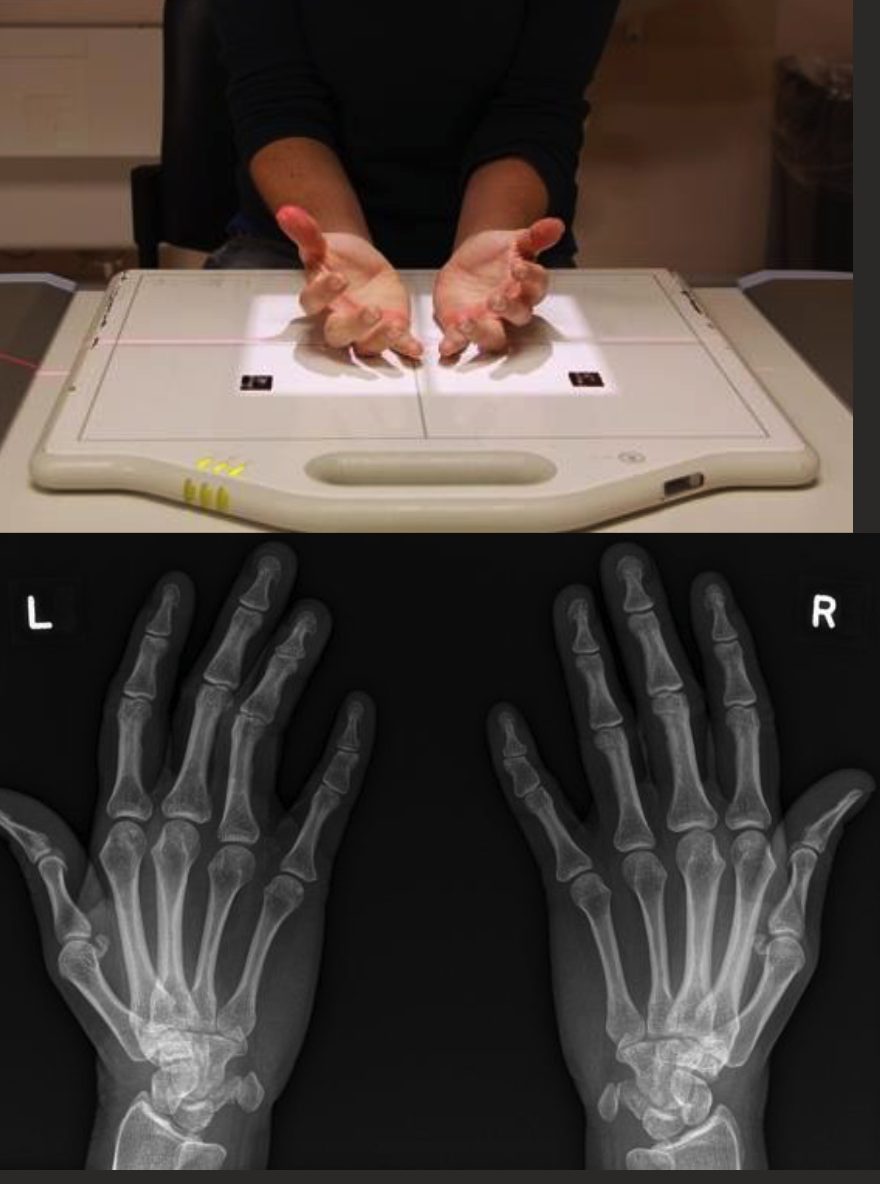
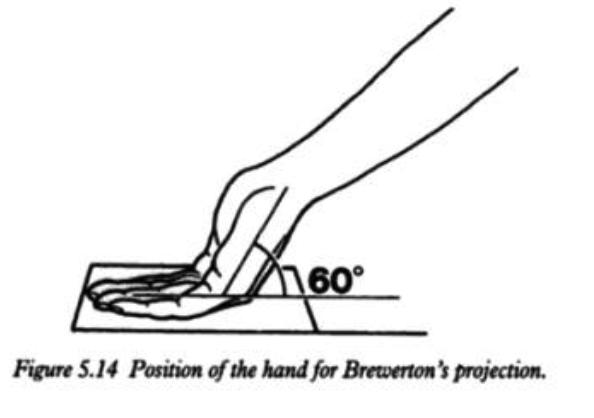
Brewerton hand view
Wrist series
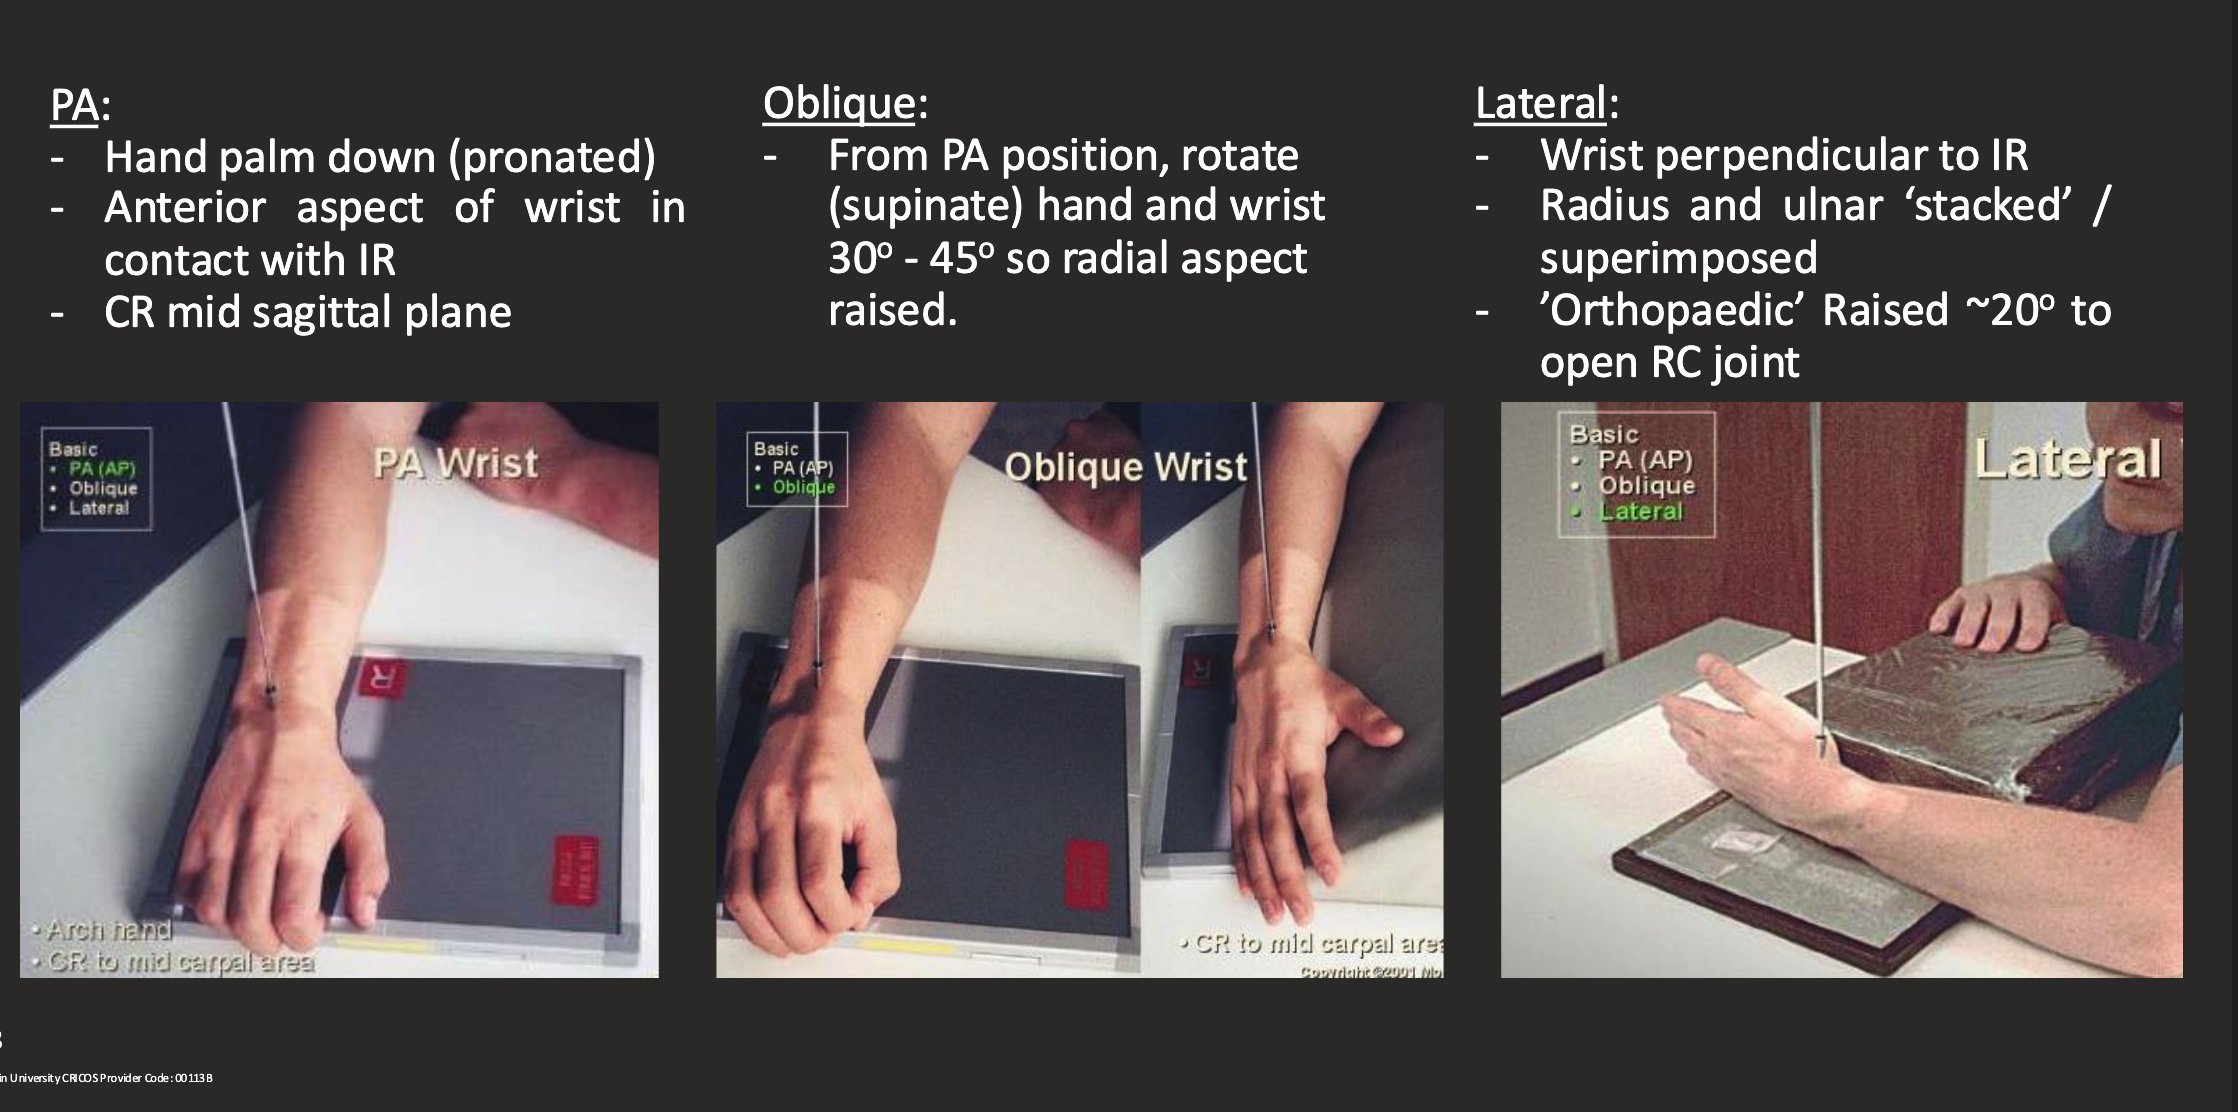
Wrist parameters
medium (24cm x 30cm) detector.
100cm SID.
50-55kVp.
2-3 mAs.
Fine focus.
Lateral or anterior marker.
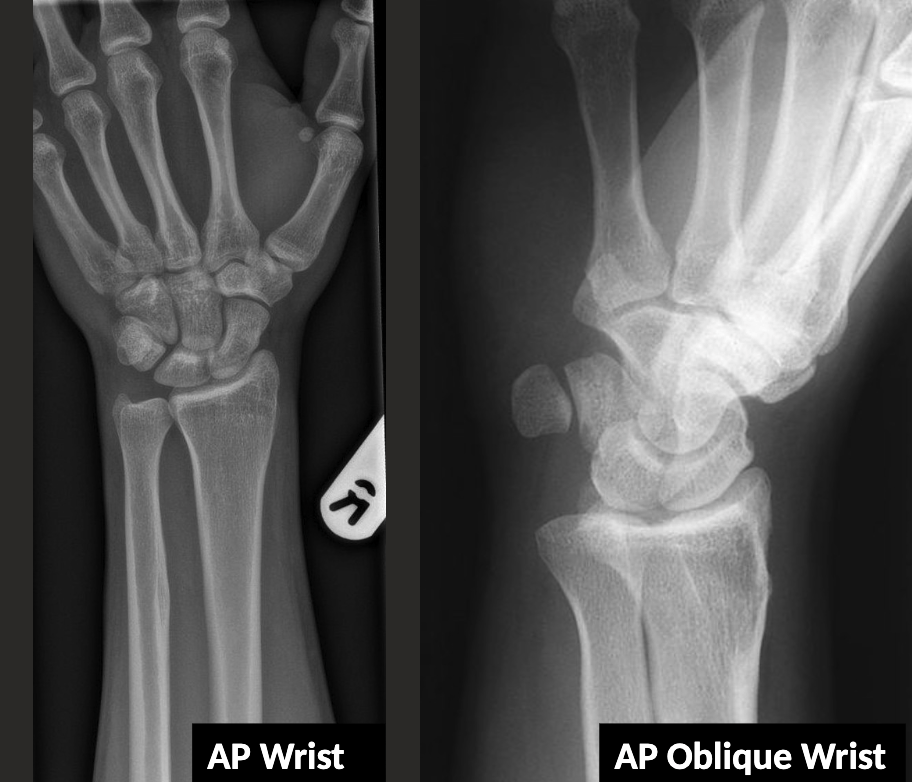
Scaphoid view
PA wrist with ulnar deviation.
Centre to anatomical snuffbox.
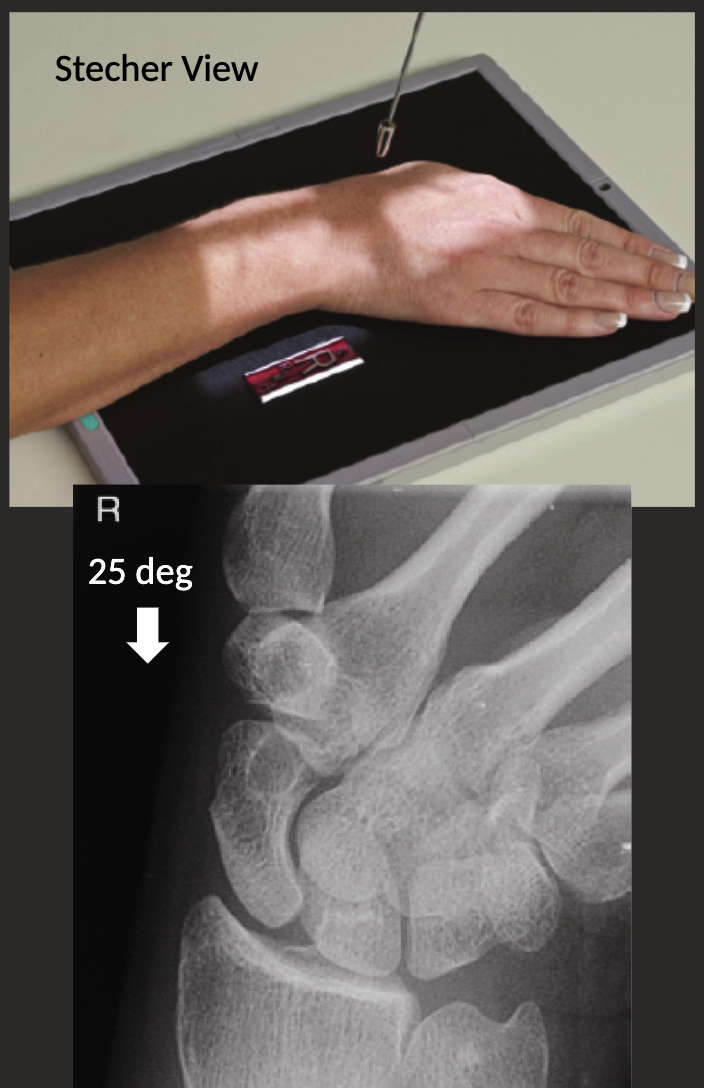
PA axial with ulnar deviation: Stecher view.
Position as above, but with cephalic angle of 15-30 degrees.
AP and AP Oblique wrist
AP Oblique → radial aspect raised 45 degrees from AP.
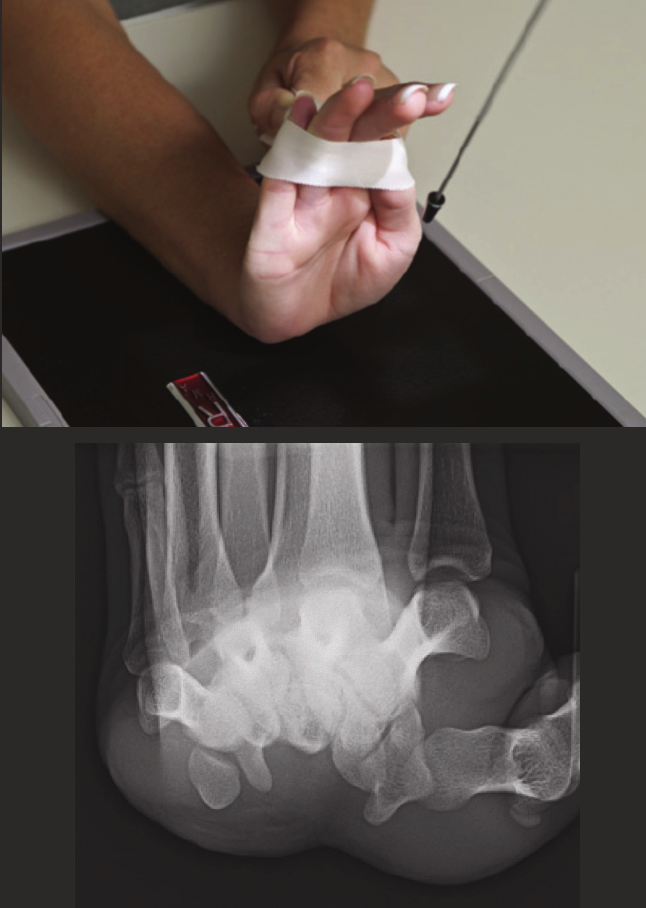
Carpal tunnel view
CR 25-30 degrees to long axis of hand.
Centre to middle of palm.
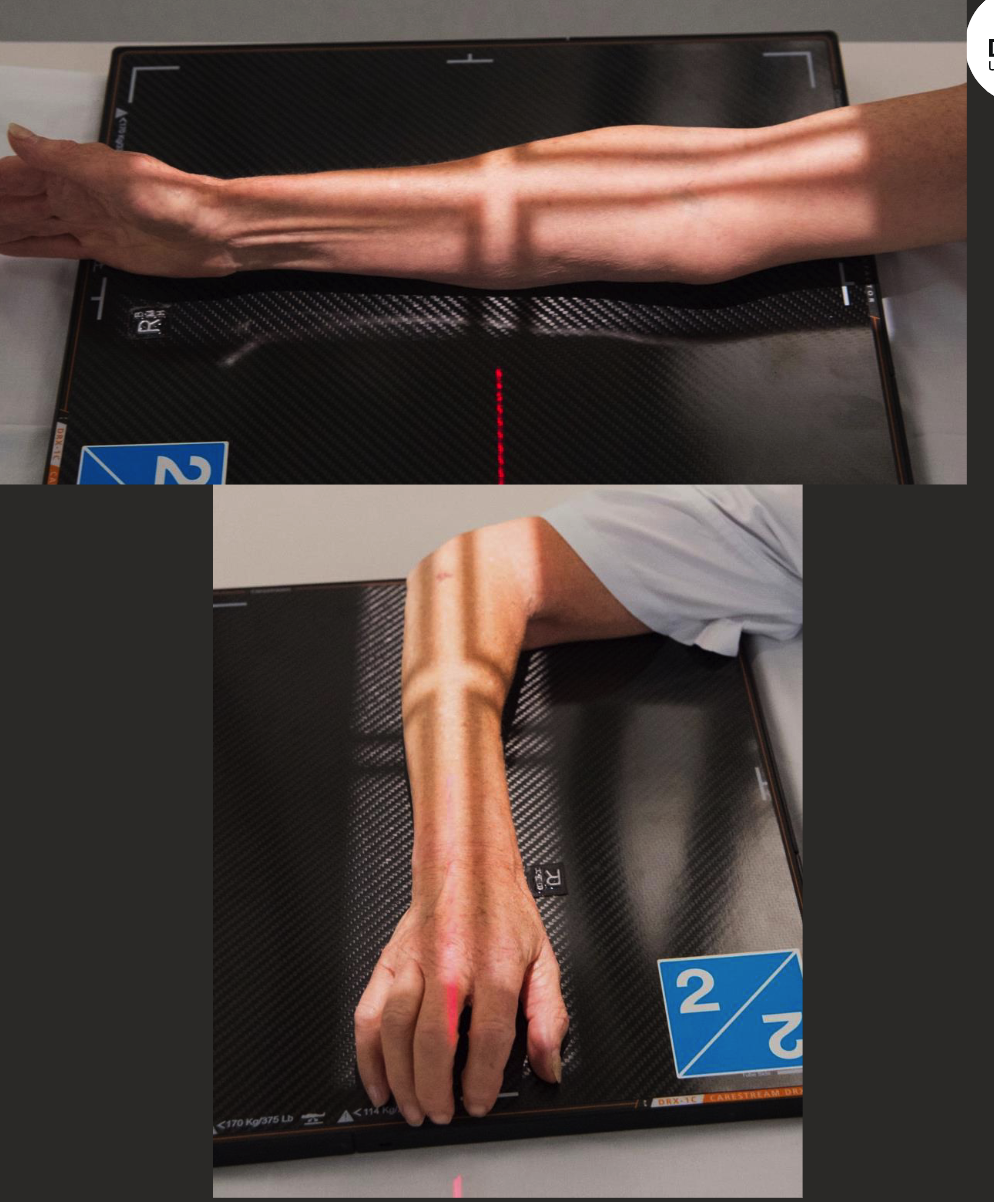
forearm AP positioning
Aligned parallel to long edge of IR or diagonally across IR.
Hand palm up on IR with arm in full extension.
Hand, elbow, and shoulderin same horizontal plane.
CR perpendicular to IR.
Collimate to include both joints in fiend and include skin edge laterally.

AP Forearm parameters
Large (35×43) detector.
SID 100cm
55-60 kVp.
2-5 mAs.
FIne.
Marker distal and lateral.
Lateral forearm positioning
Forearm aligned parallel to long edge IR or diagonal.
Hand/Wrist and elbow in ‘true lateral’.
Elbow flexed 90 degrees.
Distal radius and ulna superimposed.
Humeral epicondyles superimposed (raise wrist to help achieve this).
Hand elbow and shoulder on same horizontal plane.
CR perpendicular to IR.
Collimate for both joints and 5-8cm of distal humerus.
Plan B forearms
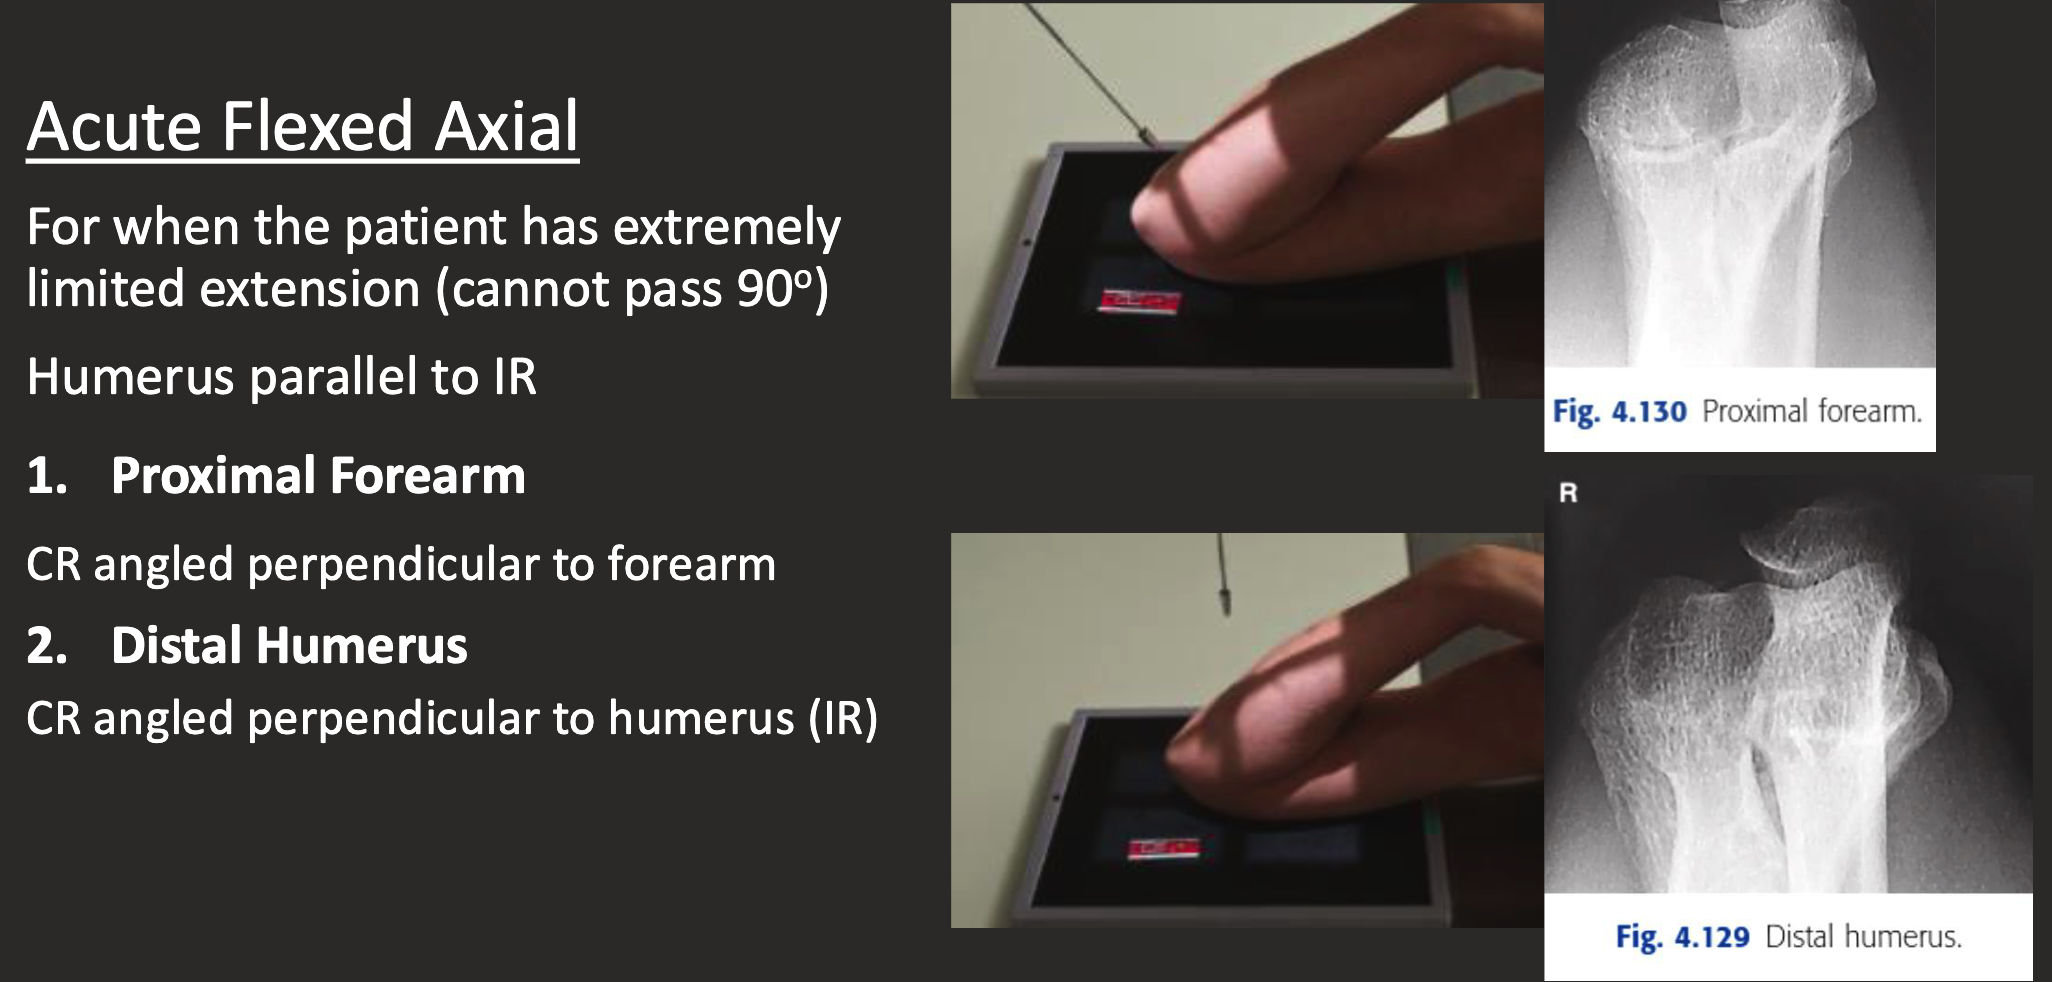
For when patient has limited ROM
AP elbow + lateral wrist (top).
Lateral elbow with PA wrist (bottom).
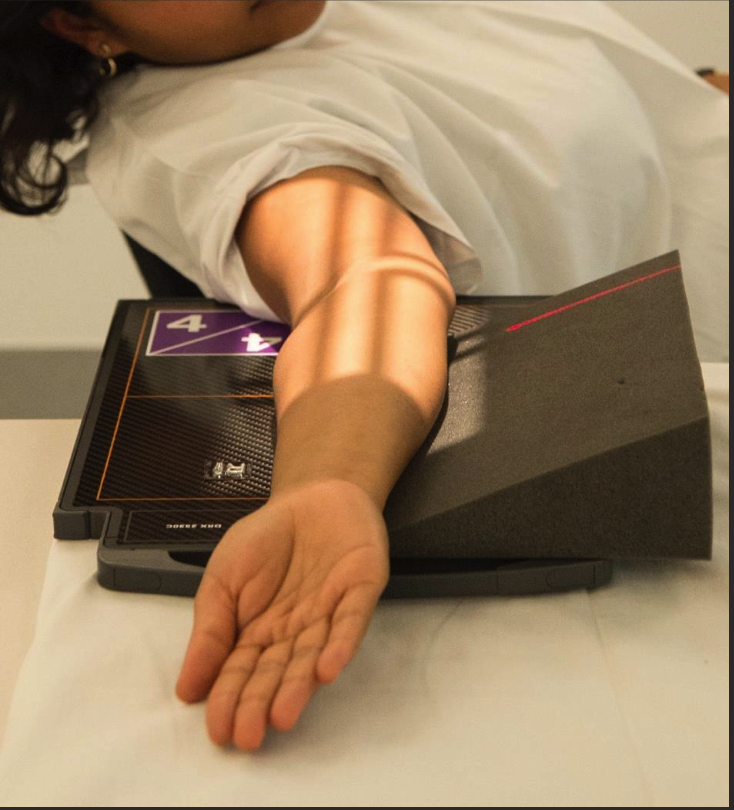
horizontal beam lateral elbow/forearm positioning
Patient has extremely limited ROM.
Support anatomy on radiolucent sponge.
Arm parallel to IR, tube perp. to IR.

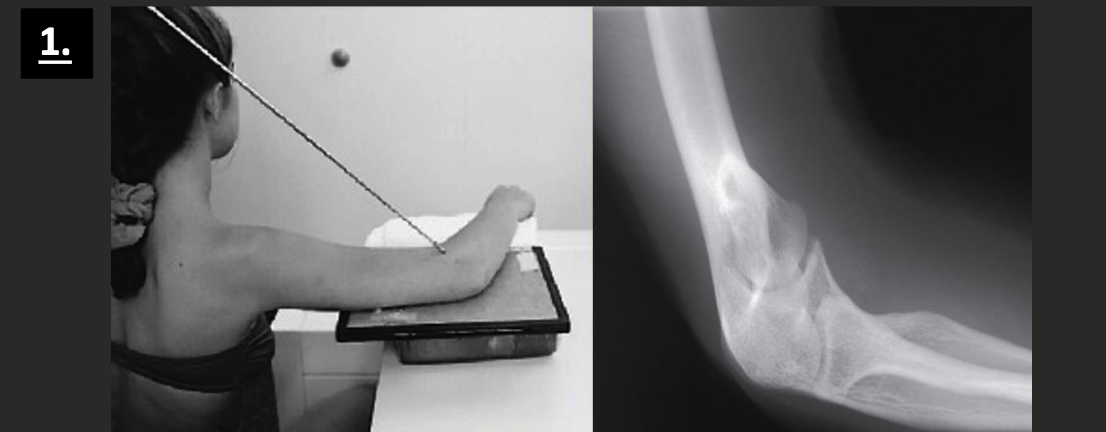
AP elbow positioning
Long axis of elbow parallel to edge of IR.
Elbow in full extension and palm up → humeral epicondyles equidistant to IR.
Hand, elbow, and shoulder on same horizontal plane.
8-10cm of prox. forearm and distal humerus included.
Centre at cubital fossa.
AP/AP oblique elbow parameters
100cm SID
55-60 kVp.
2-5 mAs.
Fine focus.
Lateral or distal marker.
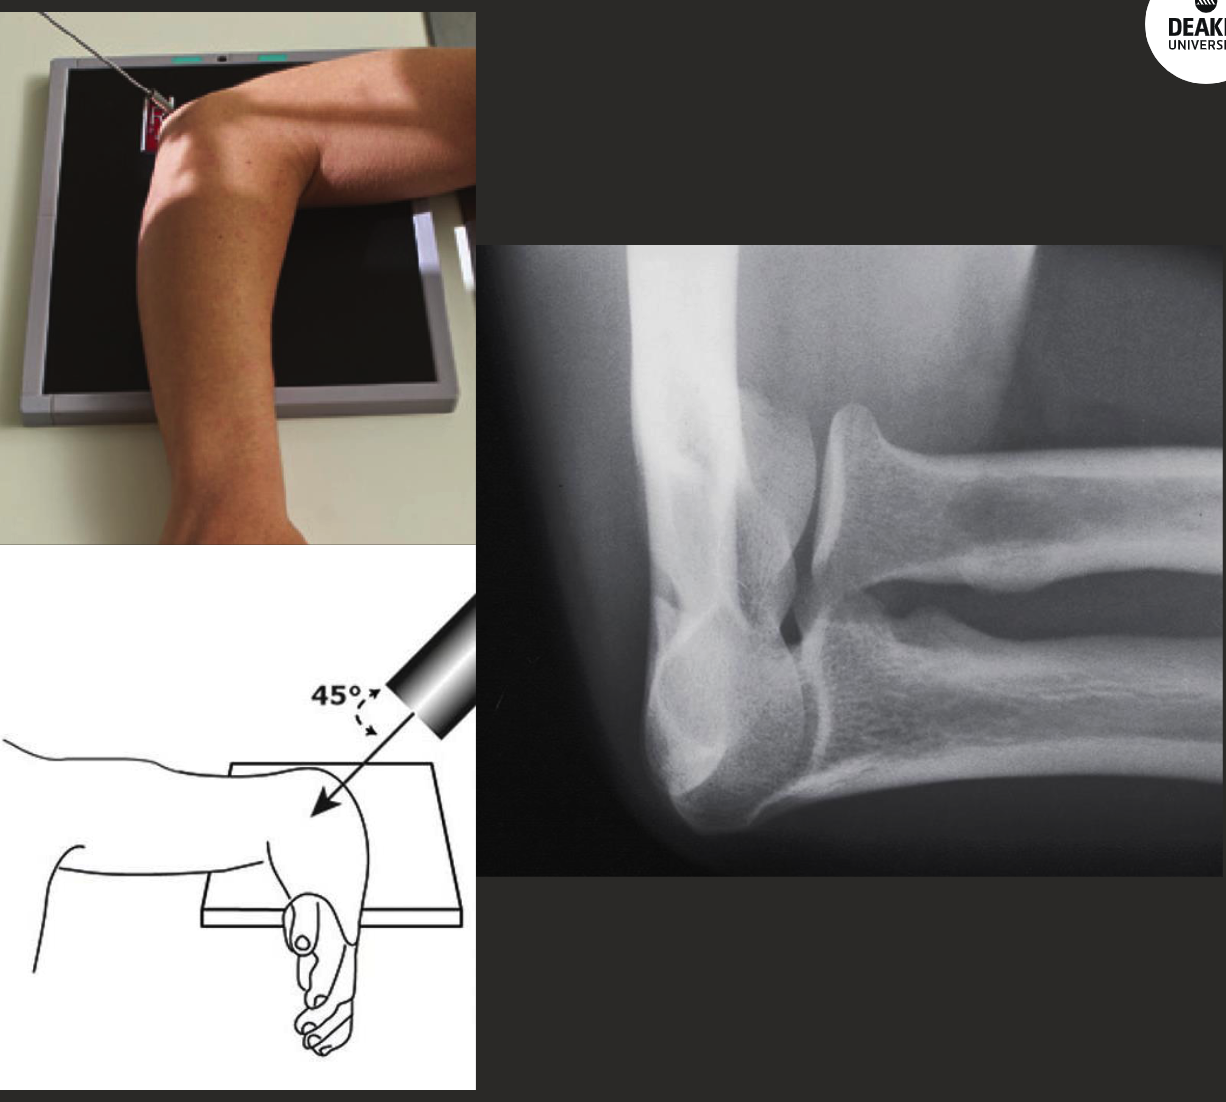
AP external oblique elbow positioning
Long edge elbow parallel long edge IR.
Start in AP position then rotate arm externally so epicondyles are 30-35 degrees oblique to IR (patient might need to lean back to aid it).
Hand, elbow, and shoulder still on same horizontal plane.
No angle on CR (perp. to IR).
Collimate to include both 8-10cm of proximal forearm and distal humerus.
Centre at cubital fossa.
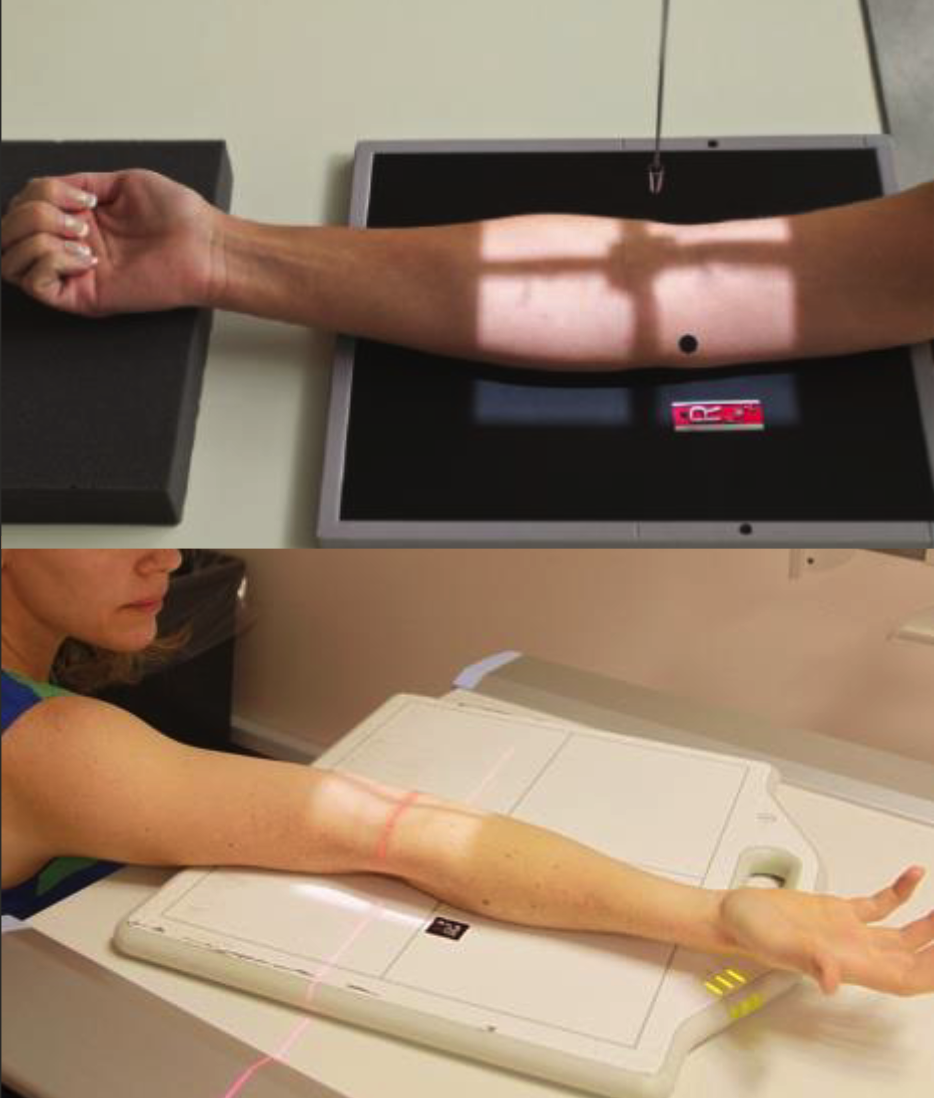
Lateral elbow positioning
Hand wrist and elbow in “true lateral.”
Distal radius and ulna superimposed.
Humeral epicondyles superimposed (raise wrist to help).
CR perp to IR, centre to JOINT.
8-10cm of both distal humerus and proximal forearm.

radial head (coyle’s view) positioning
Start in lateral position.
Pronate hand.
CR angled 35-45 degrees proximally (towards head/up the arm).
Collimate in closer to ROI.
Reverse Coyle’s positioning (coronoid process view).
Same position as radial head view, reduce elbow flexion to 80 degreesish.
CR angled 35-45 degrees DISTALLY (away from shoulder).
AP internal oblique positioning (coronoid process view)
Start in AP elbow position.
Pronate hand to palm down.
No angle on CR (perp. to IR).
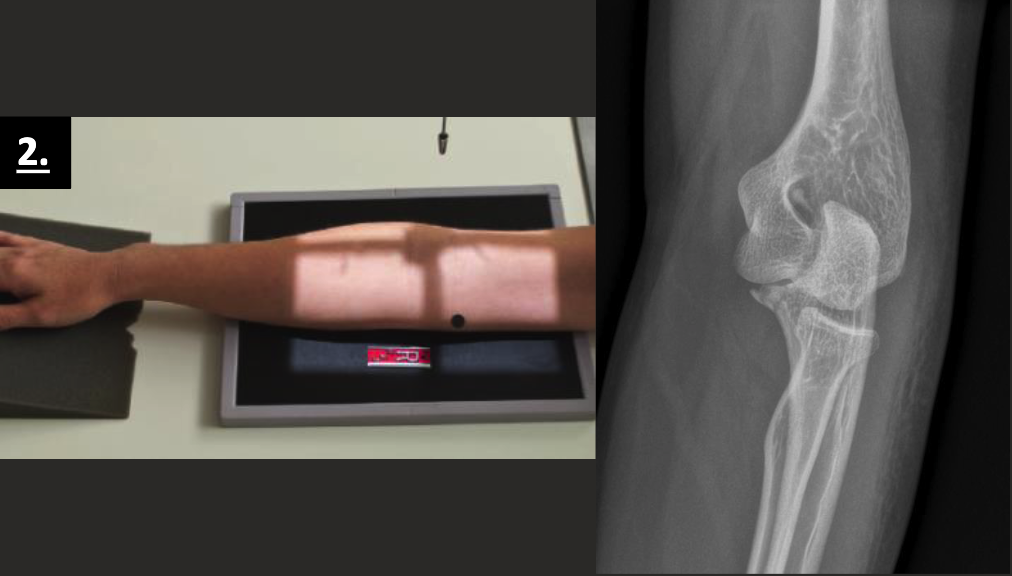
acute flexed axial positioning
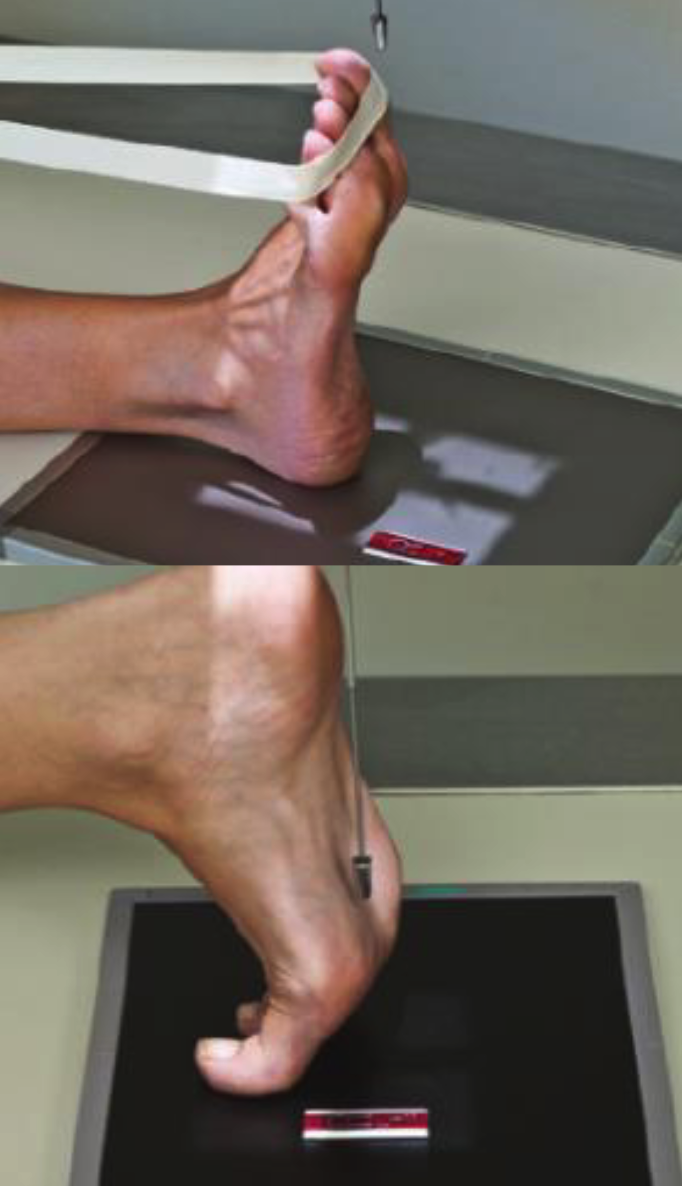
AP Toes Positioning
Patient lying or sitting on table.
Bent knee, sole of foot perpendicular to IR.
Foot’s long axis parallel to IR’s edge, toes UNCURLED.
CR angled 10-15 degrees posteriorly (towards calcaneus).
Centre to MTP joint.
Collimate for skin edges distally and MT base proximally.
Oblique (internal) toe (1st-3rd toe)
Long axis of foot parallel to IR.
Start AP toes, rotate 30-40 degrees internal.
CR perpendicular to IR.
Centre at MTP joint of interest.
Collimate for skin edge distally and MT base proximally.
Include part of toes either side.
Oblique (external) toe
Start AP toe, rotate 30-40 degrees EXTERNAL.
CR perp. to IR.
Centre at MTP joint we want.
Include MT base proximal and include part of toes either side laterally.
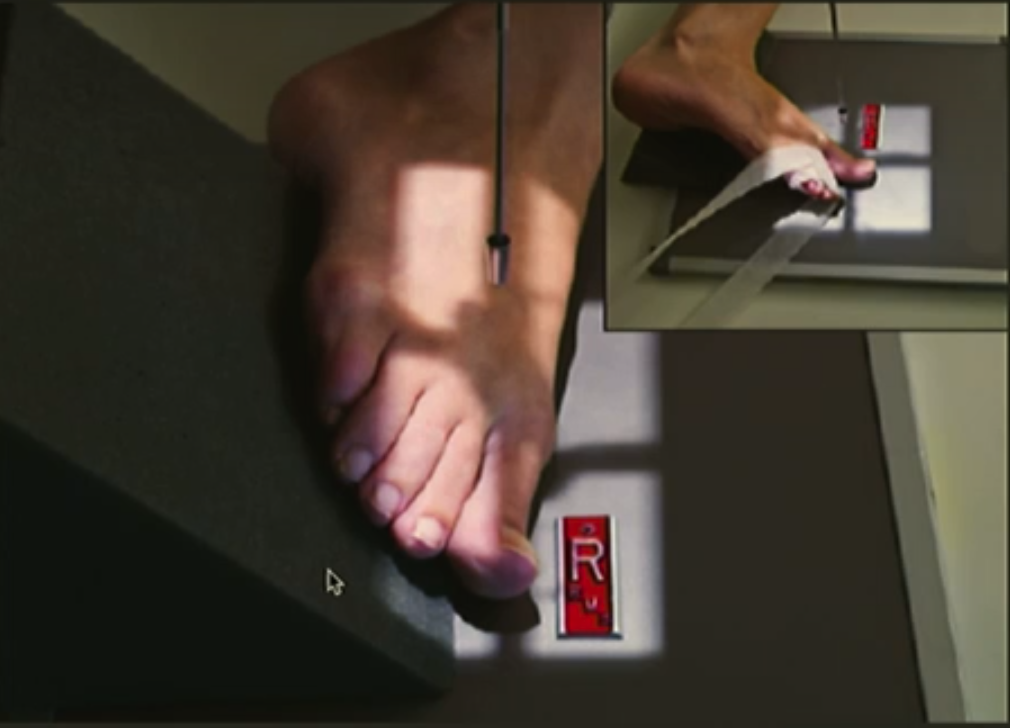
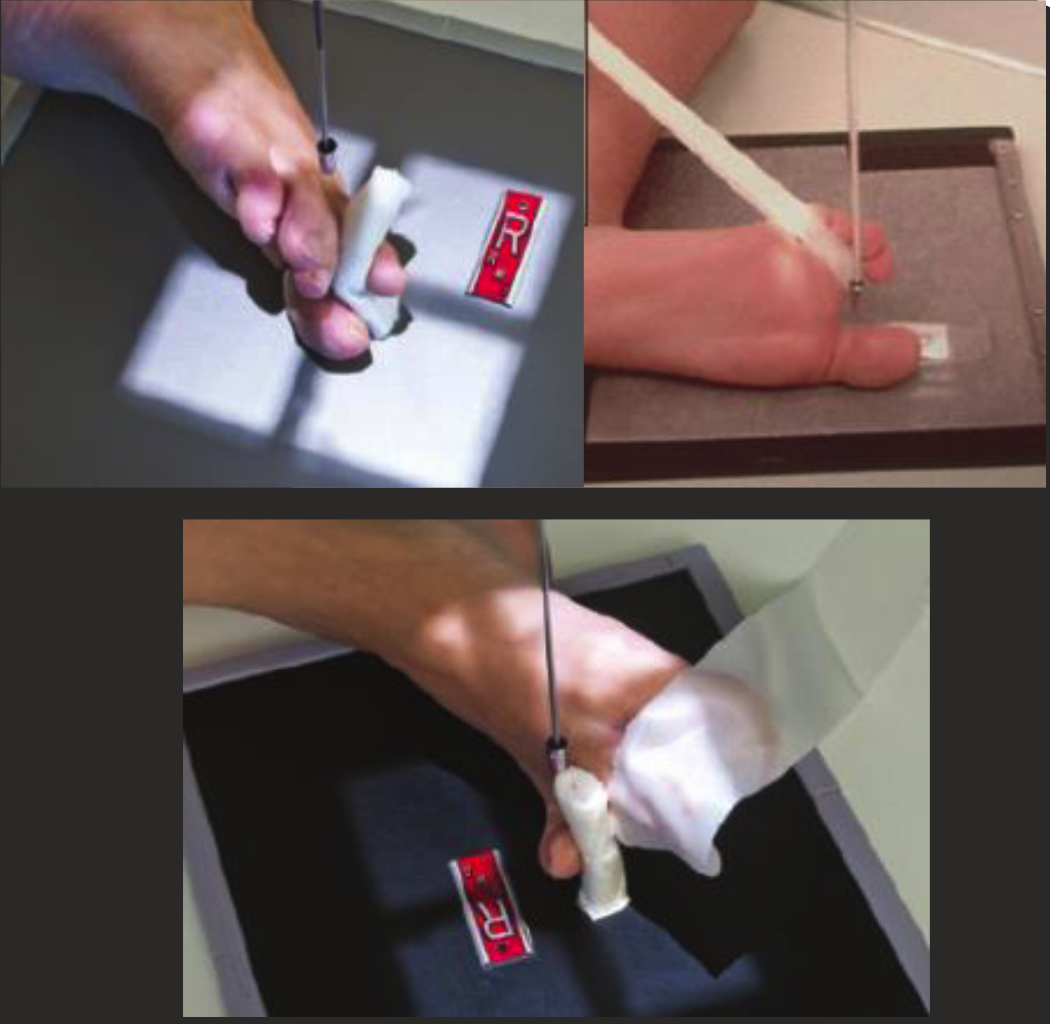
Lateral toes positioning
Rotate leg MEDIALLY for 1st-3rd toes and LATERALLY for 4th and 5th toes.
Long axis of foot parallel to IR, ensure toe of interest is true lateral position.
Use tape or radiolucent aids to separate toes (improvise).
CR perp. to IR.
Include MT base proximally.
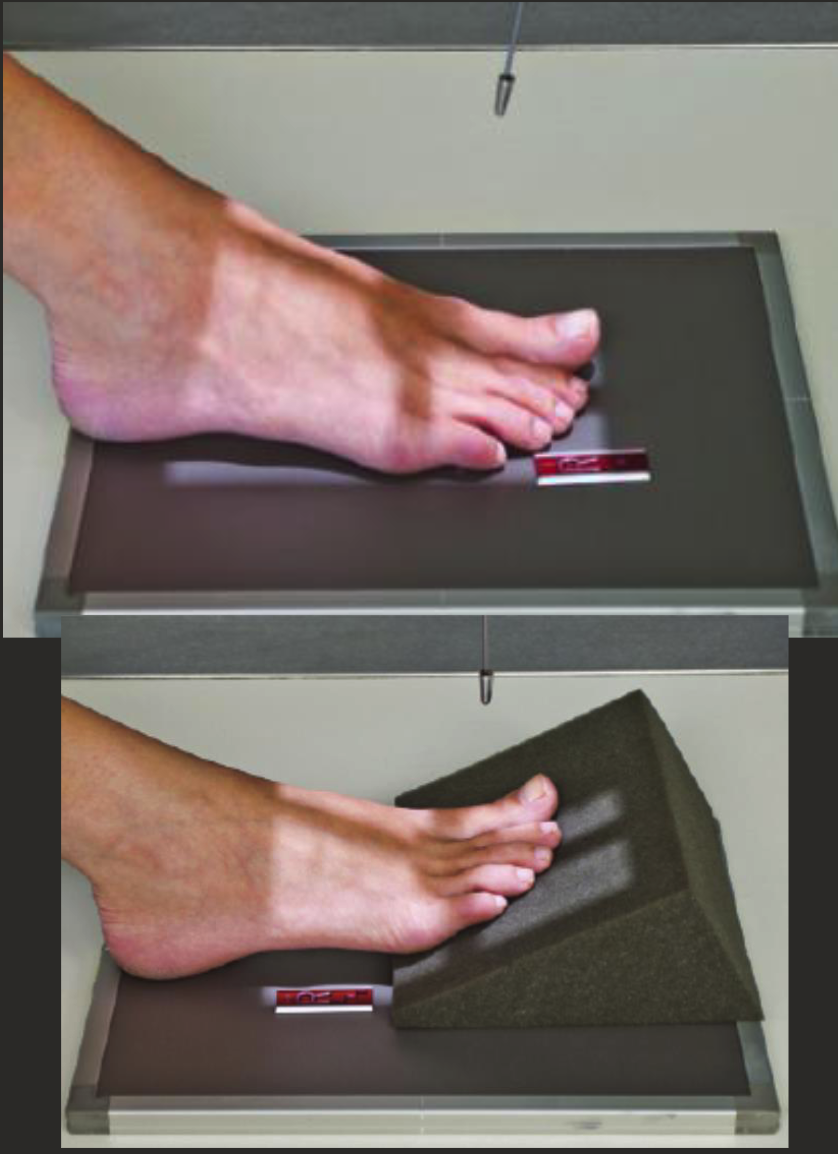
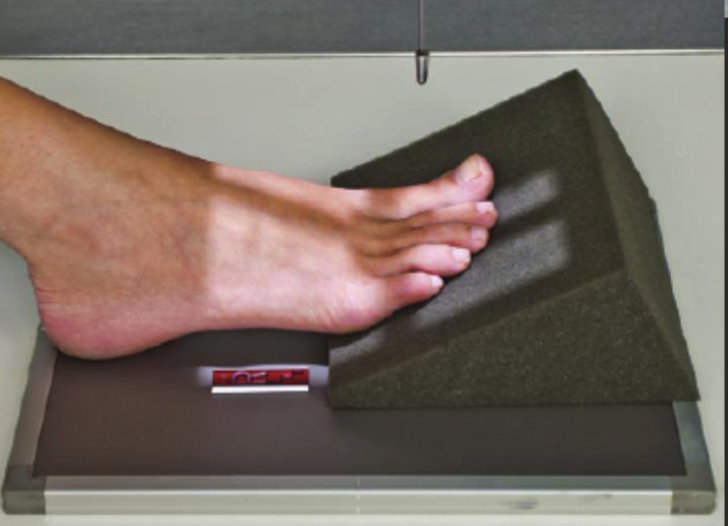
(additional) sesamoidal/tangential
Foot dorsiflexed.
Patient prone with toes flexed on IR.
OR patient supine and have aids to hold toes back/keep them flexed.
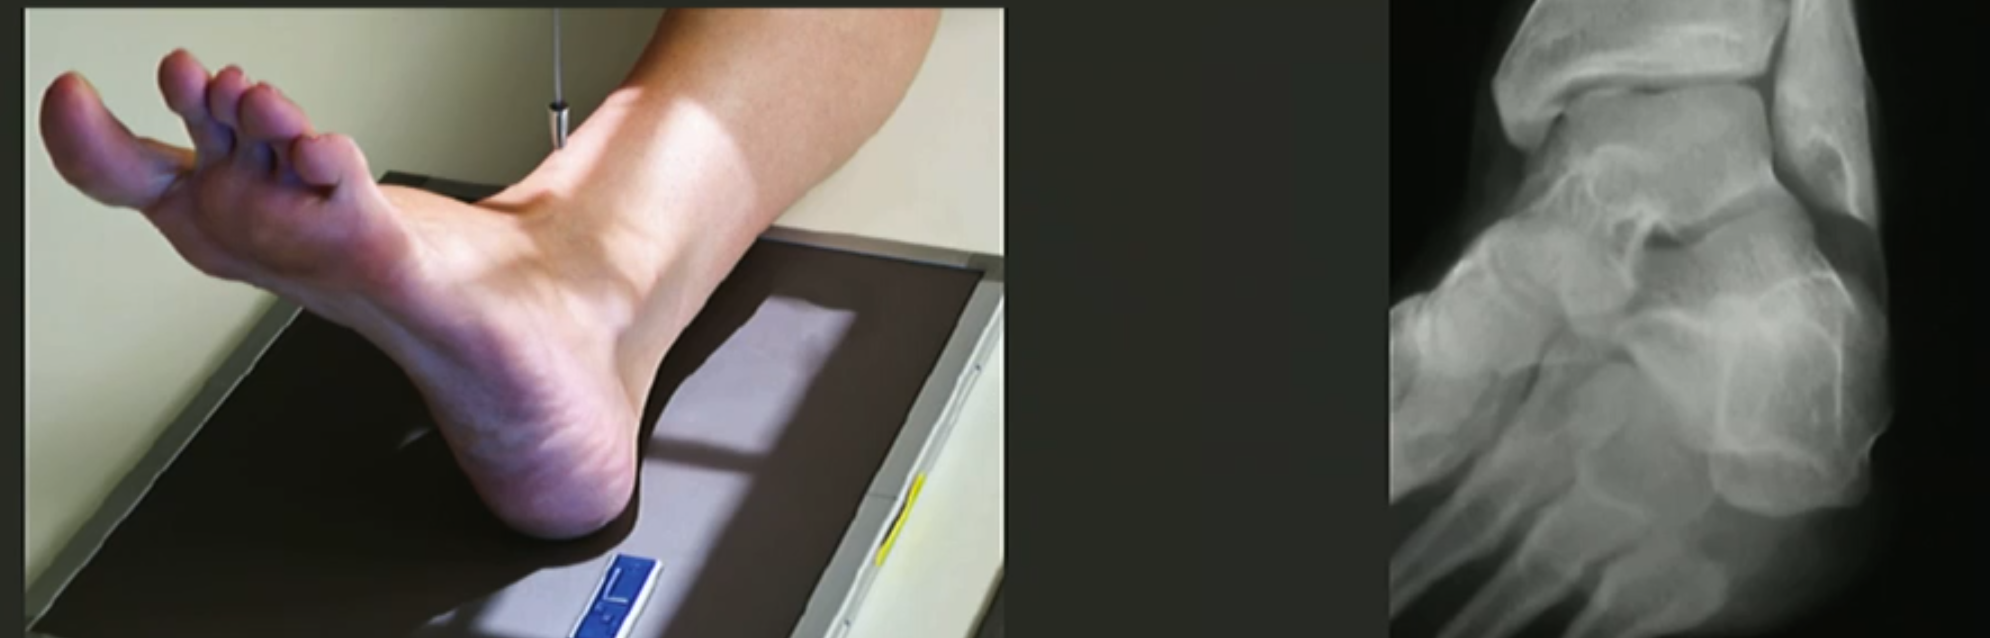
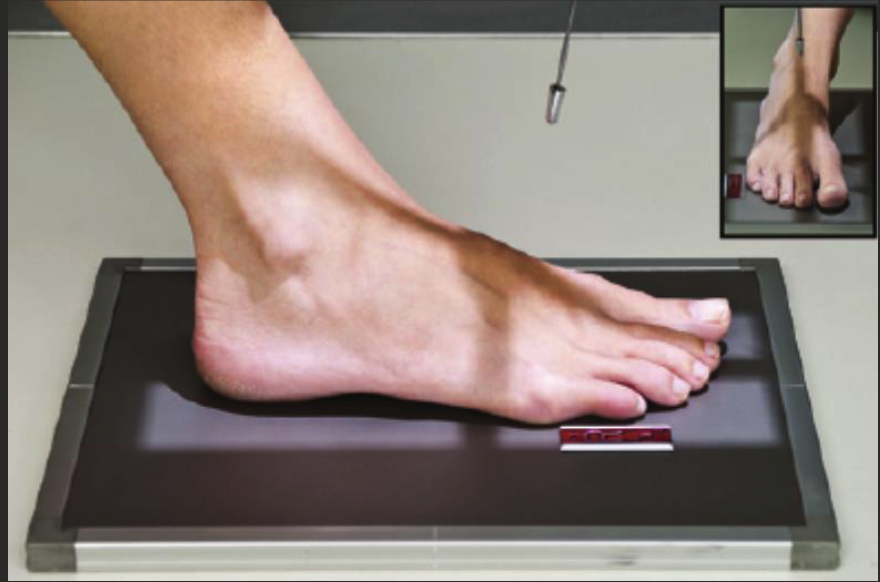
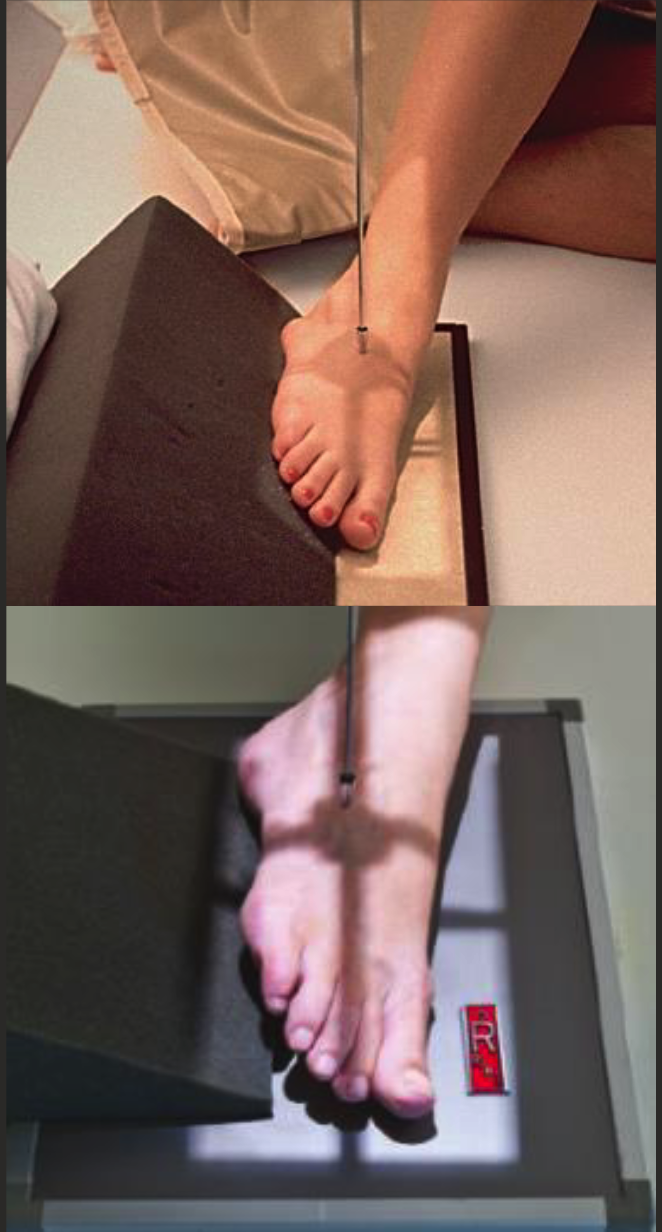
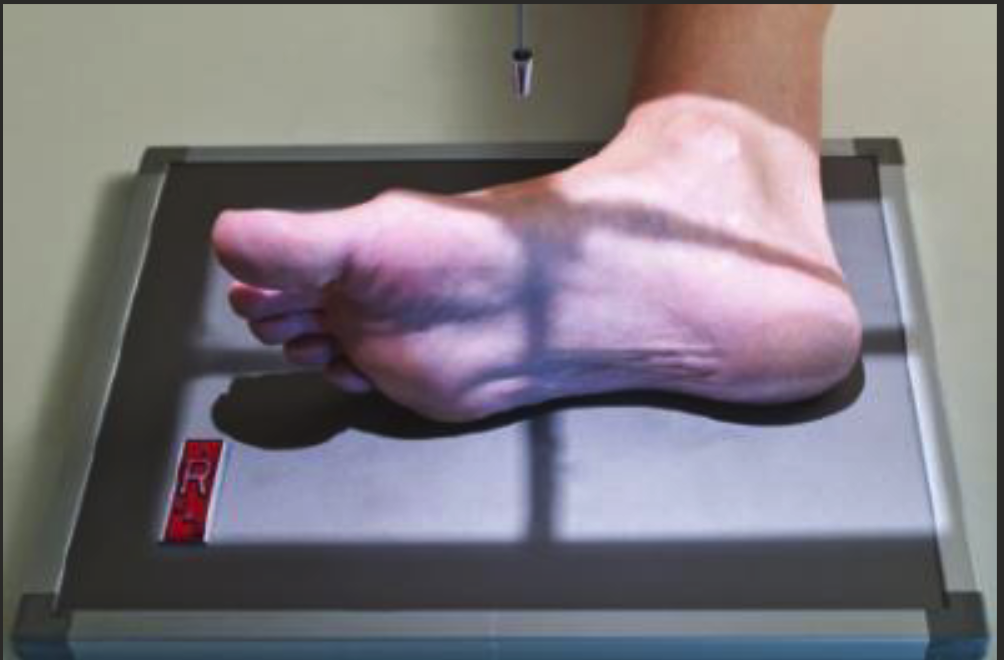
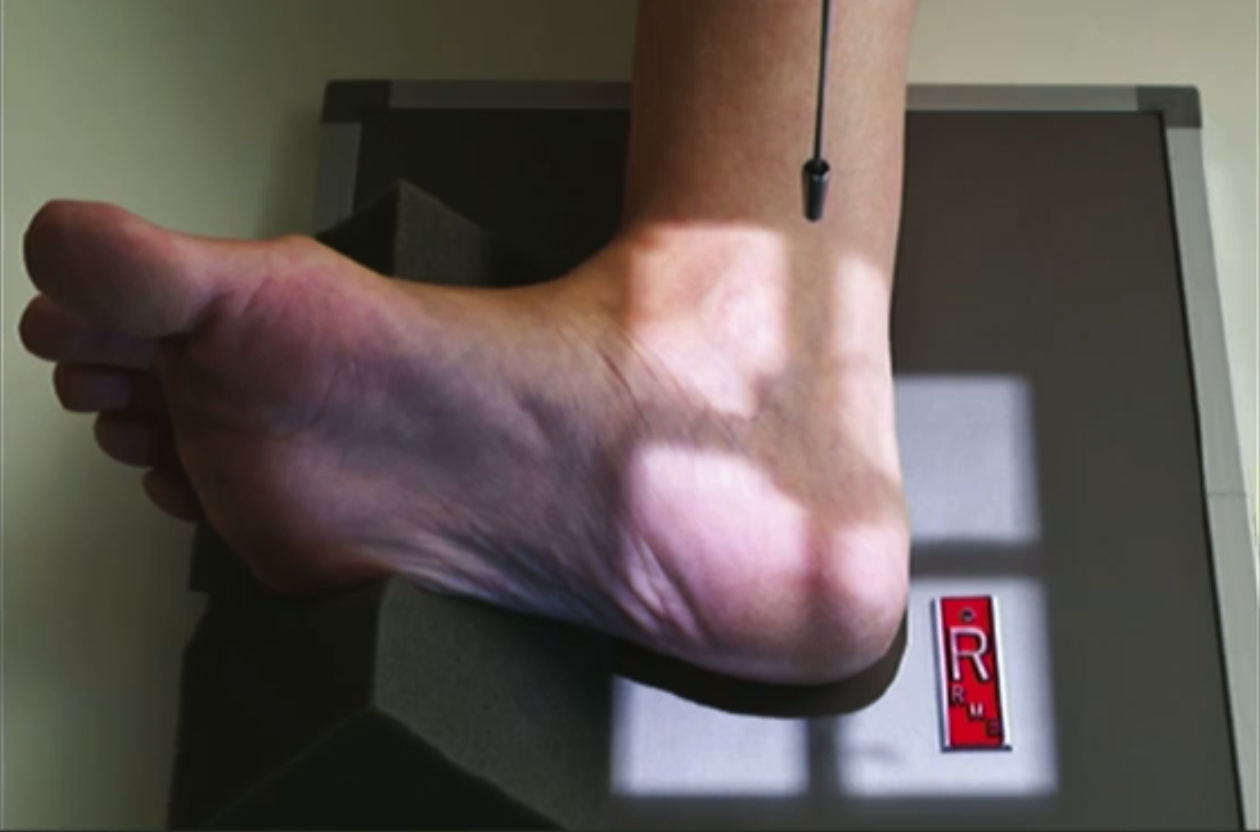
AP Foot positioning
Patient sitting or lying on table, knee bent, sole of foot flat on IR.
Long axis of foot parallel to IR edge.
CR angled 5-15 degrees posterior (depending on foot arch).
Centre at BASE OF 3rd MT.
Collimate for skin edge of TOES AND HEEL.
AP (DP) foot parameters
Medium (24×30) IR.
52-60kVp (on thicker side, go 55-60ish).
2-5 mAs.
Fine focus.
Use filter (maybe) for more even exposure.
Oblique foot positioning
From AP position rotate foot 30-40 degrees medially.
Use sponges to assist if necessary.
CR perp. to IR.
Centre at BASE OF 3RD MT.
Include edges of toes and heel.
Oblique foot parameters
55-60 kVp.
Fine focus.
2-5 mAs.
MARKER DISTAL.
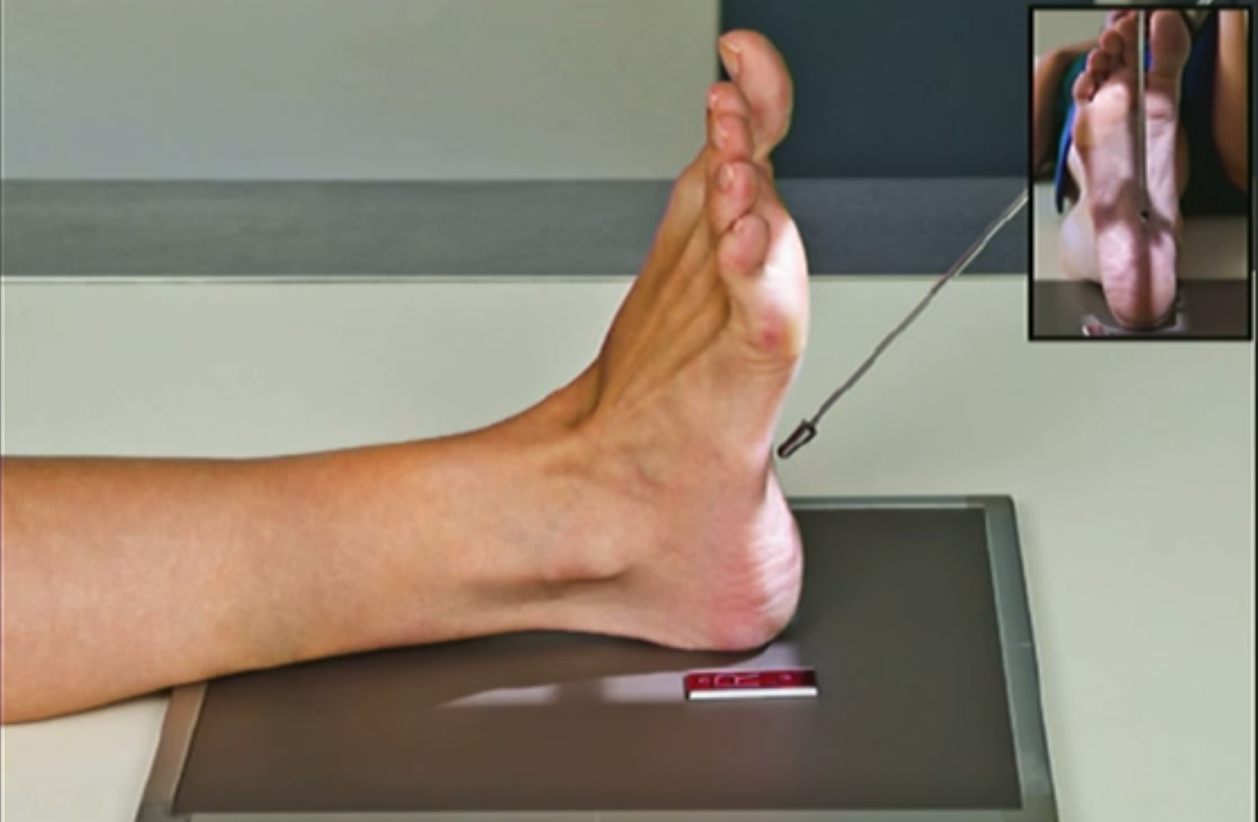
Lateral foot positioning
Carefully dorsiflex foot.
Might need 15 degree sponge under toes to ensure no over-rotation.
Centre at TARSOMETATARSAL JOINT.
Axial calcaneus positioning
Patient sitting or lying on table with leg extended out front.
Long axis of leg aligned parallel to long axis of IR.
Dorsiflexed foot, plantar surface is perpendicular to IR.
Angle CR 40 degrees cephalad.
CR centred on base of 3rd MT.
Include skin edge of heel and lateral and medial skin edges of foot.
Axial calcaneus parameters
small detector.
100cm SID.
60-65+kVp.
5-8 mAs.
Fine.
Distal marker.
lateral calcaneus positioning
Patient’s knee flexed with externally rotated leg.
Dorsiflex foot.
Plantar surface perpendicular to IR.
Collimate to skin edge of heel, ankle joint, and anterior articulation of calcaneus.
CR 2-2.5cm distal to medial malleolus.
Lateral calcaneus parameters
100cm SID.
55-65kVp.
3-5 mAs.
Fine.
Distal marker.
Subtalar joint + sinus tarsi positioning
externally rotate from lateral position by supporting heel.
CR angled 5 degrees anterior and 25 degrees caudal.
Used to visualise changes in pes planus and/or hindfoot valgus.

AP ankle positioning
Patient sitting or lying on table with leg extended out front.
Dorsiflex foot so plantar aspect of foot is perpendicular to IR.
CR perp. to IR centred between malleoli and at level of malleoli.
Include distal 1/3 of tibia.
AP, mortise, and lateral ankle parameters
100cm SID.
55-65kVp.
3-5mAs.
Fine.
Distal marker.
Mortise ankle positioning
Patient sitting or lying on table with leg extended out front.
From AP position, rotate internally around 10-15 degrees AT THE FEMUR so malleoli are equidistant from IR.
CR perp to IR, at level of malleoli and between malleoli.
Collimate for skin edges, include distal 1/3 of tib+fib.

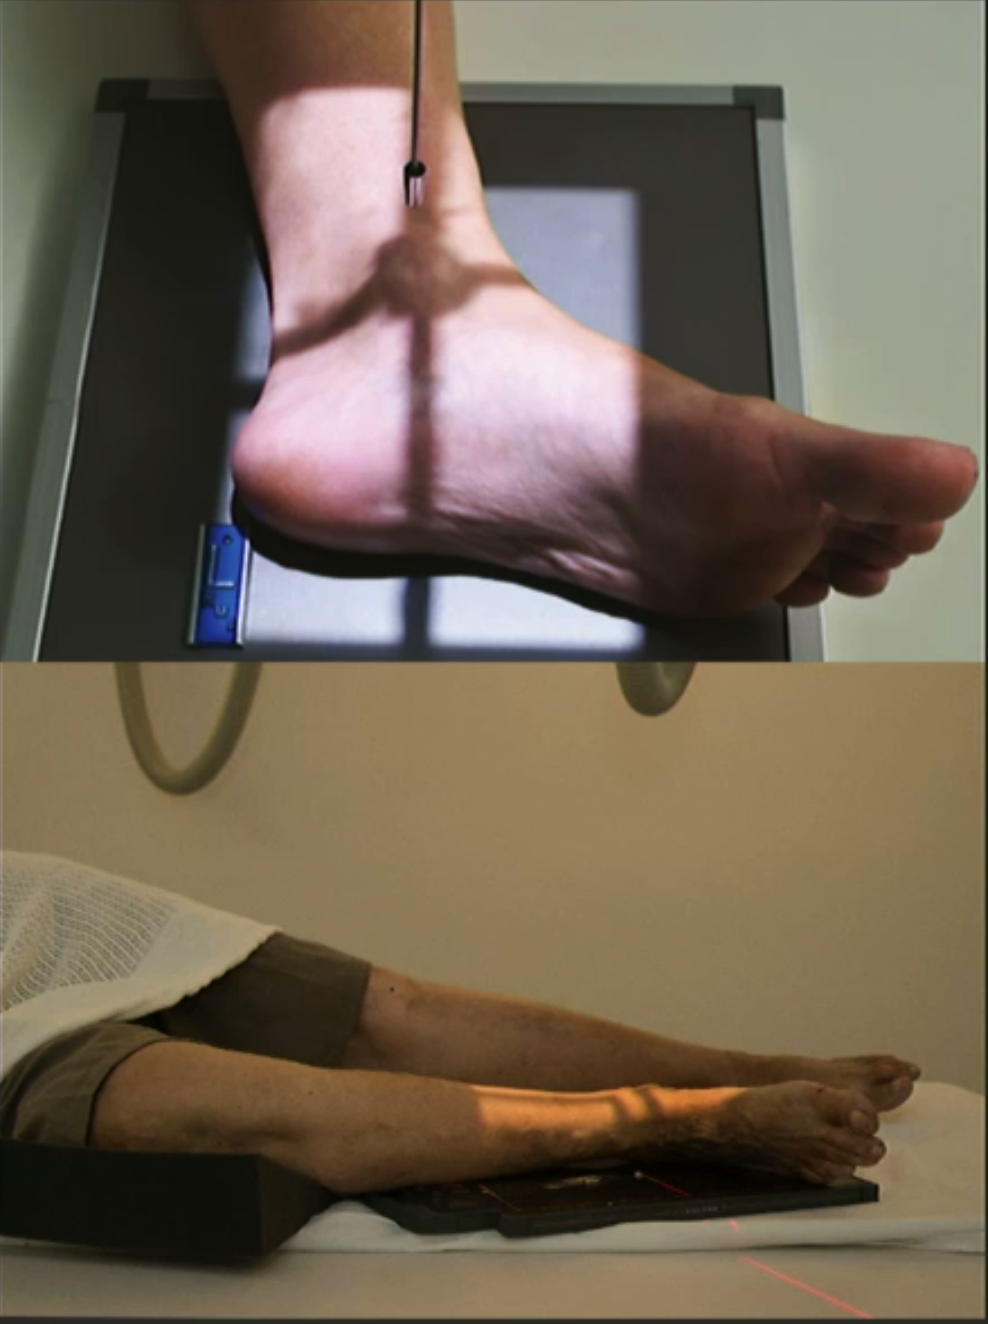
Lateral ankle positioning
Knee flexed with leg externally rotated.
Dorsiflex foot with plantar surface perpendicular to IR.
Superimpose malleoli.
CR perp. to IR, centre over medial malleolus.
Collimate for skin edge posteriorly, midfoot anteriorly, and distal 1/3 of tib+fib.
Internal oblique ankle positioning
From AP position rotate leg 45 degrees internal.
Used to assess syndesmosis (freeing it of superimposition) and inferior talus.