Bio Research Lab Practical
1/85
There's no tags or description
Looks like no tags are added yet.
Name | Mastery | Learn | Test | Matching | Spaced |
|---|
No study sessions yet.
86 Terms
Part 1 - Lab Rules & Safety
What is the first step in lab safety?
1st step in lab safety: To know what procedures you will be following and what chemicals you are working with.
Why are proper clothes important in a lab setting?
➡What counts as improper clothing?
➡What should you do/wear in lab
Proper clothes are important because they protect the body from spills
Improper Clothing
➡Shorts, skirt, dresses, sleeveless tops, open-toed shoes etc
Wear eye protection during ALL experiment, no food/drink/gum, wash hands often
➡Wear socks, closed shoes, long pants, gloves, no openings on clothes
Why is it important to label one's work? How should you label your work?
Labeling ALL work is important to
➡prevent confusion
➡allow for proper organization
➡ease of access to one's sample.
Format
(Section #)-(Team #)-Initials-Description
Ex:
Section 15, Team 1, Daniel Avery, Blank Sample
15-1-DA-B
S15-T1-DA-B
Waste Disposal: Where do these items go?
➡Tip Waste?
➡Sharp objects?
➡Broken glass?
➡EtBr Waste?
➡Chemical Waste?
➡Bacteria Culture Waste?
➡Bacteria plates and waste?
➡Equipment and Supplies?
➡Tip Waste? ➡ Small tip waste containers at bench
➡Sharp objects? ➡ Go into red sharps containers near sink
➡Broken glass? ➡ Report to TA 1st; glass will go in broken container box.
➡EtBr Waste? ➡ All EtBr waste should go in EtBr special waste container
➡Chemical Waste? ➡ Go into specific waste container (never sink)
➡Bacteria Culture Waste? ➡ Return to rack designated by TA
➡Bacteria plates and waste? ➡ Will go to TA bench.
➡Equipment and Supplies? ➡ Will go into drawers according to labels.
What is an assay?
A tool used in science that helps to quantitatively measure the amount of a single part of a sample
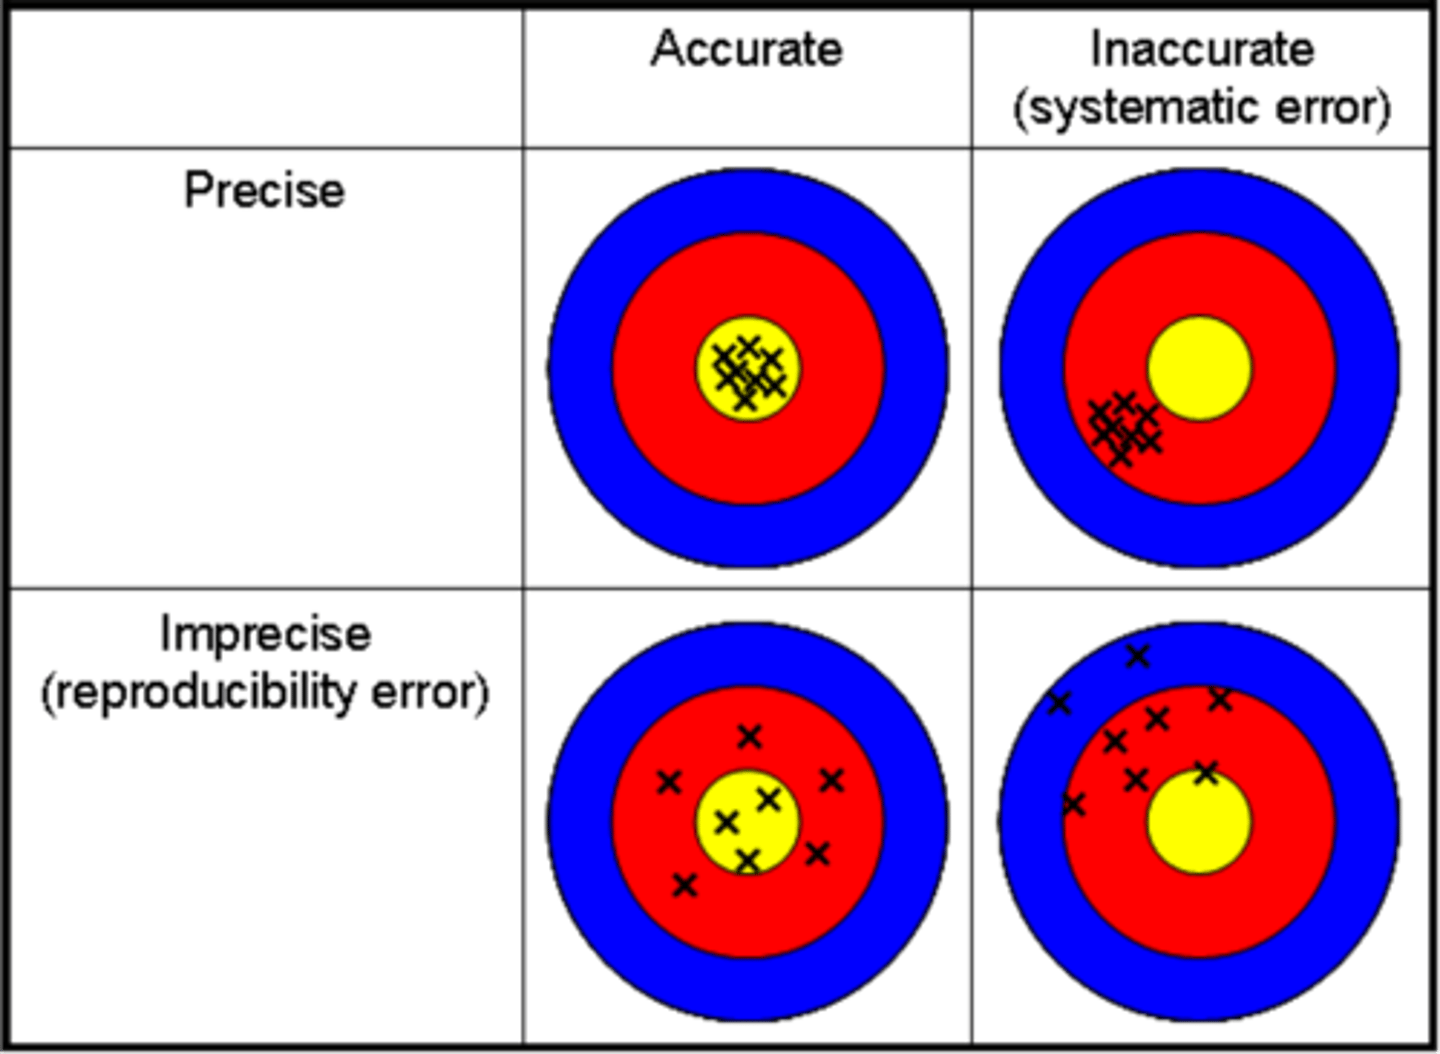
What is accuracy? What is precision?
Accuracy
➡How close a measurement is to its true value
Precision
➡How close different measurements are to one another
What are Significant figures? What are they used for?
Significant Figures
➡The digits of a number that carry meaning, contribute to its measurement resolution
➡Used to keep track of precision of measurements
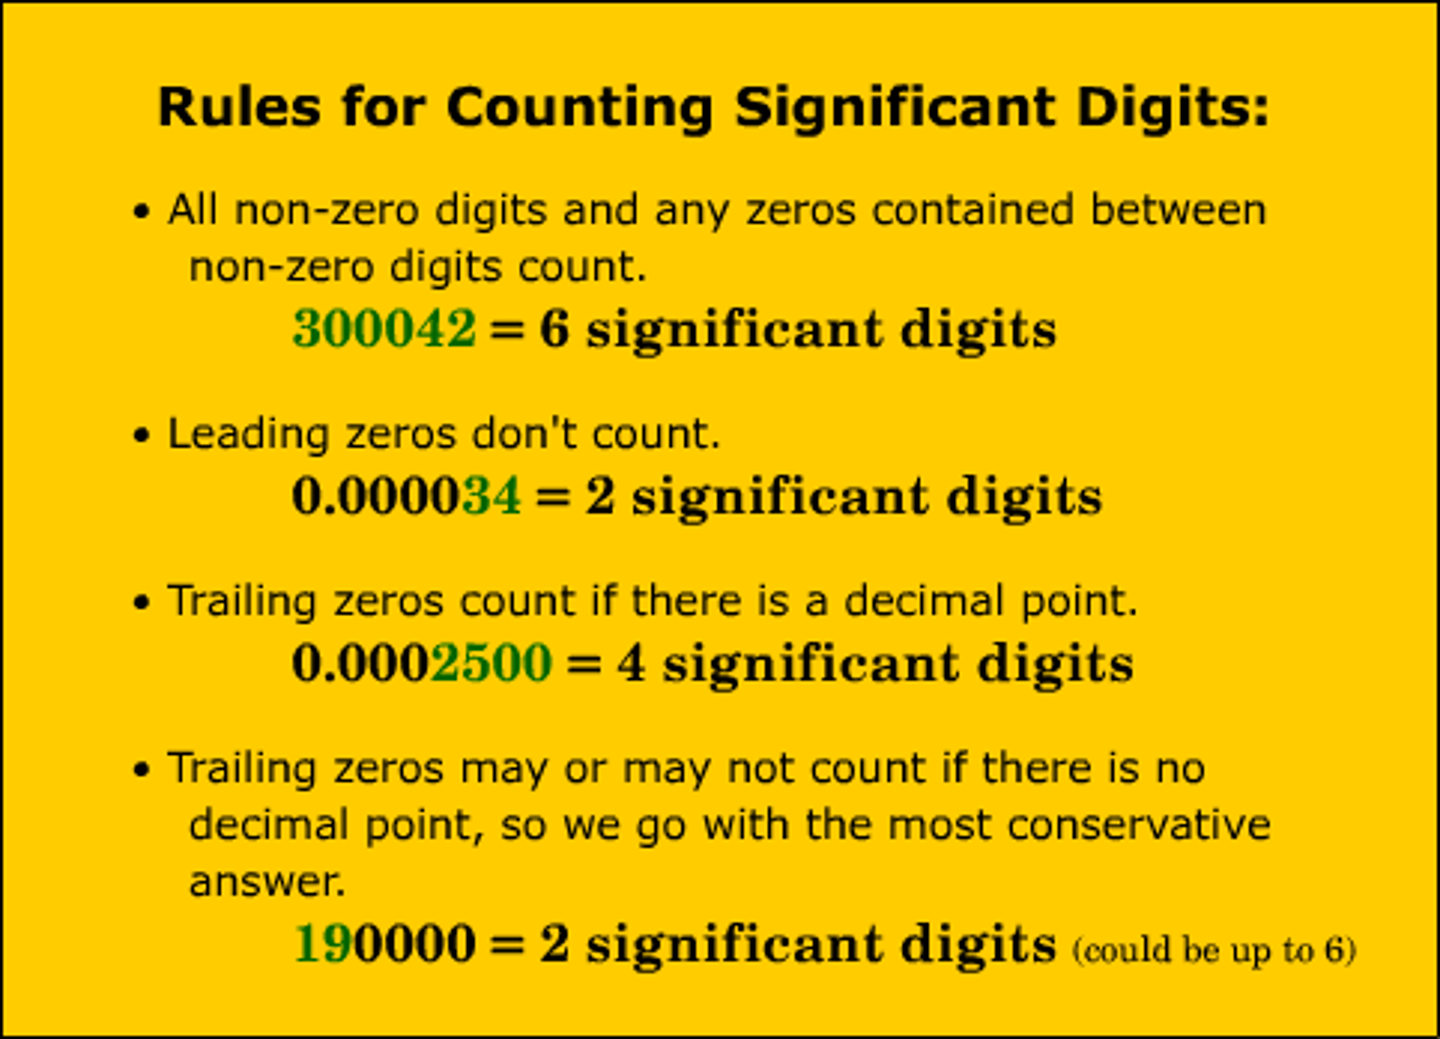
What are the rules of significant figures?
➡How should you report sigfigs?
1. Non zero numbers are always significant
2. Trapped zeroes (in between two numbers) are significant.
3. Trailing zeroes are significant.
Leading zeroes are not significant
Sigfigs can only be as accurate as the tool being used; only report the numbers you see in a measurement
Ex: Measurement = 25.06, report as 25.06
NOT 25 or 25.0600
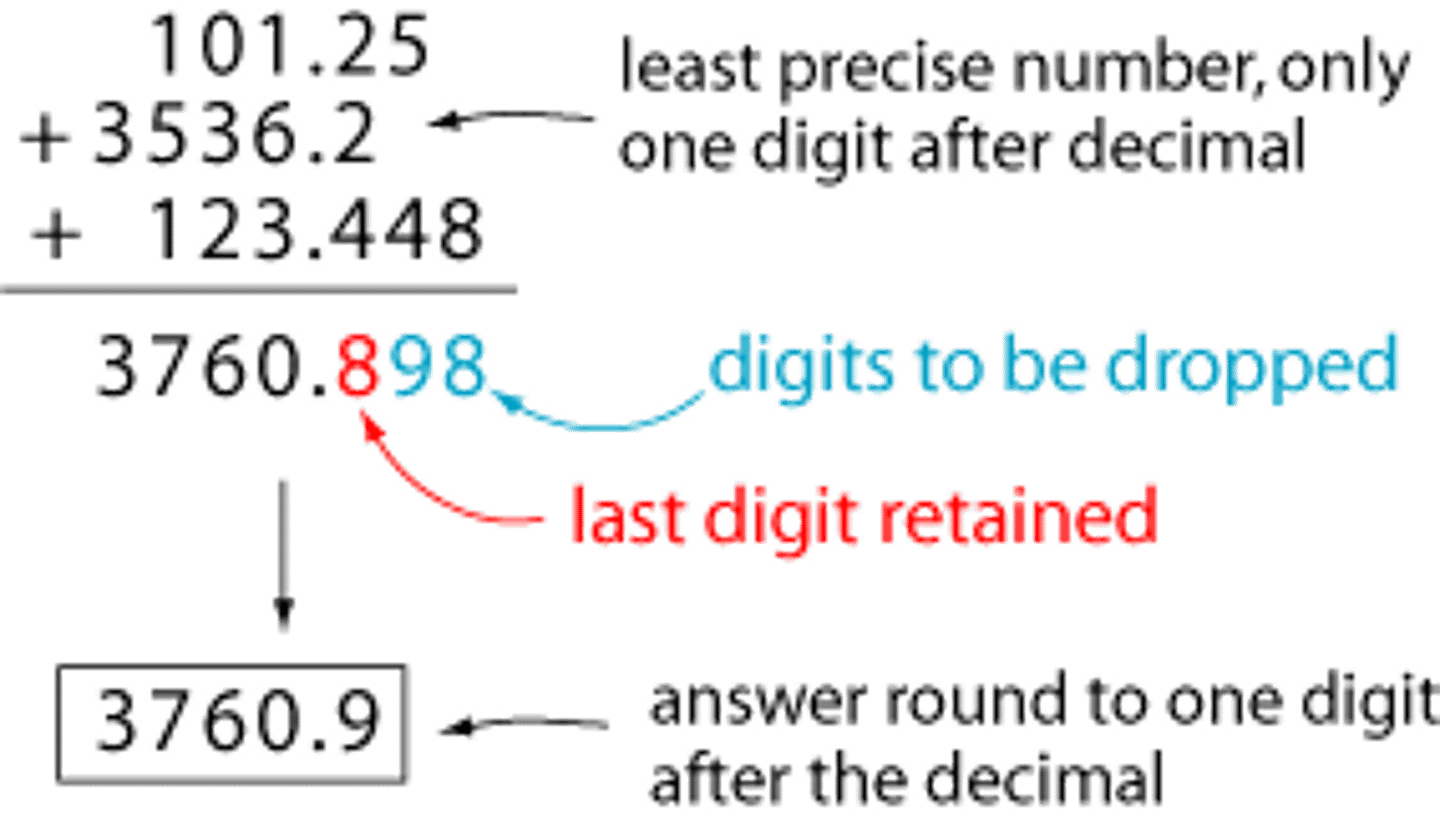
How do you handle sigfigs in calculations?
We will not have to handle too many calculations, but simply round to however many sigfigs it tells you to.
What metric system units are the following?
➡10^6
➡10^3
➡10^-3
➡10^-6
➡10^-9
➡10^-12
Metric Units
Mega (M) ➡ 10^6
Kilo (K) ➡ 10^3
Milli (m) ➡ 10^-3
Micro (µ) ➡10^-6
Nano (n) ➡ 10^-9
Pico (p) ➡ 10^-12
What are the main metric units of Liters we will be using?
How do you convert between them?
1 Liter = 1000 ml
1 ml = 1000 µl
1 µl = 0.001 ml
Basically,
➡to go from ml ➡ µl, x 1000
➡to go from µl ➡ ml, ➗ 1000
What is sterile technique?
AKA aseptic technique
➡Keeps experiments free of contaminants
➡Avoid touching surfaces/hands with pipette tips
➡Dispose of tips that have been used
What are the most common micropipettes that we use?
➡Quantities they dispense?
➡Tips they use?
Micropipette
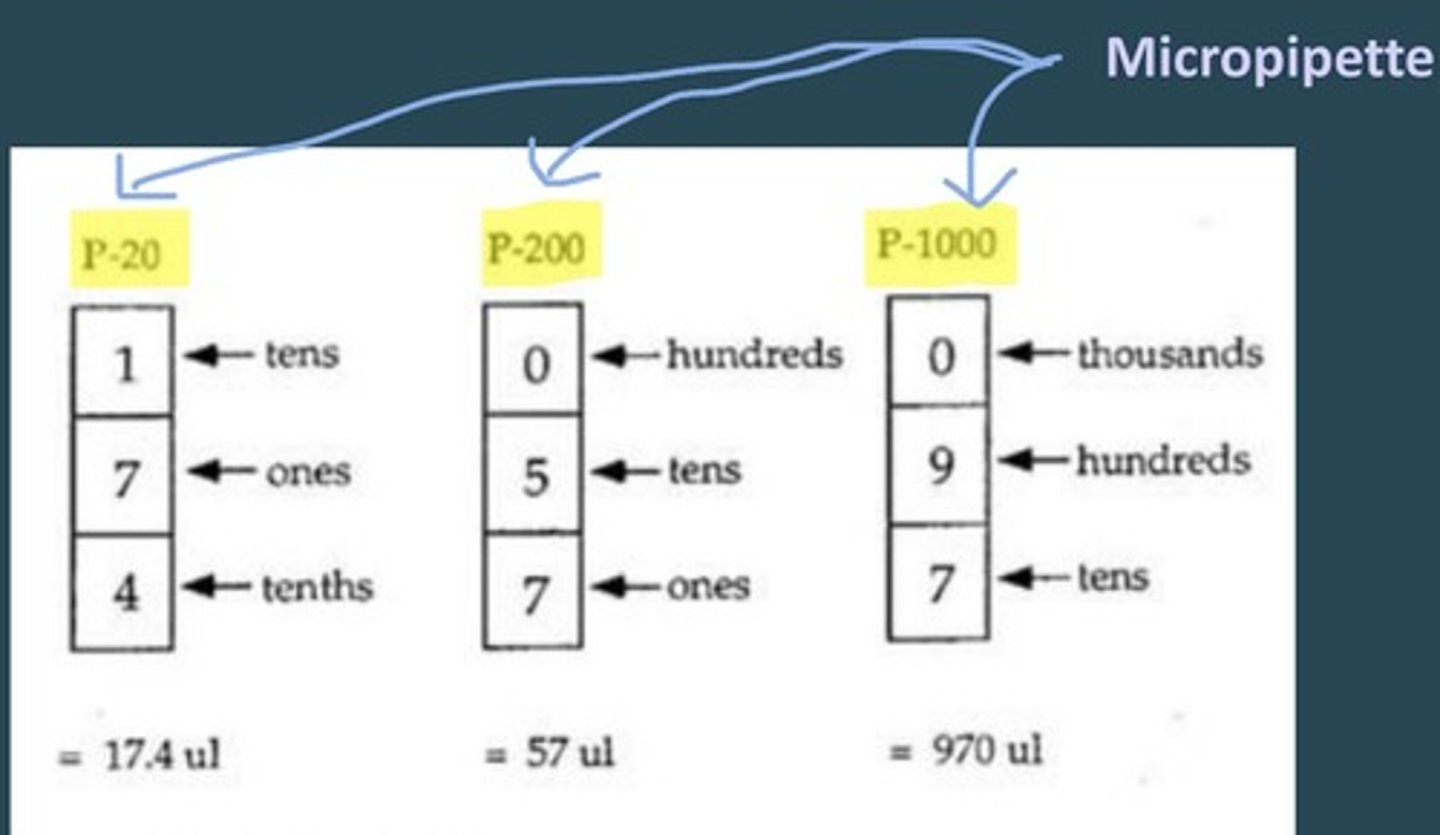
➡P-20: dispenses 2-20µl
➡P-200: dispenses 20-200µl
(both use same small tip)
➡P-1000: dispenses 100-1000µl (uses larger tip)
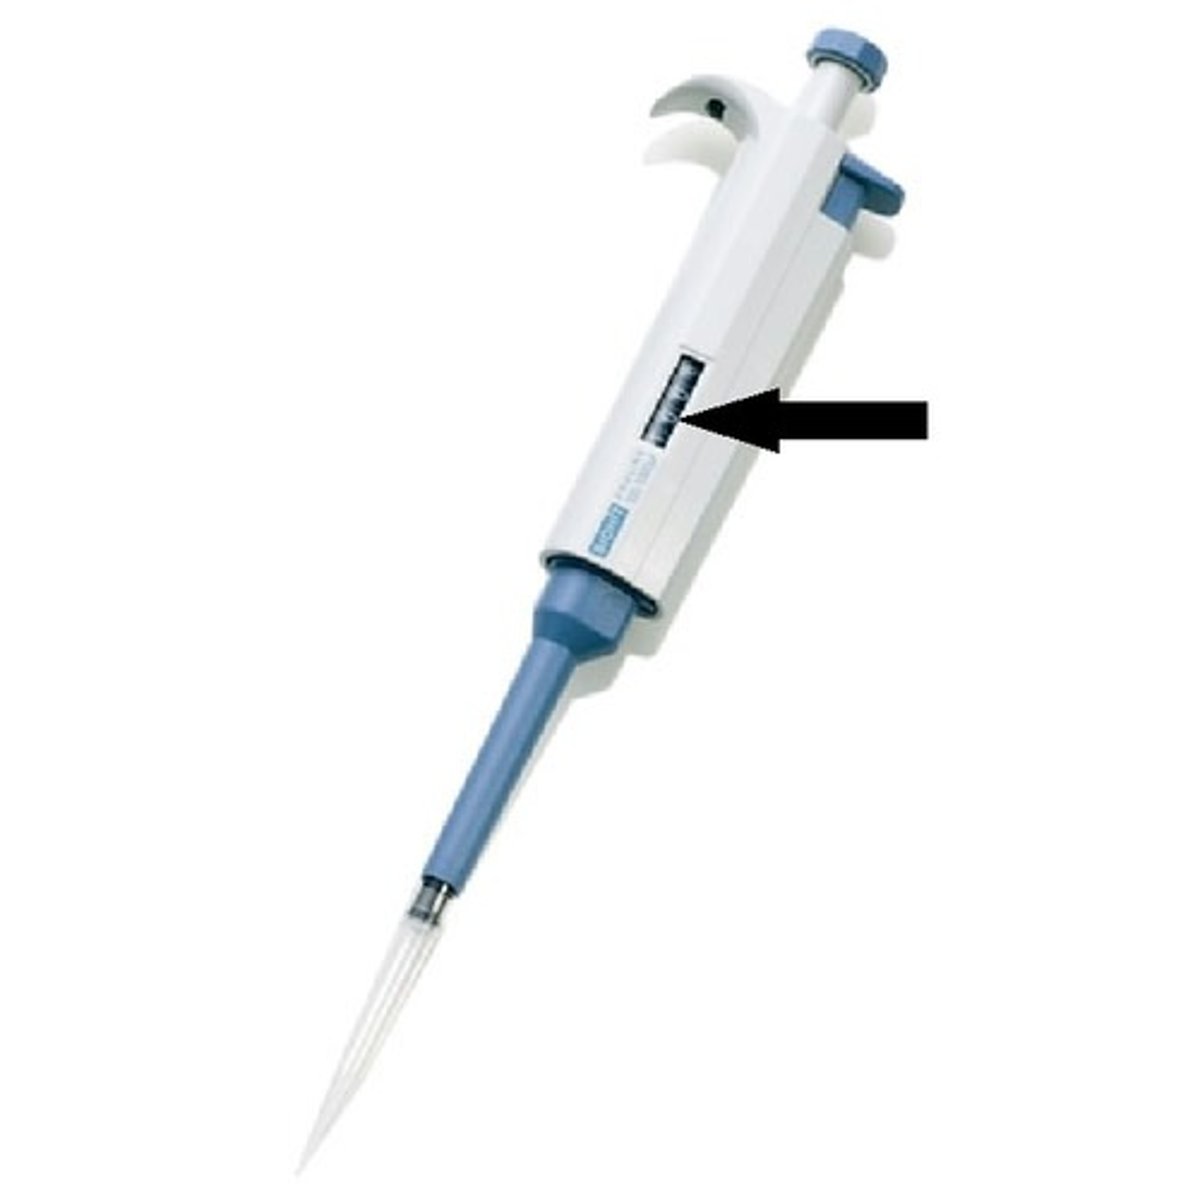
How do you adjust values on the micropipettes?
Turn the plunger in clockwise motion to increase value.
For P-1000, Thousands is in red on top, then hundreds, then tens
For P-200, Hundreds is on top, then tens, then ones (no red #)
For P-20, Tens is on top, then ones, then tenths (in red)
DONT FORGET TO LOCK IN PLACE
How do you use a micropipette?
➡What should you make sure you always do after use?
Step 1: Using thumb, press plunger down to 1st stop outside of sample.
Step 2: THEN, insert tip into liquid.
Step 3: Slowly release the plunger
Step 4: Move micropipette to whatever solution needed, and push down to first stop.
Step 5: Finally, push down to 2nd stop to fully push out any remaining liquid.
Step 6: Dispose of cap in tip waste.
ALWAYS USE CLEAN PIPETTE TIP, REPLACE AFTER USE
When are pipette bulbs and serological pipettes used?
➡How do you use one?
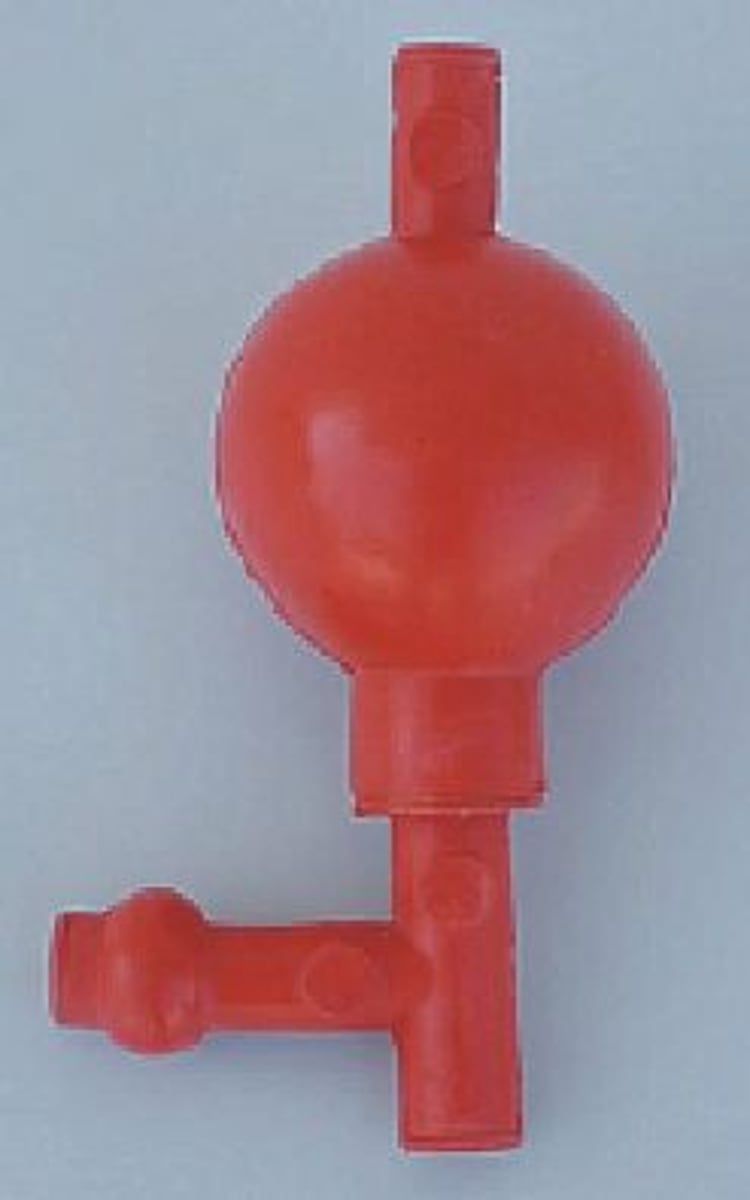
These are typically used to transfer ml quantities, typically 1-5ml
A➡S➡E
1) Insert glass serological pipette into bulb.
2)Hold A at top of bulb, and squeeze bulb.
3)Insert pipette tip into sample, and press S to take in sample.
4) Press E to empty sample.
Dont fill up too high till cotton
How do you calculate % error?
Percent error (%) =
Theoretical mass - measured mass
--------------------------------
Theoretical mass
x100

What is a buffer?
a substance that minimizes changes in pH
What is a stock solution?
highly concentrated solution that can be easily diluted (usually by water)
What is the equation that relates concentration with volume?
➡(Is used to make specific volume of dilute solution from stock solution)
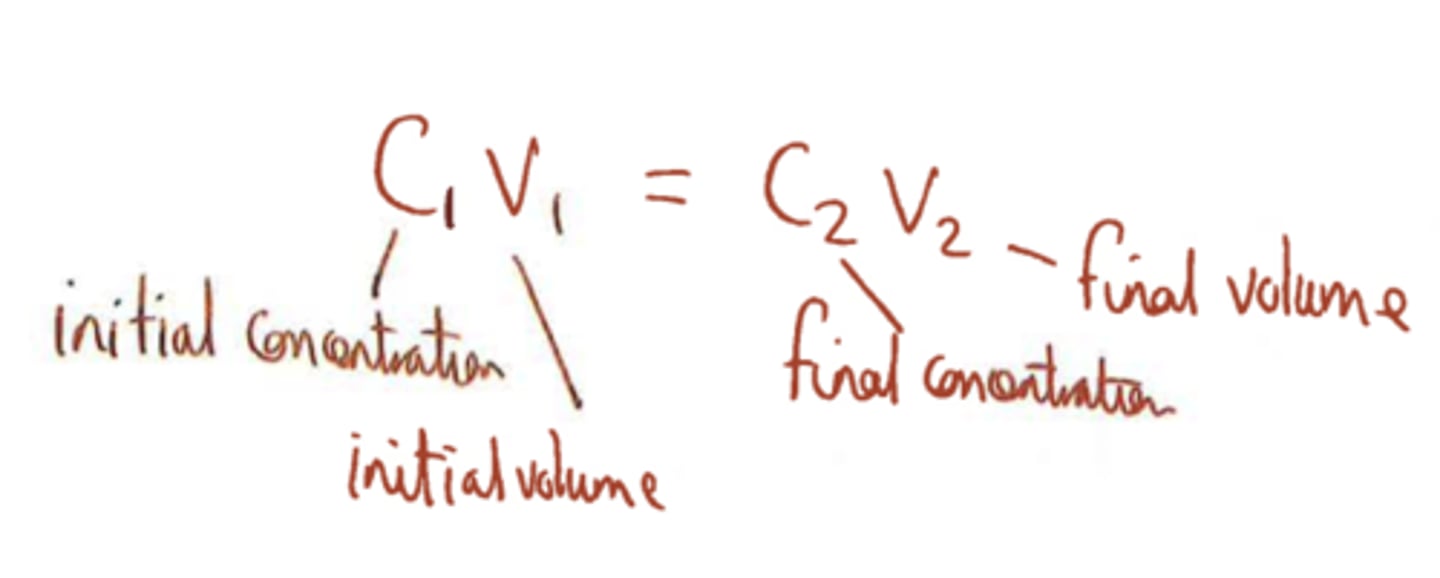
(initial Concentration of Stock Solution) x (initial Volume of stock solution needed for dilute solution) = (Final Concentration of dilute solution) x (Final volume of dilute solution)
C1V1 = C2V2
Cnctration can be given in X or mg/L or pmol/ul etc....
What is the dilution factor? What is the formula for it?
Dilution Factor
➡The factor by which the concentration of the dilute solution is reduced compared to the concentration of the stock solution
Step DF = C1/C2 = V2/V1
What does the "X" within a solution indicate?
The X indicates that the solution is in a concentrated form that must be diluted to 1X
Ex: 5X Solution must be diluted 5 fold
How do you find the amount of water needed to dilute?
Vwater = V2 - V1
(Final volume of dilute solution) - (Volume of stock solution)
What is a serial dilution?
Serial Dilution
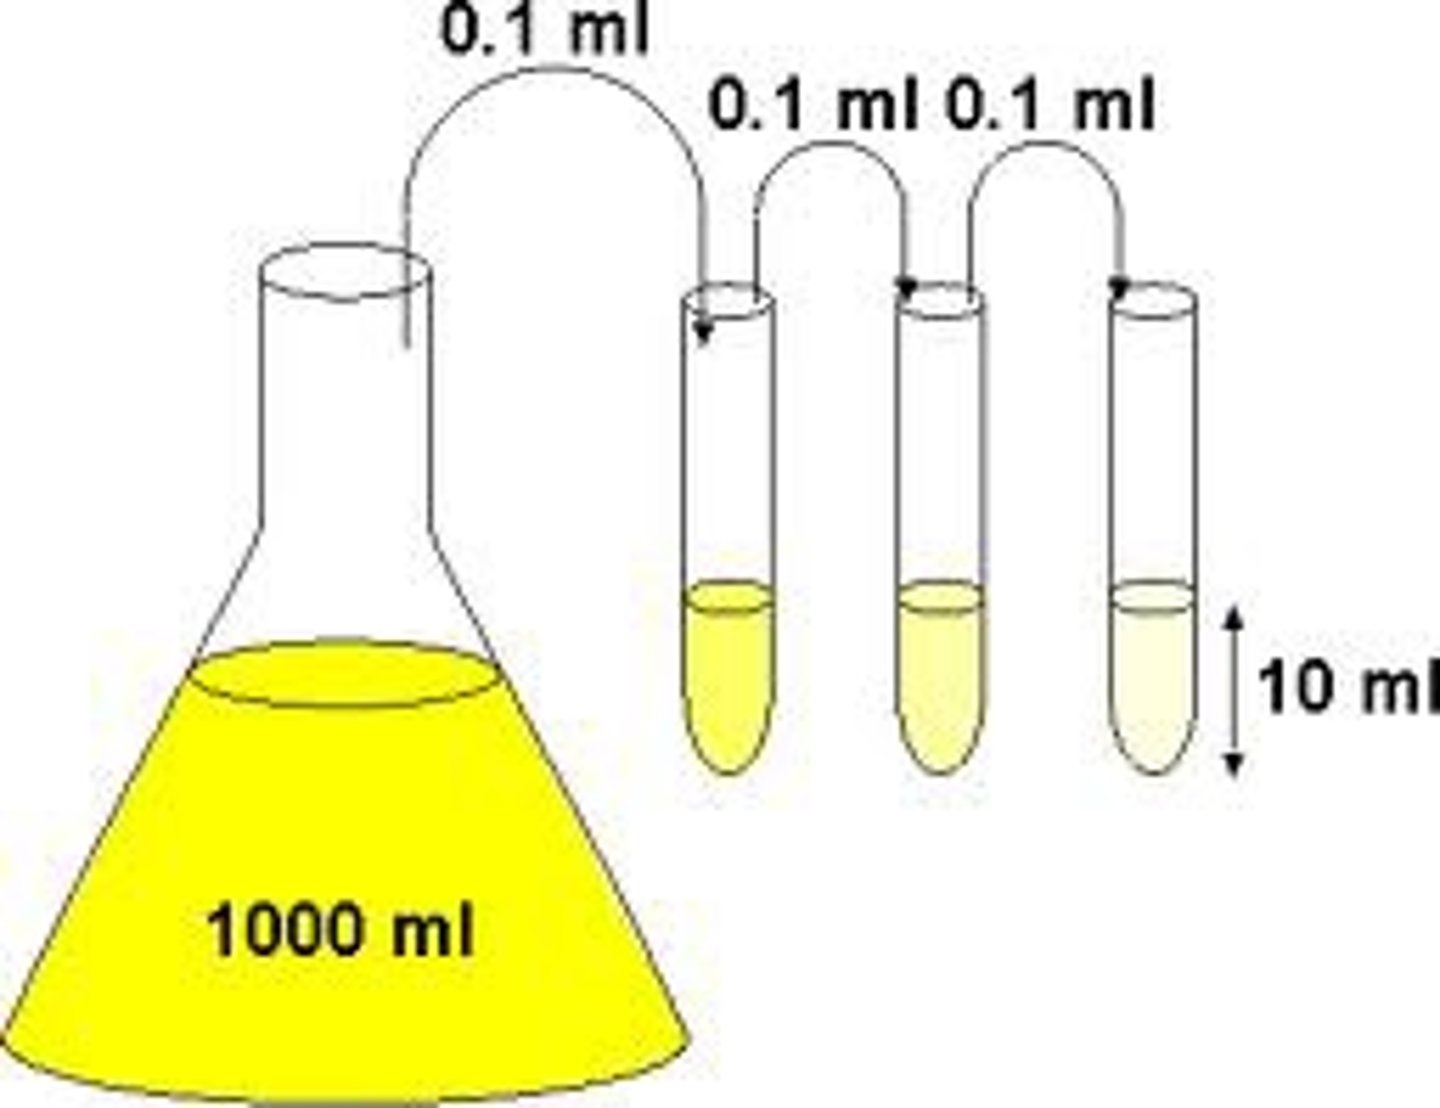
➡Stepwise dilution where the stock solution (one where u draw from) for each dilution is the dilute solution from the previous dilution
How do you find the total Dilution Factor (DF)?
Total DF = product of
Total DF = DF1 x DF2 x DF3... etc
5X 5X 5X = 125
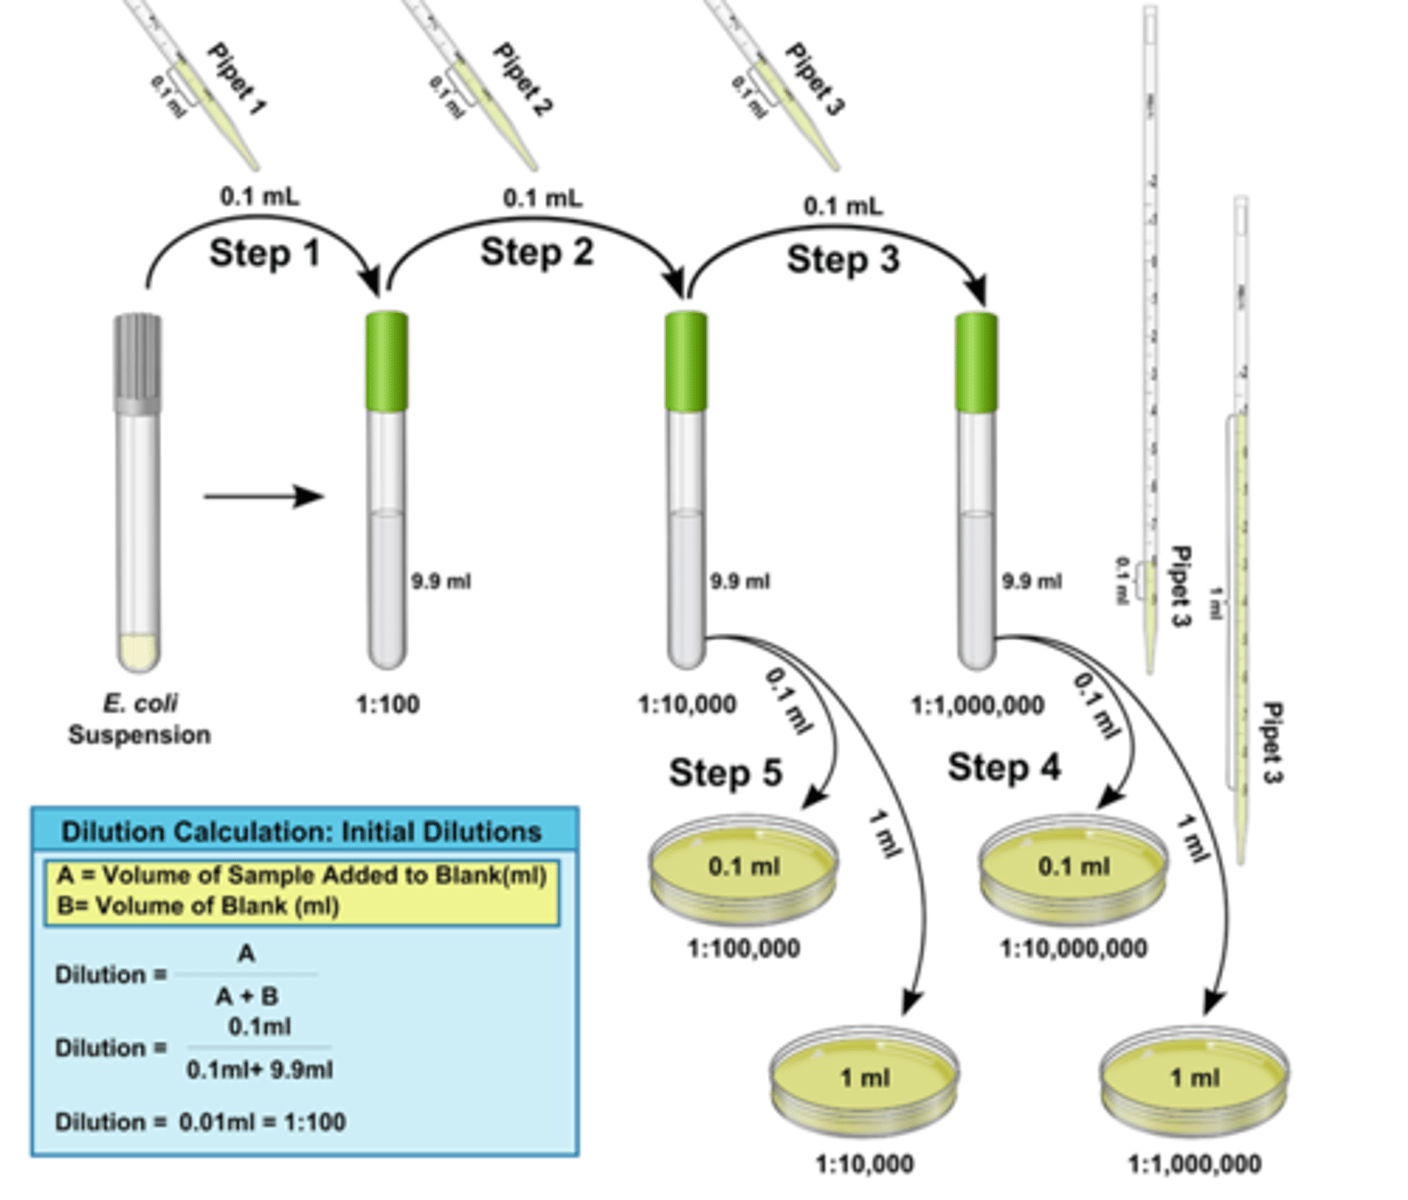
EXAMPLE QUESTION Starting with a 10X TAE Buffer, make 6ml of 1X TAE buffer.
Step 1: Identify known values. (Remember C1V1=C2V2)
C1 = 10X
V1 = ?
C2 = 1X
V2 = 6 mL final solution
Step 2: Solve for the volume of stock solution.
V1 = C2V2/C1
V1 = (1 x 6)/10 = 0.6ml stock solution
Step 3: Determine how much water you will need to dilute (Vwater= V2 - V1)
= 6mL - 0.6ml = 5.4mL water
Step 4: Find DF (C1/C2 = V2/V1)
= (10/1) = (6/0.6) = 10X
Sequence the process of making a serial dilution.
1) Obtain 6 cuvettes, label the top 0-4, and B for blank.
2)Add 2mL of bromophenol blue (8mg/ml) stock solution to the cuvette labeled 0 using the P-1000 twice.
3) Fill in each of the cuvettes 1-4 with 1mL of 1X TAE Buffer.
4) Set vortexer to on, and set dial to 6.
5) Transfer 1mL of stock solution from 0 ➡ 1. Put a cap on the cuvette and vortex.
6) Uncap cuvette 1 and transfer 1 mL from 1 ➡2. Vortex to mix. Repeat through to 4.
7) Discard the excess 1mL from cuvette 4 in rinsate beaker.
8) Add 1 mL of TAE Buffer to blank (B) cuvette.
What is the Labquest?
A useful device that can be used to collect/analyze data.
➡Can connect probes to it
➡Measure pH, temp etc
How do you use the Labquest?
➡Where is meter, graph and table?
➡How do you find the calculator?
1) Press the red button on the side to turn on (takes 1.5 mins)
2) Plug in whatever probe you are using into USB.
3) If not taken directly to LabQuest App, press home in bottom right and click LabQuest App.
4) Meter is in top left corner, graph and table in top right in that order.
➡Meter = to measure discrete values, calibrate probes, set up collection parameters
➡Graph = monitor data collection, simple stats,
➡Table = overview of collected data in table format
5) To use calculator, go to home screen. Click the accessories folder, then press calculator.
6) To turn off, press System folder, press Shut Down.
What is the SpectroVis?
➡What is the relationship between absorbance and concentration of a sample?
SpectroVis: A machine that can measure absorbance or transmittance of a pigmented solution.
➡Used to quantify concentration of a solution.
➡Absorbance is directly proportional to concentration of a sample
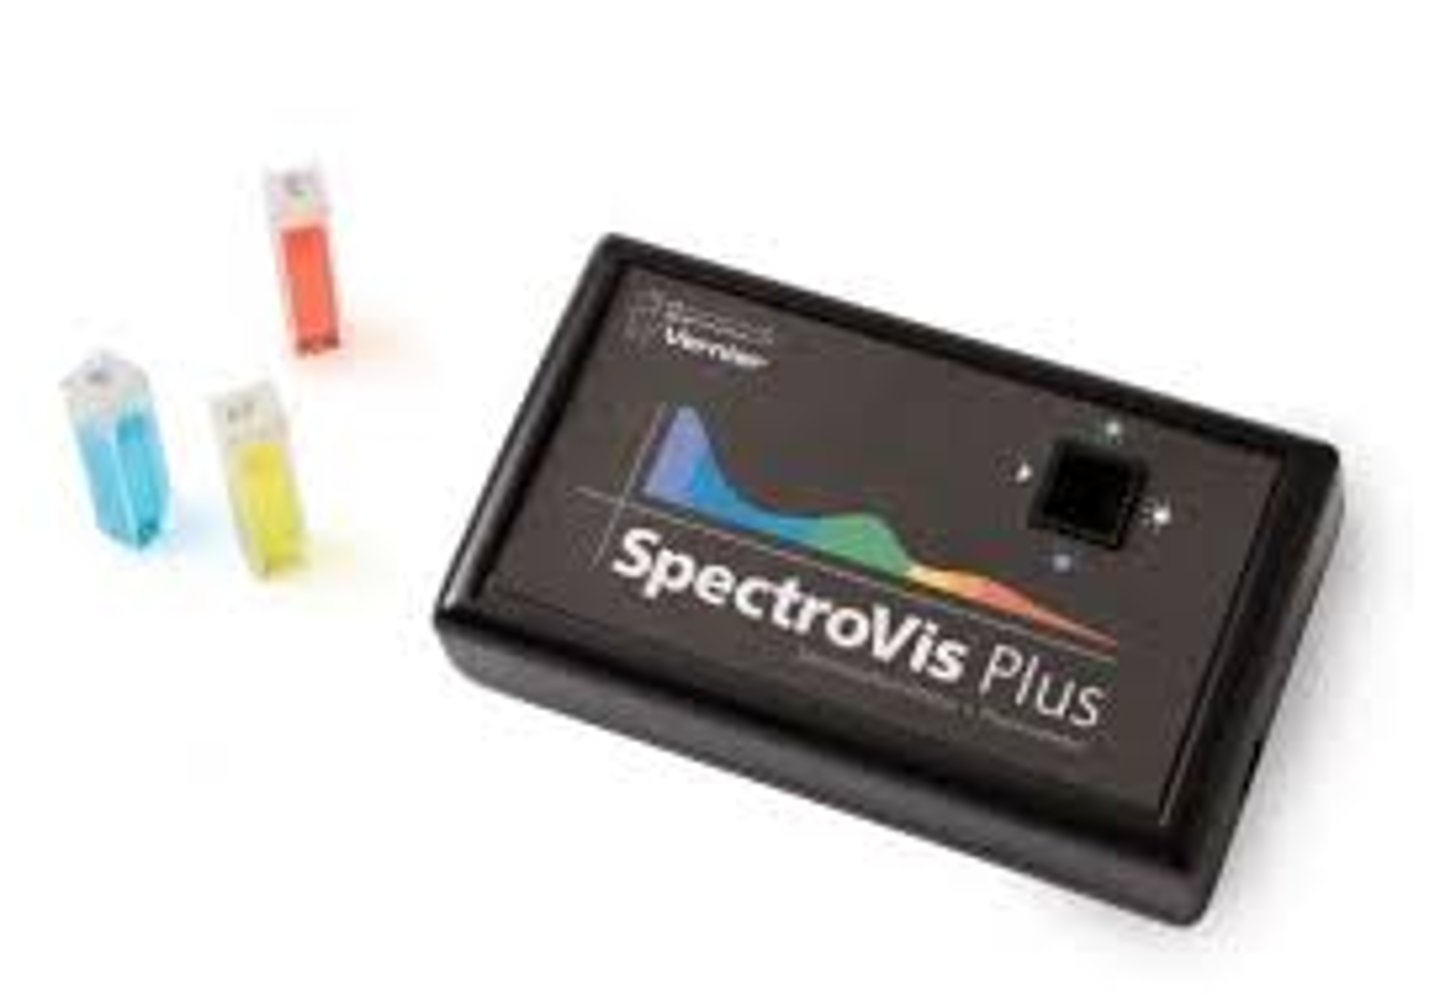
What must be done before we can use the SpectroVis?
We must calibrate using the "Blank"
➡AKA the sample used to calibrate 0 absorbance
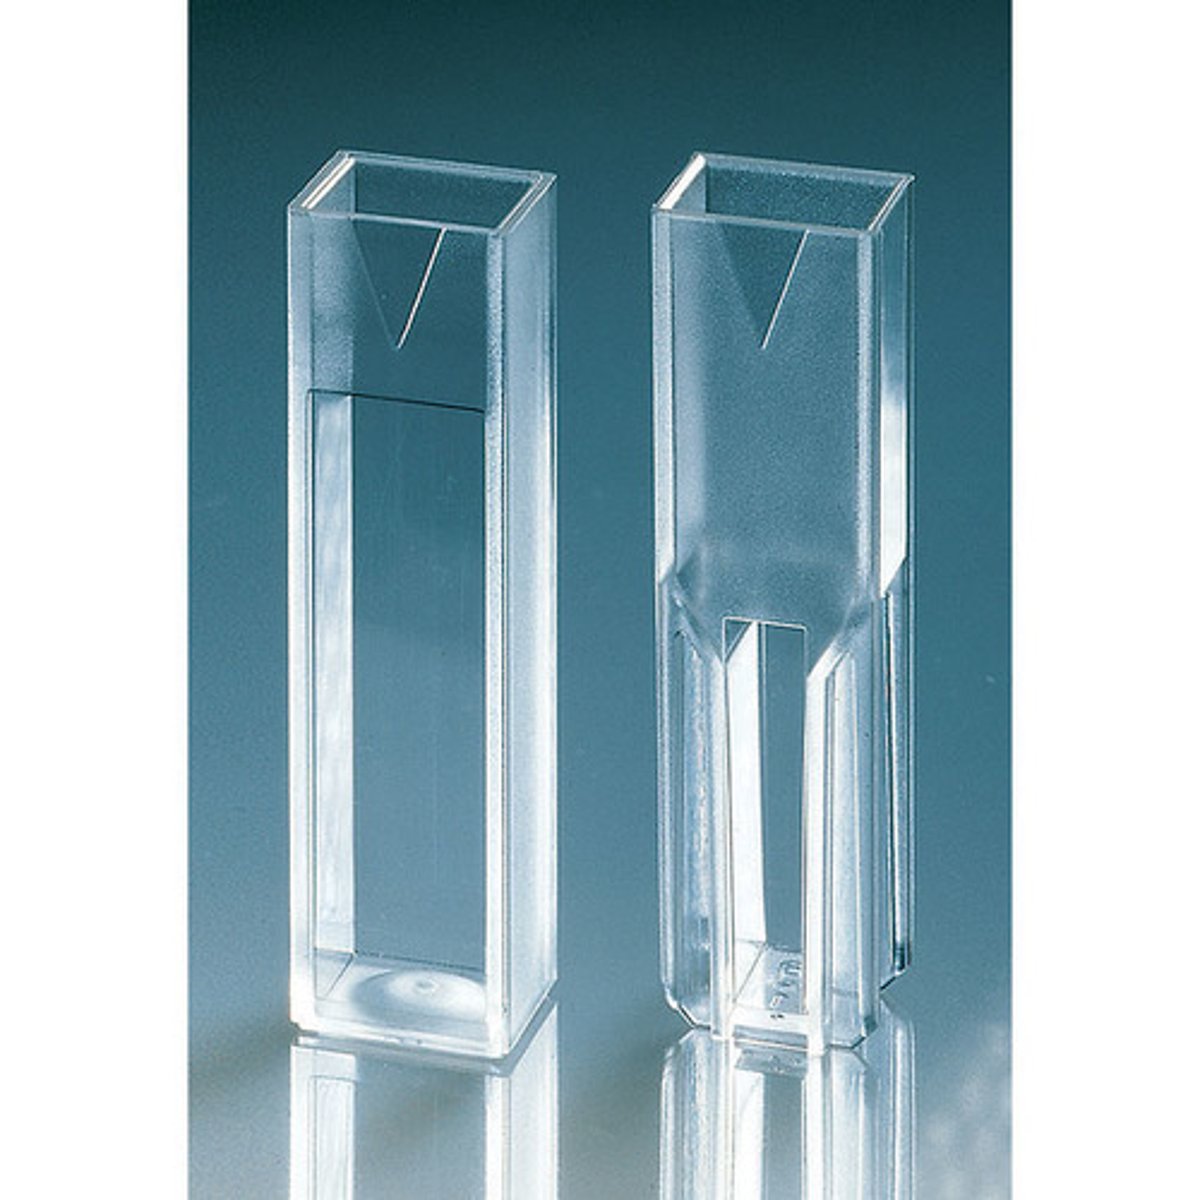
What is a cuvette?
➡What types do we use?
➡How should the cuvettes be put into the SpectroVis?
➡How much liquid should be placed in order to get accurate reading?
Cuvette
➡Small tube used to hold samples for measurements within the SpectroVis
➡We use 3ml, square cuvettes
➡Must be put in with arrow pointing to arrow
➡Must have at least 1ml for reading, label on top to avoid smudges
What is a standard solution? What are they used for?
Standard solutions have a known amount of the material being assayed
➡Used to calculate material in unknown
What is the relationship between concentration of standard and unknown with the respective absorbances?
Cs/Cu = As/Au
Concentration standard / Concentration Unknown = Absorbance Standard / Absorbance Unknown
Directly Proportional
How do you determine the concentration of an unknown sample?
1) Cncntration unknown = (Cncntration standard x Absorbance of unknown) / Absorbance of standar
Cu = (Cs x Au) / As
2) Make a standard curve by measuring absorbance of serial dilution and graphing
➡The unknown concentration (x) can be estimated, or the graph's trendline equation can be used to solve based on measured absorbance (y)
What is a standard curve?
Standard Curve: a tool that scientists use to determine the unknown concentration of a sample
➡Generated by measuring the absorbance of a serial dilution
➡Then graphing the absorbance (y) as a function of concentration (x)
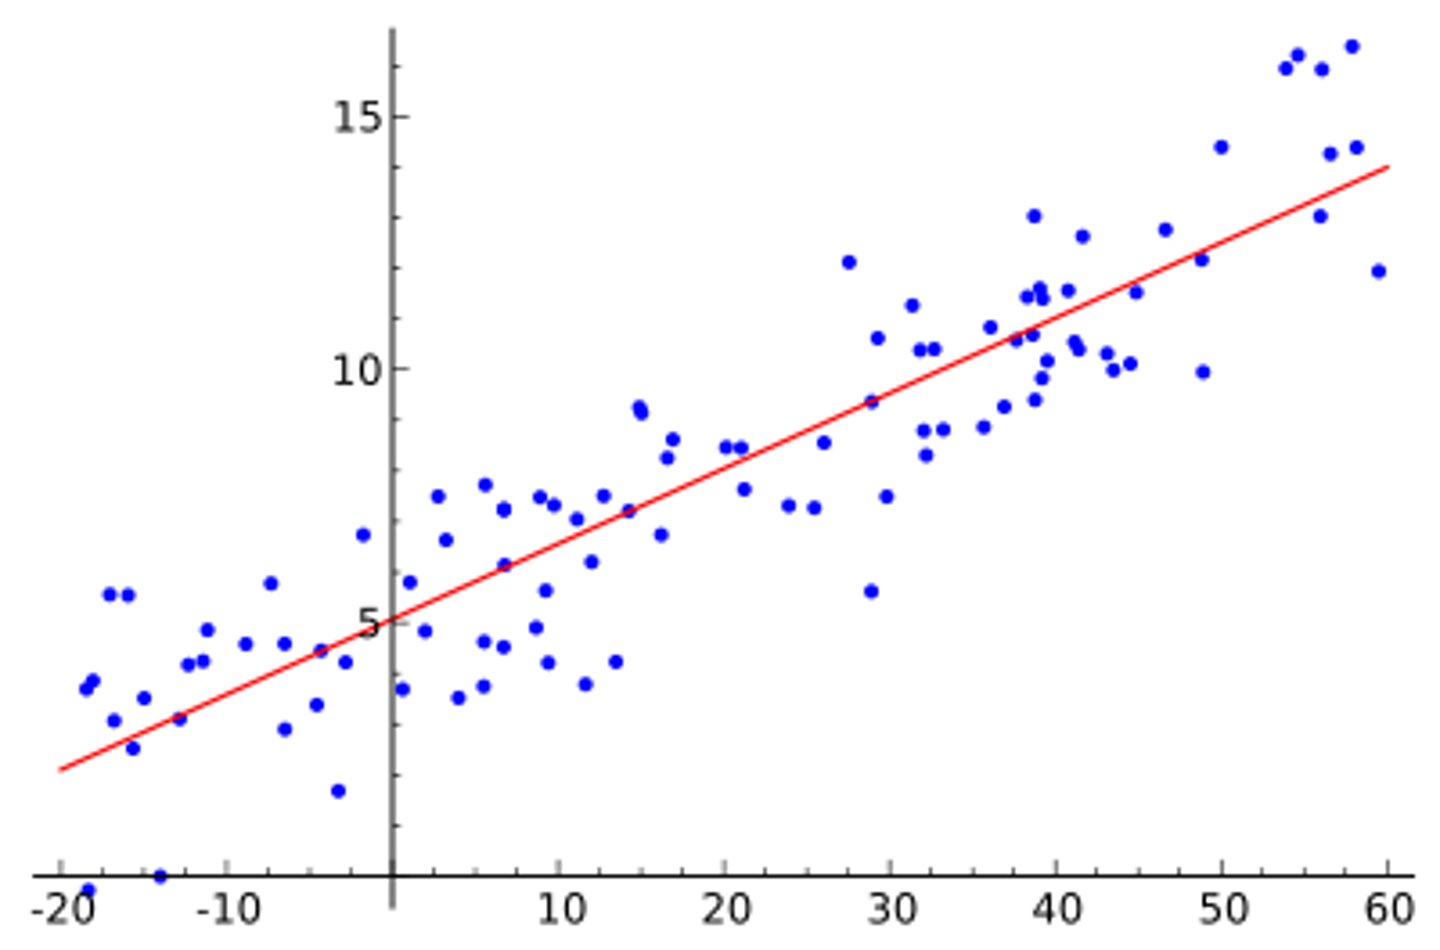
What is a linear regression?
Linear Regression
➡stat method used to model relationship between two variables (x and y)
What is a linear trendline?
➡What is R^2?
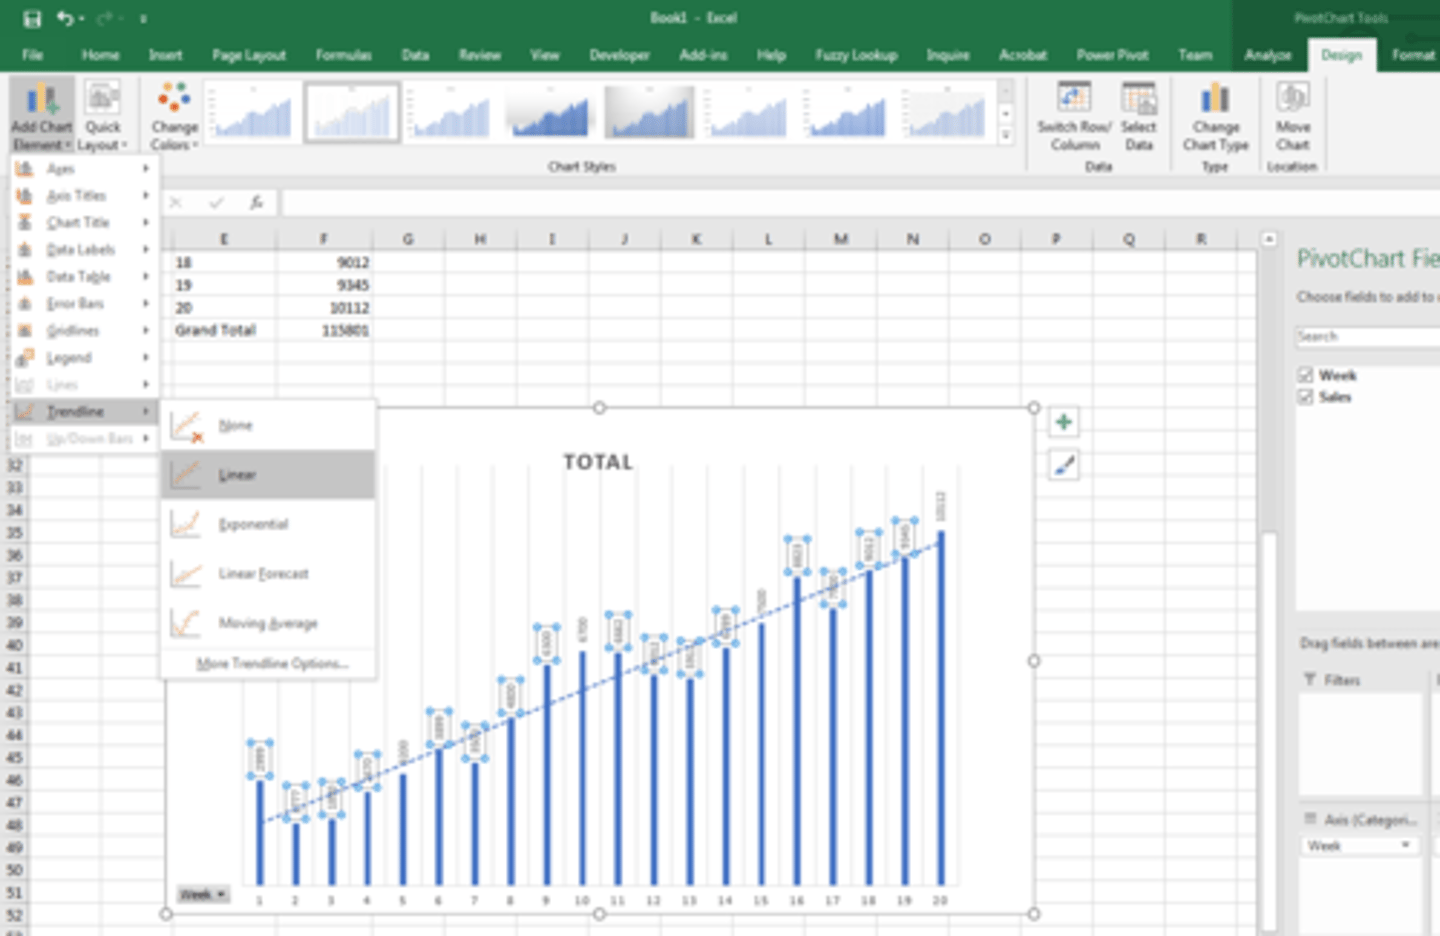
Linear Trendline: A straight line, which is best fit for the data points
➡minimizes the deviation of the data points from the line
➡R^2: value that provides measure of how well linear trendline fits data
➡R^2 = 1: perfect match of trendline to data point
➡R^2 = 0: no relationship between x and y
What is discovery science?
Discovery Science
➡uses large amounts of data or surveys of natural systems to discover patterns and correlations
What is hypothesis-driven science?
Hypothesis Driven Science
➡utilizes the scientific method, first by using discovery science as a background, then forming a scientific hypothesis, and verifying it through trial and error
What is the process of science? Sequence the steps of hypothesis-driven science.
1) Identify the problem or observation.
2) Collect background info through journals, books, profs etc.
3) State the hypothesis based on the info collected
4)Make predictions based off hypothesis, using if-then statements. (must be specific/testable)
5)Test the predictions to see if they are correct; collect data and analyze.
6) Draw conclusions, and see if there are true differences between control and experimental groups.
➡If incorrect: Rework hypothesis & predictions
➡If correct: The hypothesis is supported/most likely correct. It has not been proven correct and never can be.
7) Report conclusions to scientific community.
What three variables need to be considered in the experimental design of a controlled experiment?
➡Once you have established these variables, what can you do?
➡The independent variable: The parameter that is changed by researcher
➡The dependent variable: The parameter that responds to changes from the independent variable
➡The controlled variables: other factors that can affect the dependent variable
Once these variables have been established, you can set up your control and experiment groups
➡Control group: Independent variable is not included
➡Experimental group: independent variable is added/changed
(Controlled variables are kept same in both_
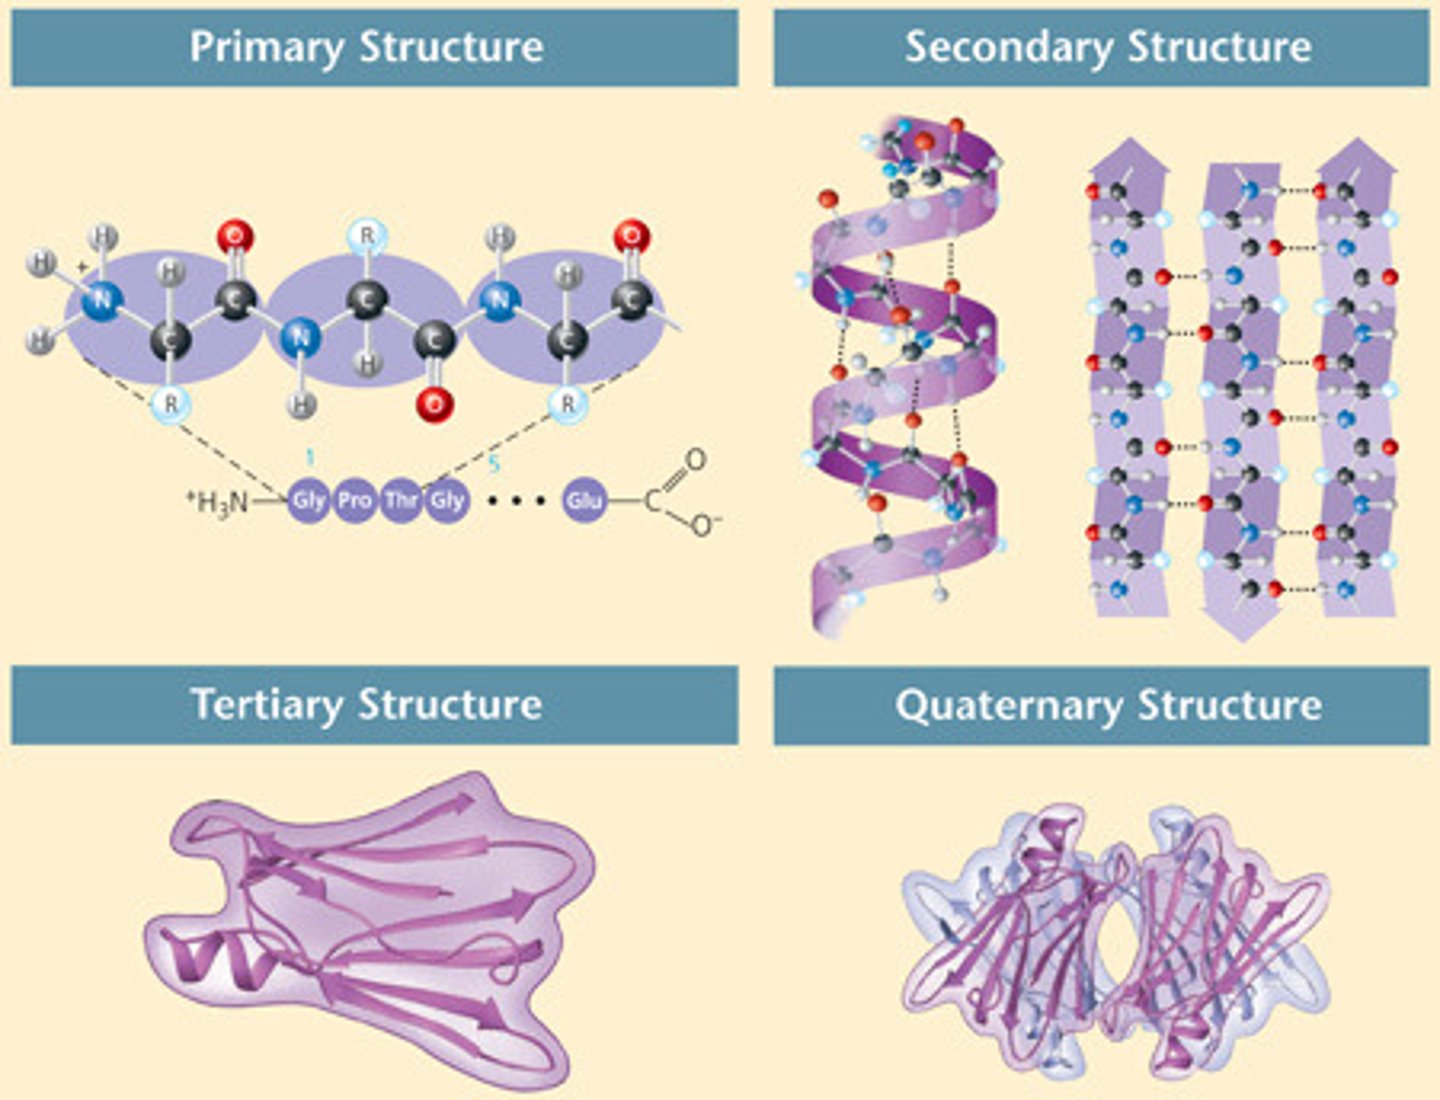
What are the four levels of protein structure? What types of bonds?
primary (covalent), secondary (h-bonds), tertiary (all bonds), quaternary (2 or more polypeptide chains)
What is an enzyme? What is the substrate?
Enzyme (end w/ -ase)
➡organic catalysts that speed up reactions by lowering activation energy; bind to a substrate
➡Highly specific, only catalyze few chemical rxns each
Substrate
➡Substance that enzyme acts upon
➡Binds to region on enzyme to form enzyme-substrate complex
Results in product
What is cytochrome c oxidase?
an enzyme that transfers electrons from cytochrome c to oxygen, resulting in the formation of water and oxidized cytochrome c. (only found in organisms that undergo respiratory metabolism)
What is the rate of an enzyme catalyzed rxn? Formula
rate: the change in a quantity per unit time
➡ΔA/ΔT = (change in absorbance) / (change in time)
(Final absorbance - initial absorbance) / (Final time - initial time) = rate A/min
What is temperature?
Average kinetic of particles regardless of volume
➡Can affect enzyme activity
What are neutral, basic, and acidic solution?
➡What do buffers do again?
Neutral
➡Solution w/ pH 7
➡Has equal ratio of H+ to (OH)- ions
Acidic
➡Solution w/ pH less than 7
➡Has more H+ ions than (OH)- ions
➡0 is most acidic
Basic
➡Solution w/ pH higher than 7
➡More (OH)- ions than H+ ions
➡14 is most basic
Buffers work to resist changes in pH; pH changes affect enzyme activity
Why is it important to measure protein concentration? How do you measure it?
The concentration of an enzyme in a solution affects the rate of reaction
➡Use the Biuret Method to test
➡In this sample, blue copper ion will bind to peptide bonds of protein
➡After the copper binds, the cmpnd turns from blue ➡ purple
➡The more purple, the higher absorbance, and more enzyme that is present
How do you find transfer volume?
Divide the total volume by the step dilution factor for the transfer volume.
The remaining is the non transfer volume.
Sequence the steps of measuring protein concentrations of enzyme extract.
Step 1: Obtain 7 cuvettes. Label them 0-4, B for blank, E for enzyme
Step 2: Gently invert protein standard 5-6 times, then add 500ul of stock protein to cuvette 0.
Step 3: Add 250ul of water to cuvette B. Then 250ul water to 1-4.
Step 4: Switch vortexer to on, set dial to 6.
Step 5: Make a 2X serial dilution of your protein standard. Start by transferring 250ul from cuvette 0 to 1. Vortex it. Then transfer 250ul from 1 to 2. Vortex and repeat for 3 and 4.
Step 6: After vortexing cuvette4,remove 250ul and dispose in rinsate.
Step 7: Add 1000ul of biuret reagent to all 7 cuvettes. Vortex all of them, then incubate for 8 mins
Step 8: Calibrate the SpectroVis during the 8 min incubation. Connect the SpectroVis to the LabQuest via USB and power on.
Step 9: The meter screen should display, if not go to meter screen by pressing ticker icon.
Step 10: Go to Sensors at menu bar at top of screen, select calibrate from drop down menu, then select Spectrometer.
Step 11: Then, wait for 90 sec and place the cuvette labeled B in the cuvette holder. Press Finish Calibration. Then press OK.
Step 12: Go to Sensors and press Data Collection. Change mode from Full Spectrum ➡ Time Based. Press OK.
Step 13: Tap on large red box on screen, and select Change Wavelength. Enter the value 540 and press OK.
STEP 14: FINALLY. place cuvette 0 in the holder to measure absorbance, record for all 0-4, and E.
Design an experiment to determine enzyme rate.
Step 1: Obtain 4 cuvettes. Label B (for blank), 1-3.
➡Cuvette 1 get buffer, substrate and no enzyme.
➡Cuvette 2 gets buffer, enzyme, and no substrate.
➡Cuvette 3 gets buffer, enzyme, and substrate.
Step 2: Add 1000ul of buffer to B.
Step 3: Calibrate the SpectroVis as b4 using blank to 546nm.
Step 4: Pipette calculated amount of buffer to each cuvette. (1100 for 1 & 2, 1000 for 3)
Step 5: Insert 100ul of enzyme into cuvette 3. Vortex briefly on 6, wipe outside, and insert into spectro immediately. Measure initial A and time.
Step 6: Do the same for cuvette 2.
Step 7:Vortex cuvette 1 and measure initial absorbence.
How to determine pH of test environment?
Step 1: Plug the pH sensor into channel 1 of LabQuest.
Step 2: Gently invert pH buffers of A, B, C 5-6 times
Step 3: Remove the pH sensor from storage bottle, rinse tip of sensor thoroughly w/ distilled water. Blot dry.
Step 4: Submerge tip of probe into pH buffer A about 3-4cm. Wait for pH probe to stabilize.
Step 5: Begin data collection by pressing start button. Collect data for 10 secs.
Step 6: Stop data collection by pressing square stop button.
Step 7: Go to analyze at the top of the screen and select statistics from drop down menu. Select your run.
Step 8: Repeat steps 2-6 for buffers B & C.
What is the population? What is a sample?
The population is all members of a biological system
➡Since its not practical to measure every member, we can use a sample (a subset of a population used to make inferences about pop.)
What are descriptive stats?
Descriptive Stats
➡used to describe and summarize data
➡includes measures of central tendency, dispersion, and distributions
measures of central tendency
➡Mean: average (sensitive to outliers)
➡Median: middle value in set of numbers
➡Mode: most seen value
measures of dispersion
➡Range: largest # - smallest #
➡Variance: describe variability w/ respect to mean
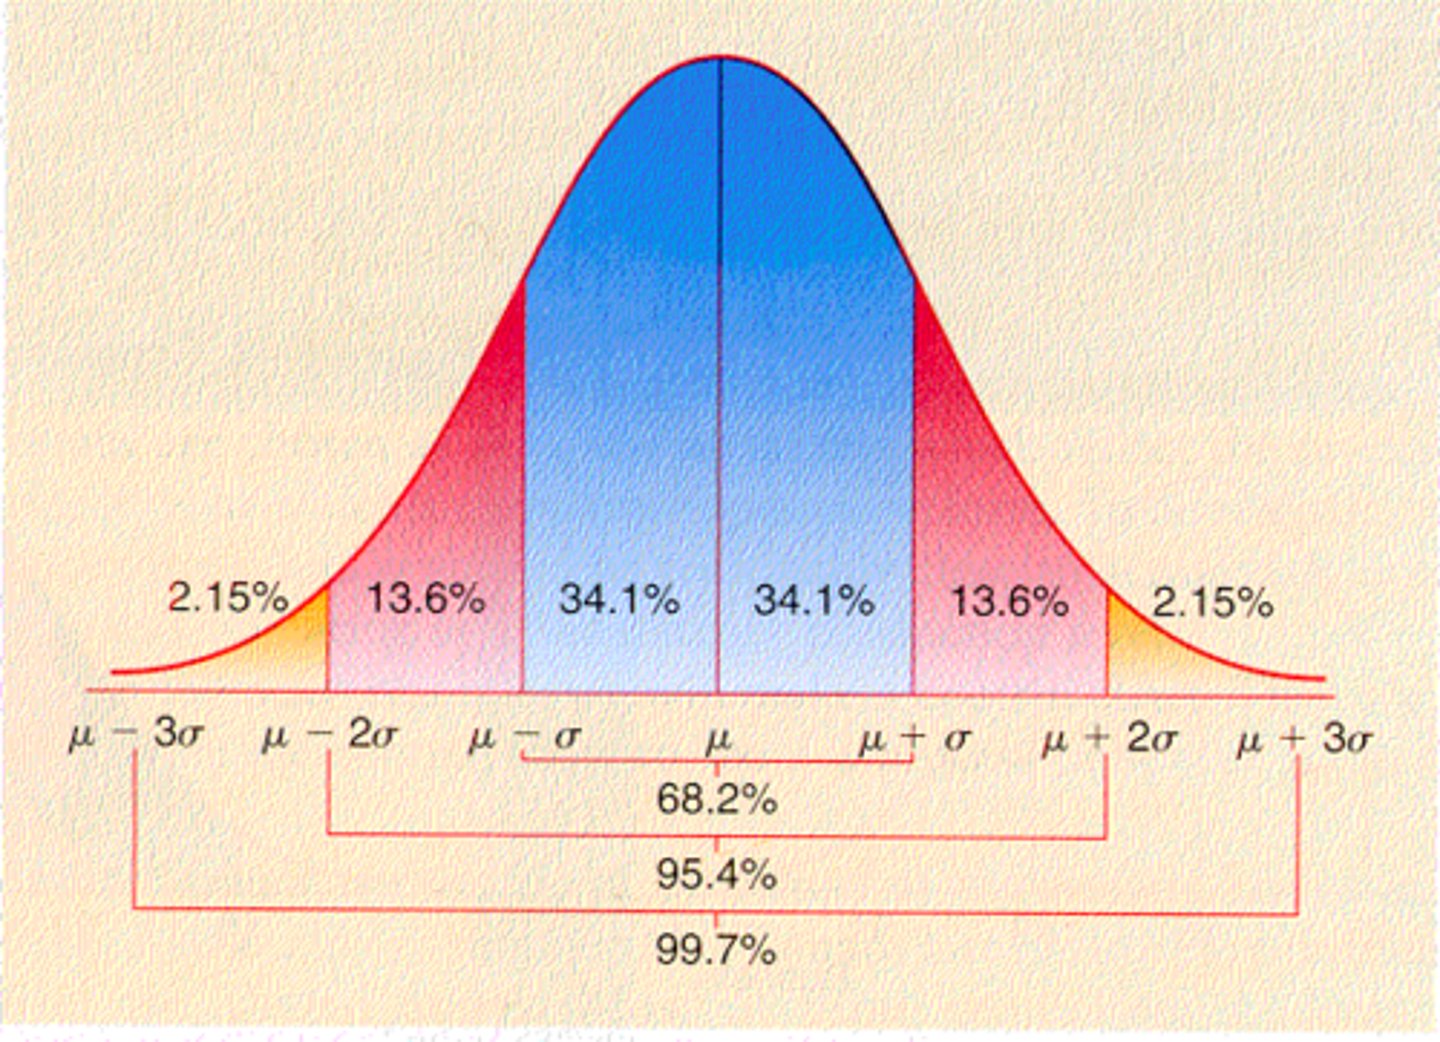
➡Std. Dev: square root of variance
measures of distribution
➡frequency of each value
➡bell shaped curve
What are inferential stats?
➡What is considered significant?
inferential stats
➡used to make estimates and draw conclusions/inferences about the population based on sample
➡can be used to compare two groups and draw conclusions about observed differences between them
T-test
➡determines if difference between two means is significantly different
➡If pvalue is greater than 0.05, it is NOT significant
➡If less than 0.05, it IS significant
What is the WQI?
➡What are the parameters?
Water Quality Index
➡used to track quality of water source
➡Needs 9 different parameters for substance
PARAMETERS
➡Temp
➡pH
➡DO
➡BOD
➡Total solids
➡Turbidity
➡Nitrates
➡Fecal Coliform
➡Total Phosphate
What is the Q-value?
➡How do they contribute to WQI?
Quality value of a parameter, measured on scale of 0-100.
➡Multiplied by weighting factor of importance to determine overall WQI
What is a lotic source? What is a lentic source?
Lotic
➡moving body of water
Lentic
➡still body of water IE pond
What is point source pollution? What is nonpoint source pollution?
point source pollution
➡any contaminant that enters environment from easily identified and confined place (ex: factory)
Nonpoint source pollution
➡general sources, such as runoff, precipitation, atmospheric deposition
➡caused by rainfall or snowmelt
Explain some of the parameters of WQI.
➡Temp
➡pH
Temperature
➡water outside normal range can harm aquatic life
➡measured over section at two locations @ opposite ends
➡affects solubility of O2, other gases
➡generally cooler water = good
pH
➡aquatic organisms are sensitive to pH of environment
➡changes can endanger plant, animals species
Explain some other of WQI
➡Dissolved Oxygen (DO)
➡BOD
➡Total Solids
➡Turbidity
Dissolved Oxygen (DO)
➡The concentration of O2 that is dissolved in water
➡Requires use of DO Probe
Biological Oxygen Demand (BOD)
➡the amount of dissolved O2 that is getting needed by organisms in water
➡high BOD = bad
Total Solids
➡measure of all suspended, colloidal, and dissolved solids in sample of water
➡Too much decreases clarity, less sunlight
Turbidity
➡measure of water's lack of clarity
➡cloudiness
How do you detect pH of a water sample?
Step 1: Plug the pH sensor into channel 1 of LabQuest.
Step 2: Gently invert Nalgene bottle of water 5 times to mix.
Step 3: Remove pH sensor from storage bottle, rinse tip w/ distilled water, and blot to dry.
Step 4: Place tip of probe into water sample 3-4cm deep; let stabilize.
Step 5: Begin data collection by pressing start button. Do it for 10 secs. Stop data collection by pressing square stop.
Step 6: Go to analyze in menubar at top of screen, select statistics from drop down. Select your run.
Step 7: Record the average.
HOW DO FIND total solids of a water sample?
Step 1: Clean the three 150ml beakers w/ soap and water, then place in oven at 100°F for 20 mins.
Step 2: Retrieve the beakers after 20 mins, and let cool.
Step 3: Using glove & sharpie, mark on glass part of beaker w/ Sec#-Team#-Sample#
Step 4: Measure the mass of beakers before water is added, and record.
Step 5: Swirl the sample water in Nalgene bottle, and remove large objects.
Step 6: Using a 100ml graduated cylinder, carefully measure 100mL of sample water and pour into each beaker.
Step 7: Place the beakers back in the oven and let bake for a week at 100°F
Step 8: Remove the beakers after a week using tongs/gloves, and allow to cool. Measure w/ a balance and record,
Step 9: Subtract mass of beaker from mass of beaker w/ solids. (IF mass is at least 0.025g, proceed). Record the masses.
Step 10: Wash beakers, remove markings.
How do you find the turbidity of a water sample?
1) Plug turbidity sensor into channel 1 of LabQuest. Let warm up for 5 mins. (kinda looks like a mouse)
2) Remove the circular glass turbidity cuvettes from box labeled Turbidity Standards.
3) Calibrate the Turbidity Sensor.
1st Calib. Point
➡Check the BLANK (Cuvette 0) for air bubble; gently tap bottom to dislodge. Gently wipe outside w/ wipe.
➡On LabQuest, go to Sensors at top of screen menubar, select calibrate from drop down menu, and select Turbidity
➡On calibrate screen, select Calibrate Now
➡Holding BLANK cuvette by lid, insert into sensor. Make sure arrowhead is pointing toward arrow.
➡Close lid.
➡Wait for live voltage reading to stabilize, then enter 0 for value 1. Press keep.
➡Remove cuvette and set aside.
Second Calib. Point
➡Obtain the Turbidity standard (100 NTU), and gently invert it four times
➡Holding standard by lid, place in sensor (arrows pointing). Close lid.
➡Wait for live voltage reading to stabilize, then enter 100 for Known Value 2. Press Keep.
➡Press OK at bottom of screen to finish calibration.
4) Gently Invert Nalgene bottle. Use a serological pipette and pipette bulb to fill empty cuvette w/ sample water to white line. (gently tap bottle for bubbles, wipe outside)
5) Place in turbidity sensor, arrows pointing, close lid.
6) Go to analyze, then statistics. Record average turbidity.
7) When finished, rinse w/ distilled water and return to box labeled Turbidity Standards.
How do you measure the Dissolved Oxygen of a water sample?
1) Plug DO probe into channel 1 of LabQuest.
2) Unscrew the protective clear case. Rinse tip w/ water, gently wipe.
3) Set the switch on DO probe to collect in % saturation.
4)Submerge the probe tip into Nalgene bottle for 40 secs. Allow stabilize b4 next step.
5) Collect data for at least 10 secs. Record the average data from 10 sec reading.
6) Rinse probe w/ distilled water
How do you measure BOD of water sample?
1) Using tape label each BOD bottle (black) with Sec#-Team#-Sample#.
2) Fill each BOD bottle w/ sample water to the neck of bottle.
3) Plug DO probe into channel 1 of LabQuest. Unscrew protective clear case. Rinse tip w/ water, gently dab.
4) Set switch on probe to mg/L.
5) Submerge probe tip in the first BOD bottle to depth of 4-6cm (DO NOT DROP)
6) Hold probe in water for 40 secs. Then, begin data collection for at least 10 secs. When sampling run is complete, press stop.
7) Go to Analyze at top of screen, then statistics. Record the average mg/L in the BOD table under initial dissolved oxygen.
8) Repeat steps 3-7 for other 2 bottles.
9) When all readings done, rinse tip and blob dry. Replace cap w/ the damp sponge.
10) Fill bottle up w/ Nalgene water till no air is left. Place in dark cabinet for a week.
11) Next week, collect the bottles. Repeat the first 9 steps for the bottles and measure DO in mg/L.
12) Record the average for all three in final dissolved oxygen.
13) Rinse probe tip, dry well, put away.
14) Clean BOD bottles.
Explain these 3 tests.
➡Nitrates
➡Fecal Coliform
➡Total Phosphate
Nitrates
➡Level of nitrogen polyatomic ions found in water
➡Levels above 10 mg/L of nitrates in water can cause fatal baby diseases
➡Contributes to eutrophication, unpleasant taste/odor, less clarity
➡Can start algal blooms
Fecal Coliform Bacteria Test
➡Test determines whether or not E. coli bacteria in water
➡E.coli = bacteria that lives in gut; presence indicates other disease-inducing pathogens
➡Presumptive test to infer amount of CO2 produced by how many E.coli in water
How to test Nitrates in a sample of water?
https://www.youtube.com/watch?v=sgXm9vuO8Zk
1) Attach probe clamp to support stand
2) Carefully insert Nitrate ISE to the probe clamp and ensure it is vertical.
3) Raise clamp to allow room for rinsate beaker to be placed under Nitrate probe.
4) Rinse the Nitrate ISE probe w/ distilled water and blot dry.
5) Uncap the Nitrate High Standard. Swap the rinsate beaker w/ Nitrate High Standard (place directly under Nitrate ISE)
6) Carefully lower probe so that white dot is submerged in NHS.
7) Soak for 30 mins.
8) After 30 mins, plug the ISE sensor into channel 1 of LabQuest.
9) Go to Sensors at menubar at top screen, select Calibrate, then select Nitrate ISE.
10) On the Calibrate screen select Calibrate Now.
11) Wait for live voltage reading to stabilize, then enter 100 for Value 1 and press Keep.
12) Remove the Nitrate ISE by removing probe clamp. Swap out for rinsate.
13) CAREFULLY rinse ISE w/ distilled water and blot dry.
14) Swap out Rinsate for Nitrate Low Standard. Lower probe into the standard, not touching bottom.
15) Wait for live voltage to stabilize, then enter 1 for Known Value 2, and press Keep.
16) At bottom of calibrate screen, press OK.
17) Rinse the ISE w/ water and blot dry again.
18) Place tip of ISE into sample water of Nalgene bottle. Leave probe submerged for 60 secs.
19) Begin data collection by pressing start ▶️ for 10 secs.
20) When complete press stop.
21)Go to Analyze then Statistics. Record the average nitrates.
22) Rinse probe w/ water and blot dry.
23) Ensure sponge at bottom of long term solution is moist.
24) Loosen lid of long term storage solution, and insert probe. Tip of probe should not be touching sponge.
25) Tighten lid of storage bottle and return probe.
How to test Fecal Coliform Bacteria are present?
1) Set up 3 DSLB tubes (clear cap) and 6 SSLB tubes (yellow caps).
2) Label each tube w/: Sec#-Team#-Amnt of water (10ml, 1ml, 0.1ml)
3) Invert the sample water tube 4-5 times to resuspend any settled bacteria.
4) With a 10ml serological pipet, transfer 10ml of sample water to each DSLB tube.
5) With the P-1000, transfer 1ml (1000ul) to each of the three middle SSLB tubes.
6) With the P-200, transfer 0.1ml (100ul) of water to three remaining SSLB tubes.
7) The tubes will be intubated by TA for a day, then refrigerated for the next week.
8) Examine the tubes and record the number of tubes w/ 10% gas or more.
➡Absence of gas = coliforms absent
➡Less than 10% gas present = prob not due to coliforms
➡More than 10% gas present = coliforms present, unsafe
Serial Dilution and Spot plating of water sample for CFU assay.
1.) Determine volumes to pipette for 3X dilution of 900ul total
2) Shake out 6 microfuge tubes. Label them 0-5.
3) Dispense sterile water into each based on table.
4)Gently invert 50ml tube w/ water sample A/B.
5) Add 900ul of pond water to tube 0.
6) Pull transfer volume (300ul) from 0, and place into 1. Vortex tube 1.
7) Continue the serial dilution as calculation. Keep replacing pipette tip.
8) Obtain an LB plate, place it bottom side up. Draw 3x4 square w/ line through equator. Number each box 2,1,0 5,43
9) Label around edge of dish: S#-T#-Sample A or B
10) Place initials next to boxes.
11) Turn lid side up and pipet a 10ul spot of dilution onto each respective agar box. Lightly vortex each tube b4. Work backwards (5➡0)
➡Dont dig into agar
12) LET DRY, will be incubated till next week.
13) After week, come back and count # of colonies per spot. Put CC for spots completely covered.
How to find CFU/ml?
What is DNA Barcoding?
Using specific DNA sequences to identify organism as a species
➡Once a sequence is taken, PCR is used to amplify it
➡Gel electrophoresis is used to visualize it
➡It is then sequenced using the SAnger method
What is the Sanger Method?
sanger sequencing -- uses dideoxynucleotides (no 3-OH group) so terminates DNA sequencing -- use 4 diff ddNTPs and get a whole bunch of diff fragments then put them together
How to plate Water Sample to Culture and Isolate Bacteria? (Bacterial culture)
➡How does this lead to PCR setup?
1. Gently suspend water sample container 5 times.
2. Label bottom of LB plate w/ Sec#-Team#-Initials-Water Source
3. Remove swab from wrapper w/o touching tip.
4. Dip the cotton tip of swab into sample water, then gently swipe across entire surface of agar. Lightly drag swab back & forth 3-5 times.
5. Bring plate to TA bench for incubation for a week.
Dilution of Bacterial Culture
6. Obtain bacterial culture. Add 800ul of sterile water to culture.
7. Vortex on 9 to mix.
Setting up PCR
1. Each student should label three 0.2ml PCR tubes with Sec#-Team#-Initials- and S, P, and N on 1 of each. On tops and sides.
2. Add 23ul of the 4x 16SrRNAMIX master mix to each of the tubes (S, P, & N).
3. Add 2ul of nuclease-free water to tube N (no DNA or bacteria).
4. Add 2ul of diluted bacteria culture to tube S.
5. Add 2ul of known bacteria DNA to tube P. Spin all the tubes in minifuge.
6. Put tubes in thermal cycler and sign out.
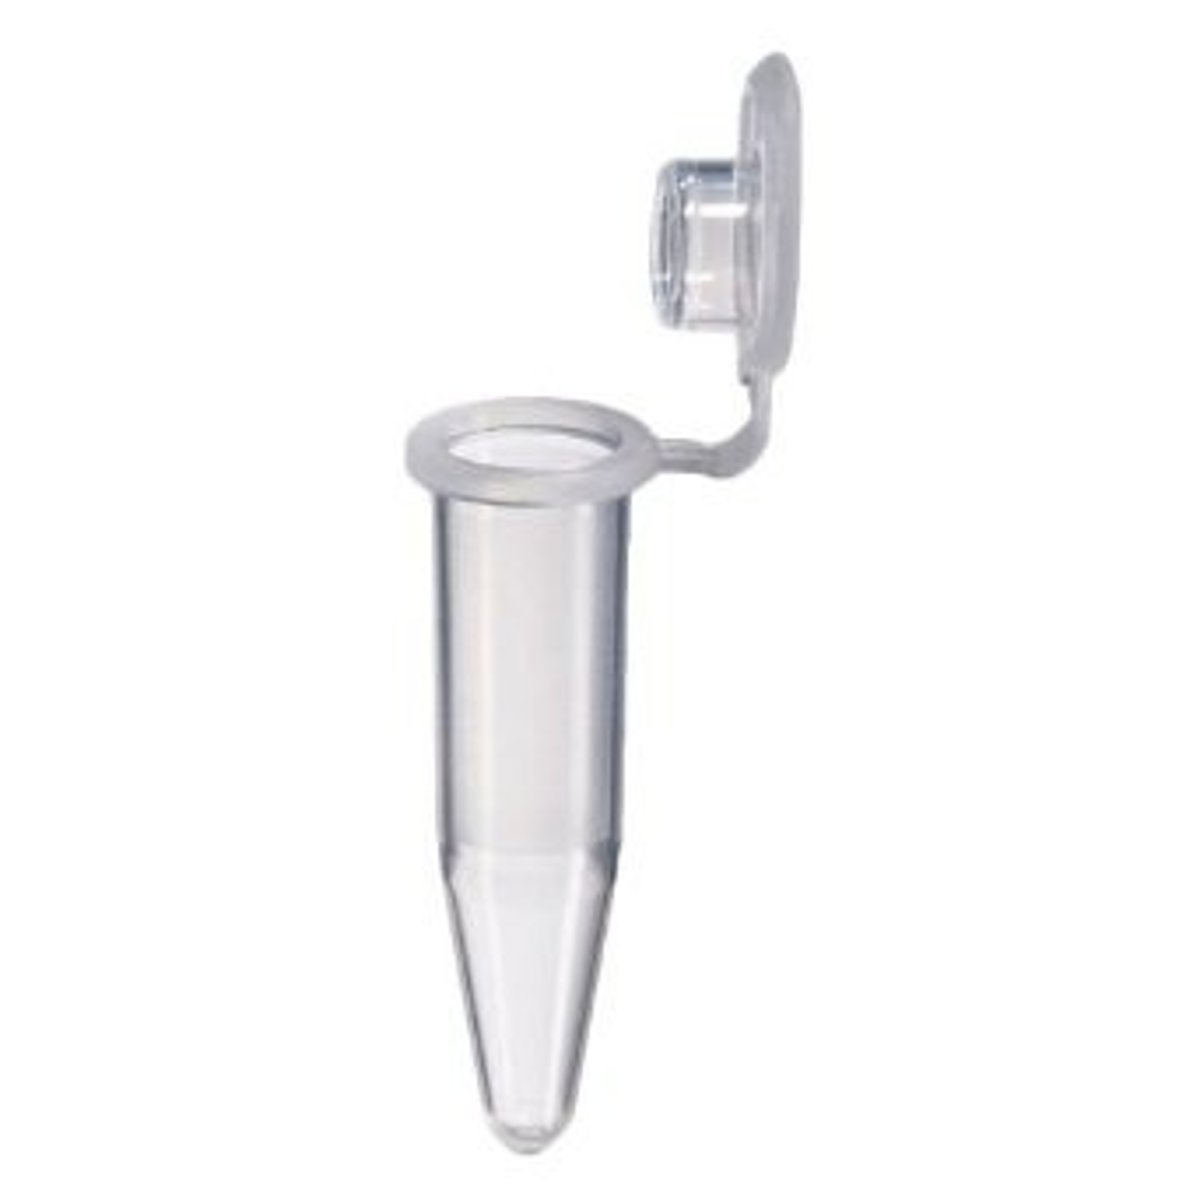
What is Total Phosphate?
Total Phosphate
➡WQI parameter
➡Excess phosphorous can lead to eutrophication, decrease in DO, and increase in BOD
➡measured in mg/L PO4-P
How to find total phosphate in water. (FINIS)
1) Label one Erlenmeyer Flask with Sec#-Team#-Initials-Sample type (lotic).
2) Measure 25mL of sample water into the flask using a 100mL graduated cylinder.
3) Add one Potassium Persulfate/Sulfate powder packet to flask and swirl till dissolved.
4) Take the sample to the hood, and add 2.0mL of H2SO4 using P-1000 twice.
5) Use sharpie to mark water level on flask.
6) Boil the sample for 30 mins, and keep adding water to keep keep near 27mL.
7)After 30 mins, remove from hot plate and allow to cool in hood.
8) Add 2 mL of 5.0N NaOH to flask using transfer pipette.
9) Add PhosVer 3/Phosphate RGT powder packet to sample.
10) Swirl solution for 5 minutes until dissolved.
11) Label a cuvette "SW". After the 5 mins, immediately add 1mL of the sample water to it.
12) Measure the absorbance of prepared water sample.
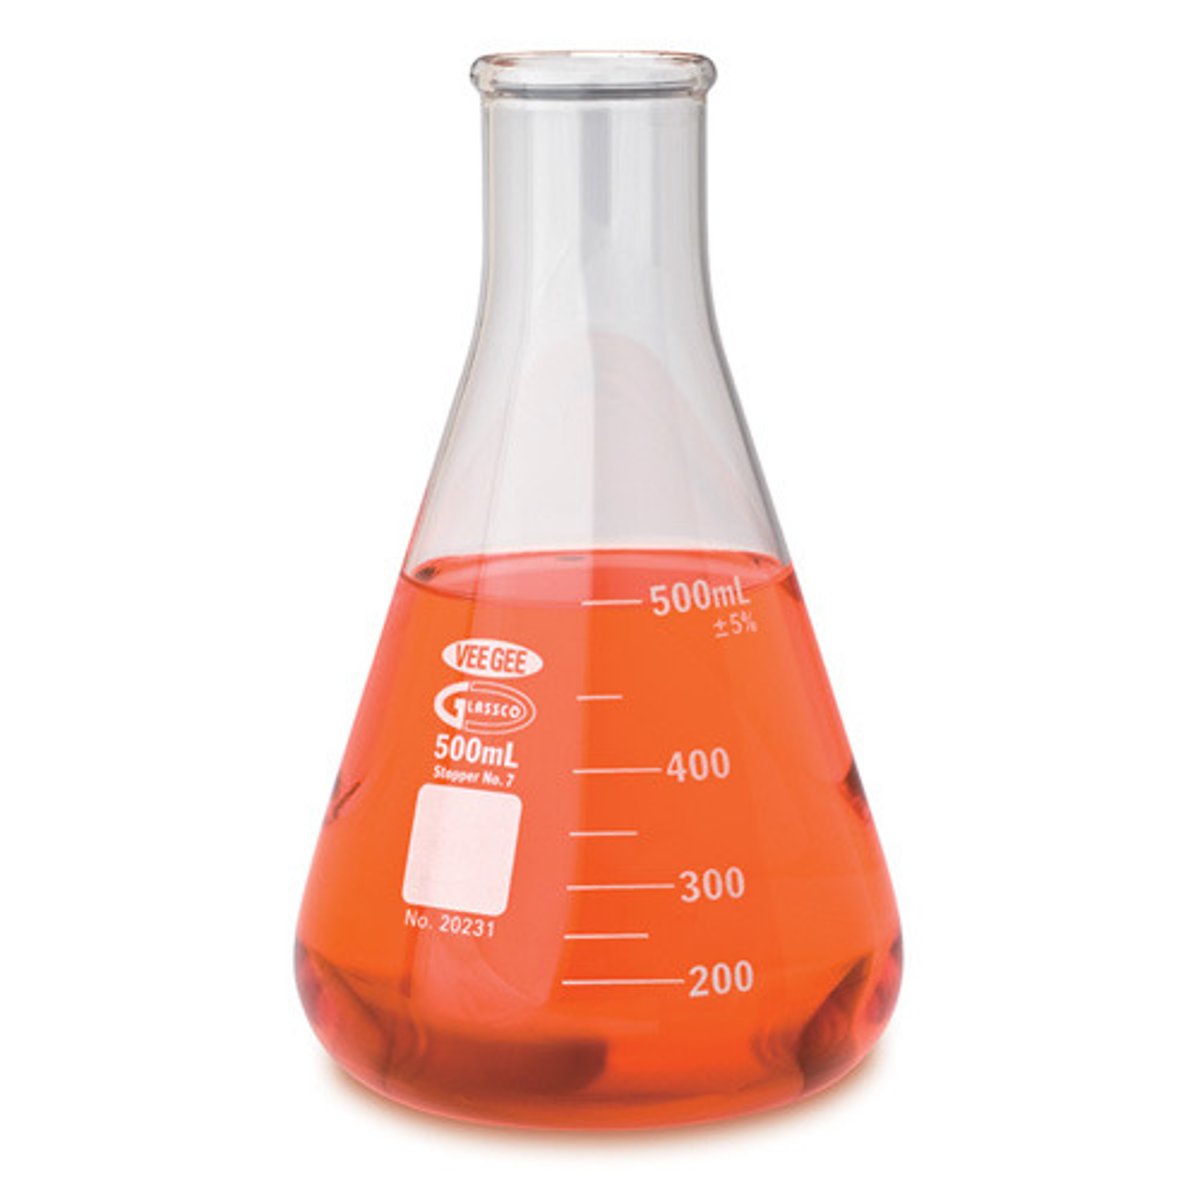
Liquid culture bacterial inoculation
1) Label on microfuge tube (Sec#-Team#-Initials-Source)
2) Add 200ul of Luria Broth (LB) medium to microfuge tube.
3) Look at agar streak from lab 4, pick a well isolated, discrete bacterial colony.
4) Get a sterile stick from glass bottle, and gently wipe bacteria off the plate.
5) Put end of stick w/ colony into LB medium in microfuge tube.
6) Discard stick into med waste.
7) Vortex microfuge tube briefly on 9. Place tube in rack for bacteria in front of class.
What is PCR? What is a Master Mix?
PCR
➡amplification of a gene sequence
Master Mix
➡consists of DNA polymerase, dNTPs, buffer, forward and reverse primers, and water
➡helps reduce pipetting errors/time
How do you set up a Master Mix?
Using C1V1 = C2V2 formula, find initial volume of 1 rxn. Multiply by 4 to get 4 rxns. volume
1) Label microfuge tube as 4X 16SrRNAMix.
2) In this tube, prepare a PCR reaction mixture by adding the calculated volumes. (22ul nuclease-free water, 10ul 16sforward , 10ul 16sreverse primers, 50ul taq mix)
3) Gently tap tube, use master mix if needed. Set aside.
Why do the DNA molecules move in electrophoresis?
Since DNA has a negative phosphate group attached, it will move toward positive electrode in gel. The smaller fragments will go further than larger.
What formula helps to know percentage of a solute in a total solution?
Percentage by Weight
% by weight (g) = g of solute/100ml of solution x final volume (ml)
Example: How do you prepare a 50mL solutions of 20% SDS?
20gSDS/100ml solution x 50mL = 10g SDS
How to prepare Agarose gel?
1. Put gel tray in pour position. Gaskets should touch walls.
2.Weigh 1.4g of agarose in weighing tray. Put agarose in 250ml Erlenmeyer flask.
3. Add 70ml of 1x TAE buffer to flask. Swirl gently.
5. Heat mixture for 1min, 15 sec at full power. Ensure no spills from boiling.
6. Use silicon hand mitt to remove and swirl further. Let agarose cool for 5 mins w/o swirling.
7. Add 3.5ul of 10mg/ml EtBr to bottle and swirl.
➡Dispose of contaminated tips w/ etbr in etbr waste.
9. While its cooling, remove both 12 well combos from the casting slots.
10. After 5 mins, use a silicone hand mitt to pour the agarose gel into tray and box. Pour from top to bottom. L3et solidify until opaque.
11. RINSE out agarose flask immediately.
How do you prepare the agarose samples?
How do you analyze the gel outcome?