ELISA and blood smears
1/29
There's no tags or description
Looks like no tags are added yet.
Name | Mastery | Learn | Test | Matching | Spaced |
|---|
No study sessions yet.
30 Terms
Blood smear and dip quick staining
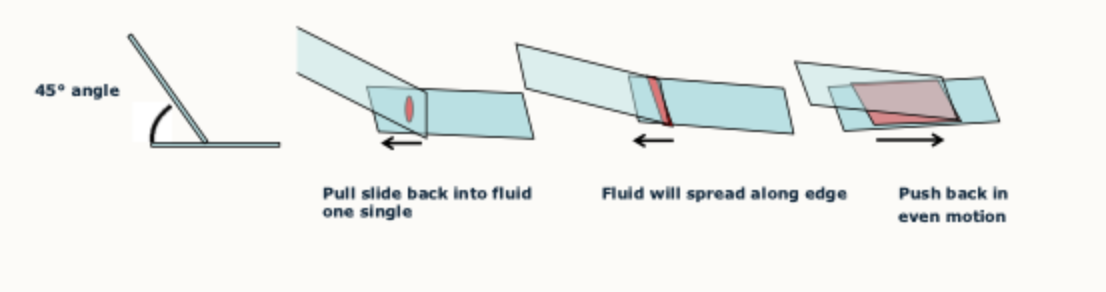
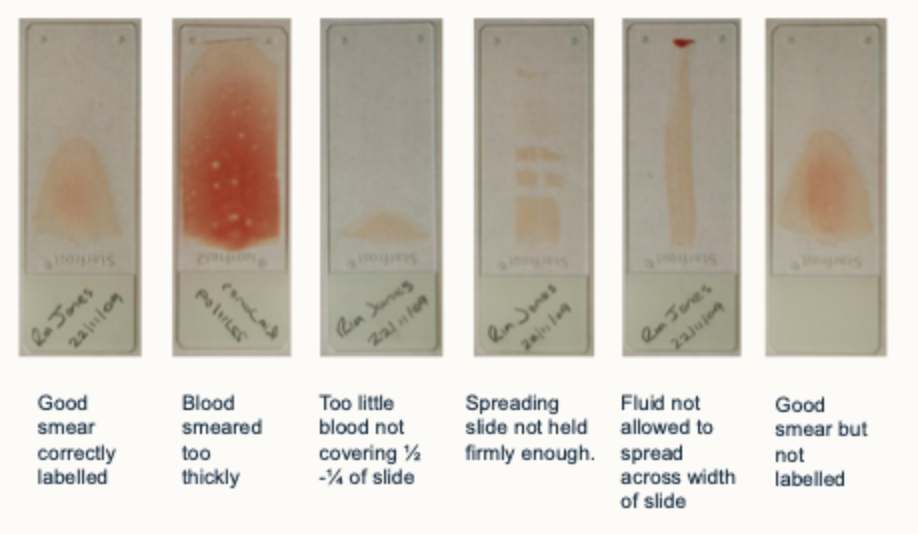
1- Label slide on frosted edge using pencil
2- Place a drop of fluid towards the edge of the slide
3- Bring another slide into contact with the drop of fluid and, holding it at about 45 degrees, spread the fluid over the surface of the labelled slide so that it forms a smear.
4- allow the smear slide to air dry
Guide for blood smear slides
Dip quick stain
Dip- quick can be used to stain material that has previously been air dried such as smears and imprints
Similar to Diff- Quick and Wright- Gleams stains- differences are the timing of staining and solvent concentrations
Wear gloves when staining your slide
1- Repeatedly dip the slide in Reagent A for 5 seconds
2- Drain off excess solution
3- Repeatedly dip slide in Solution B for 5 seconds
4- Drain off excess solution
5- Repeatedly dip slide in Solution C for 5 seconds
6- Rinse off in excess tap water
7- Allow to dry before viewing under microscope
Imaging
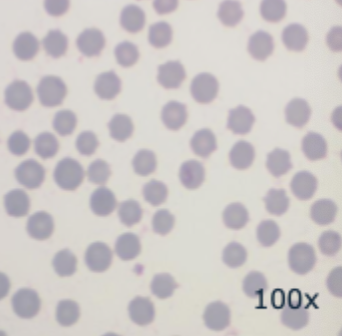
To see the cells begin to focus using the 4x and 10x objective using the coarse focus knob
You should see the cells come into view and colour so focus in on these
Now change to the 40x objective and adjust using the fine focus knob
Again focus on the cells as they come into view
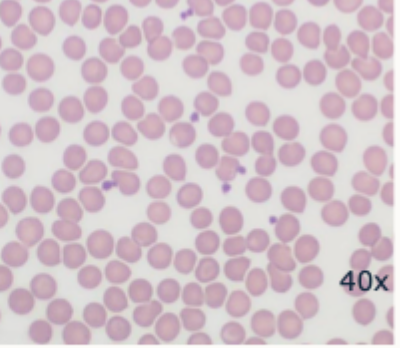
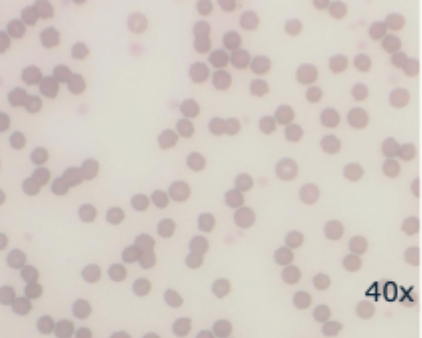
Central pallor and uniform size
Mammalian erythrocytes- dog
Some crenation (spiky appearance)
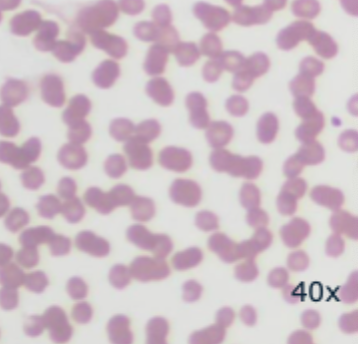
Mammalian erythrocytes- cattle
Central pallor generally not visible, size variable and smaller than canine erythrocytes
Mammalian erythrocytes- cat
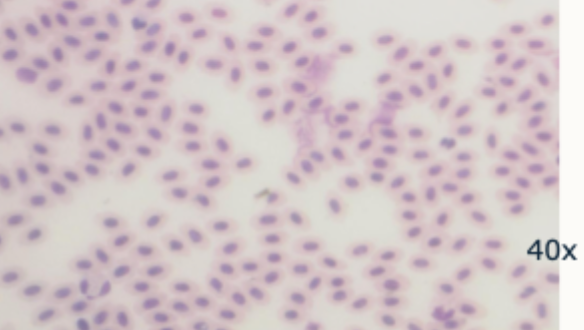
Rouleaux formation (stacks of erythrocytes)
Mammalian erythrocytes- horse
Non- mammalian erythrocytes- chicken

Non- mammalian erythrocytes- reptile
What is the main difference between mammalian and non- mammalian erythrocytes?
Mammalian- non- nucleated
Non- mammalian- nucleated
Blood cell differentiation- what colour are erythrocytes?
pink or yellowish red
Blood cell differentiation- what colour are platelets?
violet to purple granules
Blood cell differentiation- what colour are neutrophils?
dark blue nucleus, pale pink cytoplasm, reddish lilac cytoplasm
Blood cell differentiation- what colour are eosinophils?
blue nucleus, blue cytoplasm, red to red- orange granules
Blood cell differentiation- what colour are basophils?
purple or dark blue nucleus, dark purple (almost black) granules
Blood cell differentiation- what colour are monocytes?
violet nuclues, light blue cytoplasm
Blood cell differentiation- what colour are lymphocytes?
violet nucleus, dark blue cytoplasm
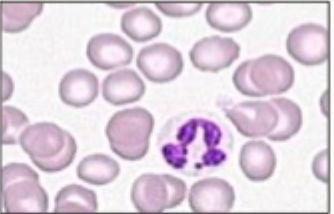
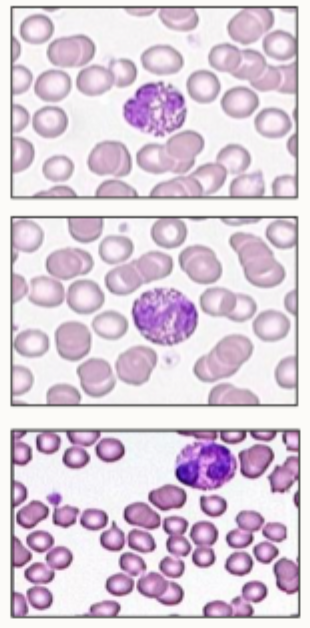
Examples of white blood cells- neutrophils
Size: 12-15 um
Nucleus: lobulated (2-4 lobes)
Colour: pale pink or light blue cytoplasm
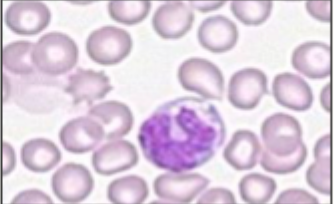
Examples of white blood cells- monocytes
Size: 15-20 um
Nucleus: irregular shaped
Lacy reticulated chromatin
Colour: blue- grey cytoplasm
Examples of white blood cells- lymphocytes
Size: 9 - 12 um
Nucleus: round with condensed chromatin
Lacy reticulated chromatin
Colour: pale blue cytoplasm (not much)
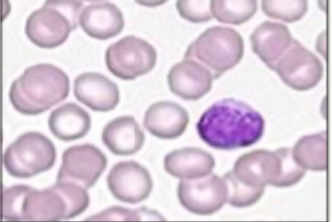
Examples of white blood cells- basophils and eosinophils
It is difficult to differentiate these cell types
Size: 12-20 um
Nucleus: lobulated
Colour: basophils- blue granules, eosinophils- orange/ red granules
Avian influenza symptoms
respiratory distress, inappetence, depression, diarrhoea, and cyanosis, decreased egg production
Tips for performing the ELISA assay
Dispose tops and transfer pipettes in buckets
Tip content of wells for washing steps onto the stacks of paper towel and tap them vigorously onto paper towels to remove all liquid and bubbles from the wells.
Minimise bubbles using wash buffer- its contains detergent. Avoid emptying transfer pipette completely and if bubbles occur remove with excess buffer
Accurate pipetting is essential for reproducible results
When drawing up liquid, place the pipette tip just below the liquid surface to minimise uptake of air- depress to the first stop position
Release the plunger slowly when you draw up liquid in a slow and controlled motion to avoid air bubbles
Expel liquid by slowly depressing plunger to the first stop position and continue to press to the second stop position to remove all liquid