Impression Making with Dental Implants and Provisional Implant Restorations
1/71
There's no tags or description
Looks like no tags are added yet.
Name | Mastery | Learn | Test | Matching | Spaced | Call with Kai |
|---|
No analytics yet
Send a link to your students to track their progress
72 Terms
What are considerations for a tooth-supported crown restoration?
Prepare tooth to achieve appropriate taper/retention
Prepare distinct margin/finish line
Place margint o achieve acceptable esthetics
Margin and preparation should be clean/dry and visible during impression making
Control for bleeding/fluid
Use light body impression material to capture fine details and RB/HV tray material
Full arch/section/triple tray may be used
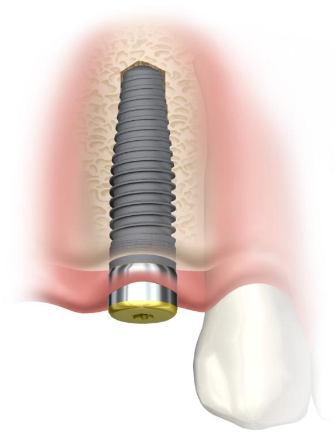
What are considerations for an implant-supported restoration?
No prep necessary
Well defined margin (implant platform)
High precision prefabricated components connected to implant and used for impression making
No need to have implant platform clearly visible when making impression but no tissue should cover the platform
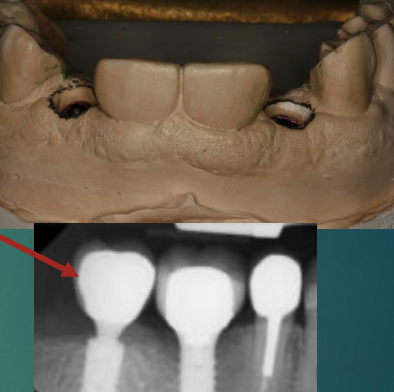
May require radiograph to evaluate impression coping fit
No need to use light body, only RB/HB impression material
Always use full arch tray
What will the impression coping capture?
Implant position and depth/angulation/margin details and transfer the information to the master cast
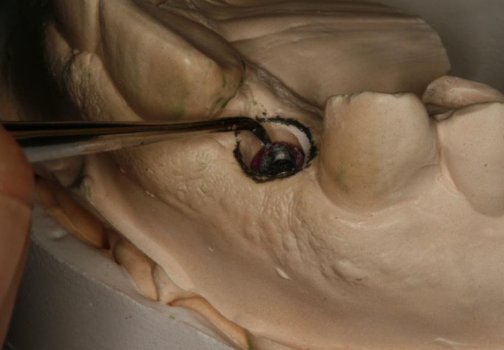
Steps for impression making
Use topical to numb tissue if sensitive
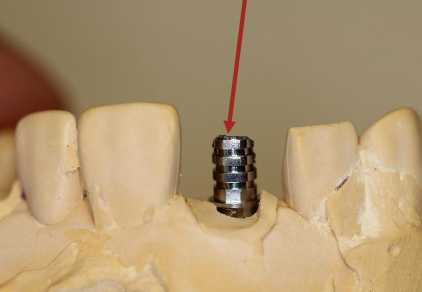
Remove healing abutment
Have impression coping ready to be placed IMMEDIATELY
Why do you have to place impression coping immediately?
The tissue will collapse if you wait more than 5 min
How do you connect the impression coping?
Hand tighten guide pin to secure coping to implant (NEVER use hand wrench to tighten the guide pin!!) & make sure the impression coping is firmly connected with no mobilityI
What kind of impression do you take, even for single units?
Full arch tray
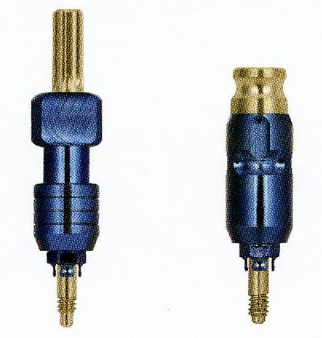
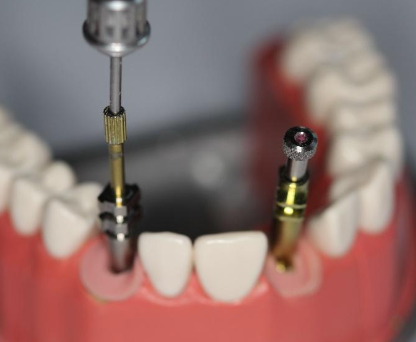
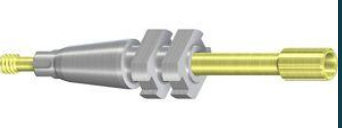
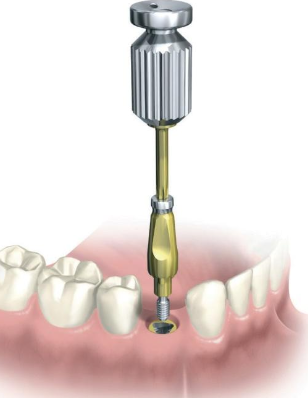
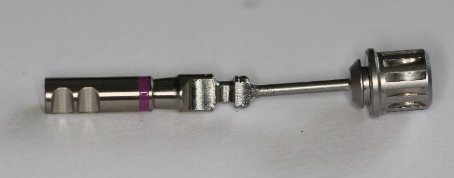
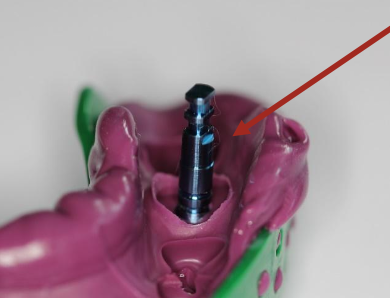
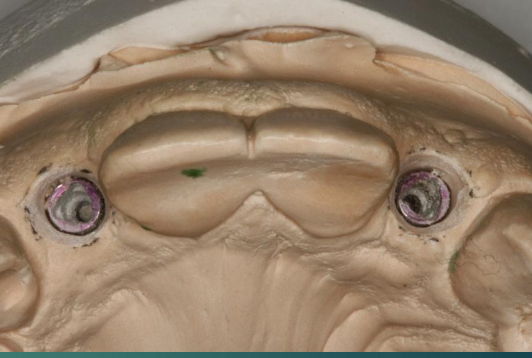
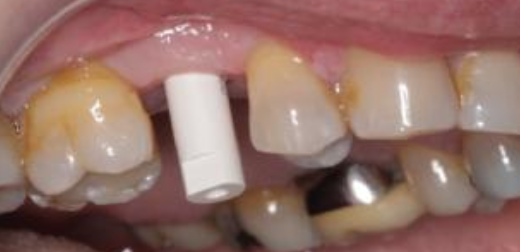
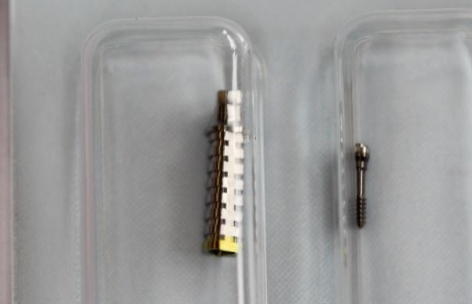
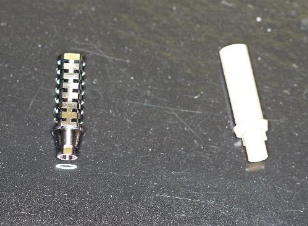
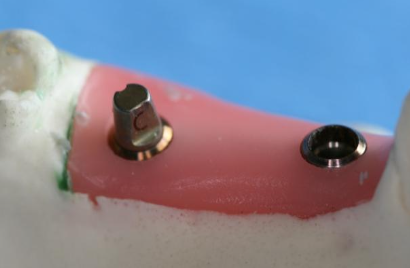
What are these?
Metal components, secured to implant using a metal threaded guide pin
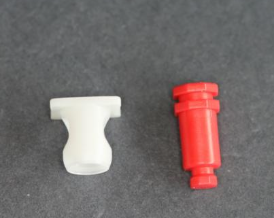
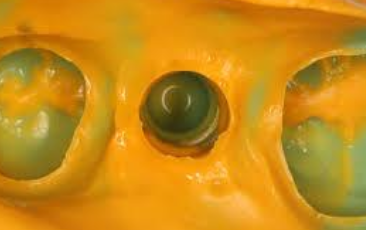
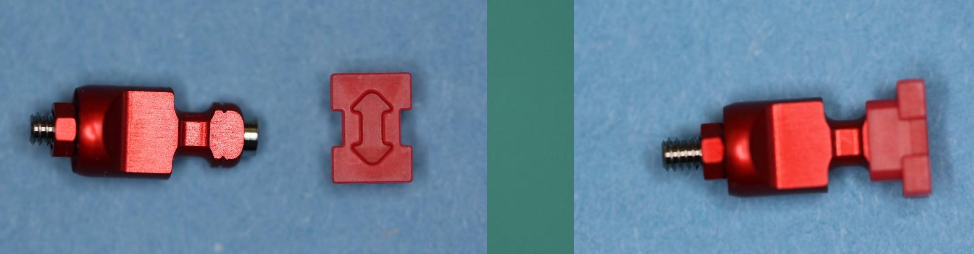
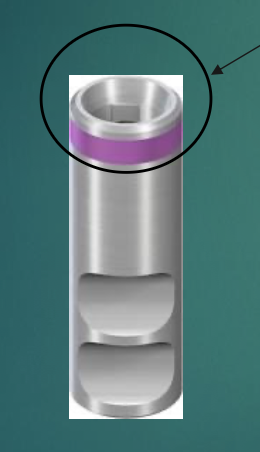
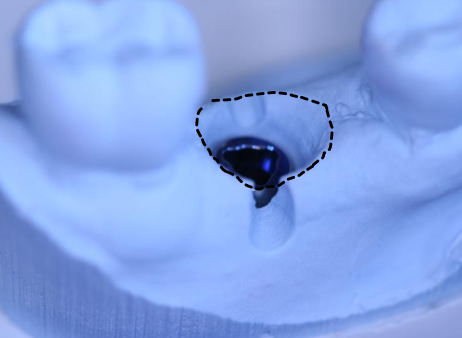
What is this?
Plastic snap-on device
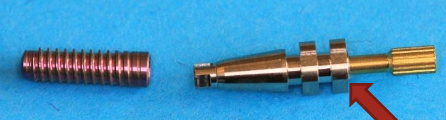
What is the purpose of the threads on the tip of the guide pin?
Secure the impression coping to the implant
Where are the flanges secured?
In the impression material, the guide pin is tightened to connect coping
With what kind of connection is it not necessary to verify seating of impression coping with PA?
Conical internal connection
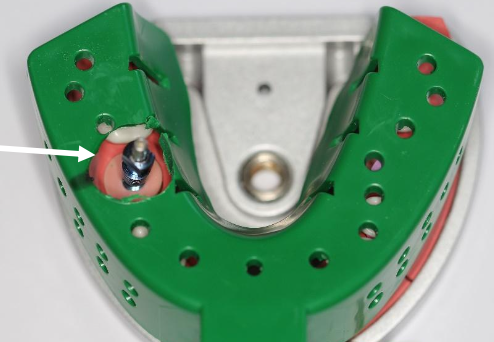
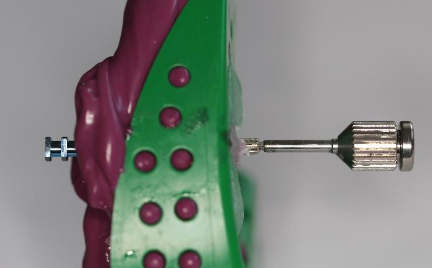
What is the open tray impression technique?
A window is made in the impression tray in the area of the implant. Ensure the window is large enough (if too small, it could be difficult to locate the guide pin). Always try in the tray to make sure you can access the guide pins
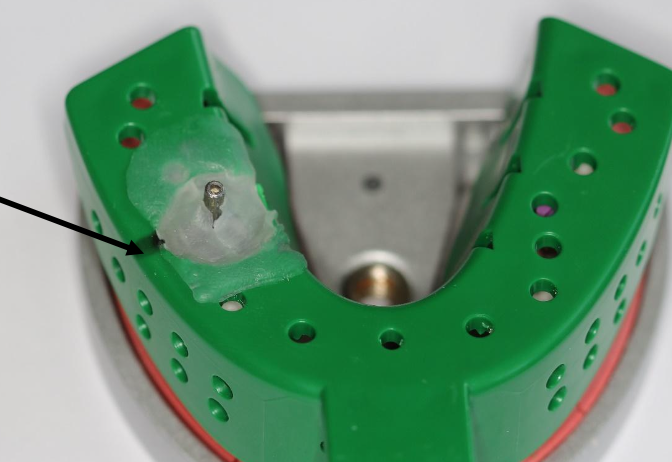
What is the purpose of the wax cover?
Prevent impression material to flow through the window

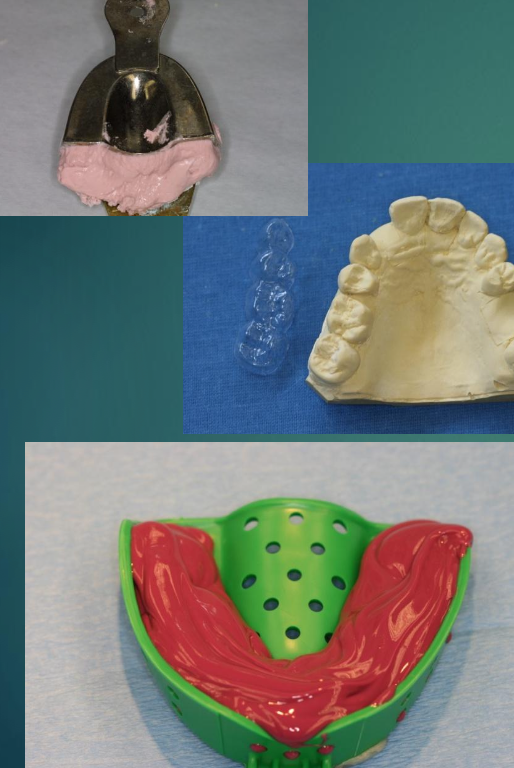
What is the impression procedure?
Apply regular body or heavy body impression material in impression tray (NO NEED TO USE LB)
Using mixing and inject impression material around coping and adjacent teeth
What should you do after before removing the tray after the material has set?
Identify position of guide pin and unscrew guide pin (make sure guide pin is not connected to the implant before removing the impression
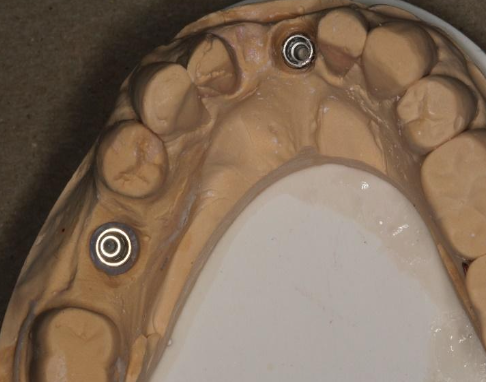
What is the closed tray impression technique?
Impression tray is covering teeth and implants
Some things to look for when inspecting the impression:
No voids
Impression coping is fully embedded in material
Include all important details
What are some benefits of using the open tray impression technique?
Recommended for anterior implants
Impression coping will ALWAYS be removed WITH impression
Recommended for multi-unit restoratations
Low risk of displacement (screw-retained)
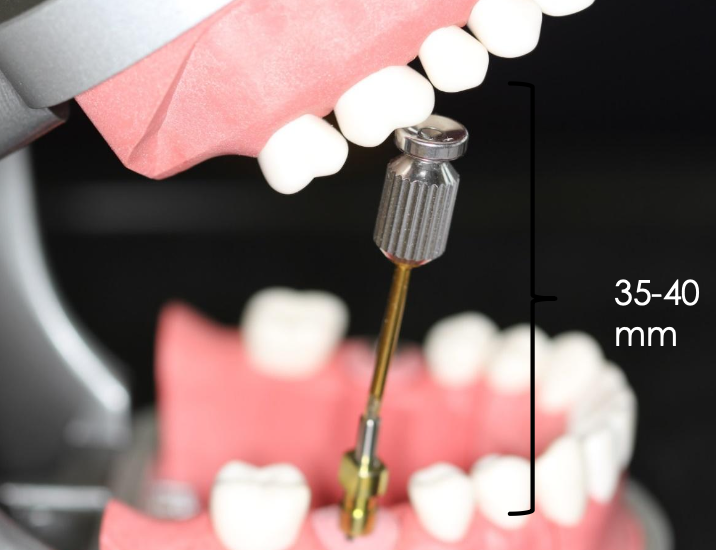
What are some contraindications of using the open tray impression technique?
Difficult for molar/bicuspid areas due to the lack of vertical space; about 35-40mm
What is the closed tray impression technique?
No tray prep for window (use plastic stock tray)
Coping / cap is removed with impression (plastic snap-on / friction type)
Metal coping stays connected to implant after impression is removed
Coping is unscrewed from implant and repositioned into impresion after tray is removed
How many components is the impression coping?
Could be either a one or two piece component
What will come out in the impression in the closed tray impression technique?
Plastic cap - pick up in impression coping tissue level implant
What will NOT come out in the impression in the closed tray impression technique?
Metal coping- it is connected to the implant. After the impression, unscrew and remove coping, then reposition coping back into the impression
When is the metal post disconnected in the two piece component?
After the impression is removed
In the closed tray impression technique, where can the snap on / friction fit coping be used?
Anywhere in the mouth- for single and multi-unit restorations
In the closed tray impression technique, metal impression copings can be difficult to re-position. What could this result in?
Compromised precision in multi-unit fixed prostheses
What is an important consideration when sending the impression off to the lab?
Always have the lab reposition the impression copings before pouring the impression, and send the copings separately with the impression
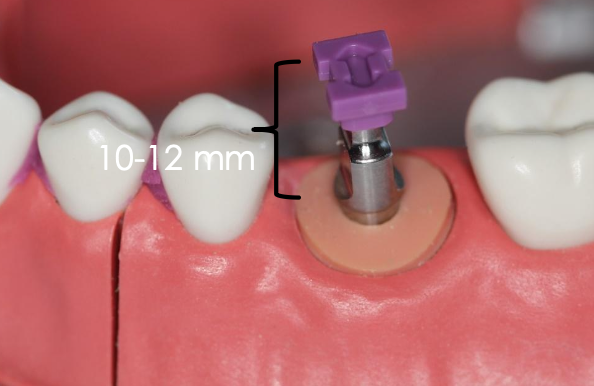
What should the vertical clearance be for the closed tray impression technique?
10-12 mm, avoid putting too much pressure when seating the impression since there must be material between tray and impression coping

What is an analog / implant replica?
A manufactured component that has an internal geometry identical to that of the implant
What is the use of an analog for the master cast fabrication?
Analog will be embedded in the master cast and used for the fabrication of the restoration
What is implant impression / transfer coping used for?
To transfer information from the patient’s mouth to the master model

When is the analog connected to the impression coping?
Before the impression is poured (this procedure is normally done by a lab technician)
In which material is the impression poured in?
Type III yellow stone / die stone
In the closed tray impression technique, how do you connect the impression coping to the analog?
Using the guide pin; then it is repositioned back into the impression
In the open tray impression technique, how do you connect the impression coping to the analog?
The impression coping is embedded in the VPS impression material; when connecting the analog to the impression coping, it is imperative to hold the analog with your fingers to prevent rotation of the coping
What happens if you don’t use your fingers to tighten the guide pin?
You may distort the impression
What are your next steps after the lab returns the master cast with full contour wax up?
Review the position and angulation of implant on cast
Locate screw access channel
Select abutment: screw-retained or cement retained
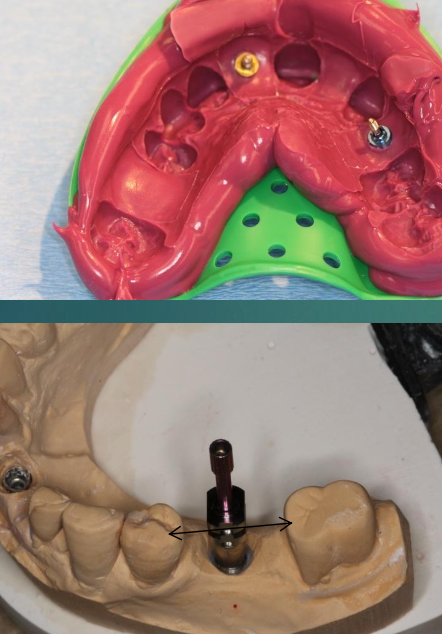
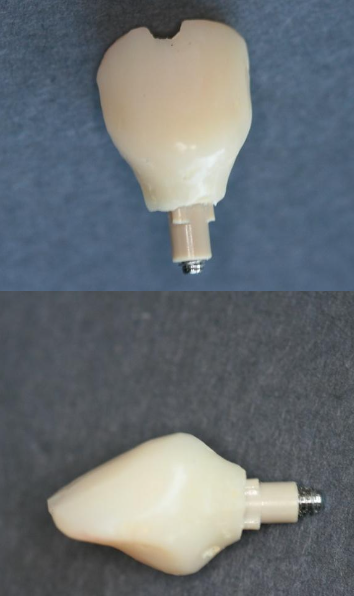
What will stone model contouring do?
Create an appropriate emergence profile for the restoration to create a “natural tooth” shape. It’ll help with hygiene and allow for adequate soft tissue support around the restoration
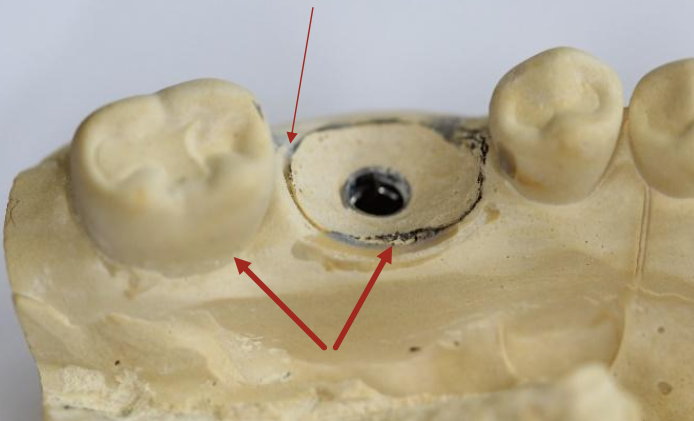
Contouring should allow ______ soft tissue between implant restoration and adjacent tooth
1 mm
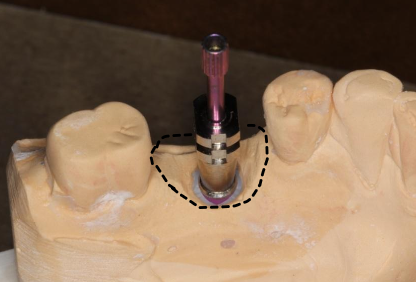
Use carver to remove stone following the outline drawn on the model
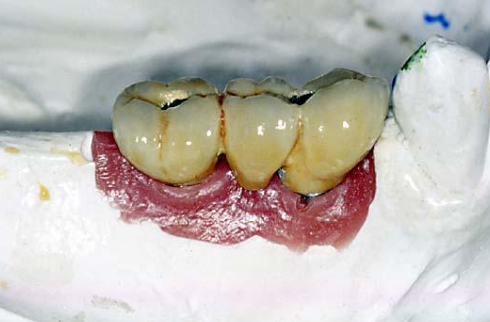
Completed contouring. The cervical area has been expanded to allow for a “natural tooth” design
Emergence profile
Lab will make buccal / lingual groove to verify seating of restoration
When should stone model contouring be done?
On bone level implants when fabricating metal abutments / PFM and FGC restorations

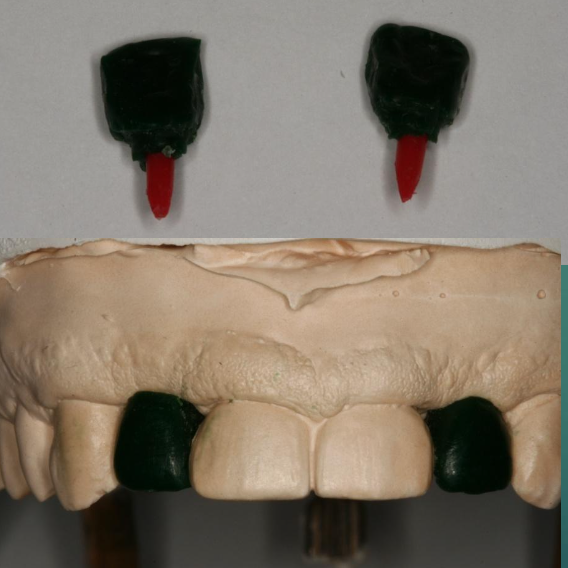
WHat is soft tissue moulage made of?
Resilient silicone impression material that resembles the oral mucosa
What are considerations for soft tissue moulage? When is it removed?
Always needed when fabricating ceramic abutments; removed when the abutment is scanned for ceramic crown fabrication
What is the big picture difference between the closed and open tray impression techniques?
Closed Tray: the coping stays in the mouth when you remove the impression. You take it out afterward and snap it back into the impression.
Open Tray: the coping comes out inside the impression when you remove it. You unscrew it before removing the tray so it stays locked in the material.
How do you create a digital impression using an intraoral scanner?
Use the trios intraoral scanner
Connect scan body to the implant
Send file to lab for fabrication of final restoration
What are provisional restorations used for? (7)
Protect underlying structures
Restore function/esthetics
Oral Comfort
Prevent tooth migration
Evaluate esthetics/function/speech
Soft tissue architecture/papilla
Always required for implants in the esthetic zone
What is the first step to fabricating a provisional implant restoration?
Create an implant-level impression using VPS, pour it in die stone or yellow stone and evaluate angulation, position and depth of implant
What is the second step to fabricating a provisional implant restoration?
Use a plastic or wooden stick that fits the inside of the implant analog, then create a diagnostic wax-up
What is the third step to fabricating a provisional implant restoration?
Create an adequate emergence profile (stone model contouring)
What is the fourth step to fabricating a provisional implant restoration?
Duplicate the wax up by:
Soak stone cast for 10-15 min
Take alginate impression of wax-ups and pour yellow stone model
Make vacuum form or VPS putty for mold
What is a provisional abutment made of?
Titanium and comes with a screw for the crown
What is the fifth step to fabricating a provisional implant restoration?
Pleace and modify the provisional abutment. Then secure the abutment to the cast and modify using a diamond or stone
What is the sixth step to fabricating a provisional implant restoration?
Secure the provisional abutment to the analog
Seal access channel with cotton pellet or short wooden stick to avoid crown material to cover screw, apply die lube on cast
Fill VPS mold/ vacuum form with Protemp
What are the steps for finishing the restoration?
Remove excess acrylic resin/ protemp
Fill any voids and do final contouring
Make sure the restoration is in emergence profile
Check occlusion / proximal contacts
Polish
Steps for seating the provisional
Remove healing abutment
Apply local anesthetic around implant area
Seat crown and hand tighten abutment screw
Take PA if used a metal temporary cylinder / clinical evaluation of interface
Evaluate occlusion / proximal contacts, cervical adaptation, esthetics
Seal access channel with cotton pellet and composite resin
Hygiene instructions
What are some concerns regarding tissue level implants?
Food impaction between crown and gum tissue
Reduced vertical clearance for restoration
Esthetics
What are the steps to creating the final implant restoration?
Create an impression with the provisional crown seated
Remove provisional crowns, clean and disinfect + connect analogs
Apply thin layer of wax around analog-restoration interface
After removing the provisional restoration, inject regisil to prevent soft tissue collapse (collapse starts within 5 minutes after removal of restoration)
Reposition provisional restoration in VPS impression and pour impression using die stone / yellow stone
Remove provisional crown from stone cast, clean / sterilize before reseating in patient and evaluate master cast
What information should be included in your lab slip?
Implant system and diameter
Abutment / restoration design
Taper, position of finish line and instructions to follow stone model
Shade, characterizations
When is the open tray impression technique recommended?
When restoring implants in the esthetic zone
After completing impression making for a PFM single implant crown in the anterior area, the student should:
Pour the impression themselves and evaluation the master cast before sending it to the lab
Stone modeling contouring should allow for 1-1.5mm of soft tissue between what?
Adjacent tooth and implant restoration
T/F: When you return a case to the lab after stone model contouring, you can normally have the custom abutment and abutment supported crown fabricated without additional try-in
True
T/F: When choosing a ceramic abutment, the final impression MUST be poured with silicone soft tissue moulage around the implant/abutment connection
True
A provisional implant restoration in the esthetic zone is normally recommended because
It can be used for tissue manipulation to achieve ideal gingival architecture prior to fabrication of the final restoration
When seating an anterior single unit provisional implant restoration
The abutment screw should only be hand tightened
T/F: A tissue level implant supported molar crown normally tends to have a less risk of food impaction around the soft tissue-crown junction when compared to a bone level restoration
False
When cementing a crown supported by a custom abutment
A cotton pellet/Teflon tape with Fermit/provisional restorative material on top to seal the abutment screw access hole.
When making an impression for a single implant restoration, student should
Inject medium or high viscosity VPS impression material around the impression coping and use the same impression material in the tray
T/F: A metal screw retained impression coping can be used for closed tray impressions
False