Class II Amalgam Preparation Design
1/63
There's no tags or description
Looks like no tags are added yet.
Name | Mastery | Learn | Test | Matching | Spaced | Call with Kai |
|---|
No analytics yet
Send a link to your students to track their progress
64 Terms
class II
- caries affecting proximal surfaces of posterior teeth
- smooth surface lesion
where do class II lesions initiate?
just gingival to the contact area
spread of class II caries
1. conical entry thru enamel
2. lateral spread at DEJ
3. conical entry thru dentin (apex face pulp)
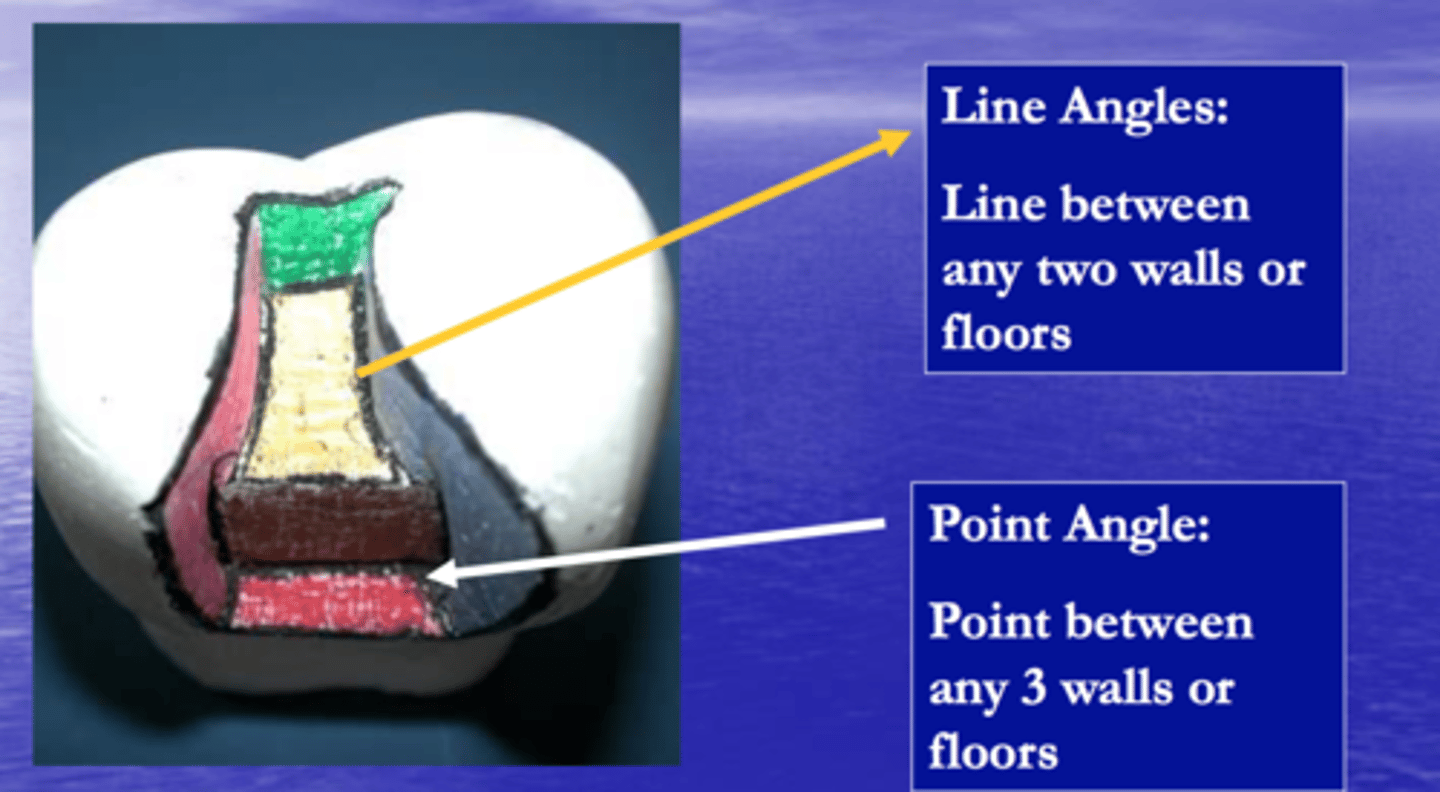
line angles vs point angles
line = junction of 2 walls
angles = junction of 3 walls
class II diagnosis
- bitewings (best)
- visual
for visual diagnosis of class II lesions, what will it look like?
marginal ridge = chalky, grey, opaque
which diagnosis method allows for early identification of incipient lesions?
bitewings radiographs
indications for class II restorations on previously unrestored tooth
DEJ has decay*
indications for class II restorations on previously restored tooth (5)
- fractured restoration
- gingival overhang
- bad contours
- light or no proximal contact
- bad margin integrity
modifying factors for class II restorations (4)
- poor OH
- high caries risk
- SES
- age
guidelines for class II restorations are
changing* based on new literature
don't need to do a restoration until at DEJ
vision for class II prep
indirect vision
general amalgam prep principles apply for class II preps such as (7)
- don't terminate on margins/ cusp tips
- remove unsupported enamel
- preserve cusps, marginal ridges, transverse ridges
- don't extend to unaffected fissures
- smooth curves
- 1.5mm pulpal depth
- 90º cavosurface margin
class II outline form is determined by
- tooth anatomy (pits/ fissures)
- adjacent structures (embrasures)
class II prep and adjacent teeth contact
contacts with adjacent hard tissues MUST be broken
how much should prep and adjacent tooth contact be broken? why is this important?
width of explorer
helps with restoration and finishing
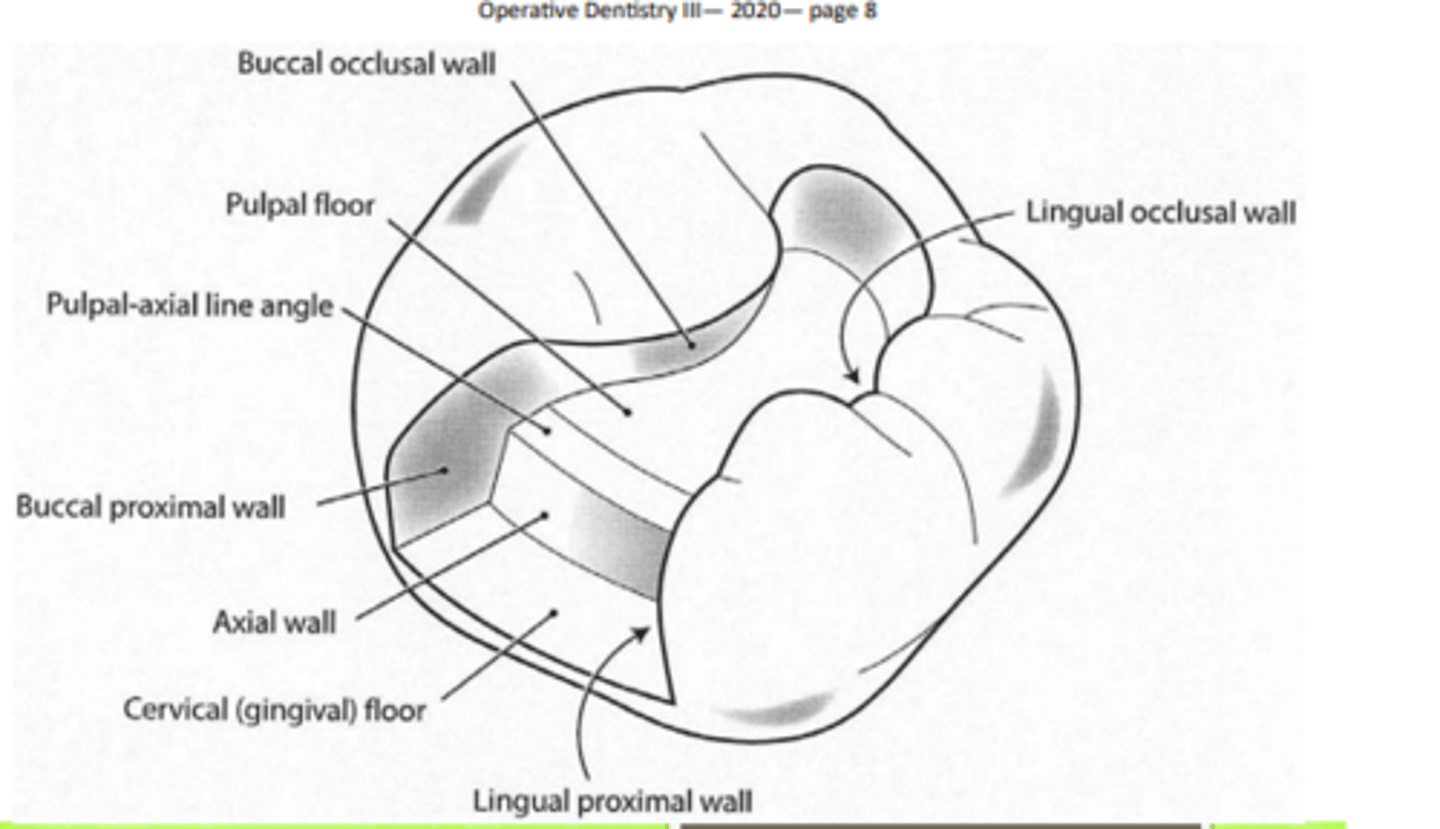
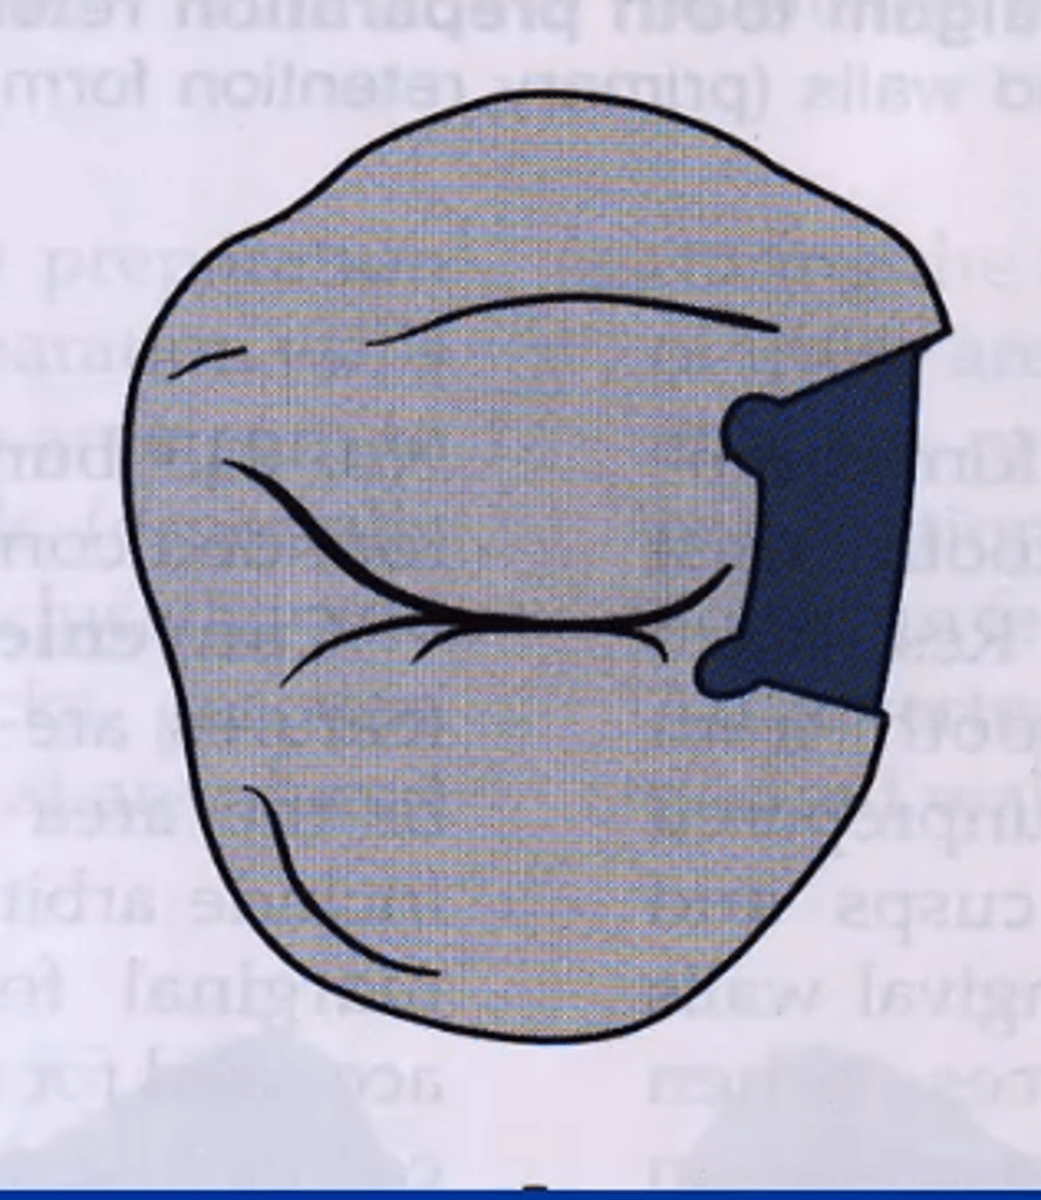
class II amalgam resistance form requirement (8)
- internal walls 0.5mm into dentin
- flat pulpal floor
- flat gingival floor/seat
- rounded line angles
- divergent wall (when applicable)
- 90º cavosurface
- pulpal depth
- keep unaffected structure
class II resistance form summarized
- proper depth
- flat floor
- rounded line angles
- divergent walls, 90º cavosurface, don't remove too much
class II retention form occlusal and proximal portions should be
INDEPENDENTLY retentive*
class II retention form requirements (4)
- convergent occlusal walls
- occlusal dovetails
- convergent proximal walls
- proximal locks
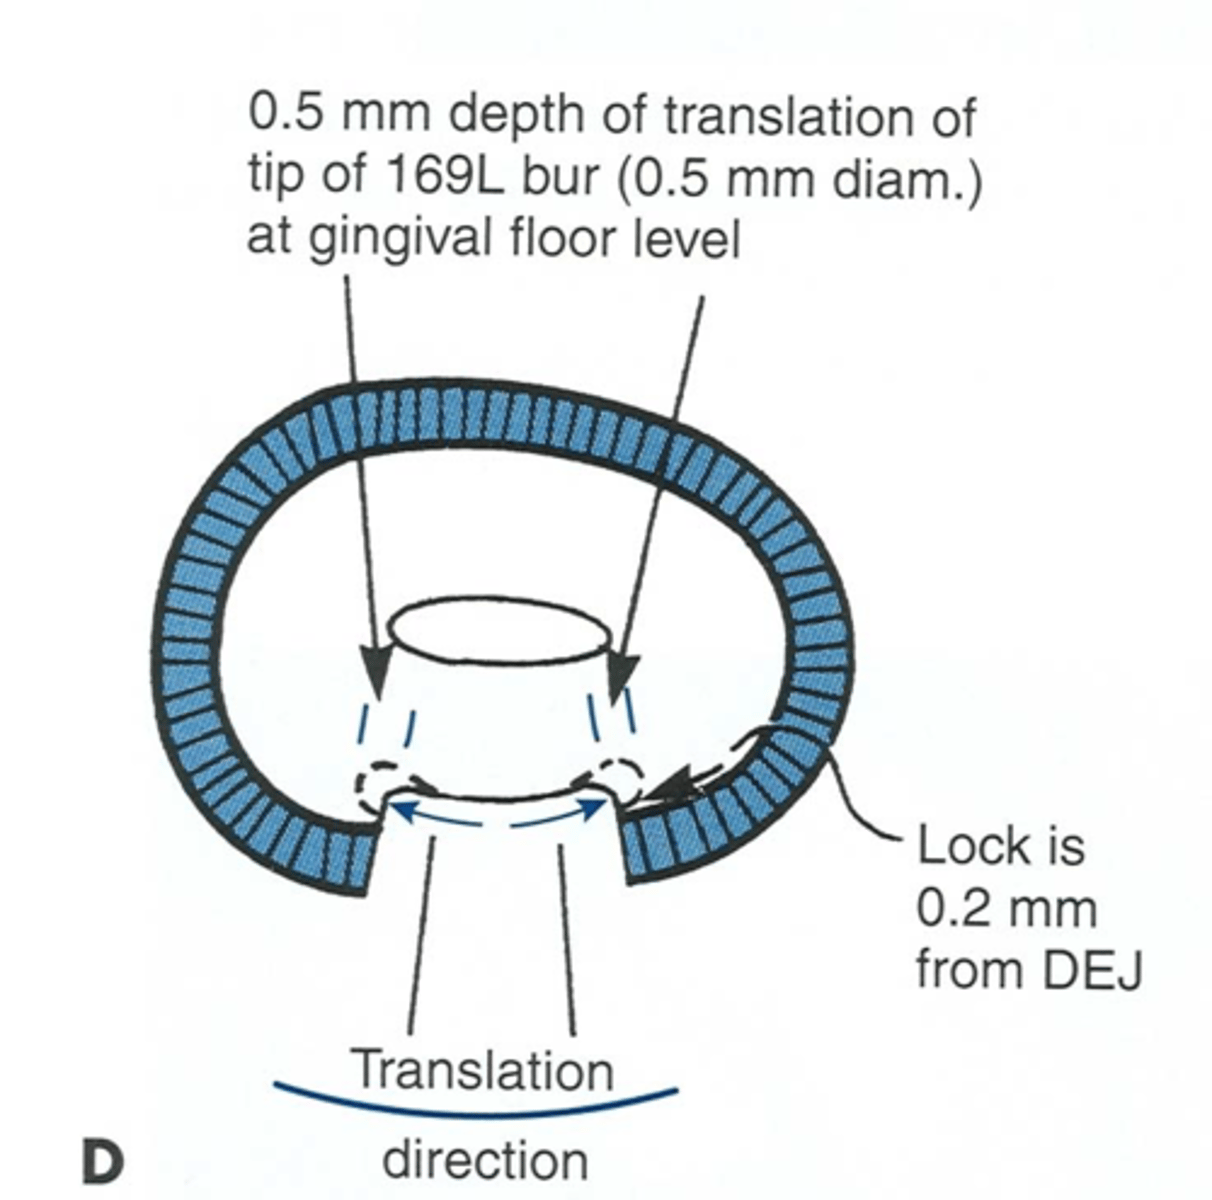
what are proximal locks (part of retention form)? are they convergent or divergent?
proximal retention grooves
convergent
where are proximal locks most prominent?
gingivally because they fade out occlusally
where should proximal locks be placed?
0.5mm inside DEJ
class II prep convenience form
- cut thru occlusal surface + marginal ridge to access proximal lesion
- may need additional extension for access/ vision
class II removal of remaining decay for an amalgam prep
- remove tooth structure ONLY in area of lesion
- don't remove entire floor/ wall to depth of lesion
why is it important to not remove healthy tooth structure around a lesion?
- structural integrity
- pulpal considerations
finishing enamel walls: steps for class II prep
1. remove remaining debris (air/ water)
2. re-evaluate prep from multiple vantage points w/ mirror*
3. make needed modifications
process of cleansing prep
1. remove debris
2. re-eval isolation
3. eval soft tissue status (hemorrhage control may be needed)
what fissures should be included in class II preps?
cariously involved secondary fissures only
isthus width of class II prep relative to intercuspal distance
1/4 intercuspal distance
gingival floor dimension is
1-1.5mm axially
aka width of box

what is gingival floor length based on? depth?
adjacent tooth BL contacts
adjacent tooth G contacts
class II prep should have ___ curves, maintain ___ for strength, and an axial wall that follows ___
smooth
marginal ridges
external contour of tooth
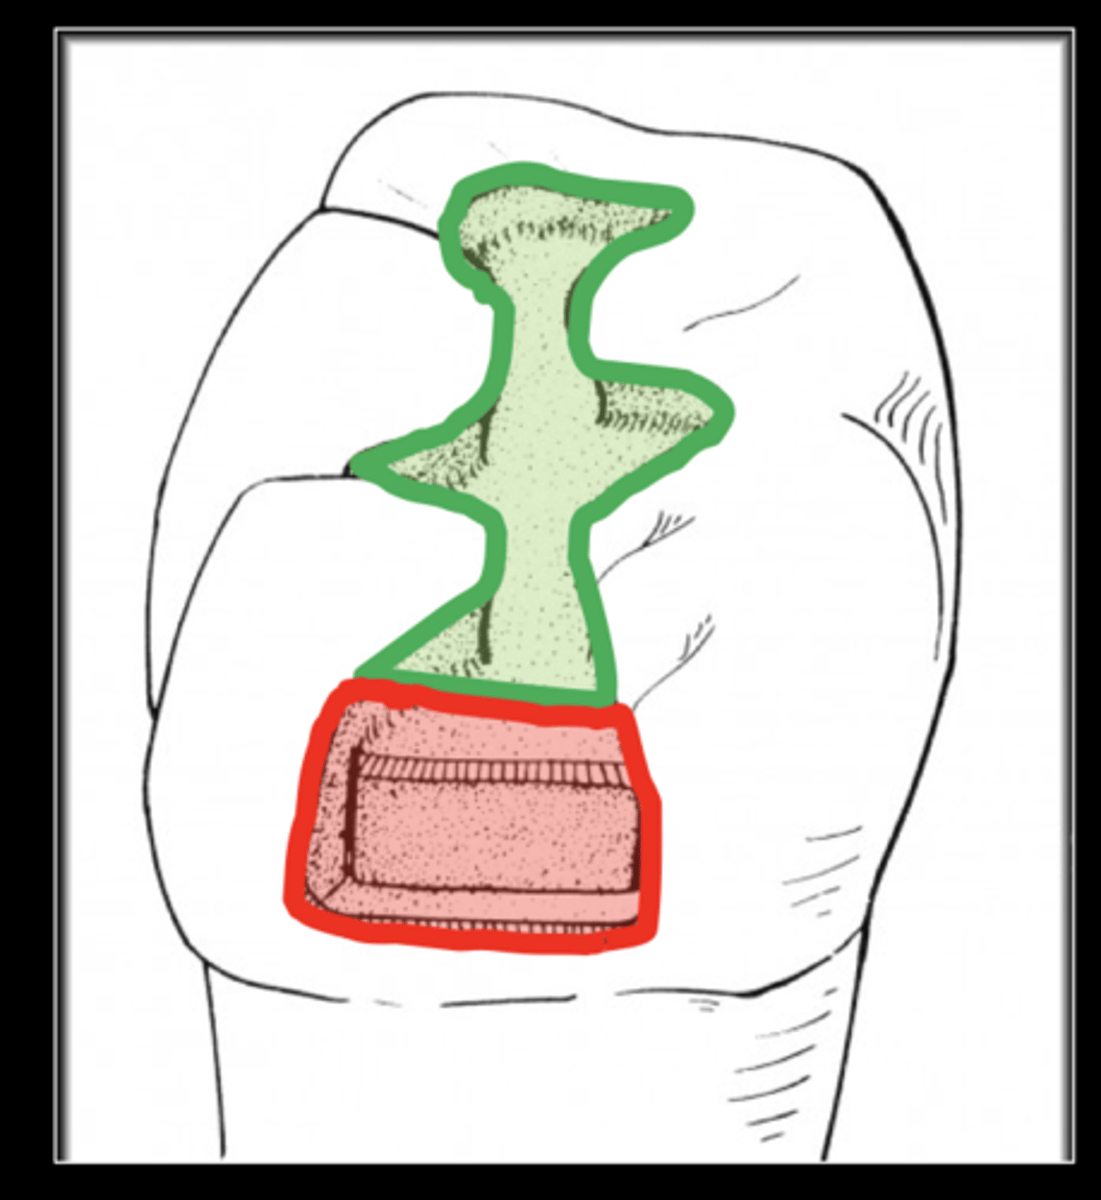
steps for class II prep
1. occlusal outline form (same as class I)
2. create internal walls w/ correct depth, convergence, etc.
3. extend in direction of lesion to include affected marginal ridge
4. proximal trenching (create prox box)
it is necessary to include affected marginal ridge, but it is important to NOT extend
THROUGH the affected marginal ridge
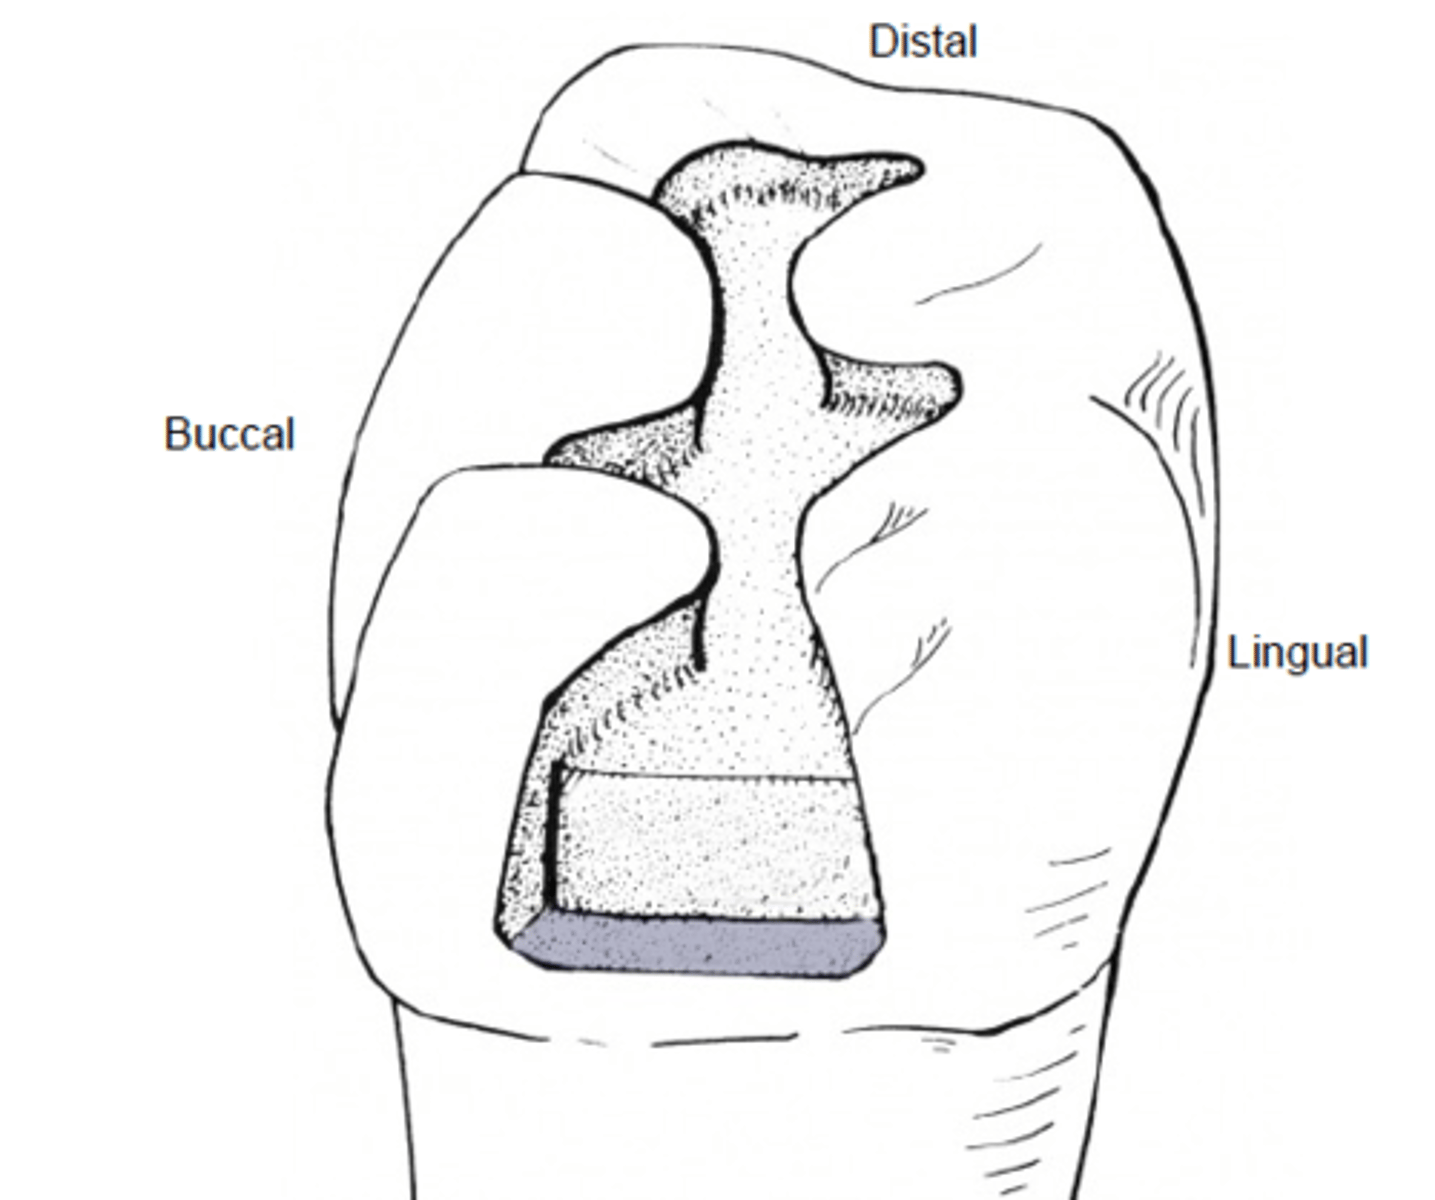
what is proximal trenching? what walls does this create?
proximal box
axial, gingival, buccal proximal, lingual proximal walls
before preparing the proximal box, visualize
location of proximo-occlusal margins
bur needed to create proximal trenching?
245*
what direction do you move bur to create proximal box?
move BL at DEJ (maintain convexity)
considerations when trenching
- break B + L contact
- break gingival contact
- pay attention to axial depth (1-1.5mm)
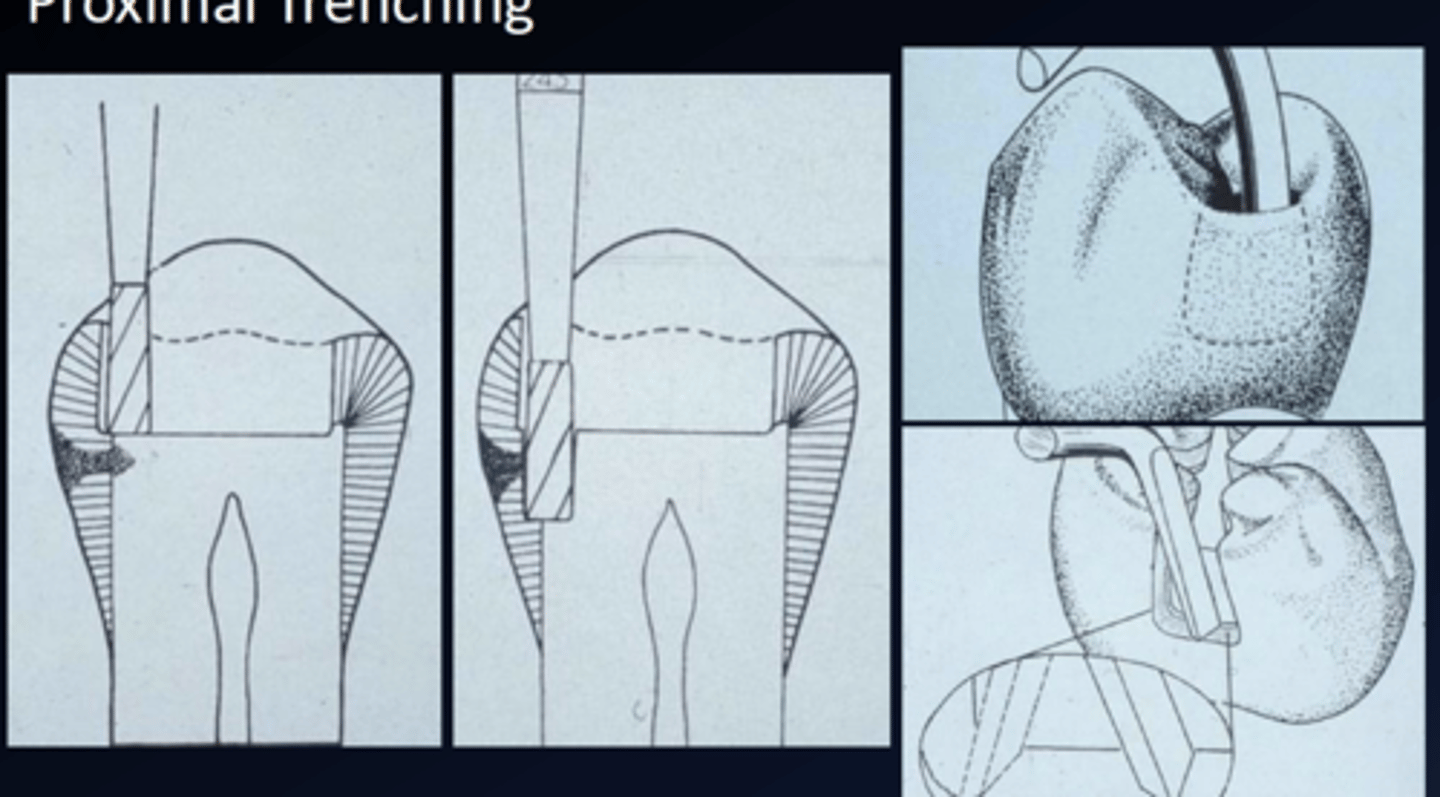
why is it important to pay attention to axial depth when proximal trenching?
enamel is thinner in gingival 1/3
when creating proximal box with the bur, leave ___ b/c ___
thin enamel plate
it's protective
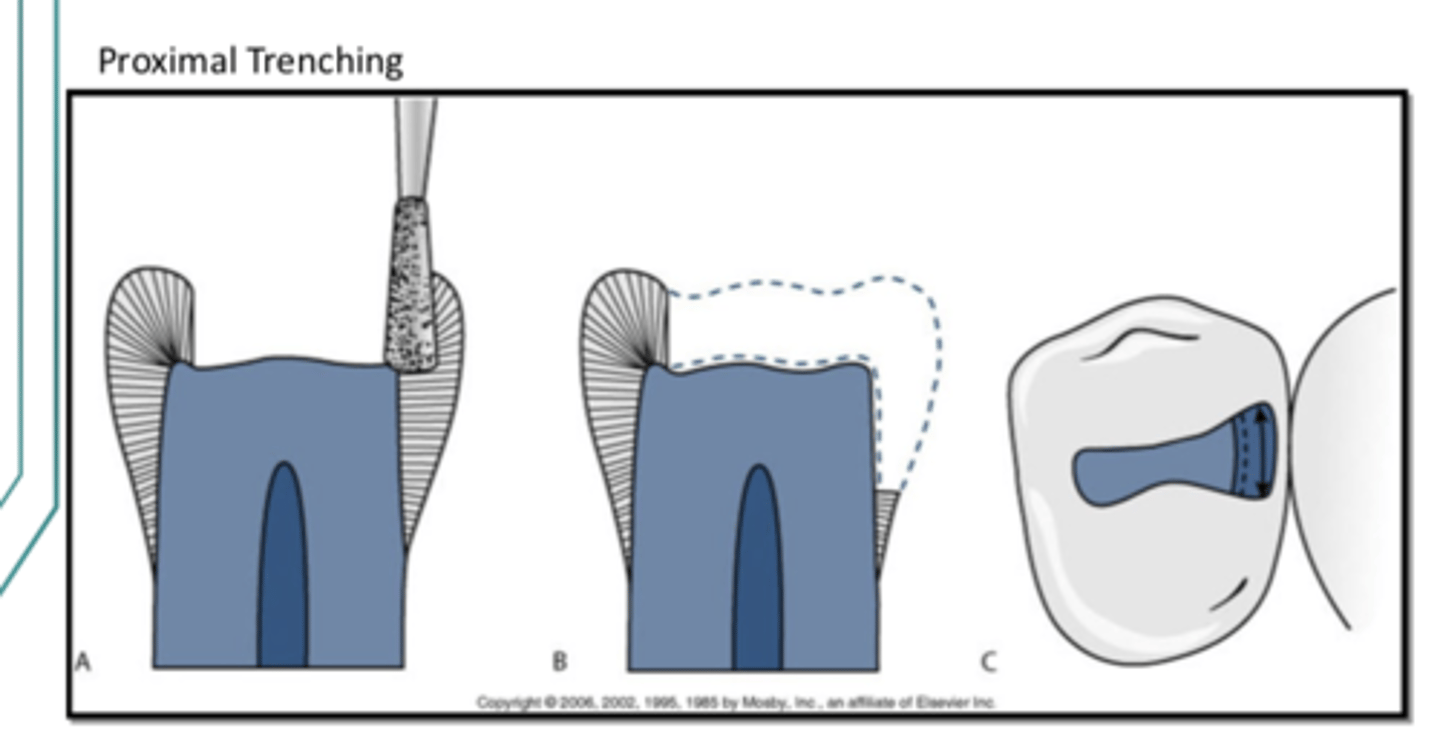
when do you remove the enamel plate?
after proper extension
how to remove enamel plate
use rotary instrument or hatchet to fracture weakened prox enamel
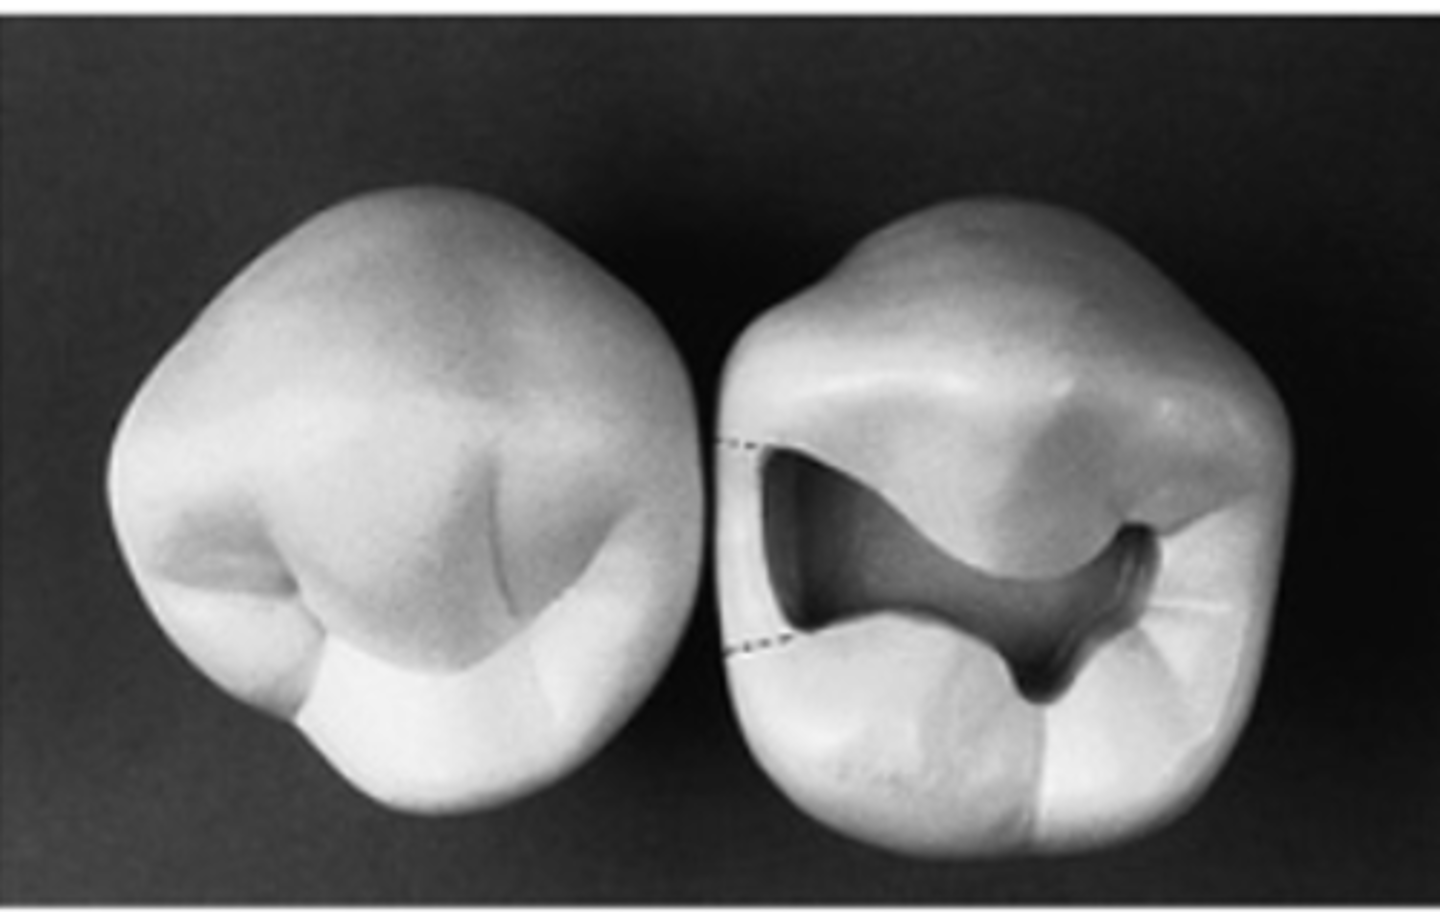
proximal trenching should create a proximal contact that is visually open
buccally and lingually
gingival clearance is defined as ___ and should be ___mm
horizontal measurement between adjacent teeth at gingival floor
0.5mm (tip of explorer)
buccal and lingual walls clearance to adjacent tooth
0.2-0.3mm ideally (0.5mm is fine tho)
after you finish occlusal walls
place retention locks/ grooves if indicated
are retention locks/ grooves present in standard preps?
no... they are a subtle prep feature added when needed
retention grooves must be opposed by ___ and only occur in ___
another groove or retention mechanism
dentin
retention grooves dimensions laterally + occlusally
0.5mm laterally
1.0mm occlusally
what is location of retention grooves based on?
anatomy (not prox box size)
what bur do you use to place retentive grooves?
1/4 round bur
once retention locks/ grooves are placed, what are the next 3 steps?
1. finish proximal enamel w/ hand piece or hatchet
2. round axio-pulpal line angle w/ hand piece or hatchet
3. double check prep w/ mirror
when double checking prep w/ mirror, look for
- proper extensions
- complete caries removal*
- sound enamel (non unsupported)
ideal amalgam angle and cavosurface angle and what it's called
90º
butt joint fit
when is a slot used?
when decay only involves proximal area (small lesion)
what burs are used to create a slot?
330 or 245
are slots used for amalgam restorations? why?
no
retention is a limitation
slots are based on visual convenience form only which means it is based on
access for infected caries removal and material placement
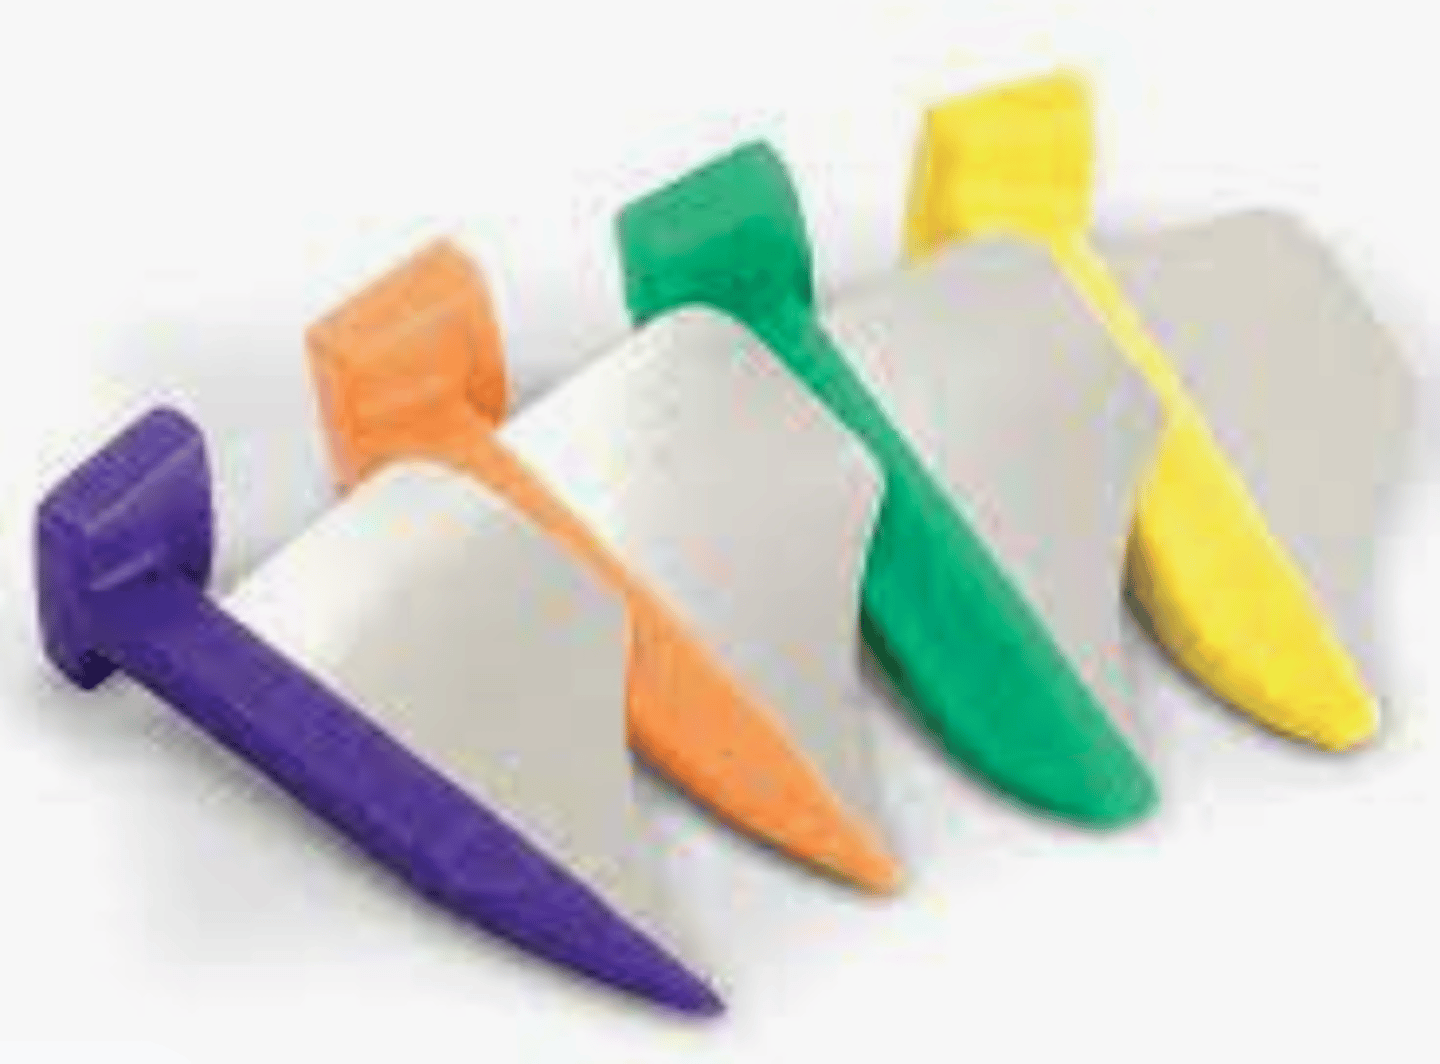
tool to help you avoid damaging the adjacent tooth
fender wedge
order of class 2 prep when caries are present
1. establish external outline form
2. establish internal outline form (remove decay from all internal aspects of prep)
3. modify + finish prep (proper retention/ resistance)
your external outline form is finished when
caries is only on axial and pulpal walls (internal walls)
where will caries NOT be once your external outline form is finished? where will caries still be?
M, D, L, B, G walls + DEJ
axial + pulpal walls