Periodontal Debridement: Sickle Scalers and Universal Curettes
1/60
There's no tags or description
Looks like no tags are added yet.
Name | Mastery | Learn | Test | Matching | Spaced | Call with Kai |
|---|
No analytics yet
Send a link to your students to track their progress
61 Terms
what is plaque and what is calculus?
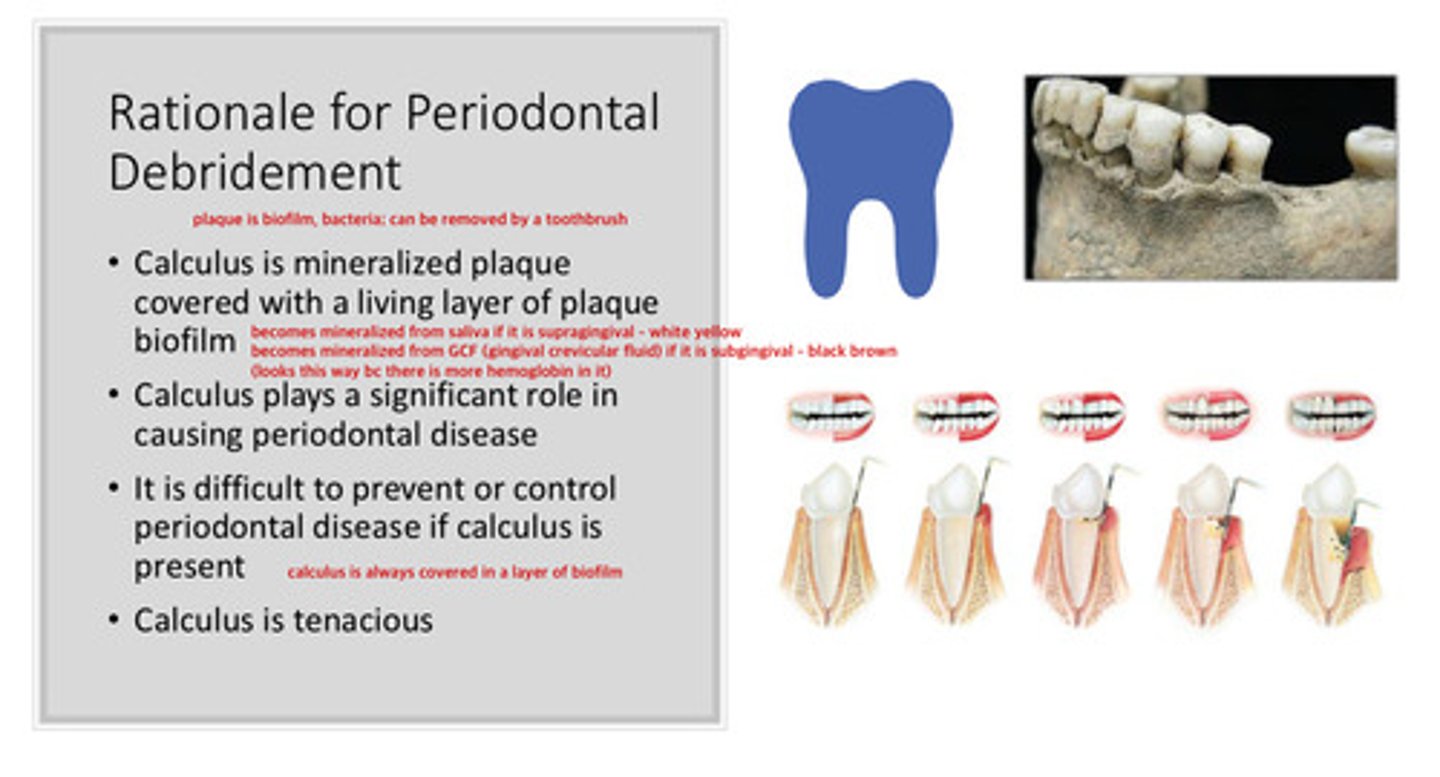
plaque is biofilm, bacteria —> can be removed by a toothbrush
calculus is mineralized plaque covered with a living layer of plaque bioflim (always is covered in a layer of biofilm)

what is the difference between subgingival calculus and supragingival calculus
if supragingival, it becomes mineralized from saliva —> looks white/yellow
if subgingival, it becomes mineralized from gingival crevicular fluid (GCF) —> looks black/brown due to hemoglobin in GCF
calculus plays a significant role in causing what dz
periodontal dz: it is difficult to prevent or control periodtonal dz if calculus is present

what is the definition of debridement
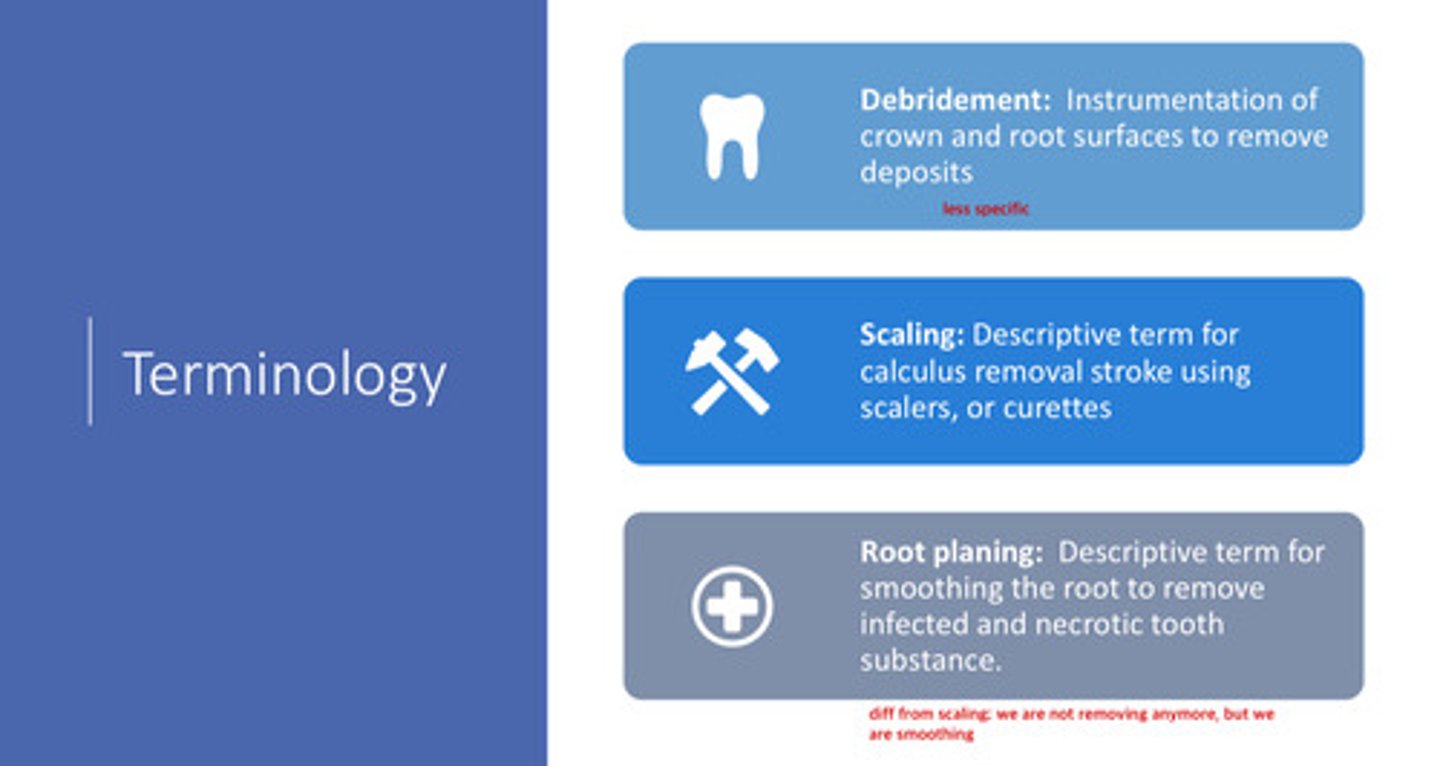
instrumentation of crown and root surfaces to remove deposits (this term is less specific)
calculus is tenacious, meaning?
it is difficult to remove and will usually come back :D

what is the definition of scaling
the descriptive term for calculus removal stroke using scalers, or curettes
what is the definition of root planing
the descriptive term for smoothing the root to remove infected and necrotic tooth substance (this is diff from scaling, we are not removing anymore, but rather smoothing)
what are the 3 relevant types of instrument strokes for periodontal debridement
1) exploratory
2) scaling
3) root planing
describe the exploratory instrument stroke
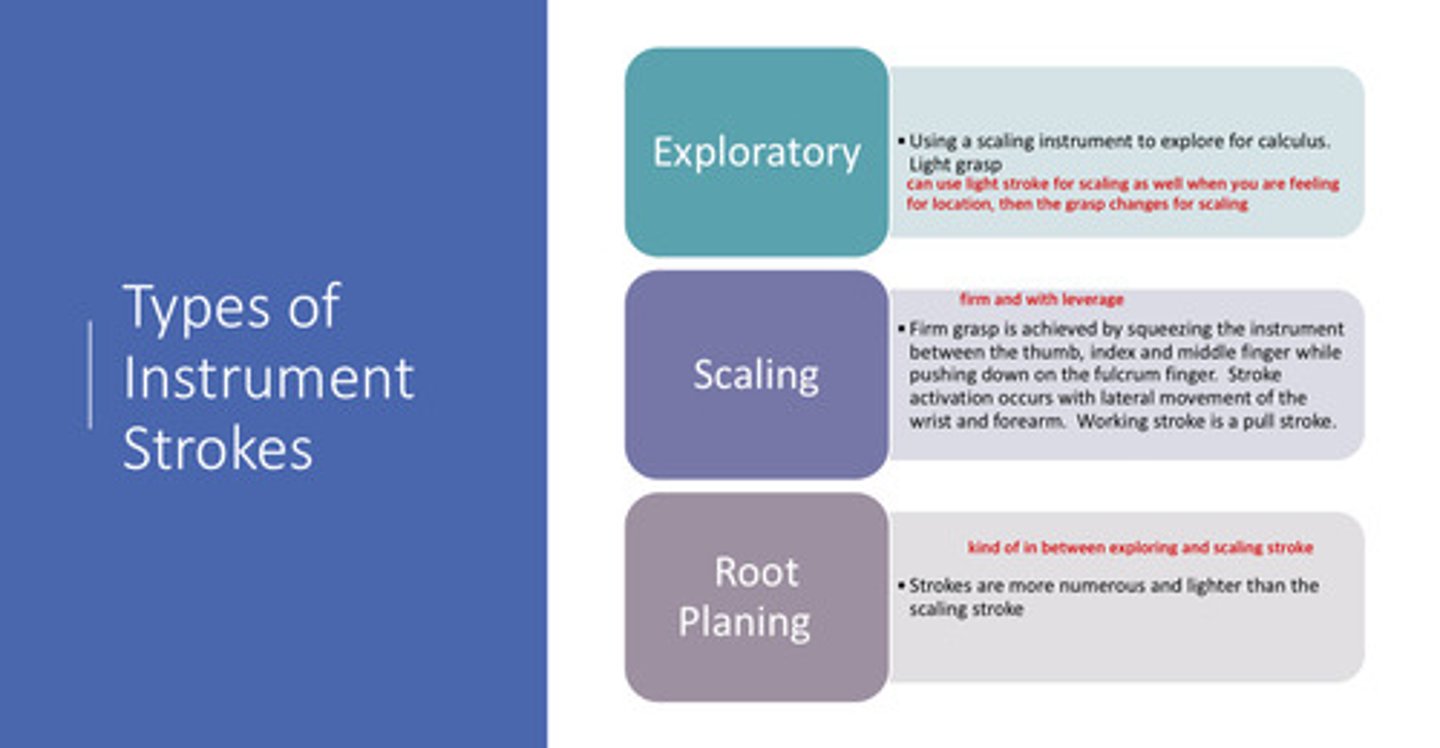
using a scaling instrument to explore for calculus; light grasp (this is the kind of stroke you would use when feeling for location; the grasp will change for the scaling stroke)
describe the scaling instrument stroke (3)
1) firm grasp is achieved by squeezing the instrument between the thumb, index, and middle finger while pushing down on the fulcrum finger
2) stroke activation occurs with lateral movement of the wrist and forearm
3) working stroke is a pull stroke
describe the root planing instrument stroke
strokes are more numerous and lighter than the scaling stroke (kind of in between exploring and scaling stroke)
review of the modified pen grasp
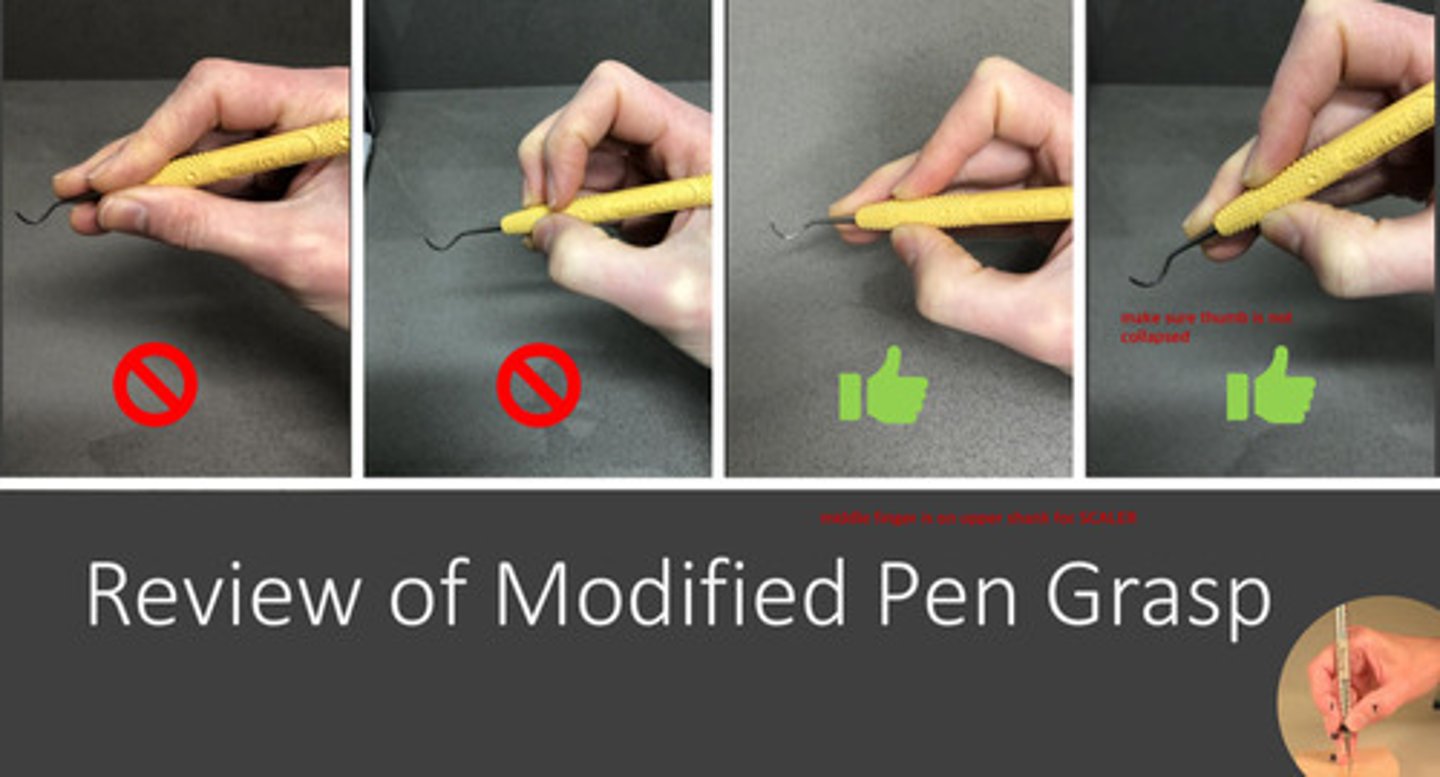
1) index finger and thumb are on opposite sides of the instrument
2) thumb is not collapsed
3) middle finger is on the upper shank for the SCALER (note that it is on the lower shank for an explorer or perio probe)
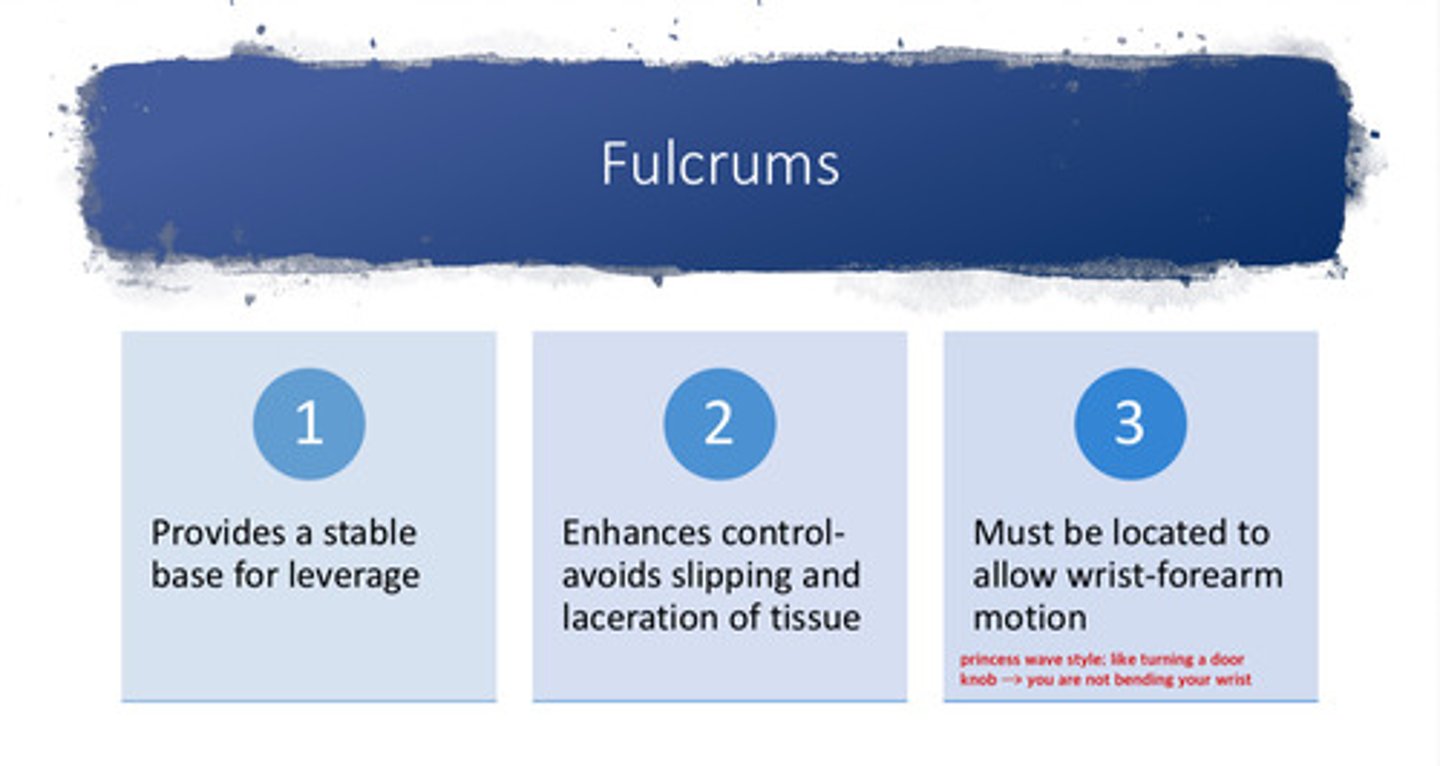
what are 3 important things to note about fulcrums
1) provides a stable base for leverage
2) enhances control: avoids slipping and laceration of tissue
3) must be located to allow wrist-forearm motion (wrist activation such as princess wave or turning a door knob; not bending your wrist)
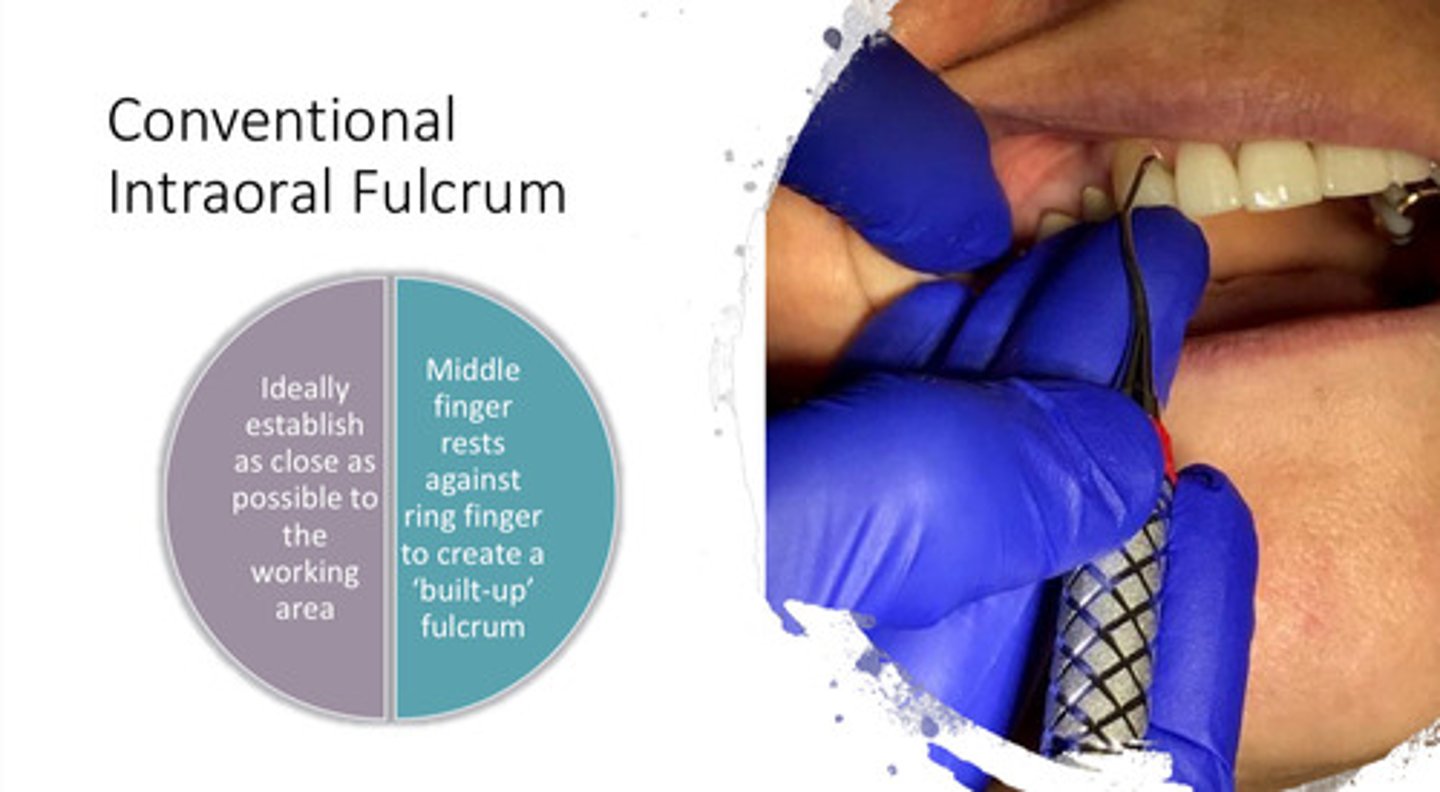
a conventional intraoral fulcrum is ideally established where?
as close as possible to the working area

in a conventional intraoral fulcrum, the middle finger rests where?
against the ring finger to create a "built up" fulcrum
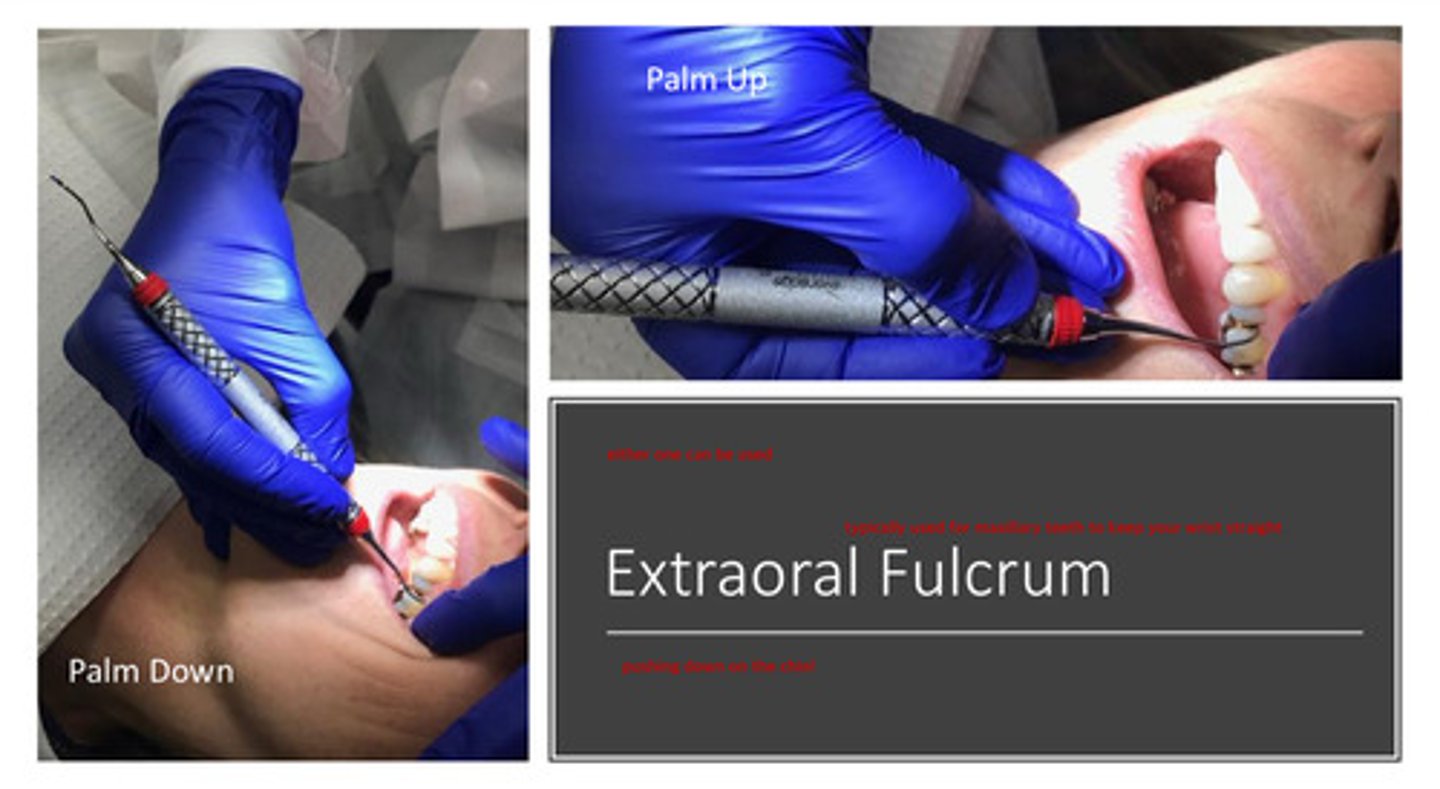
what are the 2 kinds of extraoral fulcrums, and extraoral fulcrums are typically used for which arch
1) palm up or palm down; using a pushing down motion on the chin for fulcrum
2) typically used for maxillary teeth to keep the wrist straight
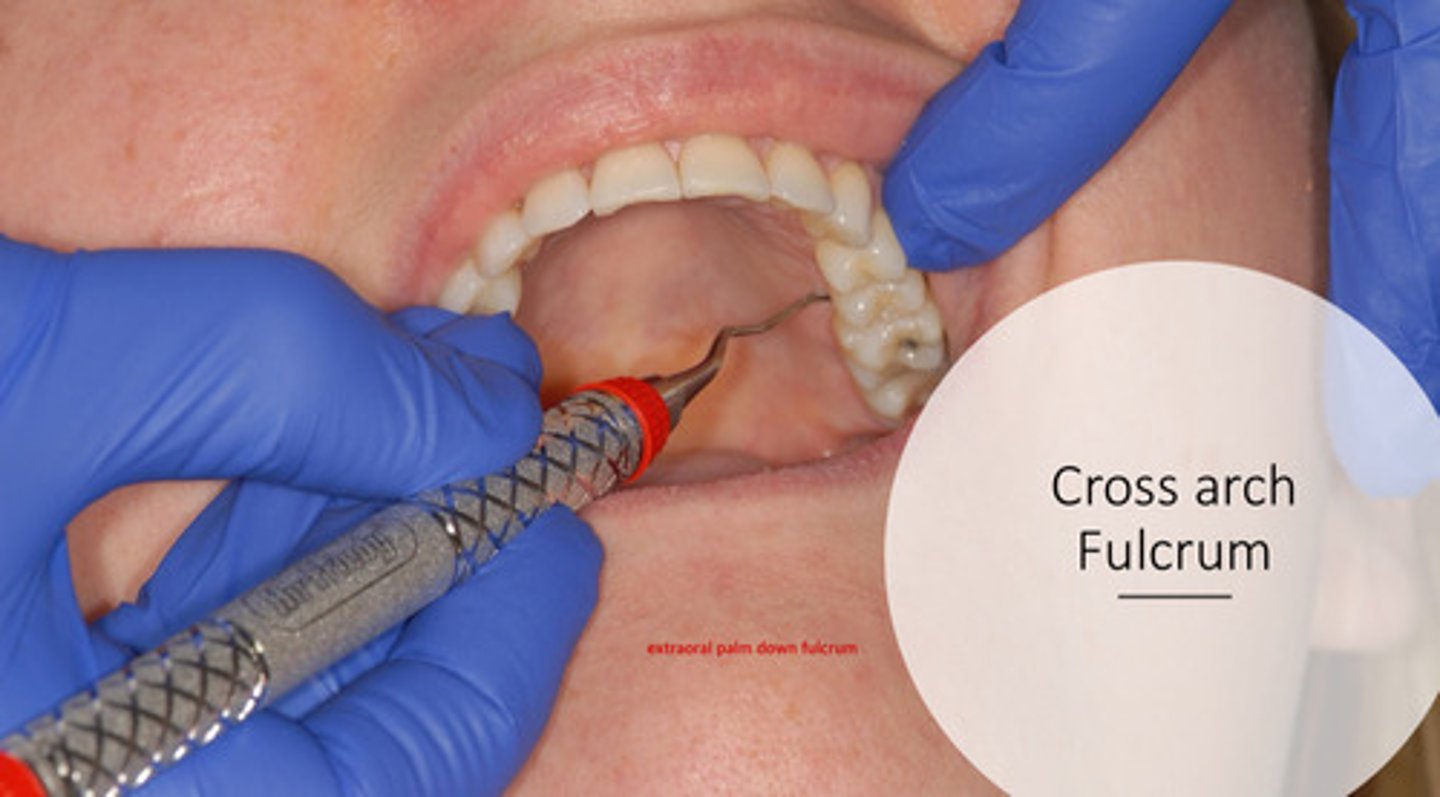
what is a cross arch fulcrum?
typically an extraoral palm down fulcrum for maxillary area (ie for lingual left posterior side)
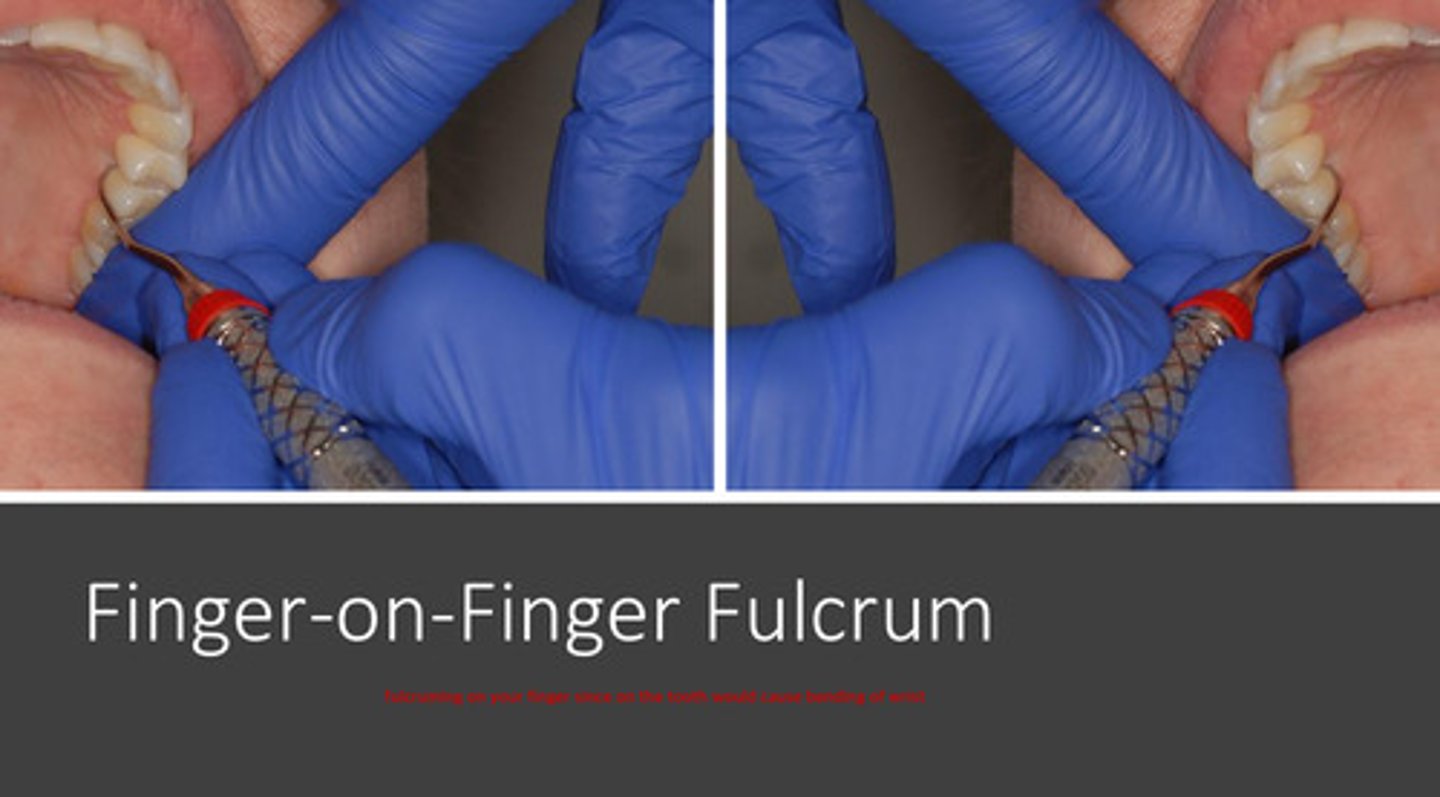
what is a finger-on-finger fulcrum?
finger of non-dominant hand serves as resting point for dominant hand, since fulcruming on the teeth itself may cause bending of the wrist (ie for lingual right posterior side)
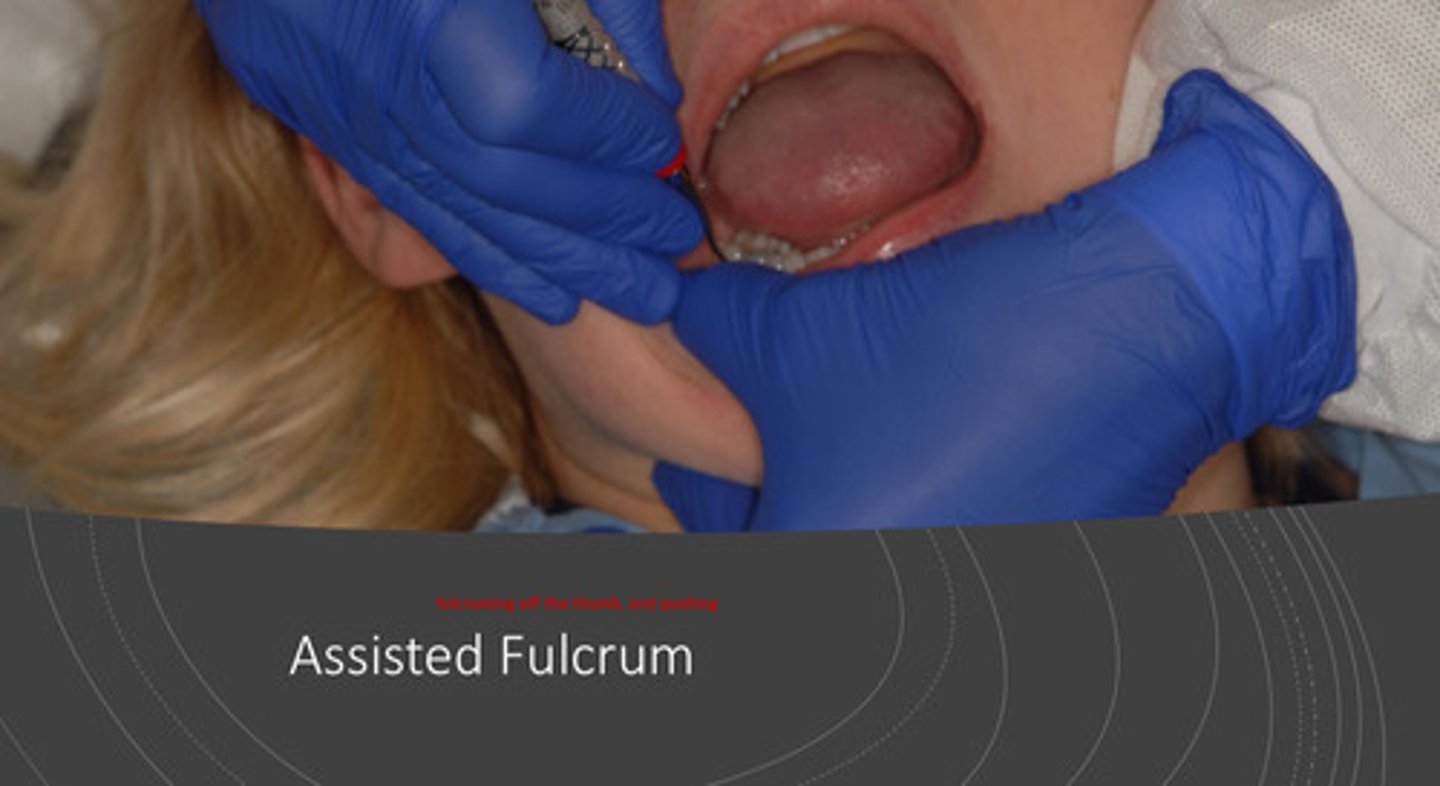
what is an assisted fulcrum?
fulcruming off the thumb of the non-dominant hand, and pushing down to have leverage
what are sickle scalers designed for?
designed for supragingival surfaces due to the pointed tip
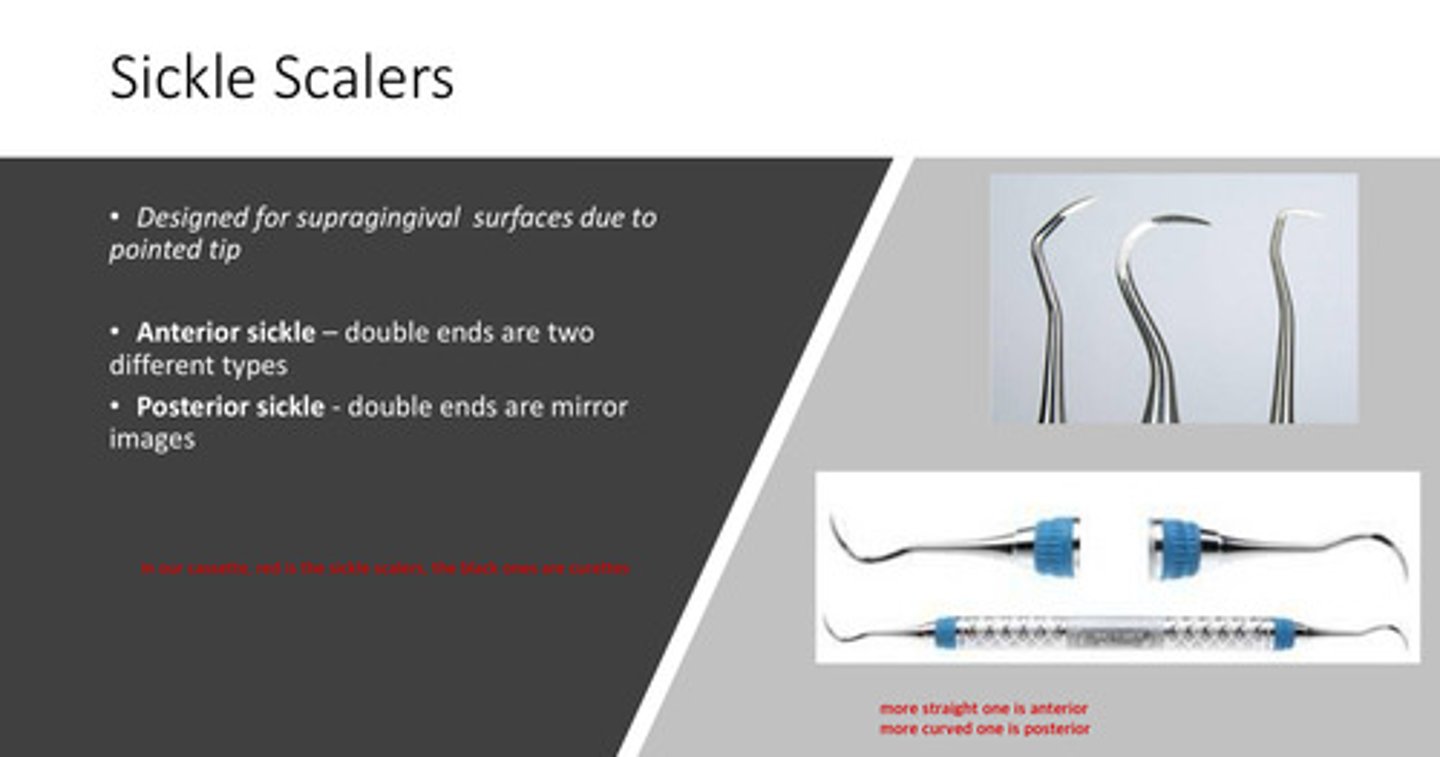
the anterior sickle typically has what kind of design
the double ends are 2 different types; more straight shank

the posterior sickle typically has what kind of design
the double ends are mirror images; more curved shank

in our D2 cassette, what color are the sickle scalers
red!
the sickle design is ? in cross section and has the face at what degree angle to the lower shank
1) triangular in cross section
2) face at 90 degrees to lower shank

the sickle design typically has two ? per end
two cutting edges per end
- note that there are many variations in design on the market!
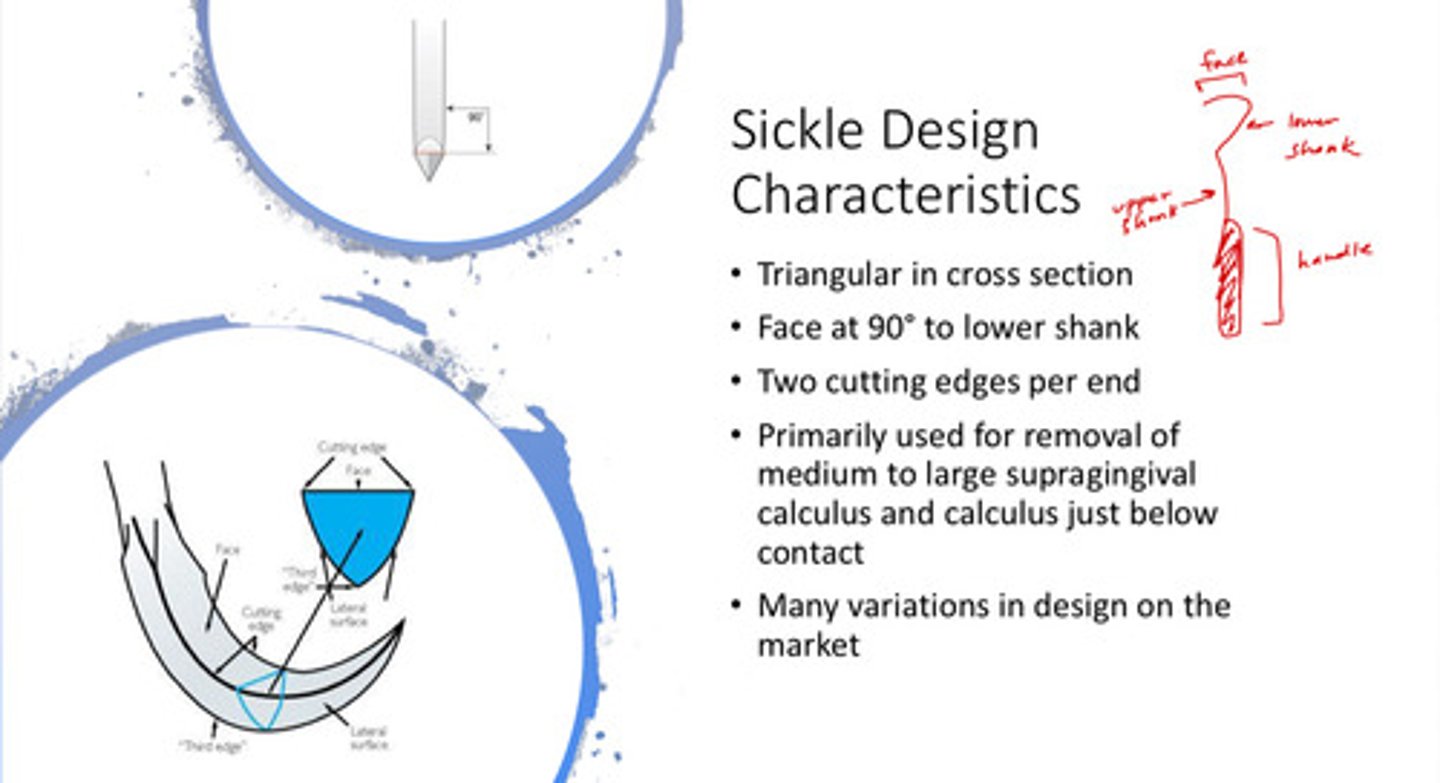
the sickle scaler is primarily used for the removal of what and where?
the removal of medium to large supragingival calculus and calculus just below the contact

image of use of the correct working end of the posterior sickle
the lower shank should be parallel to the long axis of the tooth!
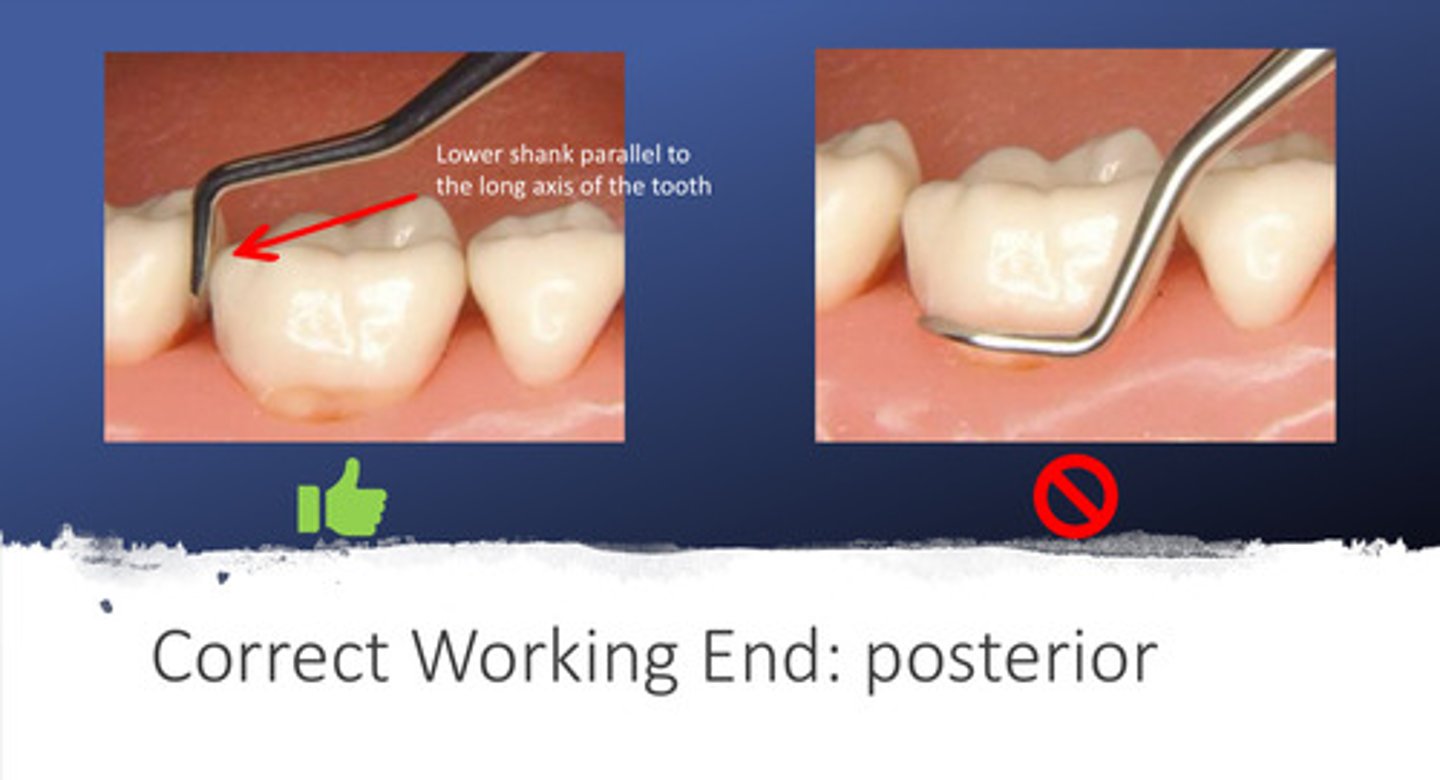
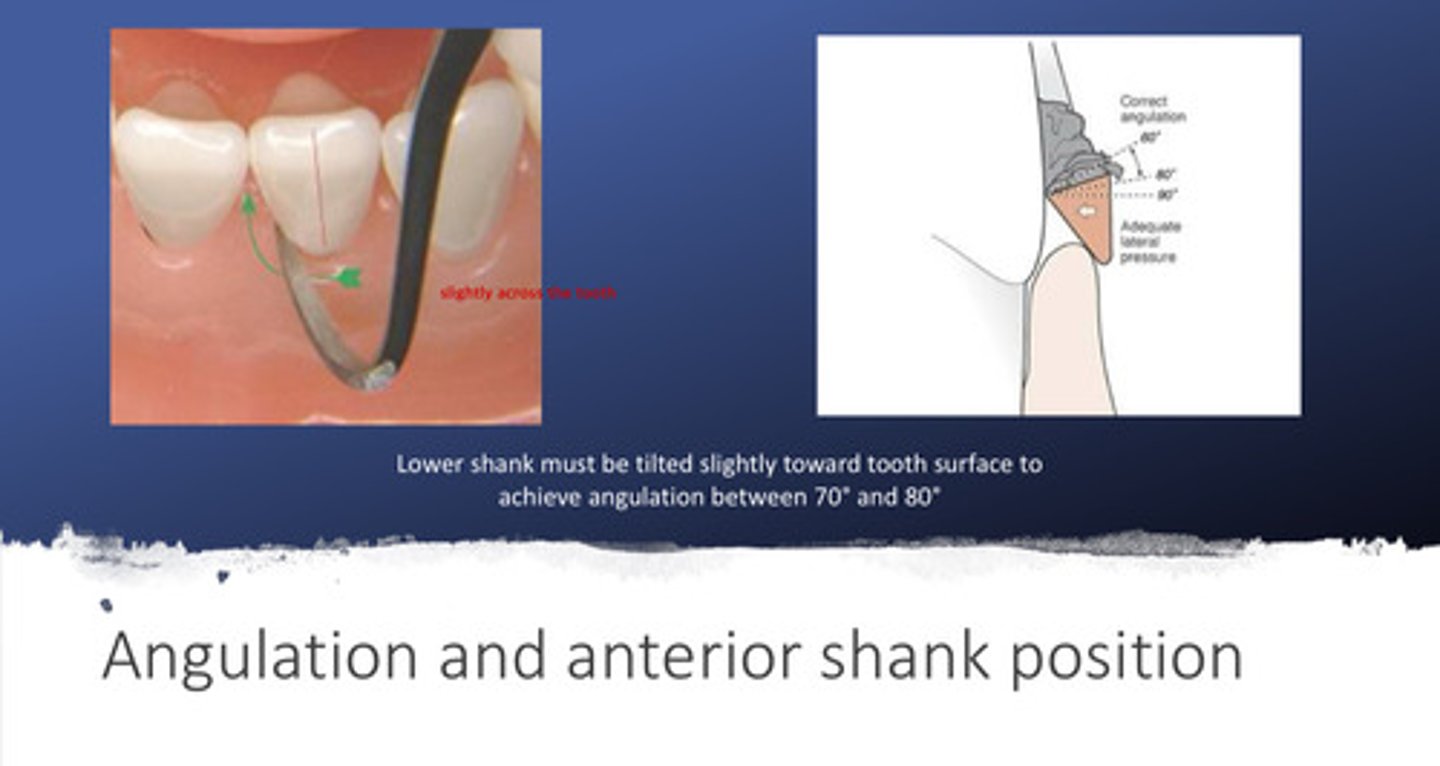
image of use of the correct working end and angulation of the anterior sickle
the lower shank must be tilted slightly toward the tooth surface to achieve angulation between 70 and 80 degrees
- note that the lower shank looks like it slightly crosses the tooth rather than perfectly parallel
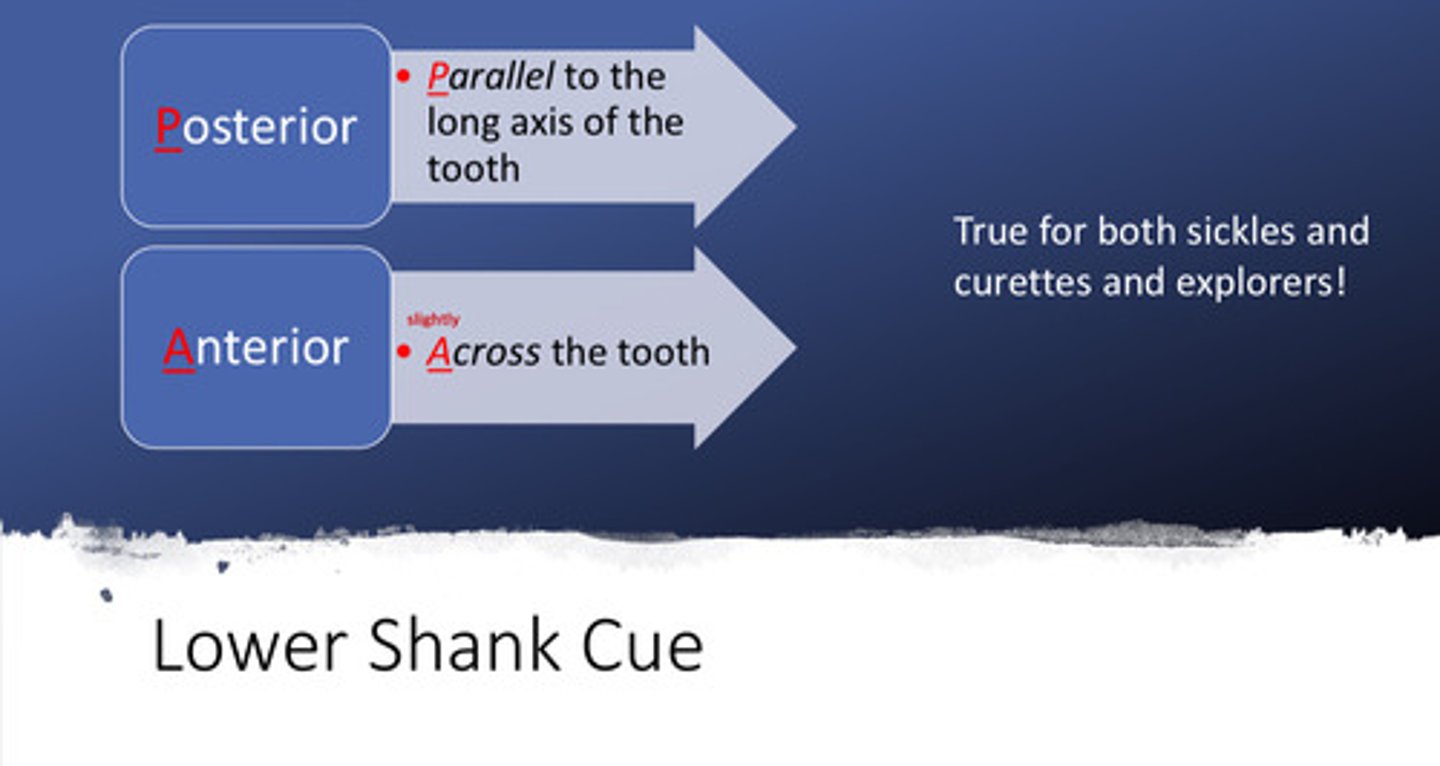
what are the lower shank cues for the posterior and the anterior sickles
posterior = parallel to the long axis of the tooth
anterior = across (slightly) the tooth
- note that these cues are true for both sickles and curettes, and explorers!
stroke activation: must maintain adaptation of how many mm of tip of cutting edge to the ?
1 mm of tip of cutting edge to the tooth surface! - tangent

stroke activation: what is the proper way to move interproximally
rolling the handle

stroke activation: how do you activate the actual stroke itself?
press down with fulcrum finger and rotate wrist/forearm to apply lateral pressure against the tooth — keeping the wrist straight and pivoting off the fulcrum finger
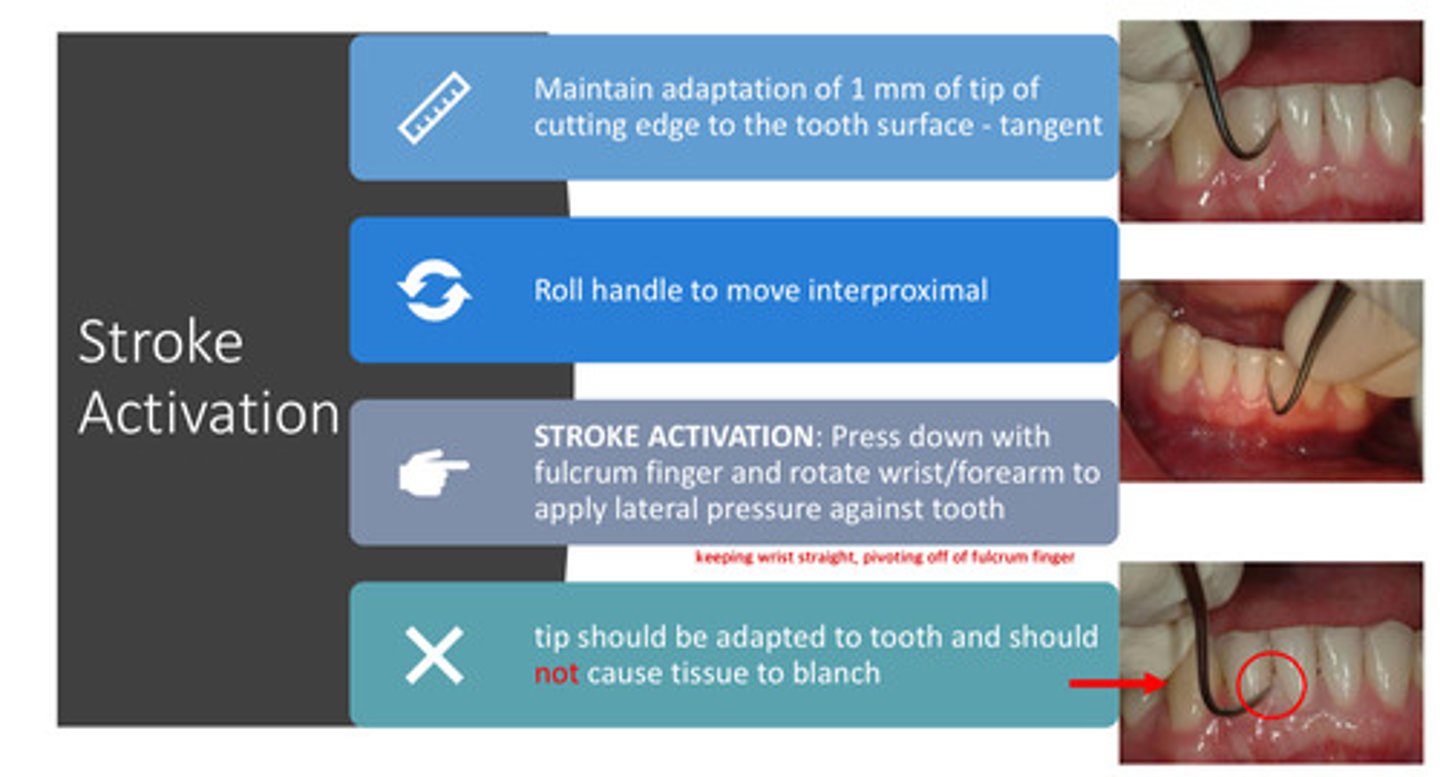
stroke activation: the tip should be adapted to the tooth and therefore, should not cause the tissue to ?
blanch!

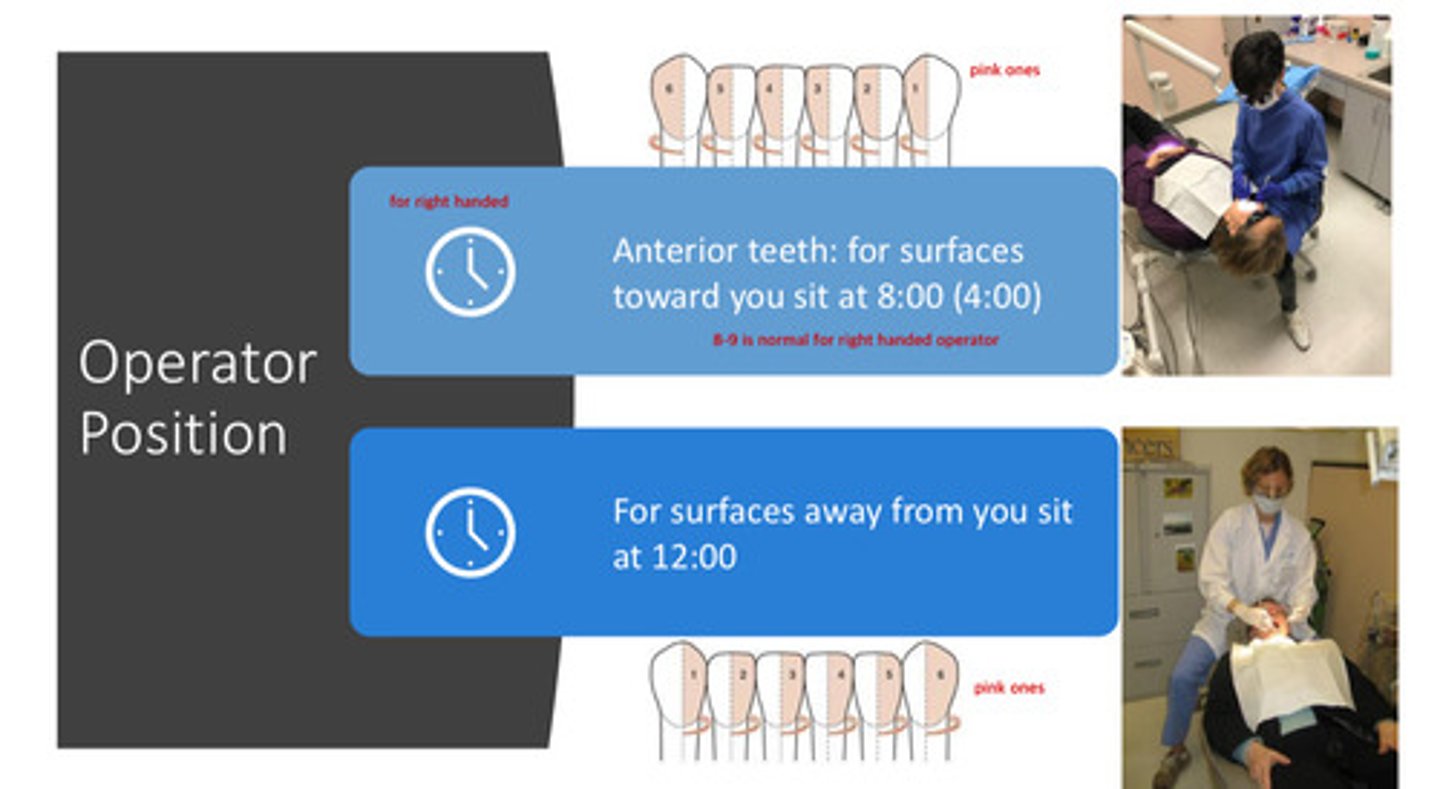
operator position: for the right handed operator, where should you be positioned for the toward surfaces of the anterior teeth
8:00-9:00 for the surfaces that are facing you

operator position: for the left handed operator, where should you be positioned for the toward surfaces of the anterior teeth
4:00 ish

operator position: for both right and left handed operators, where should you be positioned for the away surfaces of the anterior teeth
12:00
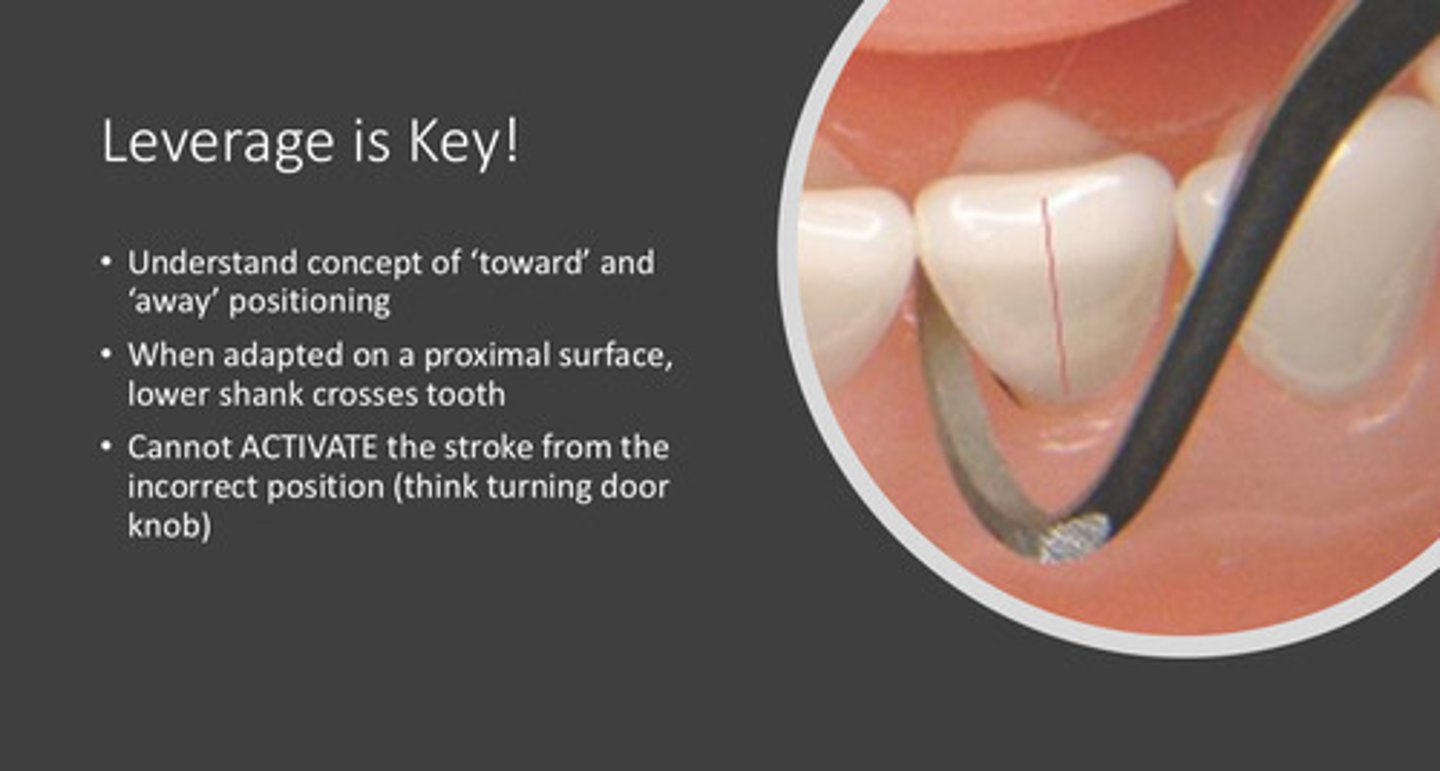
what are the 3 concepts that are needed to understand proper leverage when scaling?
1) understand the concept of "toward" and "away" positioning
2) when adapted on a proximal surface, the lower shank crosses the tooth
3) cannot activate the correct stroke from the incorrect position! (think turning door knob)
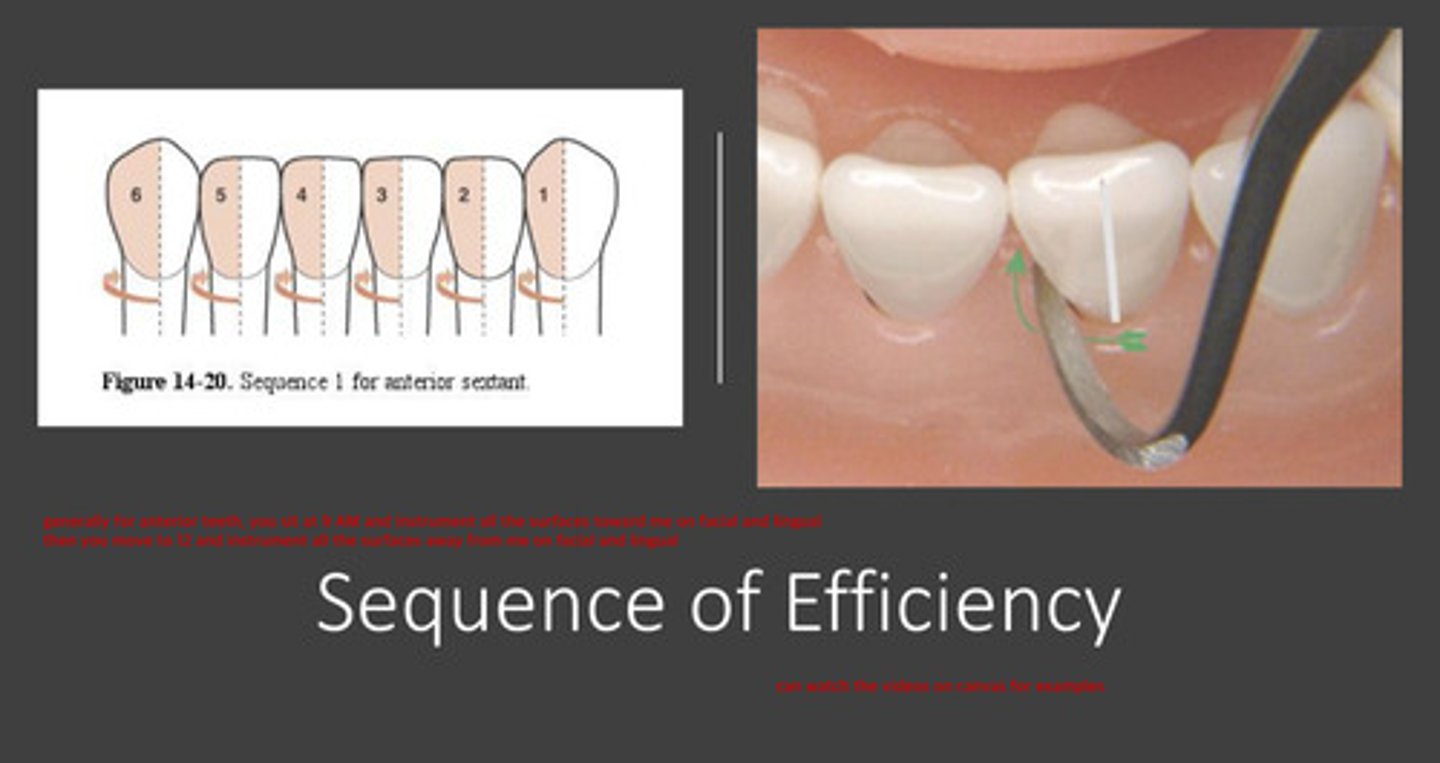
describe the sequence of efficiency for scaling
generally for anterior teeth, you should sit at 9:00 (right handed) and instrument all the surfaces towards you on the facial and lingual, and then move to 12:00 and instrument all the surfaces away from you on the facial and lingual
- essentially instrument all the appropriate and relevant surfaces when sitting at one position, and all the other surfaces when sitting at the other position
video of anterior scaling
note that you should not have finger flexing! you should pivot off the fulcrum with wrist-arm lateral movement

stroke activation: how do you activate the actual stroke itself?
press down with fulcrum finger and rotate wrist/forearm to apply lateral pressure against the tooth — keeping the wrist straight and pivoting off the fulcrum finger

sickles are excellent for calculus removal on the ? surfaces of anterior teeth, and enamel surfaces ? of the posterior teeth
on the proximal surfaces of anterior teeth & enamel surfaces apical to the contact areas of posterior teeth
sickles are not recommended for use on which surfaces
root surfaces!
universal curettes can be used in which areas to remove what size of calculus
used supra- and sub-gingivally to remove small to medium sized calculus

universal curettes have two ? per working end
two cutting edges (like the sickle scaler)
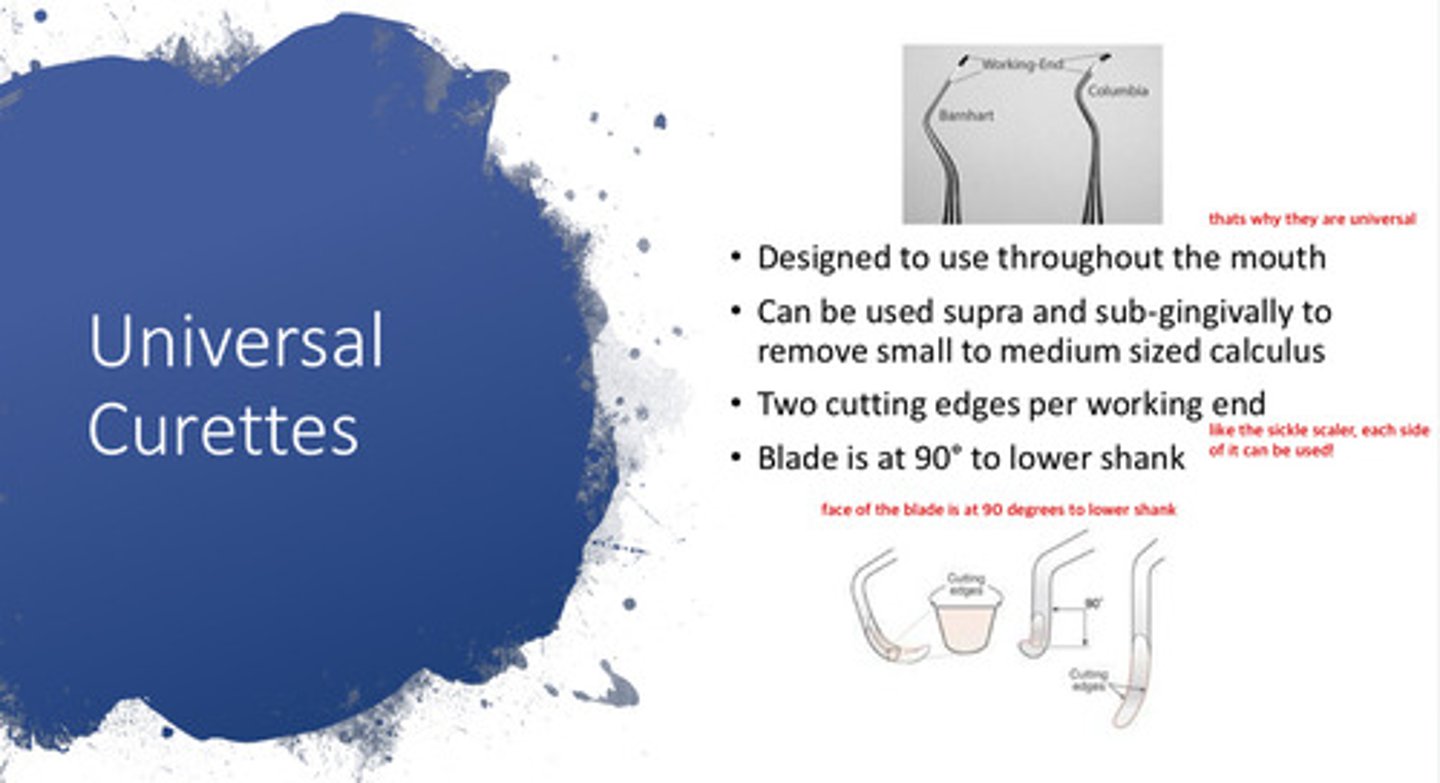
the blade of the universal curette is at what angle to the lower shank
90 degree angle

what are universal curettes?
instruments that are designed to use throughout the mouth (hence, universal)
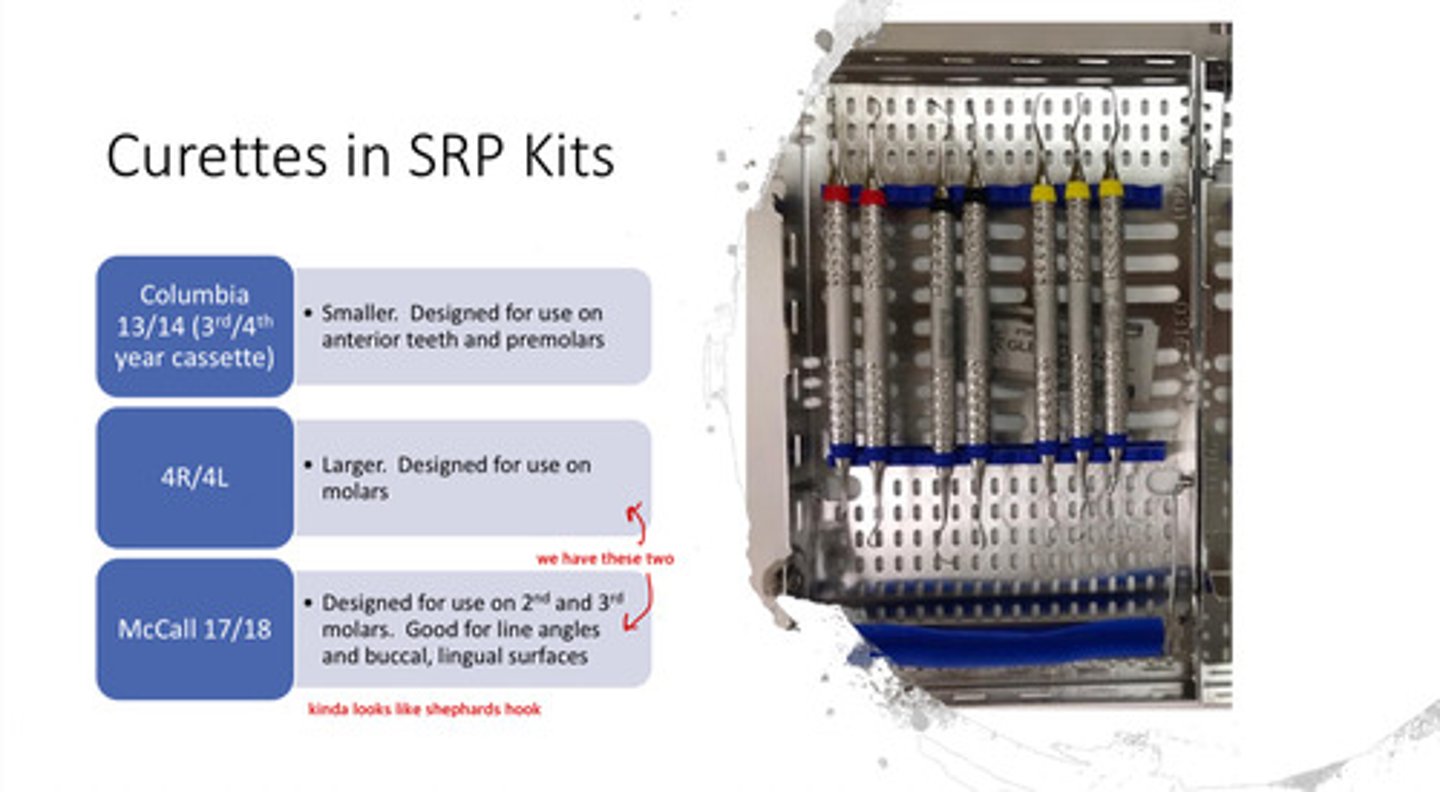
which 2 curettes do we have in the D2 cassette
4R/4L & McCall 17/18

what is the 4R/4L curette used for
these are larger, and designed for use on the molars

what is the McCall 17/18 curette used for
designed for use on 2nd and 3rd molars; good for line angles and buccal, lingual surfaces
- kind of looks like shephards hook

what other kind of curette is available in our 3rd/4th year cassette
the columbia 13/14: smaller & designed for use on anterior teeth and premolars
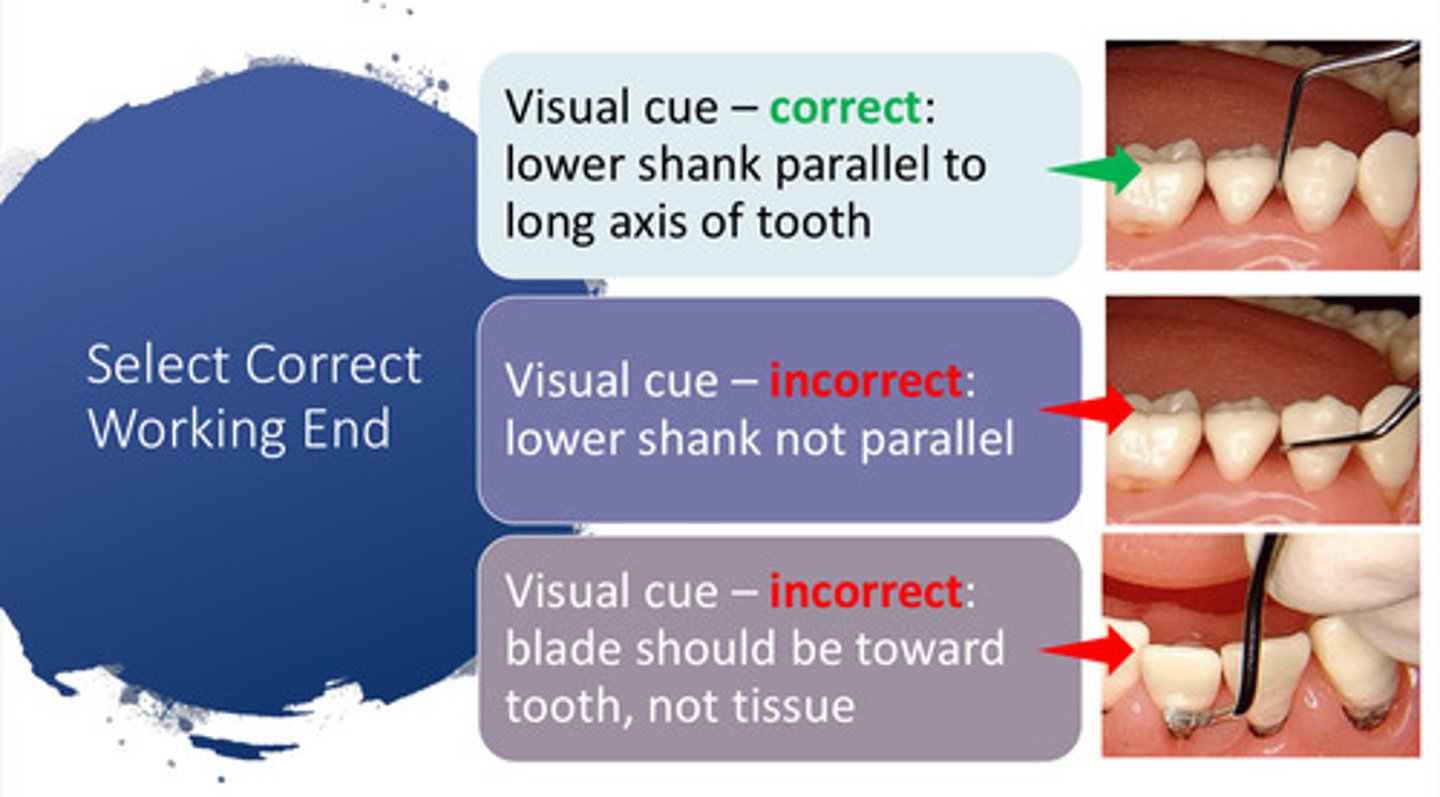
how can you select the correct working end of the curette
visual cue: the lower shank should be parallel to the long axis of the tooth & the blade should be toward the tooth, not the tissue
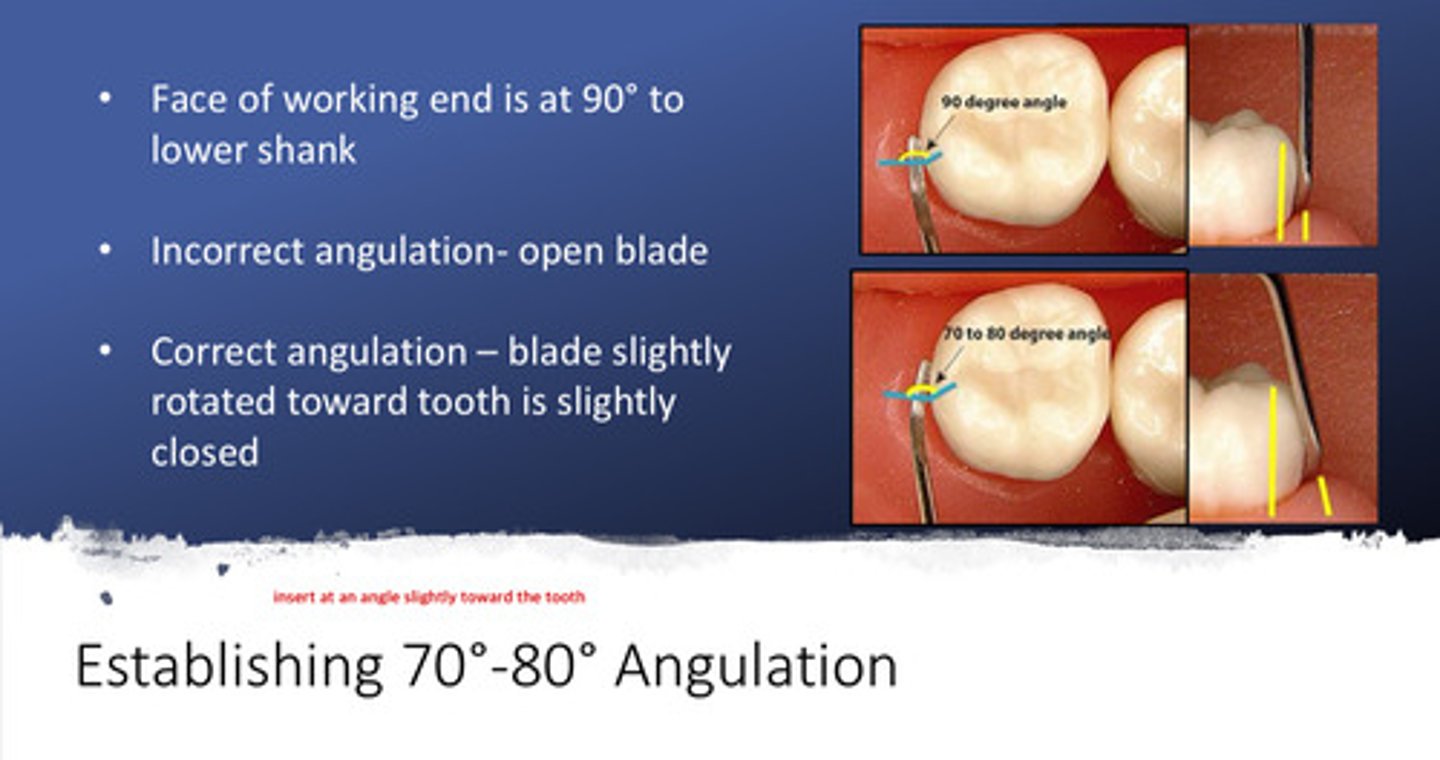
describe why you want to establish a 70-80 degree angulation with the curette (and the scaler)
1) the face of the working end is at 90 degrees to the lower shank
2) incorrect angulation will result in an open blade
3) correct angulation (70-80 degrees) will result in the blade slightly rotated toward the tooth (blade is slightly closed)
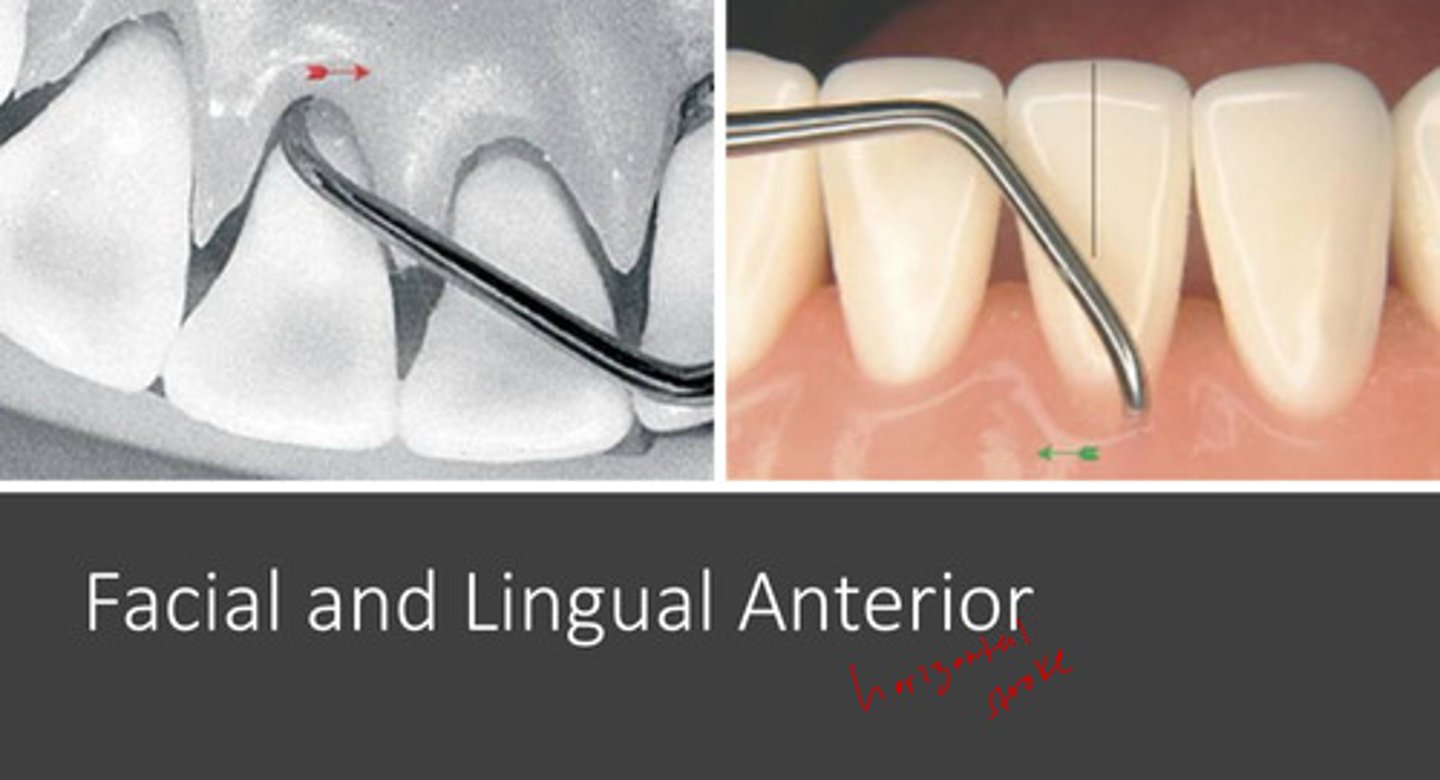
what orientation of stroke would you want on the buccal and lingual surfaces
horizontal or oblique stroke
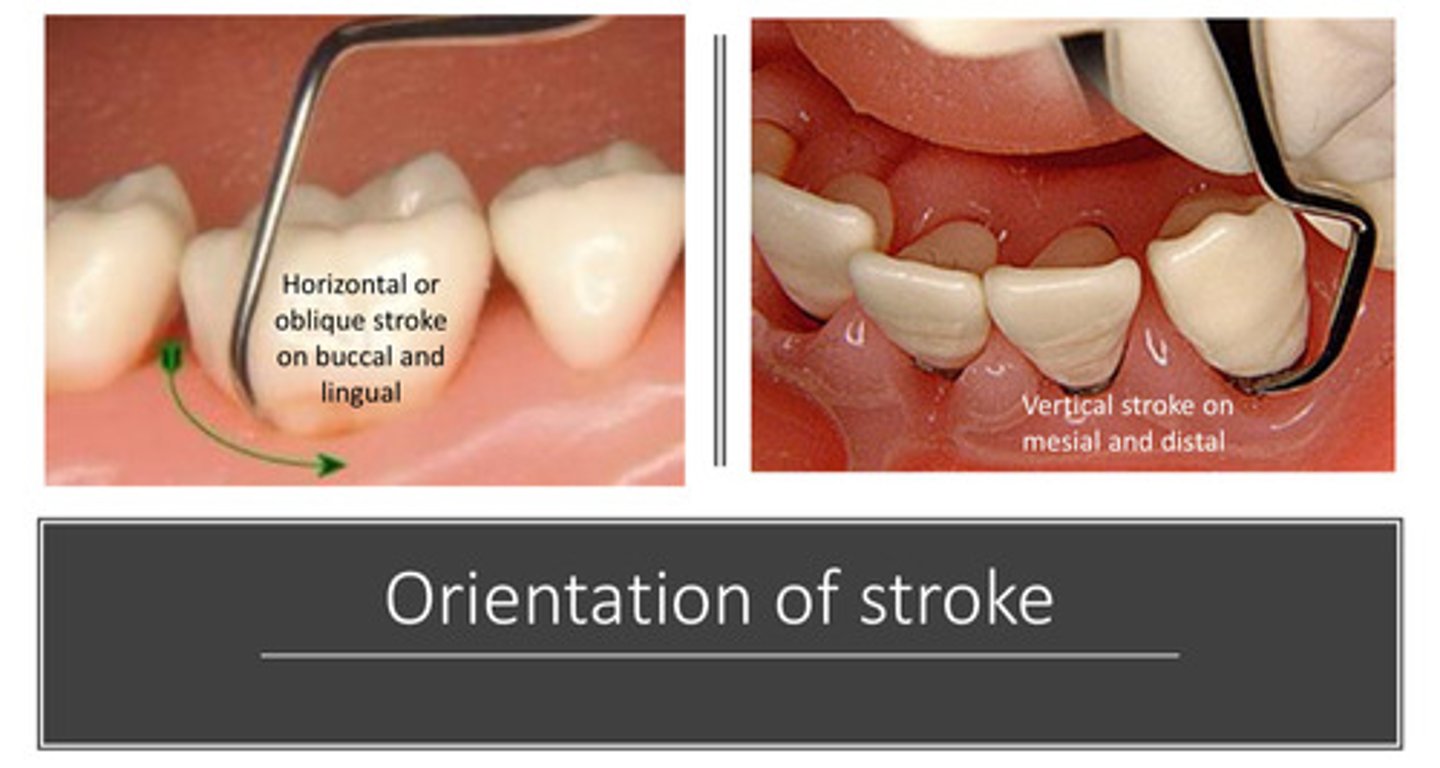
what orientation of stroke would you want on the mesial and distal surfaces
vertical stroke

describe the 7 step by step procedure to debride the mandibular molar
1) select the correct working end
2) position tip near distofacial line angle and move blade below deposit
3) tilt lower shank toward distal surface to 70-80 degrees
4) pull up to remove deposit (vertical stroke)
5) reposition working end at distofacial line angle
6) work across facial surface pulling toward you to remove deposit (oblique/horizontal stroke)
7) roll handle to adapt to mesial, get under deposit, and pull up (vertical stroke)
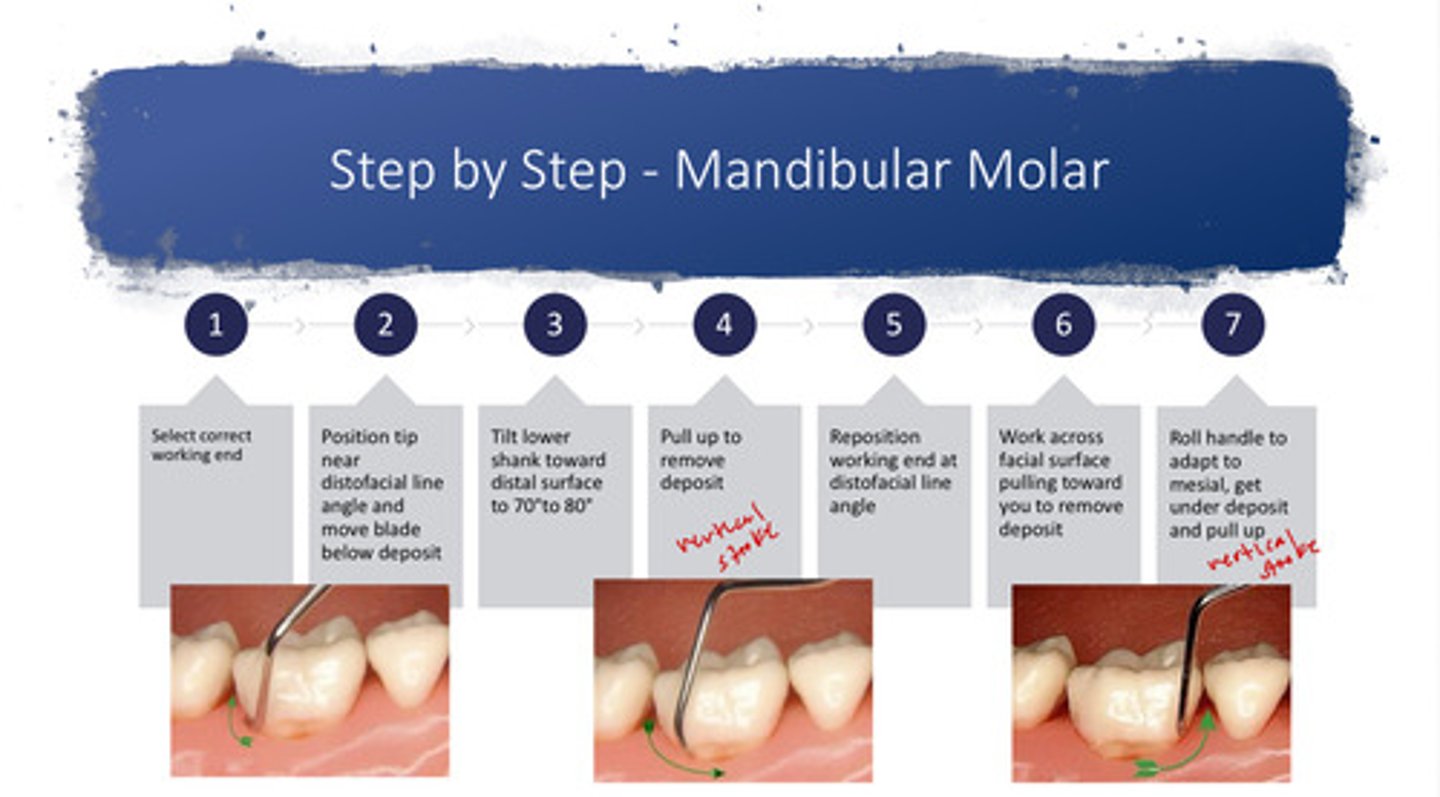
image of horizontal stroke that should be used on facial and lingual surfaces
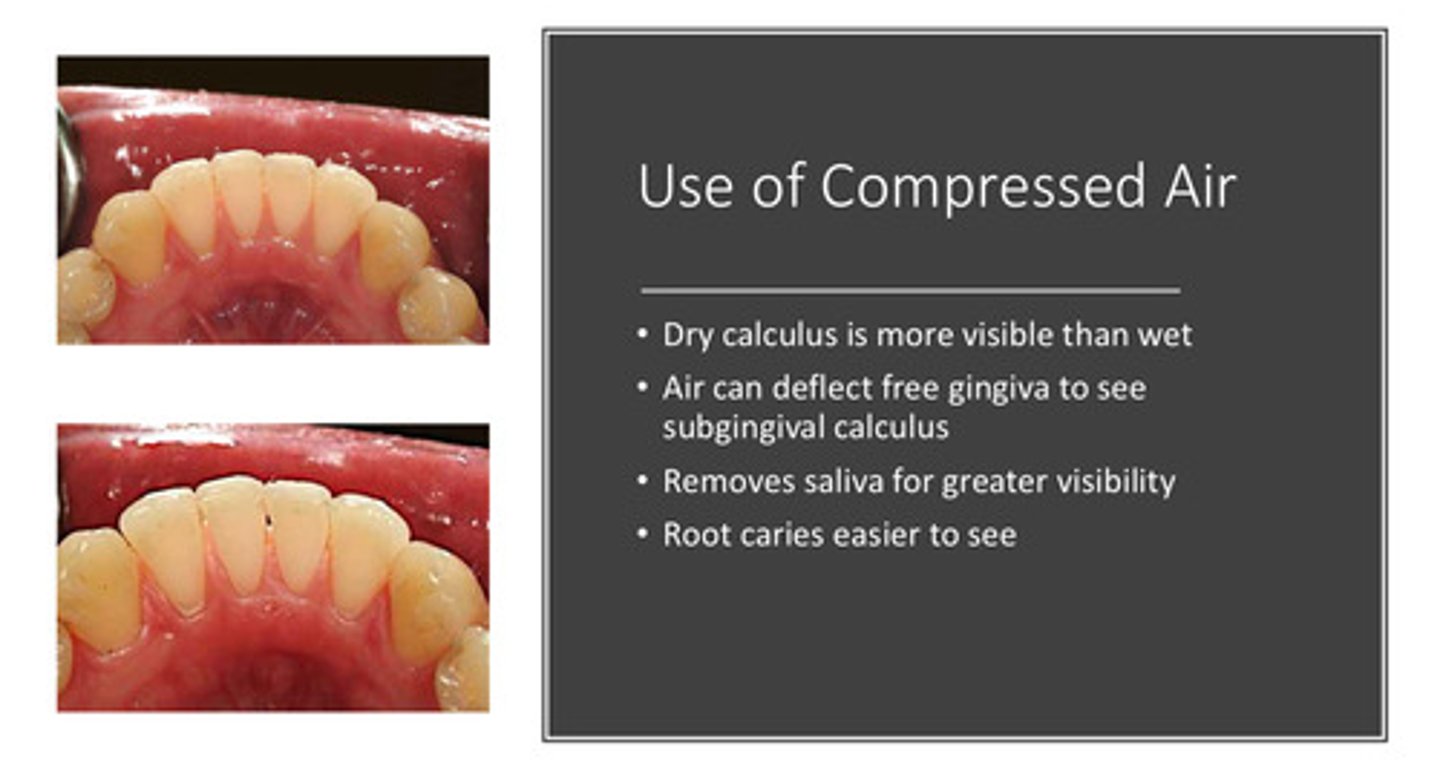
what are the 4 benefits to using compressed air when debriding
1) dry calculus is more visible than wet
2) air can deflect the free gingiva to see subgingival calculus
3) removes saliva for greater visibility
4) root caries are easier to see
in our D2 cassette, what color are the curettes?
black!
ergonomic principle #1 states what about the neutral operator posture?
neutral posture promotes a balance of muscles forces in the body —> workers should minimize time spent in awkward positions

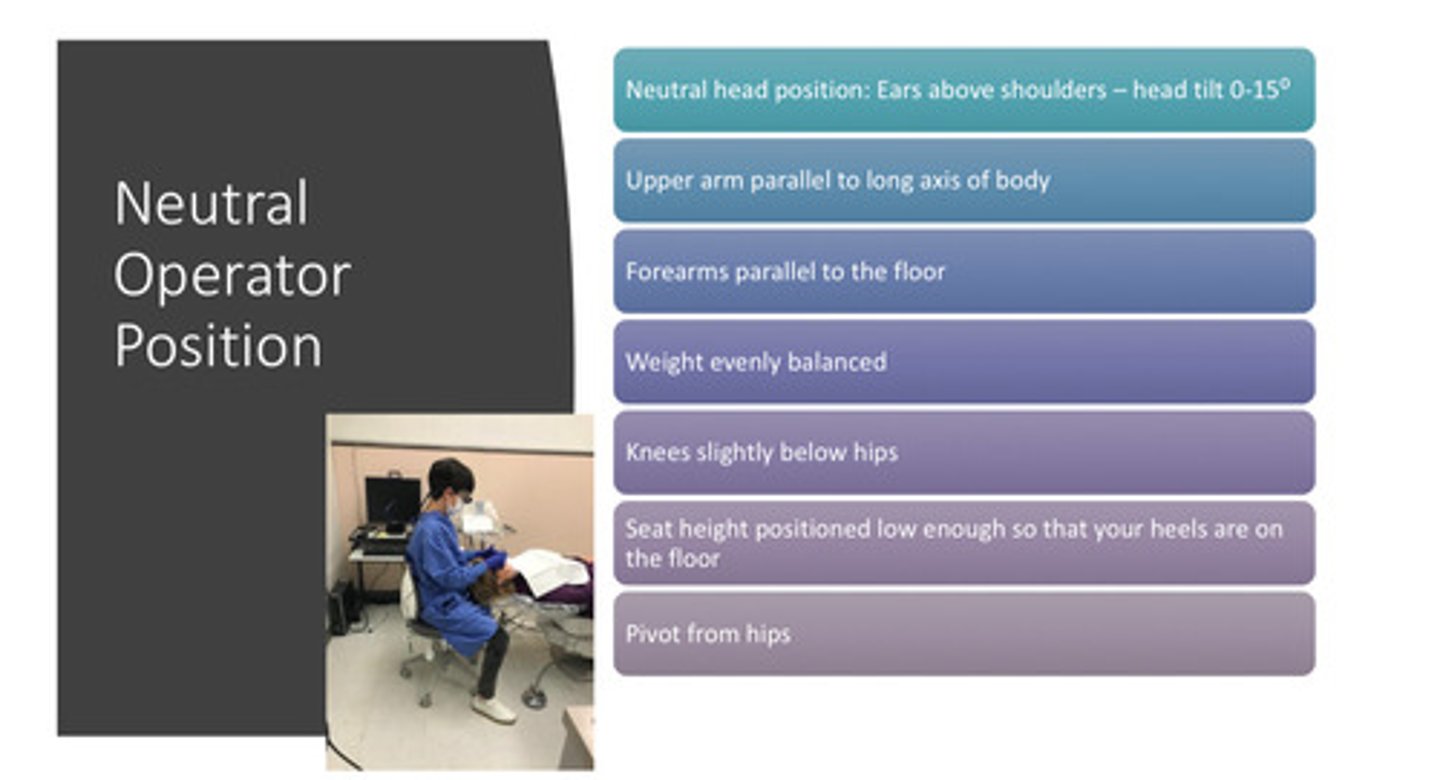
describe the neutral operator position (7)
1) neutral head position: ears above shoulders - head tilt of 0-15 degrees
2) upper arm parallel to long axis of body
3) forearms parallel to the floor
4) weight evenly balanced
5) knees slightly below hips
6) seat height positioned low enough so that your heels are on the floor
7) pivot from hips
what 7 things need to happen in the appointment prior to debridement
1) health hx update
2) evaluate radiographs
3) operator position
4) pt position
5) oral exam
6) probe
7) explore