ET 1100 Midterm S. Jenson
1/32
Earn XP
Description and Tags
Engineering Graphics Fundamentals Sean Jenson
Name | Mastery | Learn | Test | Matching | Spaced | Call with Kai |
|---|
No study sessions yet.
33 Terms
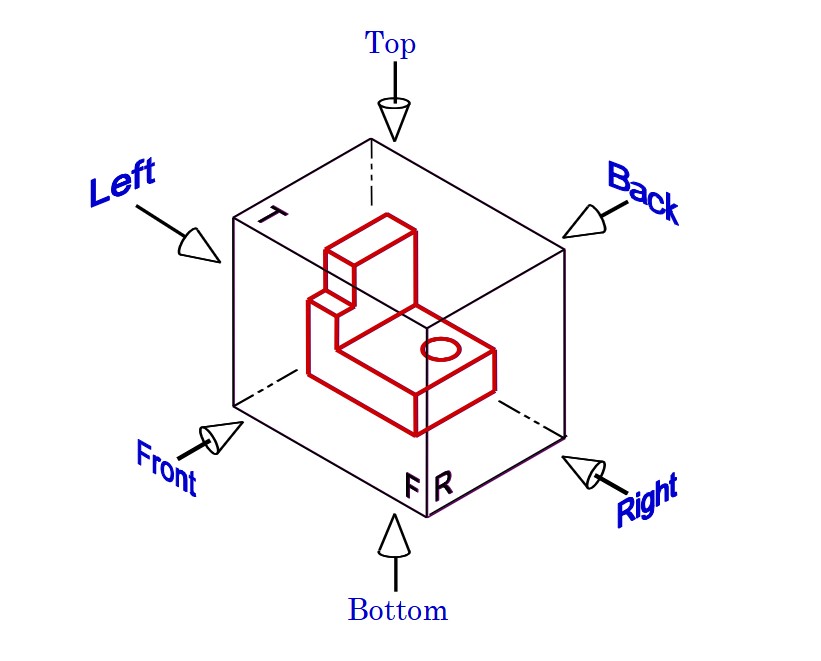
There are ___ principal orthographic views
six

Principle views hinge about the _____ view
front
True/False: Fully unfolded views must maintain their alignment
True
What do Front, Left, and Right views have in common?
height
What do Front and Top views have in common?
width
What do Top, Right, and Left views have in common?
depth
Visible/Construction Line
___________________________________
Section/Phantom Line
______ _ _ ______ _ _ ______ _ _ ______
Hidden Line
_ _ _ _ _ _ _ _ _ _ _ _ _ _ _ _ _ _ _ _ _
Centerline
_______ _ ________ _ _______ _ _______
Perpendicular projection rays project geometry onto what?
plane of projection
45° line that helps layout and check your views
miter line
True/False: An individual orthographic view shows the depths of parallel planes
false
What do oblique surfaces have the same number of in all views?
sides and corners
What does a circular hole appear as on an inclined plane?
ellipse
3rd Angle (ANSI) Projection
Top
Front R Side
1st Angle (ISO) Projection
R side Front
Top
Multiview drawings
multiple orthographic views of a single object
Multiview drawings are easier to read with the addition of what?
pictorial isometric view
Isometric axes are always how many degrees apart?
120
Starting axes in the front bottom corner of an isometric view are how many degrees?
30
The minor axis of an isometric circle aligns with the what?
center line of the hole
Degree of the tangents on isometric cylinders
30
This partial auxiliary view shows only the what?
inclined surface
Short break line
freehand wavy line
Long break line
lightning bolt style
Slices the object in half to expose the interior detail
cutting plane
Left side of scale ratio
measurement on the drawing
Right side of scale ratio
actual measurement
Civil Engineering Scales
base ten
Mechanical Engineering Scales
based on the fractional inch
Architectural Scales
based on the foot with full feet marked off to one side of the zero and 12 inches to the other
Metric Scales
millimeter marks along their edges but the numerical markings differ, range from 1:20 to 1:100