bio paper1 RPS
1/20
There's no tags or description
Looks like no tags are added yet.
Name | Mastery | Learn | Test | Matching | Spaced | Call with Kai |
|---|
No study sessions yet.
21 Terms
rp1 microscopy practical method
Use tweezers to remove a thin layer of onion epidermis
Place it flat on a slide
Add one drop of iodine to stain and show structures
Carefully lower a coverslip at an angle to prevents air bubbles
start with the lowest magnification
Place slide on the stage and clip it
Focus using the coarse focus, then fine focus
Increase magnification only after focusing
Adjust the light for a clear image
magnification calculation
Magnification = Image size ÷ Real size
safety precautions for microscopy practical
Carry microscope with two hands
Don’t touch the lens with fingers
Clean spills immediately
Keep liquids away from electrics
rp2 microbiology method
Label the agar plate into sections for each antiseptic/antibiotic and a control.
Spread the bacteria evenly over the surface of the agar using a sterile spreader or swab.
Soak paper discs in different antiseptics/antibiotics.
Place one disc onto each labelled section of the agar plate.
Add a control disc soaked in sterile water.
Tape the lid lightly and incubate the plate at 25°C for 24–48 hours.
After incubation, measure the diameter of the clear zones (zones of inhibition) around each disc
Compare results — the largest clear zone shows the most effective antiseptic/antibiotic.
microbiology aseptic techniques
Use aseptic technique:
Sterilise equipment
Open the lid only slightly
Work quickly to avoid contamination
independent dependent and control variables for microbiology RP
Independent variable (change): type or concentration of antiseptic
Dependent variable (measure): size of zone where bacteria can’t grow).
Control variables (same): same volume of bacteria, same incubation time/temperature, disc sizes
RP3 osmosis method
Cut five potato cylinders of the same diameter so their the same length (about 3 cm)
Measure and record the initial mass and length of each potato cylinder using a scale and ruler.
Prepare labelled boiling tubes with different concentrations of sugar (or salt) solution and one with distilled water.
Place one potato cylinder into each tube
Leave the cylinders overnight in the tubes so osmosis can occur.
Remove the potato pieces, blot them dry with paper towels and measure the final length and mass of each cylinder.
Record all results in a table showing initial and final mass/length.
Calculate the change in mass and length for each cylinder (final minus initial).
Plot a graph of change in mass on the y-axis against solution concentration on the x-axis
independent dependent and control variables for osmosis RP
Independent Variable
Concentration of sugar/salt solution
Dependent Variable
Change in mass or length of potato
Control Variables
Size and type of potato pieces
Volume of solution
Time left in solution
Temperature
what is an Isotonic solution
where there is no net movement of water
Percentage change = 0
It shows the solution has the same water potential (concentration of water is the same inside and outside the cells) as potato cells
test for starch
Put the food sample in a test tube or on a spotting tile.
Add a few drops of iodine solution.
Look for a colour change.
Positive Result:
➡ Turns blue-black if starch is present
Negative Result:
➡ Stays brown/orange
Test for Reducing Sugars
Add Benedict’s solution to the food sample in a test tube.
Heat in a hot water bath for a few minutes.
Positive Result:
➡ Solution changes from blue to green/yellow/orange/brick-red, depending on amount of sugar present
Negative Result:
➡ Remains blue (no reducing sugar)
Test for Proteins
Add a few drops of Biuret solution to the food sample.
Mix gently and wait a minute.
Positive Result:
➡ Solution turns purple/violet
Negative Result:
➡ Stays blue (no protein)
Test for Lipids (Fats)
Add a few cm³ of ethanol to the food sample.
Then pour this into equal volume of water.
Positive Result:
➡ A milky white emulsion forms (lipids present)
Negative Result:
➡ No cloudy layer (no lipids
food test safety precautions
Wear safety goggles.
Keep ethanol away from flames (flammable).
Be careful with biuret reagents (can irritate).
Don’t taste or eat any samples.
rp5 enzymes method
Label wells on a spotting tile with time intervals (0 s, 30 s, 60 s,…). Add a drop of iodine in each well.
Measure 2 cm³ of each buffer solution into separate test tubes (different pH values)
Place the starch, amylase, and the test tubes of buffer into a water bath at a 25 °C
Wait a few minutes to equilibrate the temperature.
Use a syringe to add 2 cm³ amylase and 2 cm³ starch and to a test tube of buffer, start the stopwatch immediately.
Every 30 seconds, use a glass rod to transfer a drop of the reaction mixture to the well on the tile.
Continue until the iodine stays brown (means no starch left).
Record the time taken for starch to be completely broken down.
Calculate the rate of reaction
Repeat Steps 2–10 with buffer solutions at different pH values.
Plot a graph of rate of reaction vs pH to identify the optimum pH.
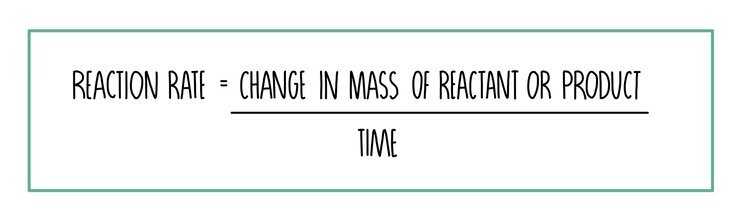
rate of reaction formula
independent dependent and control variables for enzyme rp
Independent variable - pH
Dependent variable - Time taken for starch to be broken down
Control variables - Temperature, volume of amylase and volume of starch
photosynthesis rp6 method
Place a piece of pondweed in a beaker of water.
Add sodium hydrogencarbonate to ensure carbon dioxide is not limiting.
Position a lamp at a 10cm from beaker with a metre stick beside.
Allow 5 minutes for the plant to acclimatise.
Measure the rate of photosynthesis by: Counting bubbles per minute OR measuring volume of oxygen produced using a gas syringe for higher accuracy
Repeat at different distances of the lamp to change light intensity.
Record results in a table.
Plot a graph of light intensity against rate of photosynthesis.
independent dependent and control variables for photosynthesis rp
Independent variable - Light intensity/distance from beaker
Dependent variable - Rate of photosynthesis
(measured by oxygen volume per time or bubbles per minute)
Control variables -
Temperature
Carbon dioxide concentration
Length/type of pondweed
Same apparatus and volumes
how to improve reliability rp6
repeat and calc mean
measure oxygen with gas syringe
keep conditions constant
in osmosis practical - explain why the result for the potato pieces at 1mol/dm3 was different from the result at 0.6mol/dm3
pieces at 1.0mol/dm3 lost more mass bc more water left the potato
bc of a steeper conc gradient