RMT assessment tests
1/31
Earn XP
Description and Tags
Including Dermatome, Myotome, DTR and 25 Tests
Name | Mastery | Learn | Test | Matching | Spaced |
|---|
No study sessions yet.
32 Terms
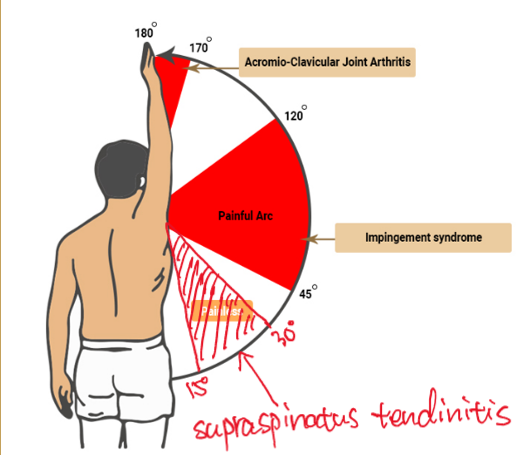
Painful arc test
A clinical test to identify shoulder impingement syndrome, where the patient is asked to abduct their arm while experiencing pain between 60 and 120 degrees of motion. If the patient has limited ROM, the therapist can assist in reaching full ROM.
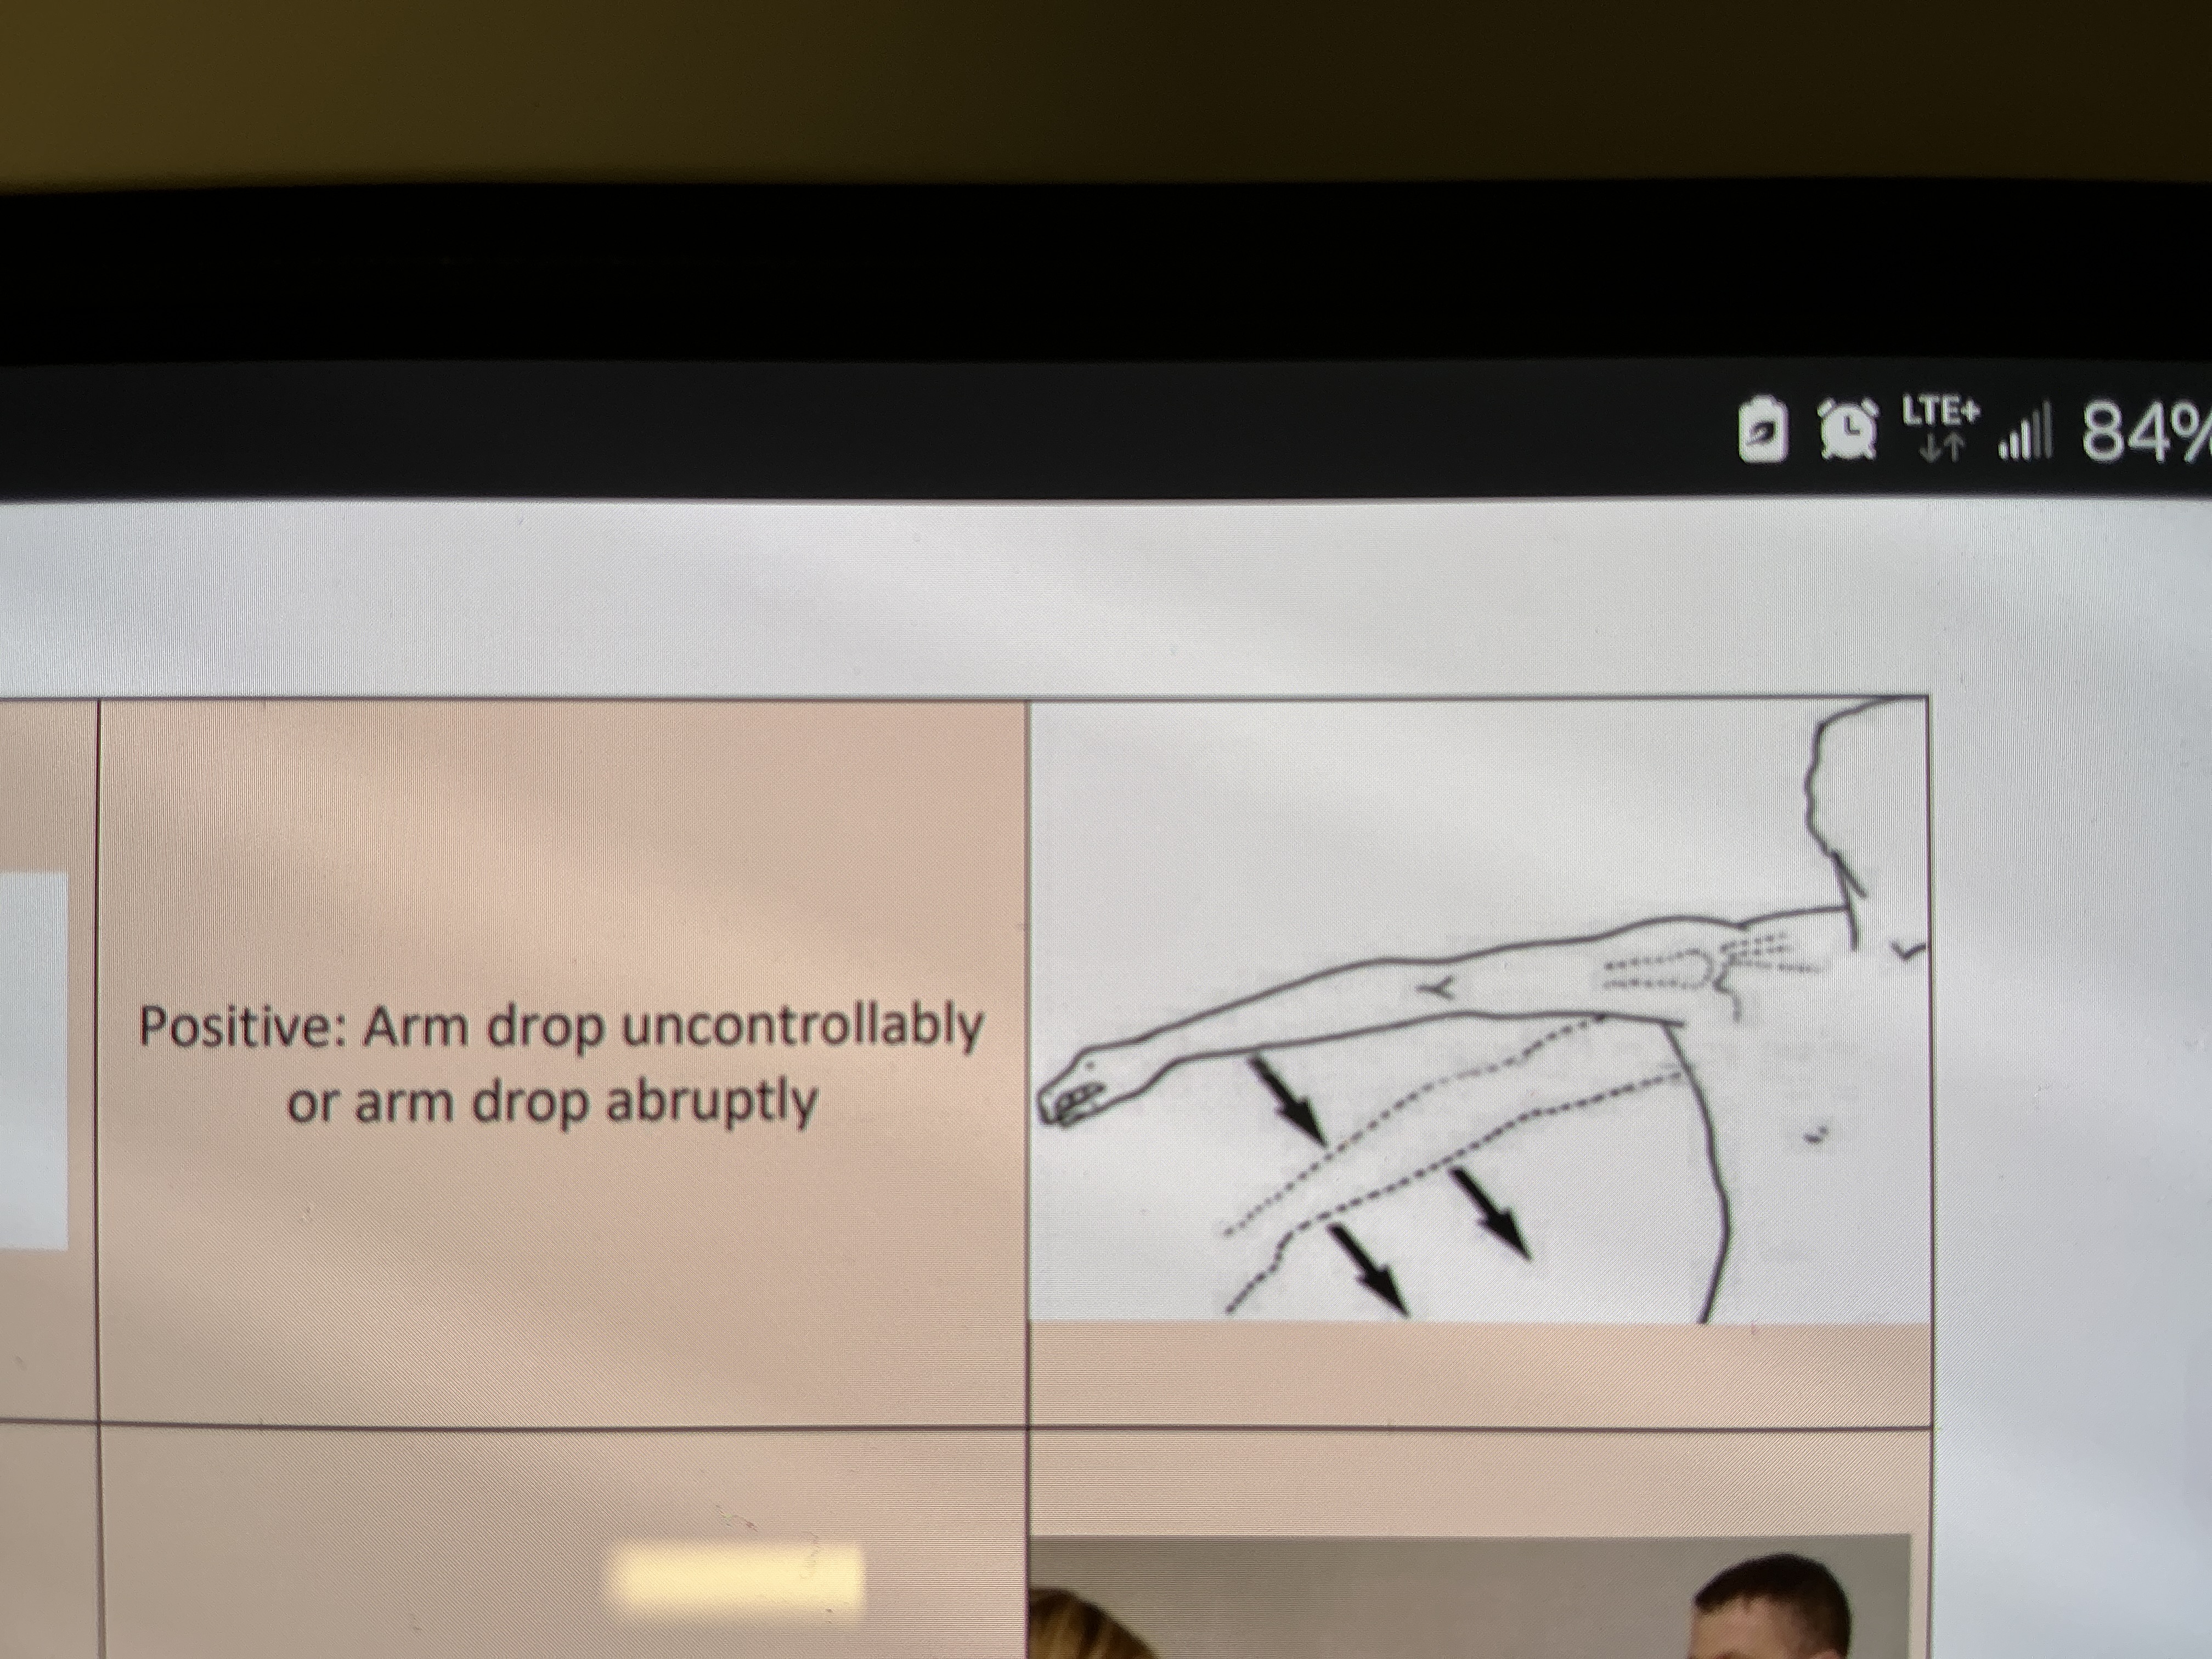
Drop arm test (Codman’s Test)
Indication: To assess for the rotator cuff tear, specifically the supraspinatus tearing or weakness.
Steps:
examiner passively abducts shoulder to 90o
Instruct the client to hold the arm in this position
Instruct the client to slowly lowers the limb from the abducted position back down to the side.
Result: If lowering the limb creates pain or the limb drops uncontrollably to the side such as lowers with jerky movements, or arm drops abruptly, it indicates a positive test result.
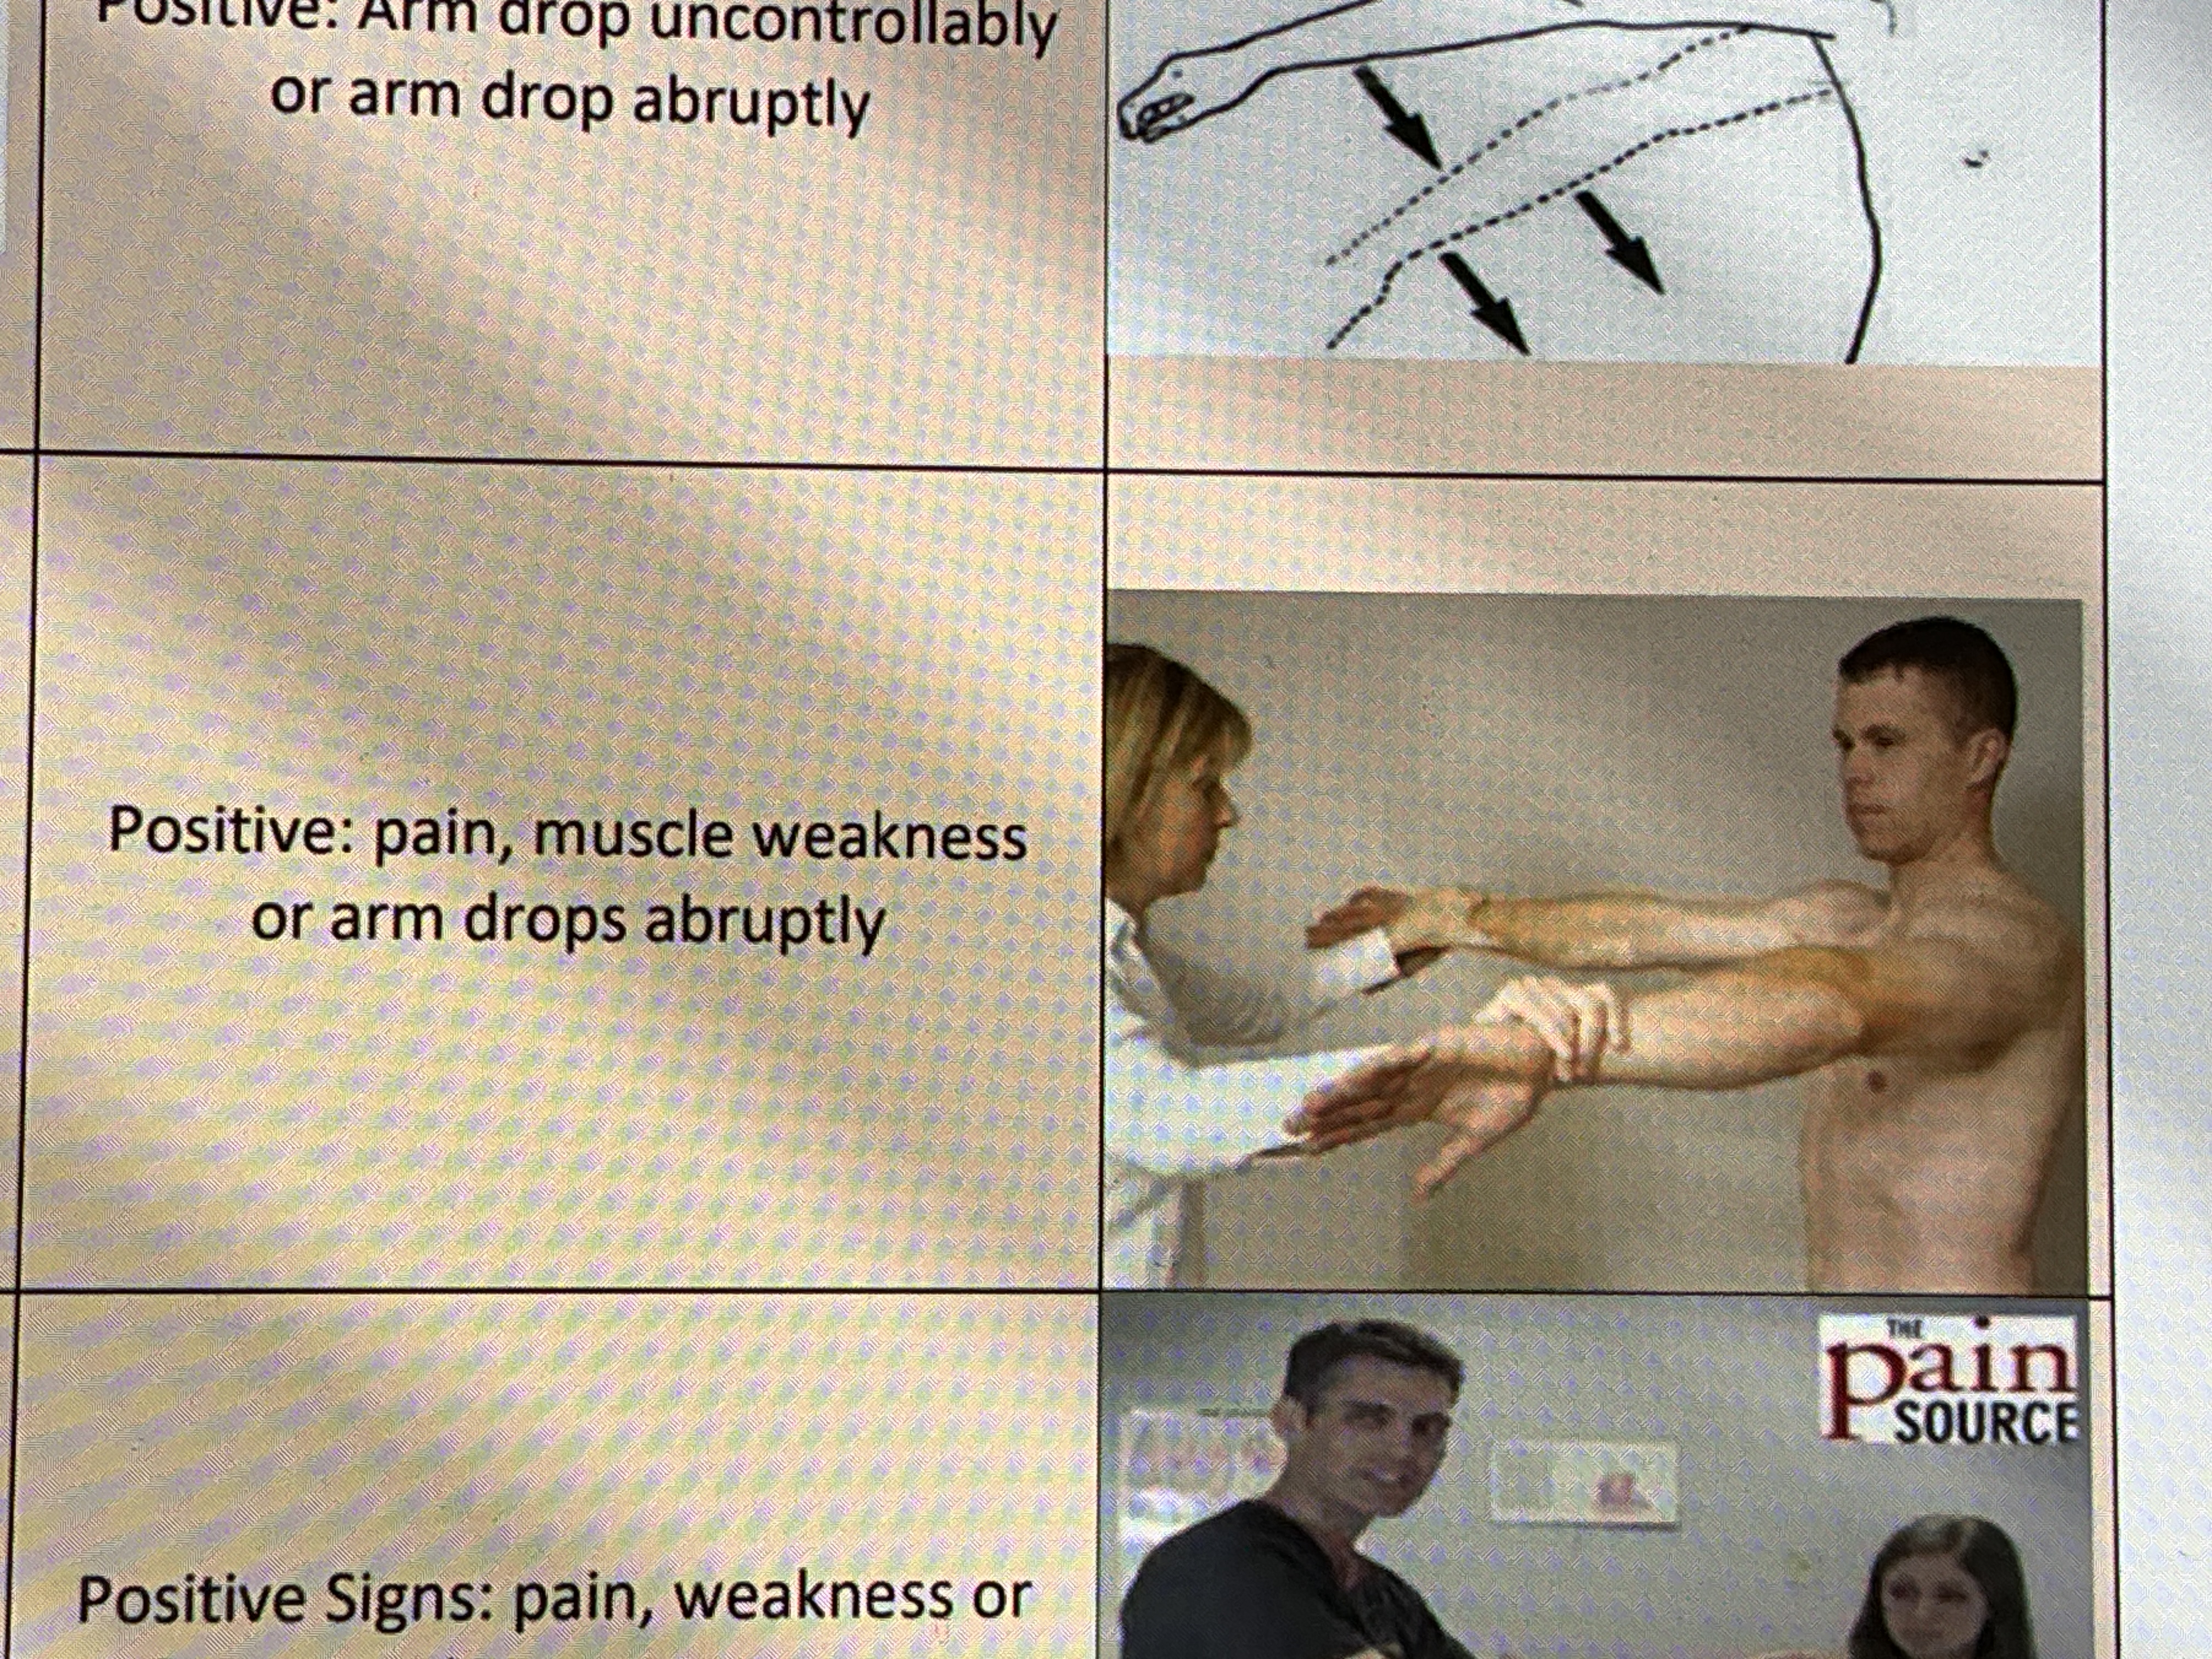
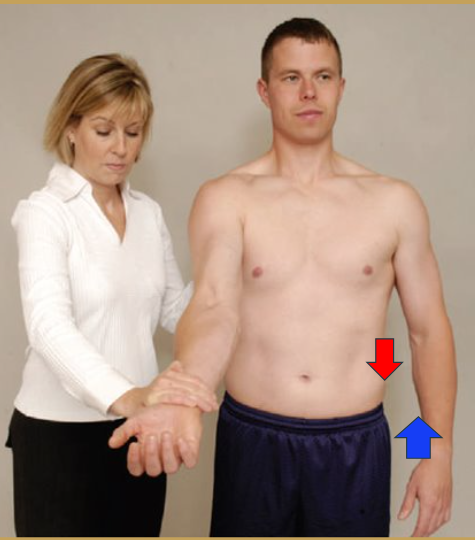
Empty can test (Jobe’s Test)
Indication: To assess for supraspinatus tendinitis, weakness or rotator cuff tear
Steps:
The client sits with the shoulder in 90 degrees of abduction and then, adducts the humerus horizontally to 30 degrees(overlap in the scapular plane).
The client is instructed to internally rotate the humerus so that the thumb points toward the floor as if the client were holding a can full of liquid tand hen emptying it.
The therapist applies pressure to the arm in the direction of adduction while the client resists against adduction.
Positive: pain, muscle weakness or arm drops abruptly
Neer Impingement test
Indication: To assess for subacromial impingement syndrome (acromion & head of humerus).(GBK is wrong with overuse injury to the supraspinatus tendon).
Steps:
The client is in a seated position or standing.
The therapist stands behind or beside the client
The therapist passively internally rotates the affected arm and forward flexes the shoulder until the end
Pain at the shoulder joint indicates a positive test.

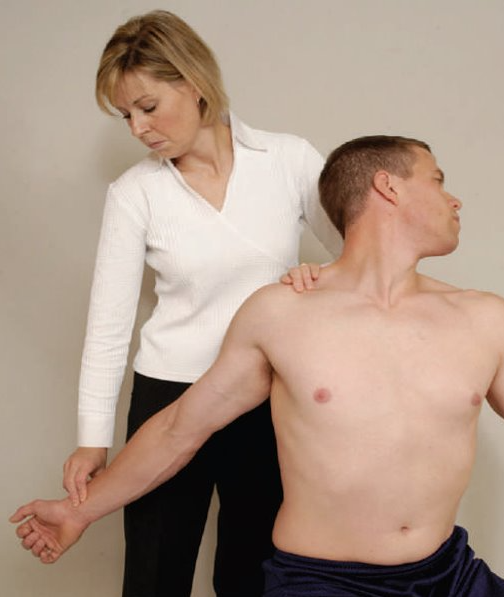
Speed's test (Biceps Straight Arm Test)
Purpose: Assess the presence of biceps tendinitis.
Steps:
The client is in a seated position. Flex the shoulder approximately 60 degrees.
Instruct the client to completely extend the elbow while supinating the arm.
The therapist isometrically resists shoulder flexion with resistance applied to the distal forearm of the client.
Result: Pain localized to the area of the bicipital groove indicates a positive test, usually inflammation of the tendon.
Yergason's test
Indication: bicipital tendonitis in the bicipital groove or transverse humeral ligament /THL rupture.
Steps:
Client seated or standing, with the affected elbow at 90o flexion and the forearm pronated.
Stabilize the client’s elbow against his/her thorax by holding at the wrist area.
Rmt hand applying resistance while the client actively supinates the forearm extends the elbow and externally rotates the humerus, all at the same time.
Meanwhile, the thumb of the other hand locates the intertubercular groove
Results:
If there is pain in the bicipital groove, the test is positive for the long head of biceps brachii tendonitis.
If the tendon is felt popping out from the bicipital groove, the test is positive for the transverse humeral ligament rupture.
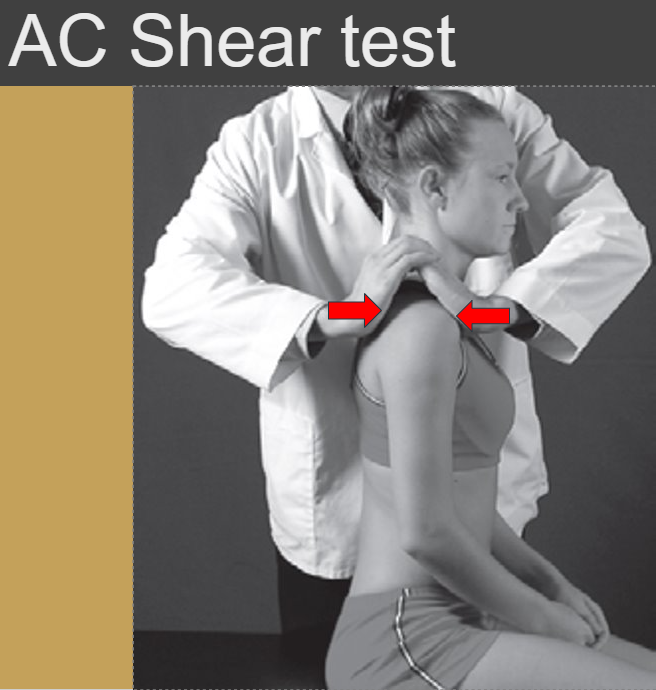
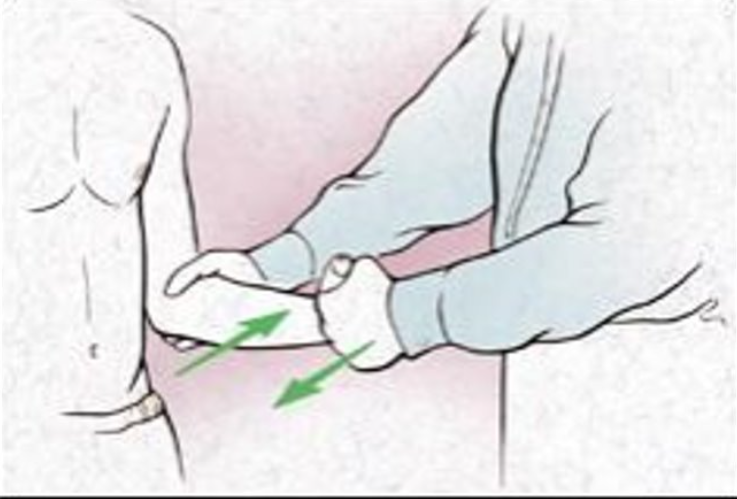
Acromioclavic ulnar shear test
Purpose: To assess the AC joint dysfunction
Steps:
1.The client is seated or stands.
2.The therapist’s hands are cupped, the fingers interlaced with the base of one hand over the spine of the scapula and the other anteriorly over the clavicle.
3.The therapist squeezes the heels of the hands together.
Positive: client reports pain or abnormal movement is detected in the AC joint.
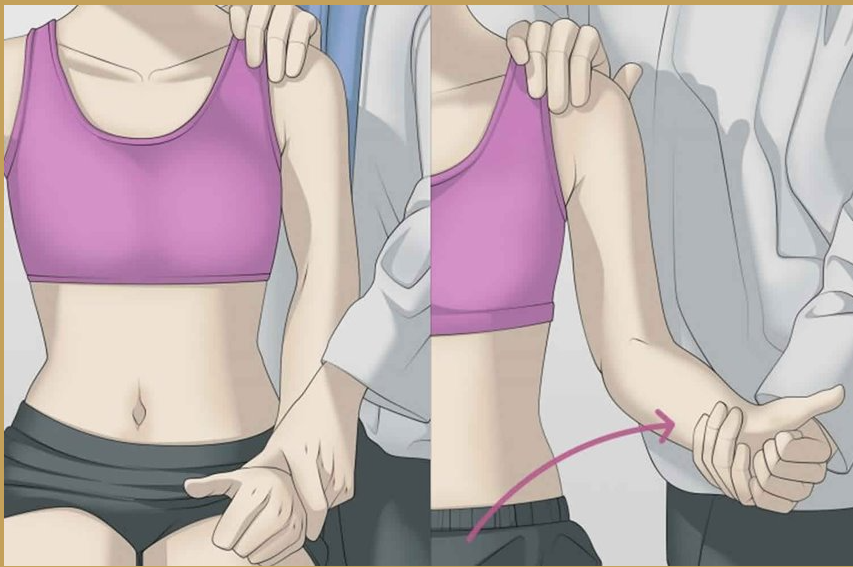
Infraspinatus strength test
Purpose: to assess the infraspinatus for weakness, tendinitis or strain
Steps:
1. Client is seated or prone
2. Adduct the client's humerus close to the thorax and flex the elbow at 90 degree
3. The therapist applies pressure to the client's wrist in the direction of internal rotation while the client tries to externally rotate the arm/humerus
Positive sign: pain or weakness
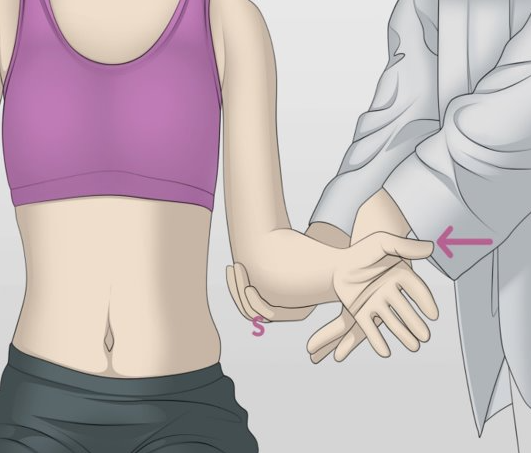
Subscapularis Strength Test
To assess the subscapularis muscle for tendinitis, strain or weakness
Steps:
Place the client in a seated or supine position, with the humerus by the side of the body and the elbow flexed to 90 degrees.
Apply pressure to the client's wrist in the direction of external rotation, while the client attempts to internally rotate the wrist.
Positive Sign: Pain along subscapularis or weakness
does not distinguish between subscapularis, pectoralis major, latissimus dorsi and teres major strength
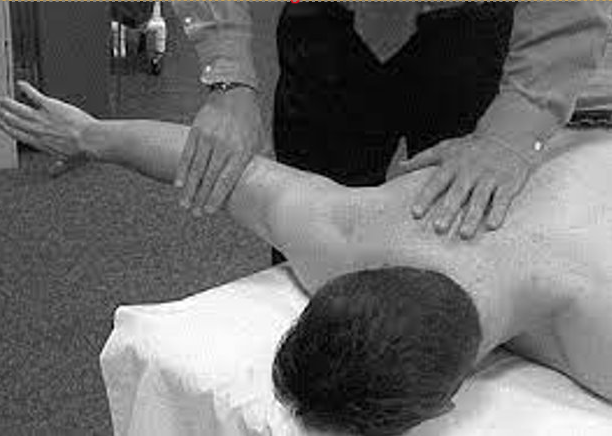
Rhomboids Strength Test
Purpose: To assess the strength of the rhomboid muscles
Steps:
Place the client in a prone position, with the affected humerus abducted to 90 degrees and internally rotated.
Ask the client to lift the arm into extension. If the client can hold this position against gravity this indicates three on the strength scale.
Stabilize the unaffected shoulder with one hand.
With the other hand, apply pressure to the distal end of the humerus in an anterior direction.
Positive Sign: if the client is unable to hold the arm in the original position.
Middle Trapezius Strength Test
To assess the strength of the trapezius muscle:
Steps:
Place the client in a prone position, with the affected humerus abducted to 90 degrees and externally rotated.
Ask the client to lift the arm into extension. If the client can hold this position against gravity this indicates three on the strength scale.
Stabilize the unaffected shoulder with one hand.
With the other hand, apply pressure to the distal end of the affected humerus in an anterior direction.
Positive Sign: the client is unable to hold the arm in the original position
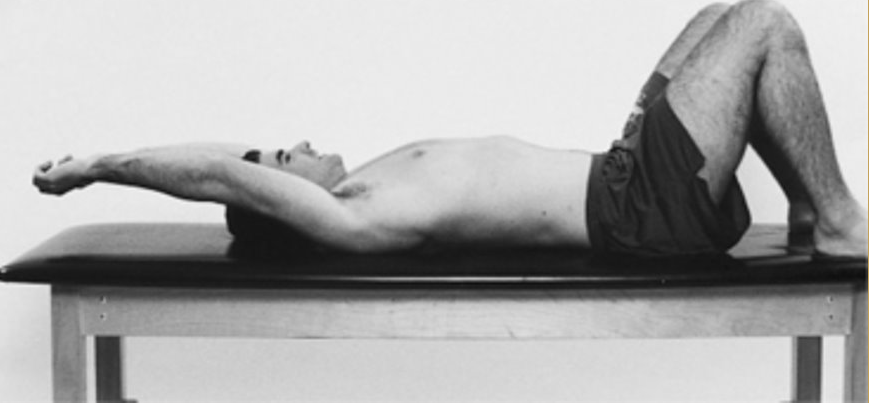
Shoulder Adductors Length Test
Purpose: To assess the length of latissimus dorsi and teres major muscles:
Steps: (Active Free)
Place the client in a supine position.
Instruct the client to flex the hips and knees with the plantar surface of both feet flat on the table. The pelvis is in posterior pelvic tilt so the low back is held flat on the table.
Instruct the client to raise both arms above the head, through full flexion at the glenohumeral joints, allowing the posterior surface of both arms to contact the table.
Positive Sign: If the GH joints cannot be fully flexed, the arms will not rest on the table above the client's head.

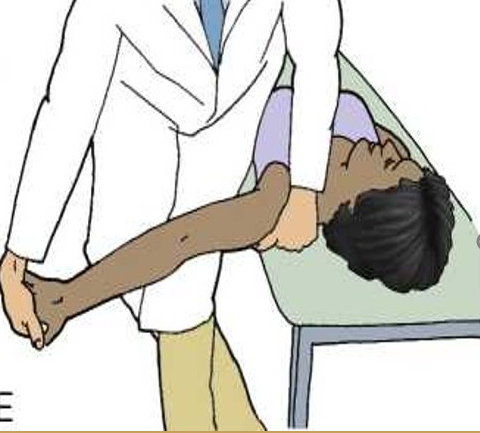
ULTT 1
Purpose: To assess C5, C6, C7 and the median nerve as the source of the shoulder arm pain
Steps: Client keep supine position, (RMT standing face to the cranial end)
Depress the shoulder and abduct the humerus to approximately 110 degrees. Extend the arm to 10 degrees below the coronal plane and to 60 degrees of external rotation. A stretching sensation is normally experienced across the anterior shoulder.
Slowly extend the client's wrist, then the fingers. Tingling is normally experienced in the lateral three digits.
Fully supinate the forearm, then slowly extend the elbow. A stretching sensation is normally experienced in the anterior elbow.
Result: Reproducing the client's original shoulder or arm pain is a positive sign for C5 C6 C7 nerve roots or the median nerve as the source of the pain.

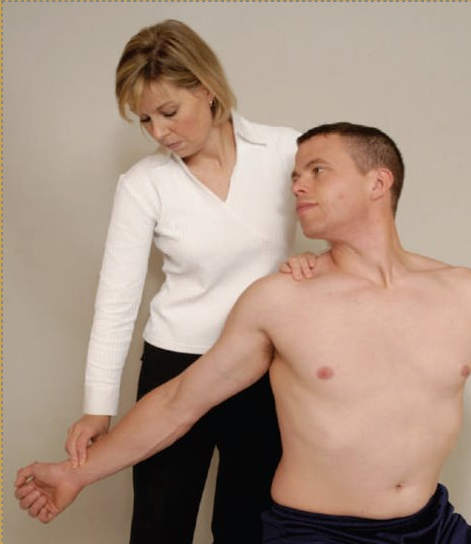
ULTT 2
Purpose: To assess the median nerve, axillary nerve, musculocutaneous nerve as the source of shoulder arm pain
Test Position: The client is in a supine position, (RMT standing face to the caudal end)
Performing the Test:
Depress the client's shoulder and abduct the humerus to 10 degrees.
Slowly Extend the arm to 10 degrees below the coronal plane and with external rotation along.
Slowly extend the wrist and fingers.
Fully supinate the forearm and extend the elbow. Feel tightness in the shoulder, elbow and tingling in the finger is a normal response.
Result:
- A positive test is reproduction of the client’s original symptoms.

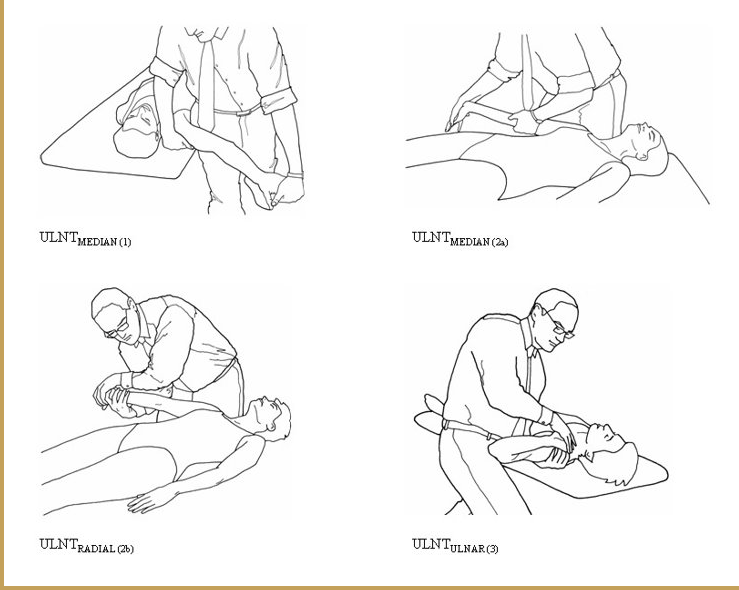
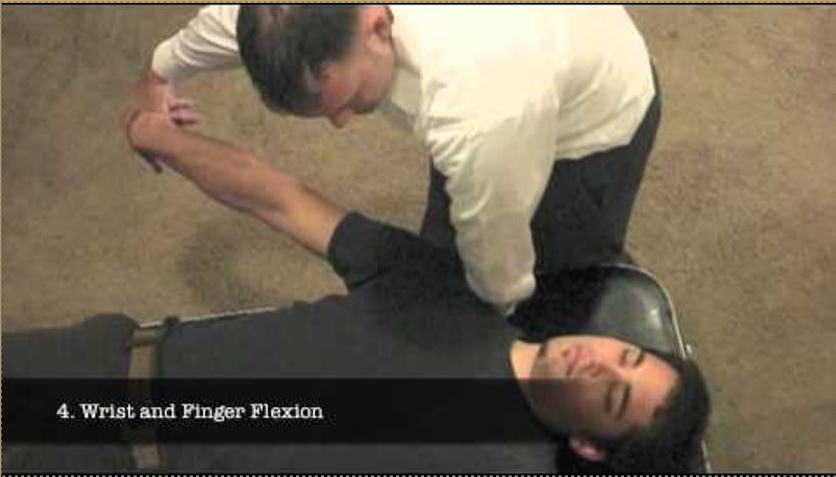
ULTT 3
Purpose: To assess the radial nerve as the source of shoulder arm pain
Test Position: The client is in a supine position, RMT standing face to the caudal end
Performing the Test:
Depress the client's shoulder and abduct the humerus to 10 degrees.
Slowly Extend the arm to below the coronal plane and with internal rotation along.
Slowly flex the wrist and fingers and deviate them ulnarly.
Fully pronate the forearm and extend the elbow. As before, Feel tightness and tingling in the finger is a normal response
Result:
- A positive test is reproduction of the client’s original symptoms.
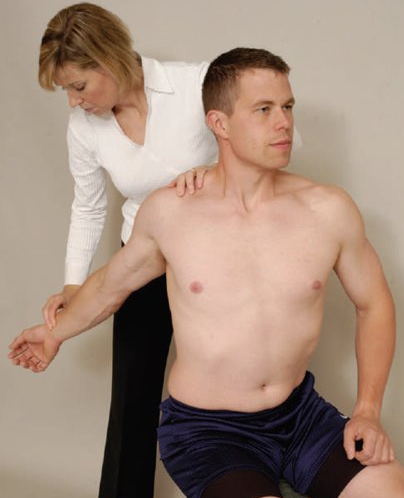
Adson's Test
Purpose: To assess for thoracic outlet syndrome caused by the anterior scalene muscle tightness
Steps:
The client is in a sitting position. Examiner stands behind the client.
Extend and slightly externally rotate the client's affected arm.
Monitor the radial pulse of this arm.
Instruct the client to rotate the head towards the affected side, to slightly elevate the chin and to take a deep breath, holding it for at least 15 to 20 seconds.
This action elevates the first rib, compressing the neurovascular bundle against the tight anterior scalene muscle
Result: A positive test is indicated by a diminished radial pulse or if the client feels tingling or numbness to the arm.
Travell's Test (Halstead’s Maneuver or Reversed Adson’s Test)
Purpose: To assess for the middle scalene muscle as the possible cause of a client's thoracic outlet syndrome , AKA Reverse Adson’s test.
Steps:
Stand behind the client.The client is in a sitting or standing position
Extend and slightly externally rotate the client's affected arm.
Monitor the radial pulse of this arm.
Instruct the client to rotate the head away from the affected side and to
take a deep breath, holding it for at least 15 to 20 seconds. The first rib is elevated, compressing the neurovascular bundle against the tight middle scalene muscle.
Result: Diminishment of the pulse or f the client feels tingling or numbness to the arm indicates a positive test for the middle scalene muscle involvement
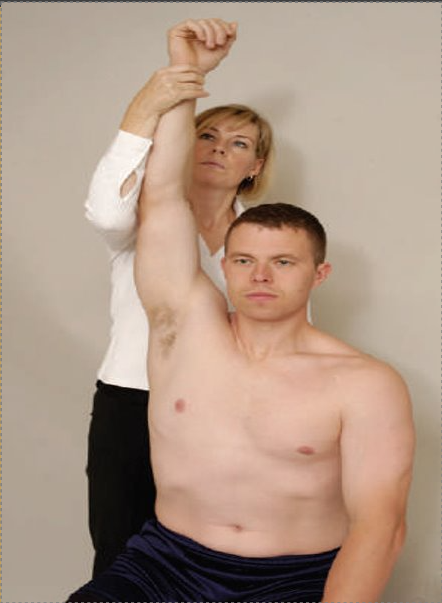
Wright's Hyperabduction Test
Purpose: To assess pectoralis minor muscle as the possible cause of TOS.
Steps:
Stand behind the client. The client in a seated position.
Passively fully abduct the client's affected arm to 180 degrees and then slightly extend the arm.
This places a stretch and torsion on the brachial plexus and axillary artery as they pass inferior to the pectoralis minor muscle.
Monitor the radial pulse as the arm is held in hyper-abduction.
Result: A diminishment of the radial pulse or if the client feels tingling or numbness to the arm is positive.
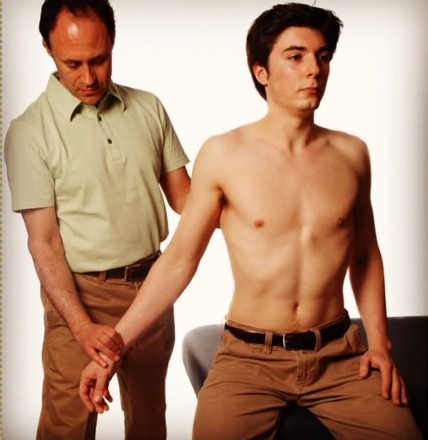
Costoclavicular Syndrome Test
Purpose: To assess for T.O.S caused by compression of the neurovascular bundle between the clavicle and the first rib (Passive Test)
Steps:
Place the client in a seated position.
Stand behind the client and monitor the affected arm's radial pulse.
The examiner depresses and retracts the shoulder of the affected arm.
Result: A positive test is indicated by a diminished pulse or the client feels tingling or numbness to the arm.
Eden's Test
Purpose: To further assess compression of the neurovascular bundle between the clavicle and the first rib (Active test)
Steps:
Place the client in a seated position with arms at the side.
Stand behind the client and monitor the affected arm's radial pulse.
Instruct the client to bring the shoulders as far into retraction and depression as possible.
Result: A positive test is indicated by a diminished pulse or the client feels tingling or numbness to the arm.
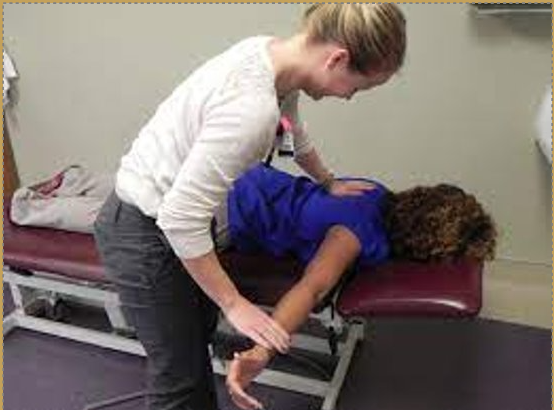
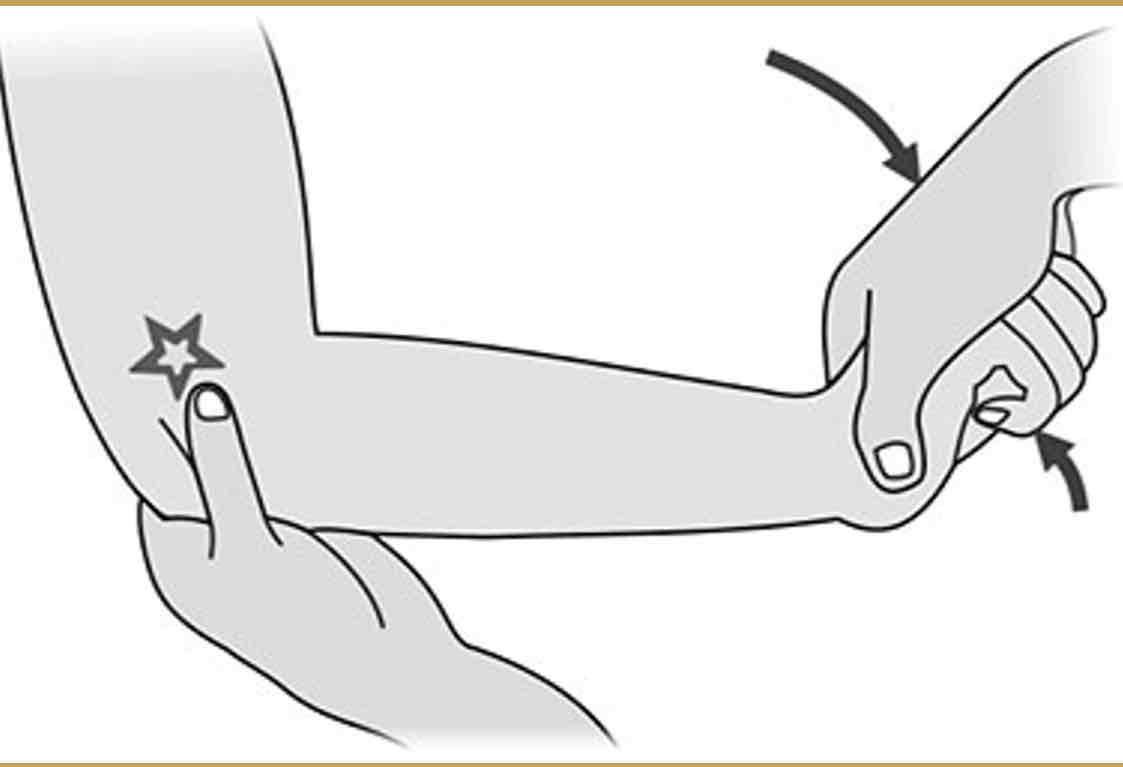
Cozen’s Test
Purpose: To assess for tendinosis of the common extensor tendon. Test for Tennis elbow.
Steps:
1.The client is seated, with the elbow in 90 flex, the wrist in pronation and slight extension.
2.The therapist stabilizes the client’s elbow with one hand while placing the thumb on the lateral epicondyle.
3.The therapist asks the client to extend the wrist against the therapist resistance.
Result: A positive test is pain local to the common extensor tendon.
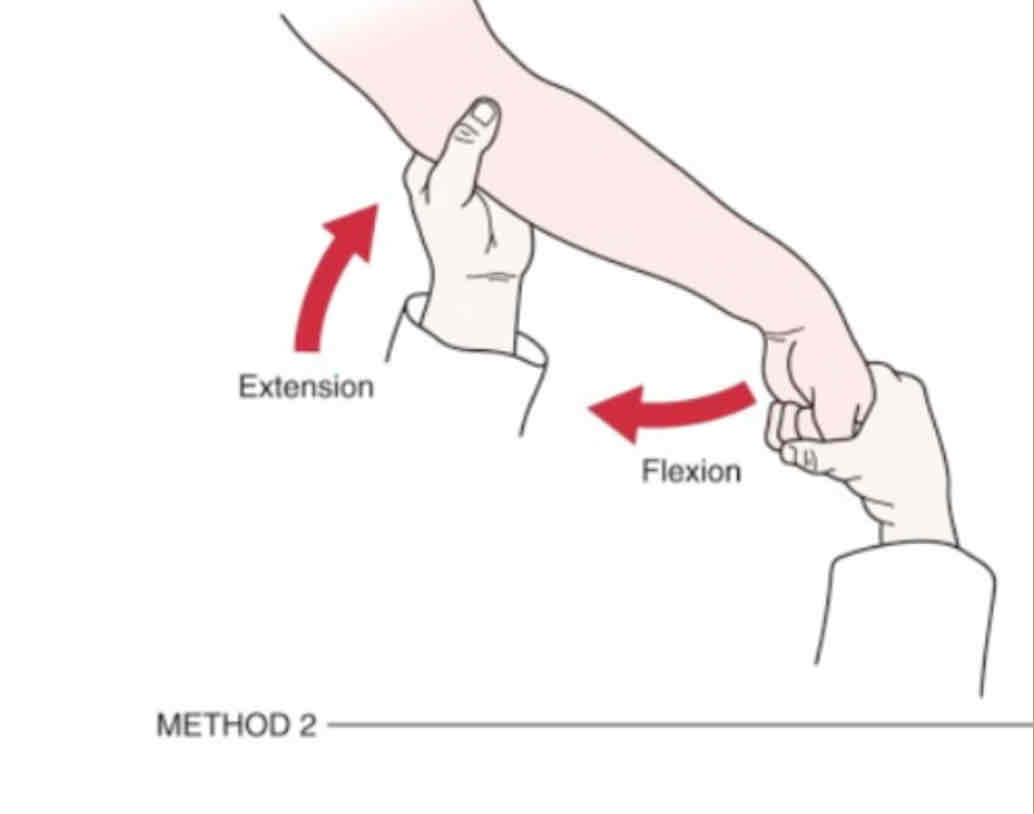
Mills Test
Purpose: To assess for tendinosis of the common extensor tendon. Test for Tennis elbow/lateral epicondylitis
Steps:
1.The client is seated, with his elbow extended.
2.The therapist passively flexes the client’s wrist.
3. Pronate the hand.
Result: A positive test result is pain local to the common extensor tendon.
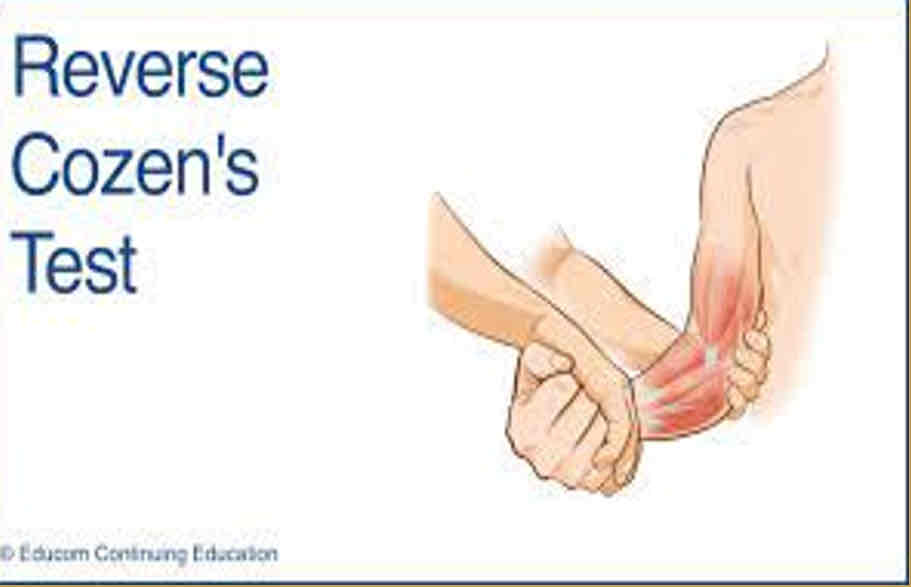
Reverse Cozen’s Test
Purpose: to check medial epicondylitis/ Golfer’s Elbow
Steps:
1.Client is sitting or standing
2.Ask the client to put his/her forearm in supination and elbow in 90o of flexion
3.Examiner palpates client’s medial epicondyle and asks the client to flex the wrist against resistance
Result: pain over medial epicondyle
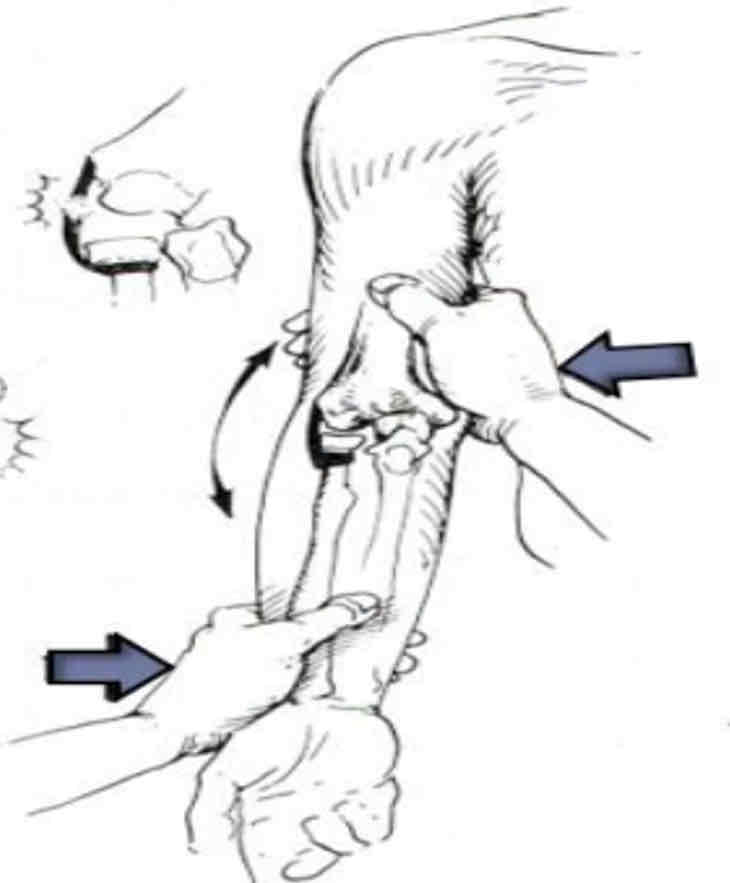
Valgus Stress Test
Purpose: To assess the stability of the medial collateral ligaments or MCL sprain
Steps:
1.The client is seated, the elbow positioned in slight flexion, and the forearm supinated.
2.The therapist places one hand on the lateral aspect of the elbow joint and the other hand medially on the mid portion of distal forearm. This allows for greater ease in the application of a valgus force by not allowing any shoulder rotation.
3.The therapist applies a valgus force to the elbow by pushing the Humero-ulnar joint toward the body.
Result: The test is positive if the client either feels pain or the therapist feels or sees gapping along the medial aspect of the elbow.

Varus Stress Test
Purpose: To assess the stability of the lateral collateral ligament or LCL sprain
Steps:
1.The client is seated, his elbow positioned in slight flexion, his forearm supinated.
2.The therapist places one hand on the medial aspect of the elbow joint and the other hand laterally on the mid portion of distal forearm. This allows for greater ease in the application of a varus force by not allowing for any shoulder rotation.
3.The therapist applies a varus force to the elbow by pushing the Humero-ulnar joint away from the body.
Result: The test is positive if the client either feels pain or the therapist feels or sees gapping along the lateral aspect of the elbow.
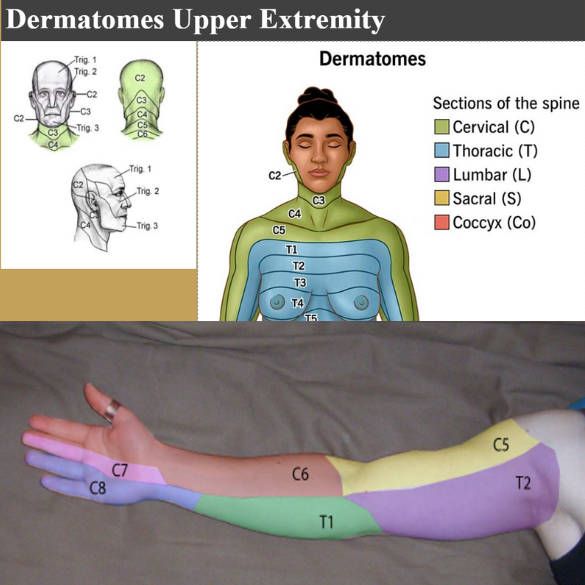
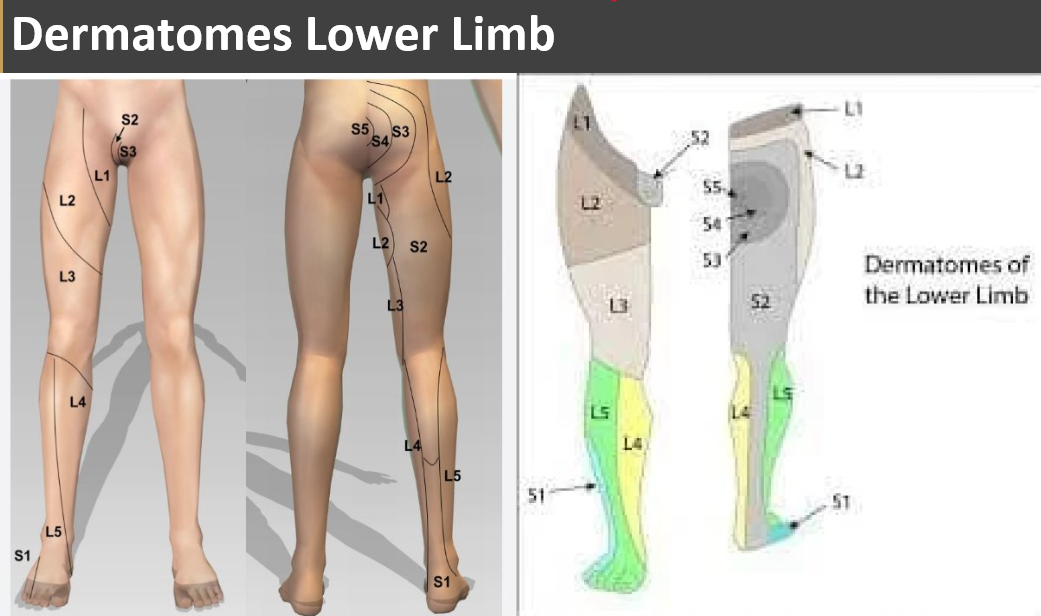
Dermatome Test, definition & purpose
Definition: sensation of an area of skin supplied by a single nerve root (SENSORY)
Purpose: to locate the Radiculopathy
Dermatome Upper Body
Dermatome Lower Body
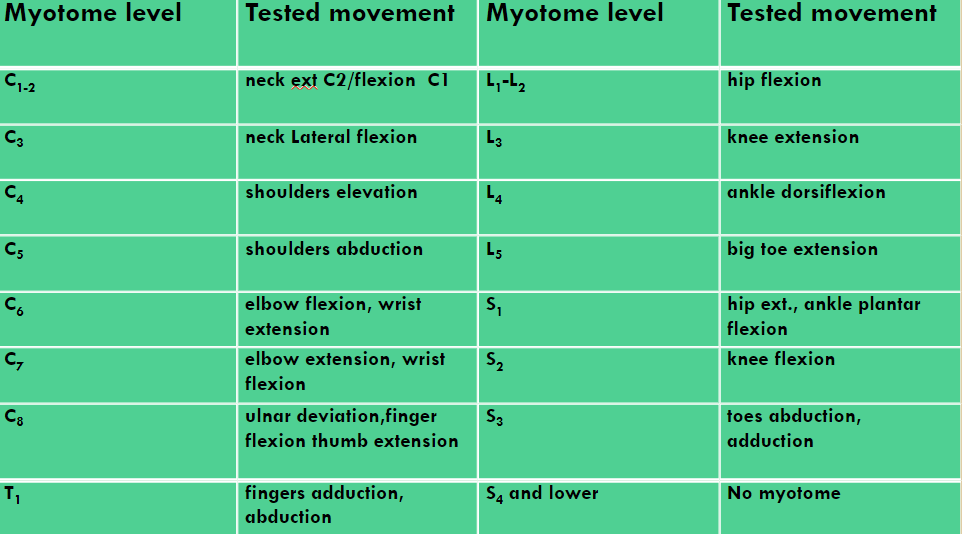
Myotome Definition & Purpose
Definition: the action of a muscle group supplied by a single nerve root (MOTOR)
Purpose: to locate the Radiculopathy
Myotome Actions
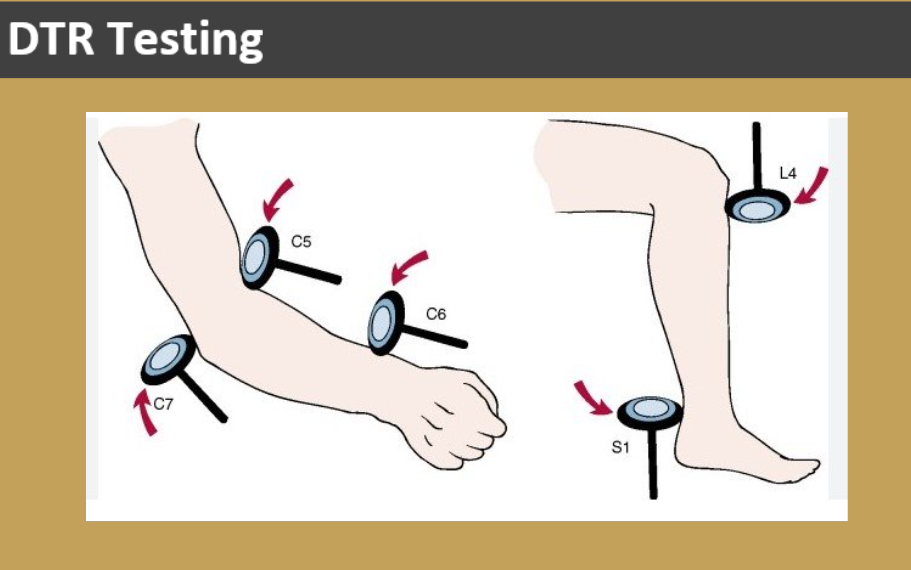
DTR definition & test purpose
Definition: a involuntary muscle reflex caused by a sudden brisky blow to the muscle tendon.
Test purpose: part of the radiculopaty assessment to detect the site of neurological leision, either UMN or LMN
DTR testing site