Dental Imaging
1/20
There's no tags or description
Looks like no tags are added yet.
Name | Mastery | Learn | Test | Matching | Spaced | Call with Kai |
|---|
No analytics yet
Send a link to your students to track their progress
21 Terms
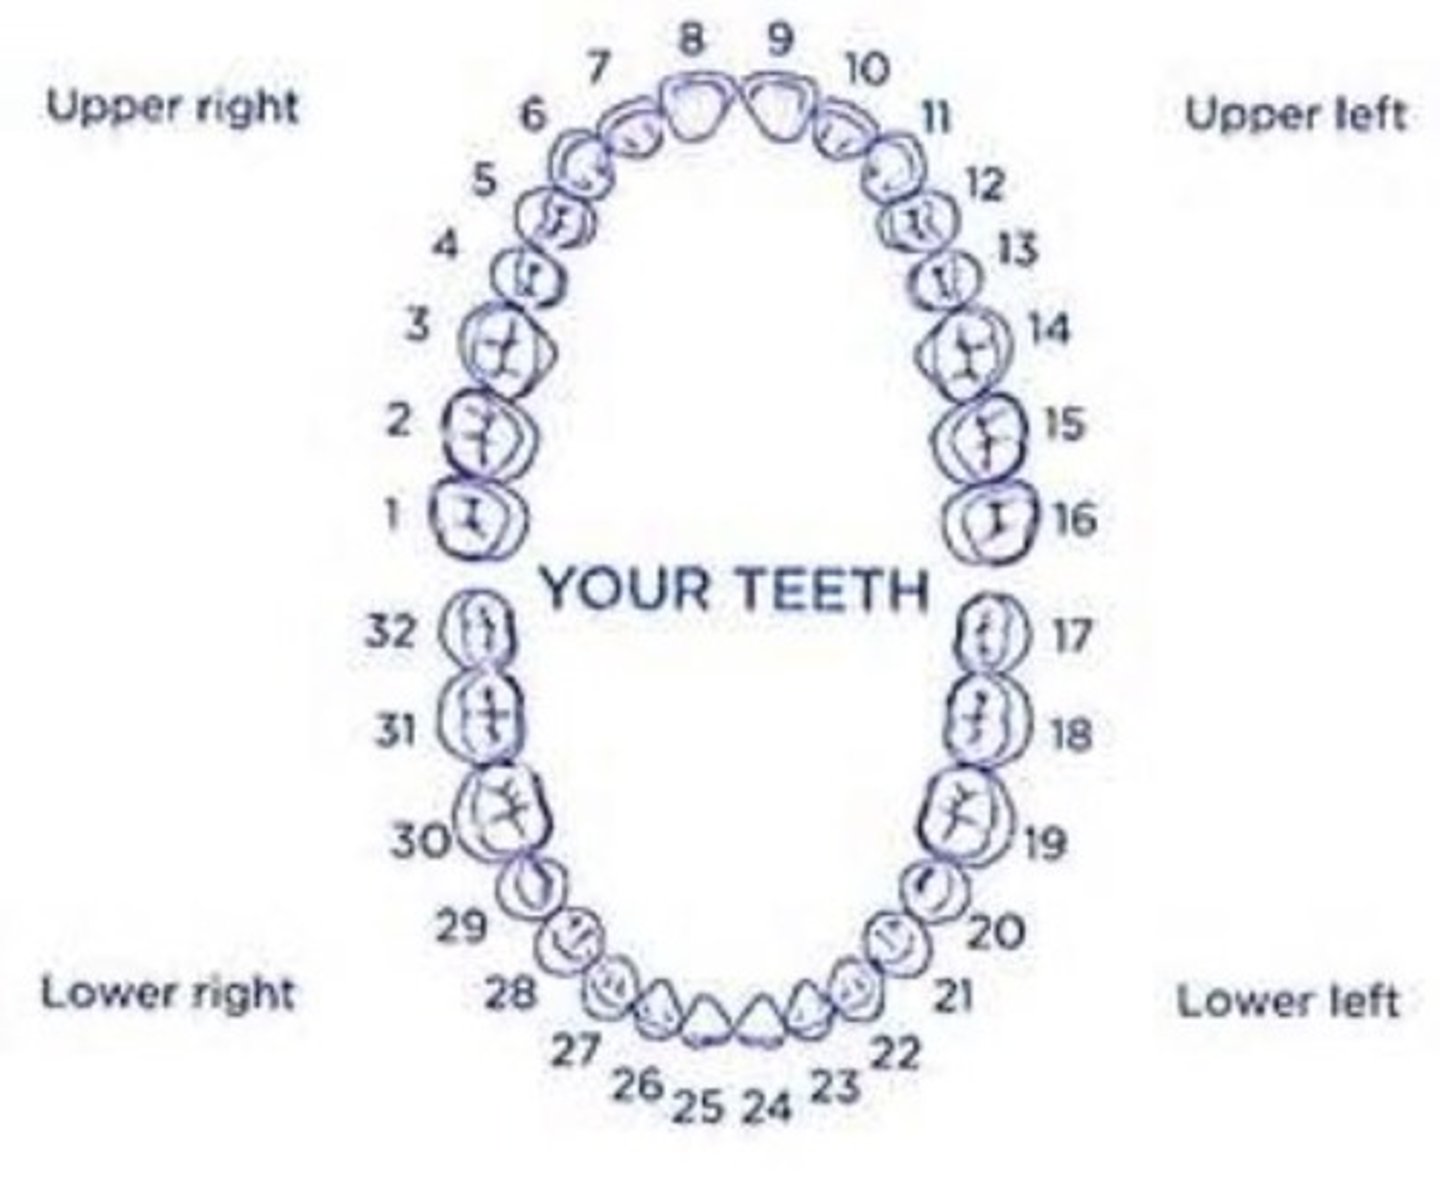
Simple diagram of the teeth:
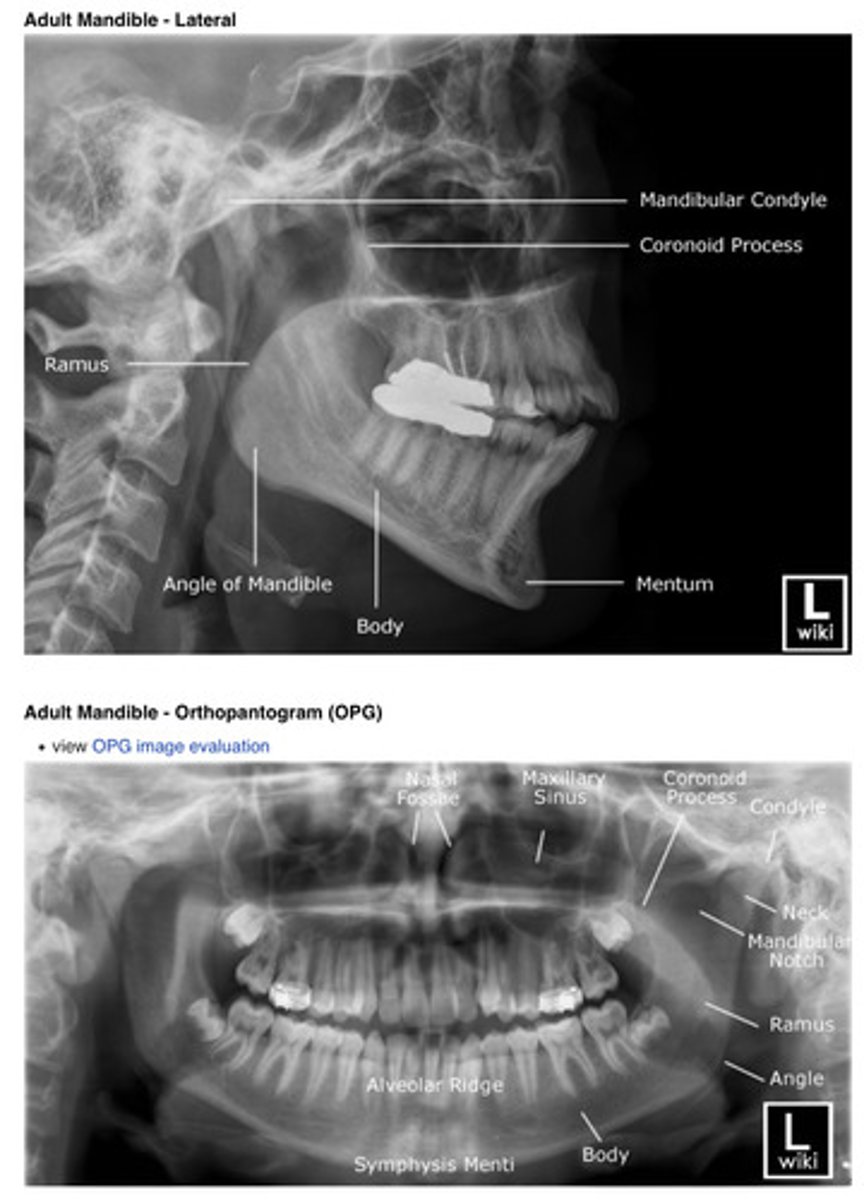
Example of an adult OPG x-ray:
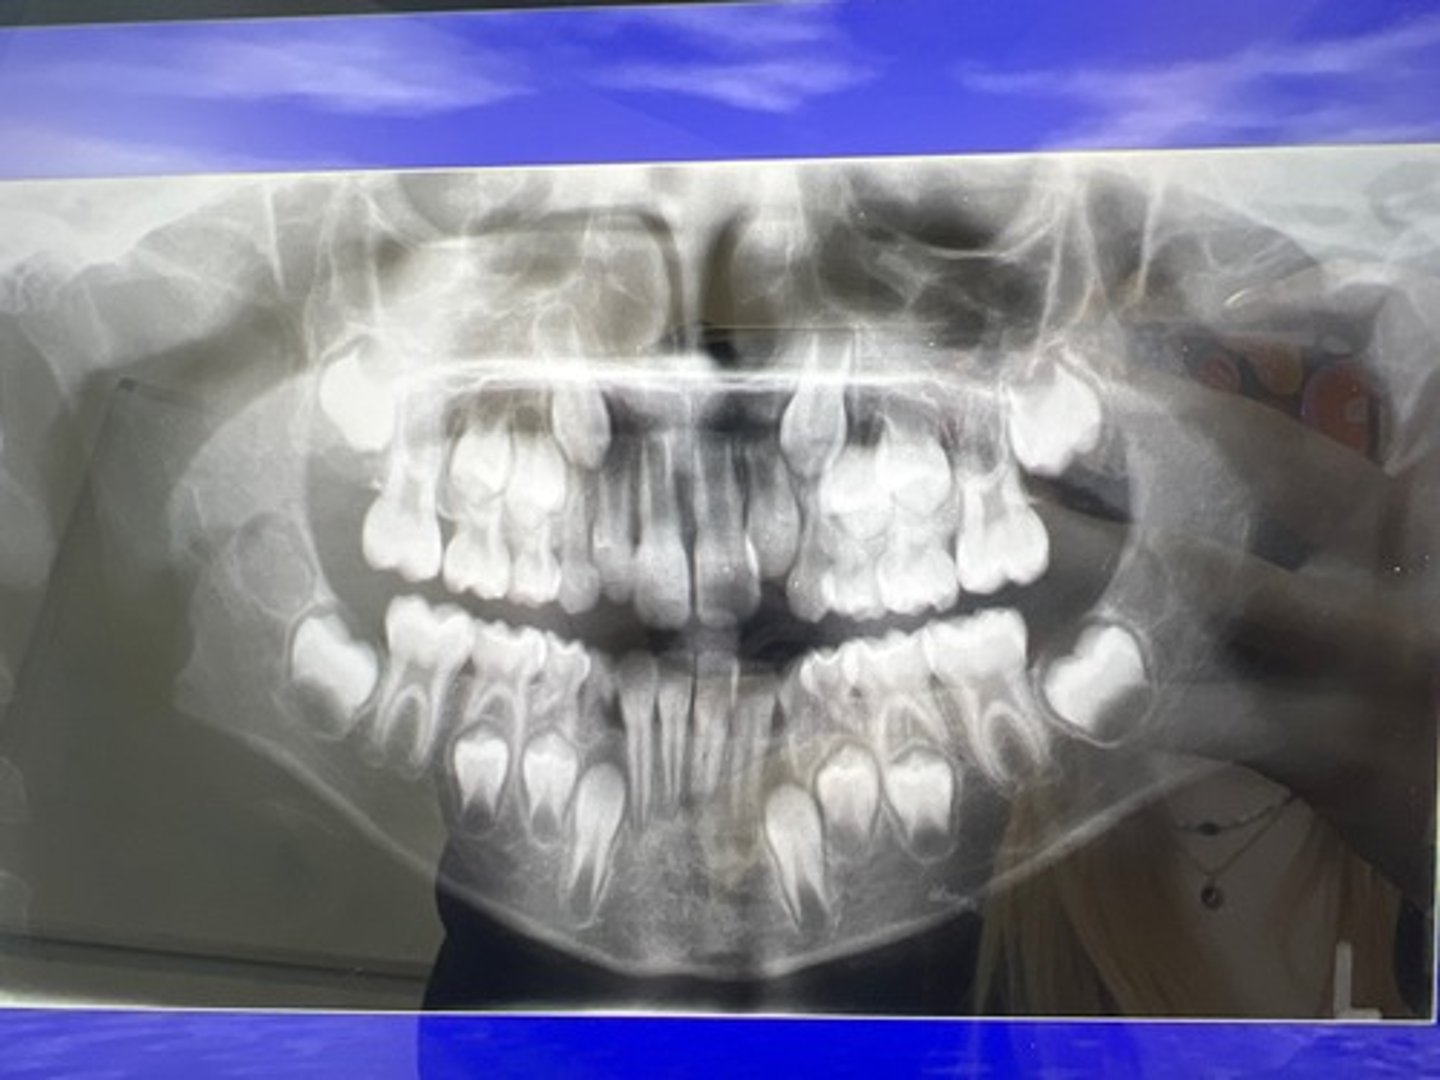
Example of a child OPG x-ray:
What are the considerations for intra- and extra-oral imaging? What should be done before imaging starts?
- IRMER 2017; check local rules different for each department, site.
- Justification; is this imaging appropriate? Make sure it is.
- Health and Safety at Work 1974; you have a legal duty to prevent cross-infection.
Briefly describe the patient preparation before performing intra- & extra-oral imaging.
- Explanation of procedure/what to expect
- Patient comfort
- Movement (prevention)
- Removal of Artefacts
- Radiation protection
Is periapical (PA) radiography part of intraoral or extraoral imaging?
- intraoral imaging.
What is periapical imaging? Give a simple definition.
- Intra-oral techniques designed to show individual teeth and the tissues around the apices.
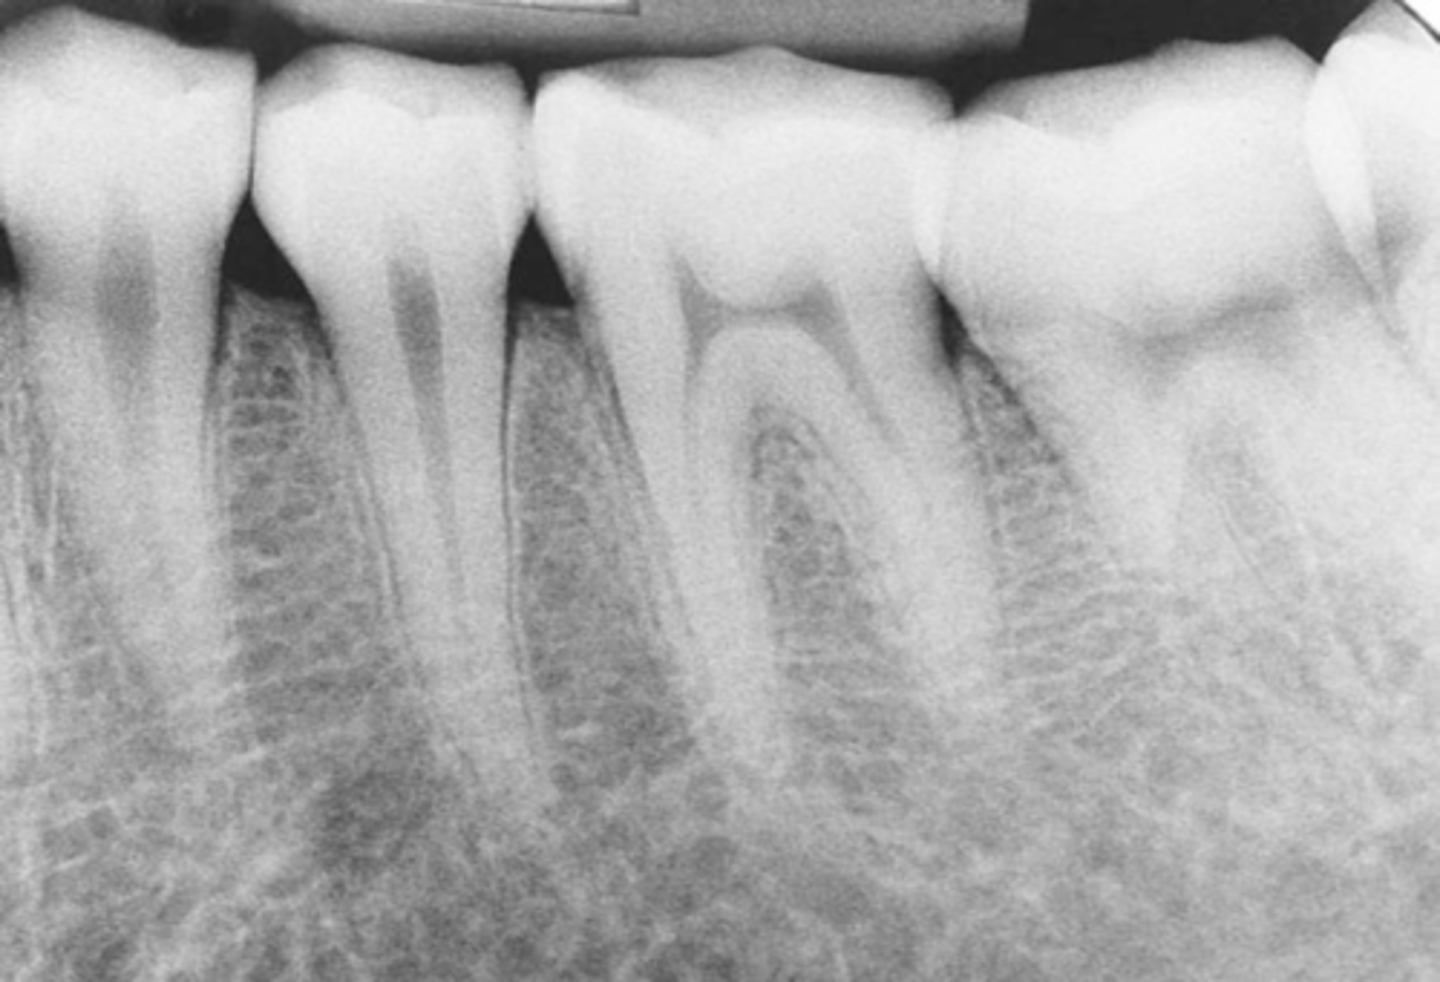
Example of a periapical x-ray:
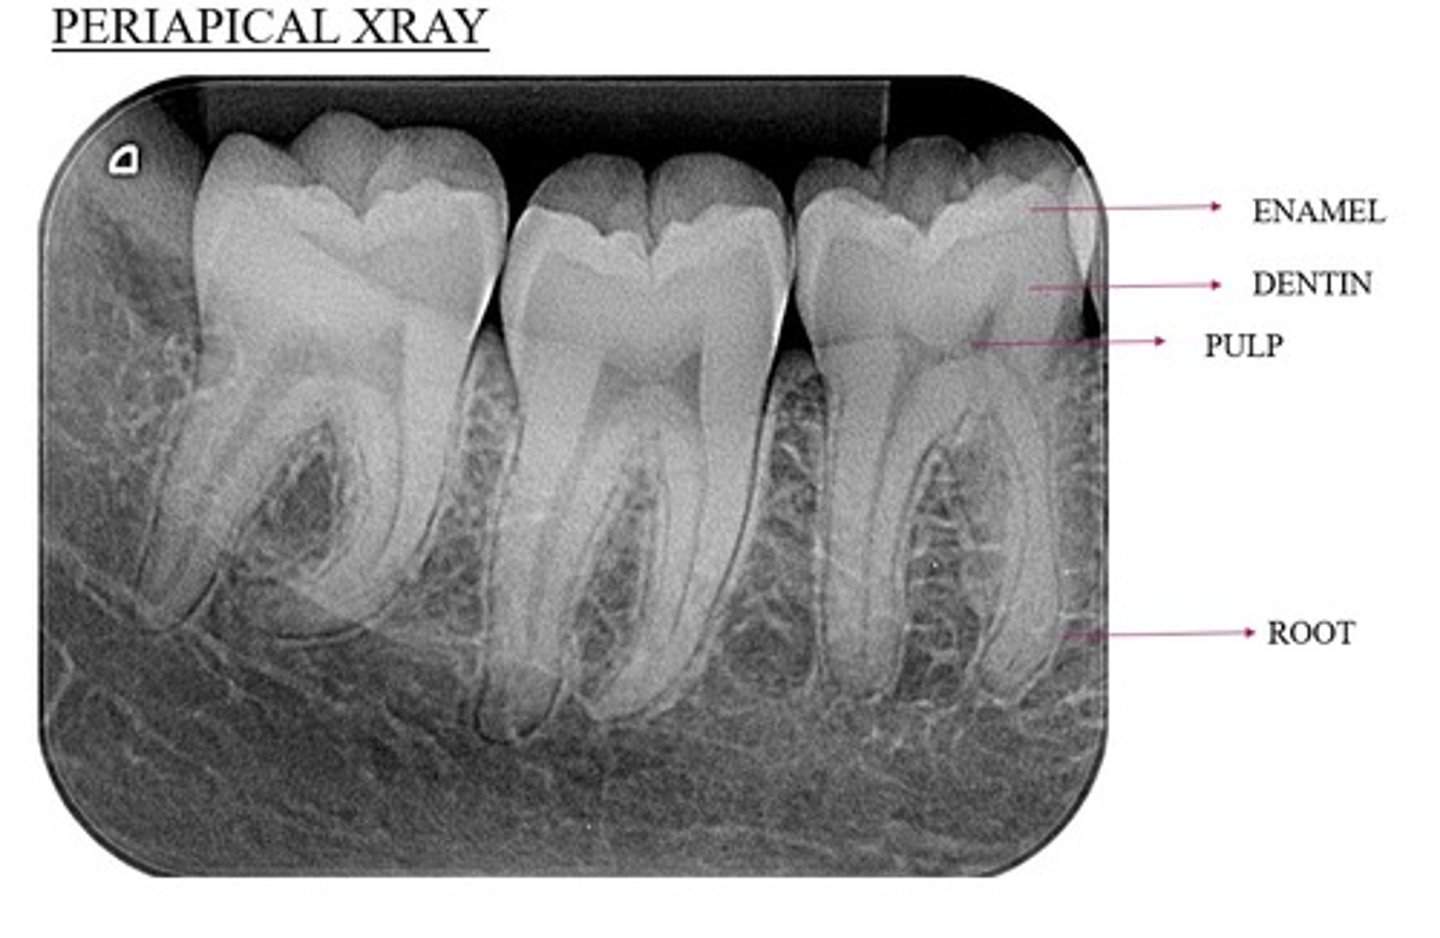
How many teeth does periapical imaging usually display?
- two to four teeth.
What anatomy is demonstrated in periapical imaging? What kind of information?
• Provides detailed information about the teeth and the surrounding alveolar bone
• Demonstrates crown to apex.
• At least 2mm bone, ideally 5mm beyond apex.
What are the clinical indications for periapical imaging? List some.
• Apical infection/inflammation
• Peridontal status
• Trauma to the teeth and alveolar bone
• Assessment of unerupted teeth
• Assessment of roof morphology
• Pre treatment
• During endodontics
• Post treatment
• Detail on apical cysts and lesions
What are the ideal patient positioning requirements for periapical radiography? Briefly describe.
• Sensor/film is placed into a beam aiming device
• This is positioned in the mouth so sensor/film is parallel to the long axis of tooth.
• X-ray tube is angled perpendicular to the sensor.
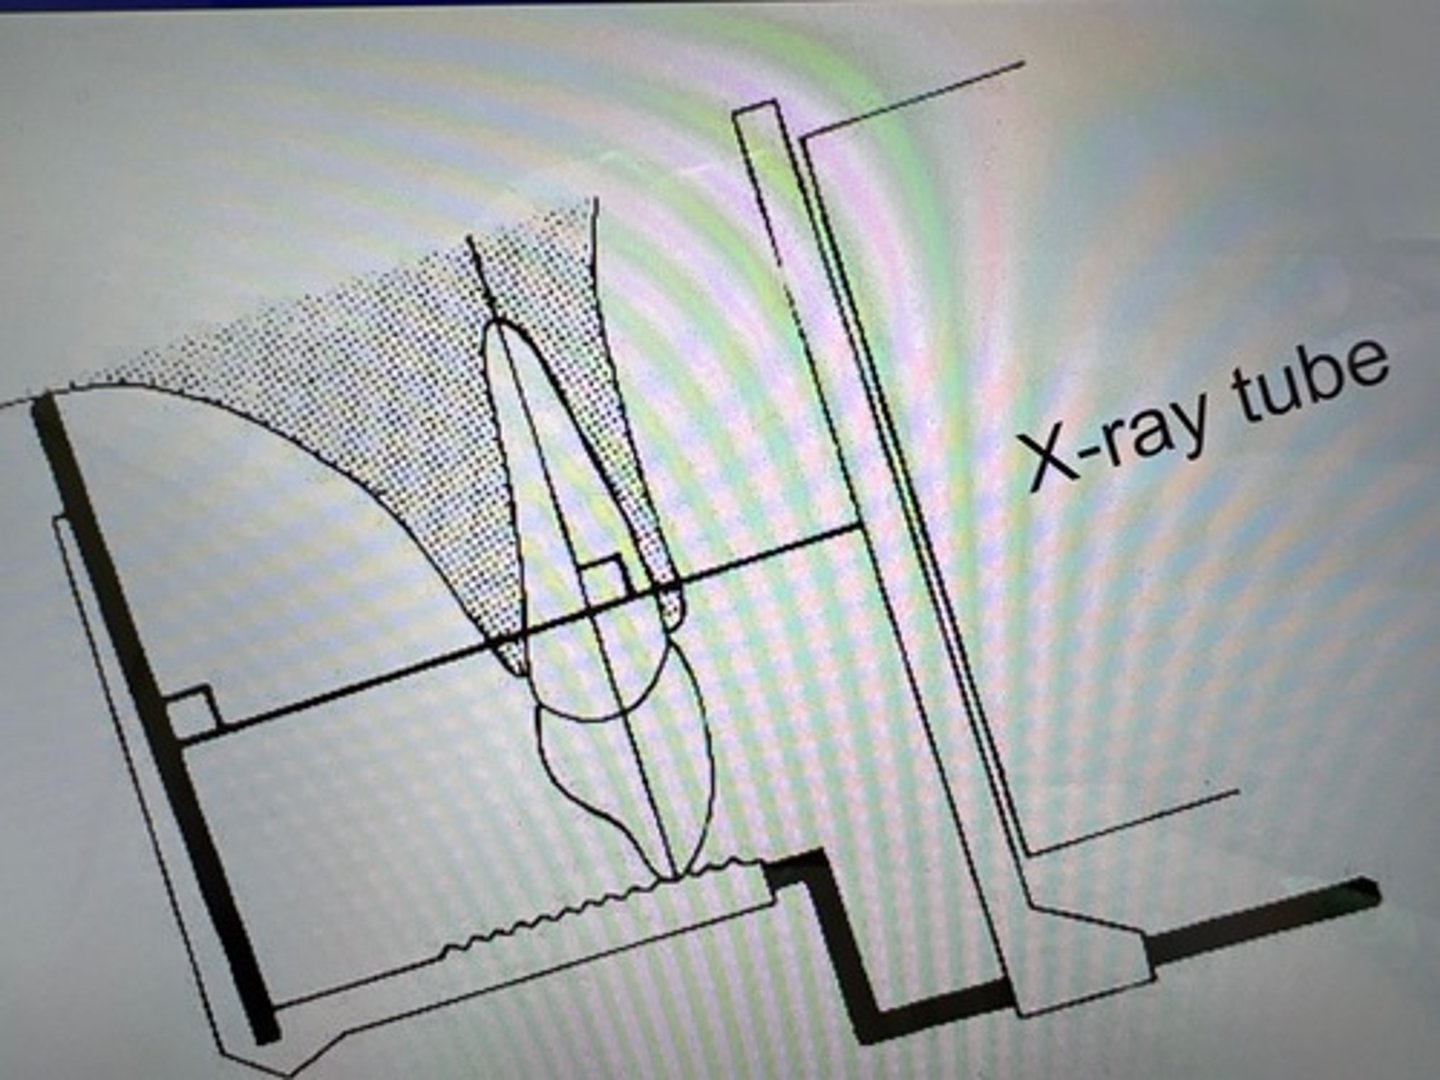
Diagram of periapical radiography positioning:
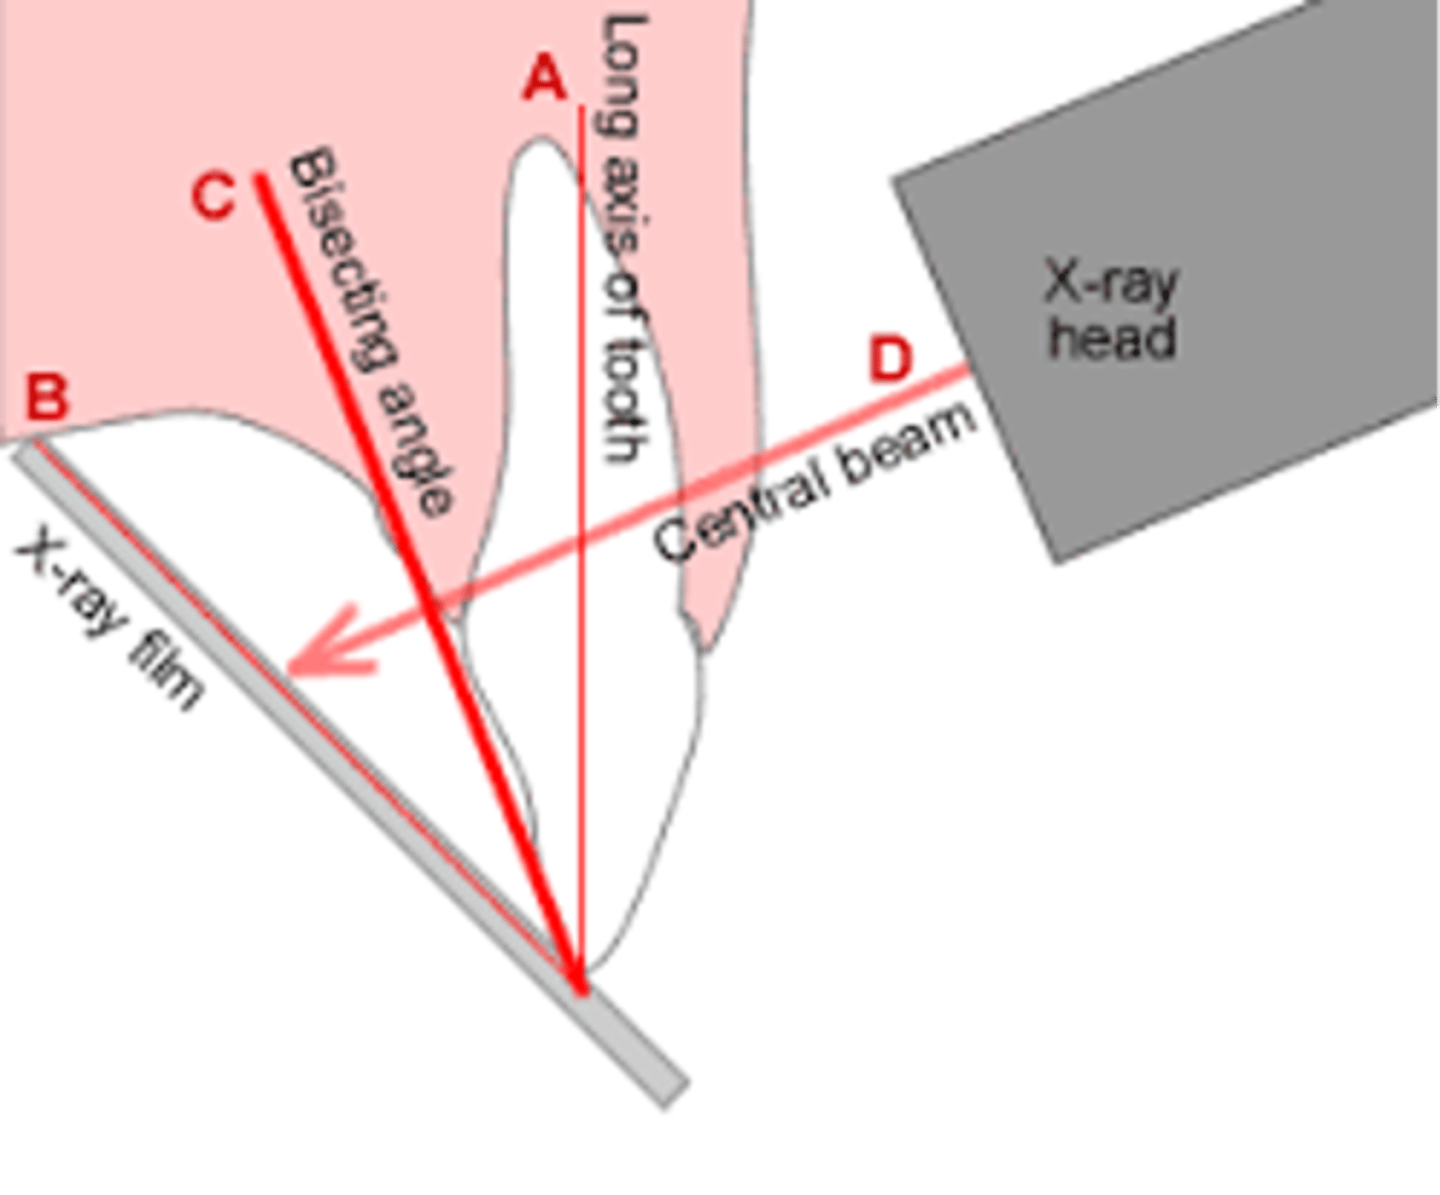
Periapical paralleling technique diagram:
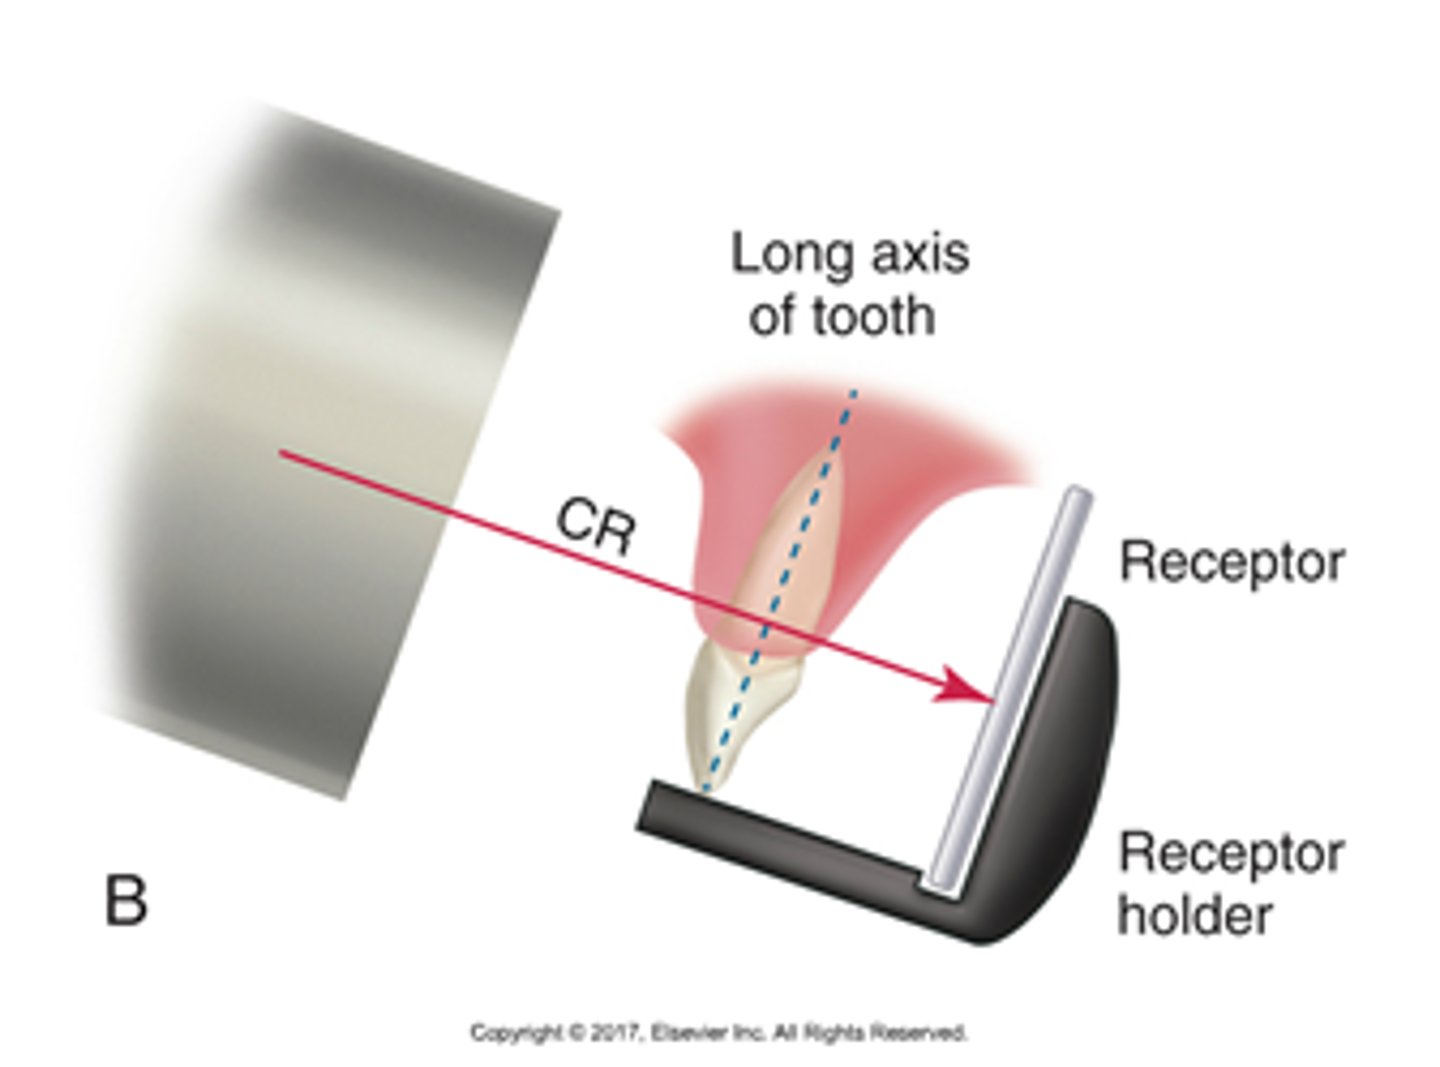
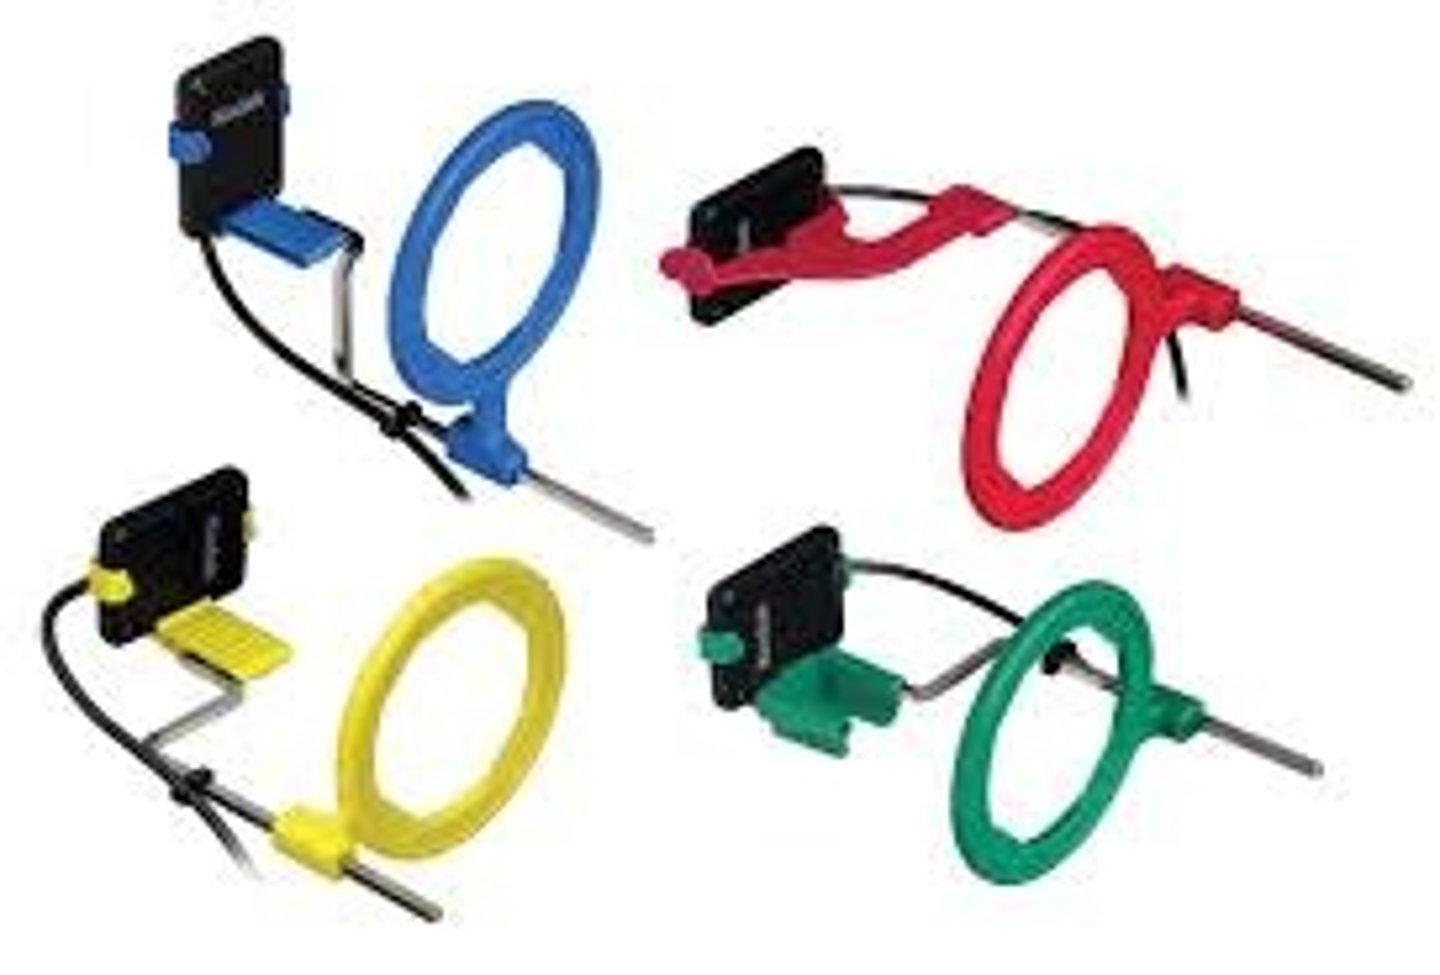
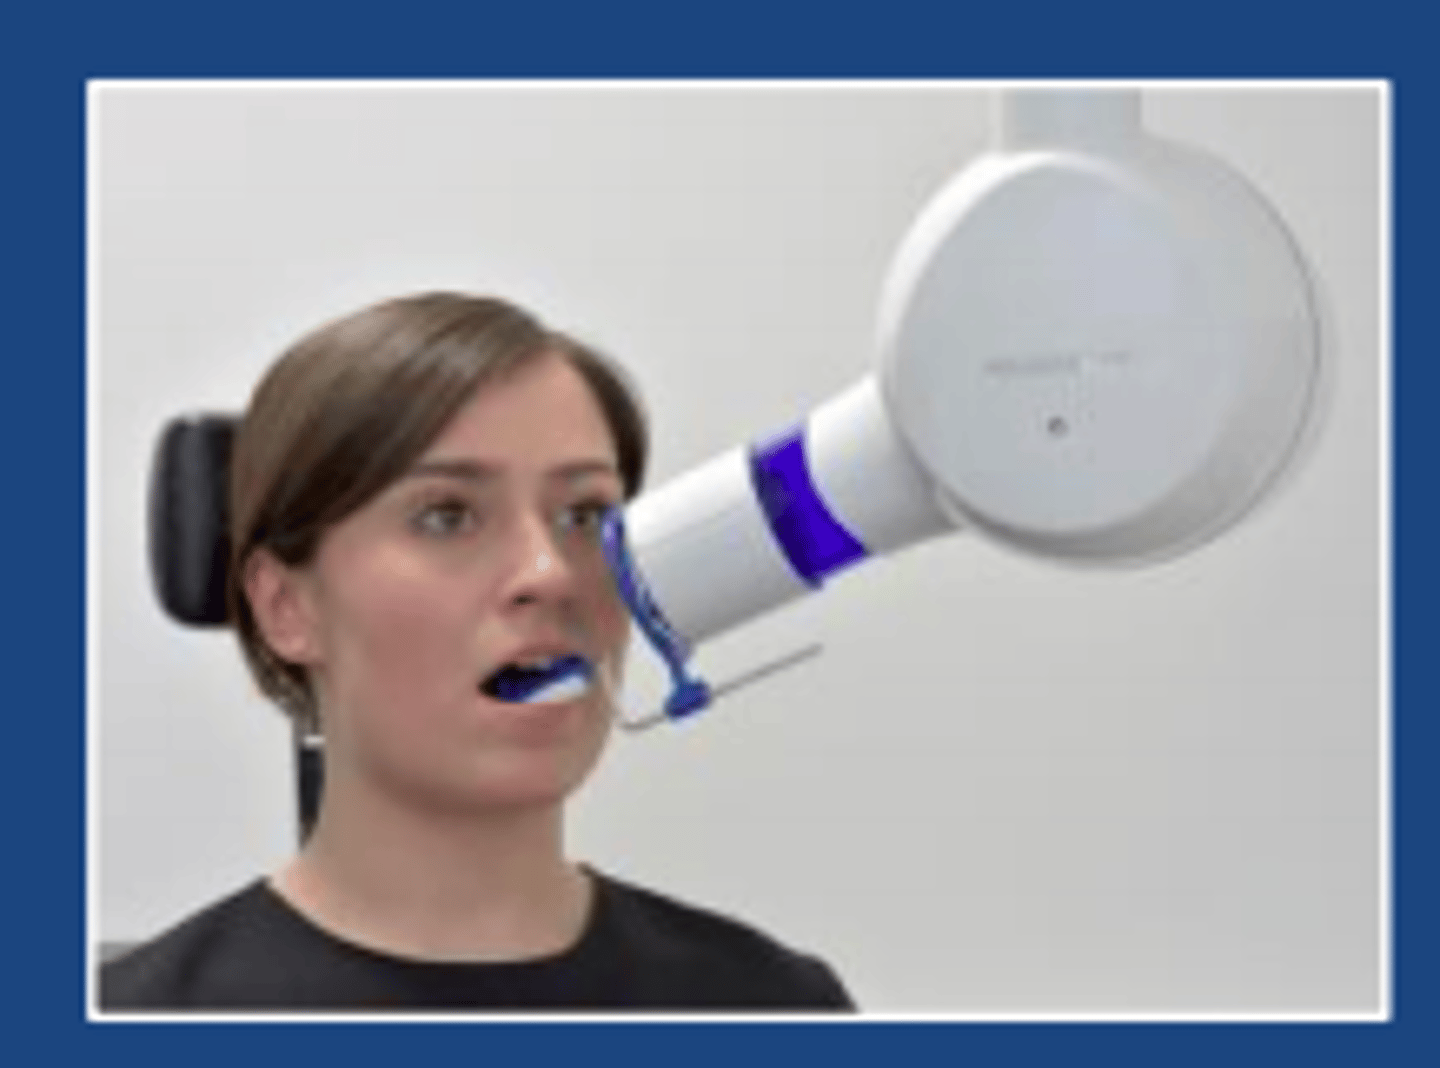
Periapical paralleling technique equipment:
Describe, in detail, the patient positioning for a periapical paralleling technique.
1. Patient's head supported.
2. Relevant occlusal plane = horizontal.
3. Correct holder and film/IR size selected.
4. The film is placed in the holder & positioned parallel to the long axis of the tooth.
5. Check infection control policy followed appropriately; disposable covers.
When imaging the incisors and canines, how should the film be placed for the maxillary teeth (upper area)?
Film and holder placed far enough back into mouth to ensure there is sufficient depth to avoid the film bending.
When imaging the incisors and canines, how should the film be placed for the mandibular teeth (lower area)?
Film placed in floor of mouth - approximately in line with the canines.
When imaging the premolars and molars, how should the film be placed for the maxillary teeth (upper area)?
Film placed in midline of the
palate - again ensuring sufficient depth to accommodate film
When imaging the premolars and molars, how should the film be placed for the mandibular teeth (lower area)?
Film placed in lingual sulcus next to the tooth in question.
Intraoral imaging; occlusal planes