Fundamental Principles of Anterior Tooth Preparation and Restoration
1/21
There's no tags or description
Looks like no tags are added yet.
Name | Mastery | Learn | Test | Matching | Spaced | Call with Kai |
|---|
No analytics yet
Send a link to your students to track their progress
22 Terms
Class III preparation/restoration
-preparation/restoration involving the proximal surface of an anterior tooth without involving the incisal angle
-involves smooth enamel surfaces
-most often start to form just apical to the contact area
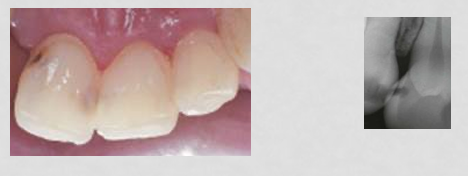
class III preparation/restoration location
-will always be on the mesial or distal of a tooth and may involve the facial surface, lingual surface, or both
-if the caries can be accessed from the lingual and the facial surface be left intact, this is preferable
-sample terminology: #8-ML, #7-DL, #6-MLF, #10-DLF
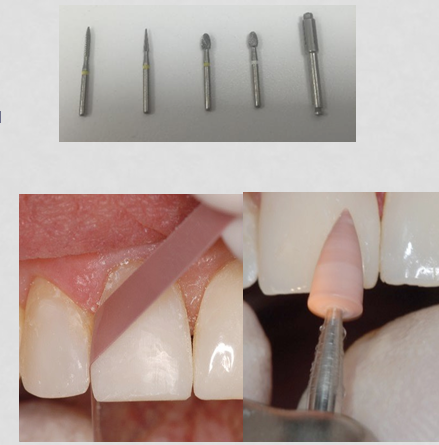
Class III preparation
-bur is directed perpendicular to the enamel surface
-initial cut is made in the center of the contact area and extended gingivally until contact is broken
-incisal and gingival proximal walls are perpendicular to the root and form an approximately 90 degree angle to the tangent of the tooth surface

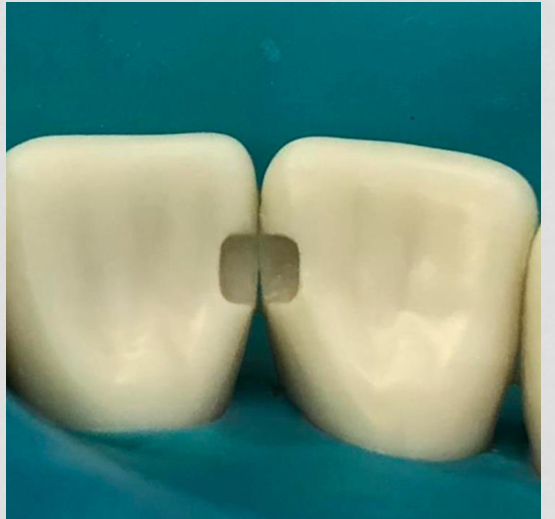
class III preparation outline form
-external outline form is rectangular, approximate axial width and facial depth of 1.7-2mm
-preparation should stay within the confines of the marginal ridge
-clinically, the shape and depth is dictated primarily by the extent of the caries
-preferred bur is a 330 carbide, 0.8mm diameter and 1.6mm length
operator positioning
-12 o’clock is preferred seating position for the maxillary lingual surfaces
-finger rests are positioned on the teeth adjacent to where you’re working
-visualization is through indirect vision
class III composite restoration steps
1) shade selection
2) isolation
3) tooth etching, priming/bonding
4) placement of composite
5) finishing and polishing
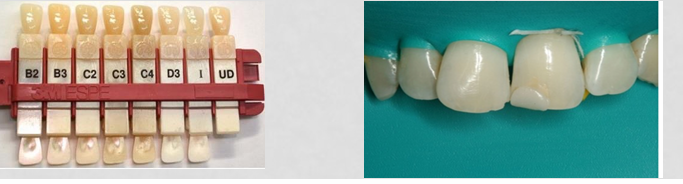
class III composite restoration steps- shade selection
-should be done before isolation and preparation of the tooth because dehydrated teeth become lighter and lose their natural translucency
-incisal 1/3s of teeth (mostly enamel) are lighter and more translucent than the cervical 1/3s (mostly dentin)
-shade selection is preferably done under natural light and an appropriate shade guide should be used
-for anterior teeth in particular, it can be helpful to place composite on the unetched tooth prior to isolation to check the shade match
class III composite restoration steps- isolation
-appropriate isolation must be confirmed before restoration placement
-for anterior teeth, the rubber dam is placed from canine to canine and a clamp is usually not needed
-rubber dam may be ligated distal to the canines with floss or small piece of rubber dam
class III composite restoration- tooth etching, priming/bonding
-for composite restorations, the tooth must be etched and a priming/bonding agent must be placed and cured
-various techniques exist for etching, priming, and bonding
class III composite restoration- placement of composite
-either a syringe or hand instrument can be used for placement
-syringe technique convenient method and reduces the possibility of trapping air, but control of the amount of composite injection must be developed
-composite placed in increments to ensure complete curing and to reduce overall polymerization shrinkage
-composite should be placed with a “jiggling” motion to prevent air incorporation and voids
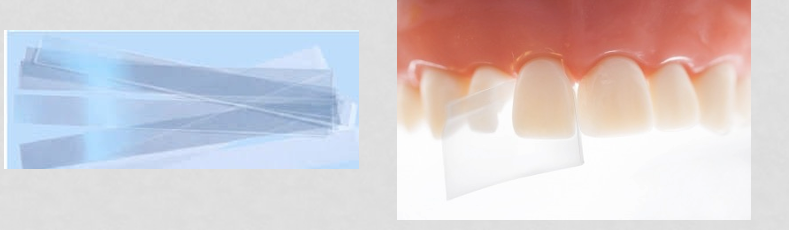
-use of a mylar matrix band and wedge is critical to achieve appropriate contour and contact, and to prevent overhand in class III restorations
-mylar matrix band should be cut to be approximately 1 inch long
-careful holding of the matrix band to mimic the interproximal contour while curing is critical for a good result


-condenser/plastic instrument
placement of composite- depth of cure
-composite has a maximum cure depth of 2.5mm; composite should not be placed in increments greater than 2.5mm
-each increment should be cured for at least 20 seconds with the curing light being held as close to the restoration as possible
-LED curing light with a narrow spectrum of blue light in the 400-500nm range which initiates photo-polymerization
-ambient light and operatory light will cure the composite material
-curing occurs through the mylar matrix band for class III and IV restorations
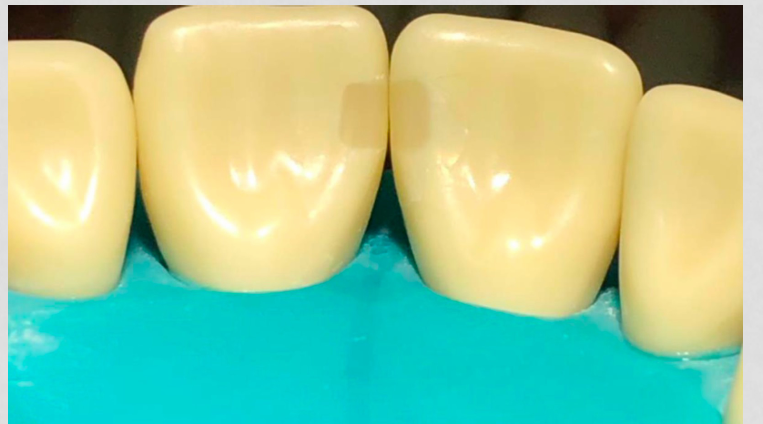
composite restoration steps- finishing and polishing
composite restoration evaluation- class III composite restoration must
-have contact
-have appropriate proximal and lingual contour
-be free of gingival overhang
-not have any excess composite present outside of the cavo-surface margin on unprepared tooth structure
-be smooth and free of voids
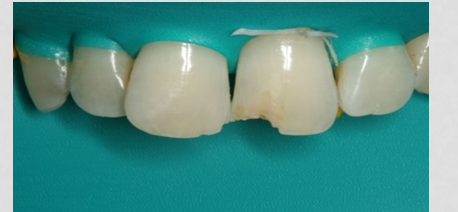
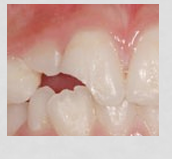
class IV preparation/restoration
-preparation/restoration involving the incisal angle of anterior teeth
-can be result of fracture or caries that extends to the incisal angle
-involves smooth enamel surfaces
-examples: #8-MIFL, #9-DIFL
class IV considerations
-a bevel or chamfer can be created to increase enamel surface area and increase the number of ends of enamel rods for bonding
-allows for increased retention and an esthetic transition from tooth structure to composite
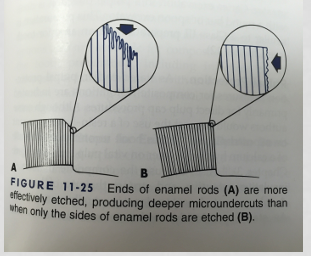
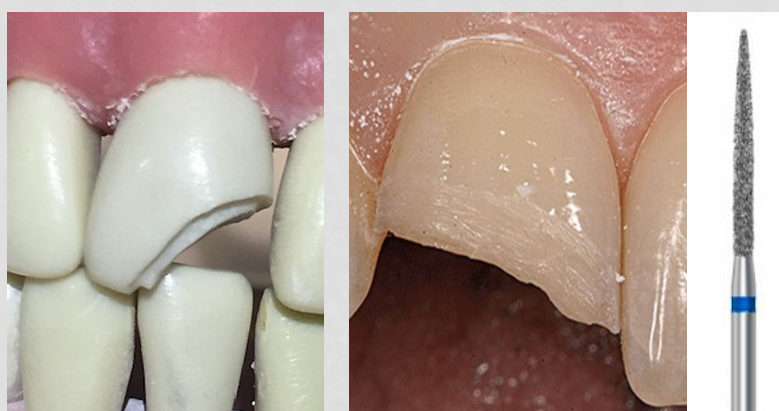
-class IV preparation with chamfer
class IV restoration
-a mylar matrix band and wedge are again used
-a lingual wall, facial wall, incisal edge, and proximal wall must be created
-can be done free hand or with a stent
-a knowledge of anatomy is critical and the tooth must be evaluated from all aspects
anterior restoration tips- mylar matrix band
-make sure the mylar matrix band is no longer than 1 inch
-contouring the band with a blunt instrument handle can help with proper adaptation of the band
-mylar matrix bands are thin and can normally easily pass between two teeth; if any difficulty is experienced, a wedge can be placed to slightly separate the teeth and allow for ease of placement
anterior restoration tips- wedge
-careful consideration should be given to choosing the right size wedge; wedge must fit securely and the apex of the wedge should ideally end at the gingival cavosurface margin
-a wedge that is too large may cause unnatural separation of the teeth leading to an overbulked restoration or an unnatural gingival embrasure space
-a wedge that is too small will not securely hold the matrix band and will not compensate for the slight thickness of the band and may also lead to gingival overhang
-wedge can be tried in and fit prior to placement of the mylar matrix band and then removed and refit with the matrix band in place
anterior restoration tips- placement
-an ideal class III preparation will require no more than 2 composite placement increments
-make sure that placement instrument is clean, dry, and free of debris; modern composites will not stick to an instrument that is clean and dry if proper placement technique is followed
-make sure the composite is protected from ambient light during the placement process
-placement of a slight excess of composite is OK for the final increment before the matrix band is adapted as this well ensure the seal of all margins; slight excess is removed during the finishing process
-operator must carefully close the matrix band around the final composite increment with the thumb and index finger
-care must be taken to make sure the band is properly contoured against the tooth and composite during this step; tooth should be your guide
-composite cured through the mylar matrix band
anterior restoration tips- finishing and polishing
-always use the existing tooth structure and your knowledge of dental anatomy as a guide for finishing and polishing
-use a constant brush like motion to avoid creating a flat or under contoured restoration
-be careful to not place an excessive amount of composite; removal of excess composite is very difficult and time consuming
-slight excess lingual composite can be removed with a football or oval shaped finishing bur; excess in the incisal embrasure and facial surfaces can be removed with a flame shaped finishing bur
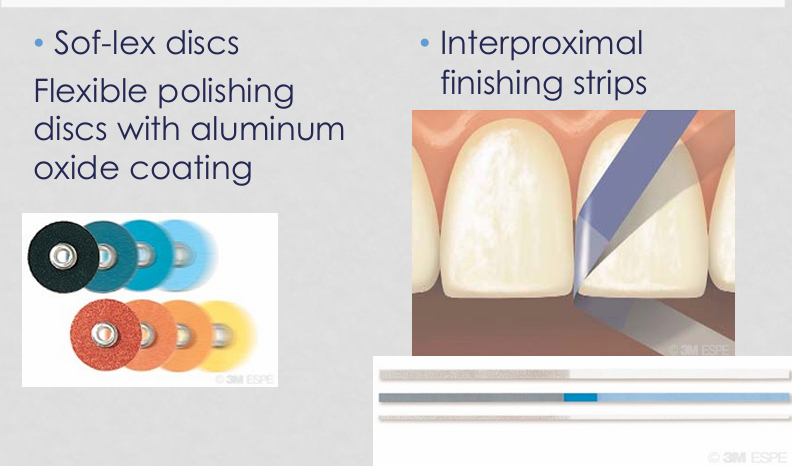
-finishing strips can be used for interproximal surfaces; do not overuse and create an open contact
-abrasive discs in sequential order (start disc depends on amount of composite that needs to be removed) create a smooth surface
-discs can also help create incisal embrasure form; discs can be used for finishing or polishing
-polishing points, cups, and discs can be used on all accessible surfaces