Primary impressions for patients with missing teeth
1/37
There's no tags or description
Looks like no tags are added yet.
Name | Mastery | Learn | Test | Matching | Spaced |
|---|
No study sessions yet.
38 Terms
What are 5 things to do before impression taking?
1 Explain what an impression is and what you are taking them for
2 consent - have they had one before - any problems?
3 check mouth for loose teeth or restorations
4 check mouth for soft tissue lesions e.g ulcers or swellings
5 prepare equipment and materials
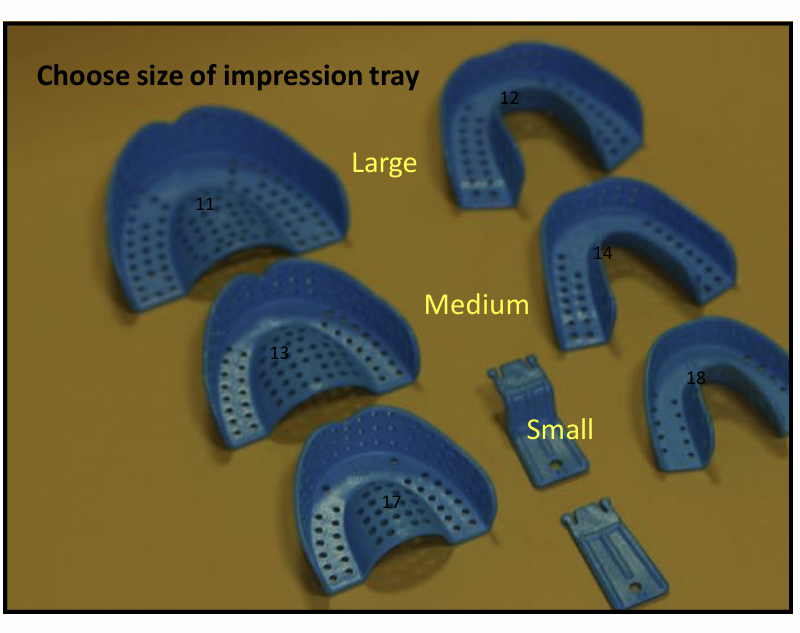
Left and right are used for which arches?
left - upper arch - shaped for the palate
the right is for the lower - missing middle part for the tongue
there are different sizes
some have handles that can be attached
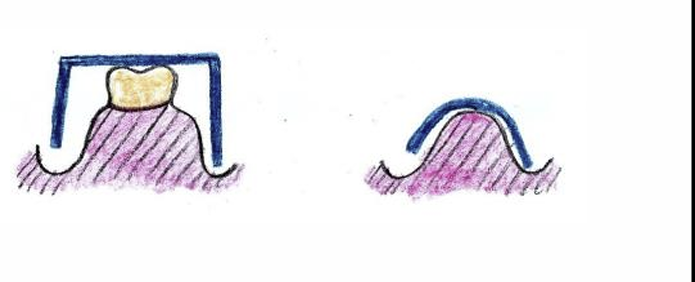
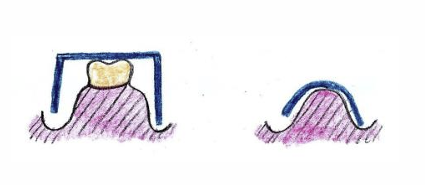
How are these two images different?
curve shape is for the alveolar ridge
3 dimensions for natural teeth
What are 5 steps taken during tray selection?
Choose the best size tray by visual inspection - or ask the patient to bite on a sheet of wax and use the imprint as a guide
then place (rotate) suitable impression tray in the mouth until it rests on occlusal surfaces
does it cover all the areas required or can you extend easily with wax?
Is there room or alginate? - when you place the impression tray in the mouth can you wriggle it 2-3 mm thickness room for alginates - others such as silicones can be smaller - important for strength
is it comfortable?
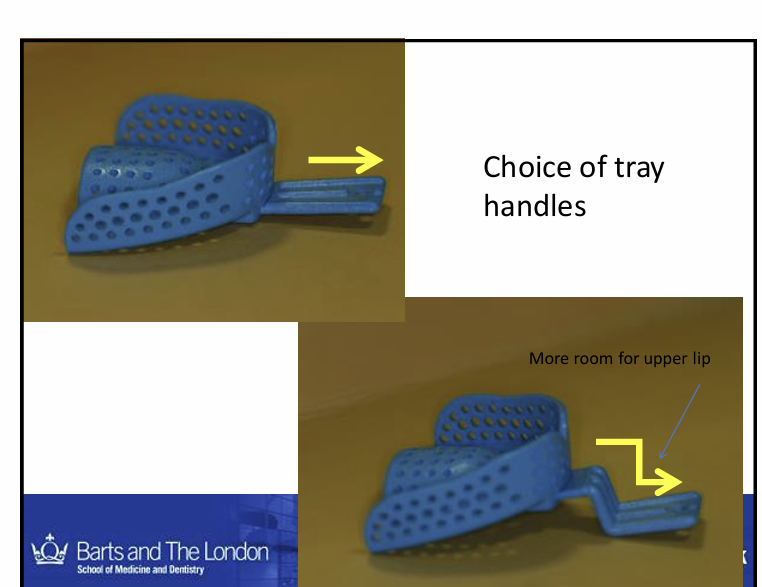
What are the uses of these different trays?
handles have different shapes - room for the lip - both used for upper
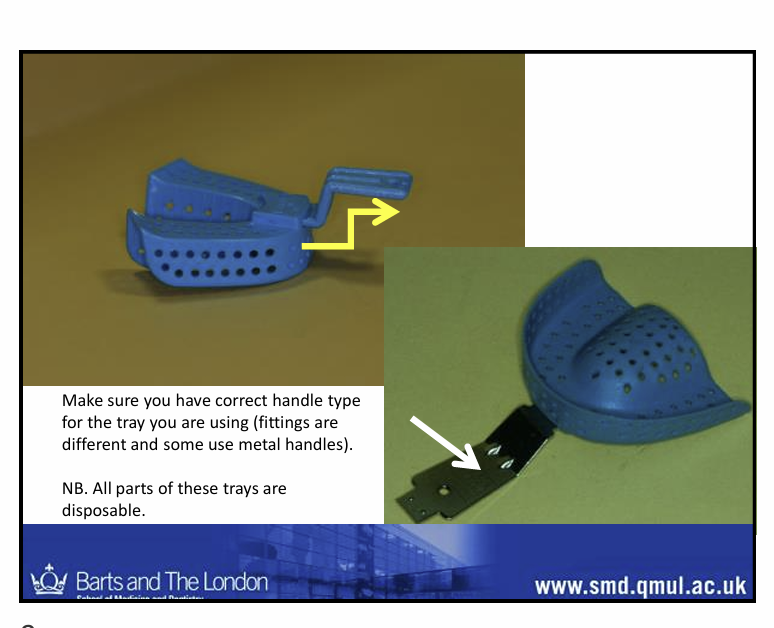
What is different about these trays/
the handles - room for the lower lip
make sure to know how to fit the handle into the tray
How do we modify the tray borders with wax?
1 - why? (2)
2 - used to record what?
3 - what is post daming?
Add double layer wax where needed to push the alginate where you need it to go and support floppy alginate when set
Aiming to record natural tooth shapes and the supporting bone and the sulcus in that area
post damming of the maxillary upper trays is where you add wax posteriorly to prevent excess material on the soft palate area
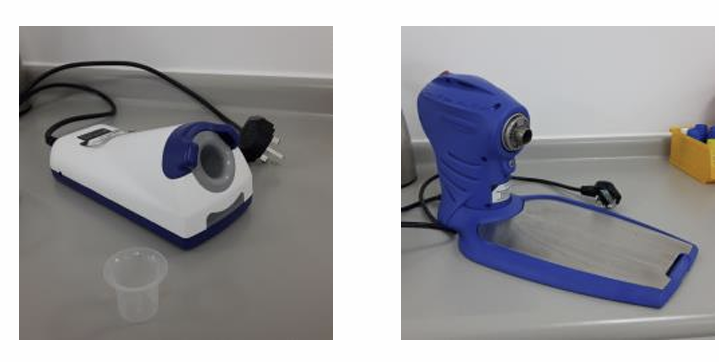
What is this image showing? why is it used?
heating equipment
used to modify and add wax to parts of the tray
left - induction heater - metal instrument to smooth and trim wax
right - hot air heater - safe to sue with gloves- softening sheets of wax
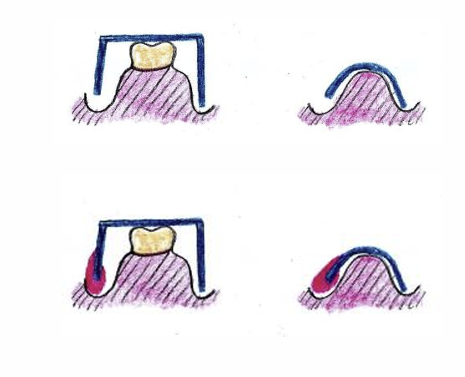
What is happening in this image?
few mm allows excess alginate to move over the borders of the tray and allow rolled borders
where the tray is short, more than 2-3 mm away from sulcus you can add wax

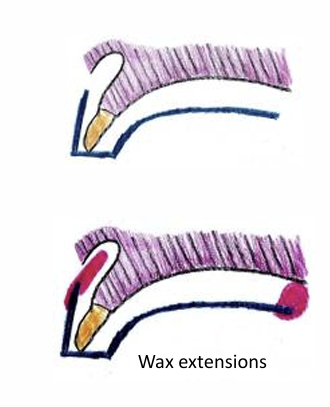
Describe why wax is added in these areas of a lower impression tray?
often sulcus deeper anteriorly
posteriorly - retromolar pad need to be recorded as when making dentures the denture are extended in that area
How should the wax be added in the posterior region of the tray to record the retromolar pas?
the wax should slant upwards - follow the contours of the anatomy
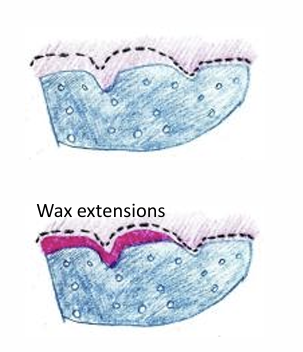
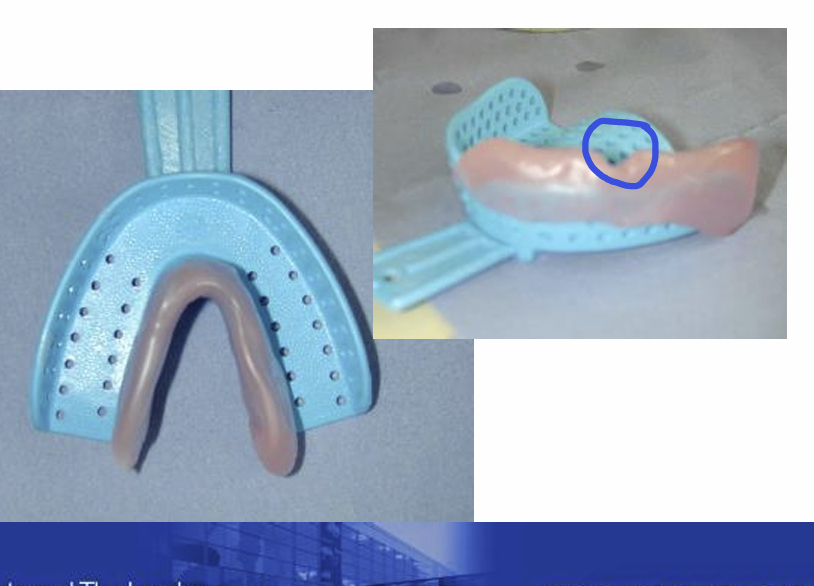
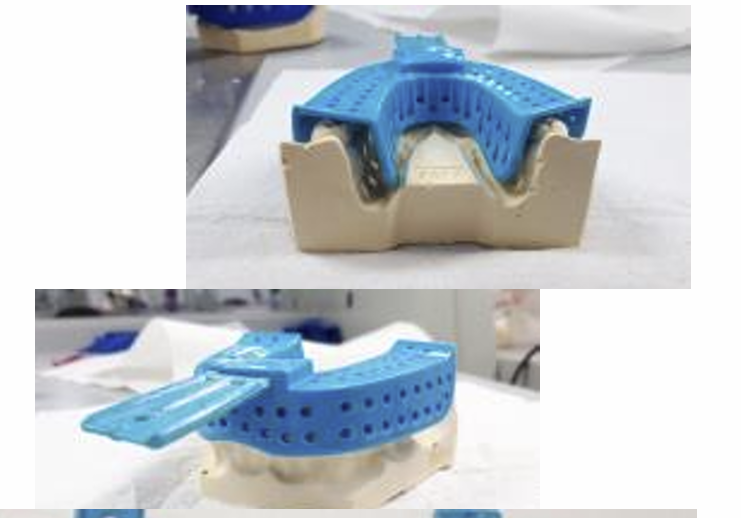
Where would wax be added in this image?
Double layer wax added in the buccal region to make sure tray extends into buccal sulcus - alginate where you want it to go an supports alginate once set!
tray is extending into the lingual sulcus
What is the V shape for?
allows room for frenal attachemnt - so impression doesn’t distort that and make it flat
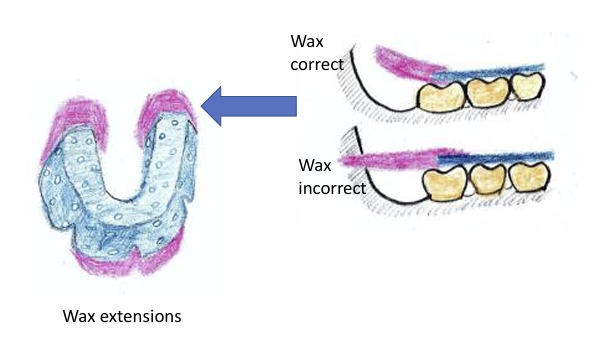
Does this Pegasus tray fit the mouth well?
yes, it fits the sulcus depth well - so no wax addition is needed
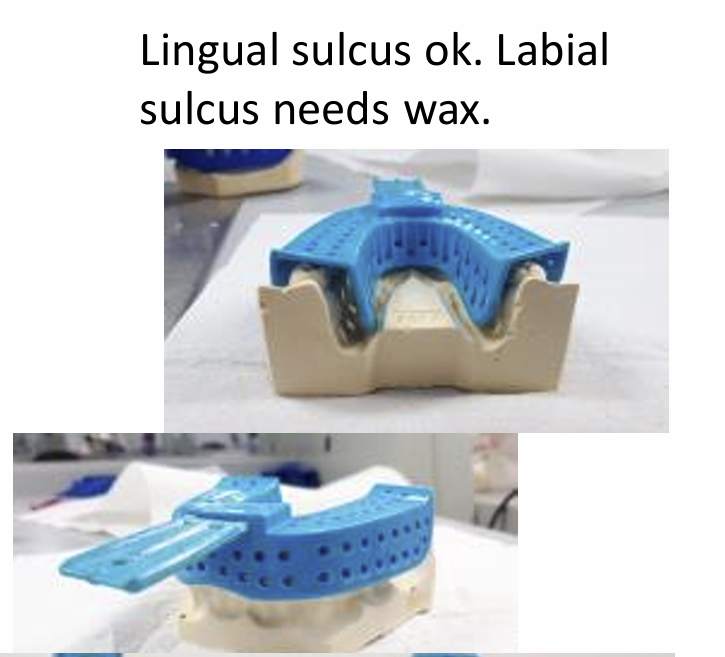
Does this tray fit need any wax?
lingually it fits ok with a small gap for the alginate
labially, there is a gap between edge of the tray and deepest part of the sulcus so wax is needed
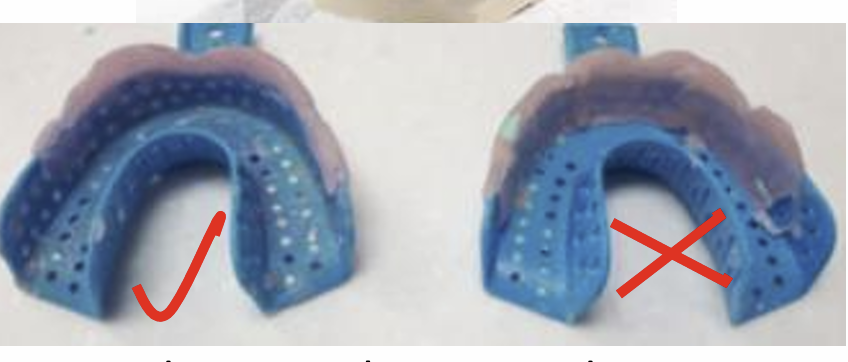
What is the mistake here?
avoid too much wax inside the tray
if you add too much wax the, ant anterior teeth incisal edge will catch on the wax
Again what is the image showing?
Shape the wax upwards in the retromolar pad area, if it went straight back it would prevent you from placing the wax tray properly
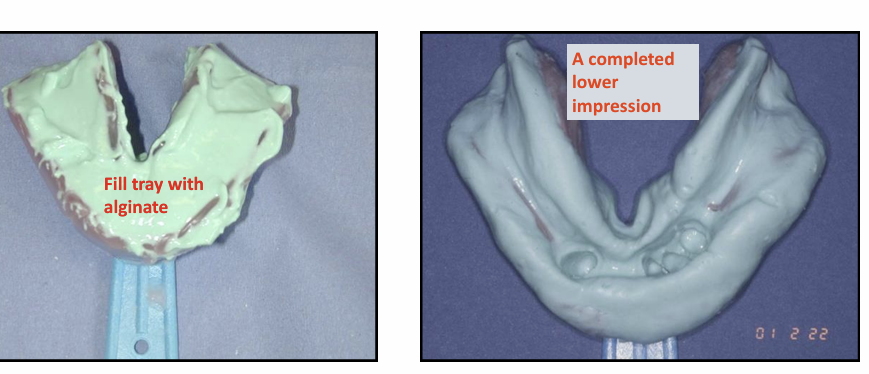
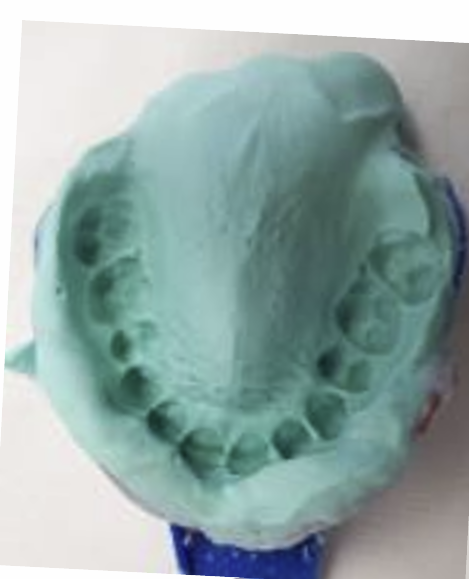
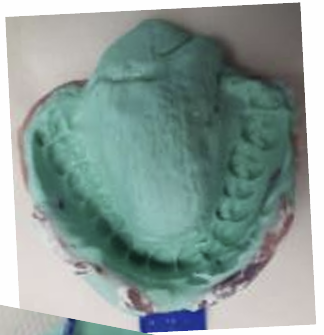
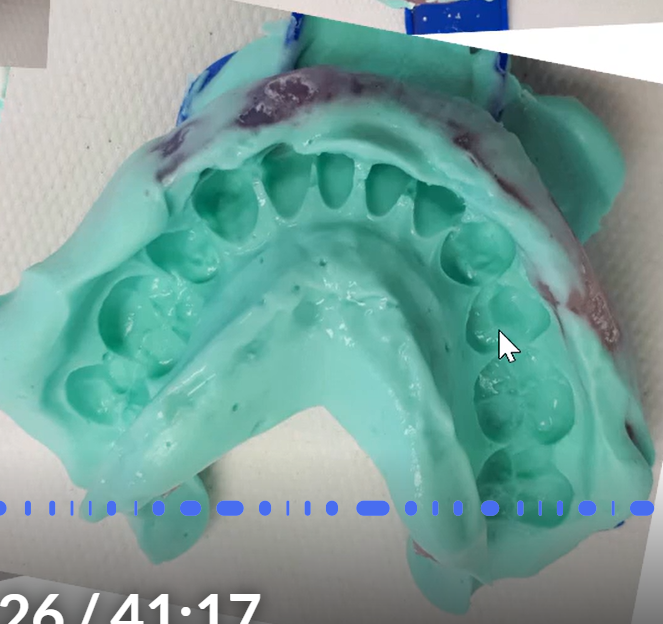
Describe the impression that has been taken - wat has been recorded?
some anterioir teeth
rolled alginate borders
some edentulous areas - recorded ridges
lower impression
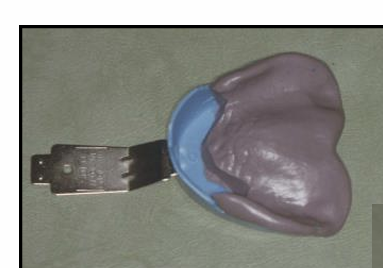
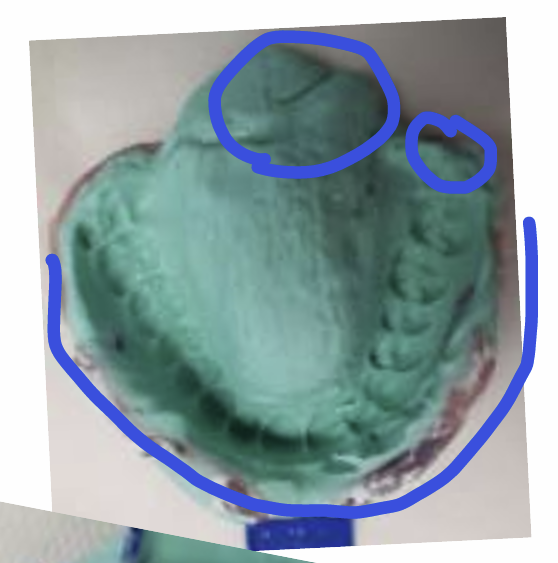
Describe what you see?
stock tray for upper complete denture - so no natural teeth in upper chart
edges - double wax
red ribbon across the back to sloe passage of alginate at the back
alginate impression - rolled borders and alginate not gone too far back - grooves - frenal attachments
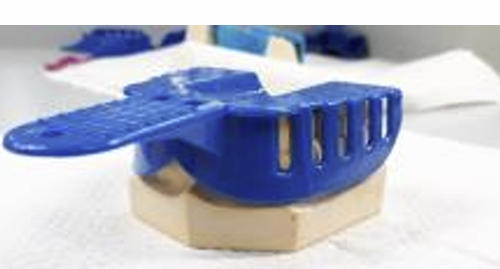
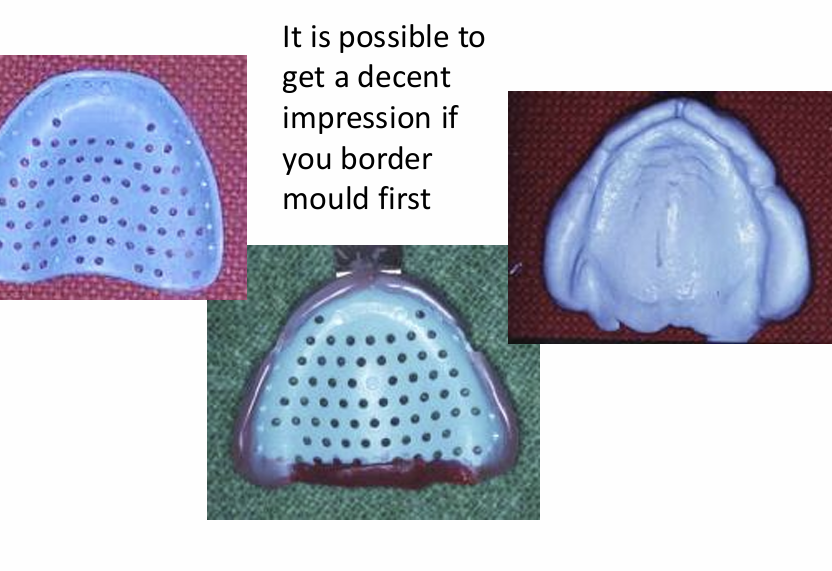
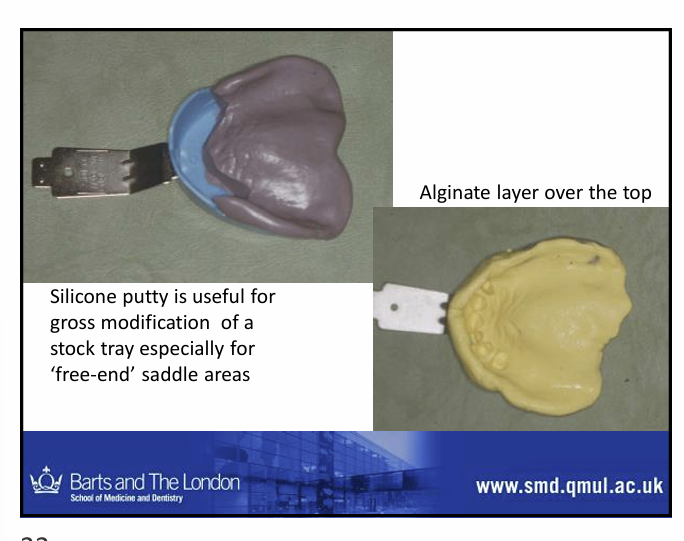
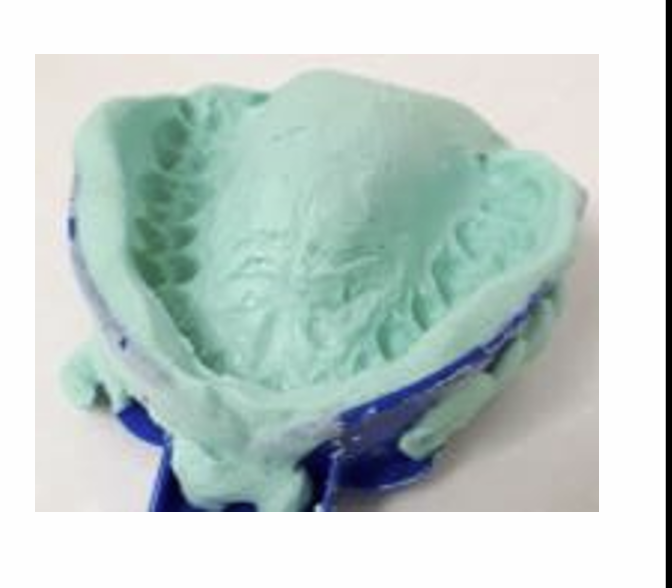
What can you do here?
block/pre-fill edentulous areas on impression tray with putty
What is happening here?
Like in the card before, the patient only has natural teeth in the anterioir region so the posterior edentulous region has been blocked out by putty
alginate layer will then cover the top
improves the accuracy of the impression
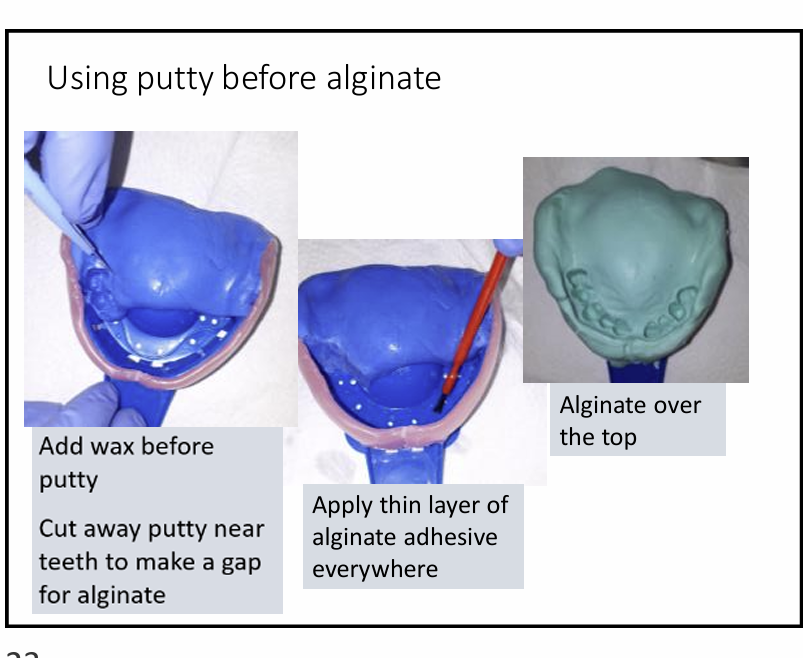
What are the steps in using putty before alginate?
Do border moulding in wax first then
Blue putty in a blue stock tray in edentulous areas in upper you can do it across the palate
any putty around the teeth is removed using a scalpel so there is space for the alginate to record the tooth surfaces
place some adhesive on the exposed stock tray and surface of the putty and wax additions and around the borders of the tray as well
alginate placed on top of the putty the tray and wax
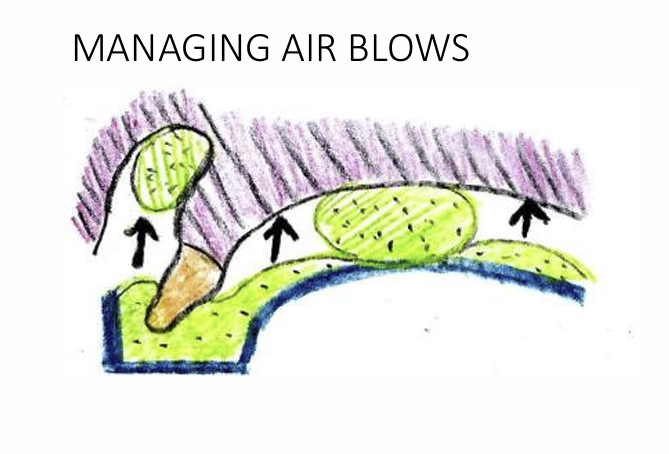
What is a problem you might face particularly in the labial sulcus and palate and how to deal with it?
air blows - air trapped in the areas causing air blows in the alginate
to manage you can pre load these areas with alginate before you put the tray in
tray is already preloaded with alginate - then quickly add the alginate in the sulcus before quickly placing the tray in the mouth so the alginates can join together - they might not stick together if you delay
What is the mistake here? (2)
tray seated too far forwards causing a lot of bulky alginate anteriorly
patietns left - problem with recording the sulcus - so right on the image
What is the mistake here?
not enough alginate in the tray in the right place - too much at the back but not enough around the border area so most of the border is recorded in wax and not alginate
lost distal part of the molar
What is the problem with this impression?
rolled border anteriorly is lacking - not the rounded shape
What is the mistake here?
lingual sulcus lacking
air blows in the anterioir labial sulcus
error?
deficiency labially
wax should be covered by alginate
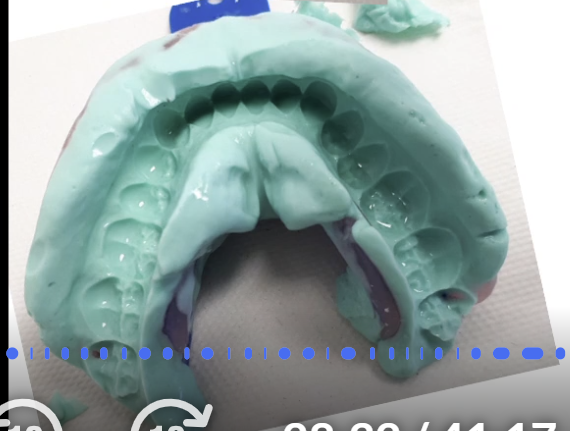
error
dry lumpy alginate in palate area
tray not seated fully, it could be alginate started to set
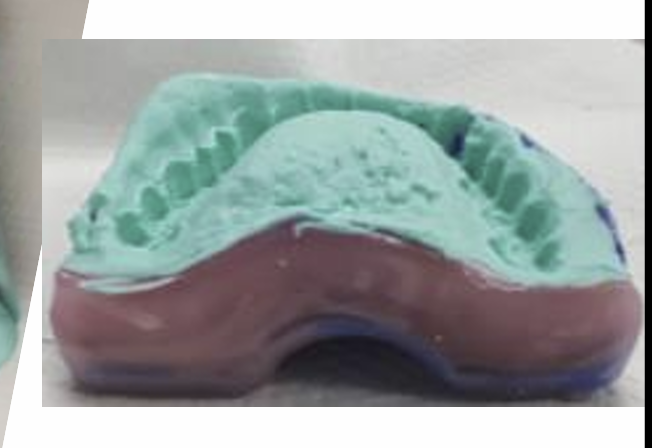
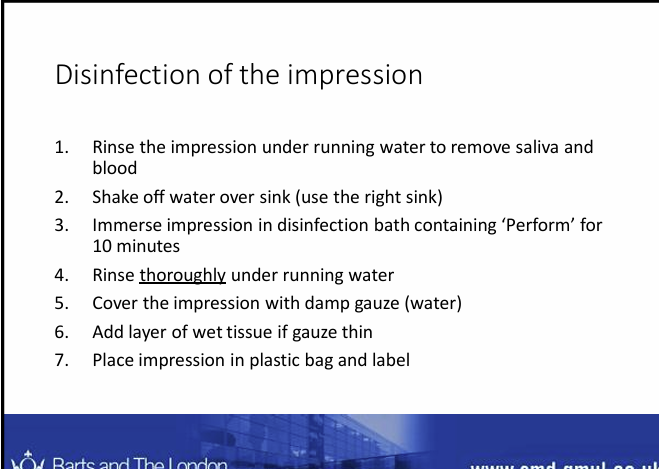
Steps for disinfecting impression material
Rinse impression
go disinfection area - submerge for 10 minutes
rinse
send to lab
chemicals left may interfere with the casting process
What must the bag contain?
MRN of the patient, name of the student and group
and date
whether it has been disinfected or not
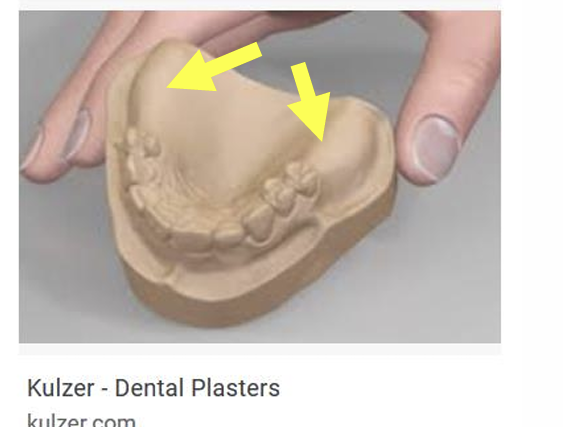
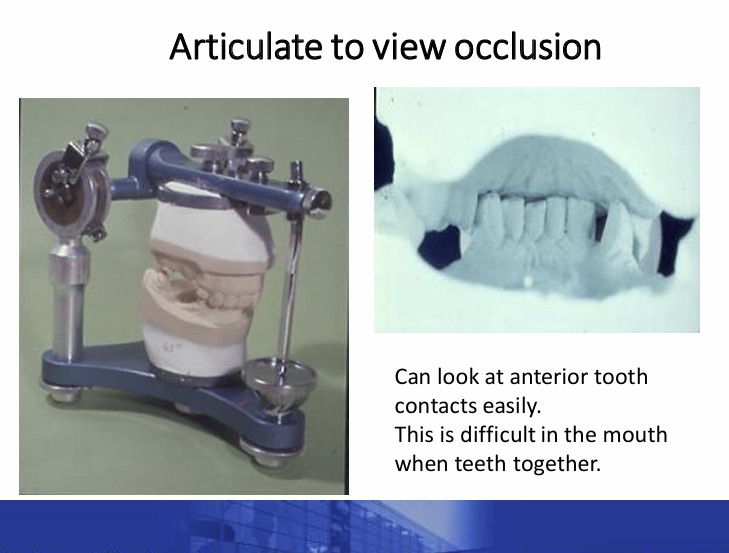
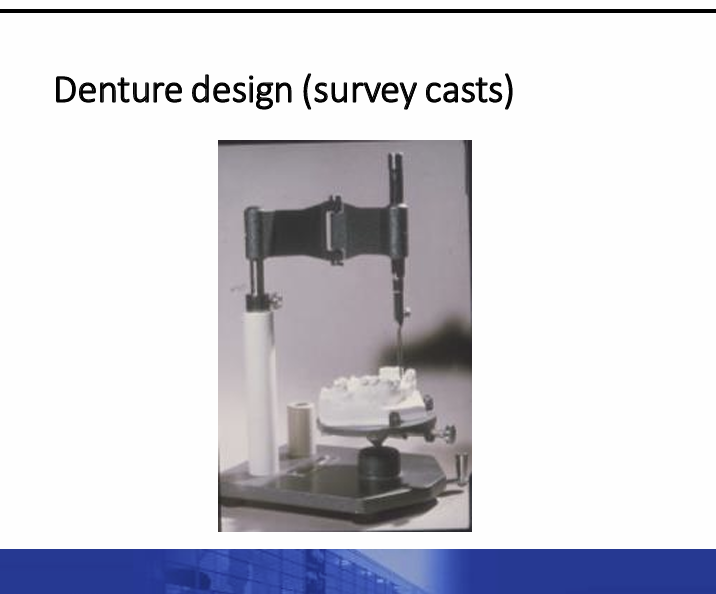
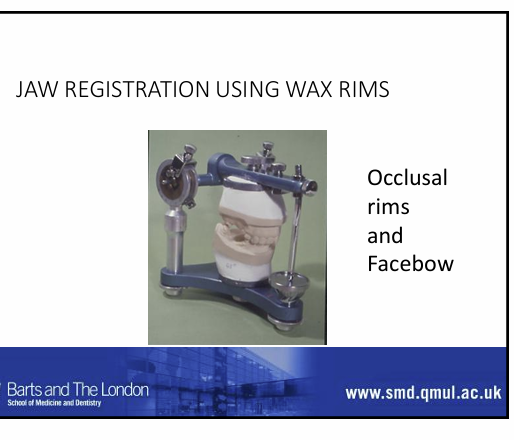
study casts are placed on a what?
articulator for planning treatment such as fixed and removable prosthodontics
enables you to see how teeth occlude
in the image it allows you to see the extent of the overbite which you wouldn’t be able to see from the patient
can be used when discussing treatment plans and discussing how to maintain their teeth and restorations
How else may study casts be used?
used for denture designs - used on surveyers?
design dentures
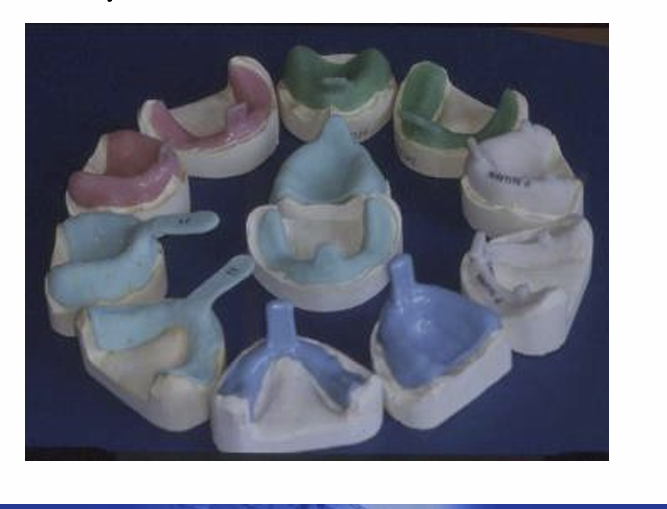
What else can study casts be used for?
special tray construction
a more personalised tray
How may they be used in treatment evaluation?
pre and post treatment record and reference during treatment
How may they also be used?
make diagnostic wax-ups - added wax to plaster teeth to change their shape - can practice changing shape of teeth on cast before doing something permanent in patients mouth
What else can they be used for?
responsibilities?
