Kois Dento-Facial Analyzer
1/13
There's no tags or description
Looks like no tags are added yet.
Name | Mastery | Learn | Test | Matching | Spaced |
|---|
No study sessions yet.
14 Terms
based on dr. kois's research of an average axis-incisal distance of _____mm, the kois dento-facial analyzer was developed to simply the procedures of transferring and mounting study casts for both esthetics and function
100 mm
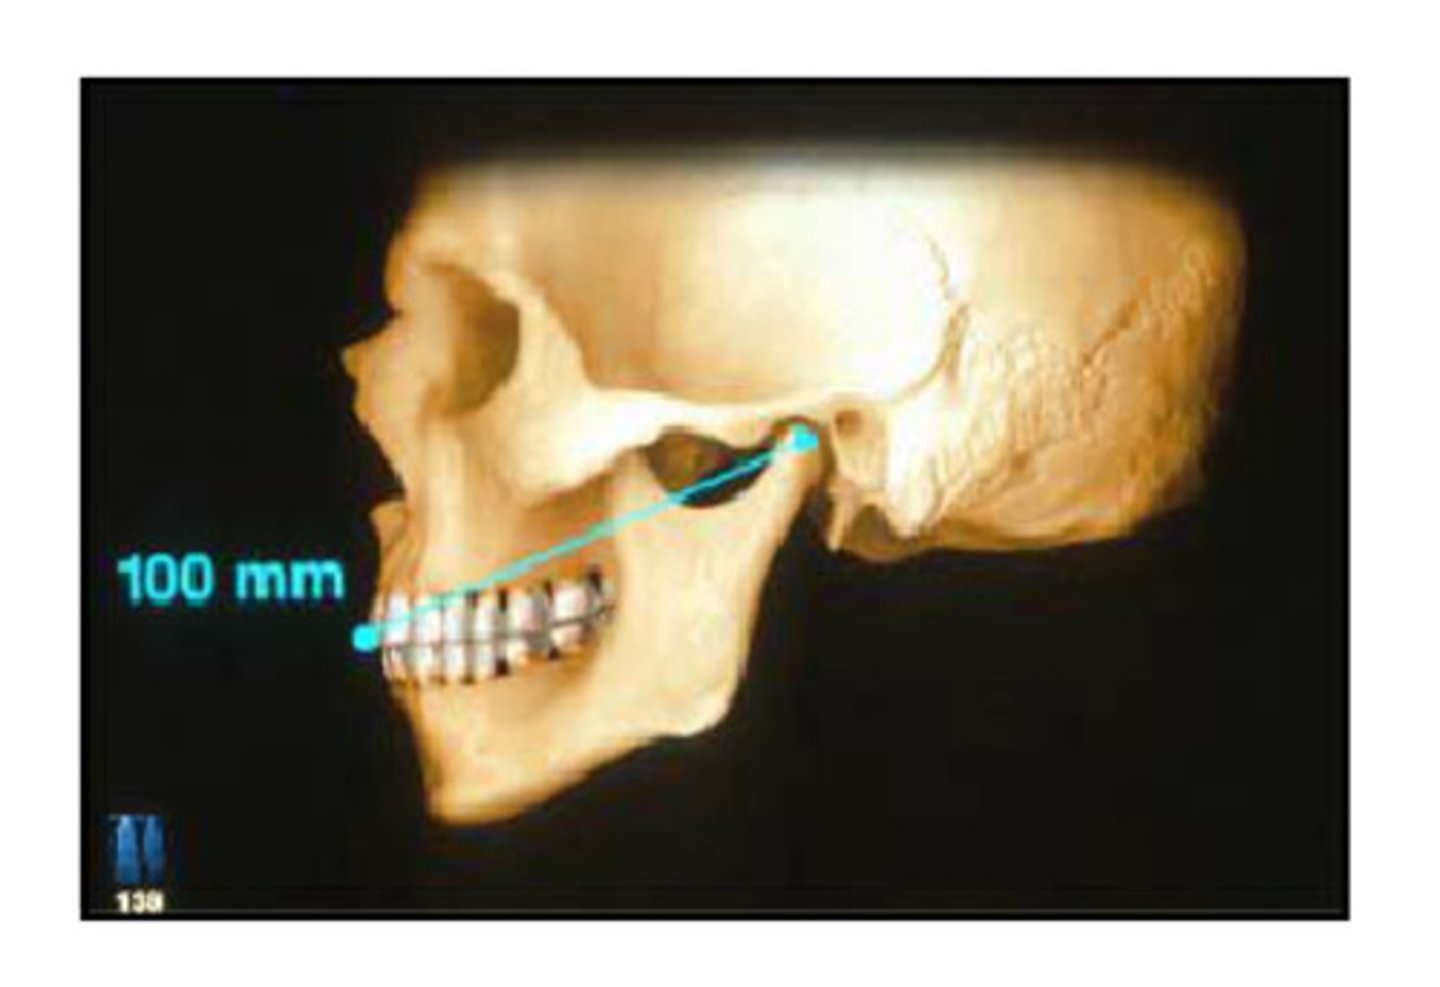
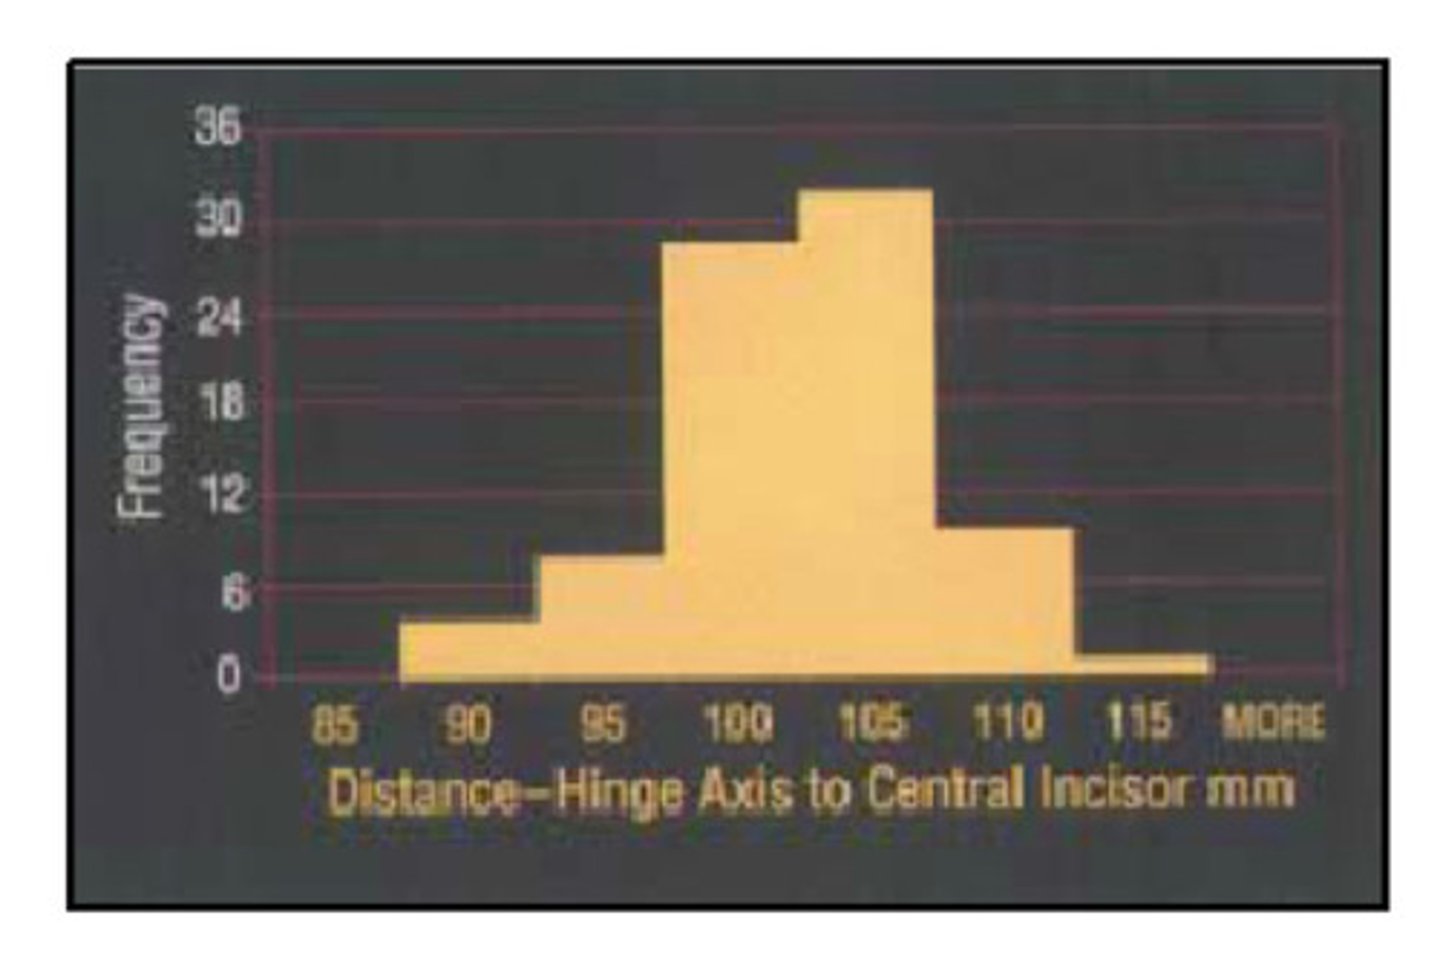
dr kois's research is substantiated and corroborated by many other studies. his study was done using different ethnic backgrounds and genders! this bar chart shows the distribution of measurements from the hinge axis to the incisal edge of the max central incisor
as you can see, approximately 80% are within 5 mm of the average 100 mm axis-incisal distance, which is approximately the same percentages reported in research comparing arbitrary earbows
traditionally, dentists are taught to make the incisal-canine line parallel to the eyes. why is this a problem?
if the eyes are slanted, then the teeth would also be made slanted!
the dental midline is critical and is always related to the facial midline. therefore, we need to register the ?
Facial midline which dictates the dental midline
the occlusal plane will be made ? to the dental midline
perpendicular
the kois system registers the steepness and tilts of the occlusal plane related in three planes of space. describe them
1) the horizontal portion of the analyzer bow will register an occlusal-horizontal plane of reference
2) the vertical rod will register the facial midline for the sagittal plane of reference
3) the average axis-incisal distance of 100 mm relates to the frontal plane of reference
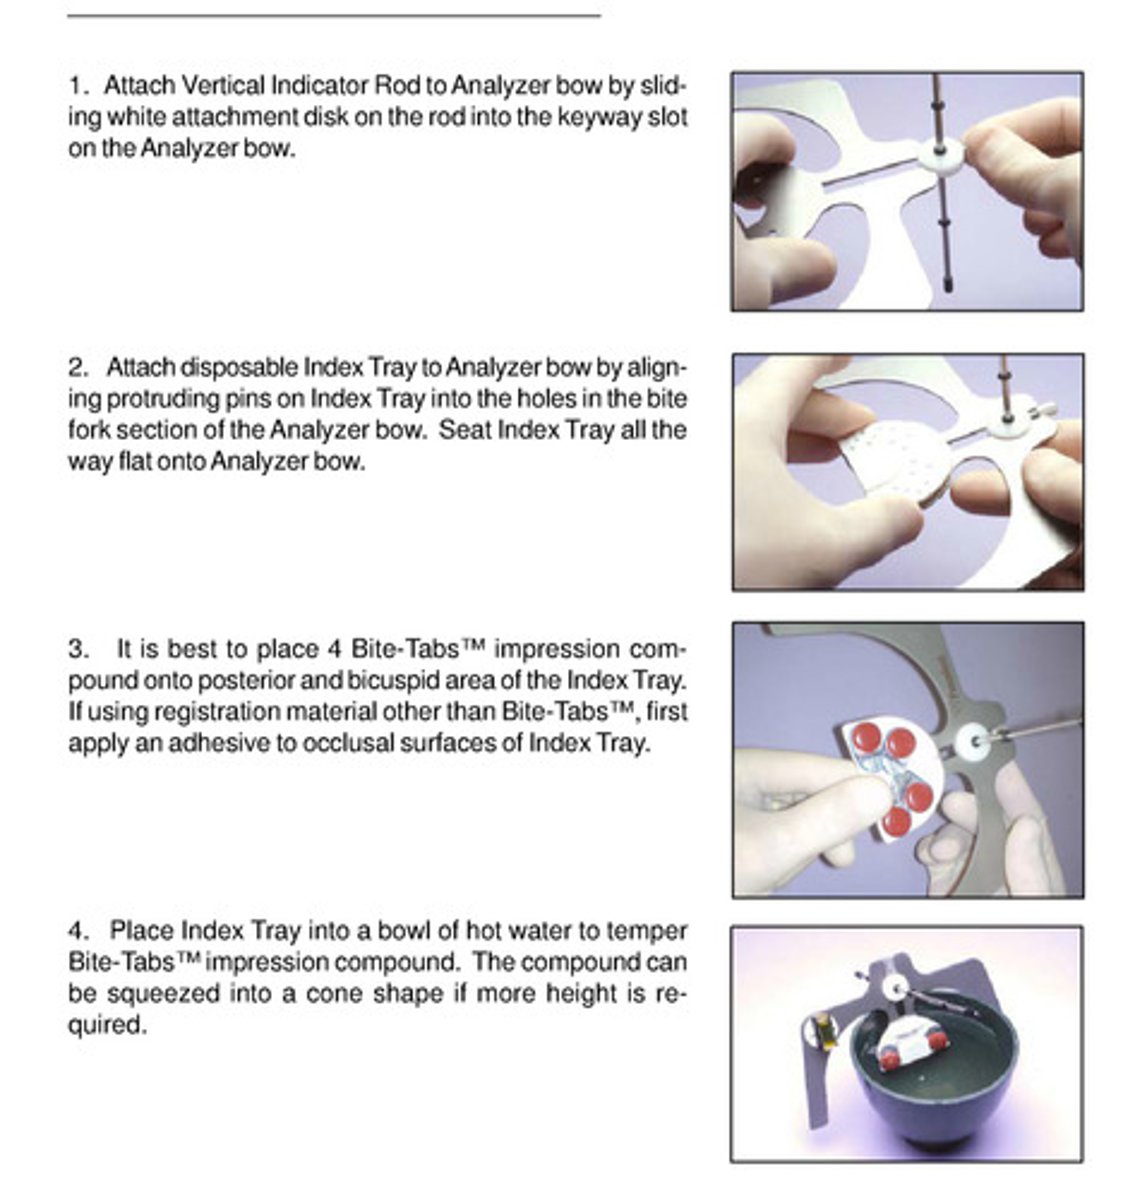
describe how the kois analyzer should be set up
1) attach vertical indicator rod to analyzer bow by sliding white attachment disk on the rod into key way slot on analyzer bow
2) attach disposable index tray to analyzer bow; seat it all the way flat
3) place 4 bite tabs impression compound onto posterior and bicuspid area of index tray; if using registration material other than bite-tabs, first apply an adhesive to occlusal surfaces of index tray
4) place index tray into hot water to temper the bite tabs impression compound; compound can be squeezed into cone shape if more height is needed
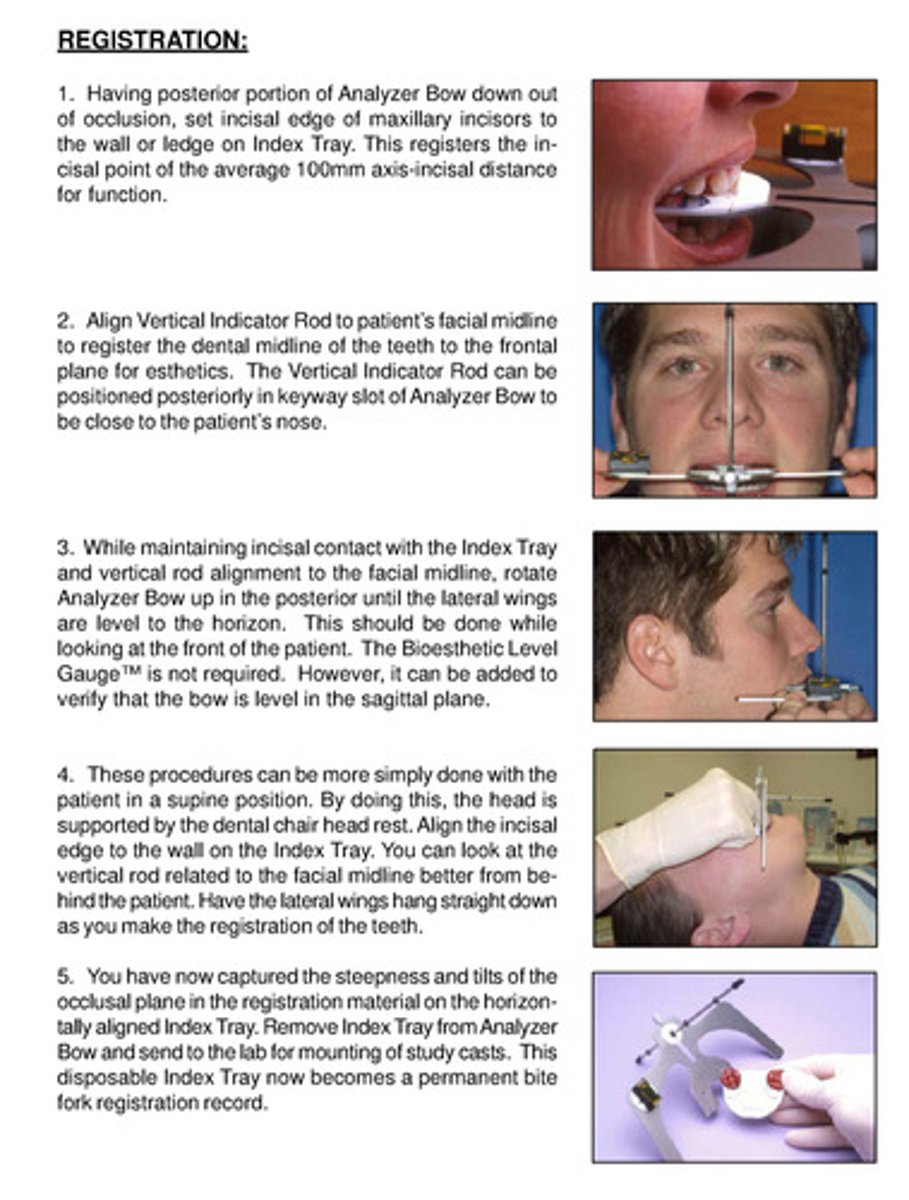
describe how to get proper registration using the kois analyzer
1) set incisal edge of max incisors to wall or ledge on index tray —> registers the incisal point of the average 100 mm axis-incisal distance for function
2) note that posterior portion should not be rotated to be level with horizon until vertical rod is aligned to patients facial midline
3) can use the bioesthetic level gauge to ensure lateral wings are level in the sagittal plane
4) this can be done easier in supine position
5) you now have bite registration :)
what should the kois adjustable platform be set at in order to prepare for mounting?
1) if using curved incisal pin articulator, set incisal pin to zero; if using straight incisal pin articulator, set to the heavy centered ring
2) set adjustable platform to 0 position with the adjustment screw
3) lock in place with lock screw
describe the mounting procedure while using kois adjustable platform
after maxillary cast is mounted, it has been engineered that the incisal edges are now 100 mm from the axis!

diagnostic options pt 1
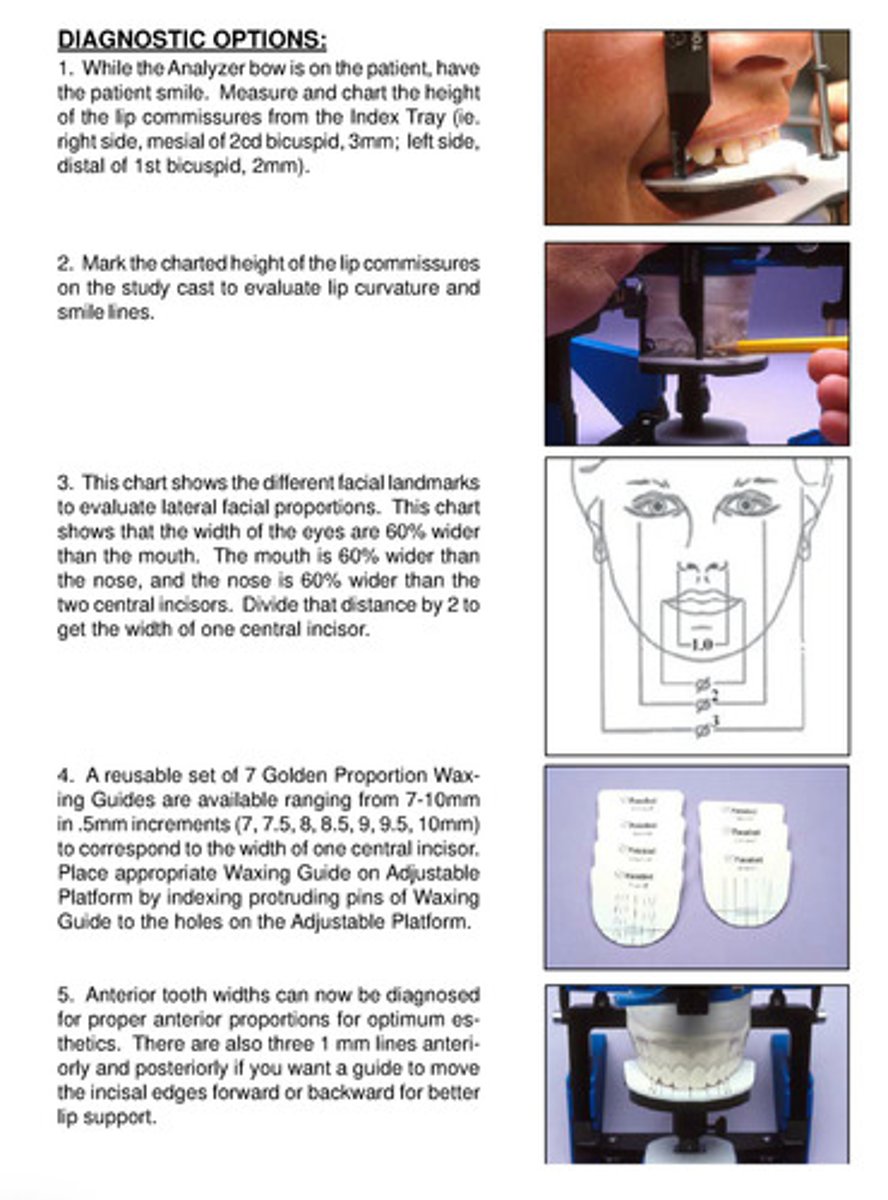
1) put analyzer bow on pt, have them smile —> measure and chart height of the lip commissures from the index tray
2) mark these measurements on the study cast to evaluate lip curvature and smile lines
3) according to a chart of different facial landmarks to evaluate lateral facial proportions, the width of the eyes are 60% wider than the mouth, the mouth 60% wider than the nose, and the nose 60% wider than the 2 central incisors
4) take that distance and divide by 2 = width of one central incisor
5) use the reusable set of 7 golden proportion waxing guides that have a range of measurements to correspond to the width of one central incisor (7-10 mm in 0.5 mm)
6) place the appropriate one onto the adjustable platform
7) the anterior tooth widths can now be diagnosed for proper anterior proportions for optimum esthetics
8) the waxing guides also have three 1mm lines anteriorly and posteriorly if you want a guide to move incisal edges forward or back for better lip support
diagnostic options pt 2
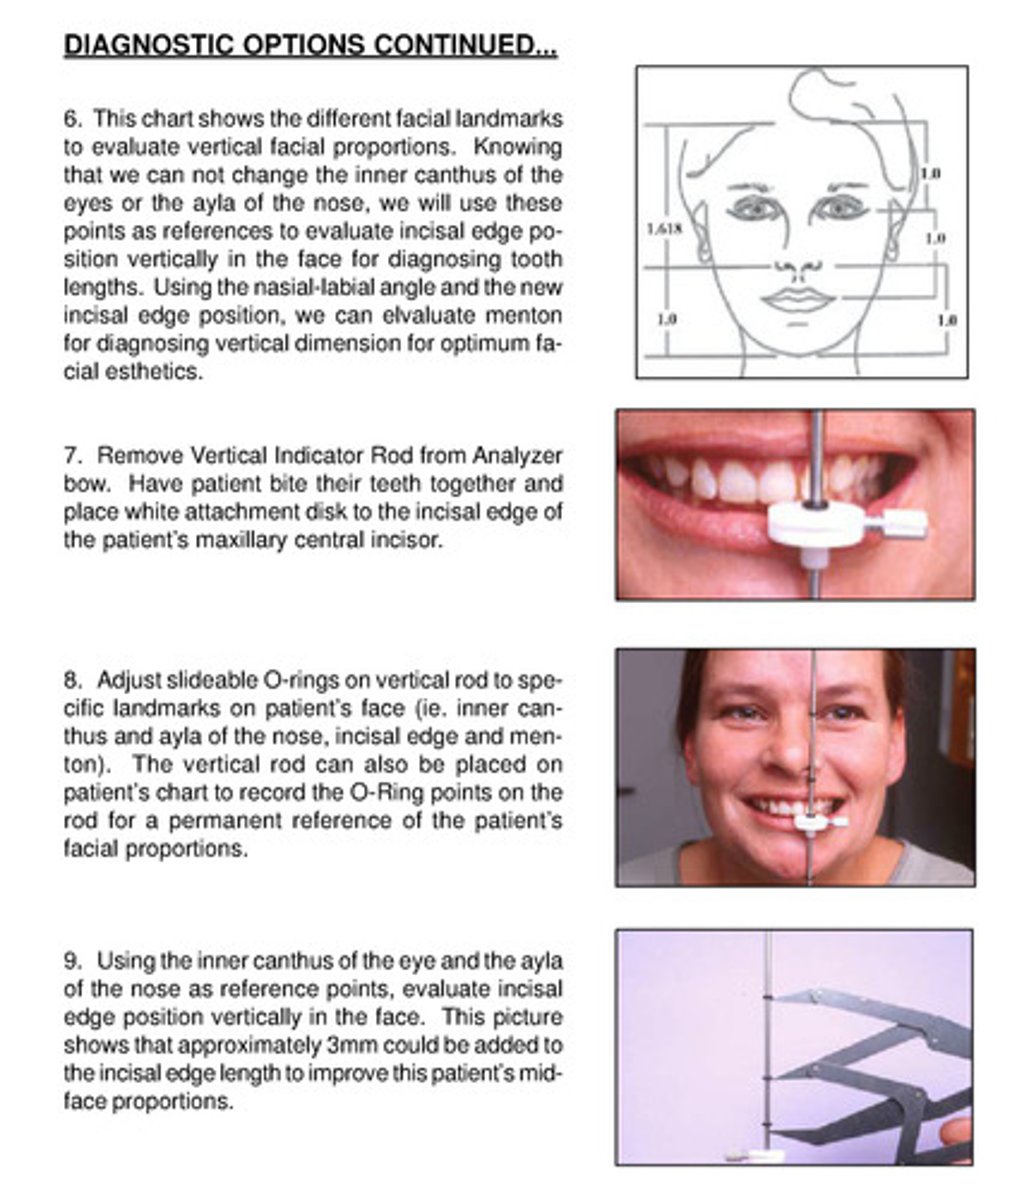
1) the chart shows different facial landmarks to evaluate vertical facial proportions
2) we cant change inner canthus of eyes or ayla of nose —> use as references to evaluate incisal edges position vertically in face for diagnosing tooth lengths
3) use nasal-labial angle and new incisal edge position —> can use menton (lowest point of chin) to diagnose vertical dimension for optimum facial esthetics
4) remove vertical indicator rod from analyzer bow —> have pt bite teeth together and place white attachment disk to incisal edge of max central incisor
5) adjust slideable o-rings on vertical rod to specific landmarks (inner canthus, ayla of nose, incisal edge, and menton); vertical rod can also be placed on pt's chart to record o-ring points on rod for permanent reference of pt's facial proportions
7) use inner canthus and ayla as reference points —> evaluate incisal edge position vertically in face; picture shows that ~3mm could be added to incisal length to improve mid face proportion
diagnostic options pt 3
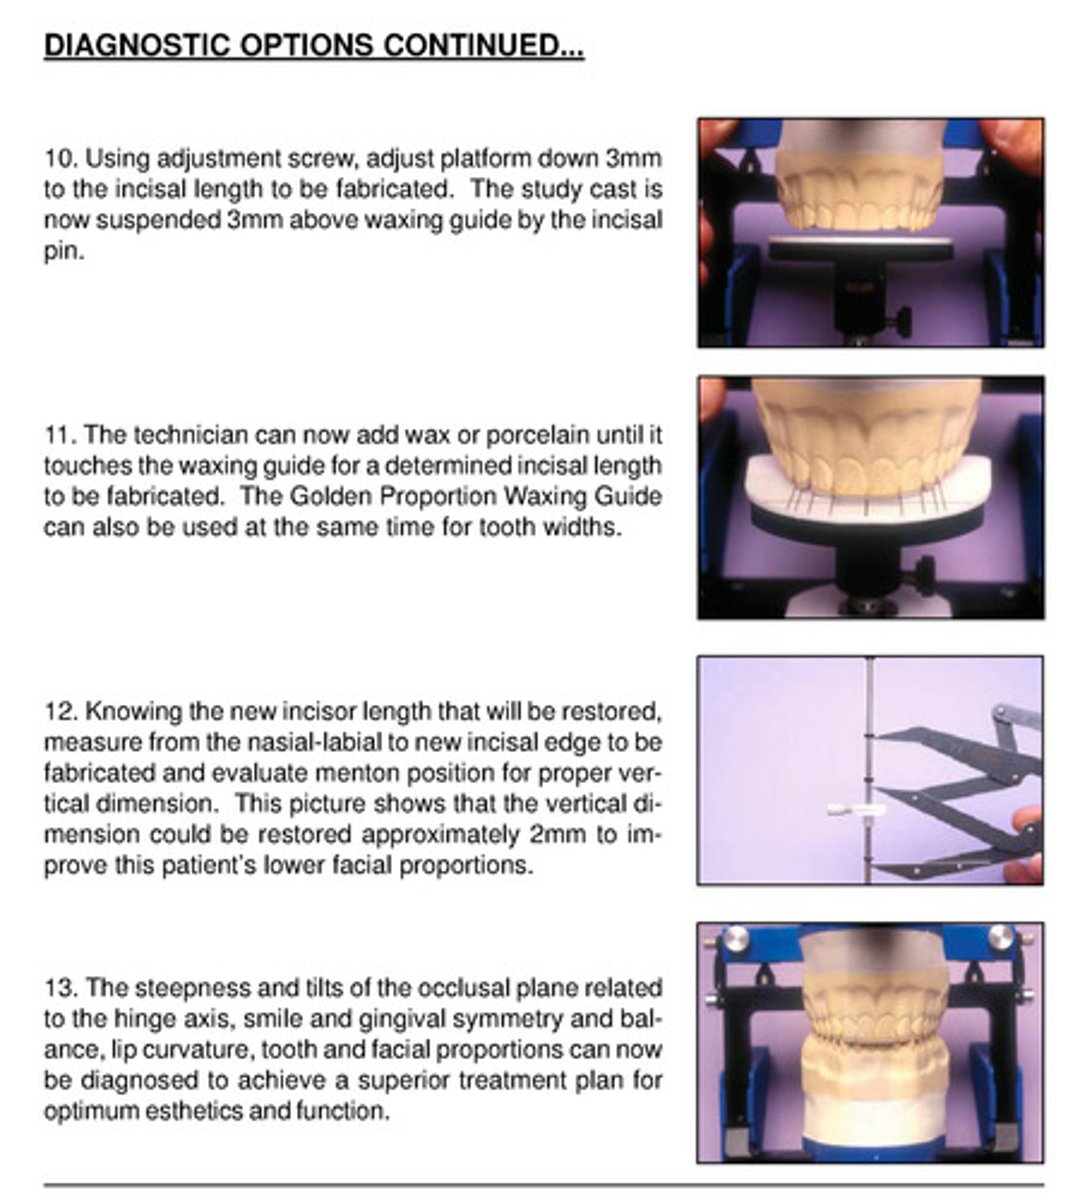
1) using adjustment screw, adjust kois platform down 3mm to the incisal length to be fabricated; study cast is now suspended 3mm above waxing guides by incisal pin
2) technician can add wax or porcelain until it touches waxing guide for determined incisal length to be fabricated; golden proportion waxing guide can also be used at same time for tooth widths
3) knowing the new incisor length that will be restored, measure from the nasal-labial to new incisal edge to be fabricated and evaluate menton position for proper vertical dimension
4) picture shows that VD could be restored ~2 mm to improve pt's lower facial proportions
5) steepness and tilts of occlusal plane related to hinge axis, smile, gingival symmetry and balance, lip curvature, tooth and facial proportions can now be diagnosed to achieve a superior tx plan for optimum esthetics and function
what is the purpose of the additional diagnostic options?
optimum esthetics and function!