S1 - Lab Positioning Guide: Upper/Lower Extremity
 Call Kai
 Learn
Learn Practice Test
 Spaced Repetition
 Match
Match Flashcards
 Knowt Play
1/43

There's no tags or description
Looks like no tags are added yet.
Name | Mastery | Learn | Test | Matching | Spaced | Call with Kai | Chat |
|---|
No analytics yet
Send a link to your students to track their progress
44 Terms
AIDET
Acknowledge - "Hello (patient's name), will you please verify your name and date of birth? Is there any chance you are pregnant?"
Introduce - "My name is (your name) and I am a radiography student."
Duration - "This exam should take about _____ minutes."
Explanation - "I will be taking images of your (body part.)"
Thank
Set up reminders
SHIELDING, MARKER, SIX (TABLE ARROWS), CR CENTERED ON DD
If changing collimation size, double check proper SID selected
Don’t move XR tube too fast
SID 40
Use foot stool; make sure it’s facing the right way for pt
Move tube before/after pt gets on table so it’s not in their way
Adjust table height so rectangle is above arrow
Don’t let patient straddle table. Move table to pt so legs comfortable
Marker Placement Basic Guidelines
*Tested
R or L markers must be placed on all radiographs
The marker should never obscure the anatomy of interest
The marker should always be placed in the exposure field on the edge of the collimation border
The marker should always be placed outside of any lead shielding
R and L markers must be used with CR and DR digital imaging
Additional Marker Recommendations
AP and PA bilateral projections:
For lateral projections of the head and trunk:
Oblique projections
For extremity projections
Projections with two images on one DD:
Limb positions where both the R and L sides are imaged side by side on one DD:
AP, PA, or oblique chest projections:
Decubitus positions of the chest and abdomen:
AP and PA bilateral projections: (head, spine, chest, abdomen, and pelvis) R marker is typically used
For lateral projections of the head and trunk: always mark the side closest to the DD, the marker is typically placed anterior to the anatomy
Oblique projections: (spine, chest, and abdomen) always mark the side closest to the DD
For extremity projections: use appropriate R or L marker; the marker must be placed within the edge of the collimated x-ray beam
Projections with two images on one DD: only one of the projections needs to be marked
Limb positions where both the R and L sides are imaged side by side on one DD: (ex. R and L AP knees) both the R and L markers must be used to clearly identify the two sides
AP, PA, or oblique chest projections: marker is placed on the upper outer corner so that the thoracic anatomy is not obscured
Decubitus positions of the chest and abdomen: the R or L marker should always be placed on the side up (opposite the side laid on) and away from the anatomy of interest
More marker notes
Put marker on LATERAL side of body part
exs:
Right PA hand → marker on thumb side
AP forward → thumb
oblique → thumb
But for LATERAL PROJECTIONS, marker goes ANTERIOR
PA Hand
Collimation (never tested)
SID
Patient Position
CR (central ray)
Collimation: 7×8
SID: 40
Patient Position
Pronate hand
Forearm on table
Spread digits
CR: ⏊ 3rd MCP (knuckle)
Notes
can set up equipment before pt or vice versa
line up collimation with DD lines
wrist and middle finger lined up longitudinal lines
palm flat

OBL Hand
Collimation: 7×8
SID: 40
Patient Position
MCP joints 45° to DD
Forearm on table
Spread digits
CR: ⏊ 3rd MCP (or 2nd MCP)
Notes
“hand flat, rotate, thumb down”
thumb parallel to DD
longitudinal line down finger and forearm

LAT Hand (blade)
Collimation: 6×8
SID: 40
Patient Position
MCP joints 90° to DD
Forearm on table
Superimpose digits
CR: ⏊ 2nd MCP
Notes
karate chop (stacked fingers), thumb down and parallel to DD
longitudinal line down finger and wrist
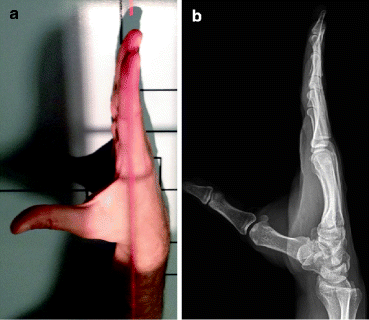
LAT Hand (Fan)
Collimation: 6×8
SID: 40
Patient Position
MCP joints 90° to DD
Forearm on table
Fan digits
CR: ⏊ 2nd MCP
Notes
karate chop, OK sign, spread last 3 fingers apart, separate thumb and finger so not touching
keep wrist lateral (no rotation)
All MCP’s superimposed and fingers parallel to DD

PA Wrist
Collimation: 4×8
SID: 40
Patient Position
Hand in a fist
Forearm on table
CR: ⏊ midcarpals
Notes
Collimate knuckle to wrist

OBL Wrist
Collimation: 4×8
SID: 40
Patient Position
MCP joints 45° to DD
Forearm on table
CR: ⏊ midcarpals
Notes
raise wrist 45° (rotate)
Collimate knuckle to wrist
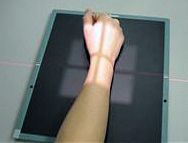
LAT Wrist
Collimation: 3×8
SID: 40
Patient Position
MCP joints 90° to DD
Forearm on table
CR: ⏊ wrist joint
Notes
like a “thumbs up” but thumb not actually up
digits don’t matter
Ulnar Deviation (Scaphoid)
Collimation: 4×8
SID: 40
Patient Position
Pronate hand
Forearm on table
Deviate hand outward
CR: 10-15° toward elbow, ⏊ scaphoid
Notes
Start PA wrist
medial rotation
make sure thumb WITH hand
Angulation 10-15° toward elbow, CHANGE SID from 40 to 37
How do you maintain 40 SID with angulation?
For every 5 degree tube turn, lower tube 1 inch
ex: 10 degree angulation = change 40SID to 38 SID
AP Forearm
Collimation: 5×15
SID: 40
Patient Position
Supinate hand
Shoulder, elbow, and wrist in same plane
CR: ⏊ midpoint of forearm
Notes:
no rotation
wrist joint parallel with DD
collimation light past elbow and wrist joints
don’t let pt straddle table, move table to pt

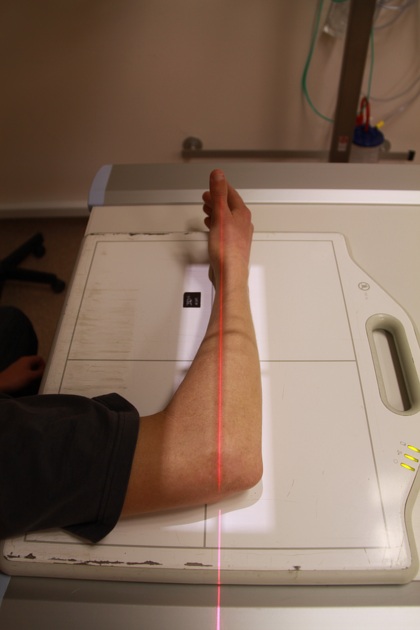
LAT Forearm
Collimation: 5×15
SID: 40
Patient Position
Elbow flexed 90°
Shoulder, elbow, and wrist in same plane
CR: ⏊ midpoint of forearm
Notes
slide DD horizontal
90° elbow (pinky on DD, thumb facing up)
lower shoulder so same plane as elbow/wrist
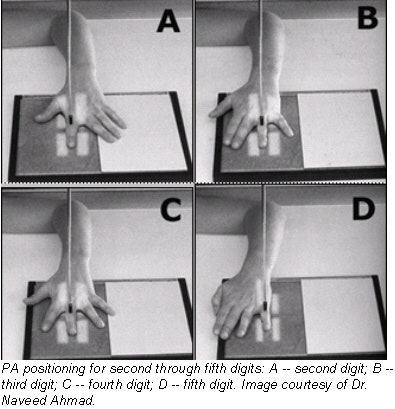
AP/PA Digits
*double check pic
Collimation: 2×6
SID: 40
Patient Position
Pronate hand
Forearm on table
Spread digits
CR: ⏊ MCP
Note
Collimate to include the entire phalange and metacarpal
AP Thumb - Rotate in so fingernail on DD, thumb line up with long axis
PA Digits 2-5 - like PA hand
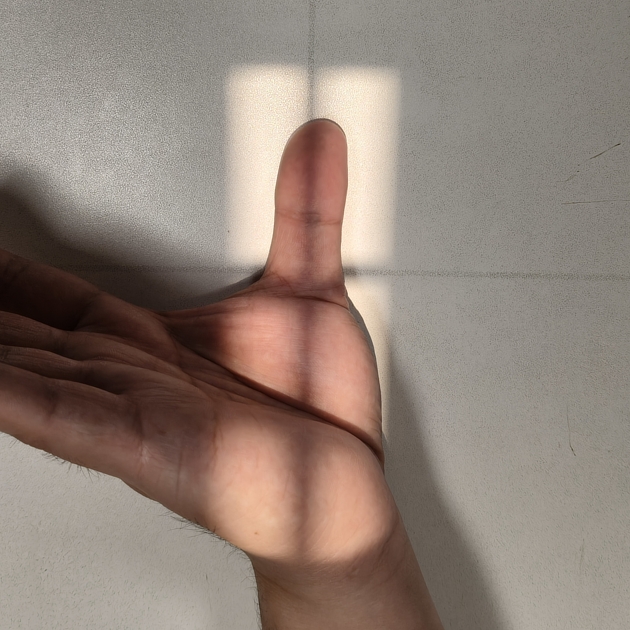
OBL Digits
*double check pic
Collimation: 2×6
SID: 40
Patient Position
MCP joints 45° to DD
Forearm on table
Spread digits
CR: ⏊ MCP
Note
Collimate to include the entire phalange and metacarpal
Thumb: no need 45°, just palm on table and rotate wrist so thumb align with forewarm
Digits 2-5: regular OBL hand
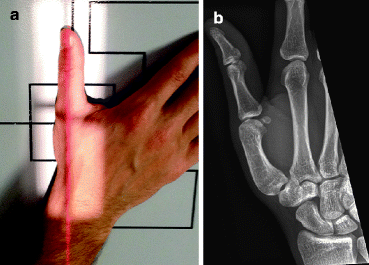
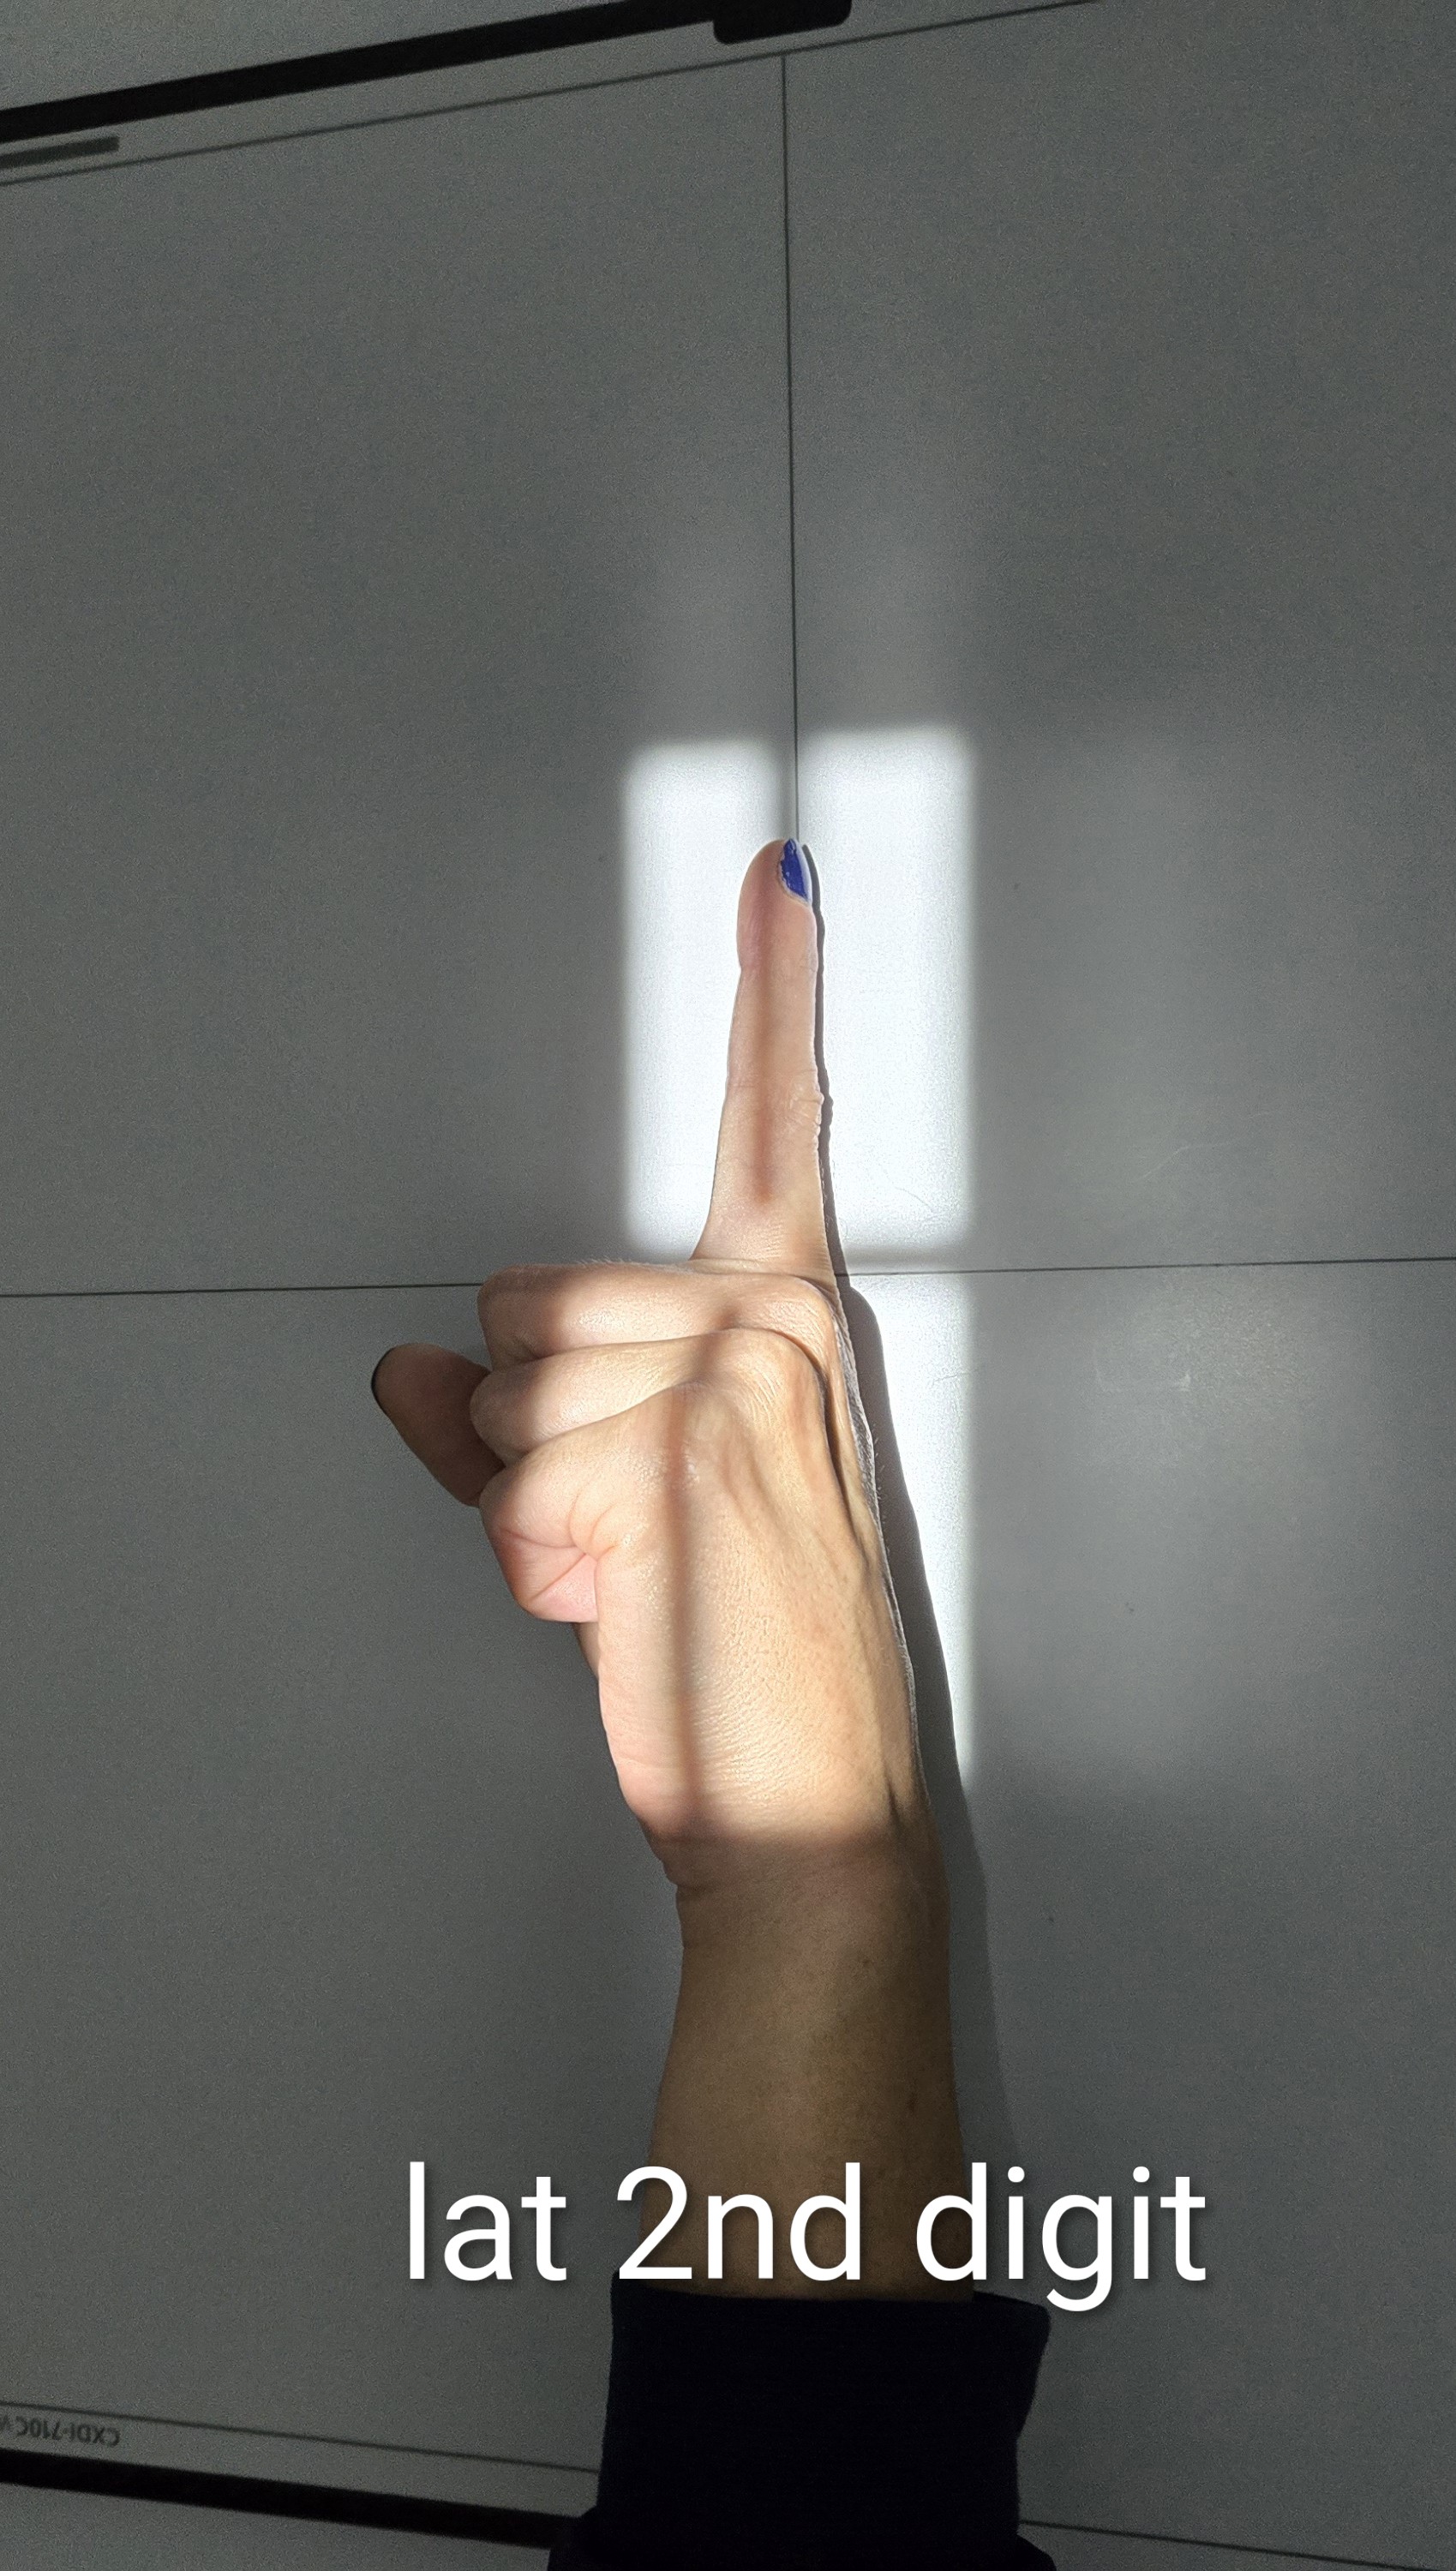
LAT Digits
*double check pic
Collimation: 2×6
SID: 40
Patient Position
MCP joints 90° to DD
Forearm on table
Fan digits
CR: ⏊ MCP
Note
Collimate to include the entire phalange and metacarpal
Thumb: PA Hand, rotate outwards, roll in 2-5 digits until thumb lateral
marker inside thumb (anterior)
2nd and 3rd digit: finger out, rotate inwards wrist
4th: karate, finger bend in, no rotate
5th: fist, pinky out, no rotate


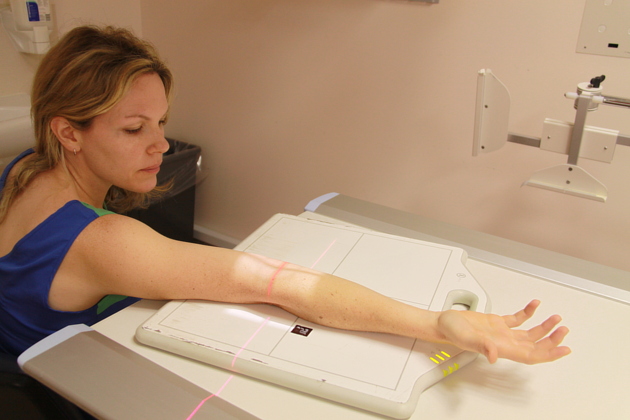
AP Elbow
Collimation: 5×9
SID: 40
Patient Position
Supinate hand
shoulder, elbow, wrist in same plane
CR: ⏊ elbow joint
Note:
raise table
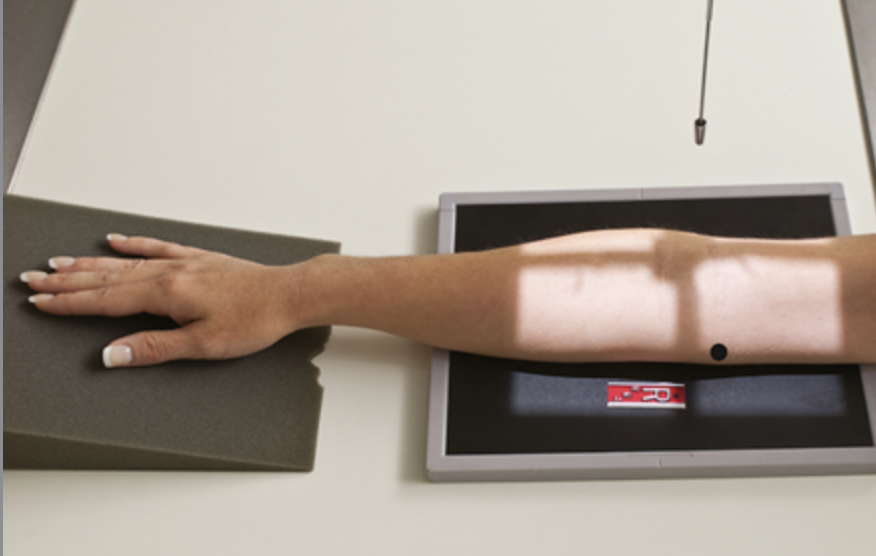
OBL Elbow (Medial)
Collimation: 5×9
SID: 40
Patient Position
Elbow rotated 45°
Shoulder, elbow, and wrist in same plane
CR: ⏊ elbow joint
Note:
raise table
AP elbow, then turn palm prone
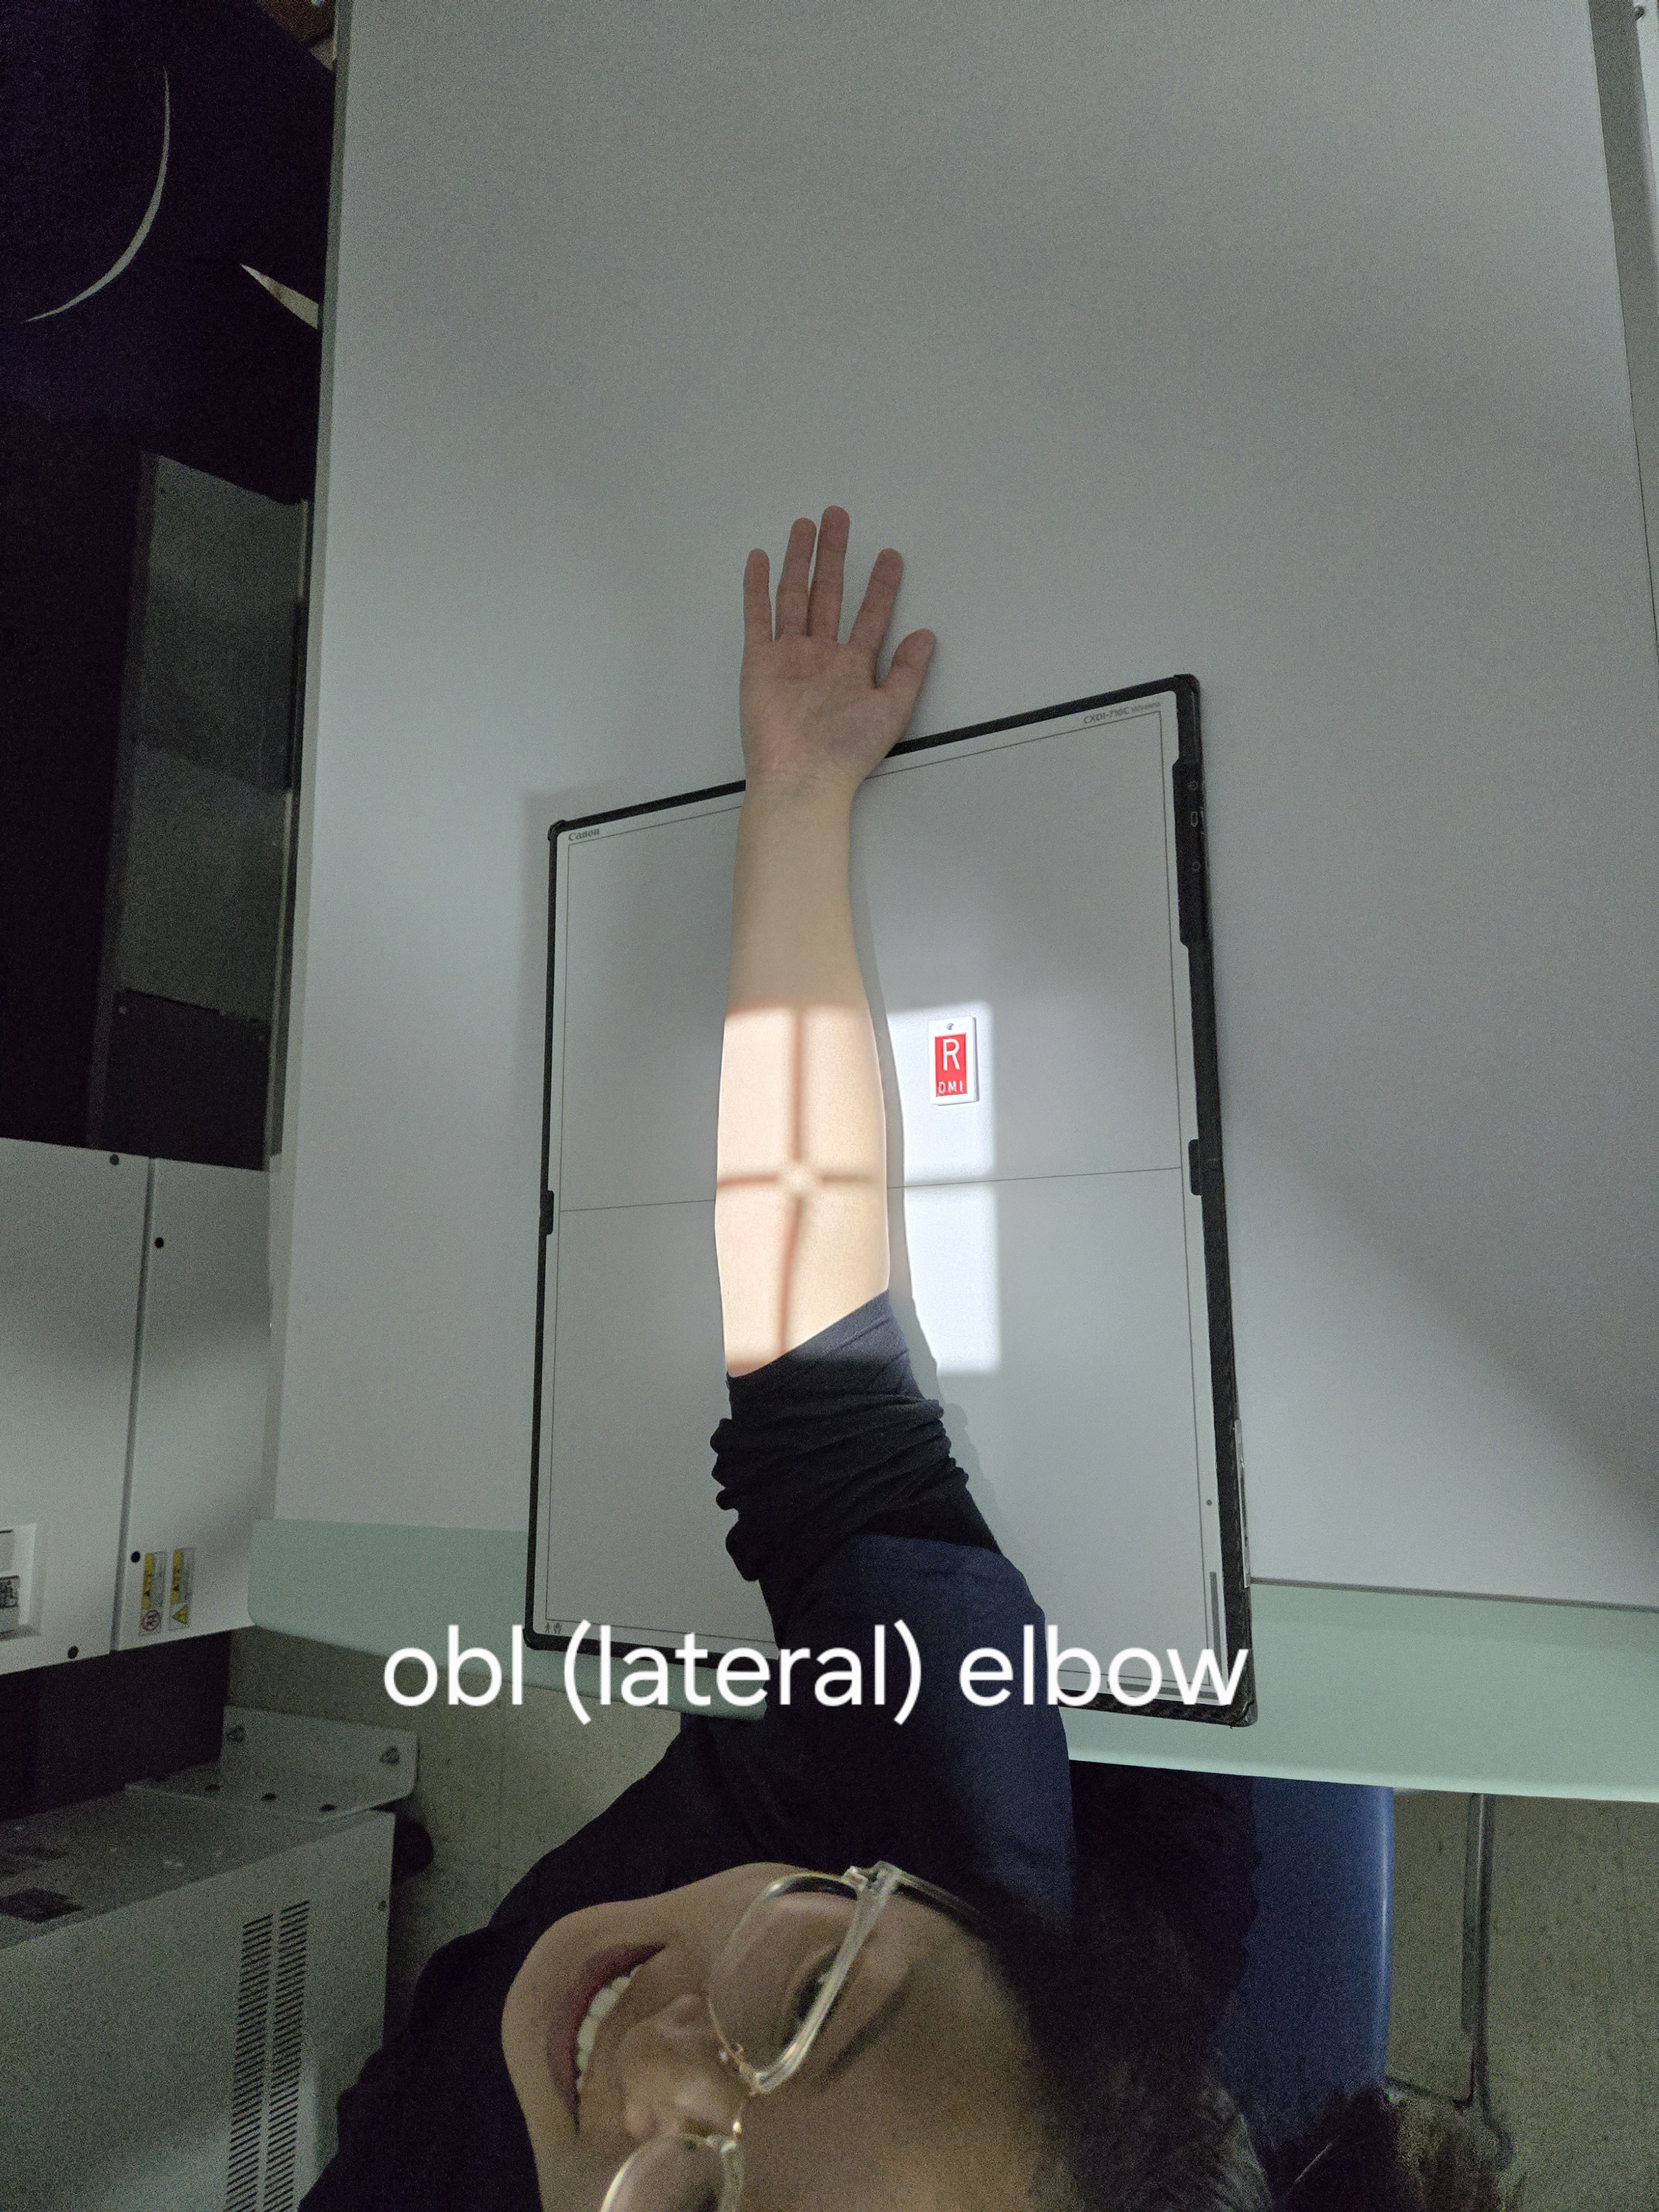
OBL Elbow (lateral)
Collimation: 5×9
SID: 40
Patient Position
Elbow rotated 45°
Shoulder, elbow, and wrist in same plane
CR: ⏊ elbow joint
Note:
raise table
AP Elbow, rotate arm out (pt bend awkwardly)
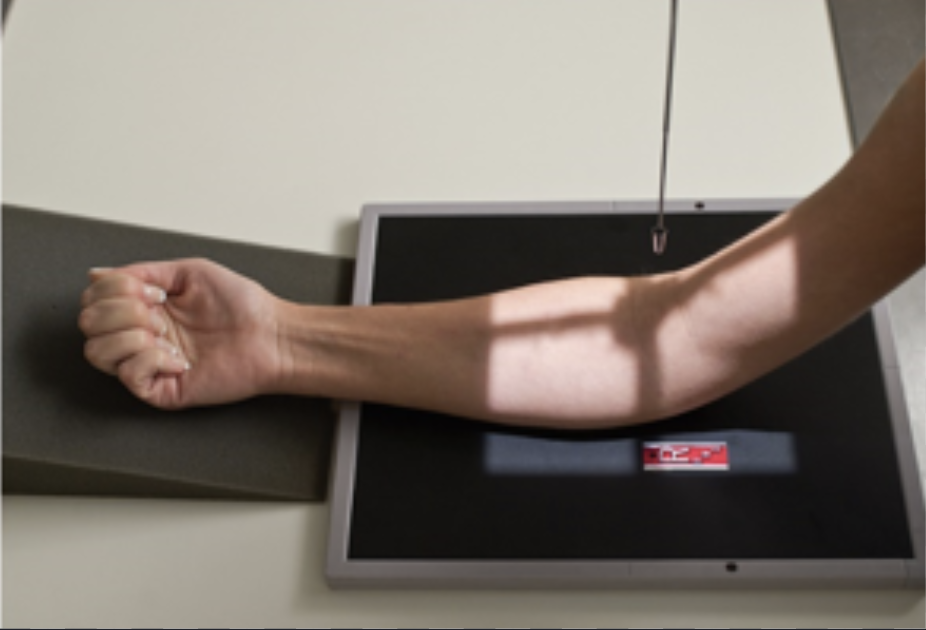
LAT elbow
Collimation: 5×9
SID: 40
Patient Position
Elbow flexed 90°
Shoulder, elbow, and wrist in same plane
CR: ⏊ elbow joint
Note:
raise table
make sure hand karate position
marker anterior

Partial Flexion Proximal Forearm Elbow
Collimation: 5×9
SID: 40
Patient Position
Forearm on table
CR: ⏊ elbow joint
Note:
AP elbow, forearm on table
prob have pt stand
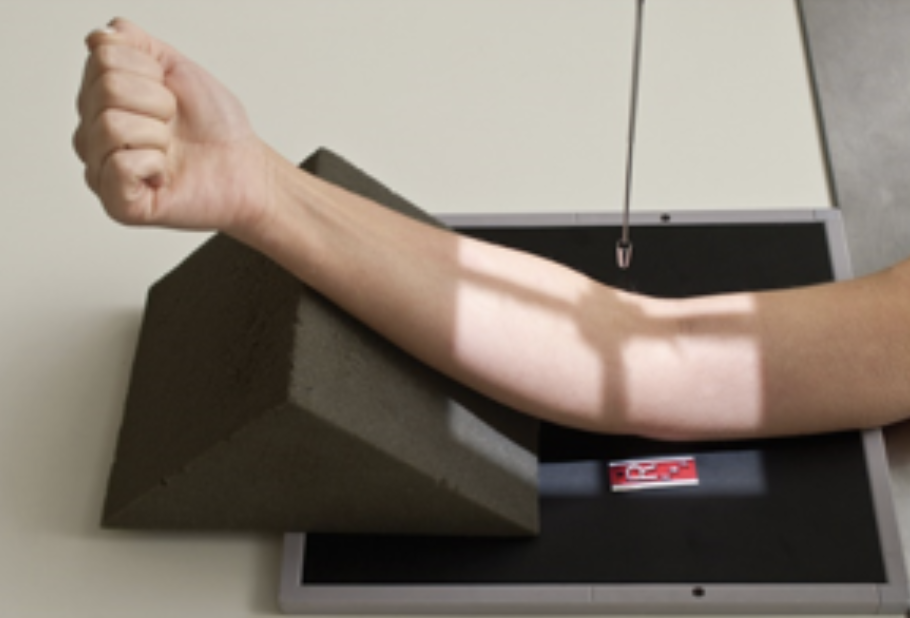
Partial Flexion Distal Humerus Elbow
Collimation: 5×9
SID: 40
Patient Position
humerus on table
CR: ⏊ elbow joint
Note:
AP elbow, humerus on table
AP elbow vs partial flexions?
If pt can fully extend elbow → AP elbow
If cannot → partial flexion proximal forearm + distal humerus
AP Foot
Collimation:
SID:
Patient Position
CR:
Note:
OBL Foot
Collimation:
SID:
Patient Position
CR:
Note:
LAT Foot
Collimation:
SID:
Patient Position
CR:
Note:
AP Ankle
Collimation:
SID:
Patient Position
CR:
Note:
OBL Ankle (45 degree)
Collimation:
SID:
Patient Position
CR:
Note:
OBL Ankle (Mortise)
Collimation:
SID:
Patient Position
CR:
Note:
LAT Ankle
Collimation:
SID:
Patient Position
CR:
Note:
AP Tib/Fib
Collimation:
SID:
Patient Position
CR:
Note:
LAT Tib/Fib
Collimation:
SID:
Patient Position
CR:
Note:
Axial Calcaneus (Os Calcis)
Collimation:
SID:
Patient Position
CR:
Note:
LAT Calcaneus (Os Calcis)
Collimation:
SID:
Patient Position
CR:
Note:
AP Knee
Collimation:
SID:
Patient Position
CR:
Note:
OBL Knee (lateral)
Collimation:
SID:
Patient Position
CR:
Note:
OBL Knee (medial)
Collimation:
SID:
Patient Position
CR:
Note:
LAT Knee
Collimation:
SID:
Patient Position
CR:
Note:
PA Axial Knee (Camp Coventry, Tunnel, Notch)*
Collimation:
SID:
Patient Position
CR:
Note:
Sunrise Patella (Tangential) (Settegast)
Collimation:
SID:
Patient Position
CR:
Note:
Merchant Patella (Tangential)
Collimation:
SID:
Patient Position
CR:
Note: