W2: Body Mechanics & Vital Signs/Assessment of Activity Tolerance
 Call Kai
 Learn
Learn Practice Test
 Spaced Repetition
 Match
Match Flashcards
 Knowt Play
1/18

There's no tags or description
Looks like no tags are added yet.
Name | Mastery | Learn | Test | Matching | Spaced | Call with Kai | Chat |
|---|
No analytics yet
Send a link to your students to track their progress
19 Terms
what is body mechanics?
Body mechanics are an important component of safety. Using proper body mechanics protects the patient and caregiver and maximizes leverage for ease and safety of a task.
principles of body mechanics
-Position yourself so your center of gravity (COG) and an objects center of gravity are as close to you as possible. Your COG is located at approximately the S2 level.
-Increase your base of support (BOS) for appropriate width, breath and neutral or diagonal stance. You may need to straddle a barrier if needed.
-Position your feet according to direction of movement.
-Keep lumbar and thoracic spine in neutral positions, using a hip hinge and adequate scapular retraction.
-Be prepared for the lifting activity, mentally and physically, before starting the lift.
-Educate patient in their roles and responsibilities associated with the lift.
-Clear a path from point A to point B.
-Discuss a plan with all team members involved. Communicate clearly who is in charge and continue to communicate throughout the transfer.
-Avoid twisting or flexing the spine by moving your feet or pivoting over your feet. Pivoting requires a person to keep pelvis and shoulders aligned.
-Base of Support (BOS) should be wide enough and in a direction to achieve safe balance and allow for transfer of weight without twisting or bending the spine.
-Lumbar lordosis should be maintained at all times. Motion and forces should come from lower extremities.
-When lifting or moving a load, keep the load (in this case, your patient) close to your center of mass to decrease force and stress on your body.
-Pushing an object is generally easier than pulling, however, it also depends on the task/activity, the object, and your mechanics.

weight shifting
It is safer to move your center of gravity within your base of support. This avoids twisting or bending in the spine and allows you to adapt to external perturbations. Widening your BOS will allow you to reach further before moving outside your BOS.
standing posture
In standing, a person should have a neutral spine with typical anatomical curves in the spine. If you were to drop a plumb line from the ceiling, alongside a patient, the plumb line should pass through: external meatus (ear), humeral head, greater trochanter, and lateral malleolus

sitting posture
In sitting, a person should have a neutral spine with typical anatomical curves in the spine. Their feet should be firmly planted on the ground and the hips and knees should be bent to approximately 90 degrees.
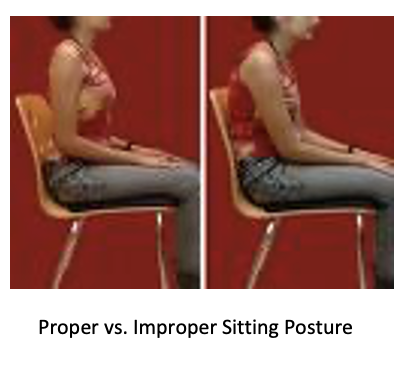
squatting
Partial squat is used to lift an object between knee and waist height. Deep squat is used to lift objects lower than knee height. Kneeling or half kneeling can be used to lift awkward or low to the ground objects, to lift them to a safe lifting height. The lumbar spine should be kept in a neutral position with a normal lumbar lordosis.
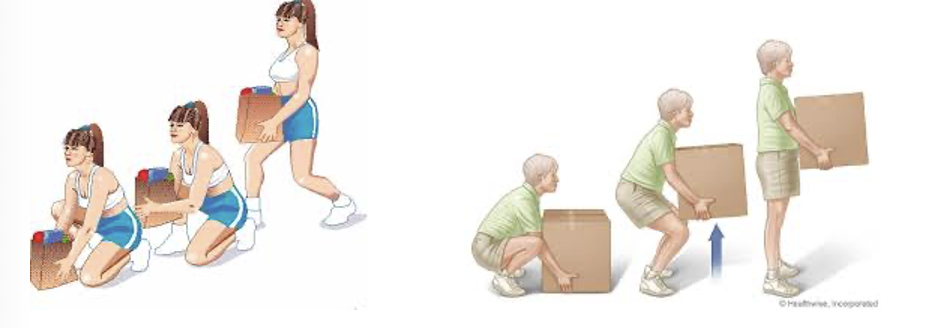
Golder’s Lift
is used for objects that are low to the ground and light. A person stands on one leg, extending the other leg straight behind them as they hip hinge to the ground. The spine remains neutral.

core stability tests (3)
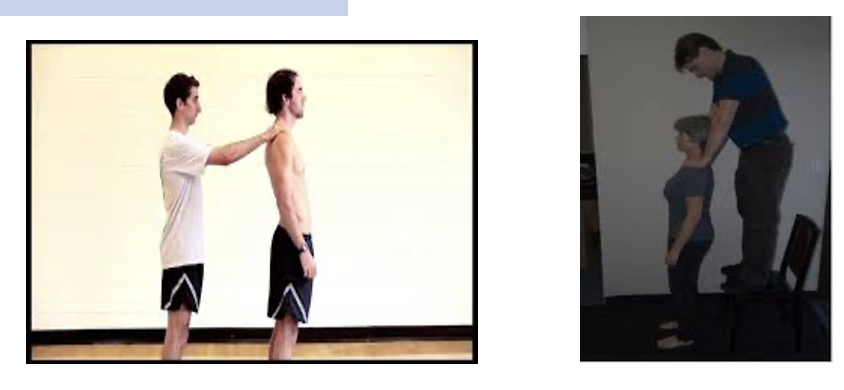
-Elbow Flexion Test: Patient stands with arms at side, elbows flexed to 90 degrees and normal base of support. Evaluator puts pressure through the patient’s forearms in a downward vertical direction. An inability to accept this weight without buckling or bending in the lumbar spine indicates poor core stability.
-Push Test: Patient stands with normal base of support. Evaluator gives quick, random horizontal pushes through patient’s shoulders in variety of directions. Inability to maintain balance indicates poor core stability. Can also be done with patient standing with staggered stance.
-Vertical Compression Test: Patient stands with arms at side and normal base of support. Evaluator puts quick, strong downward vertical pressure through patient’s shoulders. Buckling or bending in the lumbar spine indicates poor core stability. Can also be done with patient sitting and or with PT standing on a stool/chair/mat.
vital signs
-Typically include pulse rate, heart rate (HR), respiratory rate (RR), temperature, blood pressure (BP), level of oxygenation (P02), and pain; they indicate general health, physiologic status, and level of pain. Once a baseline is established, subsequent readings/measurements can be used to measure patient responses to activity.
-Baseline measurements at rest need to be established, especially with the: elderly, very young, debilitated; those whose history includes limited aerobic activity for several weeks/months, cardiovascular (CV) problems, recent trauma, especially those with cardiopulmonary compromise or recent major surgery.
-If patient has abnormal values at rest, cause of values needs to be identified before initiation of activity.
-Adverse responses to activity include: mental confusion, fatigue, lethargy, dyspnea, slow reaction, decreased response to stimuli, nausea, syncope, diaphoresis, pupil constriction/dilation, and loss of consciousness. Some adverse responses simply require close monitoring during and following the intervention, while others imply a contraindication to further activity.
body temp
-Oral: 96.8-99.3 = normal range, 98.6 = normal average
-Rectal: 97.8-100.3 = normal range
-Patient with an elevated body temperature prior to intervention should not exercise until cause of abnormal temperature is determined.
-Patient whose body temperature elevates abnormally during intervention should be given adequate rest periods.
-Patient with lower than normal body temp before intervention should be monitored for tolerance and response.
-A decrease in body temperature during intervention is abnormal and should be further evaluated
pulse
-Indirect measure of contraction of left ventricle of heart, reported in beats per minute.
-Normal adult: 60-100 bpm
-Normal newborns: 100-130 bpm
-Children 1-7 years old: 80-120 bpm
-Sites to measure pulse (may need to use a stethoscope): temporal, carotid, brachial, radial, femoral, popliteal, dorsal pedal and posterior tibial arteries, and apex of heart. The most common site for children and adults is radial, while for infants is brachial. Use of the carotid artery to take a pulse should only be done if the patient has no history of cardiovascular disease and even then, should only be done with the patient seated. If a drop in pulse rate/HR occurs with activity, the activity should be stopped with further investigation into the cause of the drop.

terminology:
-strong and regular
-weak and regular
-irregular
-Thready
-tachycardia
-bradycardia
-Strong and regular – even beats, good force
-Weak and regular - even beats, poor force
-Irregular – strong and weak beats
-Thready – weak force and irregular
-Tachycardia – rapid (>100 bpm)
-Bradycardia – slow (<60 bpm)
pulse oximetry
-Measures level of blood oxygen saturation of hemoglobin. Most devices also measure pulse rate. Placed over fingertip of forefinger, ring finger, or ear lobe. Accuracy of readings can be validated by taking a manual heart rate.
-Normal blood oxygen saturation is 95-100%, even while exercising or performing activities.
-Hypoxemia <90% saturation (may require supplemental oxygen)

blood pressure: systolic and diastolic values
-Indirect measurement of the pressure of blood flow against the inside of an artery.
-Written as systolic/diastolic pressure:
Systolic pressure: pressure in the artery at time of left ventricle contraction
Diastolic pressure: pressure in the artery at time of rest of the heart
-Normal range, adult: Less than 120/80 mmHg
New American Heart Association (AHA) guidelines:
Ø Normal: Systolic less than 120 and diastolic less than 80
Ø Elevated: Systolic between 120-129 and diastolic less than 80
Ø Stage 1: Systolic between 130-139 or diastolic between 80-89;
Ø Stage 2: Systolic at least 140 or diastolic at least 90 mm Hg;
Ø Hypertensive crisis: Systolic over 180 and/or diastolic over 120, with patients needing prompt changes in medication if there are no other indications of problems, or immediate hospitalization if there are signs of organ damage.
Ø Hypotension: systolic pressure consistently below 100mHg
blood pressure: how measure
-Most commonly measured at brachial artery. Can also be assessed at femoral artery.
-Equipment needed: stethoscope, sphygmomanometer, chair, upper extremity support for patient.
-Cuff size must be correct to ensure accurate measurement. Width of bladder = 40% of circumference of midpoint of limb. If the cuff is too large, the BP measurement will be artificially low. If the cuff is too small, the BP measurement will be artificially high.
Korotkoff’s sounds:
-Phase 1: First, faint clear tapping sounds detected and gradually increase in intensity. This is the indication of systolic pressure.
-Phase 2: Sounds have a murmur or swishing quality.
-Phase 3: Sounds become crisp and loud.
-Phase 4: Distinct and abrupt muffling of sound until soft, blowing quality is heard. This is the diastolic pressure.
-Phase 5: Sounds disappear completely.
Techniques for measurement:
1. Patient sits with forearm supported on firm object approximately at level of heart, thighs parallel to each other, feet flat on floor.
2. Expose antecubital space of L or R arm. Palpate brachial pulse for placement of stethoscope.[KA1]
3. Apply deflated cuff to arm with center of bladder over medial aspect of arm. Cuff should be 2.5 cm above antecubital space.
4. Place diaphragm of stethoscope over brachial artery, applying firm but light pressure to maintain contact with skin.
5. Inflate cuff to 20-30 mmHg above estimated systolic pressure.
a. Gold standard to determine estimated systolic pressure: Palpate the radial pulse and then inflate the cuff. Once the radial pulse disappears, record this number and deflate the cuff. This is your estimated systolic pressure. Wait one minute and then inflate the cuff 20-30 mmHg above the recorded estimated number.
Release valve on cuff so needle drops at rate of 2-3 mmHg per second. Listen for Korotkoff’s sounds, taking note of needle position/reading when initial sound is heard. This is the systolic pressure value. Continue to deflate the cuff until there is an absence of sound of pulse/beat. This reading is the diastolic pressure value. Completely deflate the cuff and remove from patient. Record your values, patient position and extremity used.
-If repeated measurement is needed, deflate cuff completely, allow patient to sit quietly for 1-2 minutes.
respiration
Is a measure of breaths/minute; normal for children and adults is 12-20, can be as high as 24 for geriatric populations. Measure rate, rhythm, depth, and character of respiration via touch or observation.
pain
Self-report of pain is most reliable measure of pain. If pain is reported, more information is necessary – location, time, intensity, duration, etc. Pain can be measured using either a numeric pain scale of 0-10 where 0 = no pain and 10 = the worst possible pain; or by use of a visual analog scale (i.e. sad to happy faces) commonly used with children, persons with dementia or other language barriers.
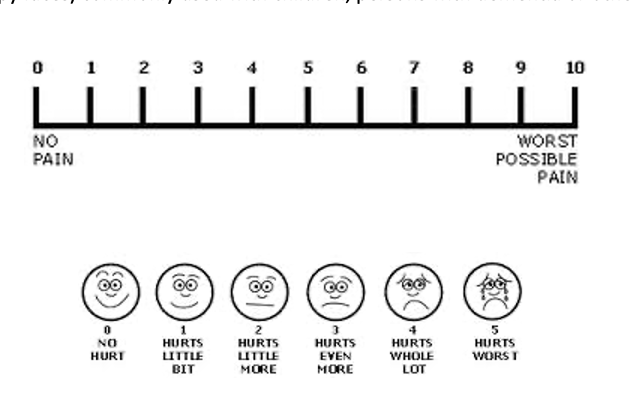
Rate of Perceived Exertion (RPE)
The Borg Rating of Perceived Exertion (RPE) is a way of measuring physical activity intensity level. Perceived exertion is how hard you feel like your body is working. It is based on the physical sensations a person experiences during physical activity, including increased heart rate, increased respiration or breathing rate, increased sweating, and muscle fatigue. Although this is a subjective measure, a person's exertion rating may provide a good estimate of the actual heart rate during physical activity* (Borg, 1998).

dyspnea scale
Dyspnea is difficult or labored breathing; shortness of breath. Dyspnea is a sign of serious disease of the airway, lungs, or heart. The onset of dyspnea should not be ignored; it is reason to seek medical attention.
