L-Spine & Sacrum/Coccyx notecards
1/8
There's no tags or description
Looks like no tags are added yet.
Name | Mastery | Learn | Test | Matching | Spaced |
|---|
No study sessions yet.
9 Terms
Lumbar Spine Routine
-AP
-(Posterior Obliques)
-Left Lateral
-Lateral L5-S1
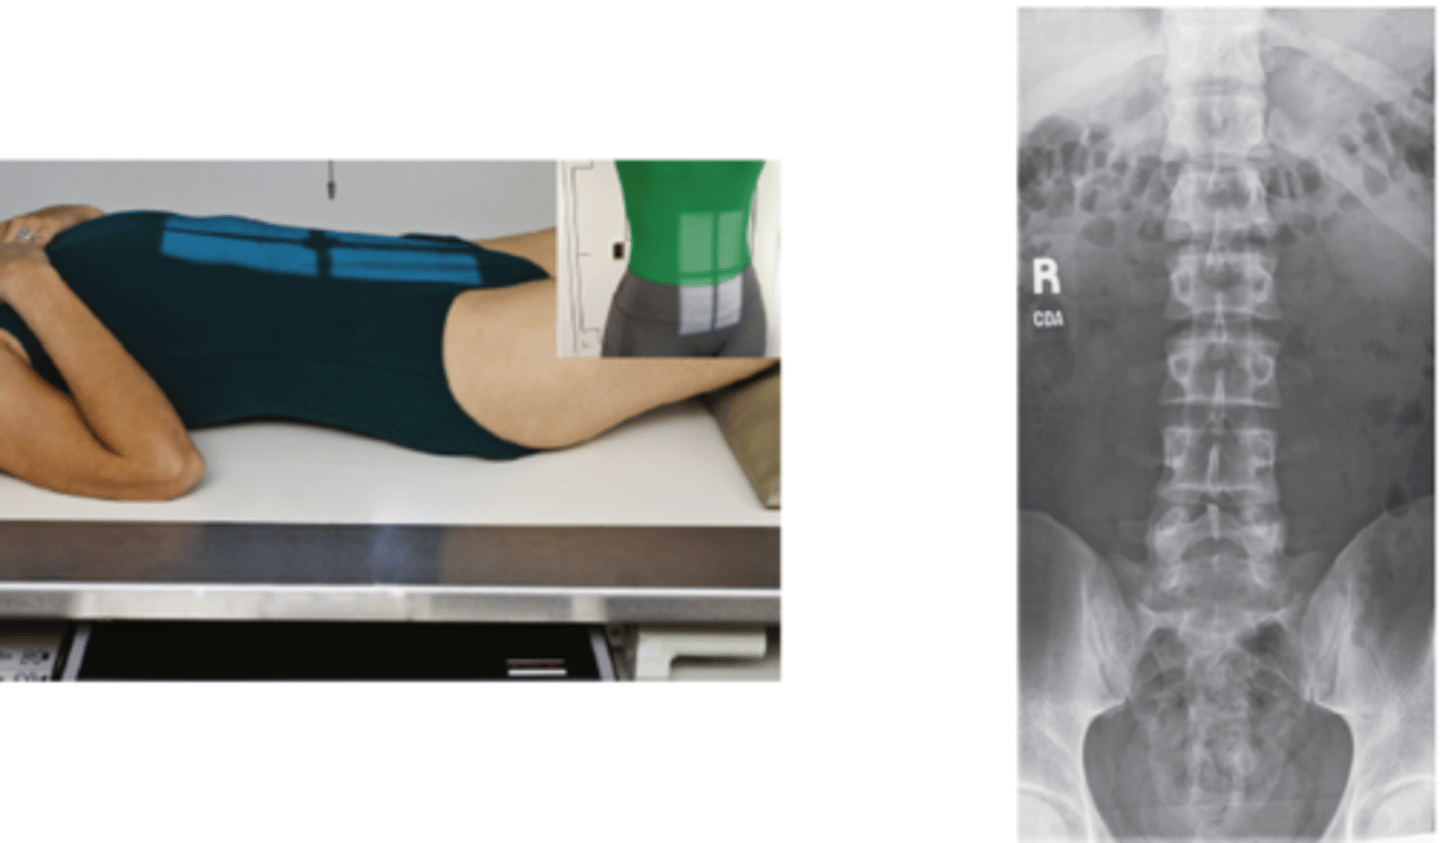
Recumbent Lumbar AP
1. Name of Exam: Lumbar Spine
2. Routine: AP, Bilateral obliques, Left lateral, L5-S1 Lateral
3. Position: Supine, Bend knees
4. Projection: AP5. CR: L4 (crest) and MSP
6. Technique: 80-90 kVp, Table bucky, Center cell, 14x17 LW
7. 40” SID, Large FS
8. Expiration
9. Anatomy Best Visualized: Bodies, intervertebral joints
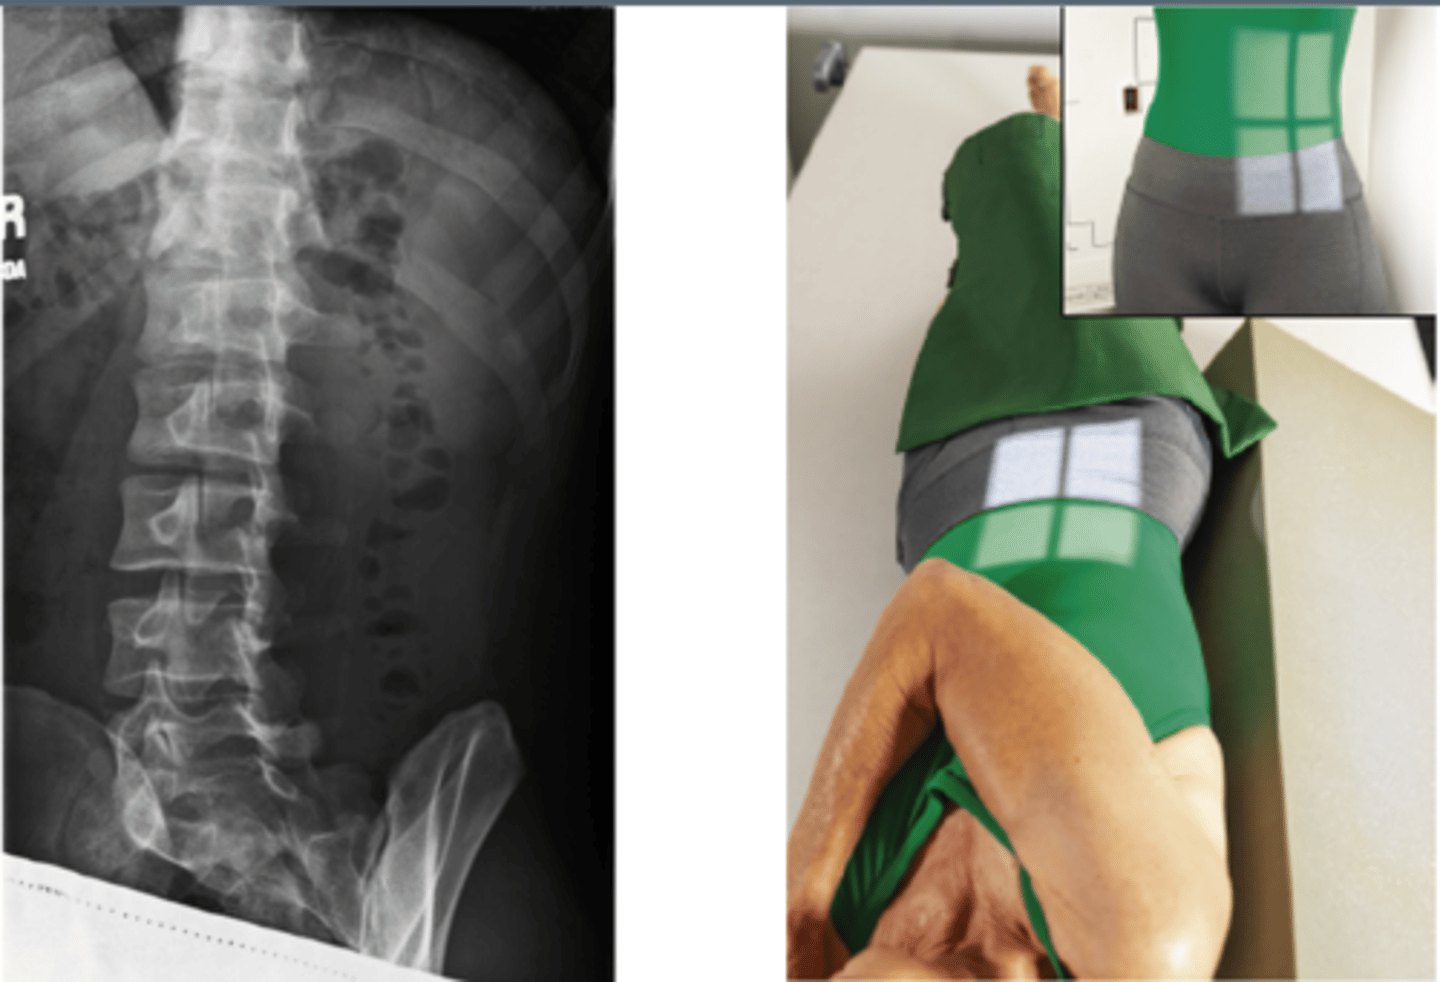
Recumbent Lumbar Posterior Obliques
1. Name of Exam: Lumbar Spine
2. Routine: AP, Bilateral obliques, Left lateral, L5-S1 Lateral
3. Position: 45-degree posterior oblique
4. Projection: APO
5. CR: 1-2” Superior to Crest, 2” medial to the upside ASIS
6. Technique: 80-90 kVp, Table bucky, Center cell, 14x17 LW
7. 40” SID, Large FS
8. Expiration
9. Anatomy Best Visualized: Zygapophyseal Joints-Downside
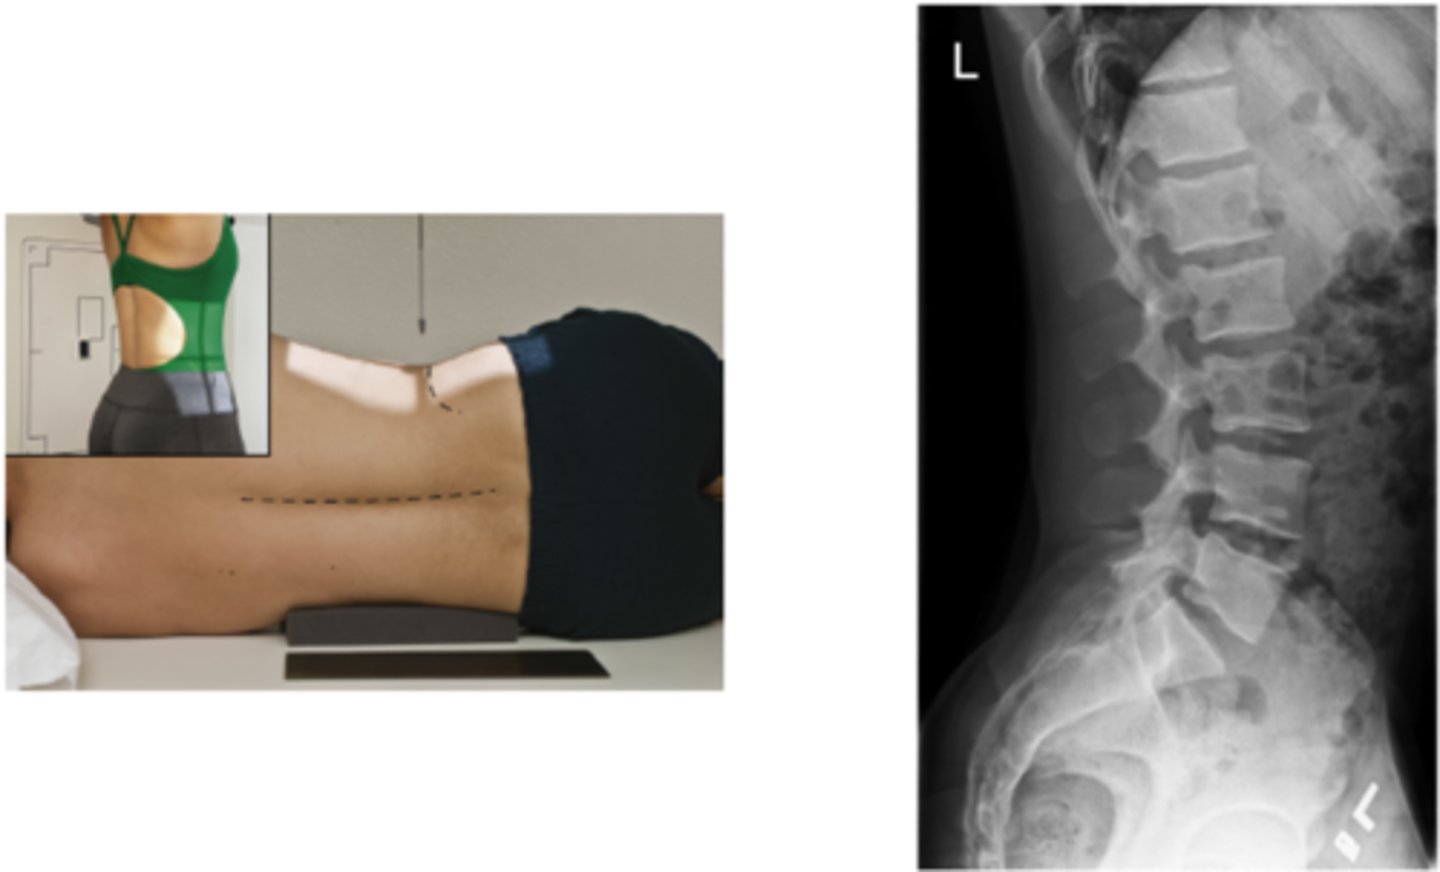
Recumbent Lumbar Lateral
1. Name of Exam: Lumbar Spine
2. Routine: AP, Bilateral obliques, Left lateral, L5-S1 Lateral
3. Position: Recumbent left lateral, Bend knees
4. Projection: Lateral
5. CR: L4 and MCP
6. Technique: 80-90 kVp, Table bucky, Center cell, 14x17 LW
7. 40” SID, Large FS
8. Expiration
9. Anatomy Best Visualized: Intervertebral Foramina
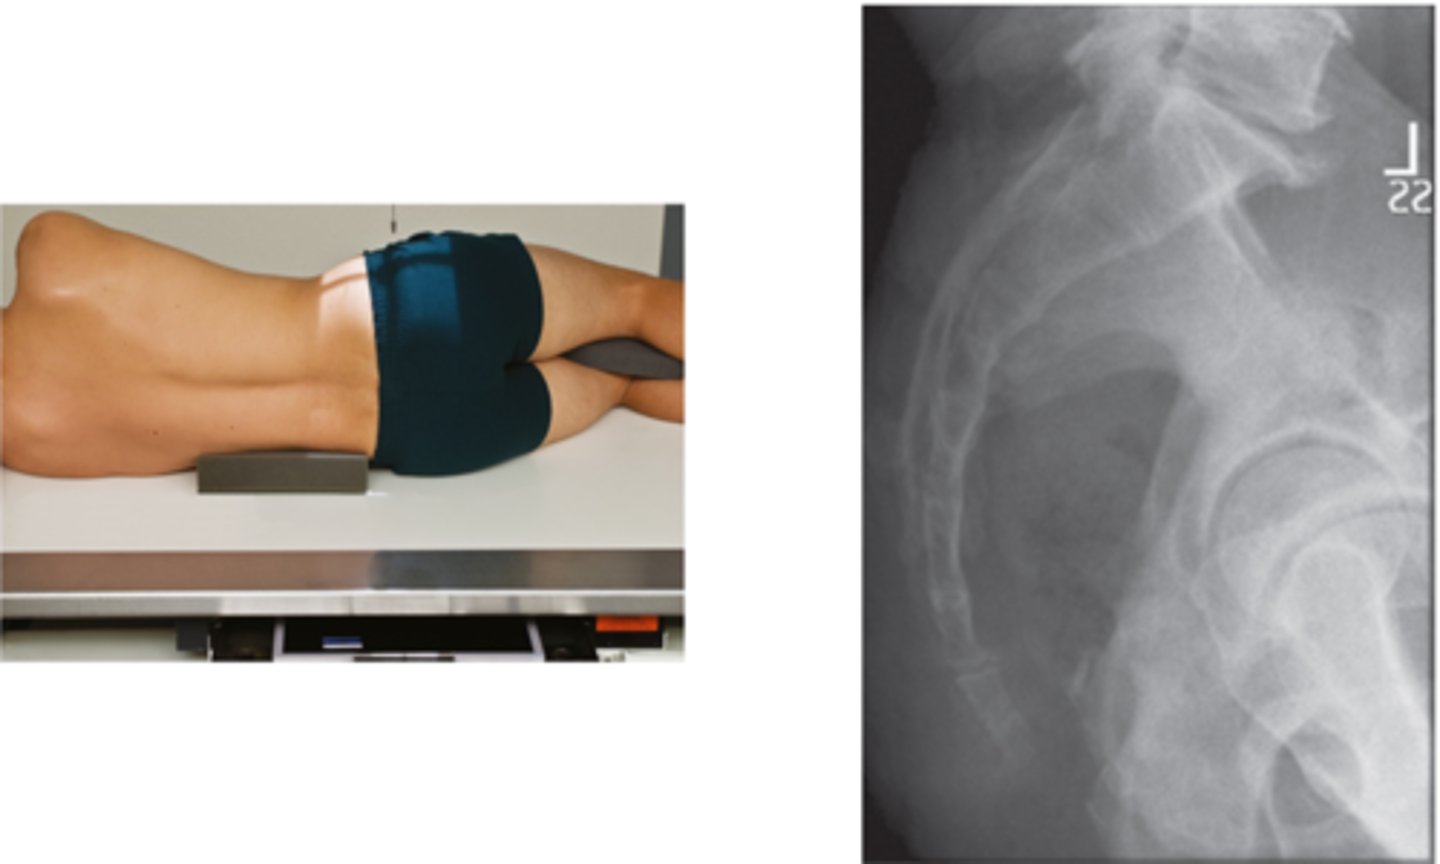
L5-S1 Lateral
1. Name of Exam: Lumbar Spine
2. Routine: AP, Bilateral obliques, Left lateral, L5-S1 Lateral
3. Position: Recumbent lateral, Bend knees
4. Projection: Lateral
5. CR: 1.5” inferior to crest, 2” posterior to ASIS, 5–8-degreecaudal tube angle
6. Technique: 80-90 kVp, Table bucky, Center cell, 10x12 LW
7. 40” SID
8. Expiration
9. Anatomy Best Visualized: L5-S1 Joint Space

Sacrum Coccyx Routine
-AP Axial Sacrum
-AP Axial Coccyx
-Lateral Combination
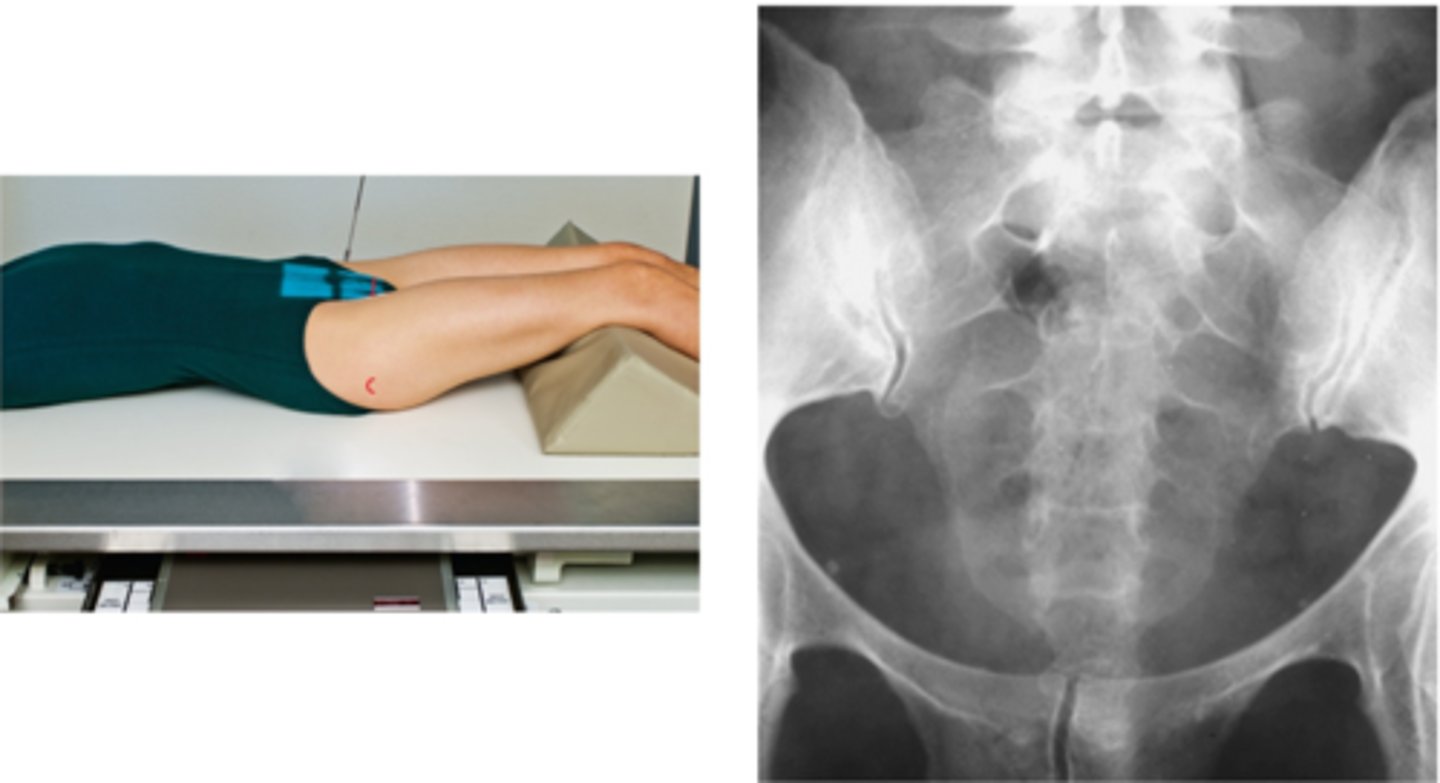
Recumbent AP Axial Sacrum
1. Name of Exam: Sacrum/Coccyx Exam
2. Routine: AP Axial Sacrum, AP Axial Coccyx, CombinationLateral
3. Position: Supine, Bend knees
4. Projection: AP Axial
5. CR: 2” superior to symphysis and MSP, 15-degree cephalictube angle
6. Technique: 80-90 kVp, Table bucky, Center cell, 10x12 LW
7. 40” SID
8. Expiration
9. Anatomy Best Visualized: Sacrum, SI Joints, L5-S1 Space
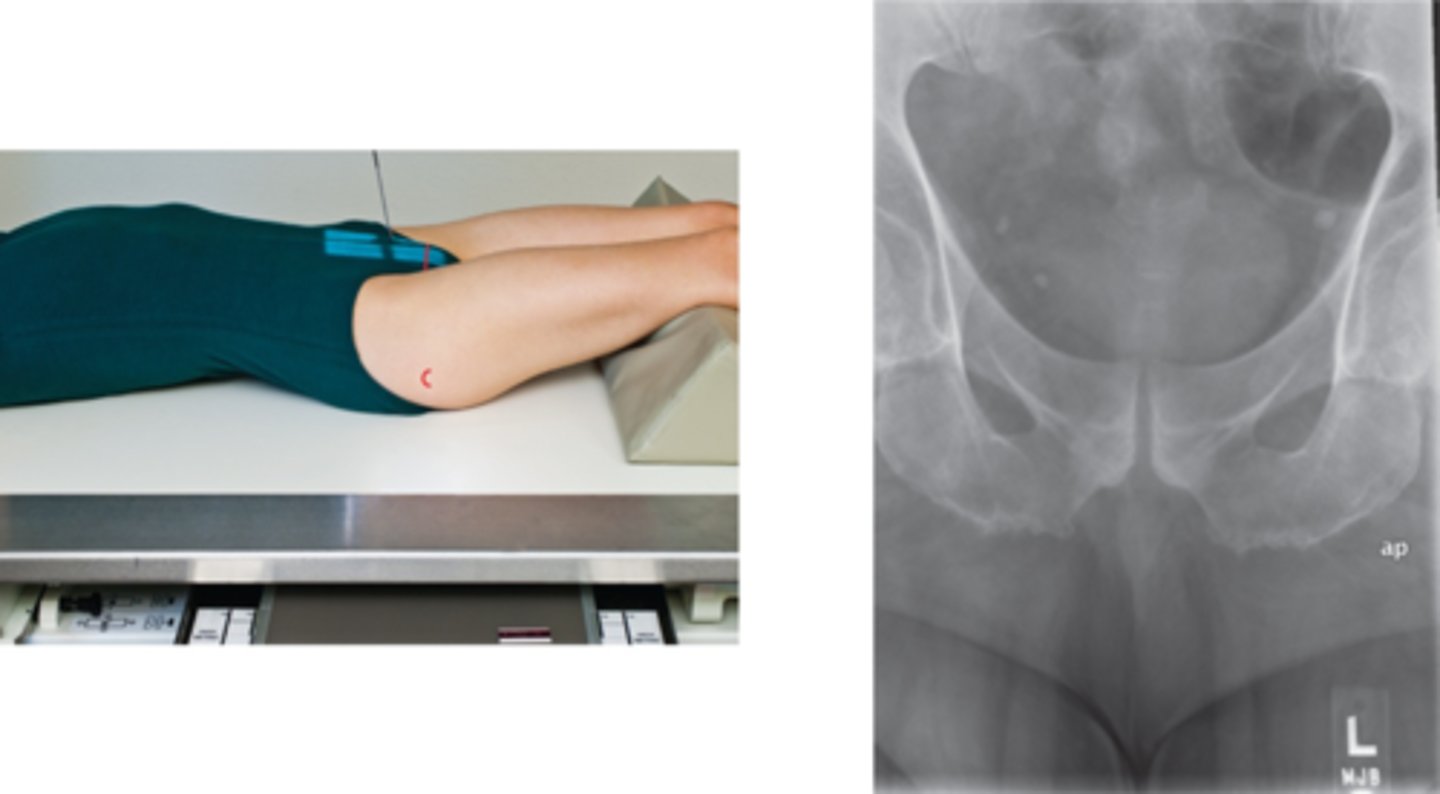
Recumbent AP Axial Coccyx
1. Name of Exam: Sacrum/Coccyx Exam
2. Routine: AP Axial Sacrum, AP Axial Coccyx, CombinationLateral
3. Position: Supine, Bend knees
4. Projection: AP Axial
5. CR: 2” superior to symphysis and MSP, 10-degree caudal tube angle
6. Technique: 80-90 kVp, Table bucky, Center cell, 10x12 LW
7. 40” SID
8. Expiration
9. Anatomy Best Visualized: Coccyx free of superimposition
Recumbent Combination Lateral
1. Name of Exam: Sacrum/Coccyx Exam
2. Routine: AP Axial Sacrum, AP Axial Coccyx, CombinationLateral
3. Position: Recumbent Lateral, Bend knees
4. Projection: Lateral
5. CR: 3-4” posterior to ASIS
6. Technique: 80-90 kVp, Table bucky, Center cell, 10x12 LW
7. 40” SID
8. Expiration
9. Anatomy Best Visualized: Sacrum, L5-S1 Joint, Coccyx