Preliminary Impression for CDs & Achieving a good working model
1/32
There's no tags or description
Looks like no tags are added yet.
Name | Mastery | Learn | Test | Matching | Spaced |
|---|
No study sessions yet.
33 Terms
Primary Impressions for Complete Dentures: purpose, requirement
Purpose
For Diagnosis and Construction of Custom Impression Trays
Requirements:
Must capture all intraoral landmarks, retromolar pads, retromylohyoid
space, hamular notches, etc
Will be slightly overextended but must essentially capture the 3-D contours
of the vestibular borders of the limiting structures
An accurate primary cast that records all anatomic landmarks that should be
covered by a denture permits fabrication of properly extended custom trays
that will expediate boarder molding and facilitate a quality final impression
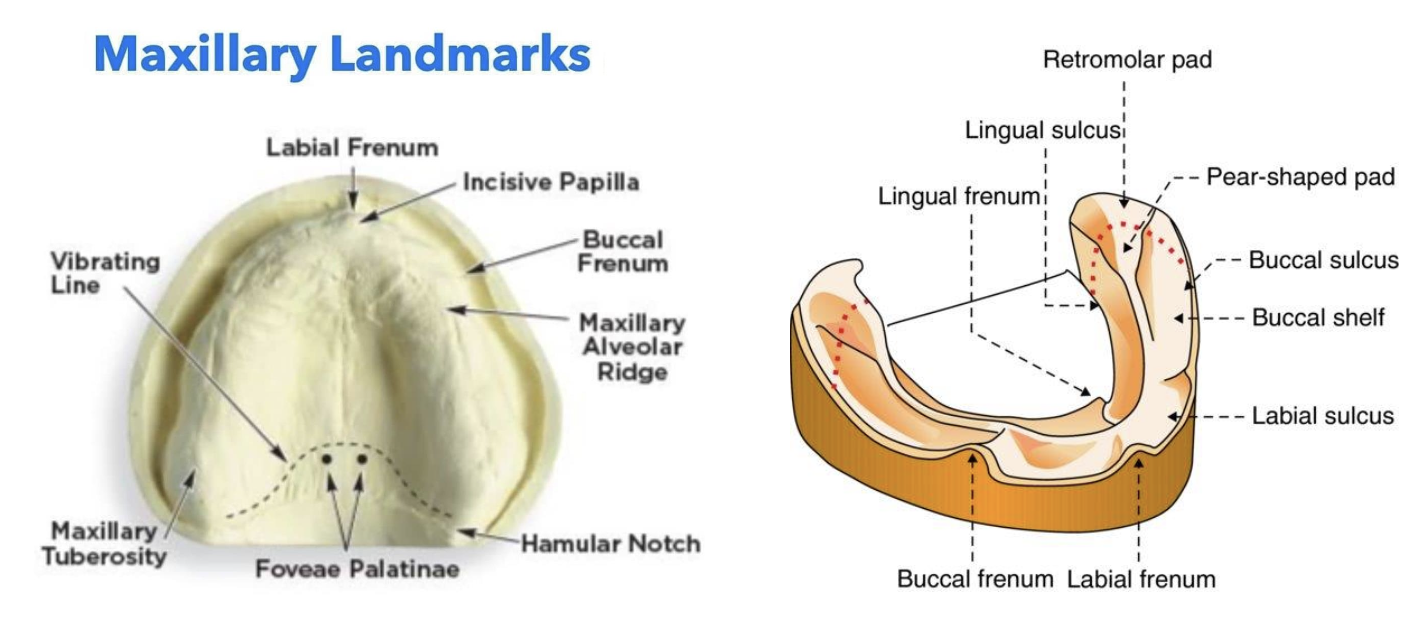
Maxillary and mandibular landmarks that should be seen in the cast from the primary impressions for CD
Primary impressions - Armamentarium
1. Alginate (reversible
hydrocolloid)
2. Tray adhesive
3. Edentulous metal stock
trays
4. Plaster mixing bowl
5. Round edge spatula
6. Periphery wax
7. Water bath
8. Mouth mirror 2X2 gauge
7 Steps - Primary Impressions for Complete Dentures
1. Select a stock tray
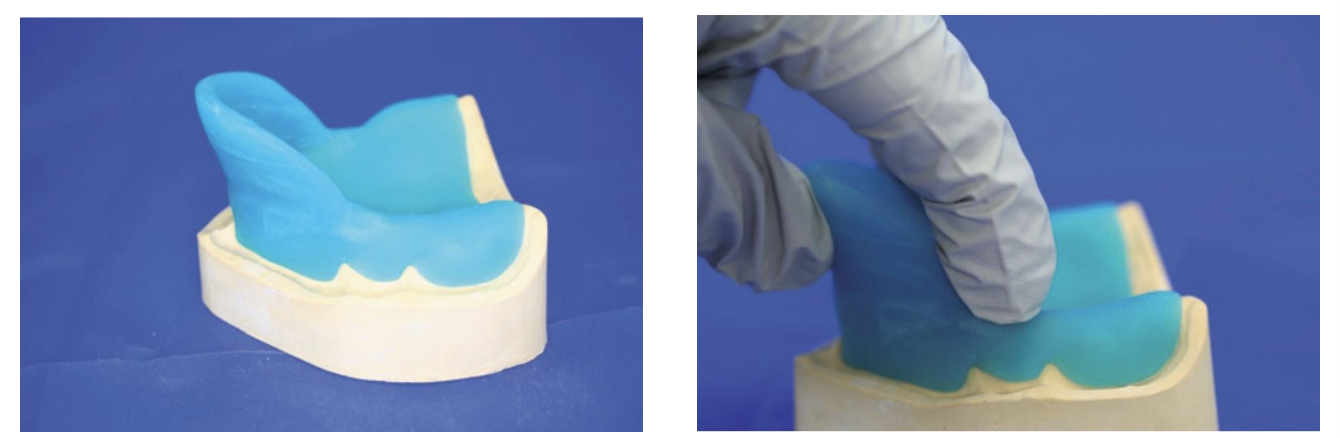
2. 3. Extend tray only where necessary with soft periphery wax
Warm the periphery wax in a warm water bath, insert in patient's mouth and mold the periphery wax to the intraoral contours
4. Spray with adhesive
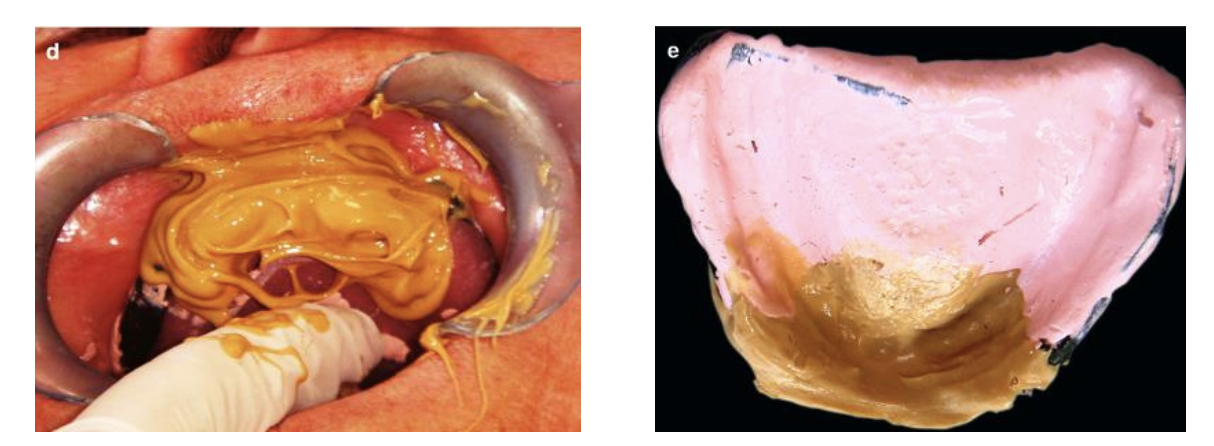
5. Irreversible hydrocolloid impression
6. The primary impression should have no major pressure
spots or voids and it should capture all peripheral
extensions
7. Pour impressions in plaster with adequate bases including
the central “tongue” area of the mandibular impression
How should an ideal mandibular alginate impression be?
Ideal Impression should:
Show no pressure spots
Record the ridge, peripheries, retromolar pads and retromylohyoid fossa
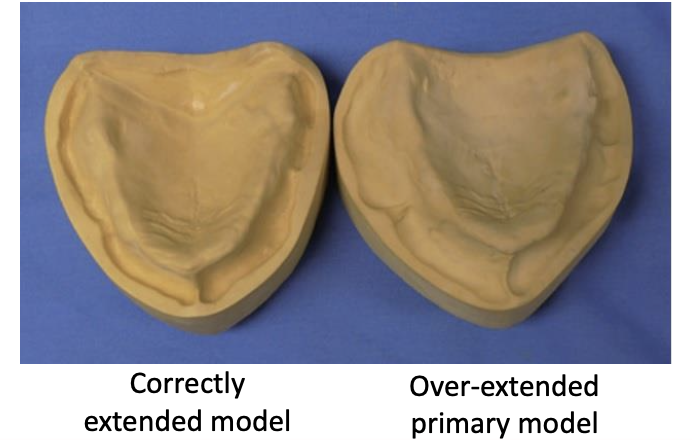
Why can’t we work with primary models?
1. Primary impressions taken in stock trays always cause overextension of the denture bearing area because the impression is displaced into the sulci
An accurate recording of the functional sulcus is essential to define the denture extension and resulting retention and stability
Retention depends on the denture extending to fill the sulcus and thus creating a seal; if the denture is overextended, stability is compromised and the muscles may be displaced.
Excessive thickness of the material used in primary impressions results in poor accuracy both because of the amount of contraction on setting and over time and because of distortion resulting form the differing thickness of the material over the impression
To achieve a good-quality working impression, it is essential to use a well-designed customized tray in conjunction with the appropriate impression material
WHat is essential to achieve a good working model?
To achieve a good-quality working impression, it is essential to use a well- designed customized tray in conjunction with the appropriate impression material
What should allow a customized impression tray?
A customised impression tray should:
allow easy control of the impression material
guide the impression material to the mucosa; support the impression material to provide even contact with the oral tissues
enable pressure on selected areas of the denture-bearing area
provide an even layer of impression material
support the set impression material
be rigid and retain its shape throughout the impression procedure and during the pouring of the model
What should ensure the design of the tray?
the tray is rigid
the entire denture-bearing area is included
the periphéry of the tray finishes such that impression material can flow into the buccal and labial sulci without causing displacement of the soft tissues
the tray is spaced appropriately for the amount of undercut present
the handle is designed to avoid displacing the lips
the tray allows free movement of nay muscle attachments
Primary considerations when selecting an impression tray and material
amount of undercut present
whether any areas of the mucosa are mobile or unsupported
When can we chose a close-fitting tray?
where the majority of the denture-bearing area is free from large undercuts, close fitting trays should be used
action of close fitting trays
closefitting trays allow pressure to be exerted on the denture-bearing area during the impression-taking procedure
compressing the mucosa and ‘adapting’ the relaxed mucosal tissues closely to the underlying alveolar bone helps in that the resultant fitting surface of the denture mirror that of the mucosa under load during function
this allows the masticatory forces acting on the denture to be transmitted directly and comfortably to the alveolar bone
Type of impression done by close-fitting trays
mucocompressive impressions
benefits close fitting trays
allow a thin, uniform layer of impression material to be used
shrinkage on setting or over time is then minimal
impression material for close-fitting trays and why
as there are only small amounts of undercut present: we may use impression material that are nonelastic or rigid once set like zinc oxide and eugenol paste
or if unavailable, use medium-bodied silicone material
spaced trays: when?
large undercuts (bc in close-fitting trays, removal from the mouth with large undercut would be difficult without distortion and removal from the cast model would cause fracture of the cast)
How should be increased the spacing between the tray and the tissues?
according to the depth of undercut, tear strength and elastic limit of the impression material
in short, the greater the depth of the undercut, the more likely the material is to tear or exceed its elastic limit on removal
the solution is to provide greater spacing where large undercuts are present
the amount of spacer required depends on the tear strength of the impression material being used: the weaker the material the thicker the spacer required
impression material used with space trays
weak material such as alginate
Further considerations while choosing spaced trays
viscosity of the unset impression material
if it is very high, additional spacing is necessary to allow seating of the tray without using excessive force
the use of such high-viscosity material is rarely indicated in CD
What is low & high viscosity materials?
Viscosity is a measure of how resistant a fluid is to flow. Low viscosity materials, such as water, have a lower resistance and flow more rapidly whereas high viscosity materials, such as honey or tar, resist deformation and flow more slowly
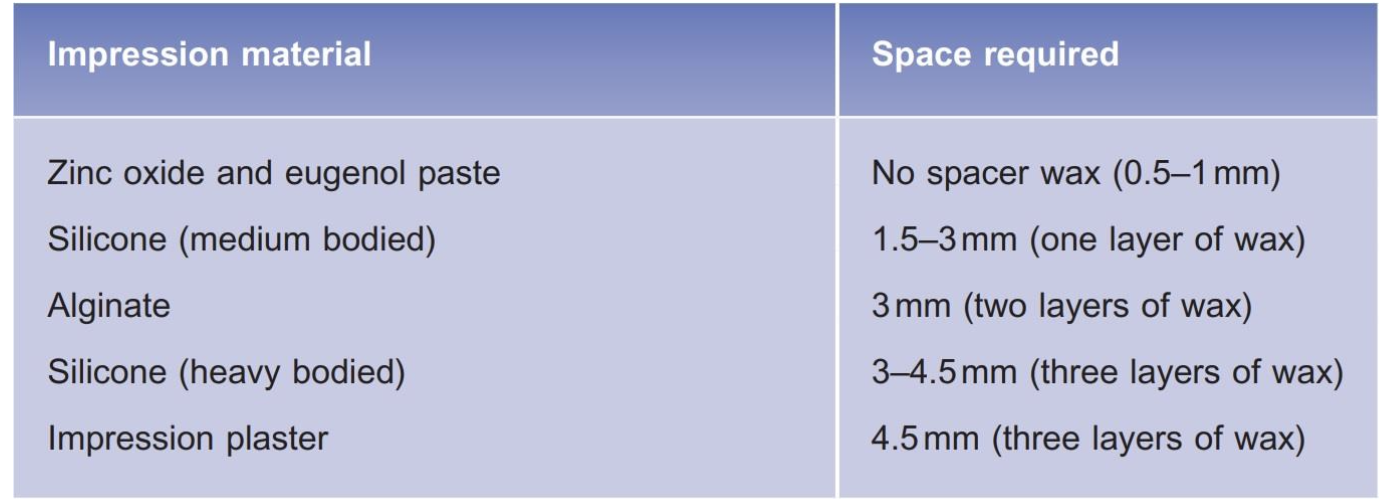
Types of impression material and spaced required
when do we use windowed trays?
where fibrous ridges are present, impression techniques must be adapted to ensure that the mobile tissues is not displaced during the recording procedure
windowed trays: how is the impression done?
the impression is taken in two stages using a customized tray designed such that there is a ‘window’ over the fibrous ridge
first, a close-fitting impression is taken over the denture-bearing area in a modified tray using a zinc oxide/eugenol impression material
once set, a second mucostatic material can be used to record the mobile area
windowed trays: impression material used?
impression plaster is ideal as it can be applied without causing distortion and readily adheres to the impression tray
alternatively, low-viscosity silicone may be used
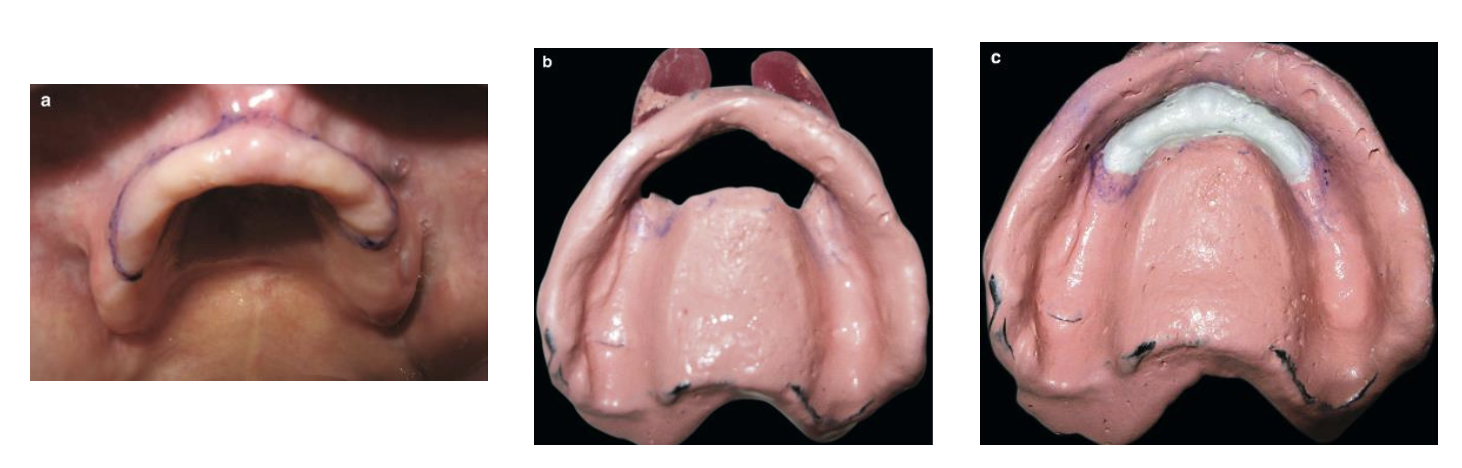
Method to identify the peripheral extension
the simplest method is to mark the extension with an indelible pencil on the alginate impression, with subsequently ‘tattoos’ onto the primary model
use a permanent marker pen on silicone materials
if convenient, the required peripheral outline may be drawn directly onto the model
Method to identify the peripheral extension
an approximation of the peripheral extension may be made using the primary model
the simplest method is to identify the deepest part of the sulcus, then draw the proposed periphery relative to this, taking into account the thickness of the impression material
this allows room for the material to wrap around the periphery of the tray
for a 1.5 mm spaced tray, draw the extent of the tray 1.5 mm toward the alveolar ridge from the deepest part of the sulcus as shown in the relative Fig.
Prescription information - fabricating customized trays
the type of impression material that will be used for the working impression
the type of tray required
the amount of spacer wax required
an indication of the peripheral extension of the tray, taking into account the thickness of the impression material to be used
any special features required (outline window tray positions and whether a variable thickness of spacer wax is required)
type of handle required (intramural, extra oral, finger stops, stepped or not and where the handle for a windowed tray should be placed)
consequences of under extending close fitting tray
can detached from the tray and would be likely to distort during model preparation
the mechanically weak impression materials will be unsupported and susceptible to distortion
consequences of overextended close-fitting tray
the tray will displace the muscle insertion and lead to an inaccurate impression
how should the close fitting tray be at the periphery? why?
thin to prevent the sulcus becoming overloaded with impression material and to allow room for the impression material to fully mould around this area of the tray without the tray ‘pushing the material away during impression taking
consequences of excess impression material or thick trays
can cause displacement of the soft tissues, resulting in a false record of the sulcus. The alveolar suffers little resorption in these areas
best design handle of close fitting tray
intraoral
avoid distortion of the labial sulcus
the height of the handle should be such that it is level with the top of the lip and it should extend distally around the ridge to the premolar region → this allows the clinician’s fingers to exert pressure on the baseplate evenly along the entire impression tray after seating the impression