Lab Stuff
 Call Kai
 Learn
Learn Practice Test
 Spaced Repetition
 Match
Match Flashcards
 Knowt Play
1/143

There's no tags or description
Looks like no tags are added yet.
Name | Mastery | Learn | Test | Matching | Spaced | Call with Kai | Chat |
|---|
No analytics yet
Send a link to your students to track their progress
144 Terms
what are the 3 stain bottles (Staining Blood Smears)
methanol
eosin
methylnol blue
how to stain blood smear ((3 × 3) + 2) (Staining Blood Smears)
methanol (fixative) (green bottle)
dip for 1 second x 5 dips
drain excess
eosin (red bottle)
dip for 1 second x 5 dips
drain excess
methylnol blue (blue bottle)
dip for 1 second x 5 dips
drain excess
rinse in distilled water
lean tip/monolayer towards to top cause it drys faster
define fixation (4) (Staining Blood Smears)
kills and dehydrates blood cells
changes refractive index
makes cell more permeable to stain
causes cells to adhere to slide
define staining (Staining Blood Smears)
contains basic and acidic components which stain different parts of the cells
define washing (Staining Blood Smears)
stops the staining process
what does too blue mean (3) (Staining Blood Smears)
smear too thick
staining time too long
stain and/or buffer too high (basic)
what does too pink mean (2) (Staining Blood Smears)
staining time too short
stain and/or buffer too low (acidic)
what does too light/pale mean (4) (Staining Blood Smears)
staining time too short
over washing
incorrect stain to buffer ratio
pH of stain/buffer too acidic
what do artifacts mean (4) (Staining Blood Smears)
stain precipitate may be present if inadequate washing
slide not dry prior to staining
stain needs to be re-filtered
not enough stain used
what does refractile artifacts mean (2) (Staining Blood Smears)
shiny areas on cells that occur due to water contamination of stain
not allowing slide to dry prior to staining.
define skipocytes (Staining Blood Smears)
can’t accuratly identify so are skipped when counted
what 2 cells are considered skipocytes (Staining Blood Smears)
smudge
basket cells
what do basket cells mean (Staining Blood Smears)
exploded cells
what can cause skipocytes (Staining Blood Smears)
too much pressure
what are 4 granules (Staining Blood Smears)
neutrophilic
eosinophilic
basophilic
azurophilic
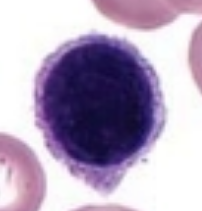
what is it (Staining Blood Smears)
lymphocyte
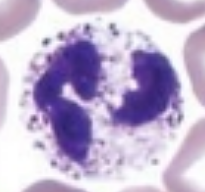
what is it (Staining Blood Smears)
neutrophil
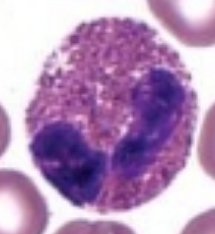
what is it (Staining Blood Smears)
eosinophil
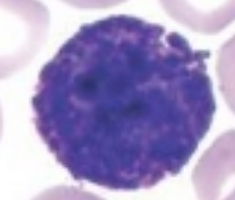
what is it (Staining Blood Smears)
basophil
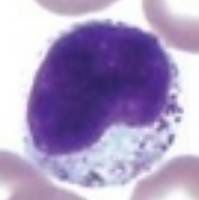
what is it (Staining Blood Smears)
monocyte
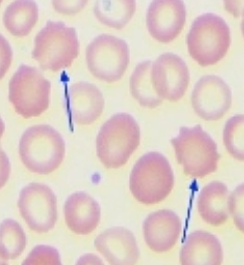
what is it (Staining Blood Smears)
crenated RBC’s
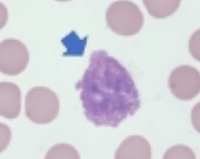
what is it (Staining Blood Smears)
smudge cell
Smear left too long in the Eosin dye(# 2) it will be too —(color) (Staining Blood Smears)
orange
Smear left too long in the Methylene dye (#3) it will be too — — (color) (Staining Blood Smears)
dark blue
what does PBS stand for
Peripheral Blood Smear
what materials are needed for a PBS (4)
Well-mixed anticoagulant whole blood (purple top tube)
Glass microscope slides
Capillary tubes
Kimwipes
procedure for PBS (7)
wipe microscope slides with kim-wipe
Invert the EDTA whole blood sample
Fill a microhematocrit capillary tube at least ½ full with the EDTA whole blood
Using the capillary tube, place a small drop of blood (2-3mm) at the end of the microscope slide near the frosted end
The spreader slide is the 2nd slide and is held at a 30-40° angle
Using a thumb and forefinger or just forefinger, anchor the slide to the table and back the spreader slide into the drop of blood
Pause once the spreader slide is in the blood to allow the blood to spread across the edge of the spreader slide, then in a smooth motion advance the spreader slide all the way to the end of the sample slide
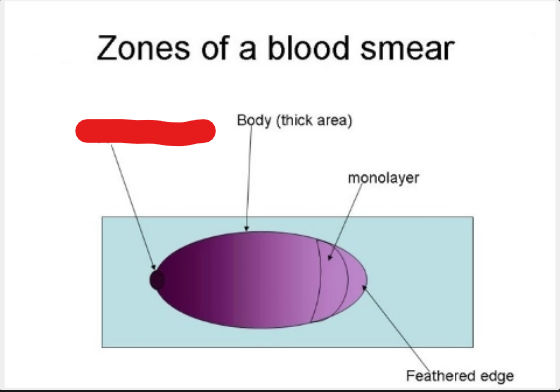
what is it
application point
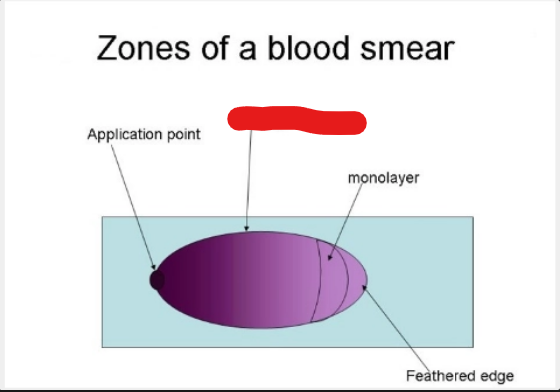
what is it
body (thick area)
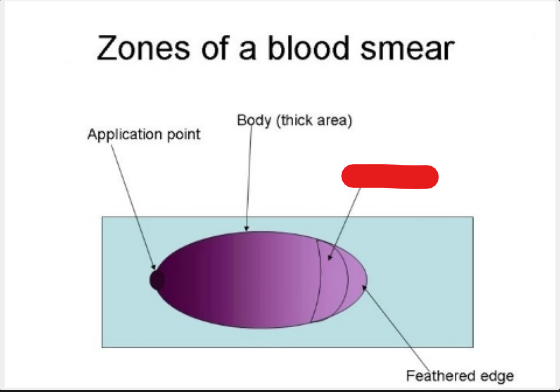
what is it
monolayer
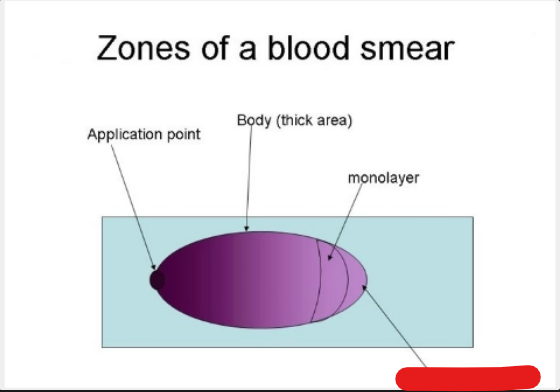
what is it
feathered edge
Criteria for a Good Smear (6)
Thumb print or bullet shape in appearance
Minimal visible indication as to where the drop of blood was applied
Entire film should cover more than one-half to two-thirds the slide area
Keep the portion of the smear away from the edge of the slide
Symmetrical, bullet shape
Microscopically, should have an even distribution of cells within the monolayer
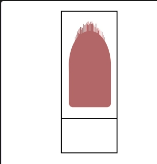
what is the issue
Tails
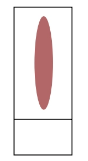
what is the issue
Long and narrow
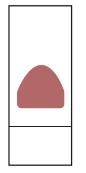
what is the issue
Short and wide
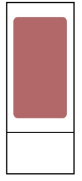
what is the issue
Square
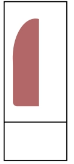
what is the issue
Half-bullet
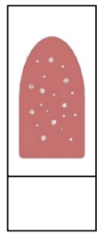
what is the issue
Holes
what causes holes
The slide has dirty or a greasy film from fingerprints or immersion oil.
The sample was collected from a patient who recently ate, resulting in the presence of lipids in the blood
what are the consequences of holes
Void areas within the monolayer
how to avoid holes (2)
Ensure that slides and work area are clean.
If possible, the patient should fast prior to blood collection.
how to avoid half-bullet
To ensure even right-to-left pressure of the spreader slide, standing (vs. sitting) while making the smear may help.
what the consequence of half-bullet
The monolayer counting area is reduced by half.
what causes half-bullet
A half-smear is the result of uneven pressure and contact from the spreader slide
how to avoid a square
Increase the forward motion speed of the spreader slide
what is the consequence of square
Overly large, expanded monolayer where the cell distribution can be compromised.
what causes a square
A square-shaped smear can be seen when moving forward too slowly.
how to avoid short and wide
Lower the angle of the spreader slide
what are the consequences of short and wide
Thick smear with a narrow monolayer making cell identification difficult.
what causes short and wide (2)
If the spreader slide is held at an angle greater than 30
the blood may not be pushed out over the length of the slide.
how to avoid long and narrow (2)
Pause longer when backing into the drop.
Slow your speed slightly when moving the spreader slide forward.
what is the consequence of long and narrow
no true monolayer
what causes long and narrow
This results when the blood is spread too soon before it has had the chance to spread along the edge of the spreader slide.
how to avoid tails (3)
Ensure the spreader slide remains in contact for the length of the bottom slide.
Wipe slides prior to making a smear and examine their quality.
Redraw a new sample if clumping has occurred due to a sample collection and handling error.
what consequence comes from tails
Uneven distribution of cells within the monolayer.
what causes tails (4)
Lifting the spreader slide up at the end of the spreading motion.
Debris present on the slide.
Cell clumps present in the sample.
Poor quality slides.
define monolayer
Portion of the blood smear where, when viewed microscopically, the red blood cells are evenly spaced
What does the Coag Dx Analyzer do?
Helps detect a patient’s clotting ability
what blood does it use (2) (Coag Dx Analyzer)
whole blood (no anticoagulant)
citrated whole blood (blue top tube)
what tests does it run (4) (Coag Dx Analyzer)
aPTT
Citrate aPTT
PT
Citrate PT
what does aPTT stand for (Coag Dx Analyzer)
Activated Partial Thromboplastin Time
what does PT stand for (Coag Dx Analyzer)
Prothrombin Time
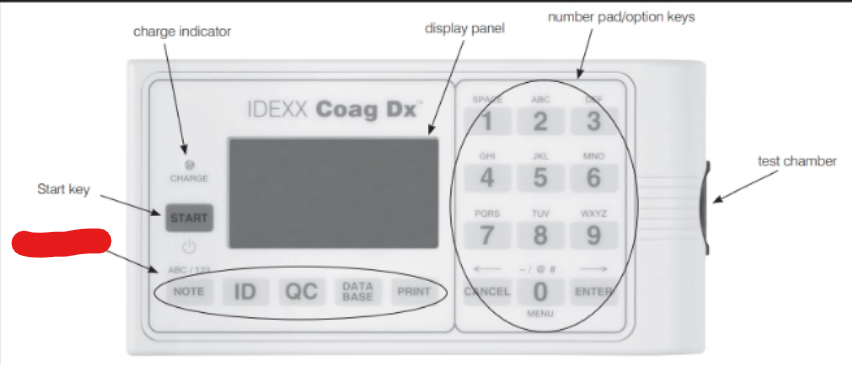
what is it (Coag Dx Analyzer)
action keys
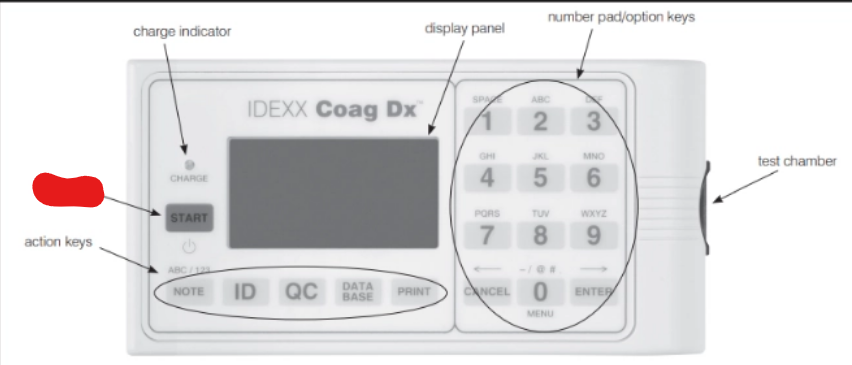
what is it (Coag Dx Analyzer)
start key
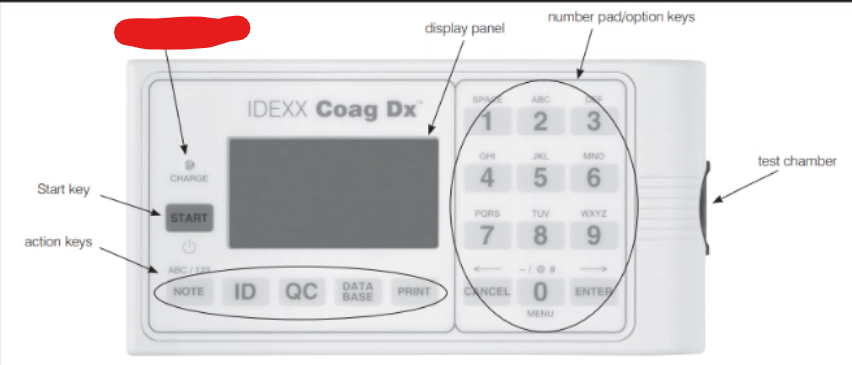
what is it (Coag Dx Analyzer)
charge indicator
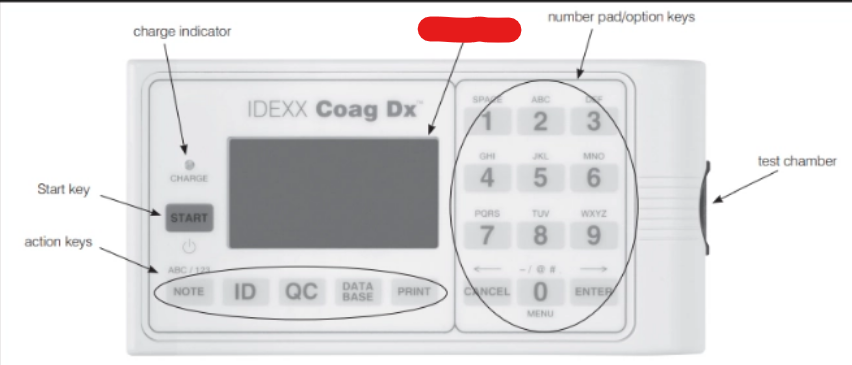
what is it (Coag Dx Analyzer)
display panel
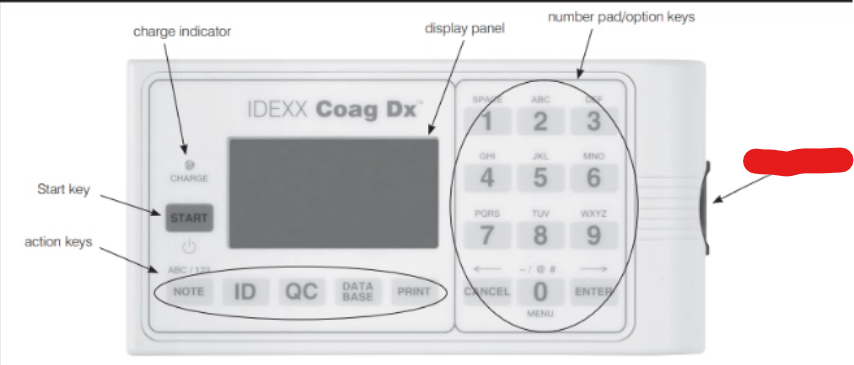
what is it (Coag Dx Analyzer)
test chamber
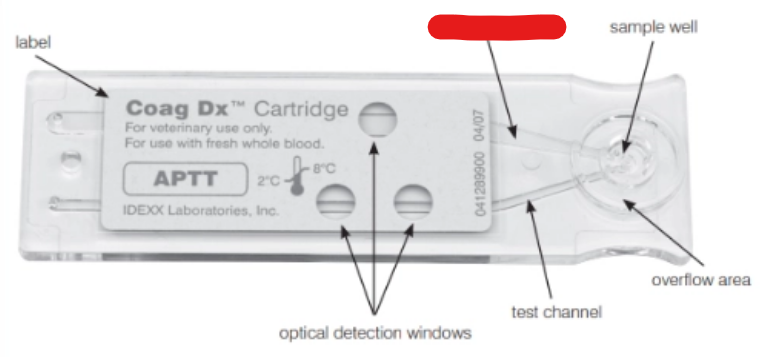
what is it (Coag Dx Analyzer)
waste resevoir
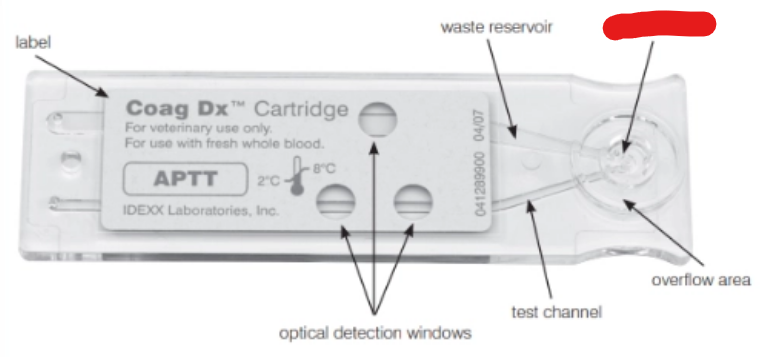
what is it (Coag Dx Analyzer)
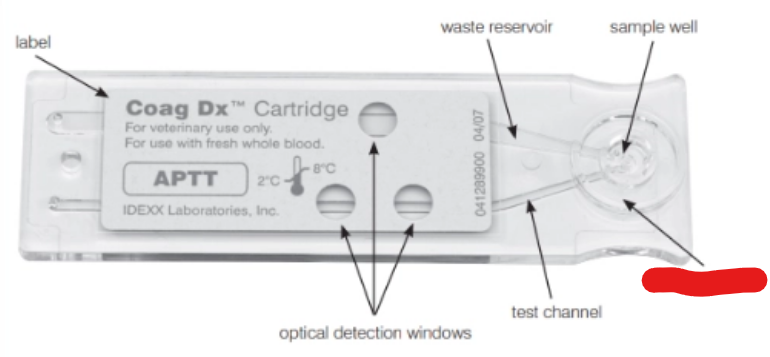
sample well
what is it (Coag Dx Analyzer)
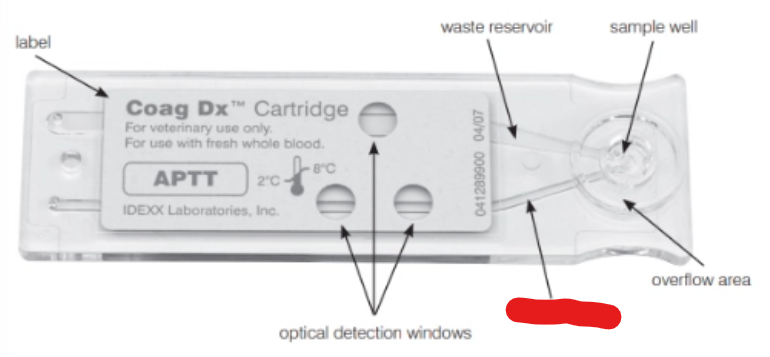
overflow area
what is it (Coag Dx Analyzer)
test channel
what is it (Coag Dx Analyzer)
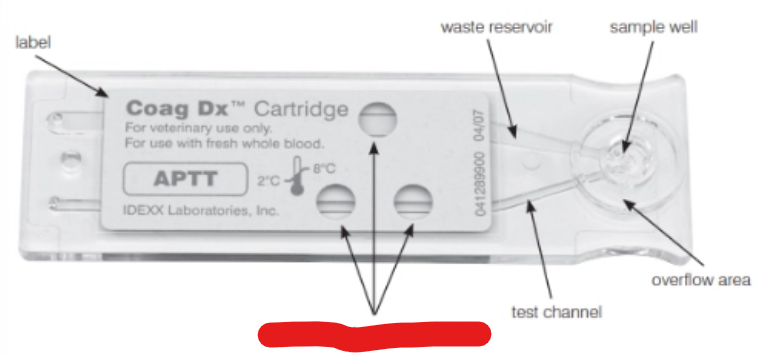
optical detection windows
how to enter client and patient ID’s and Species (5) (Coag Dx Analyzer)
Insert a cartridge into the test chamber
then press the ID key to display the Identity Patient menu
Enter Client ID
Enter Patient ID
Enter species
how to collect and run non-anticoagulated whole blood samples (8) (Coag Dx Analyzer)
remove IDEXX coag Dx PT and/or aPTT cartridges from refridgerated storage
allow them to come to room temperature. this takes 30-60 mins. do not open pouch prior to use
prepare the venipuncture site by shaving fur and cleansing with alcohol. Allow the site to air dry completely, as alcohol interferes with the coagulation assay
With the label facing up, insert the appropriate PT or aPTT cartridge
into the IDEXX Coag Dx Analyzer to warm (30–90 seconds) Push the cartridge all the way in until it stops.Obtain a minimum of 0.2 mL (0,2 cc) blood with a needle and plastic syringe.
Immediately dispense one drop of blood into the sample well of the cartridge, filling from the bottom of the well up. This can be done with or without the needle (Figure 4-2).
Press the Start key (Figure 4-7). The elapsed time (in whole blood seconds) is displayed until the sample clots. When a clot is detected, the analyzer beeps once. Final results of the test are calculated and displayed on the screen.
Remove the cartridge. Results are saved and the client/patient information is cleared so that another patient sample can be tested. Discard used needles, syringes and cartridges in the appropriate waste containers.
how to collect and run Citrated Blood Samples (9 + 2) (Coag Dx Analyzer)
Remove IDEXX Coag Dx Citrate PT and/or Citrate aPTT cartridges from
refrigerated storage and allow them to come to room temperature (15°–30°C/59°–86°F). This takes 30–60 minutes. Do not open the pouch prior to use.Prepare the venipuncture site by shaving fur (if necessary) and cleansing with alcohol. Allow the site to air dry completely, as alcohol interferes with the coagulation assay.
Use one of the following methods to collect the blood sample:
Collect the sample directly into a 3.2% sodium citrate evacuated tube and allow the blood to be drawn into the tube until it reaches the tube’s stated draw volume.
Collect the sample in a plastic (not glass) syringe and then use the syringe needle to puncture the stopper of an evacuated tube containing 3.2% sodium citrate. Allow the blood to be drawn into the tube until it reaches the tube’s stated draw volume.
Mix gently by inverting the tube at least 4 times. Allow the sample to equilibrate with the citrate for at least 5 minutes before testing.
With the label facing up, insert the appropriate Citrate PT or Citrate
aPTT cartridge into the IDEXX Coag Dx Analyzer to warm (30–90
seconds) (Figure 4-8). Push the cartridge all the way in until it stops.Again, gently mix the sample by inverting the tube at least four times.
Using the disposable plastic pipette provided with the Coag Dx Cartridge, collect the sample from the evacuated tube (Figure 4-9) and then dispense one drop of blood into the sample well of the cartridge, filling from the bottom of the well up
Press the Start key (Figure 4-15). The elapsed time (in whole blood seconds) is displayed until the sample clots. When a clot is detected, the analyzer beeps once. Final results of the test are displayed on the
screen.Remove the cartridge. Results are saved and the client/patient information is cleared so that another patient sample can be tested.
how to maintain CBC analyzers
require routine maintenance
running of controls
quality assurance checks
specific start up, shutdown, and maintenance procedures are mandatory;
what sample is needed (CBC Analyzers)
EDTA tube
whats the principal (2) (CBC Analyzers)
Laser beams determine the density of solid components and their size.
Cells scatter light differently depending on the presence or absence of granules and nuclei; therefore, the degree/direction of light scatter allows for specifying the cell as it is being counted.
what are some CBC analyzers (3) (CBC Analyzers)
HM5 Analyzer
IDEXX LaserCyte
ProCyte
principle of HM5 Analyzer (CBC Analyzers)
Based on the passage of electric current across two electrodes separated by a glass tube with a small opening.
principle of IDEXX LaserCyte (CBC Analyzers)
The analyzer uses laser flow cytometry.
define serology
involves the detection of specific antigens OR antibodies in a patient’s sample
The sensitivity of a test demonstrates the ability to detect — — (Serology)
true positives
The sensitivity of a test demonstrates the ability to detect — — (Serology)
true positives
A test with high sensitivity is able to detect … (Serology)
low levels of antigen in a patient’s sample
A test with low sensitivity will produce … (Serology)
false negatives
The specificity of a test demonstrates the ability of the test to detect and react with … (Serology)
intended antigen in the patient’s sample
ELISA stands for (Serology)
Enzyme-Linked Immunosorbent Assay
ELISA is aka (Serology)
snap test
ELISA tests rely on … and … that occurs in this presence to create a visible positive result (2) (Serology)
the binding of specific antigens and/or antibodies
a color change enzymatic reaction
ELISA tests detect either the presence of — or — in the patient’s sample (Serology)
antigen, antibody
RIM stands for (Serology)
Rapid Immunomigration
RIM is aka (Serology)
Lateral Flow Tests
what blood stuff can be used in a heartworm test kit (3) (Serology)
Serum
plasma
whole blood
FIV/FeLV combo test uses what blood stuff (3) (Serology)
Serum
plasma
whole blood
supplies needed for Baermann Technique (10) (Serology)
Ring stand
Funnel
Tea strainer or wire screen
Rubber tubing
Clamp
Cheesecloth or gauze square
Pipettes
Conical tube
Microscope slide
Coverslip
Procedure for Baermann Technique (10) (Serology)
place the funnel into the ring apparatus
attach the rubber tubing to the end of the funnel
Place a tea strainer on top of the funnel and line with a couple of layers of the gauze squares
Apply clamps at the end of the rubber tubing. Should be watertight
Add 15 g of feces to the lined tea strainer
Cover with warm water (not hot) until the fecal sample is submerged
Allow the sample to sit overnight to allow the larvae to emerge and sink to the bottom of the tubing
Release the clamp slowly and collect a few drops into a conical tube
Apply one drop to a microscope slide and cover with a coverslip
Examine the slide for larvae. Lugol’s iodine may be used to visualize the larvae more easily
what does PCV stand for
Packed Cell Volume
what materials are needed for a PCV test (5)
Well-mixed, anticoagulated whole blood
Tube sealant
Reader card
Centrifuge
Capillary tubes
what is the procedure for a PCV test (4)
Begin with well-mixed, anticoagulated blood.
Fill two capillary tubes 3/4 full with blood, and seal one end with clay. Filling a second tube serves two purposes:
Place tubes in the groves of the centrifuge, directly across from one another, with the clay pointing towards the outside
Close centrifuge lid(s)