CHAPTER 14: IMPLANT TREATMENT
 Call Kai
 Learn
Learn Practice Test
 Spaced Repetition
 Match
Match Flashcards
 Knowt Play
1/54

Earn XP
Description and Tags
ppt only!!
Name | Mastery | Learn | Test | Matching | Spaced | Call with Kai | Chat |
|---|
No analytics yet
Send a link to your students to track their progress
55 Terms
Dental implant
a permucosal device that is compatible and biofunctional and is placed on or within the bone to provide support for prosthesis
structure of dental implant
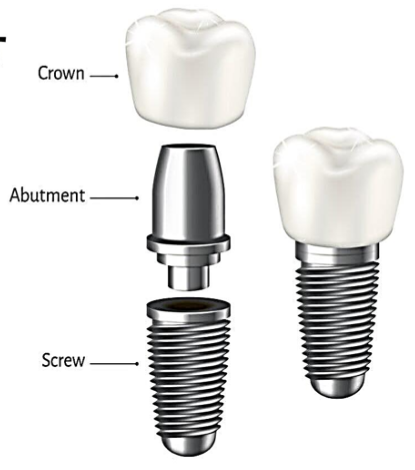
Bone-implant Interface
Fibro-osseous integration
Osseointegration
Bioactive integration
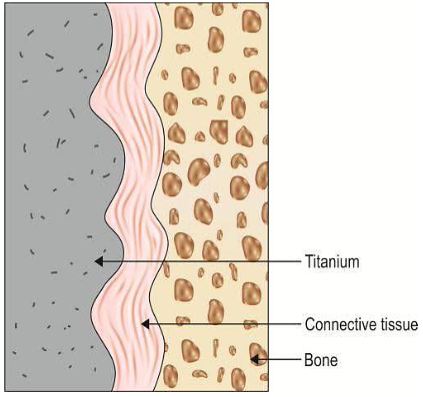
Fibro-osseous integration
Is defined as “tissue to implant contact by interposition of a healthy dense collagenous tissue between the implant and the bone interface”.
Attributed to proliferation of connective tissue into the interface.
Not desirable since union is WEAK.
Bioactive integration
Is defined as the integration which results by a physiochemical interaction between collagen of bone and hydroxyapatite crystals of the implants.
Osseointegration
Is defined as a direct structural and functional connection between ordered living bone and the surface of the load carrying the implant
Growth of bone in direct contact with implant surface without an intervening band of organized connective tissue
Four Factors for Osseointegration to Occur
A biocompatible material
Atraumatic surgery
implant immobility, relative to bone, during healing phase
Implant placement in intimate contact with bone
A biocompatible material
Material of choice = titanium (biologically inert)
Atraumatic surgery
Handpiece = slow speed with high torque
Provide copious irrigation
Bone temperatures below 47°C
implant immobility, relative to bone, during healing phase
If primary stability may be less = two-stage surgery
If primary stability is adequate = single-stage surgery
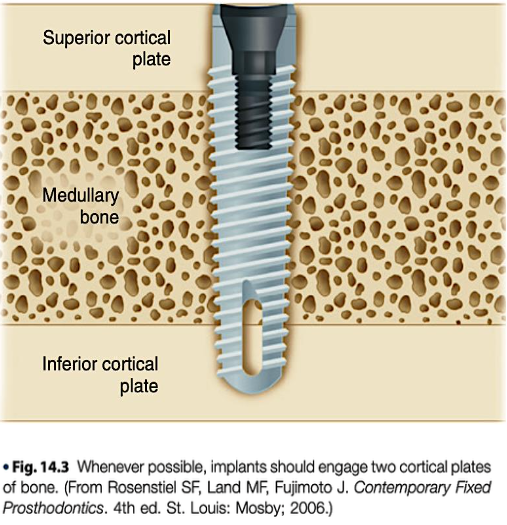
Implant placement in intimate contact with bone
Implant should engage two cortical plates of bone
• Utilize a long, wide-diameter implant
Classification of Implants (based on shape and form)
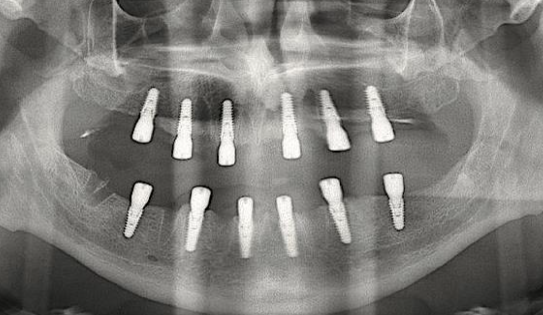
Endosteal/Endosseous
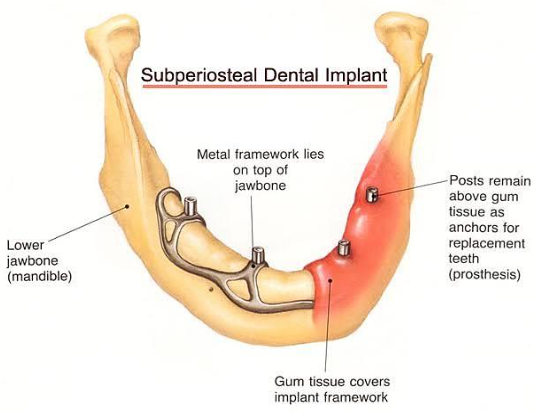
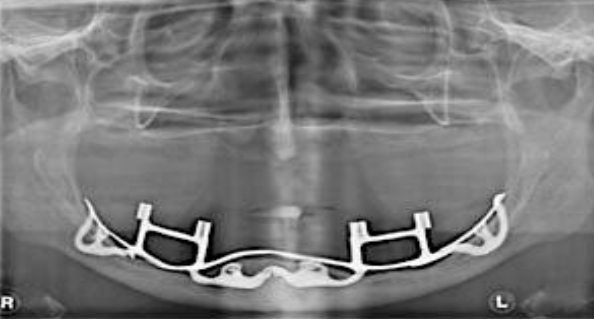
Subperiosteal
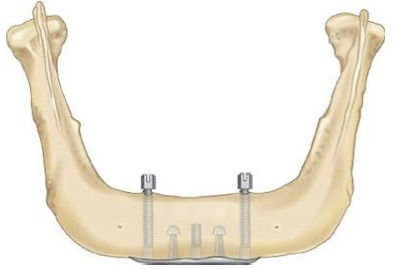
Transosteal/Mandibular staple
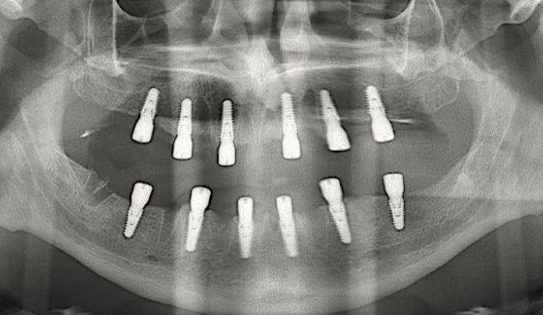
Endosteal/Endosseous
Is surgically placed into the bone
• Shaped like a small screw, cylinder or blade
• The most popular implant
Subperiosteal
Is surgically placed under the periosteum and rests on the bone
• Located on or above the bone
• Most common in the mandible
Transosteal/Mandibular staple
Consists of a horizontal beam attached to metal rods and inserted all the way through the mandible from superior border to the inferior border
• Seldom used due to its highly invasive nature
• Most commonly used to support
a mandibular denture with severe resorption
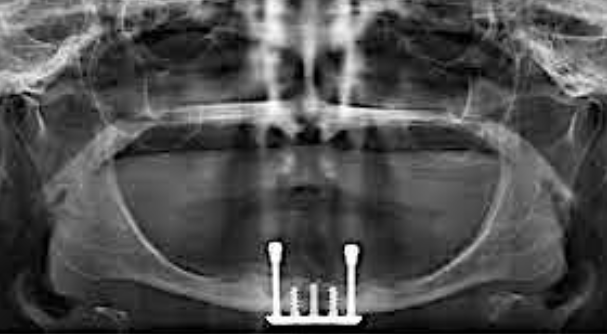
Factors affecting the load-bearing
Factors affecting the load-bearing capacity of implants
Number and size of the implants
Arrangement and angulation of the implants
Volume and quality of the bone-implant interface
Number and size of the implants
For completely edentulous arch: 4 implants for MN; 6 implants for MX
Connecting a single implant to one natural tooth with a fixed partial denture should be avoided.
For three-tooth edentulous span
a. 3 implants with 3 splinted crowns
b. 3 implants with 3 single-unit crowns c. 2 implants as terminal abutments for
a 3-unit fpd
d. 2 adjacent implants with a fpd with a
cantilevered pontic
Arrangement and angulation of the implants
(loads directed through the long axis of the implants)
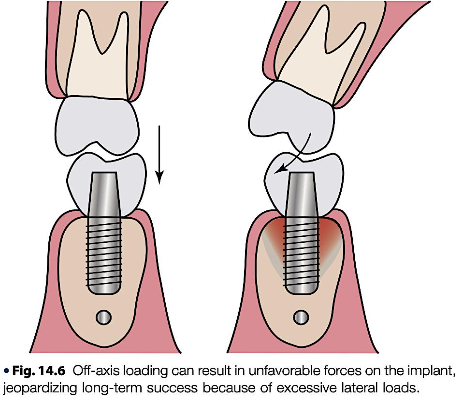
Volume and quality of the bone-implant interface
(bone density)
Classification of Bone Quality / Density
Type I bone
Type II bone
Type III bone
Type IV bone
Type I bone
Composed of homogenous compact bone, less blood supply than the rest of the types, takes 5 months to integrate
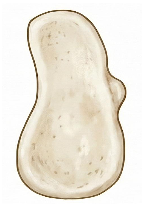
Type II bone
Composed of a thick layer of compact bone surrounded by a core of dense cancellous or trabecular bone, takes 3-4 months to integrate
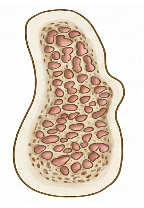
Type III bone
Composed of a thin layer of cortical bone surrounded by a core of dense trabecular bone, takes 6 months to integrate
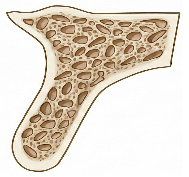
Type IV bone
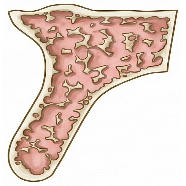
Composed of a thin layer of cortical bone surrounded by a core of low density trabecular bone of poor strength, requires the longest time to integrate – 8 months
Surgical Procedures: Endosseous Implant
One-stage / Non-submerged
Two-stage / Submerged
One-stage / Non-submerged
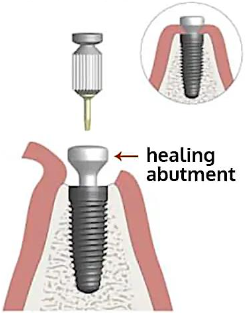
In this procedure, the coronal portion stays exposed through the gingiva during the healing period
• The healing abutment protrudes about 1-2mm from the crest of bone and flaps are adapted around the implant
Two-stage / Submerged
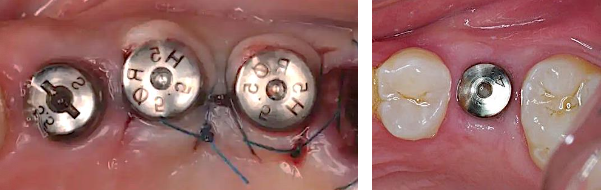
The 1st stage ends by suturing the soft tissues over the implant so that it remains excluded from the oral cavity
• Implants are left undisturbed for 2-3 months in the mandible and 4-6 months in the maxilla
• In the 2nd stage, the implant is uncovered and titanium abutment is connected to the implant body
Implant Procedures
Local anesthesia (local infiltration or nerve block)
Implant site exposure (flapless surgery or with tissue elevation)
Flap reflection
Implant insertion
Suturing
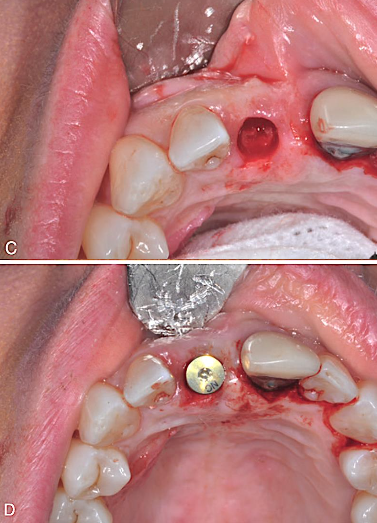
Implant Site Exposure for Flapless surgery (no flap)
Done when there is adequate keratinized tissue over an ideal ridge form
• Advantages: creates least soft tissue trauma and provides best postop esthetics
• Example: use of tissue punch
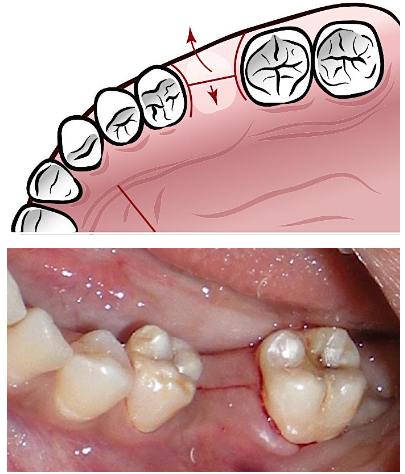
Implant Site Exposure for With tissue elevation (with flap)
Advantages are:
convenient retraction, better access and visualization; additional procedures such as bone grafting can be done
• Example: midcrestal incision (mesial-distal surfaces of the teeth adj to the edentulous space)
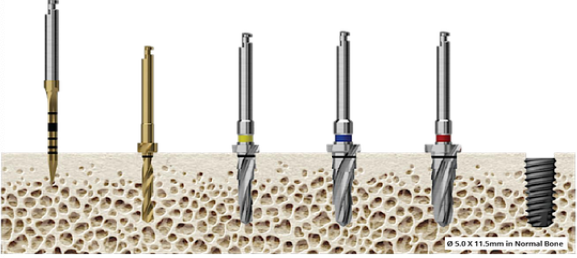
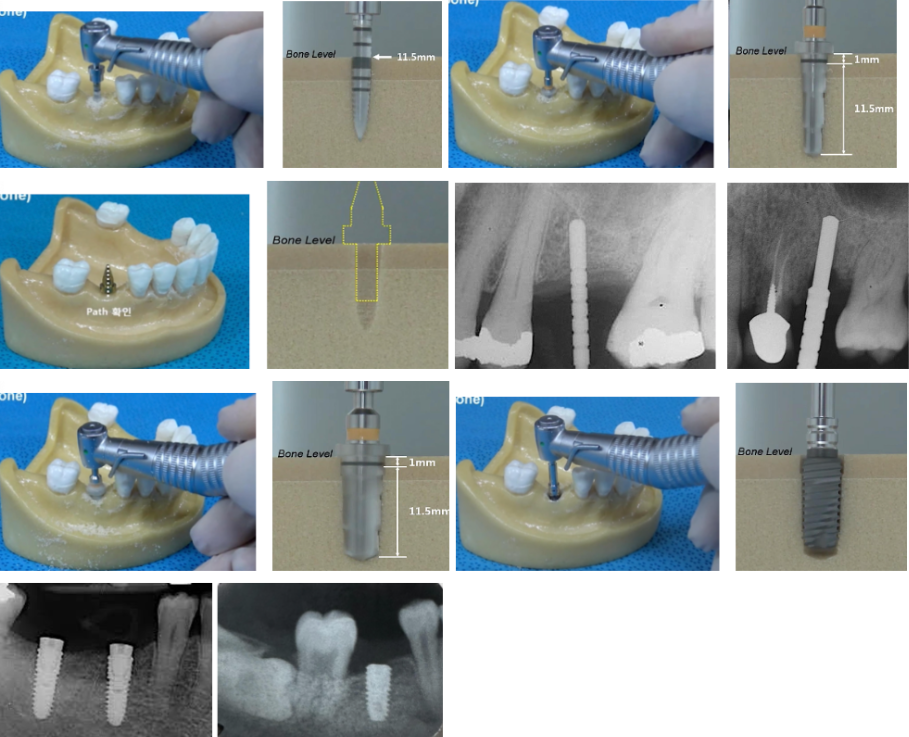
Preparing the Osteotomy
Drilling is done in series of steps.
• All drills, except the last drill, should be irrigated.
Establish the length before the width
steps:
Step 1. Initial osteotomy
Often a pilot drill is used to create an initial hole in the bone.
2. Deepen the osteotomy
Larger drills are used to increase the length
3. Assess parallelism
Position parallel pins. Take radiograph.
4. Enlarge the osteotomy
Widen the osteotomy up to the desired diameter.
5. Place the implant fixture
Lower rpm with no irrigation to promote bleeding.
Implant Components
Implant Body or Fixture
Cover or Healing Screw
Healing or Interim Abutment
Impression Coping
Implant Analog or Replica
Implant Abutment
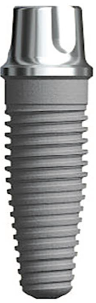
Implant Body or Fixture
is the implant component placed within bone
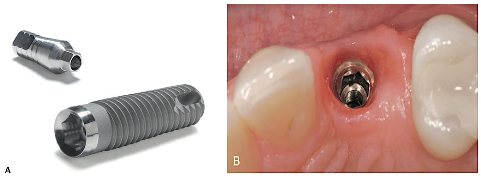
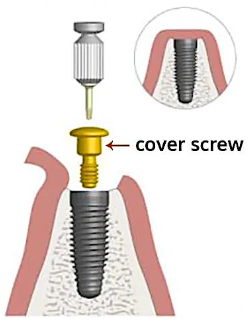
Cover or Healing Screw
a small screw placed over a dental implant to protect it during the healing phase (two-stage) before suturing
• purpose: to prevent bone from growing between the screw and the implant
• in the second stage of two- stage surgery, the cover screw is removed and replaced with a healing abutment
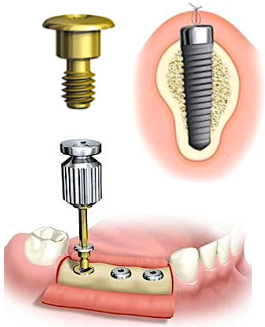
Healing or Interim Abutment
are dome-shaped intraimplant screws that provide permucosal access to the implant platform
• are placed immediately after a one-stage surgical approach or after uncovering in a two- stage surgical approach
• should project 1 to 2 mm superior to the height of the gingival tissue
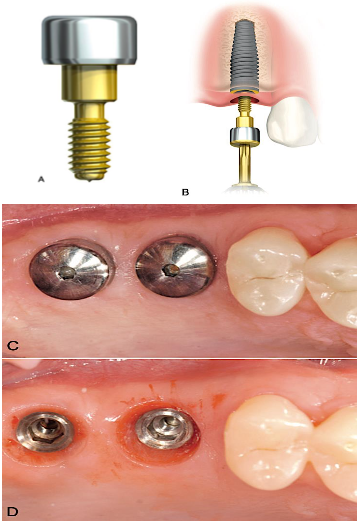
Implant Abutment
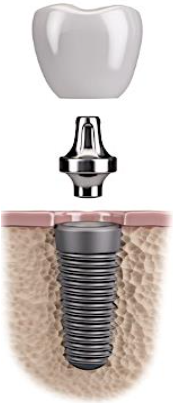
the abutment is the portion of the implant that supports or retains a prosthesis or implant superstructure.
• three main categories:
(1) screw retained
(2) cement retained
(3) prefabricated attachment abutments
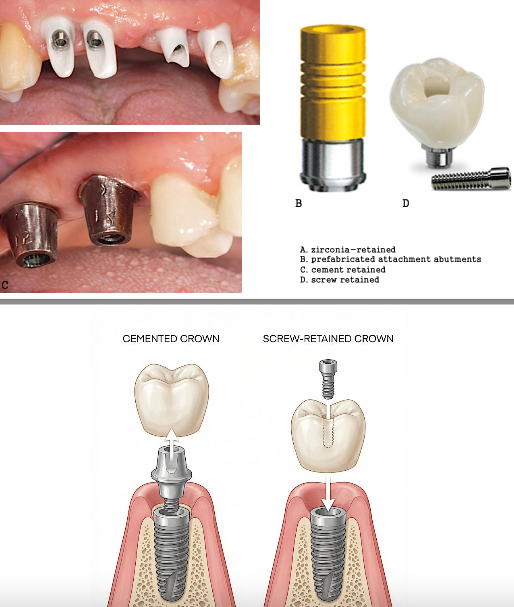
Impression Coping
aka: impression posts, impression pins or implant transfers
facilitates transfer of the intraoral location of the implant to the same position on the laboratory cast
• the impression transfer can be closed-tray transfer or open-tray transfer
[listen record on this part, & see ppt again]
![<p>aka: <span style="color: rgb(255, 0, 0);">impression posts, impression pins or implant transfers</span></p><p>facilitates transfer of the <span style="color: rgb(255, 0, 0);">intraoral location </span>of the implant to the same position on the laboratory cast</p><p>• the impression transfer can be <span style="color: rgb(255, 0, 0);">closed-tray transfer </span>or <span style="color: rgb(255, 0, 0);">open-tray transfer</span></p><p><span style="color: rgb(255, 0, 0);">[listen record on this part, & see ppt again]</span></p>](https://assets.knowt.com/user-attachments/74cc10bd-5804-4006-b3b3-d1f74ef93d4f.png)
Implant Analogues (laboratory analogues)
are screwed directly into the impression coping to replicate exactly the top of the implant fixture in the laboratory cast
• this allows laboratory technician to have an accurate and flexible representation of soft tissue
[listen record on this part, & see ppt again]
![<p><span>are screwed directly into the impression coping </span><span style="color: rgb(255, 0, 0);">to replicate exactly the top of the implant fixture </span><span>in the laboratory cast</span></p><p><span>• this allows laboratory technician to have an accurate and flexible representation of soft tissue</span></p><p><span style="color: rgb(255, 0, 0);">[listen record on this part, & see ppt again]</span></p>](https://assets.knowt.com/user-attachments/a10d89a3-3aad-4efa-8dd4-c10244e269f1.png)
Impression Techniques
Open-tray technique (pick-up or direct method)
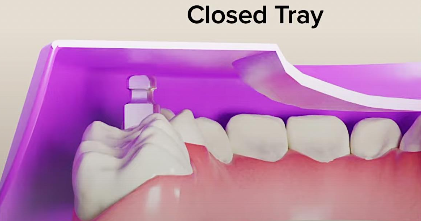
Closed-tray technique (transfer or indirect method)
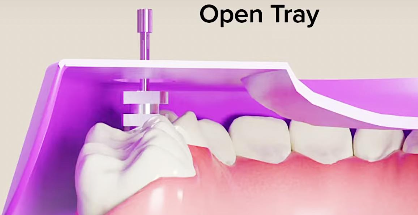
Open-tray technique
aka: pick-up or direct method
involves using a special impression tray with openings that allow the impression copings to protrude.
• The clinician unscrews the
impression copings after
the impression material
has set, capturing the
exact position of the implants.
Closed-tray technique
aka: transfer or indirect method
involves using standard impression trays and transferring impression copings after the impression has set.
• The clinician removes the
impression and then
unscrews the copings,
placing them back into the
impression before sending it to the dental lab.
1mm
Minimum required distance between implant and Buccal plate,
Lingual plate, nasal cavity, maxillary sinus
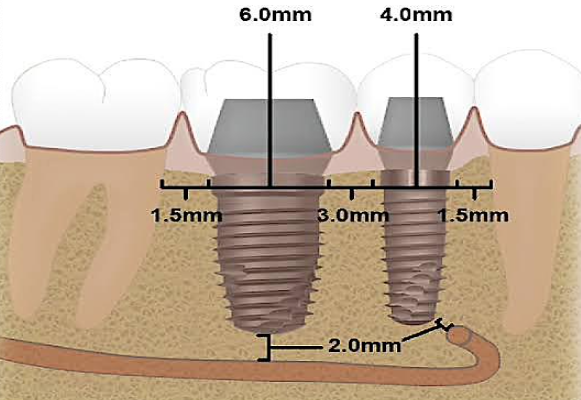
1.5mm
Minimum required distance between implant and Adjacent natural tooth
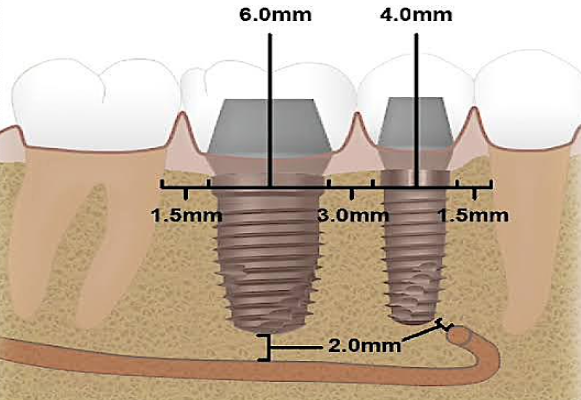
2mm from superior bony canal
Minimum required distance between implant and inferior alveolar canal
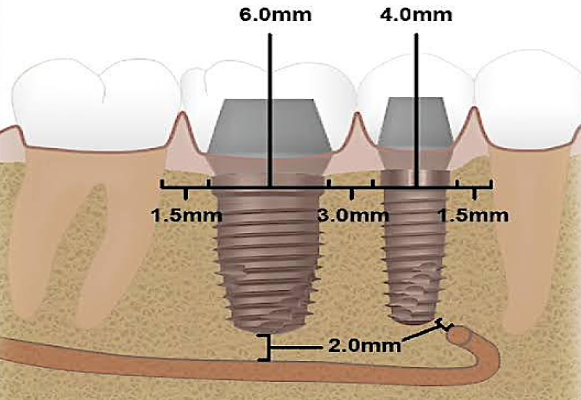
3mm between outer edge of implants
Minimum required distance between implant and Inter-implant distance
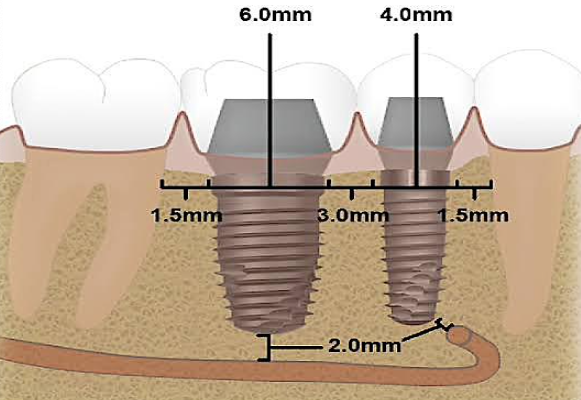
5mm from anterior foramen
Minimum required distance between implant and Mental nerve
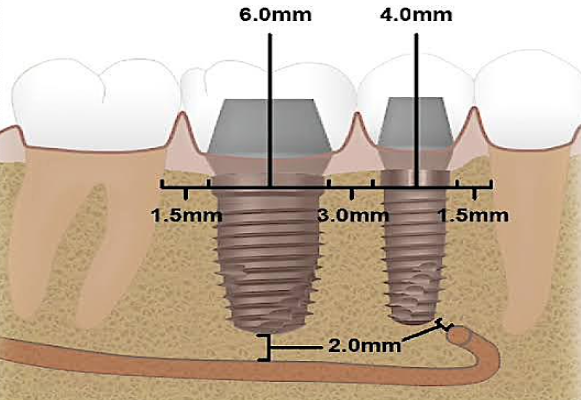
Avoid midline maxilla
Minimum required distance between implant and Incisive nerve
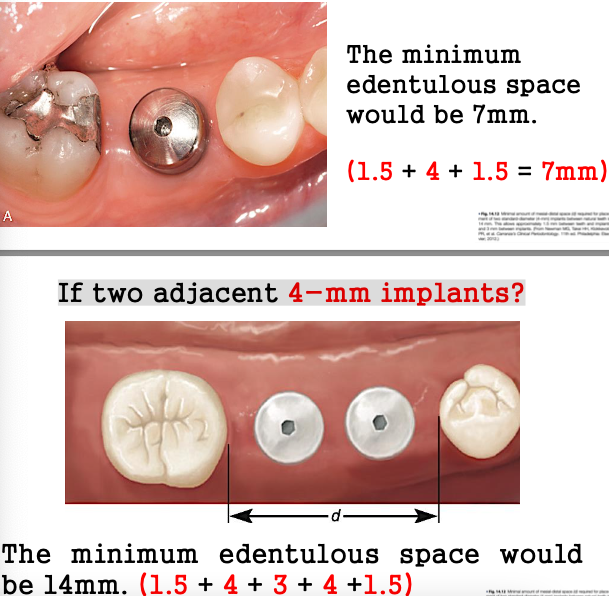
see photo for the explained answer
If a 4-mm-diameter implant is planned to replace a missing tooth, how much total
mesiodistal width is required?
If two adjacent 4-mm implants?
Contraindications for Implants
medical conditions (diabetes, osteoporosis, HIV, AIDS, uncontrolled metabolic diseases)
medications (bisphosphonates, anti-angiogenics)
medical treatments (chemotherapy and irradiation)
psychological or mental conditions (psychiatric syndromes (e.g., schizophrenia, paranoia) or mental instabilities (e.g., neurosis, somatic symptom disorder)
certain habits or behavioral considerations such as smoking, tobacco use, substance abuse, and parafunctional habits
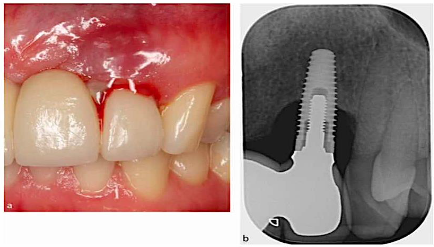
Types of Peri-implant Diseases
Peri-implant mucositis
Peri-implantitis
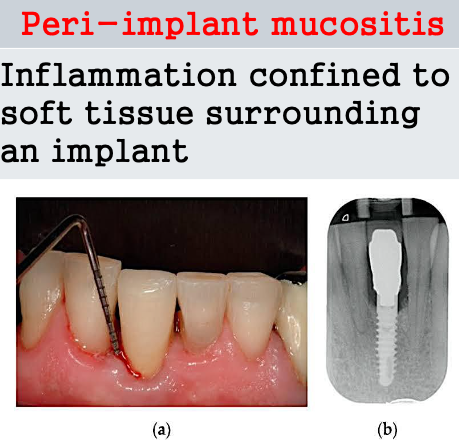
Peri-implant mucositis
Inflammation confined to soft tissue surrounding an implant
Peri-implantitis
Peri-implant bone loss in conjunction with soft tissue inflammation
Early implant Failure (before ossseointegration)
Improper preparation of the implant site
Bacterial contamination
Improper mechanical
stability following implant
insertion
• Premature loading of theimplant
late implant Failure (before ossseointegration)
Excessive load
• Infection, e.g. peri-implant
mucositis, peri-implantitis