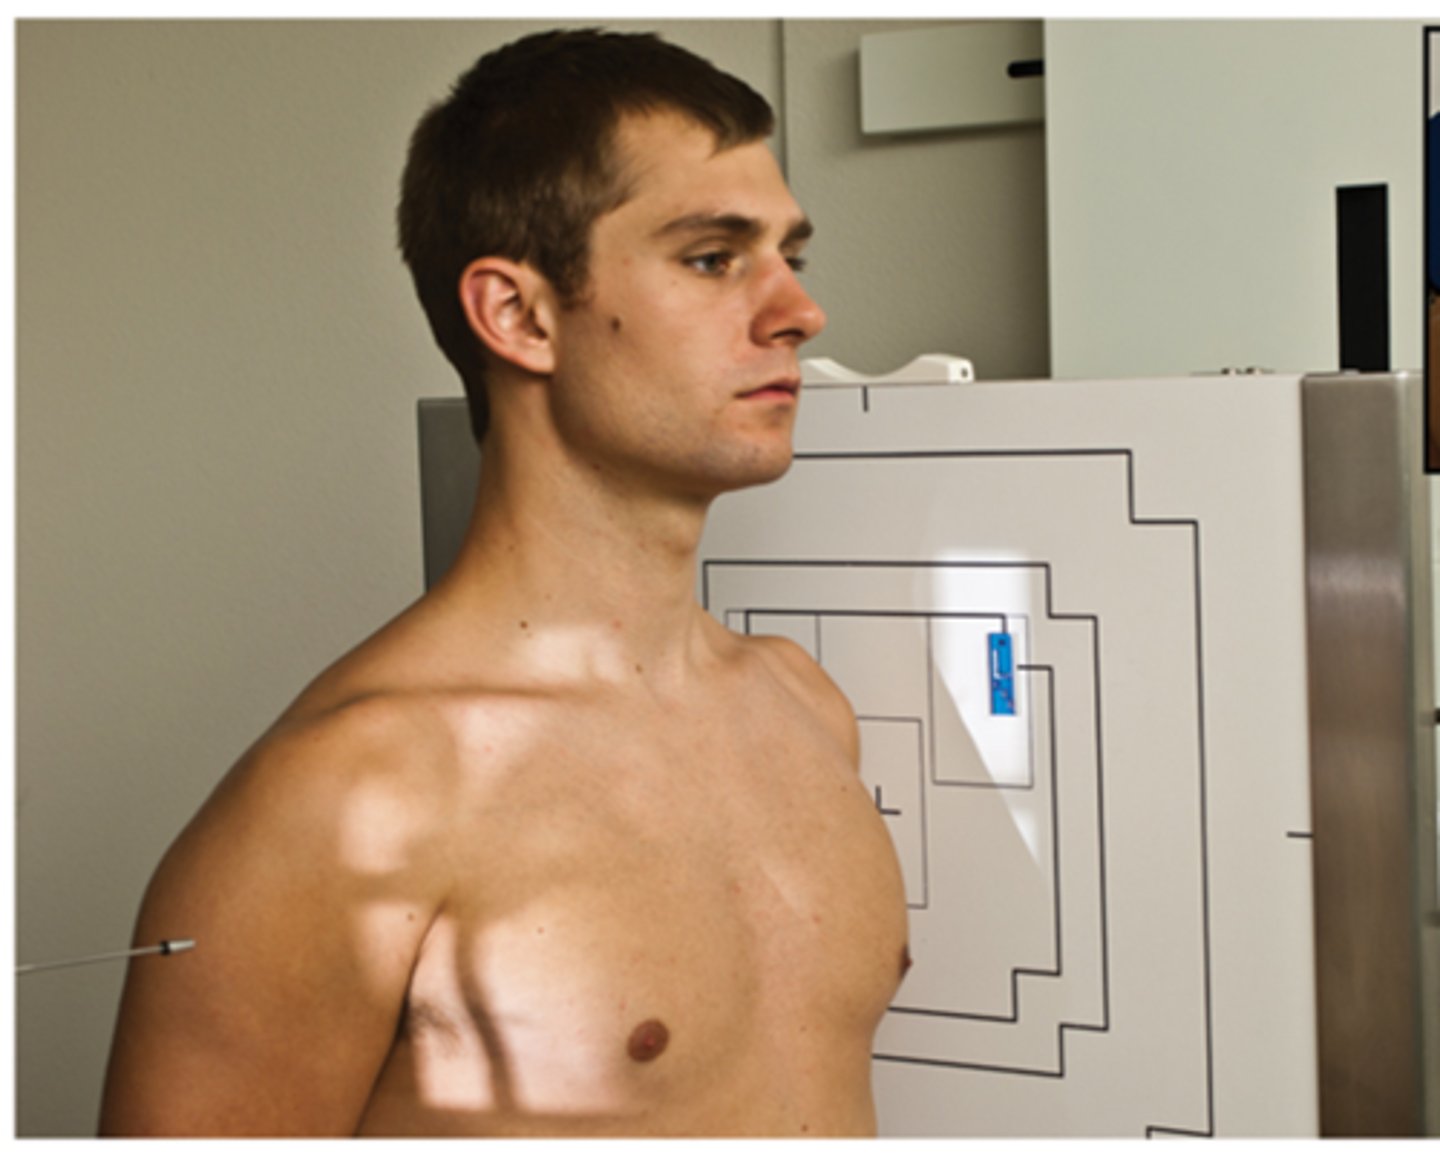
Final Eval (STAMPSBC)
 Call Kai
 Learn
Learn Practice Test
 Spaced Repetition
 Match
Match Flashcards
 Knowt Play
1/121

There's no tags or description
Looks like no tags are added yet.
Name | Mastery | Learn | Test | Matching | Spaced | Call with Kai | Chat |
|---|
No analytics yet
Send a link to your students to track their progress
122 Terms
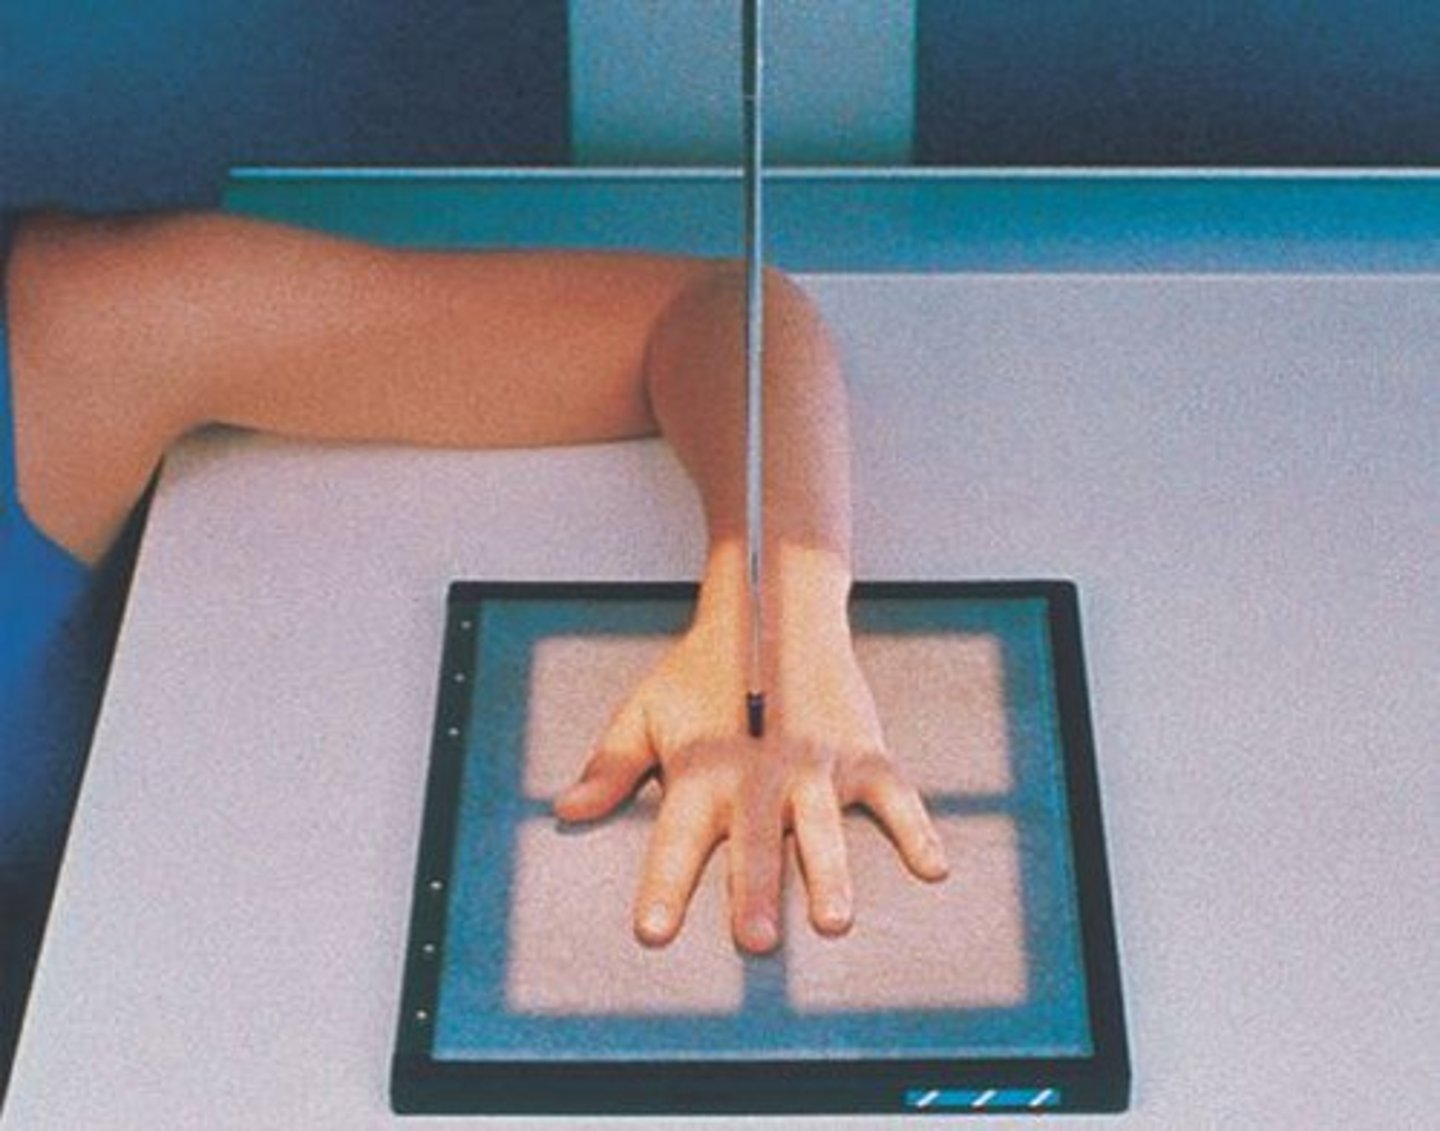
STAMPSBC for PA Hand
S - shield on lap
T - 4.5 mAs @ 60 kVp
A - no angle
M - correct marker on cassette
P - PT seated w/ palm flat on cassette, CR 3rd MCP joint
S - 40
B - suspension
C - 10 x 12
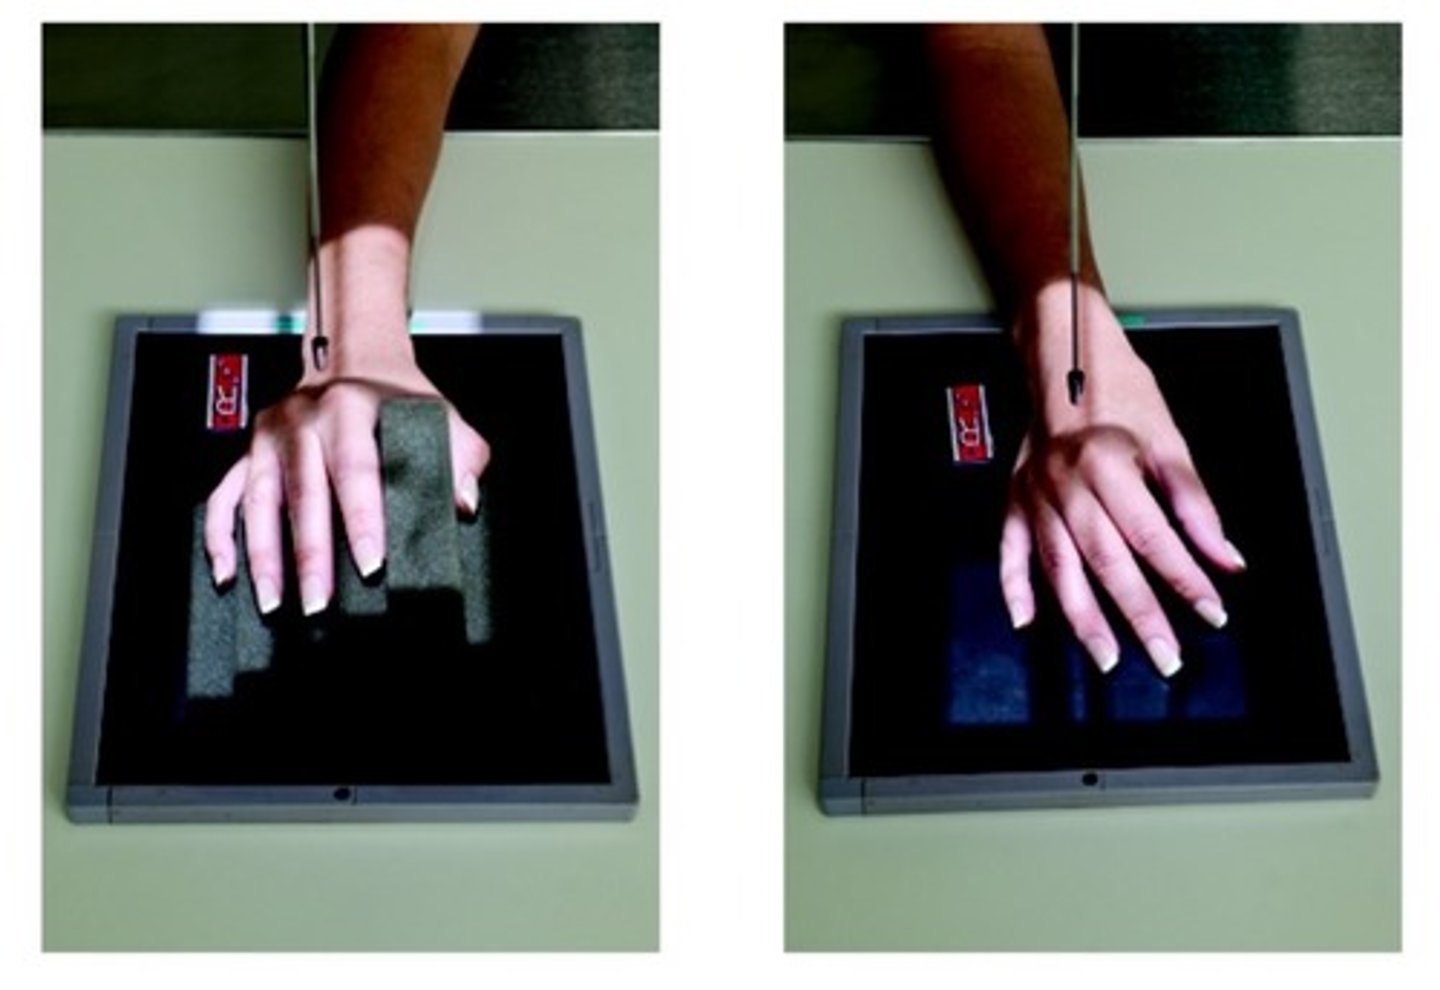
STAMPSBC for Oblique Hand
S - shield on lap
T - 4.5 mAs @ 60 kVp
A - no angle
M - correct marker on cassette
P - PT seated w/ hand rotated 45 degrees laterally, CR 3rd MCP joint
S - 40
B - suspension
C - 10 x 12
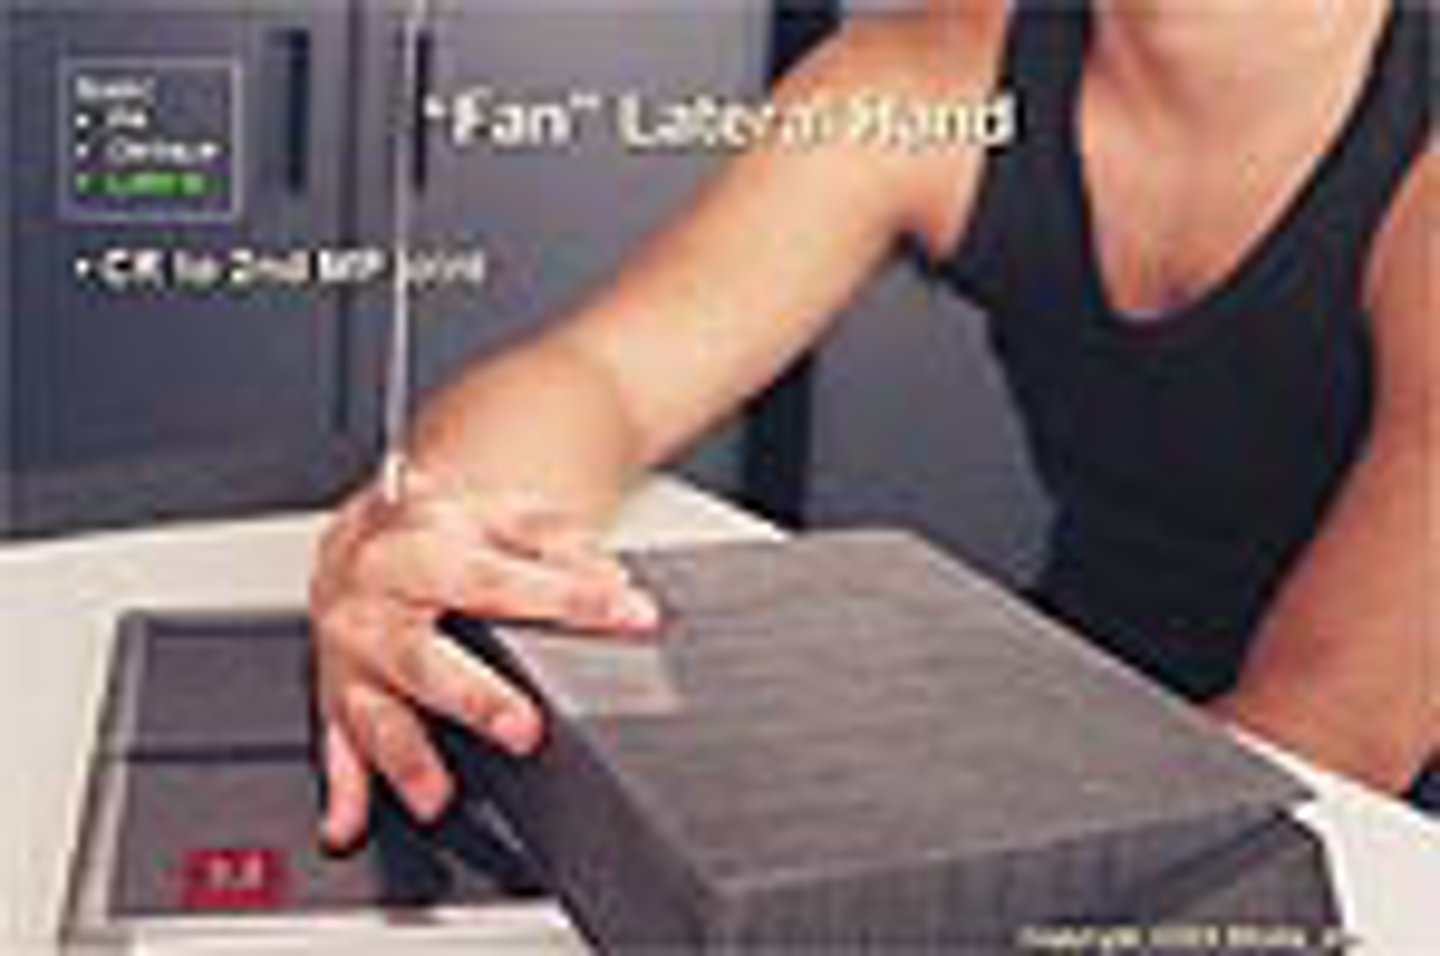
STAMPSBC for Fan Lateral Hand
S - shield on lap
T - 4.5 mAs @ 60 kVp
A - no angle
M - correct marker on cassette
P - ulna side down, CR 2nd MCP
S - 40
B - suspension
C - 10 x 12
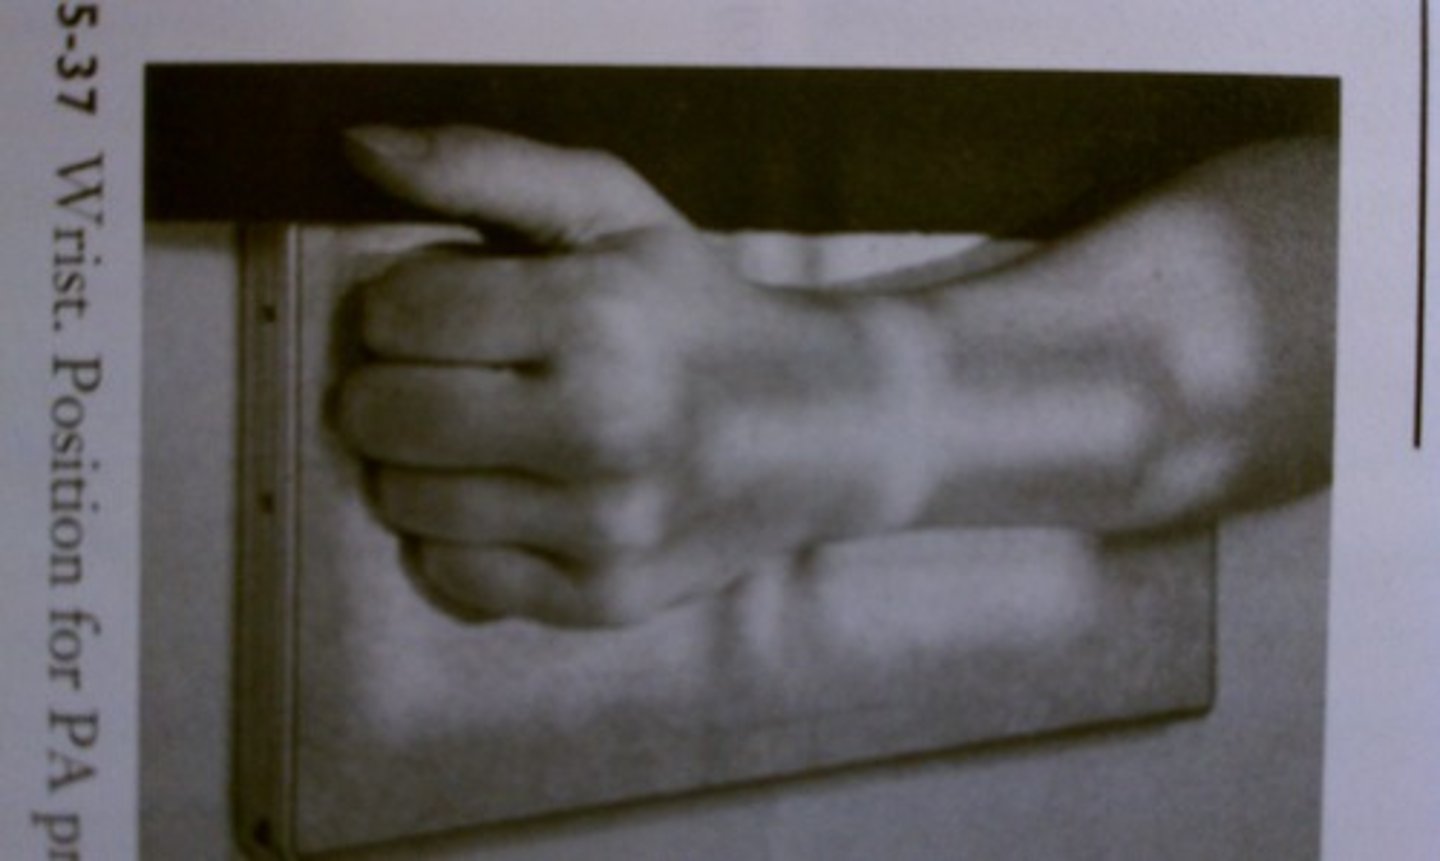
STAMPSBC for PA Wrist
S - shield on lap
T - 4.5 mAs @ 60 kVp
A - no angle
M - correct marker on cassette
P - make a fist, pronated, CR @ midcarpal
S - 40
B - suspension
C - 10 x 12
STAMPSBC for Oblique Wrist
S - shield on lap
T - 4.5 mAs @ 60 kVp
A - no angle
M - correct marker on cassette
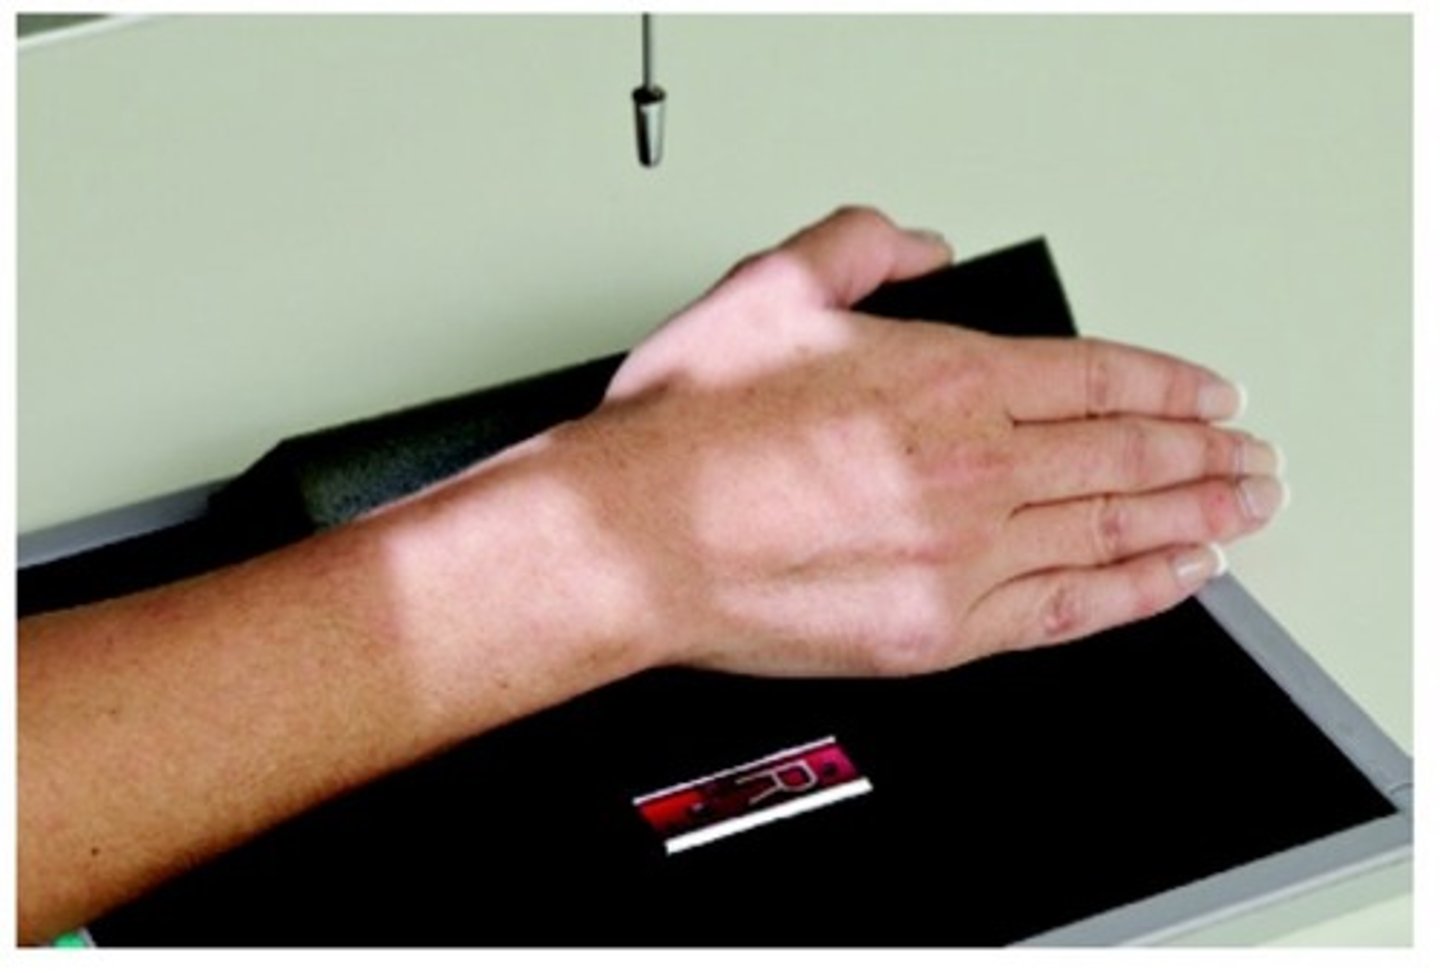
P - 45 degree lateral rotation, CR @ midcarpal
S - 40
B - suspension
C - 10 x 12
STAMPSBC for Lateral Wrist
S - shield on lap
T - 4.5 mAs @ 60 kVp
A - no angle
M - correct marker on cassette
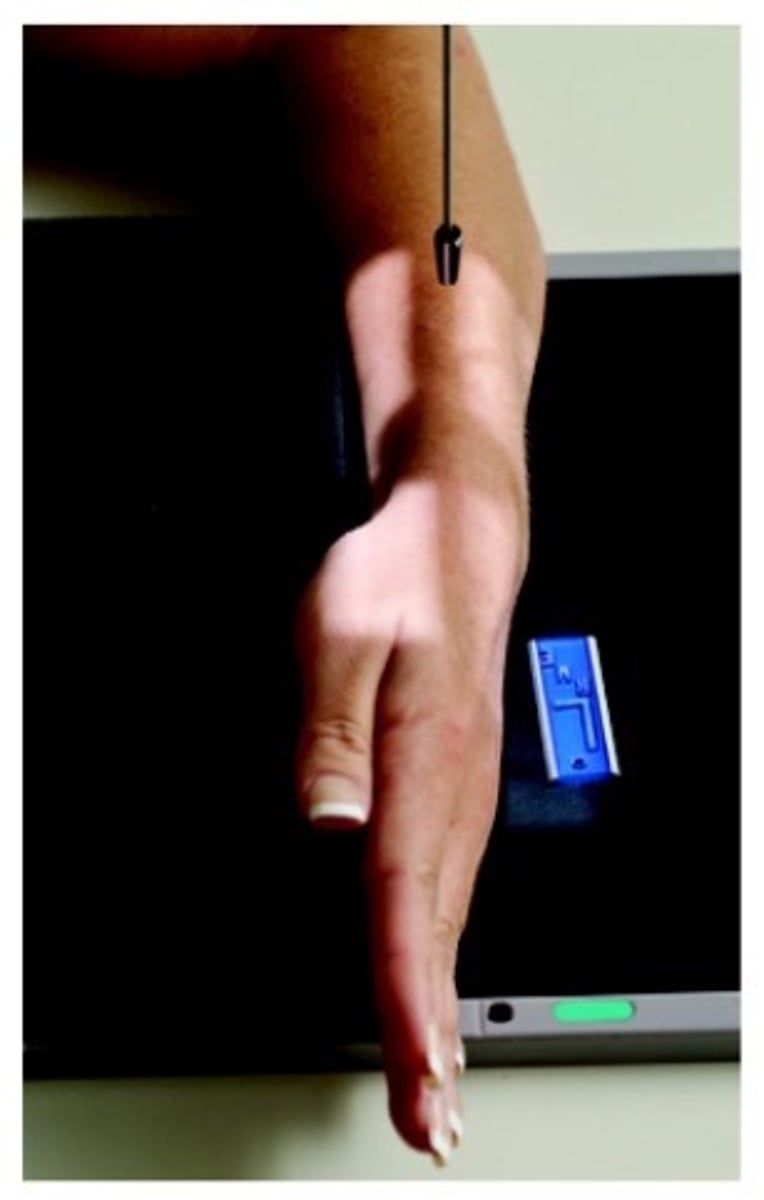
P - elbow bent 90 degree, CR midcarpal
S - 40
B - suspension
C - 10 x 12
STAMPSBC for Ulnar Deviation (scaphoid)
S - shield on lap
T - 4.5 @ 60
A - 10 to 15 degrees toward elbow
M - correct marker on cassette
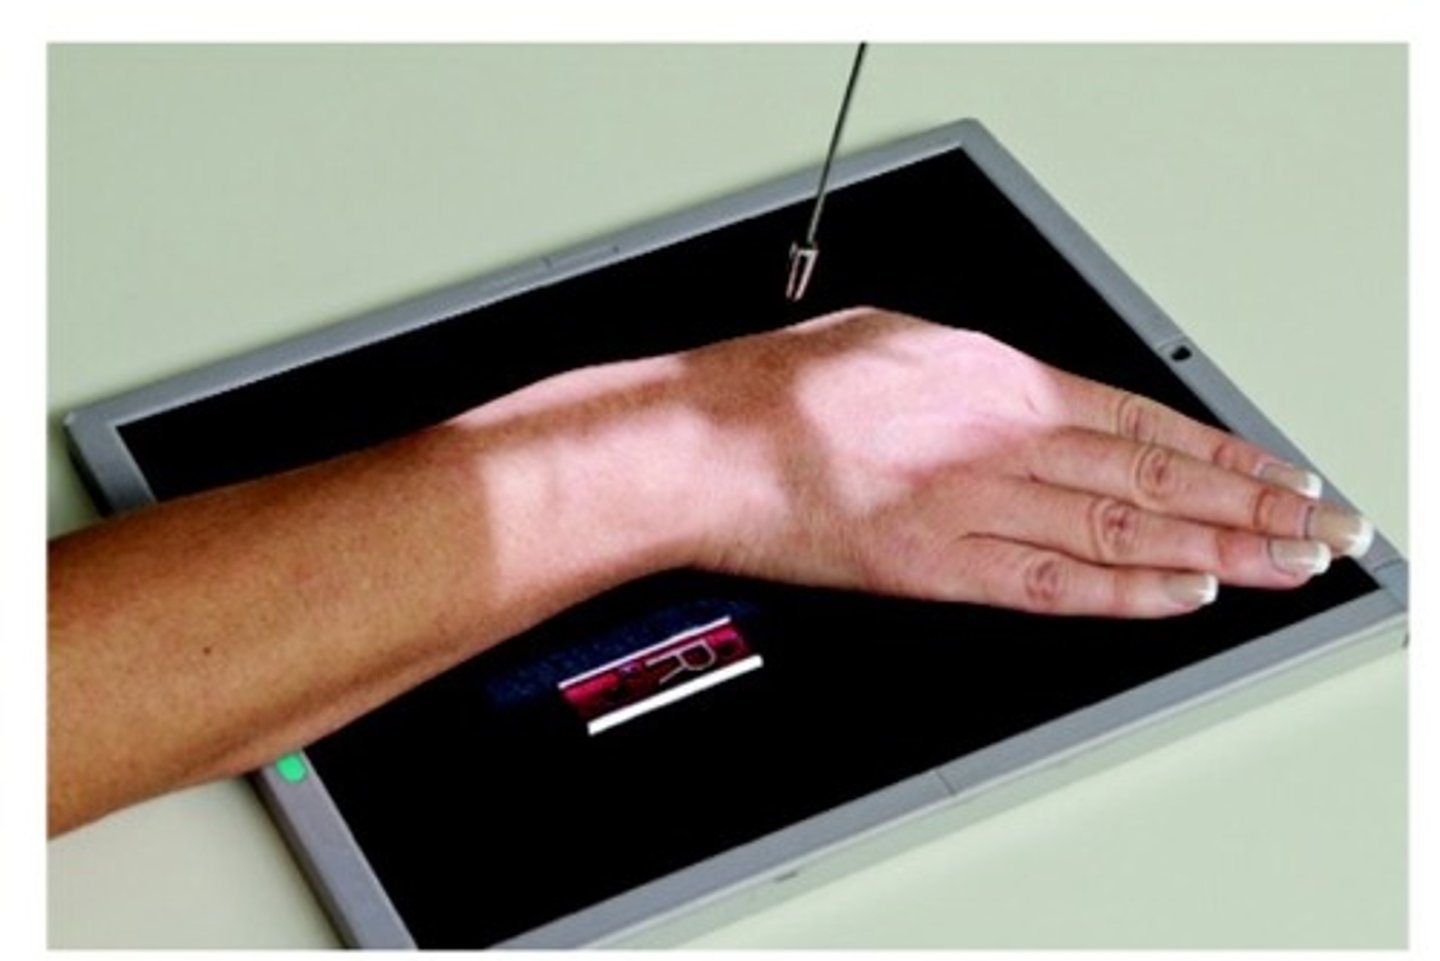
P - hand turned toward ulnar side w/ forearm straight, CR on scaphoid
S - 40
B - suspension
C - 10 x 12
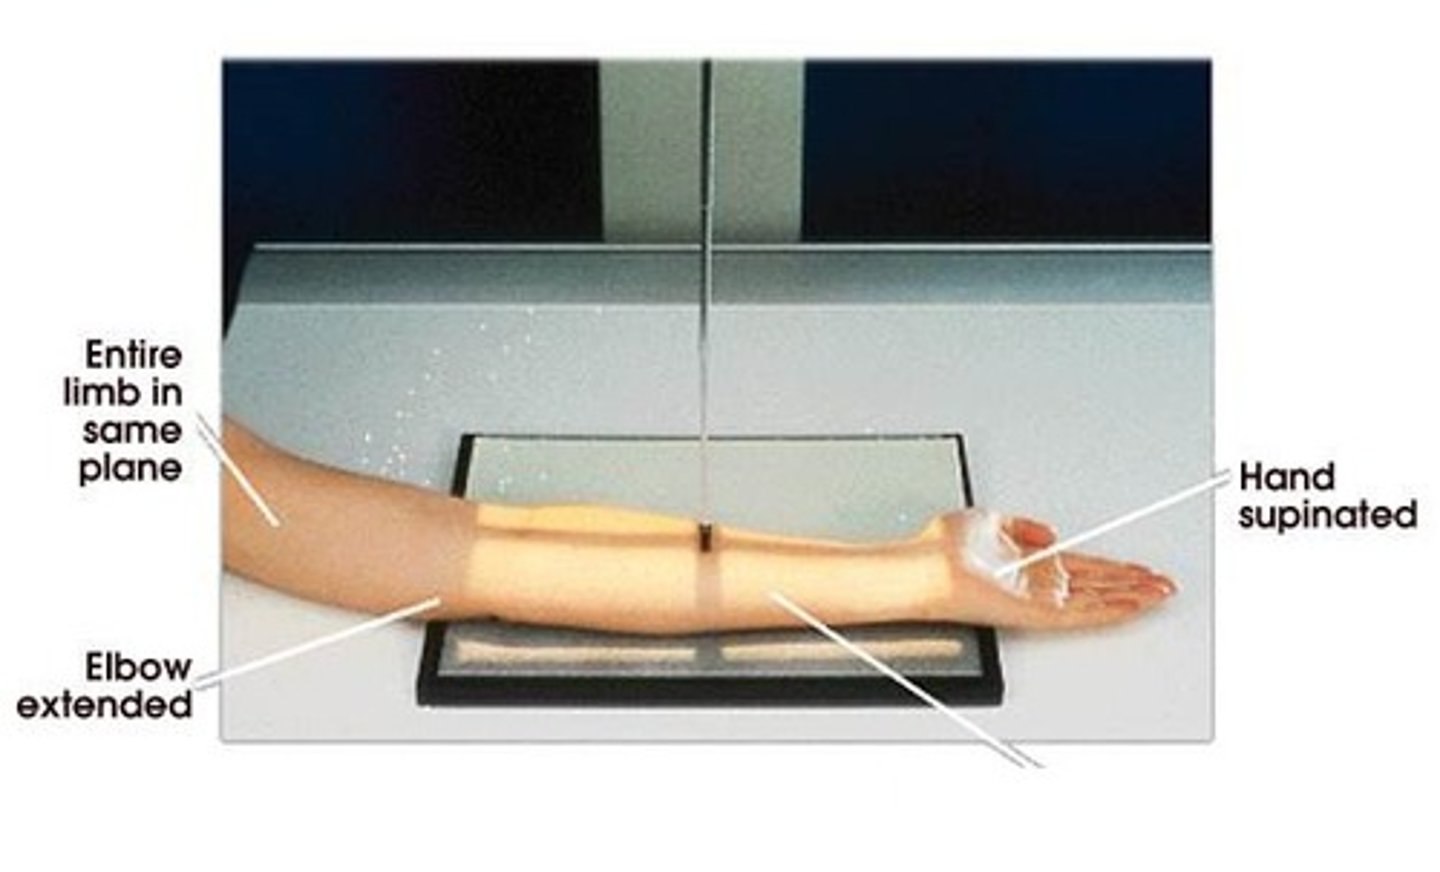
STAMPSBC for AP Forearm
S - around waist
T - 6 mAs @ 60 kVp
A - none
M- correct marker on cassette
P - CR midforearm, epicondyles parallel to IR, hand supinated
S - 40
B - suspension
C - 14 by 17
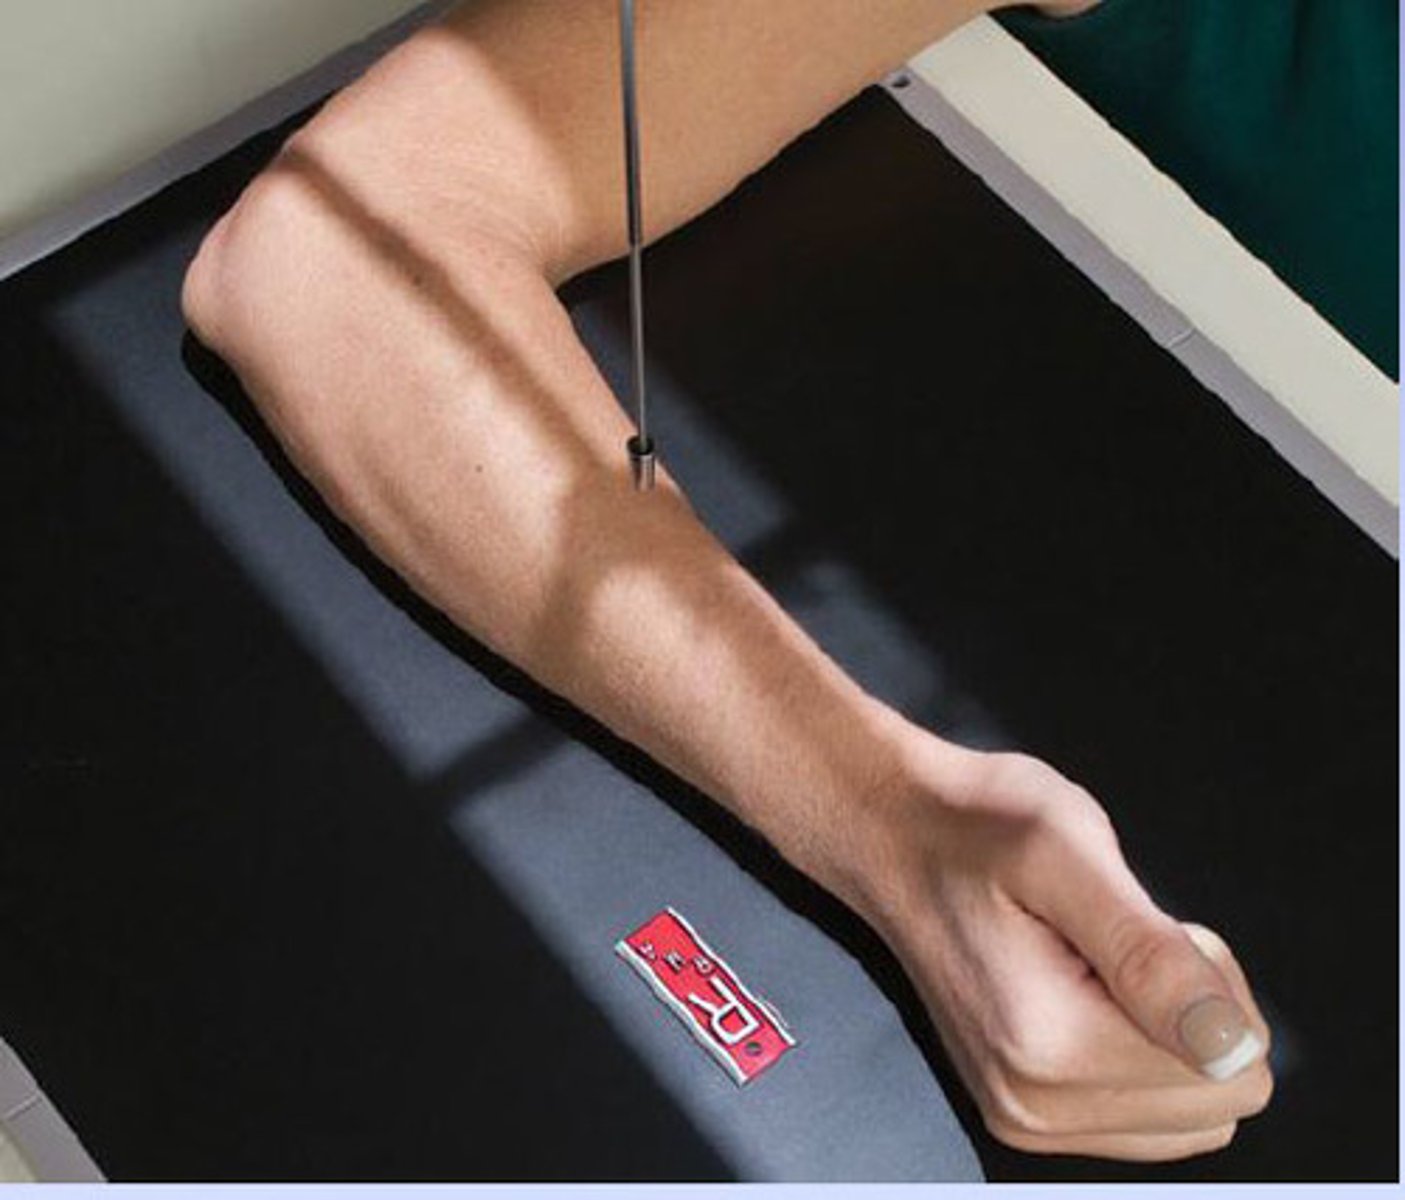
STAMPSBC for Lateral Forearm
S - around waist
T - 6 mAs @ 66 kVp
A - none
M - correct marker on cassette
P - CR midforearm, epicondyles perp
S - 40
B - suspension
C - 14 x 17
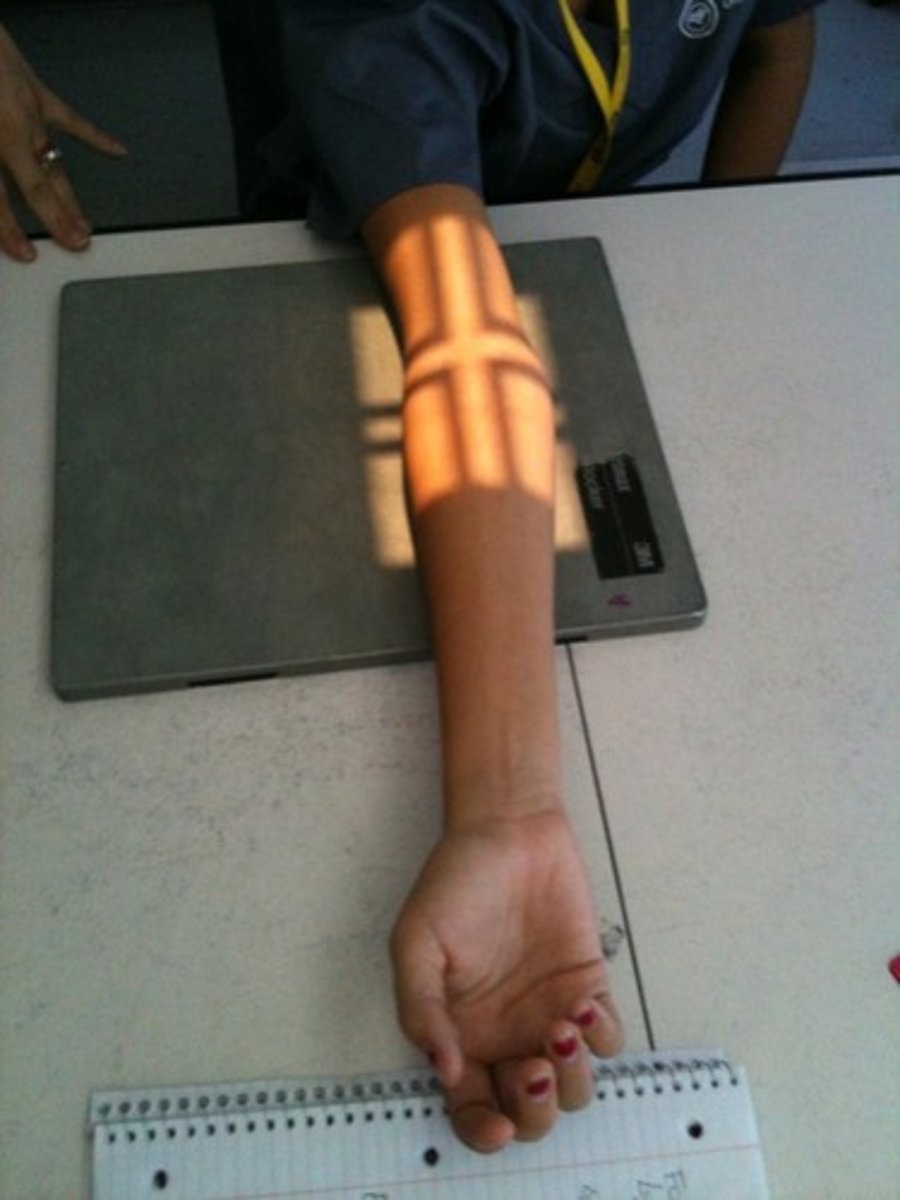
STAMPSBC for AP Elbow
S - on lap
T - 6 mAs @ 60 kVp
A - none
M - correct arm, on cassette
P - hand supinated, CR mid elbow, shoulder and wrist on same level
S - 40
B - suspension
C - 10 by 12
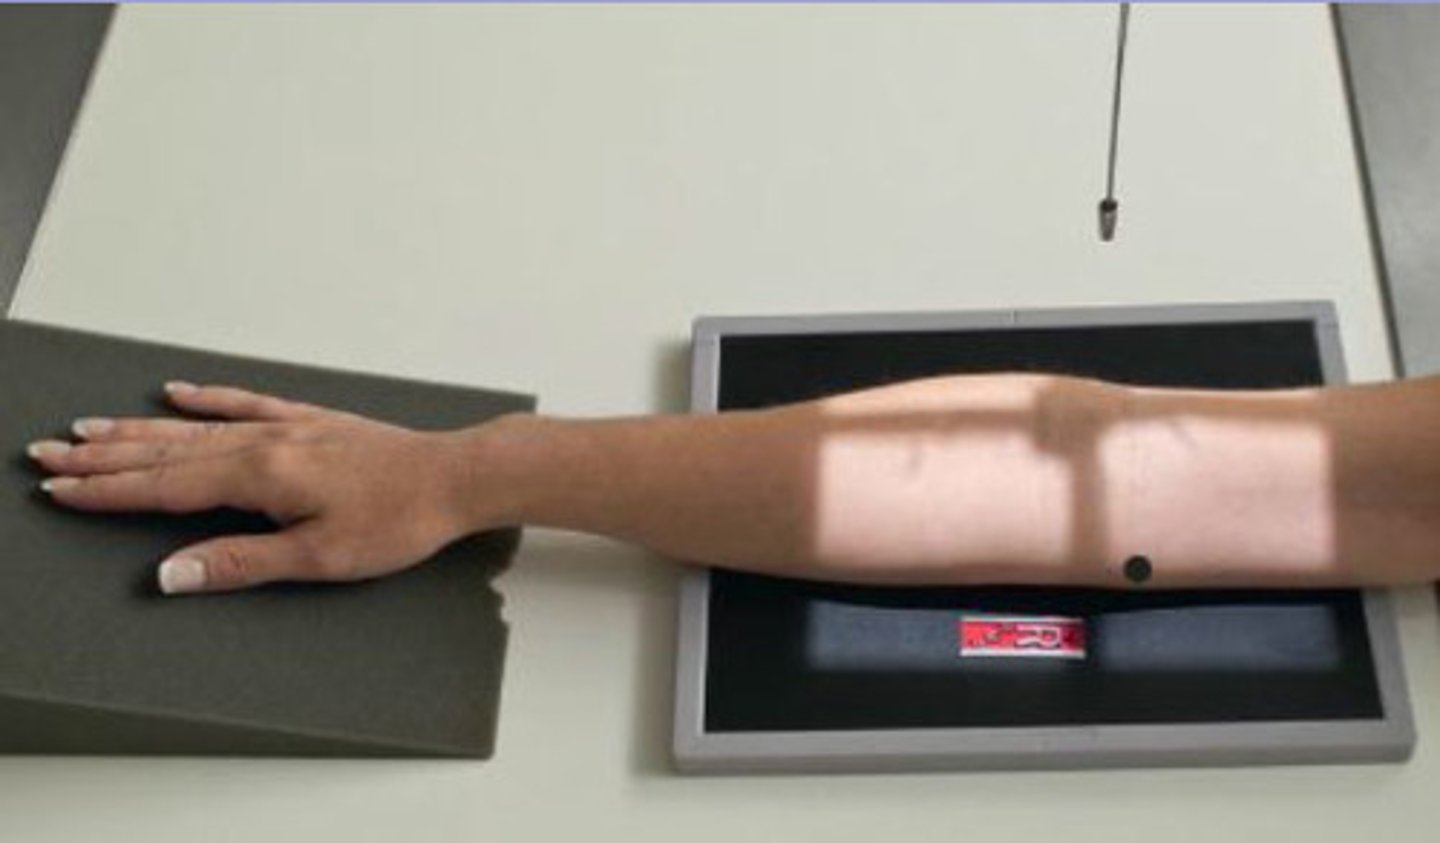
STAMPSBC for Internal Oblique Elbow
S - on lap
T - 6 mAs @ 60 kVp
A - none
M - correct arm, on cassette
P - 45 degree rotation medially, CR mid elbow
S - 40"
B - hold
C - 10 by 12, L
STAMPSBC for External Oblique Elbow
S - on lap
T - 6 mAs @ 60 kVp
A - none
M - correct arm, on cassette
P - 45 degree rotation laterally, Cr mid elbow
S - 40"
B - hold
C - 10 by 12
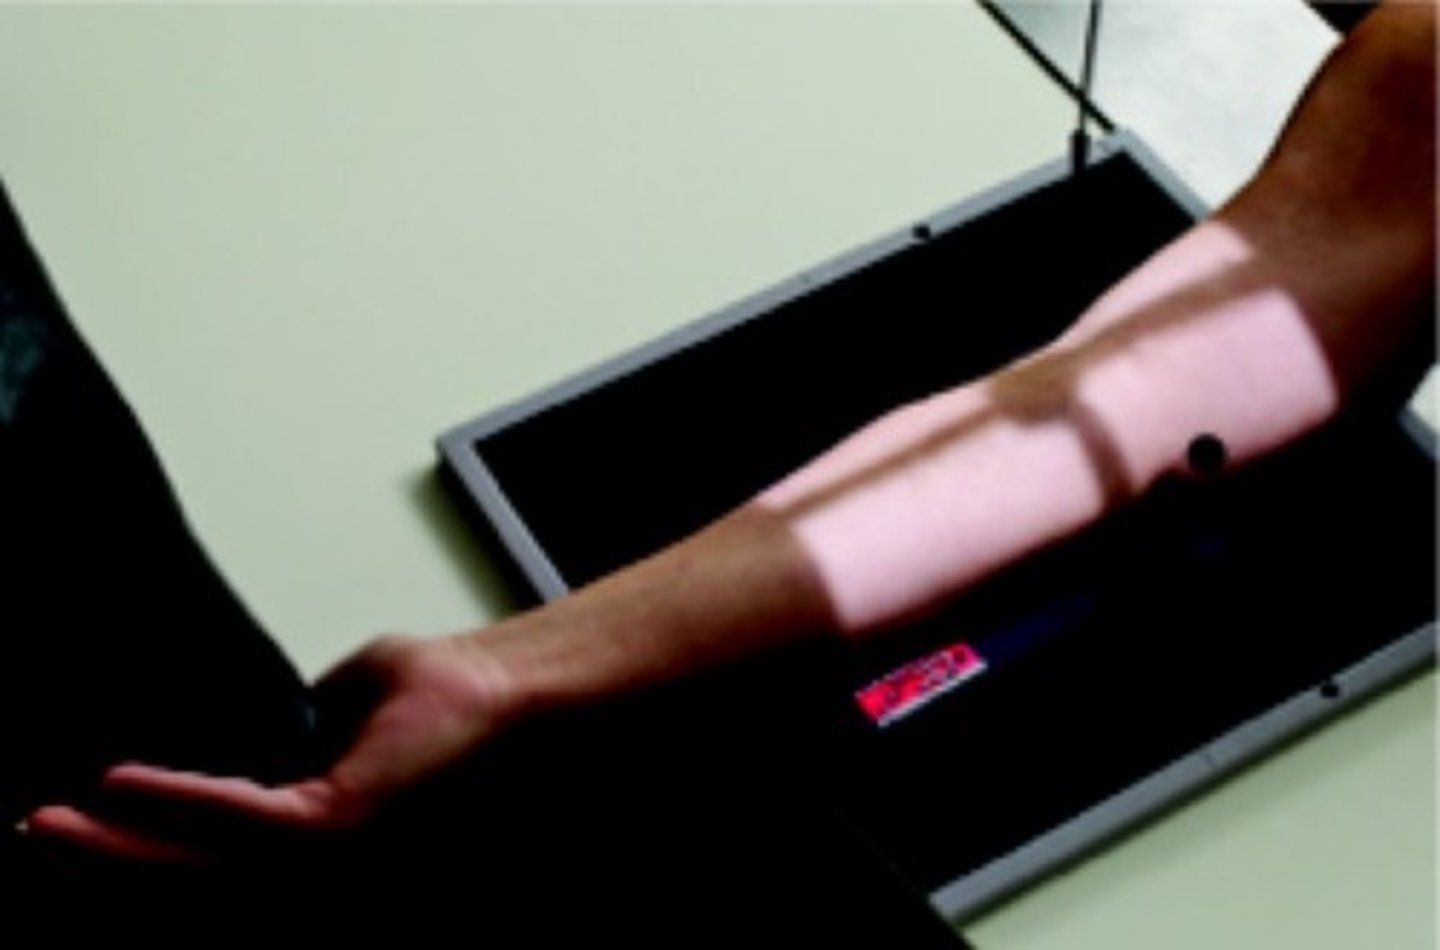
STAMPSBC for Lateral Elbow
S - on lap
T - 6 mAs @ 66 kVp
A - none
M - correct arm, on cassette
P -90 degree bend of the elbow, distal humerus and proximal forearm included, CR mid elbow
S - 40"
B - hold
C - 10 by 12
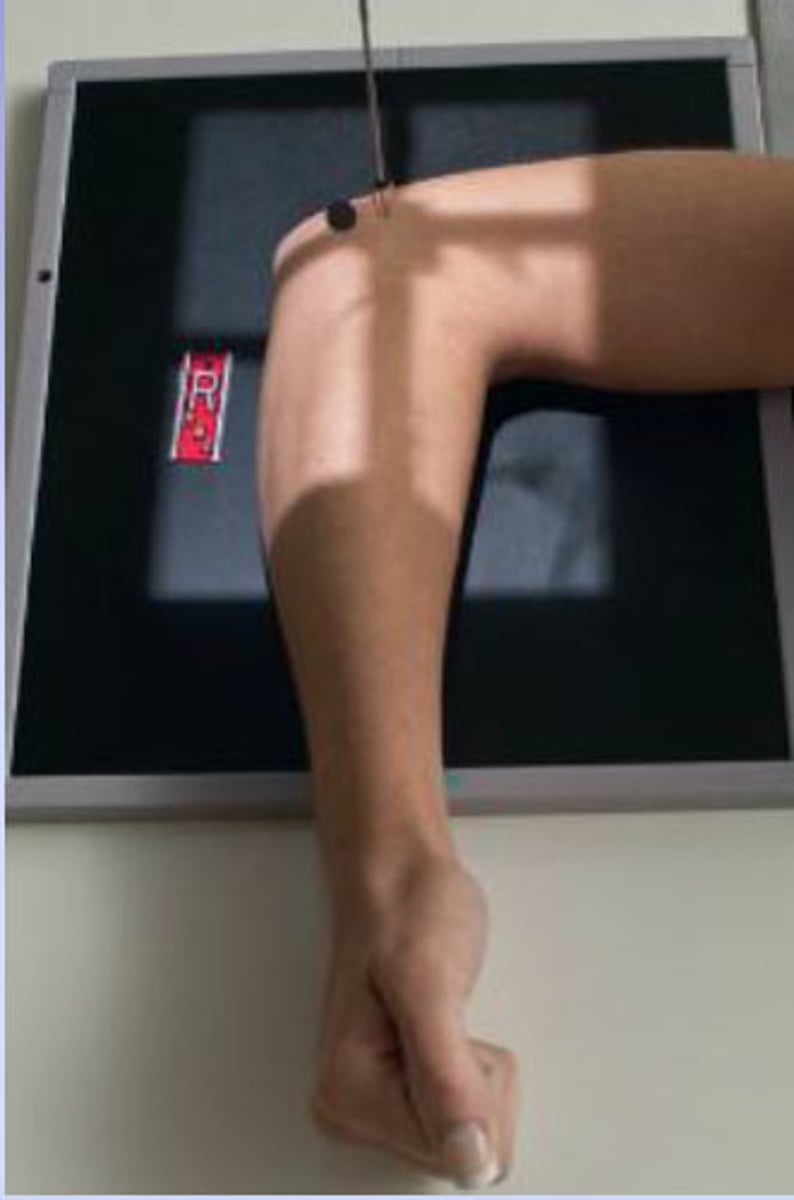
STAMPSBC for AP Humerus
S - around waist
T - 8 mAs @ 70 kVp
A - none
M - correct arm
P - CR mid humerus, epicondyles parallel to IR
S - 40"
B - hold
C - 14 by 17, L
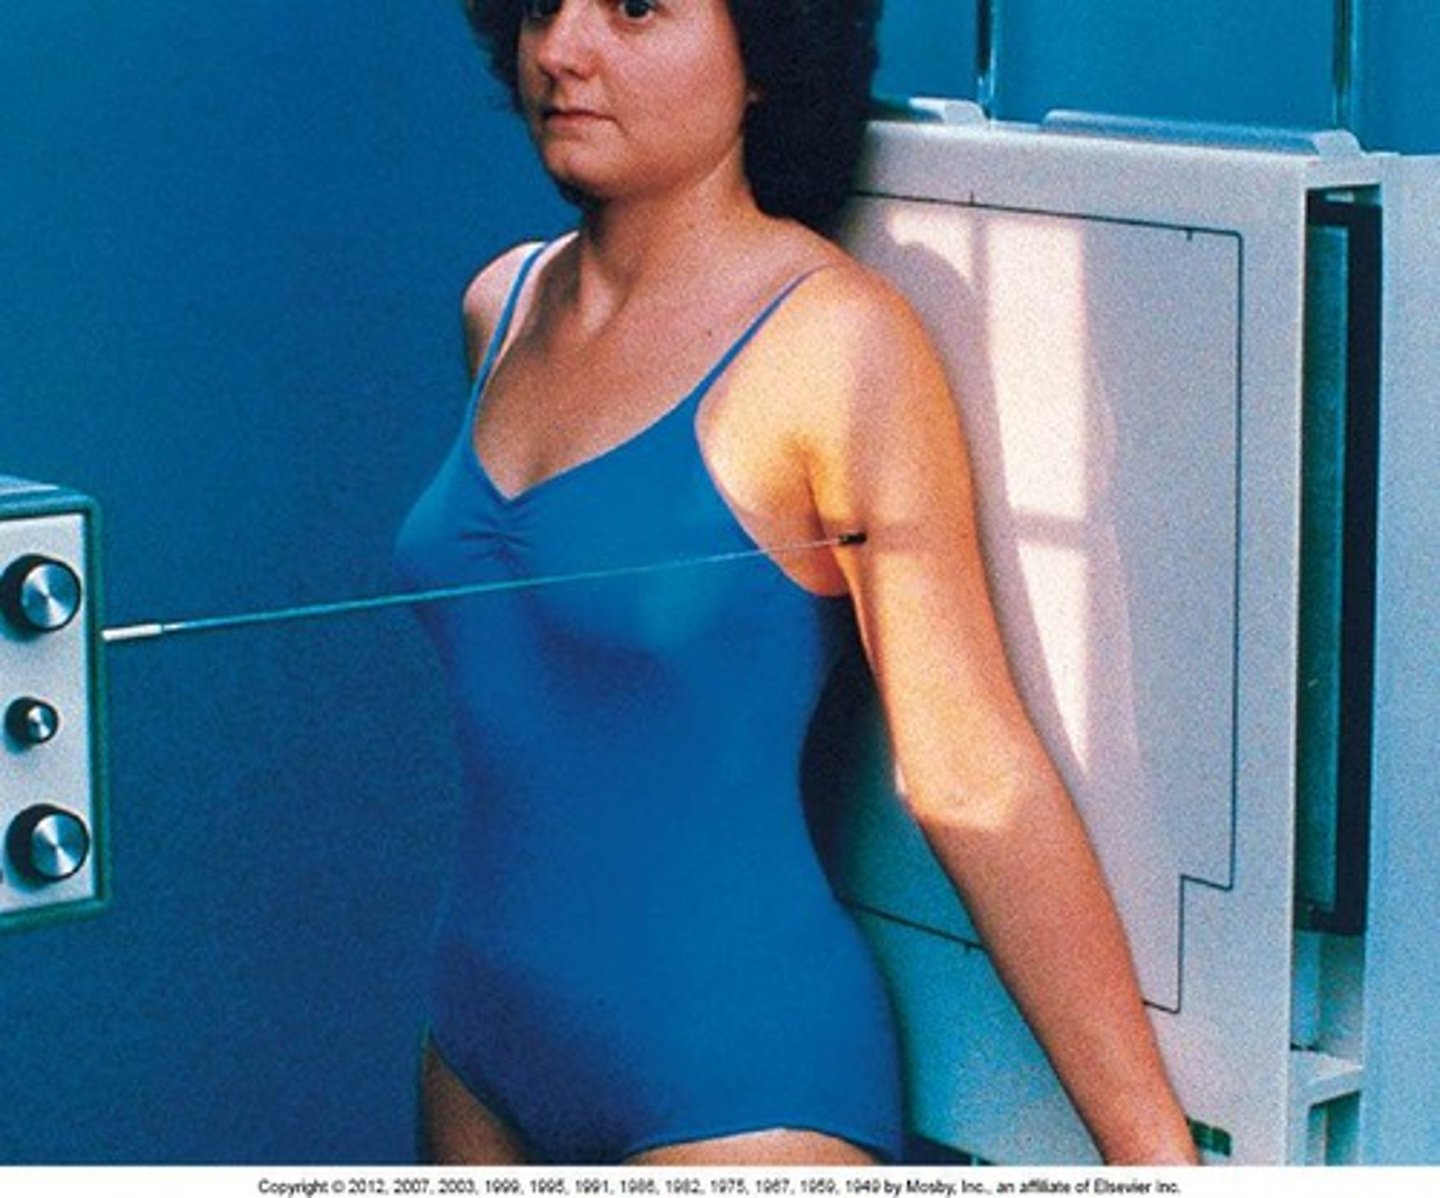
STAMPSBC for Lateral Humerus
S - around waist
T - 8 mAs @ 70 kVp
A - none
M - correct arm
P - CR mid humerus, epicondyles perp to IR, hand on hip
S - 40"
B - hold
C - 14 by 17, L
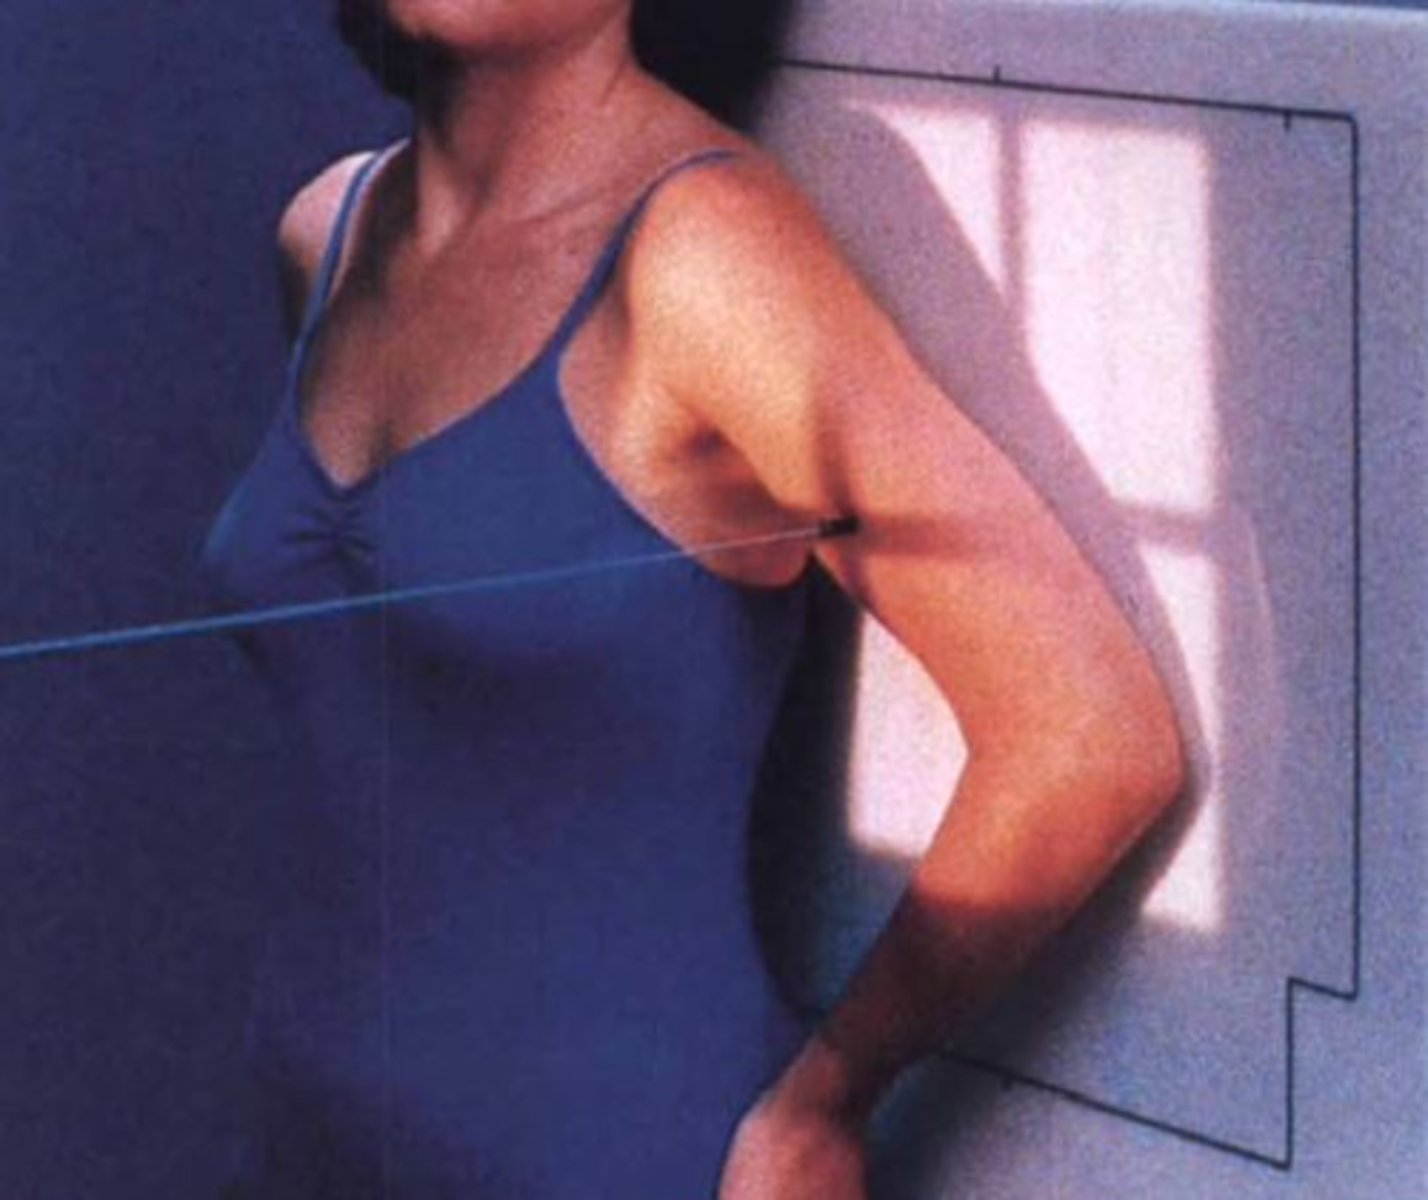
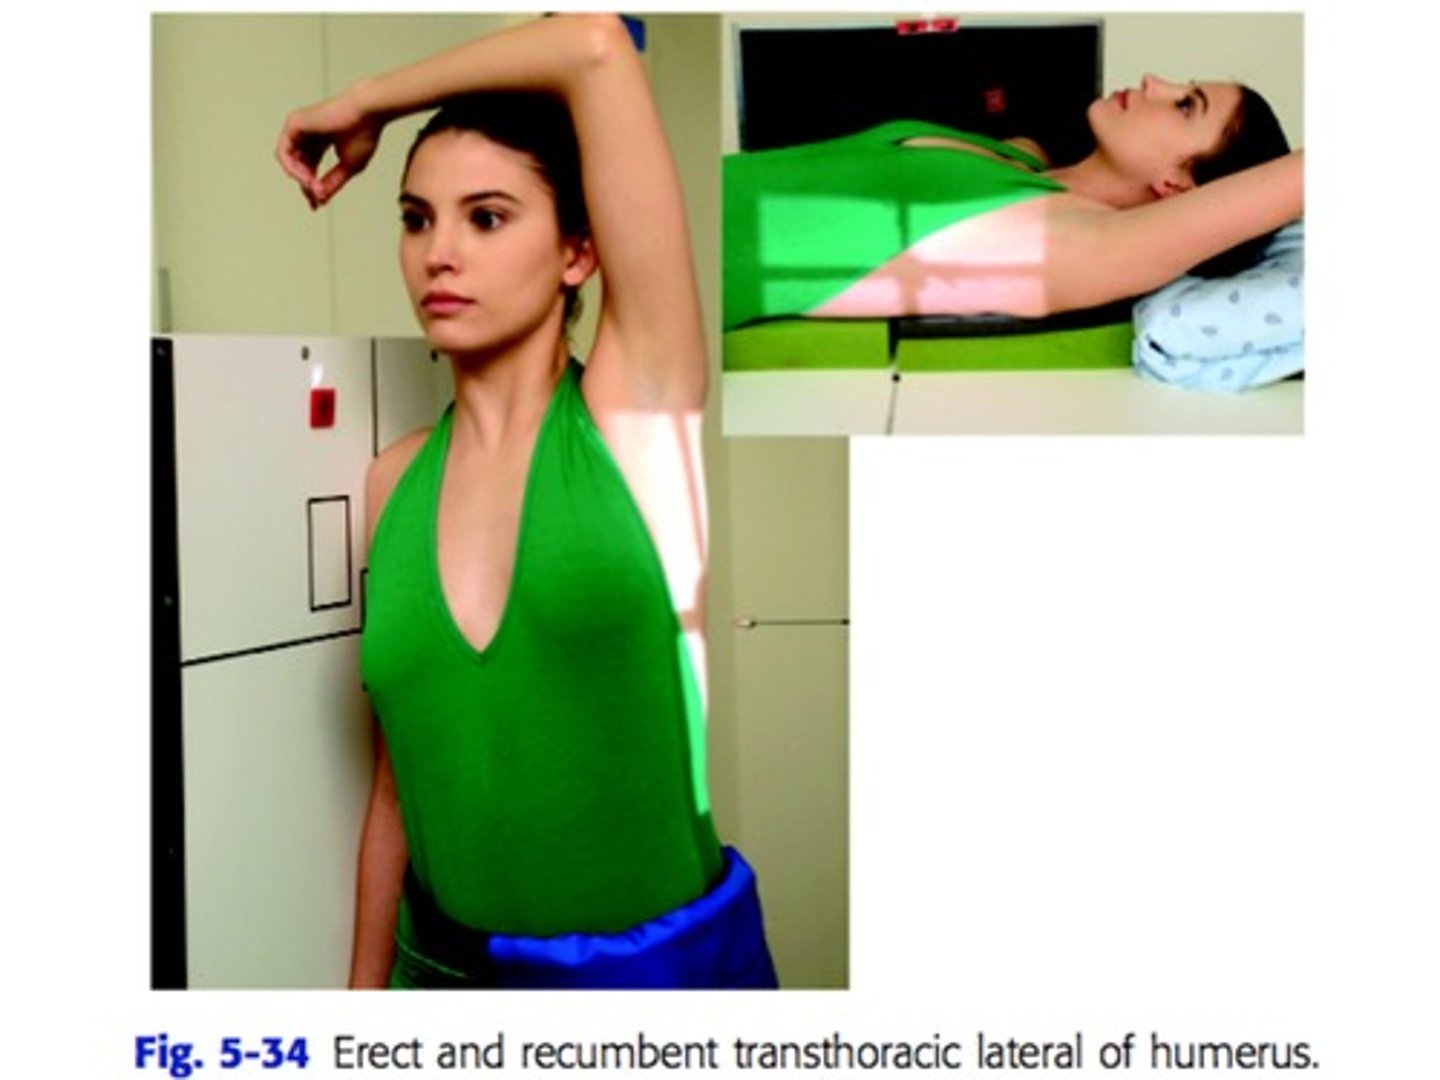
STAMPSBC for Transthoracic Humerus (trauma)
S - around waist
T - 40 mAs @ 75 kVp (decrease mA, increase seconds)
A - none
M - injured arm
P - injured arm touching IR, other arm over the head, CR mid humerus
S - 40"
B - orthostatic
C - 14 by 17, L
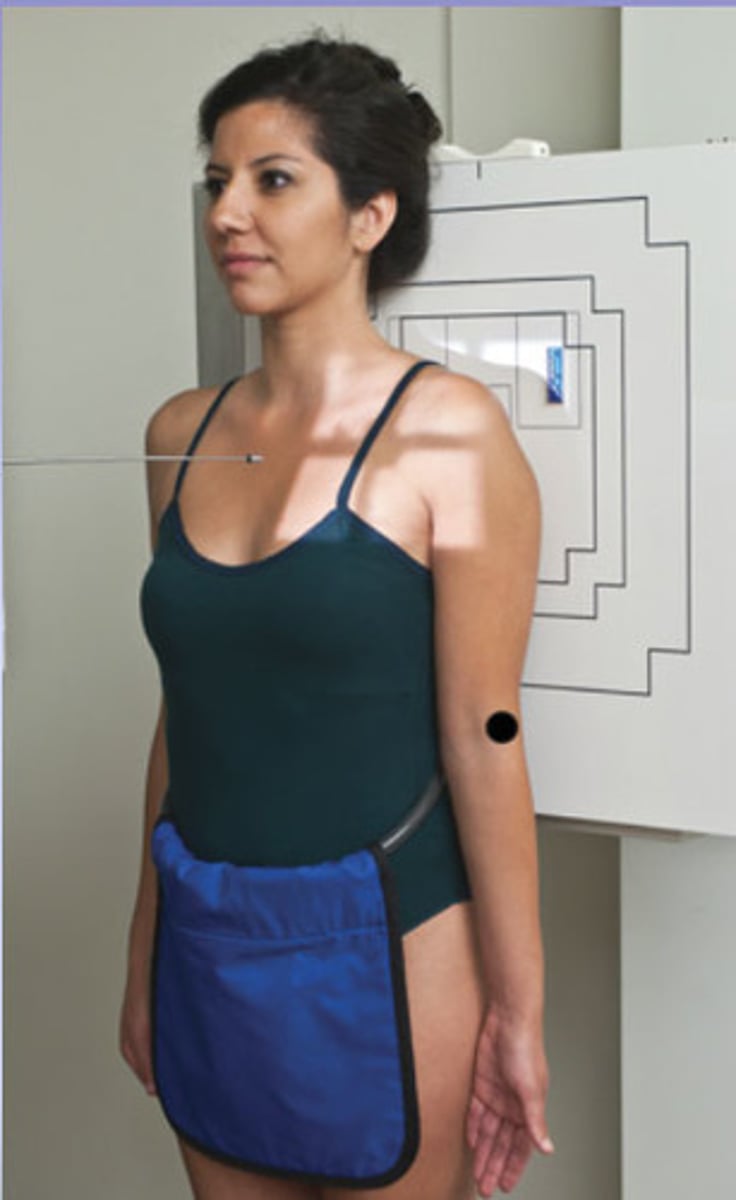
STAMPSBC for AP Shoulder (neutral)
S - around waist
T - 7 mAs @ 70 kVp
A - none
M - correct marker above shoulder
P - PT stands w/ back to board & arm hanging naturally, CR 1" below coracoid
S - 40"
B - suspension
C - 10 x 12 crosswise
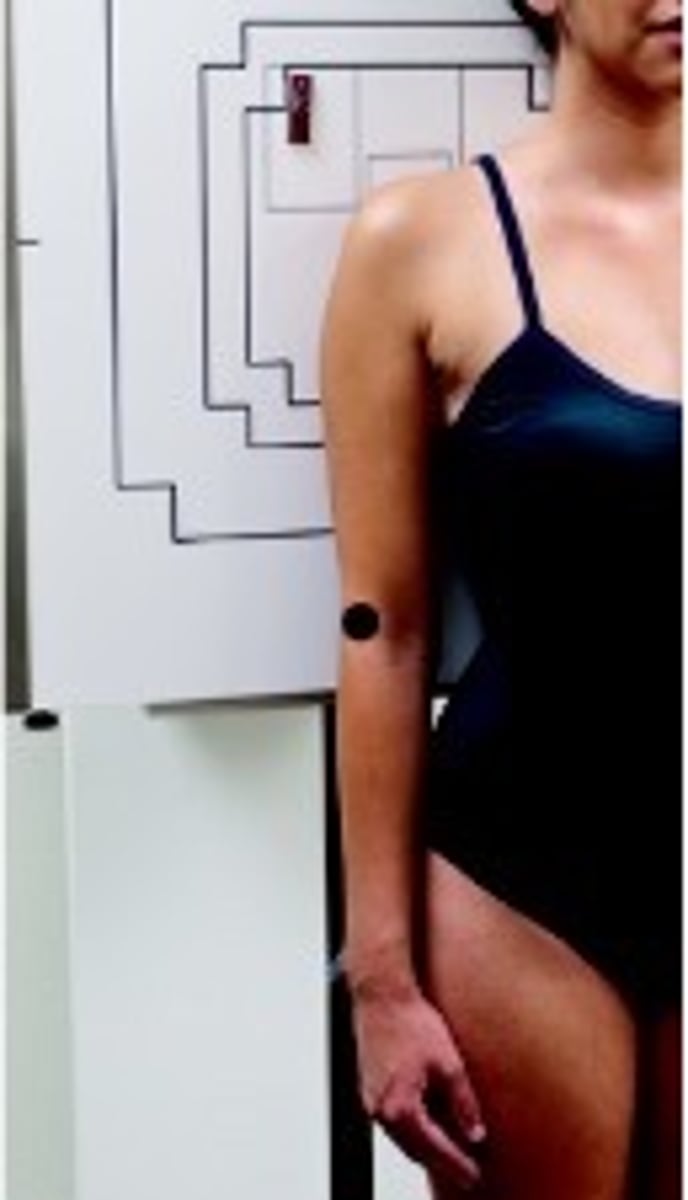
STAMPSBC for AP External Rotation Shoulder
S - around waist
T - 7 mAs @ 70 kVp
A - none
M - correct marker above shoulder
P - PT stands w/ back to board & epicondyles parallel, CR 1" below coracoid
S - 40"
B - suspension
C - 10 x 12 crosswise
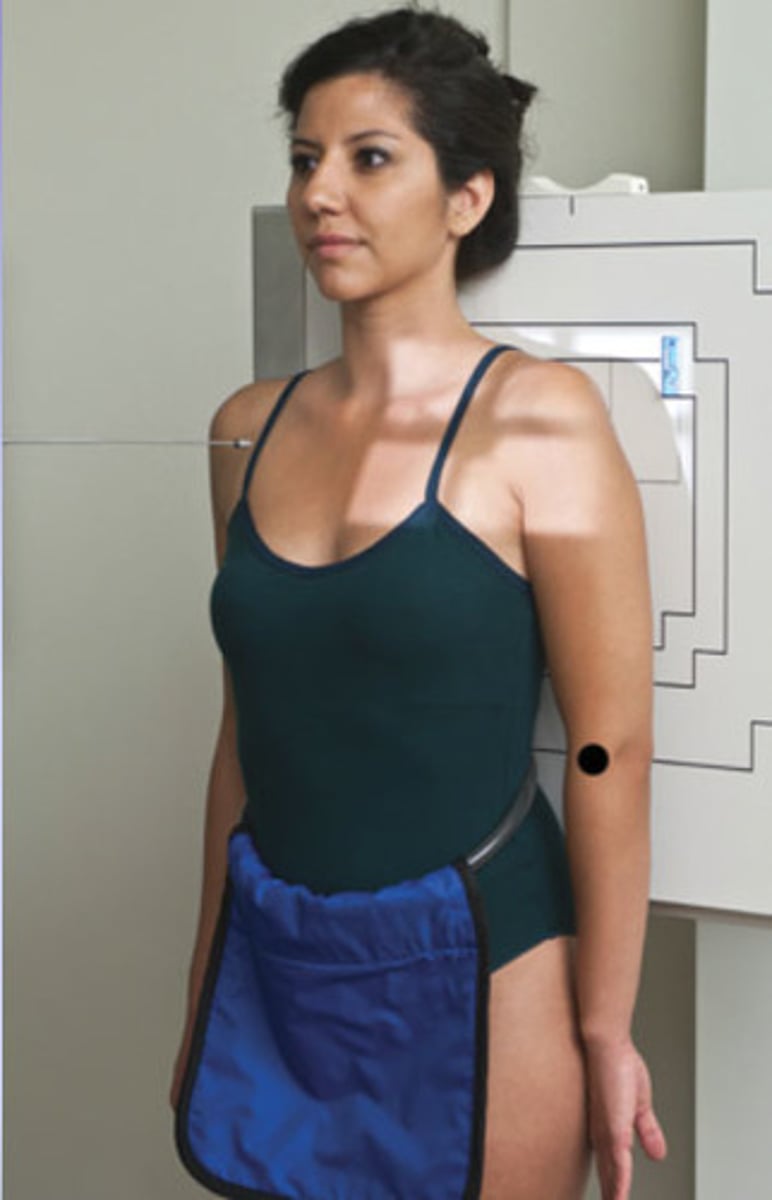
STAMPSBC for AP Internal Rotation Shoulder
S - around waist
T - 7 mAs @ 70 kVp
A - none
M - correct marker above shoulder
P - PT stands w/ back to board & epicondyles perp, CR 1" below coracoid
S - 40"
B - suspension
C - 10 x 12 crosswise
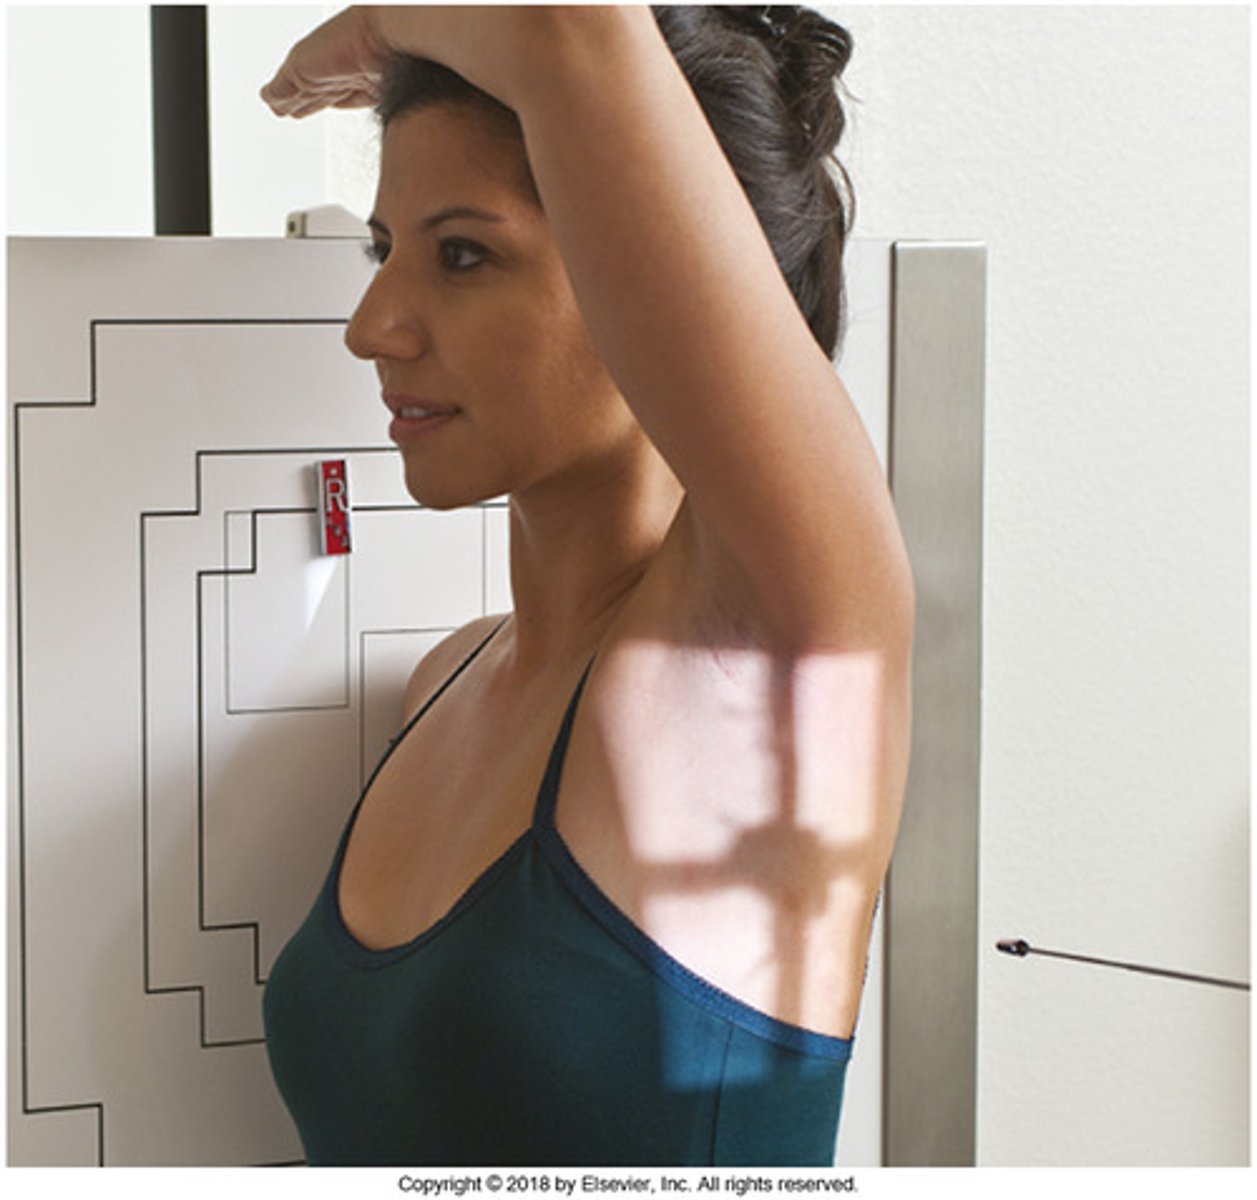
STAMPSBC for Transthoracic Shoulder
S - around waist
T - 30 mAs @ 75 kVp
A - no angle
M - correct marker in light field
P - PT stands w/ injured arm to board & non injured arm above head, CR @ surgical neck
S - 40"
B - orthostatic
C - 10 x 12 LW
STAMPSBC for Superior Inferior Shoulder (axillary)
S - on lap
T - 5 mAs @ 65 kVp
A - no angle
M - on cassette
P - PT sits sideways @ end of table & leaning over cassette as far as they can w/ palm down, CR @ joint space
S - 40"
B - suspension
C - 10 x 12 lengthwise, collimate side to side
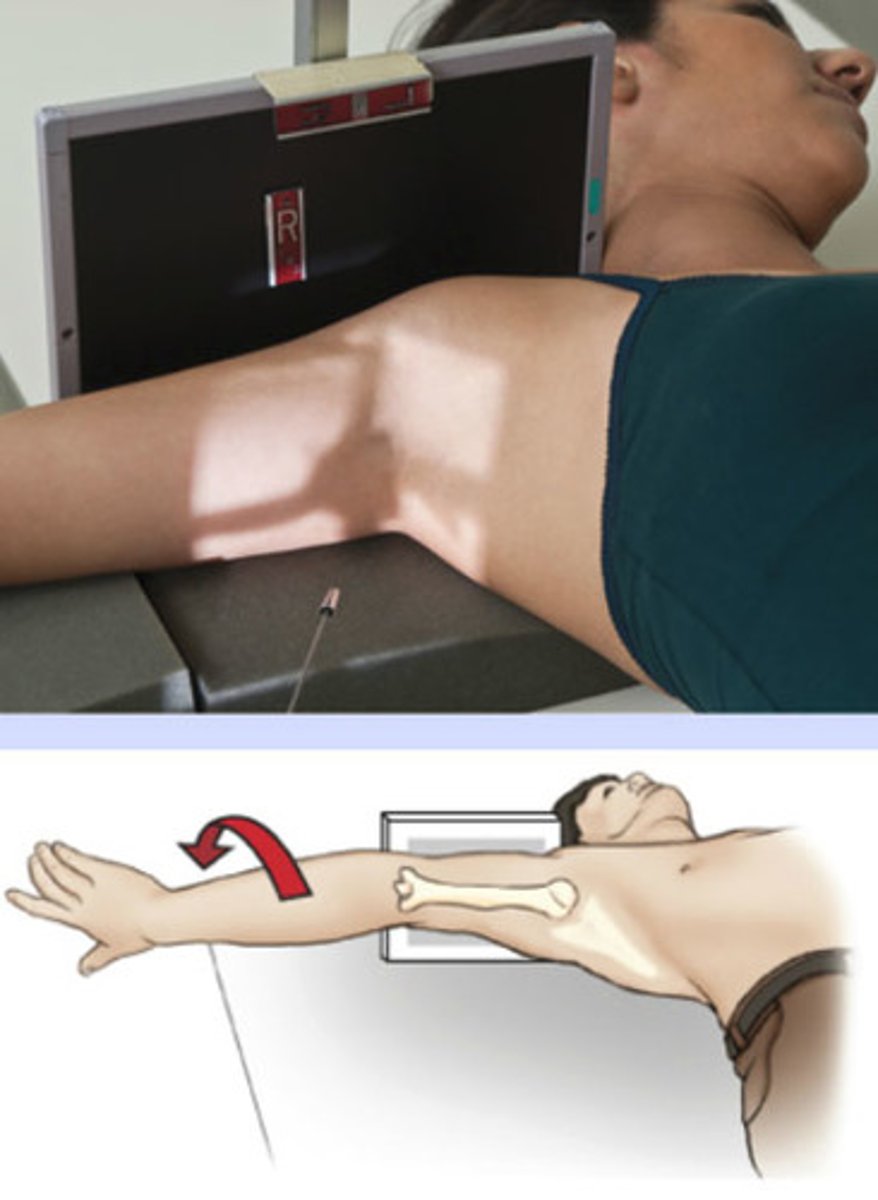
STAMPSBC for Inferior Superior Shoulder (axillary/trauma)
S - over lap
T - 5 mAs @ 65 kVp
A - tube ROTATED 25-30 degrees
M - taped to cassette
P - PT laying as close to edge of table as close as they can w/ head tilted away & cassette pushed against neck, CR @ joint space
S - 40"
B - suspension
C - 10 x 12 crosswise
STAMPSBC for Shoulder "Y"
S - around waist
T - 7 mAs @ 80 kVp
A - no angle
M - correct marker in bottom corner
P - PT rotated 45-60 degrees w/ affected side to board & arm across BELLY, CR mid scapula
S - 40"
B - suspension
C - 10 x 12 lengthwise
STAMPSBC for Grashey Shoulder
S - around waist
T - 7 mAs @ 70 kVp
A - none
M - correct marker above shoulder
P - PT 35-45 degree rotation toward affected side w/ arm abducted, CR @ joint space
S - 40"
B - suspension
C - 10 x 12 crosswise
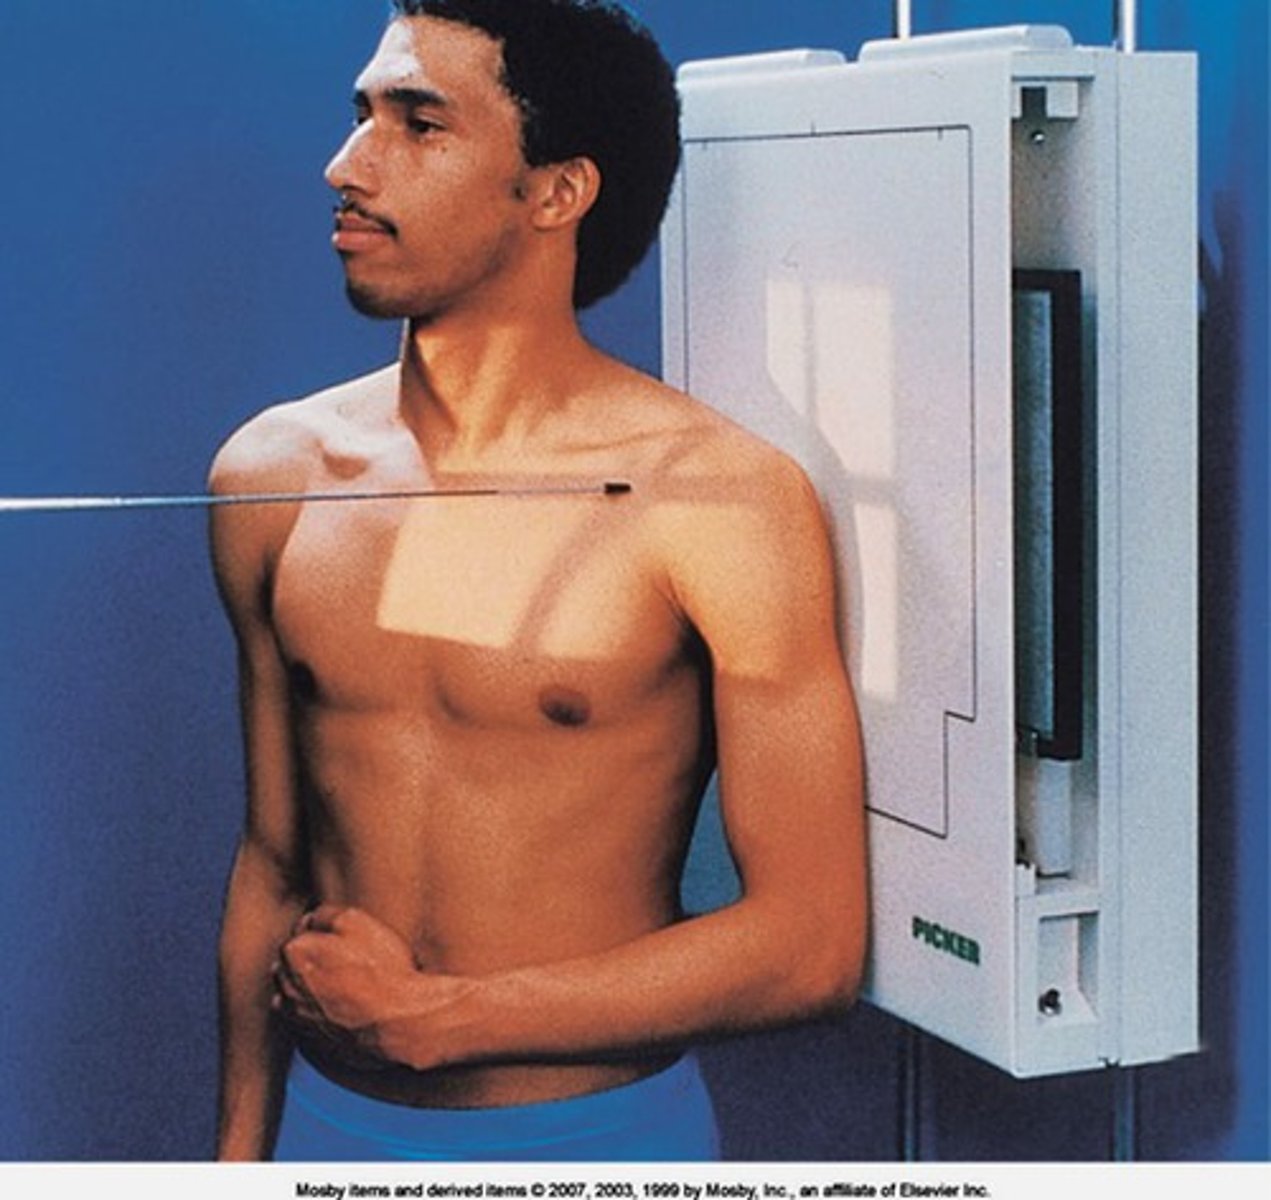
STAMPSBC for AP Scapula
S - around waist
T - 7 mAs @ 70 kVp
A - none
M - bottom corner
P - PT stands w/ back to board & arm flexed 90 degrees, CR 2" down from coracoid & 2" in from lat boarder
S - 40"
B - orthostatic
C - 10 x 12 lengthwise
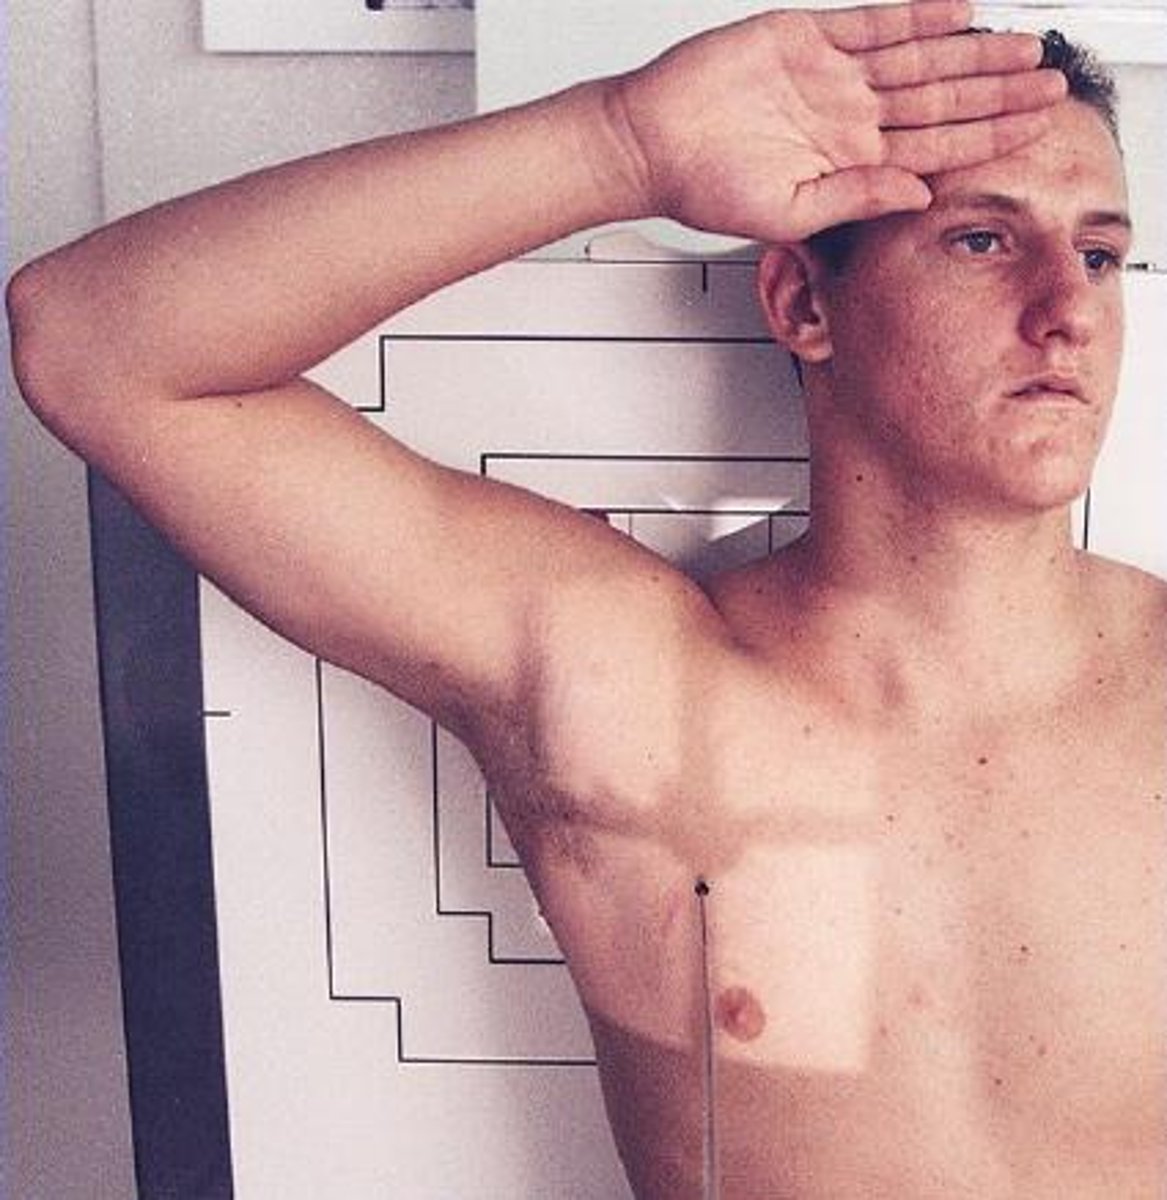
STAMPSBC for Scapula "Y"
S - around waist
T - 7 mAs @ 80 kVp
A - none
M - correct marker in bottom corner
P - PT rotated 45-60 degrees w/ affected side to bucky & hand on shoulder, CR mid scapula
S - 40"
B - suspension
C - 10 x 12 lengthwise
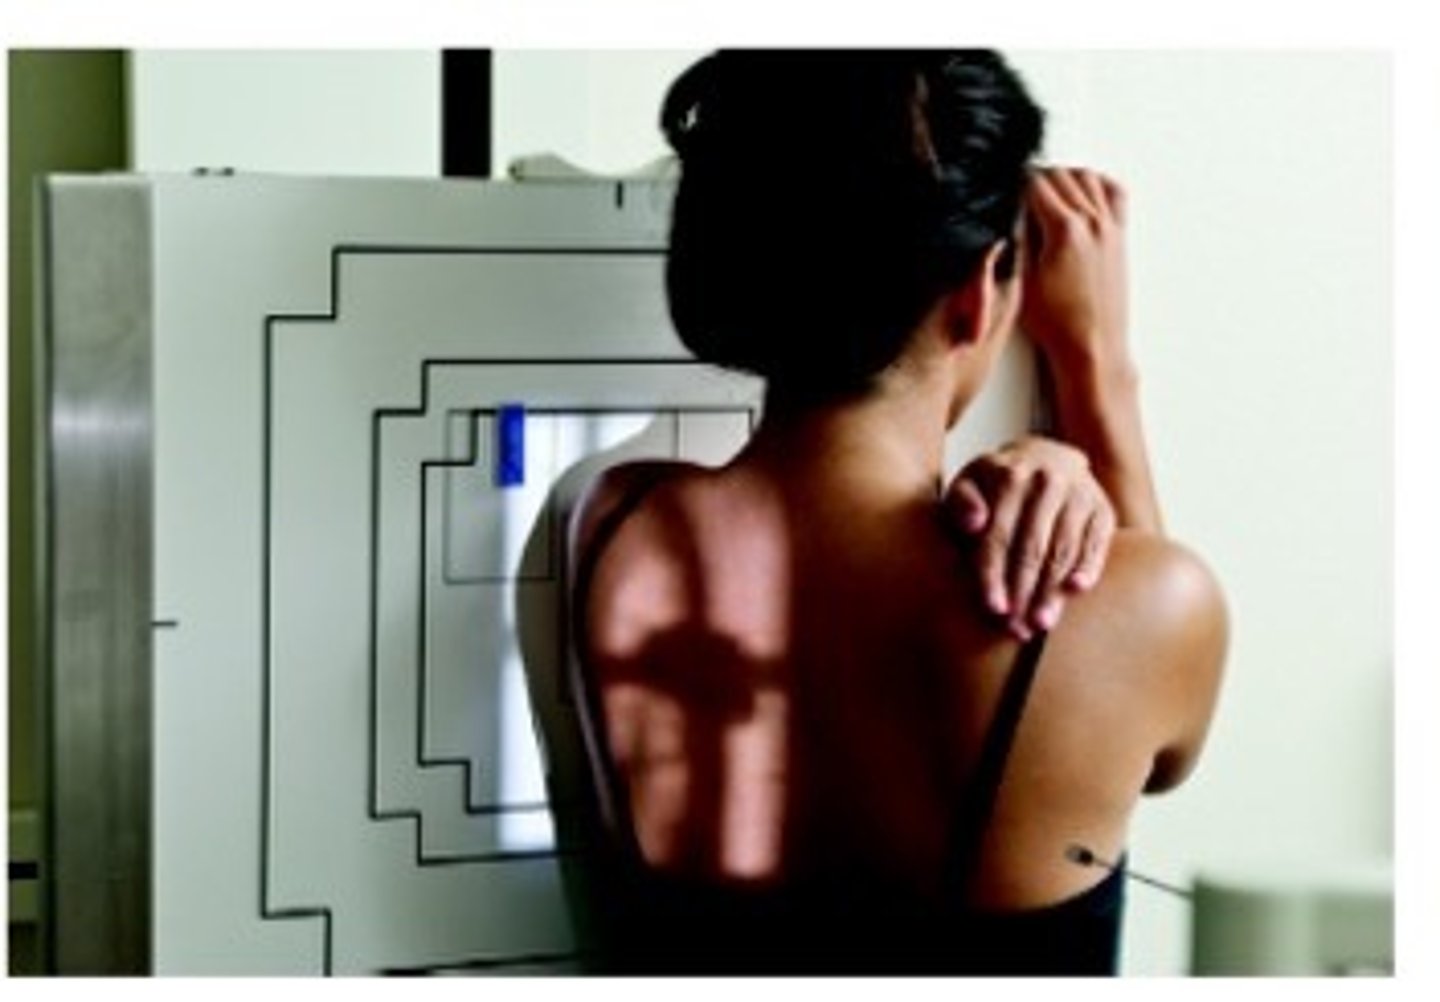
STAMPSBC for AP Clavicle
S - around waist
T - 7 mAs @ 70 kVp
A - none
M - side being imaged
P - CR mid clavicle, get both joints
S - 40"
B - deep breath in, hold
C - 10 x 12 crosswise
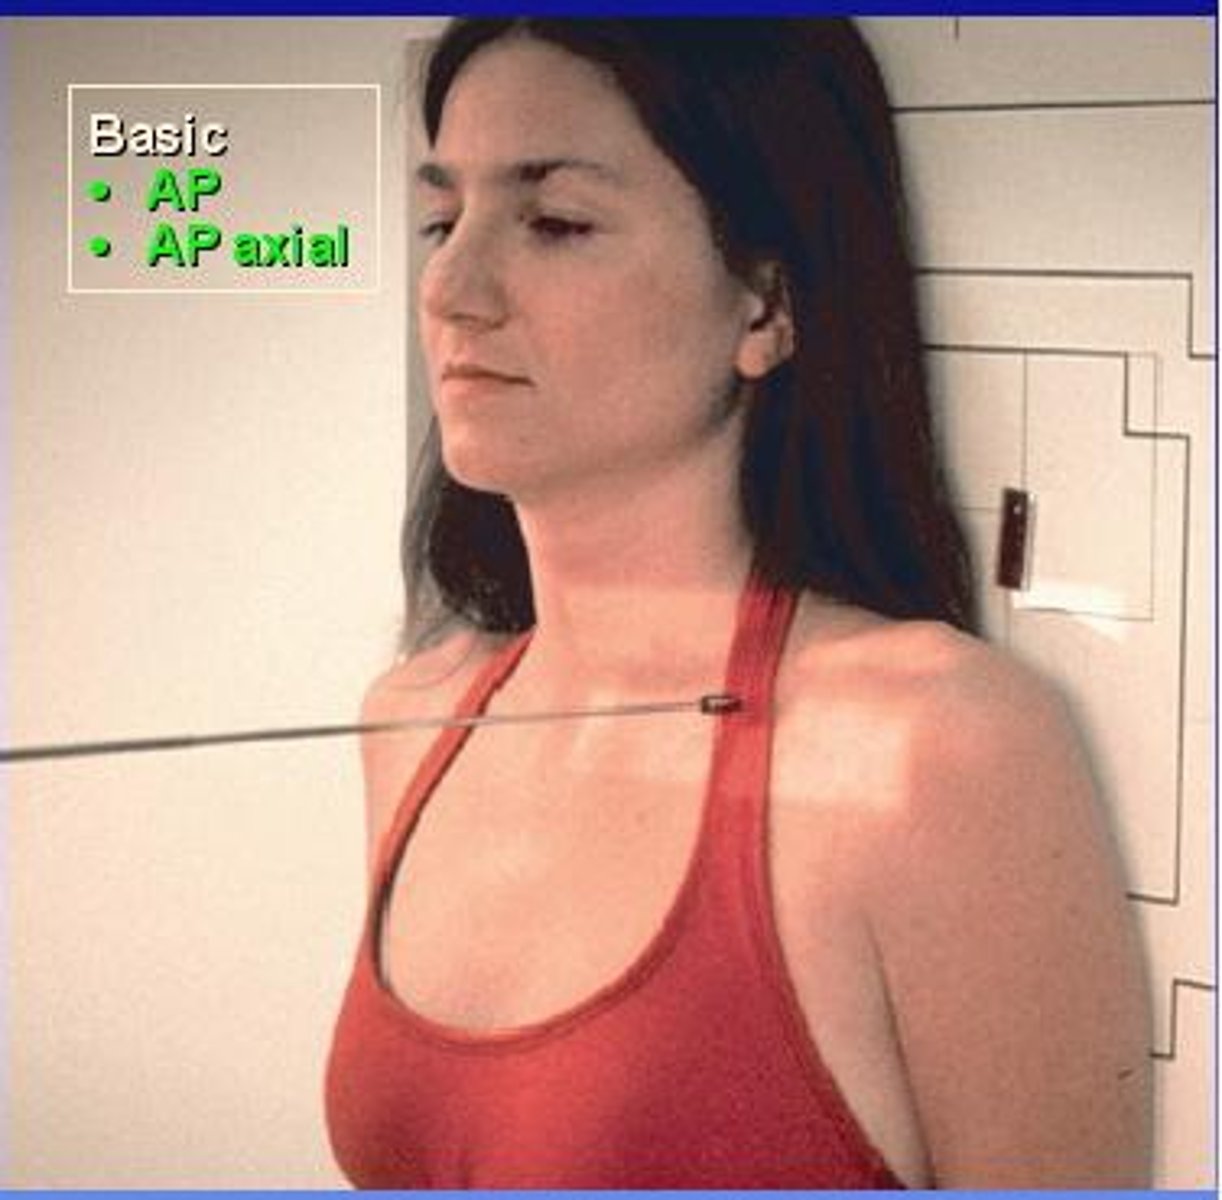
STAMPSBC for AP Axial Clavicle
S - around waist
T - 7 mAs @ 70 kVp
A - 15 cephalad
M - side being imaged
P - CR mid clavicle, get both joints
S - 40"
B - deep breath in, hold
C - 10 x 12 crosswise
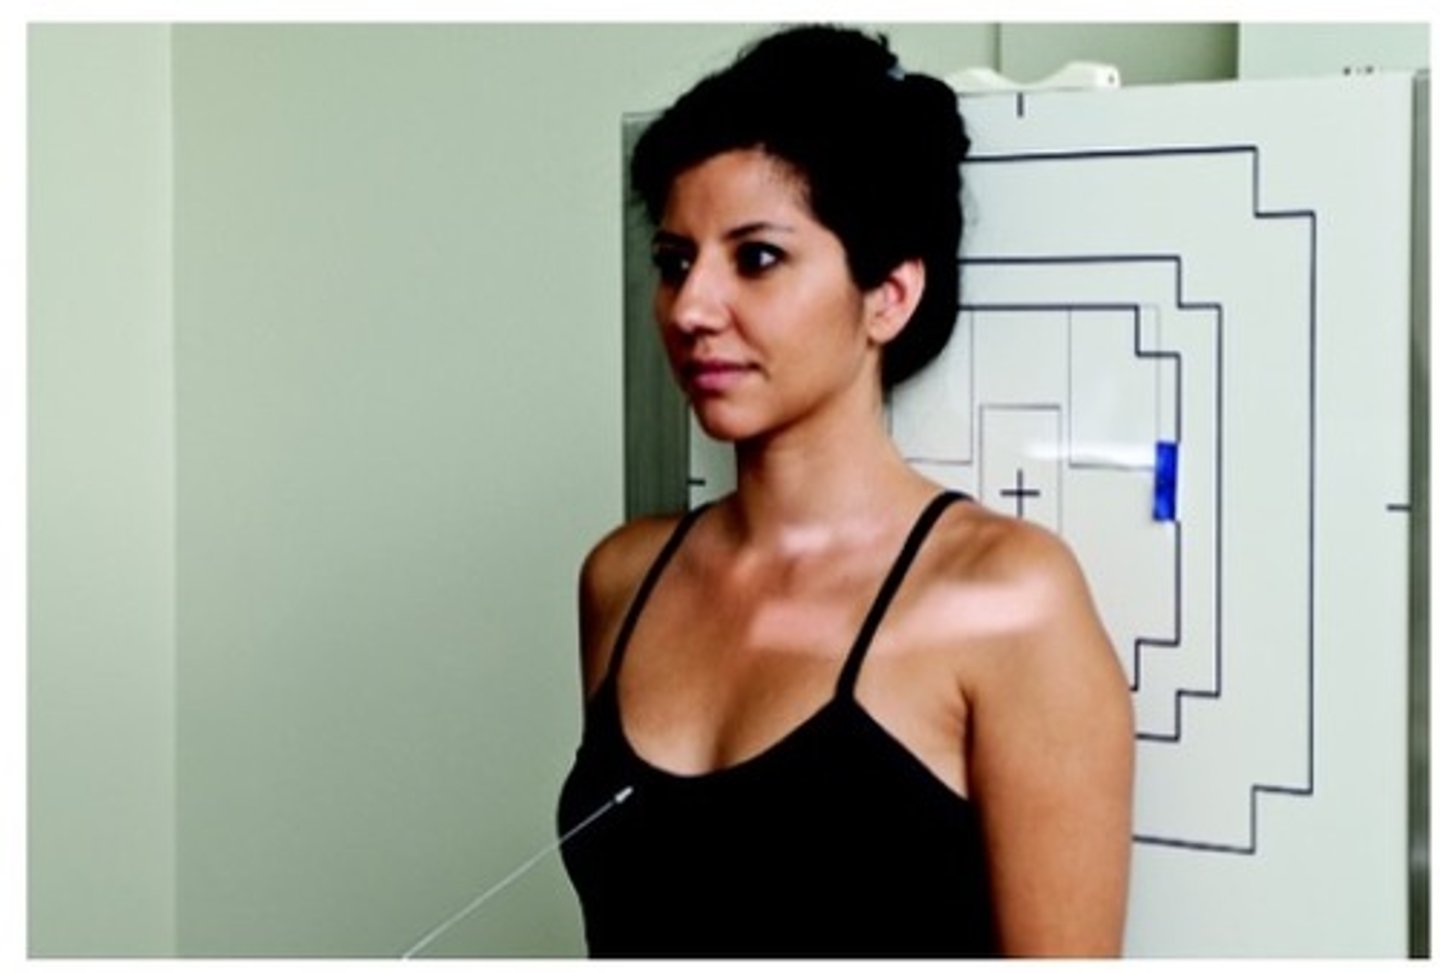
STAMPSBC for AC Joints w/ Weights
S - around waist
T - 8 mAs @ 70 kVp
A - none
M - both markers
P - PT stands w/ back to board holding weights, CR 1" above jug notch
S - 72"
B - suspension
C - 14 x 17 crosswise, collimate top to bottom
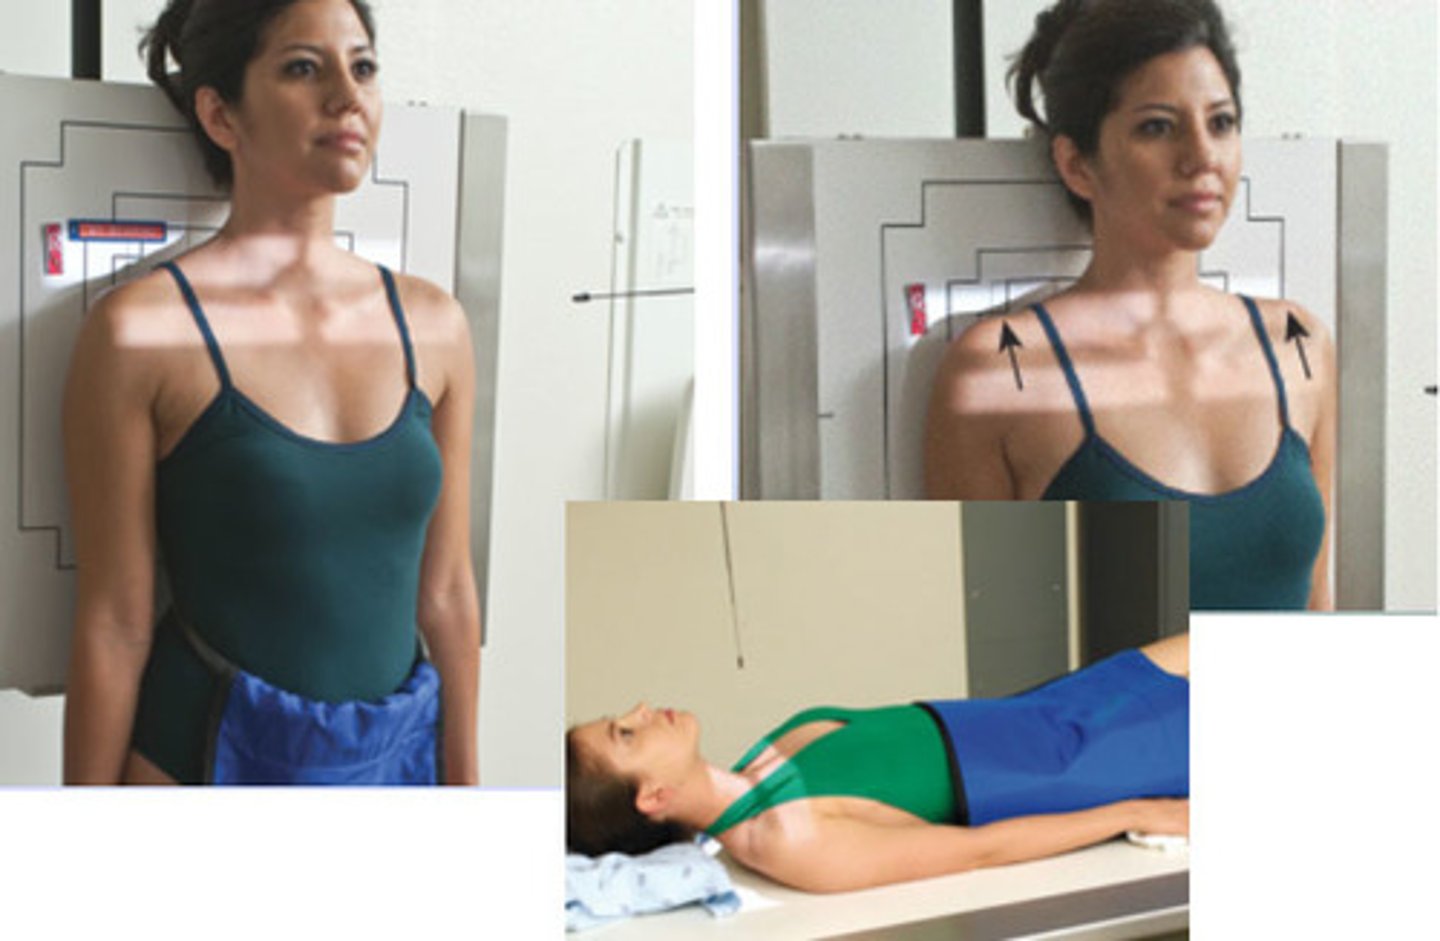
STAMPSBC for AC Joints w/o Weights
S - around waist
T - 8 mAs @ 70 kVp
A - none
M - both markers
P - PT stands
S - 72"
B - suspension
C - 14 x 17 crosswise, collimate top to bottom
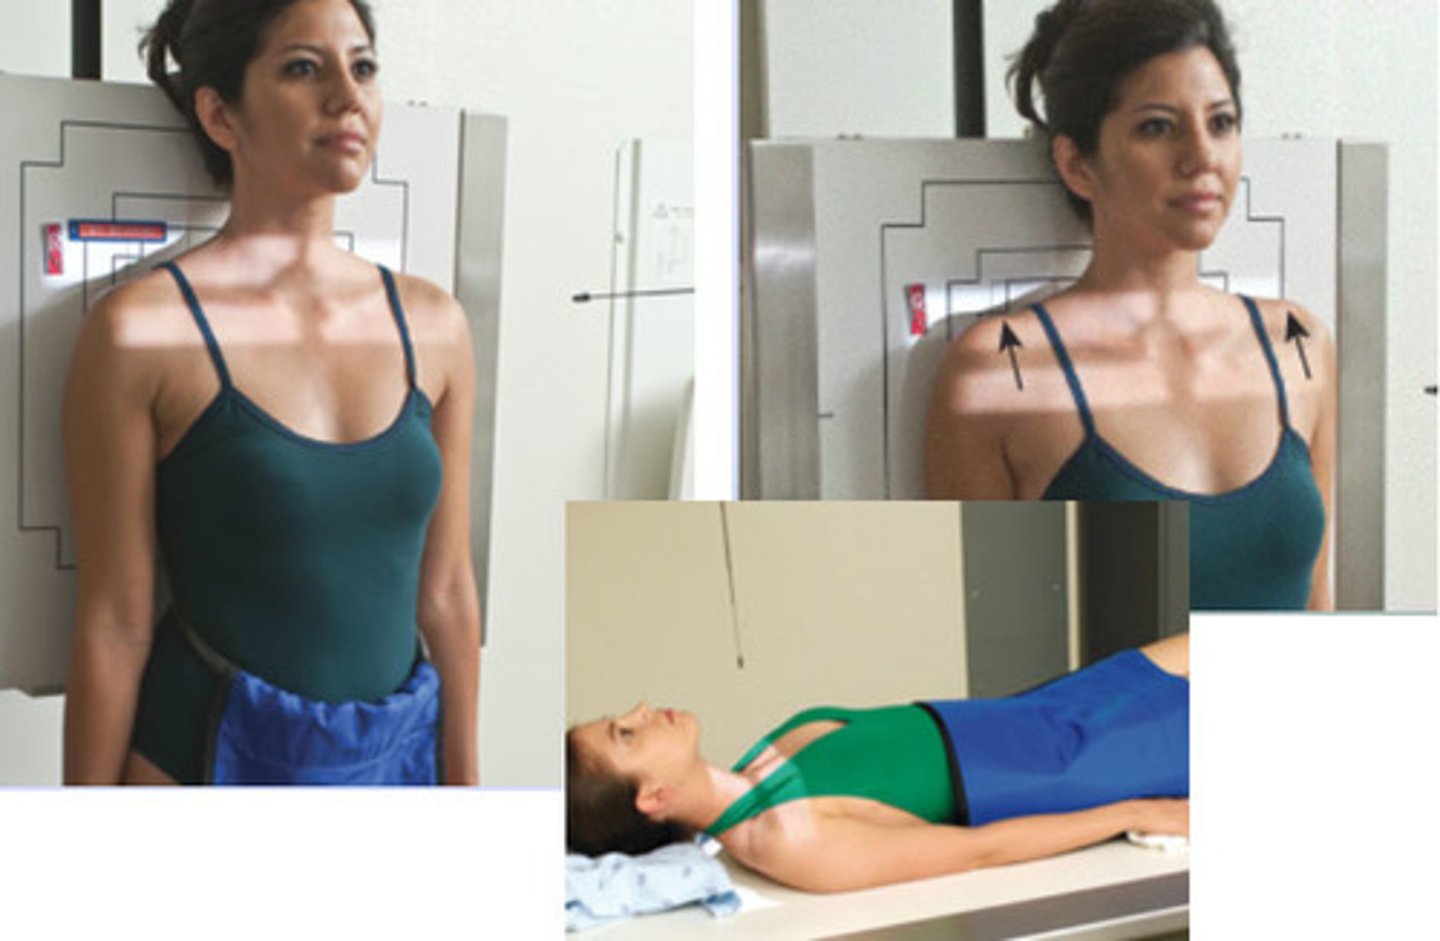
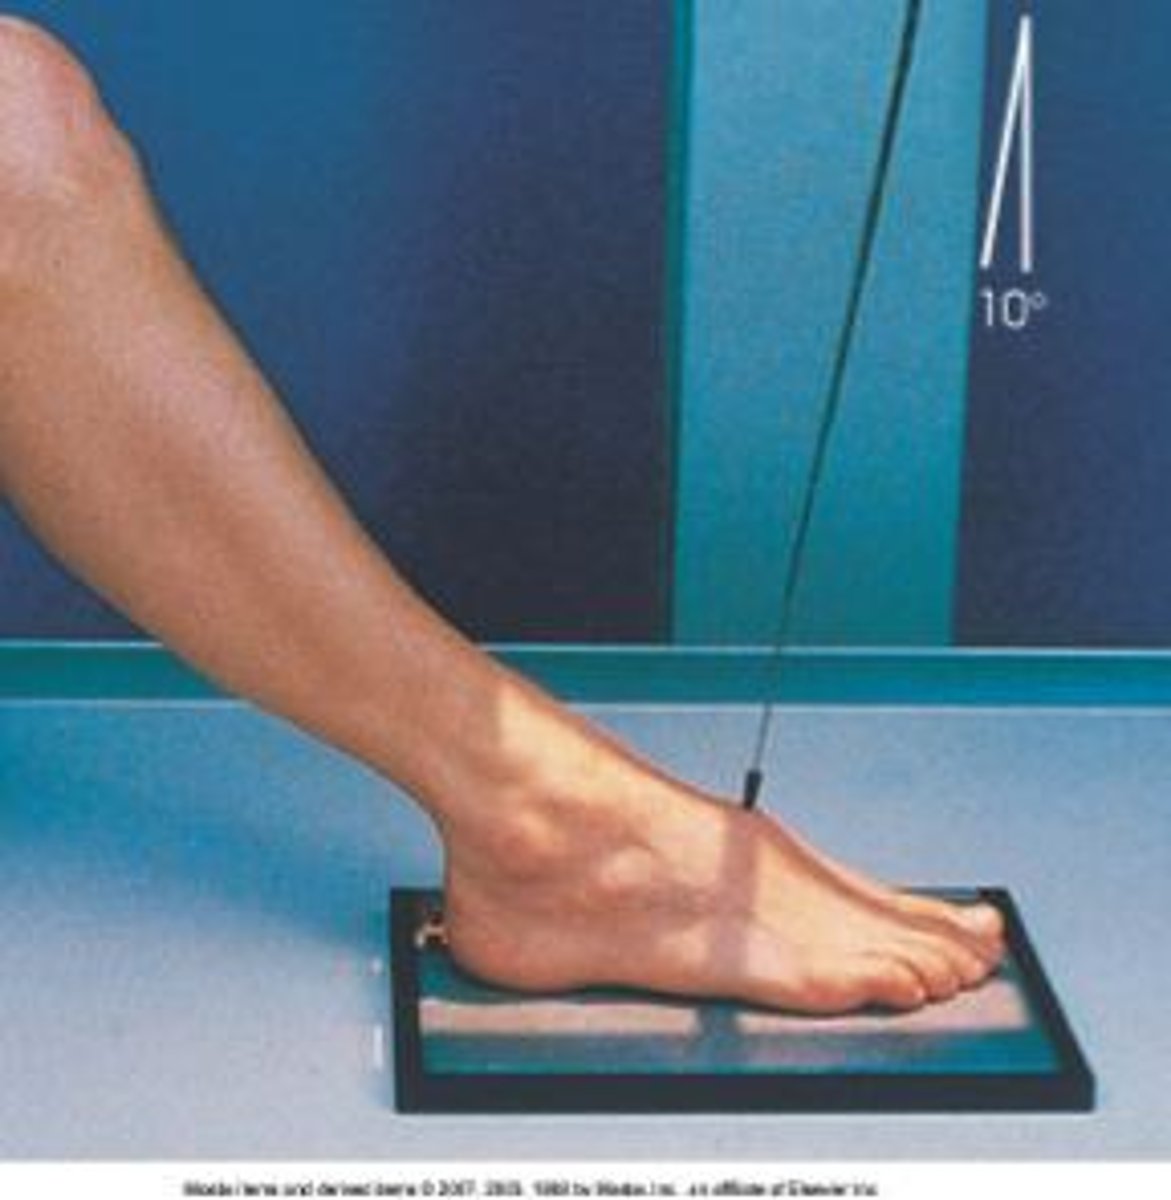
STAMPSBC for AP Foot
S - on lap
T - 4.5 mAs @ 60 kVp
A - 10 degrees toward ankle
M - correct foot, on cassette
P - foot flat on IR, CR mid foot (3rd MT)
S - 40"
B - suspension
C - 10 x 12, L
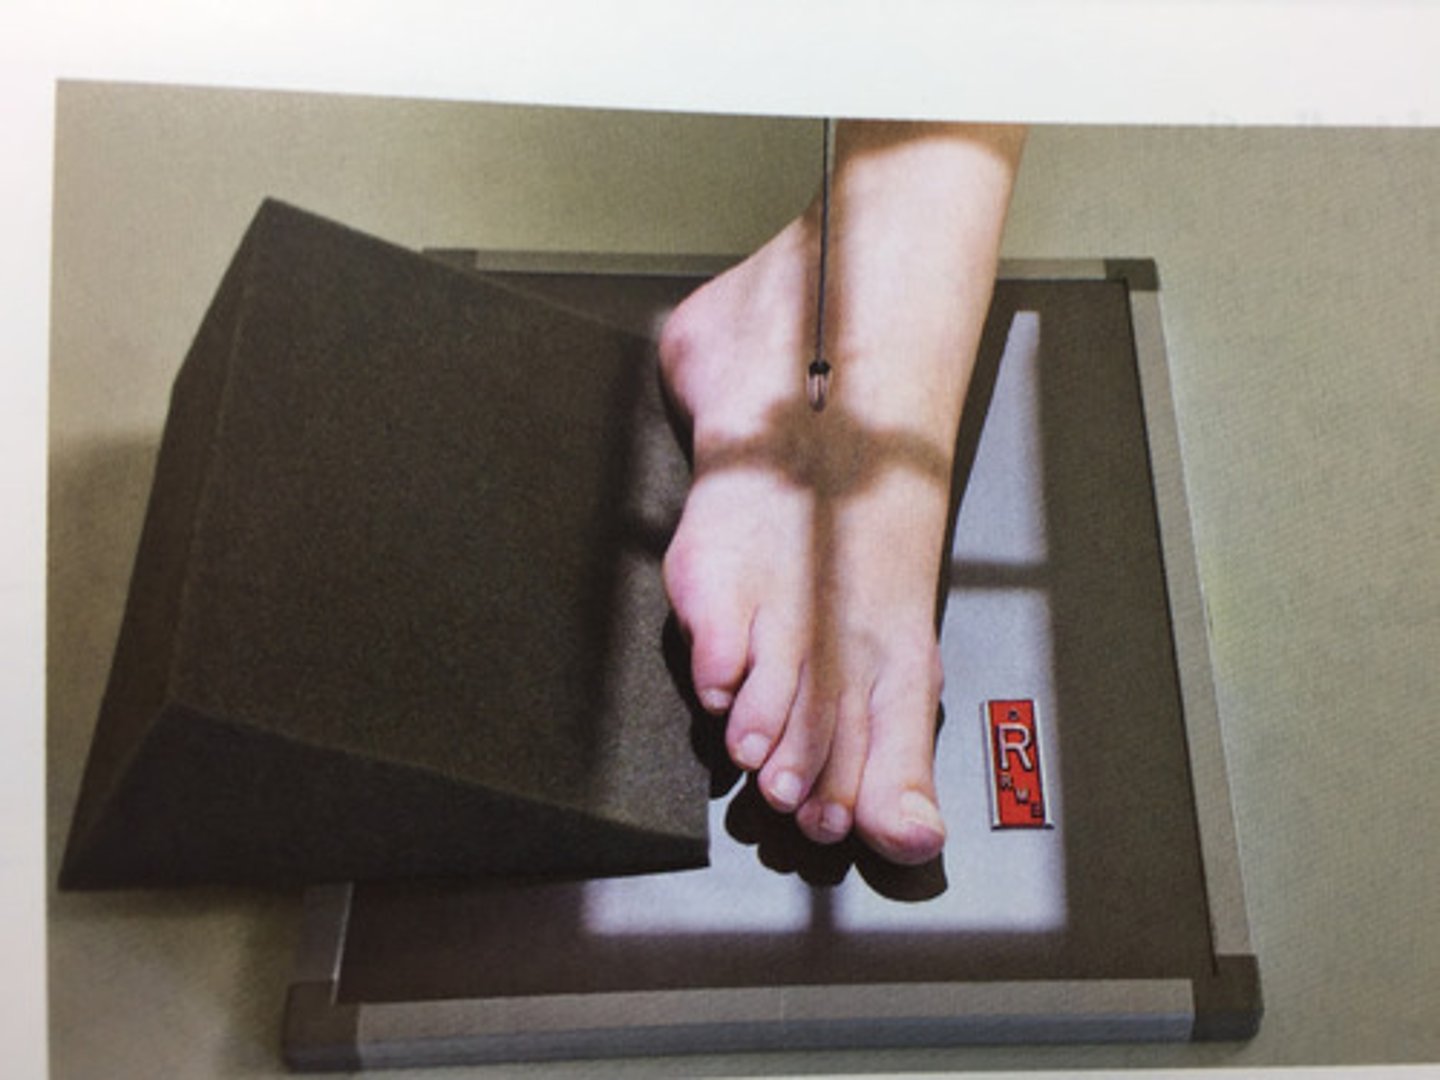
STAMPSBC for Oblique Foot
S - on lap
T - 4.5 mAs @ 60 kVp
A - none
M - correct foot, on cassette
P - 30 degree rotation medially, CR to 3rd metatarsal
S - 40"
B - hold
C - 10 x 12, L
STAMPSBC for Lateral Foot
S - on lap
T - 4.5 mAs @ 60 kVp
A - none
M - correct foot, on cassette
P - lateral side down, CR to 3rd metatarsal, directed @ medial cuneiform
S - 40"
B - hold
C - 10 x 12, C
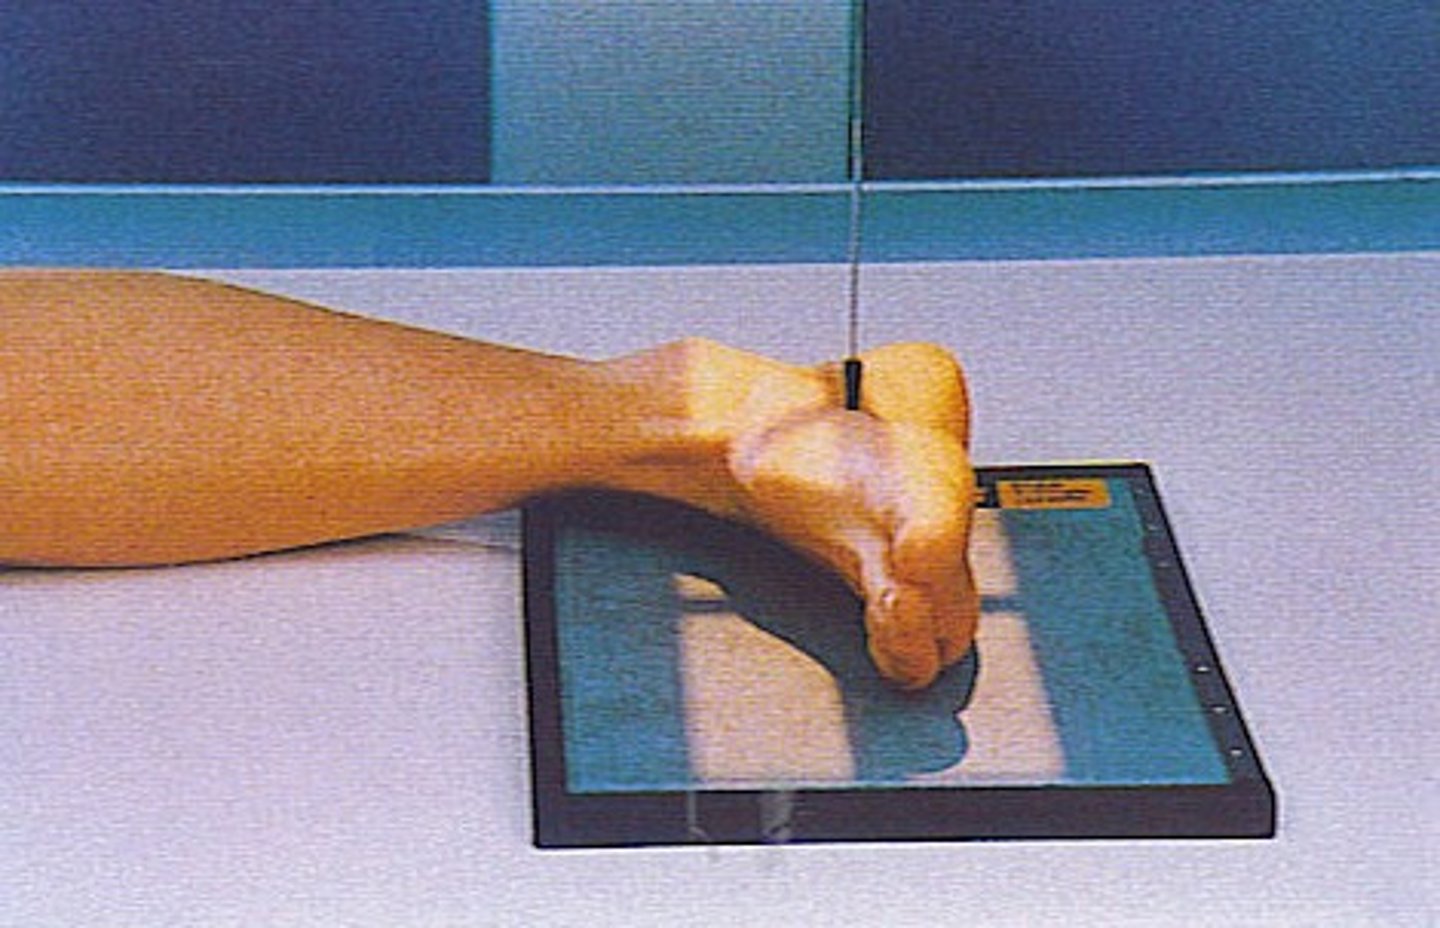
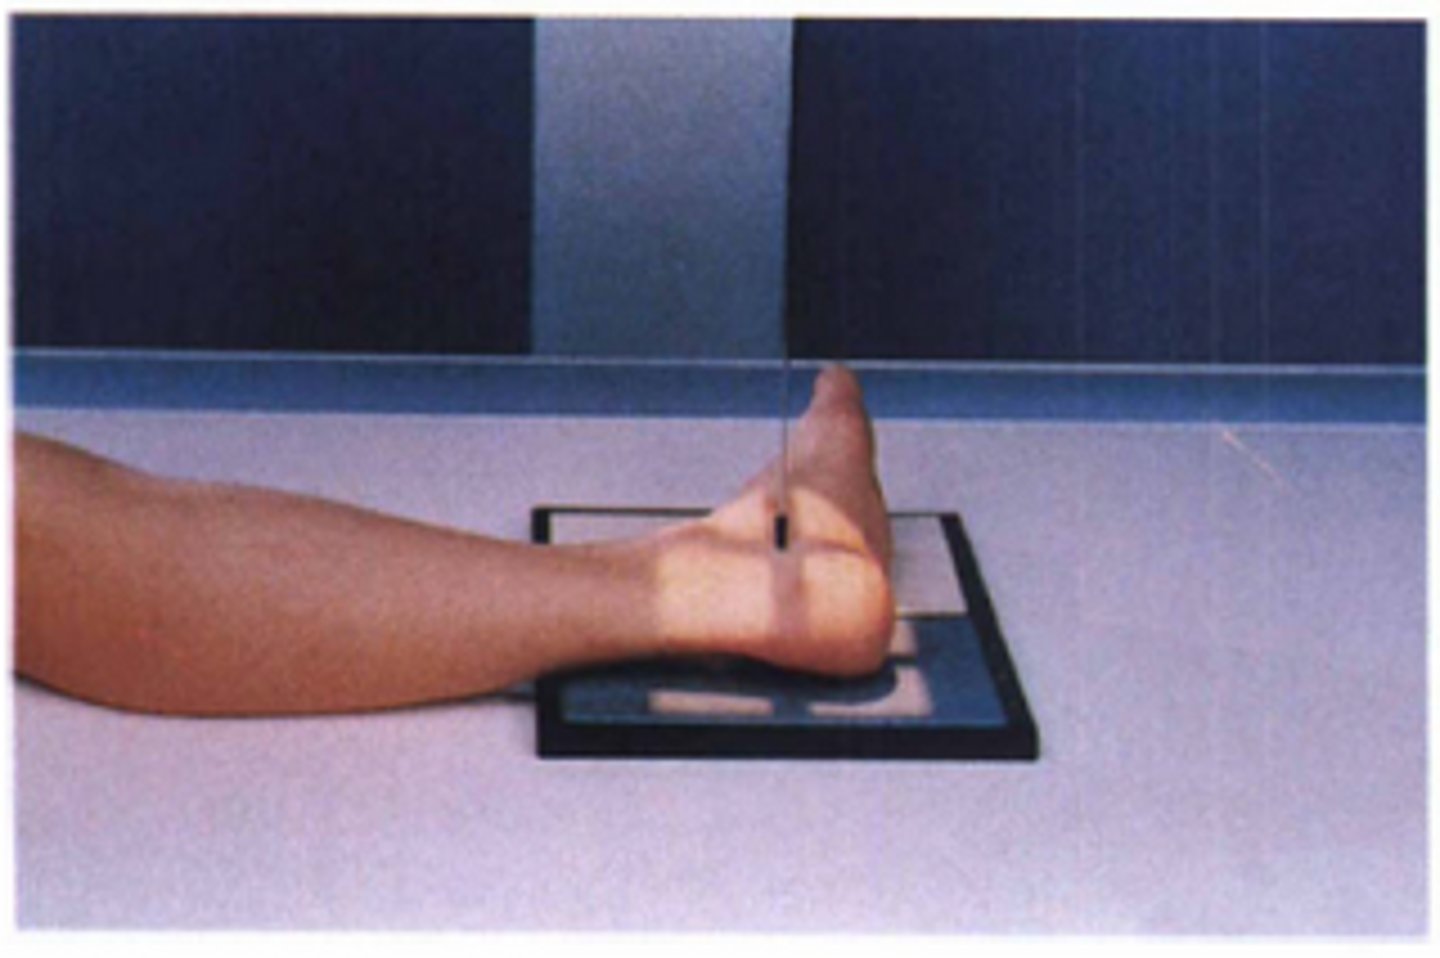
STAMPSBC for Lateral Calcaneus
S - on lap
T - 5 mAs @ 60 kVp
A - none
M - correct foot on cassette
P - lateral side down, CR 1/2" below malleolus
S - 40"
B - hold
C - 10 x 12, C
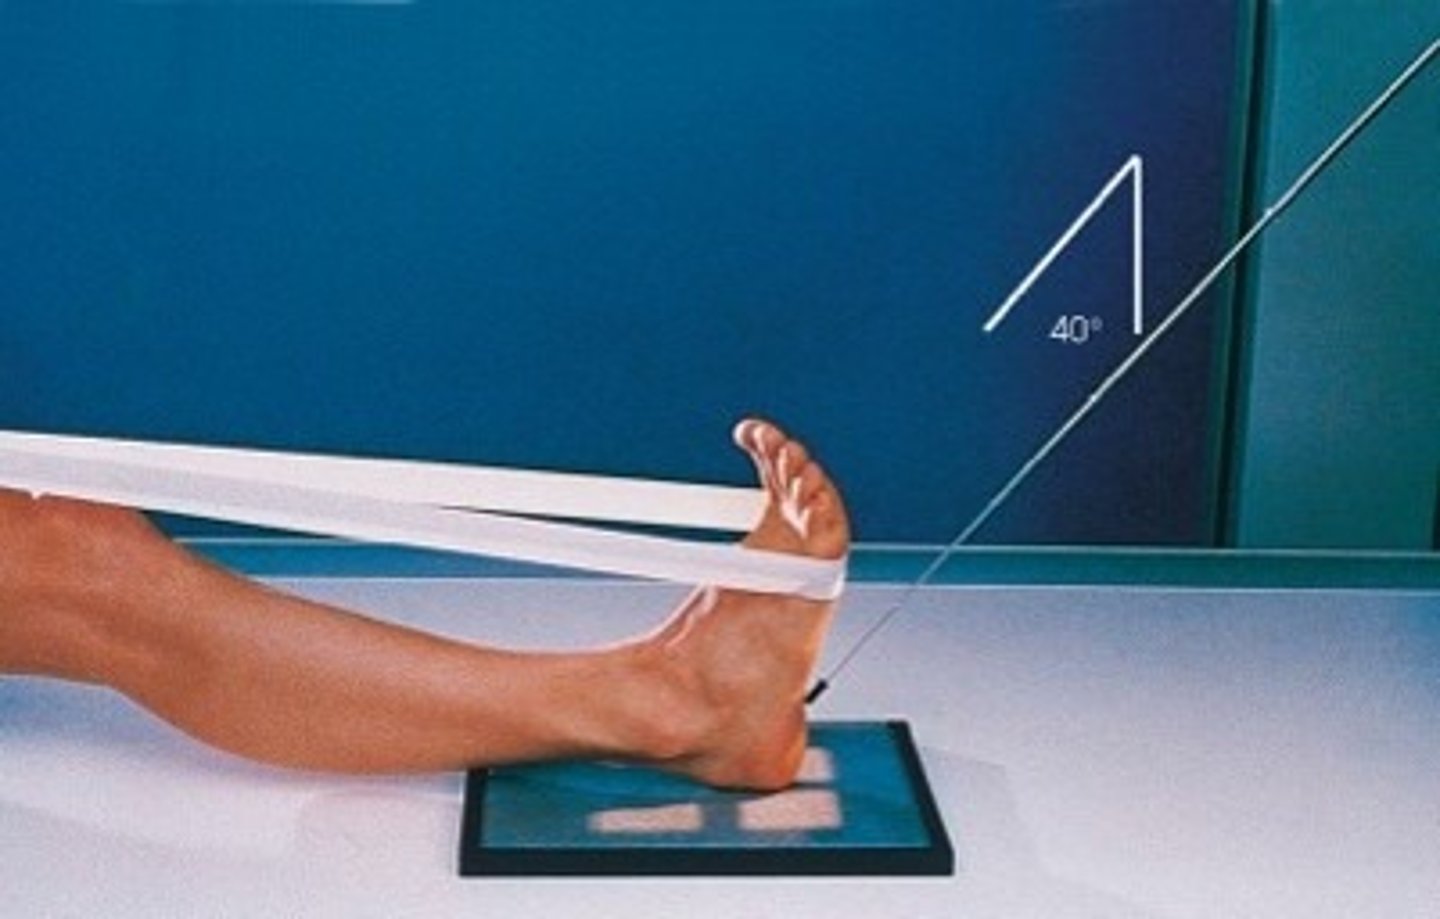
STAMPSBC for Axial Calcaneus
S - on lap
T - 16 mAs @ 65 kVp
A - 40 degree cephalic
M - correct foot, on cassette
P - pull toes back, CR to 3rd metatarsal
S - 40"
B - hold
C - 10 x 12, L
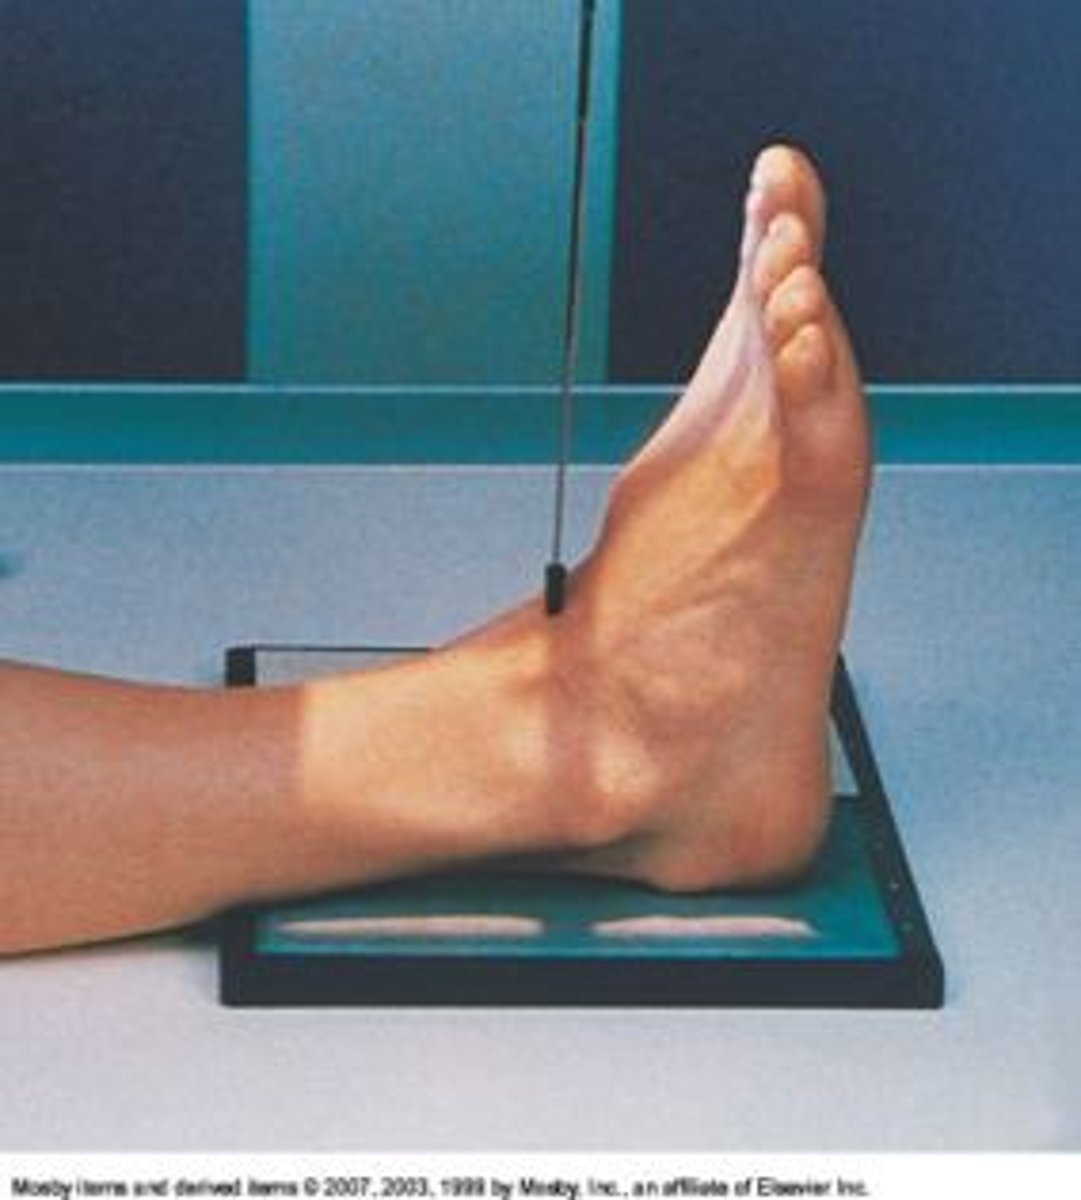
STAMPSBC for AP Ankle
S - on lap
T - 5 mAs @ 60 kVp
A - none
M - correct foot, on cassette
P - dorsiflex foot, CR between malleoli
S - 40"
B - hold
C - 10 x 12, C
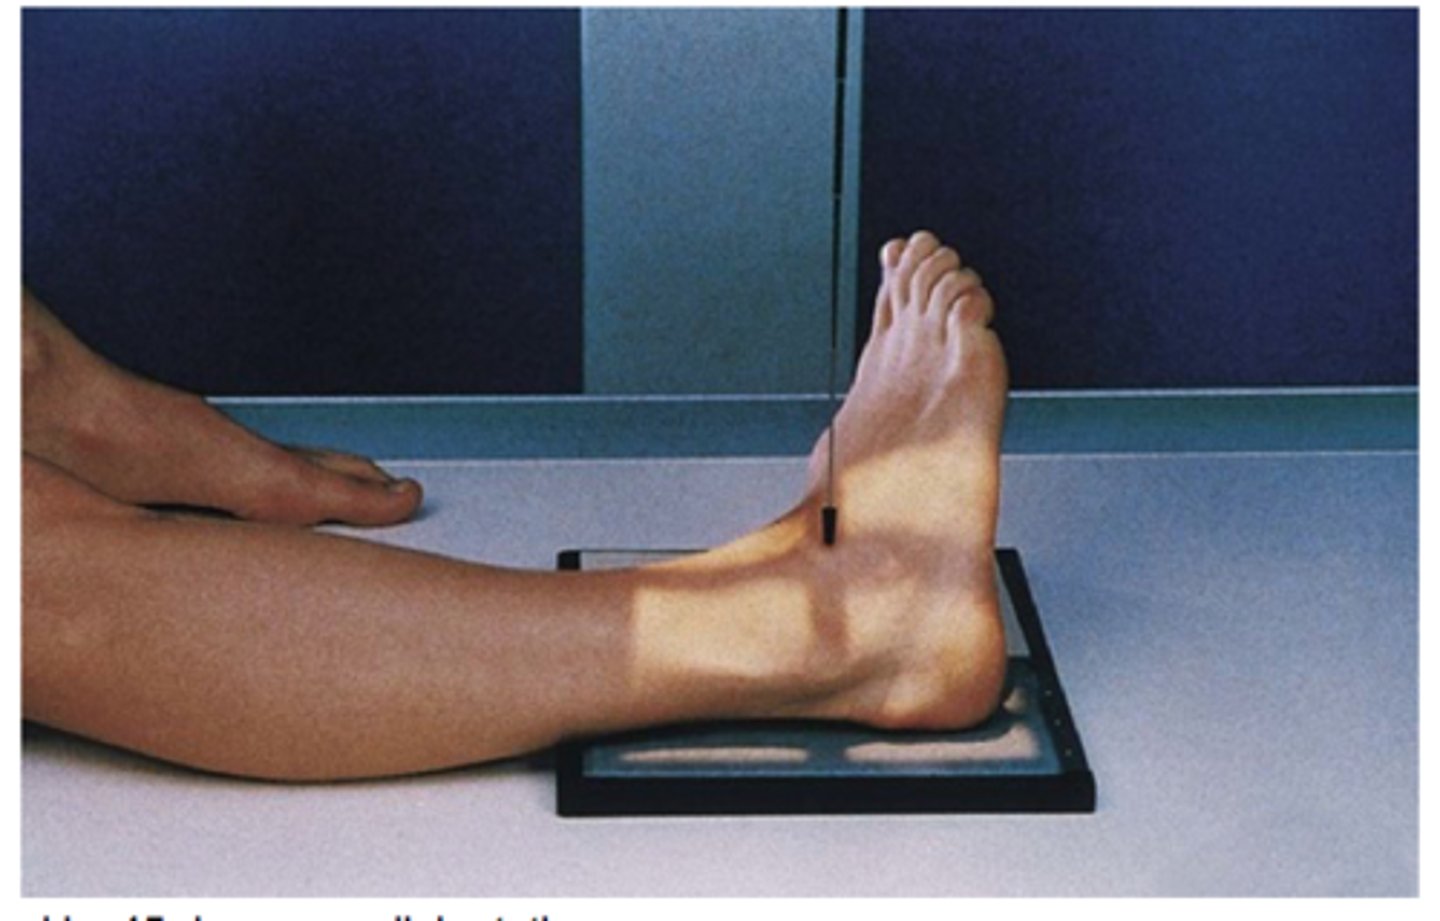
STAMPSBC for Oblique Ankle
S - on lap
T - 5 mAs @ 60 kVp
A - none
M - correct foot, on cassette
P - CR between malleoli, 45 degree medial rotation
S - 40"
B - hold
C - 10 x 12, C
STAMPSBC for Lateral Ankle
S - on lap
T - 5 mAs @ 60 kVp
A - none
M - correct foot on cassette
P - lateral rotation, CR @ medial malleolus
S - 40"
B - hold
C - 10 x 12, C
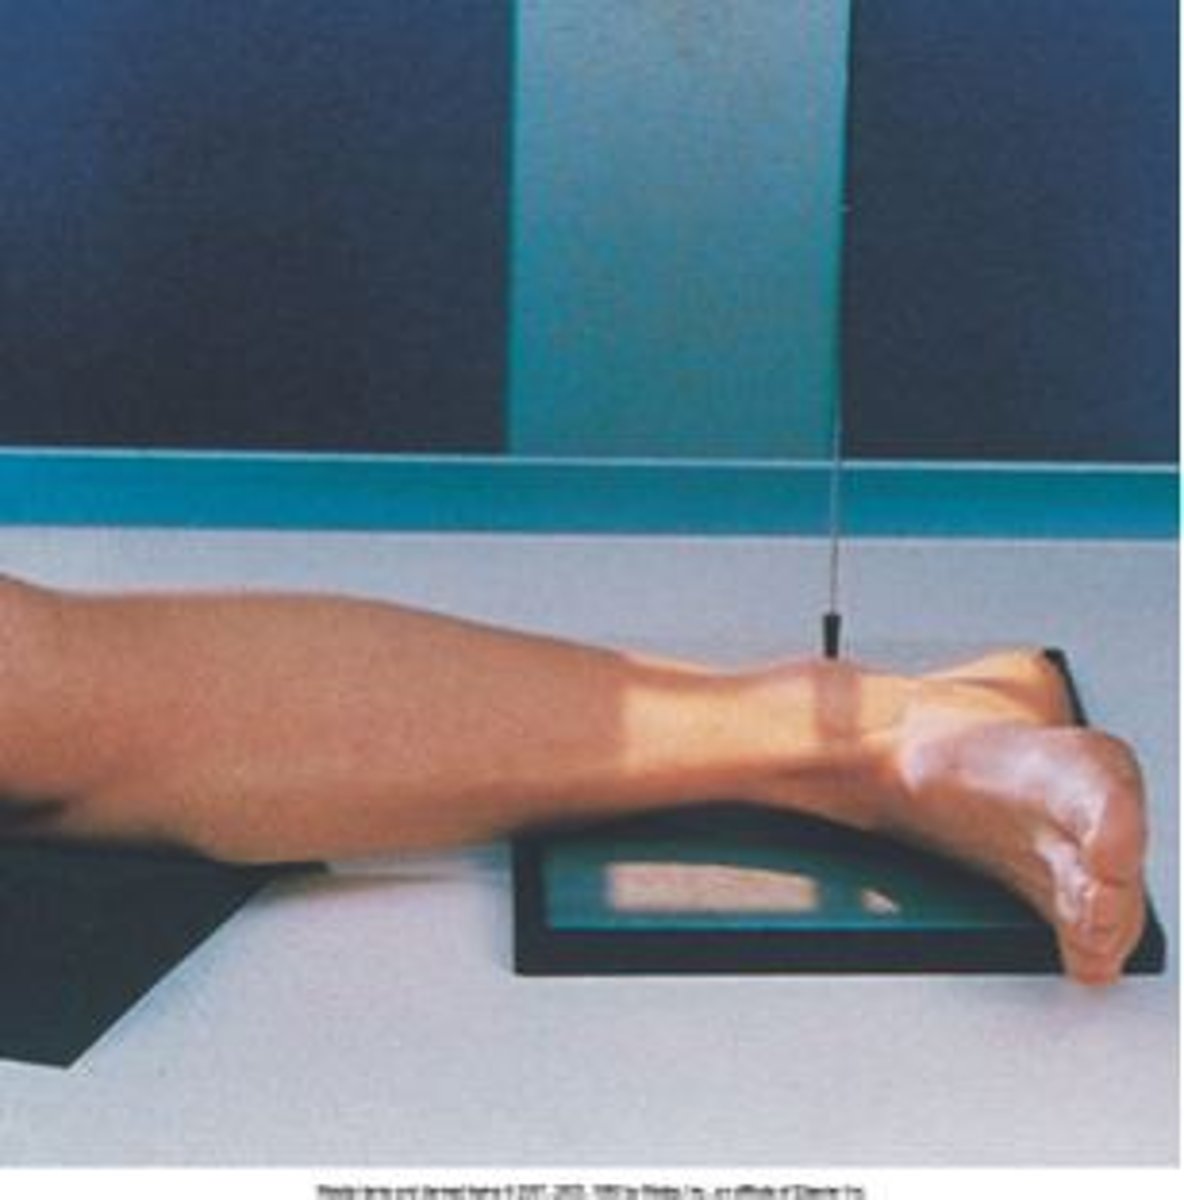
STAMPSBC for Mortise Oblique Ankle
S - on lap
T - 5 mAs @ 60 kVp
A - none
M - correct foot, on cassette
P - 15-20 degree rotation medially, CR between malleoli
S - 40"
B - hold
C -10 x 12, C
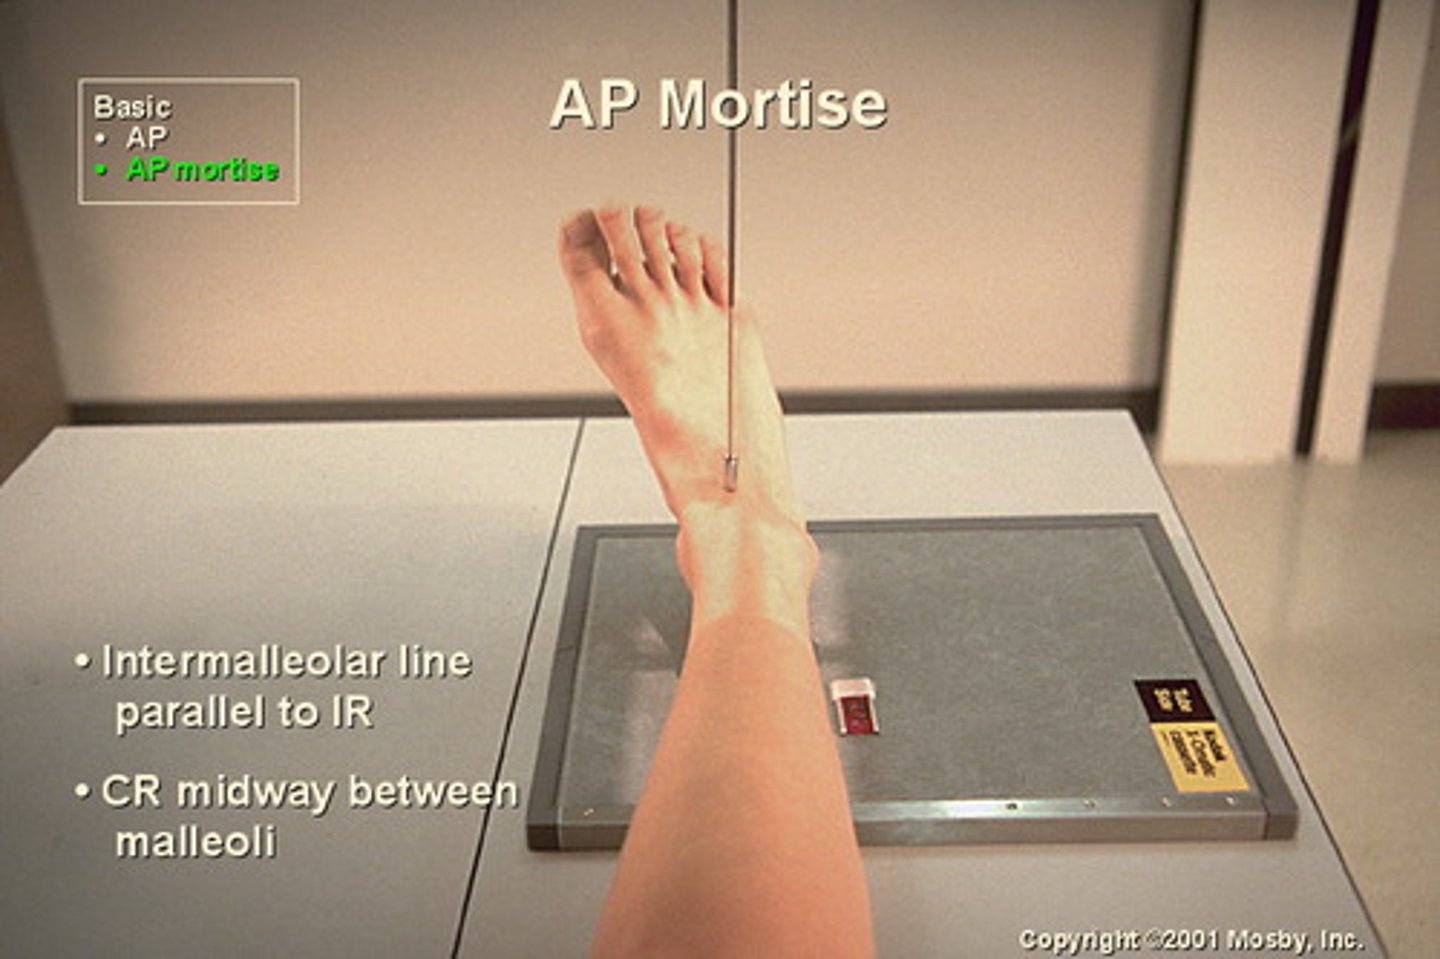
STAMPSBC for AP Tib/Fib
S - on lap
T - 5 mAs @ 60 kVp
A - none
M - correct leg, on cassette
P - laying down, CR midshaft, include 1-2" above and below joints
S - 40"
B - hold
C - 14 x 17, place behind the thigh and foot (diagonal)
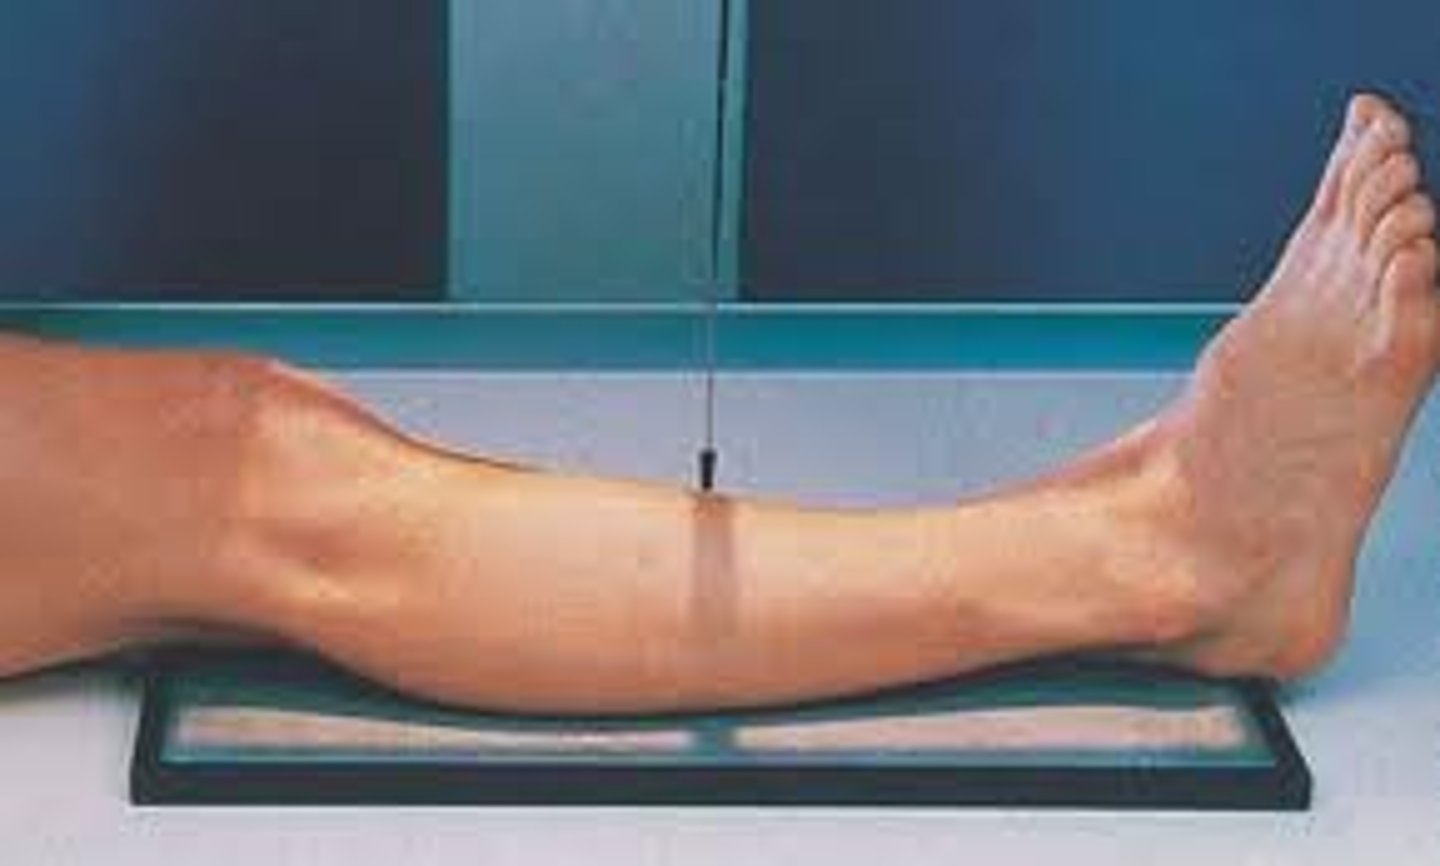
STAMPSBC for Lateral Tib/Fib
S - on lap
T - 5 mAs @ 60 kVp
A - none
M - correct leg, on cassette
P - "sleeping position", patella straight out, CR midshaft
S - 40"
B - hold
C - 14 x 17, L
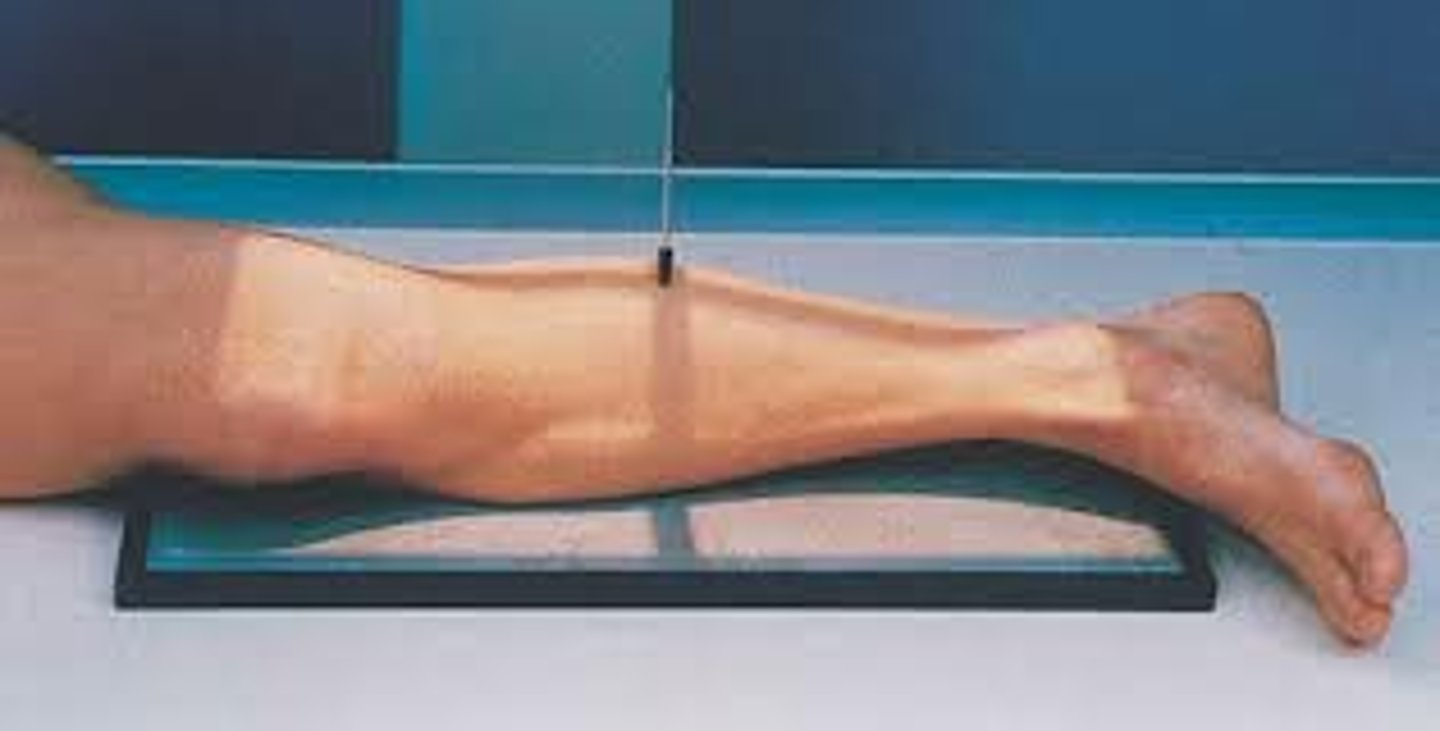
STAMPSBC for AP Knee
S - on lap
T - 5 mAs @ 60 kVp
A - none (if large person= 5 degrees cephalic)
M - correct leg, on cassette
P - Supine, CR 1/2" below apex
S - 40"
B - hold
C - 10 x 12, L
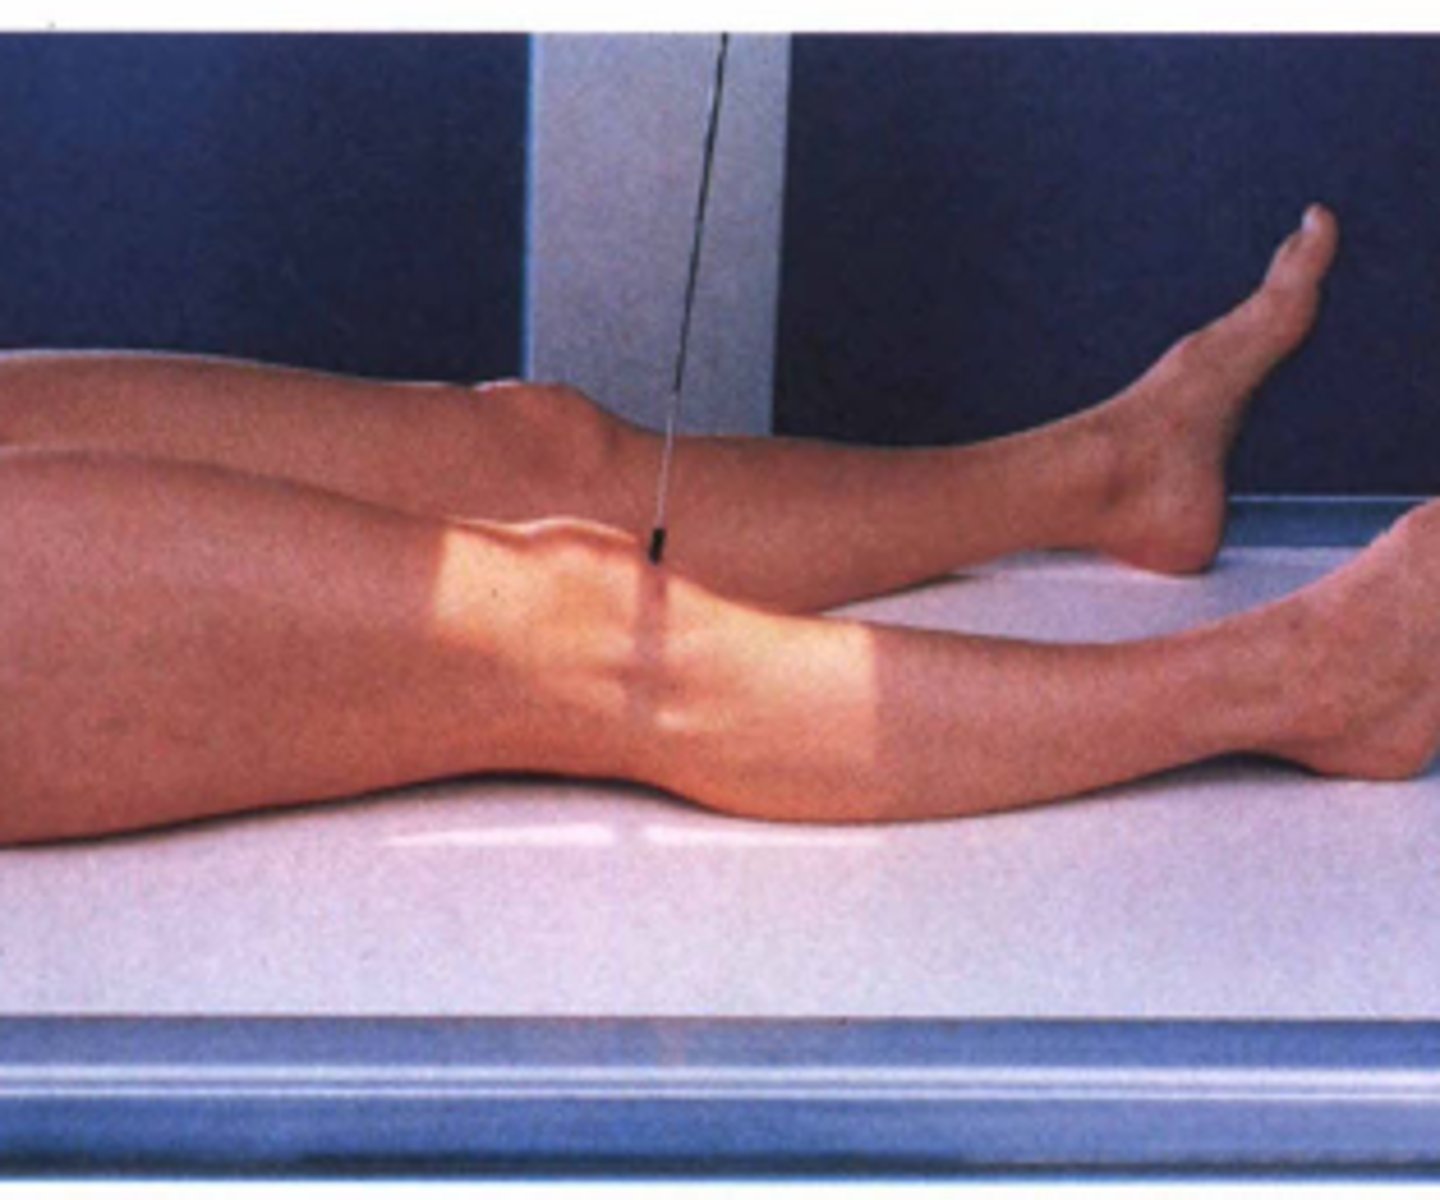
STAMPSBC for Internal Oblique Knee
S - on lap
T - 5 mAs @ 60 kVp
A - none
M - correct marker on cassette
P - PT supine w/ knee rotated 45 internally, CR 1/2" below patella
S - 40"
B - suspension
C - 10 x 12 lengthwise
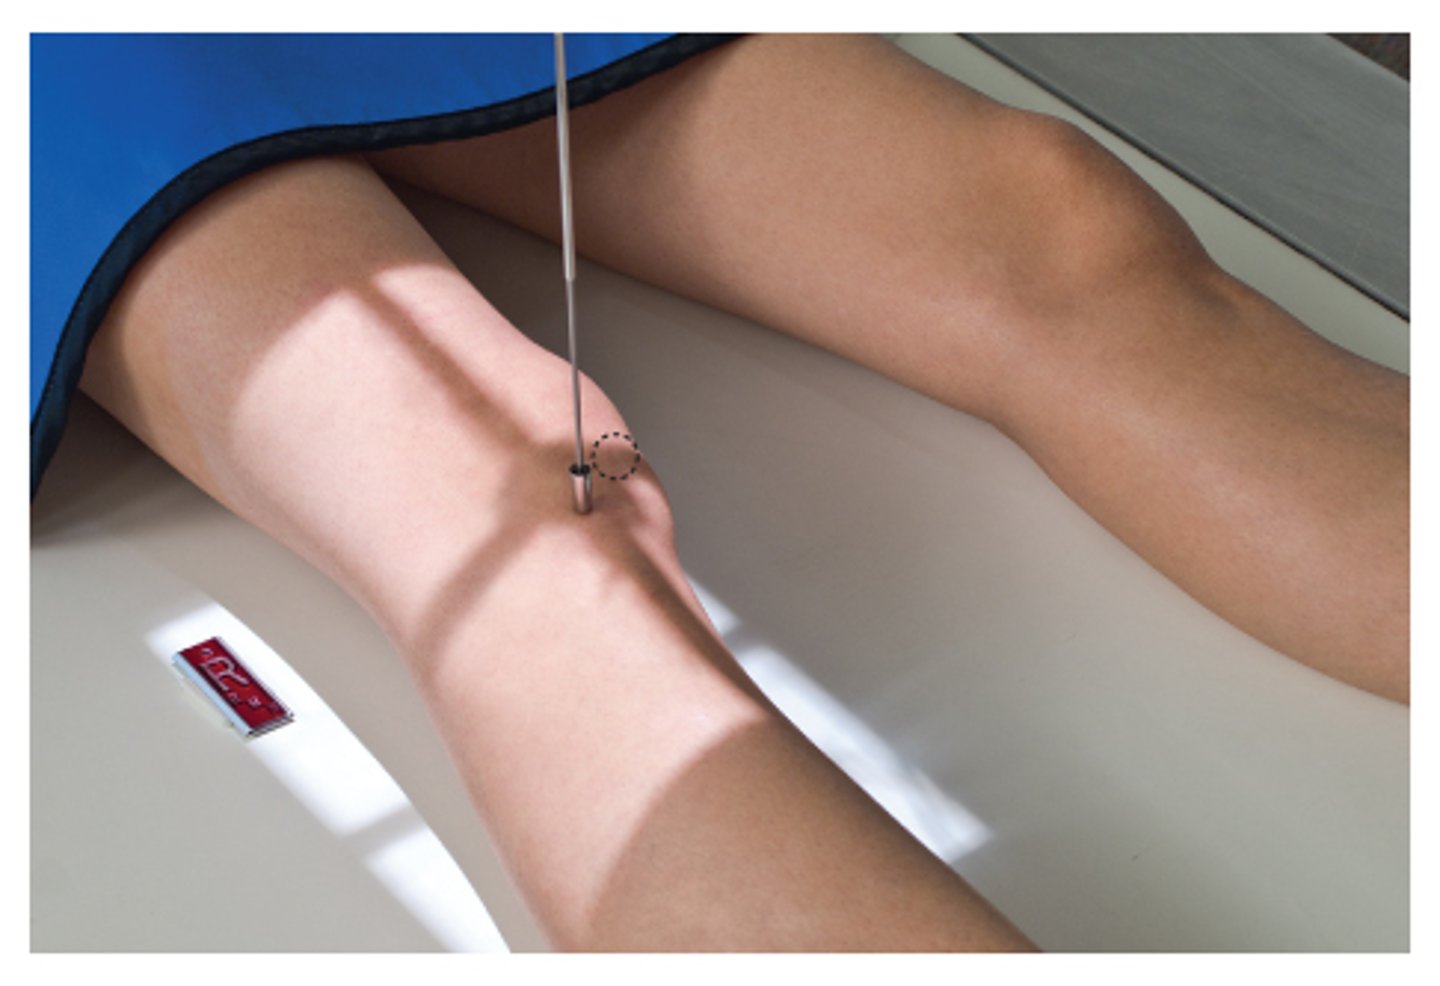
STAMPSBC for External Oblique Knee
S - on lap
T - 5 mAs @ 60 kVp
A - none
M - correct marker on cassette
P - PT supine w/ knee rotated 45 externally, CR 1/2" below patella
S - 40"
B - suspension
C -10 x 12 lengthwise
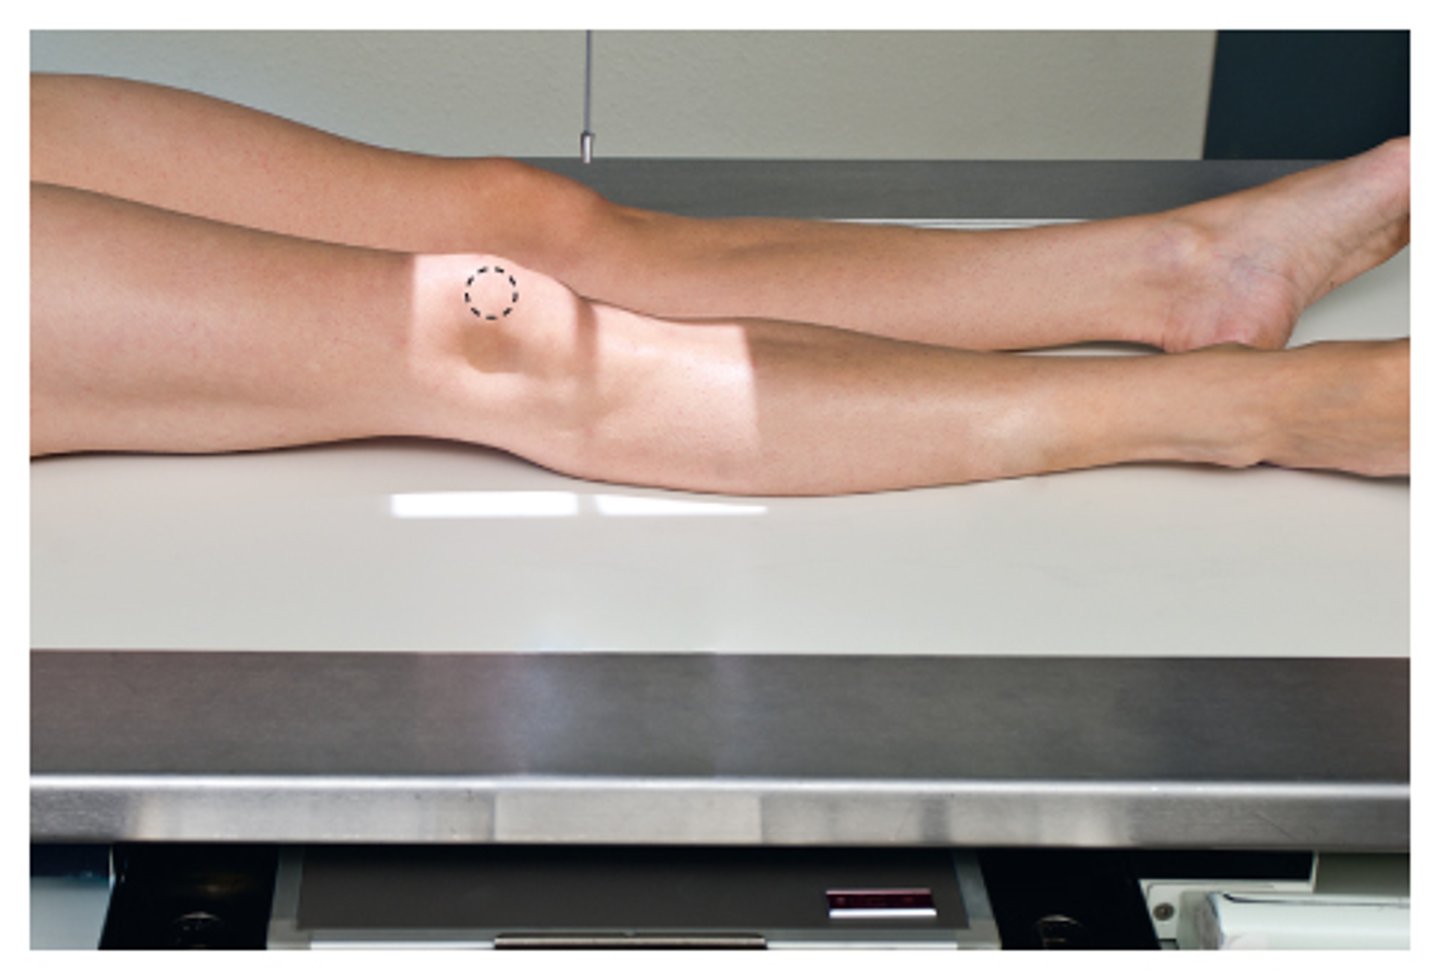
STAMPSBC for Lateral Knee
S - over lap
T - 5 mAs @ 60 kVp
A - 5 to 7 cephalic
M - correct marker on cassette
P - PT on side w/ non imaged leg kicked over, slight bend in imaged leg & patella pointed straight out, CR 1/2" below bottom of patella
S - 40"
B - suspension
C - 10 x 12 lengthwise
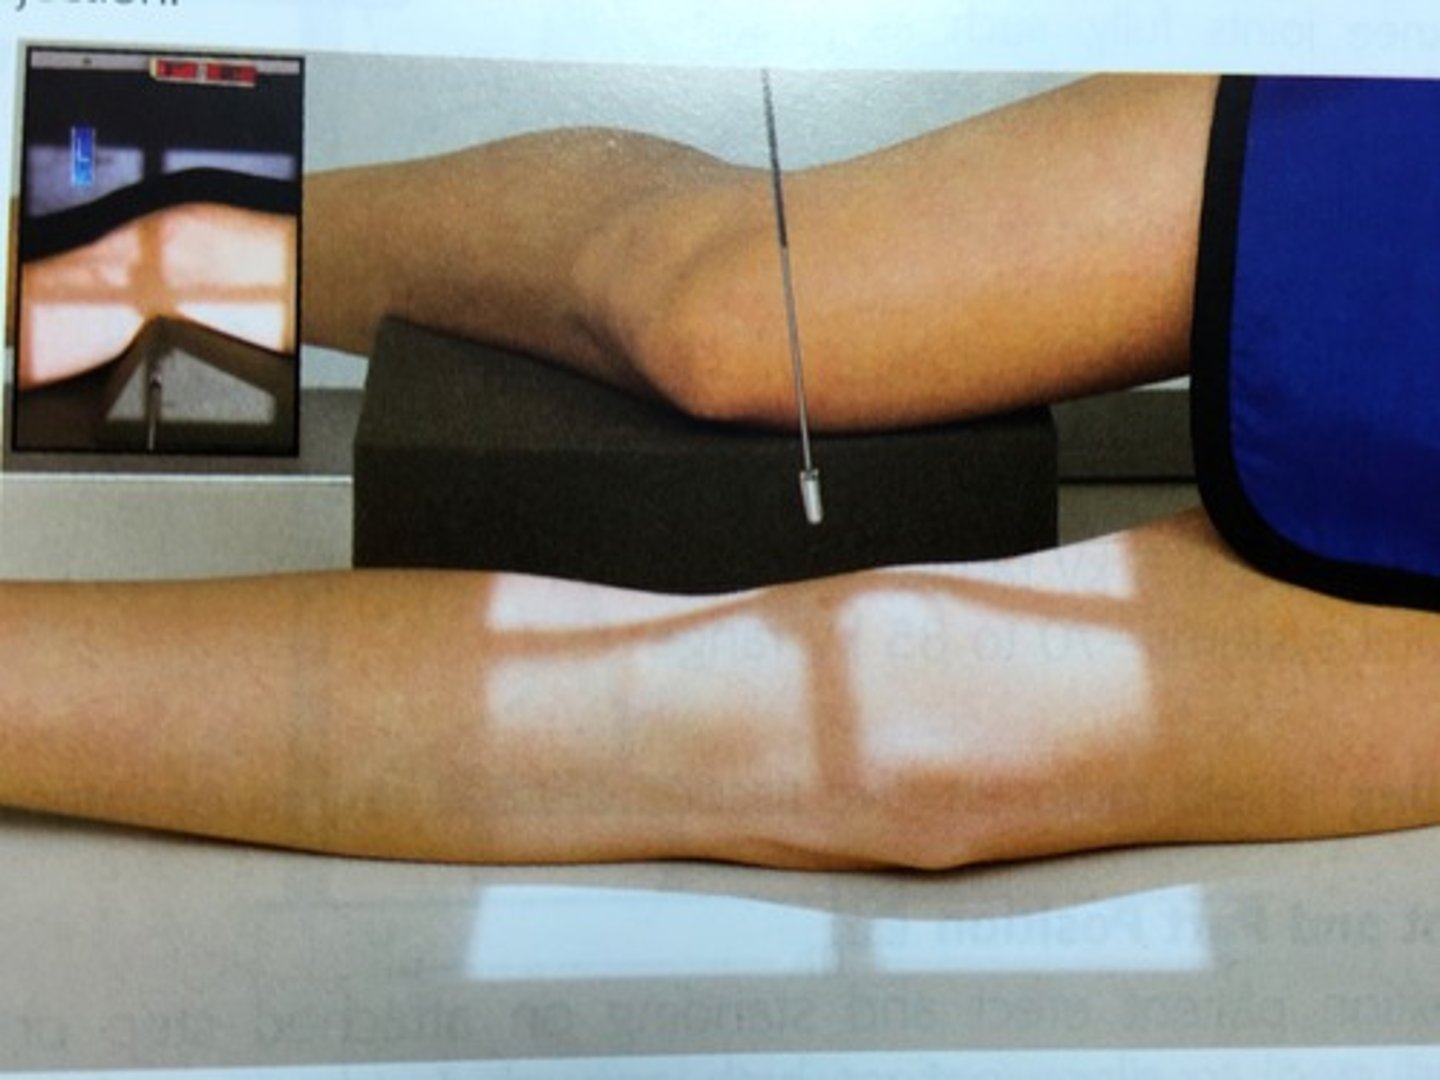
STAMPSBC for Holmblad (tunnel)
S - over butt
T - 5 mAs @ 65 kVp
A - none
M - correct marker on cassette
P - PT on hands and knees w/ imaged leg extended slightly, CR to popliteal crease
S - 40"
B - suspension
C - 10 x 12 lengthwise
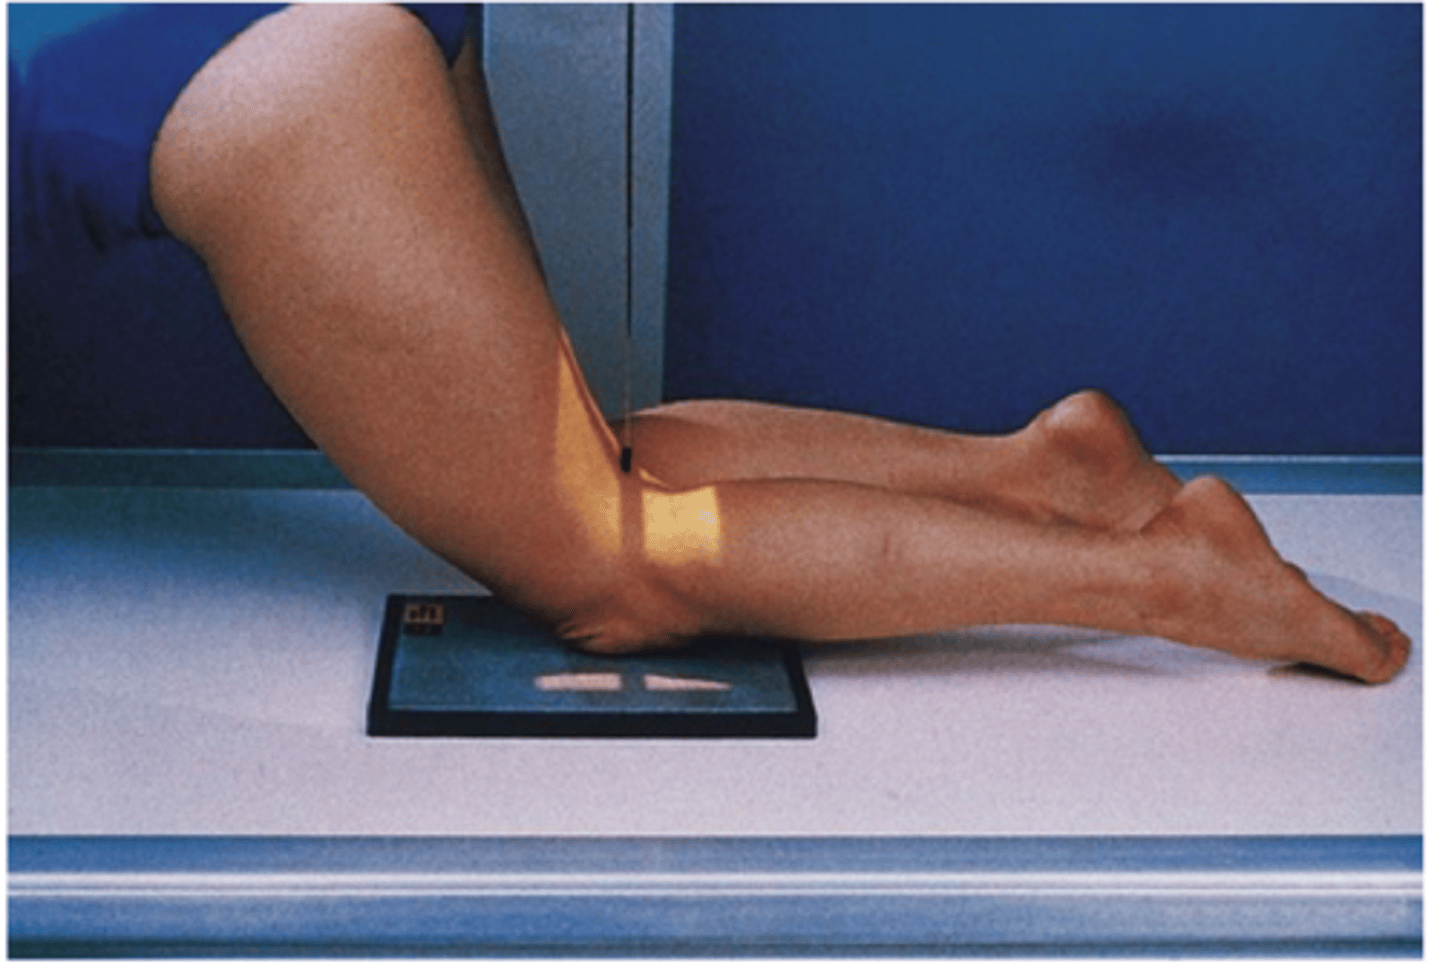
STAMPSBC for PA Patella
S - over butt
T - 5 mAs @ 60 kVp
A - none
M - on cassette
P - PT prone, CR to mid patella
S - 40"
B - suspension
C - 10 x 12 lengthwise, 8 x 8 collimation
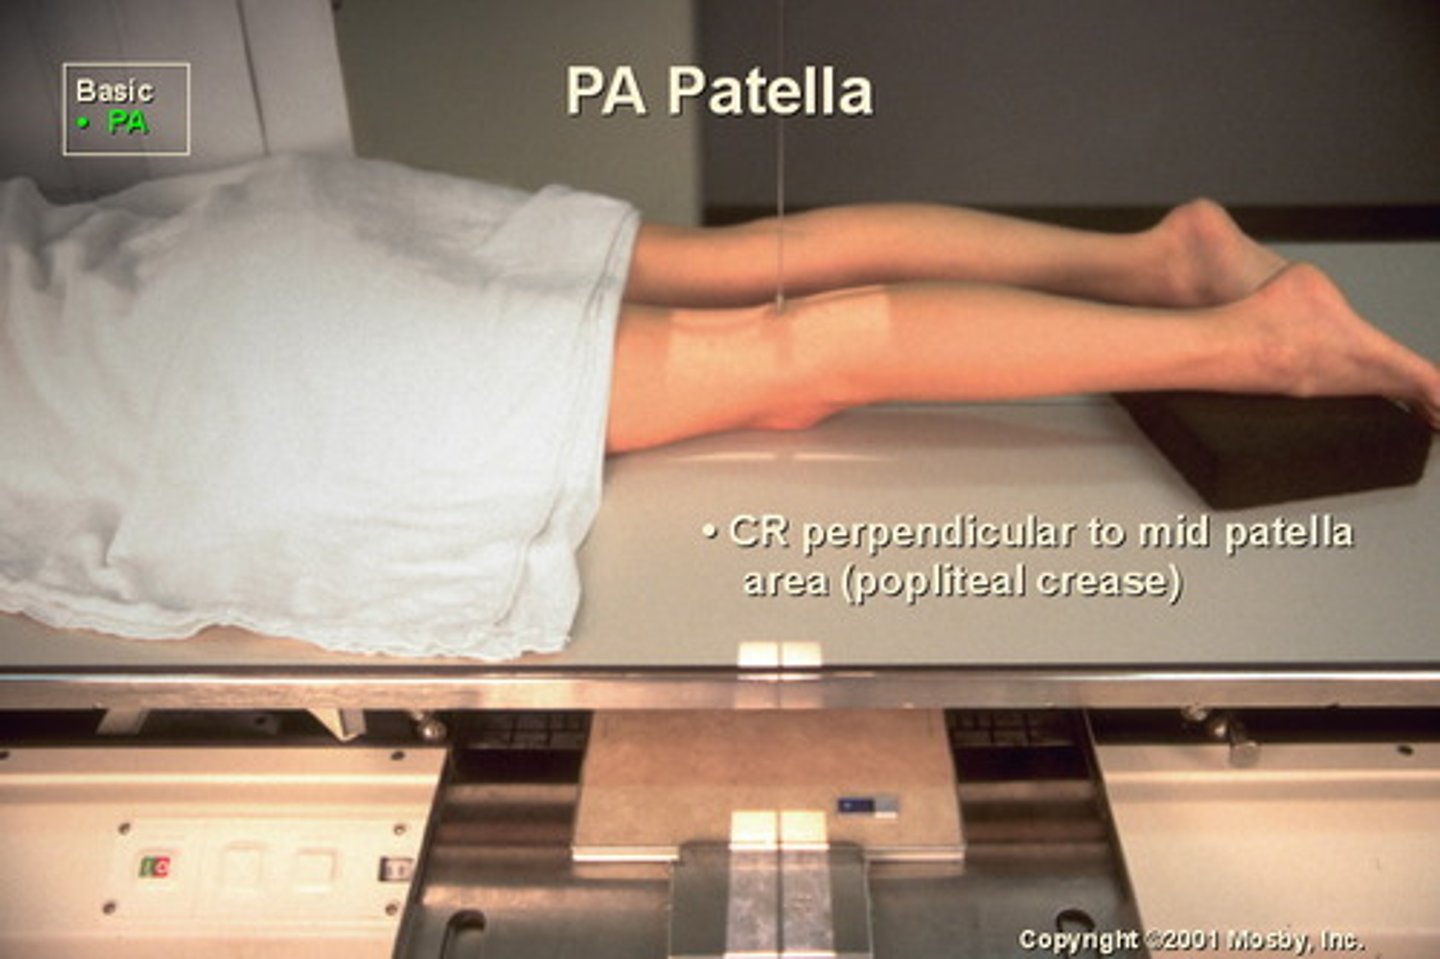
STAMPSBC for Lateral Patella
S - over hip
T - 5 mAs @ 60 kVp
A - none
M - on cassette
P - PT on side w/ non imaged leg kicked over, CR to joint space
S - 40"
B - suspension
C - 10 x 12 lengthwise
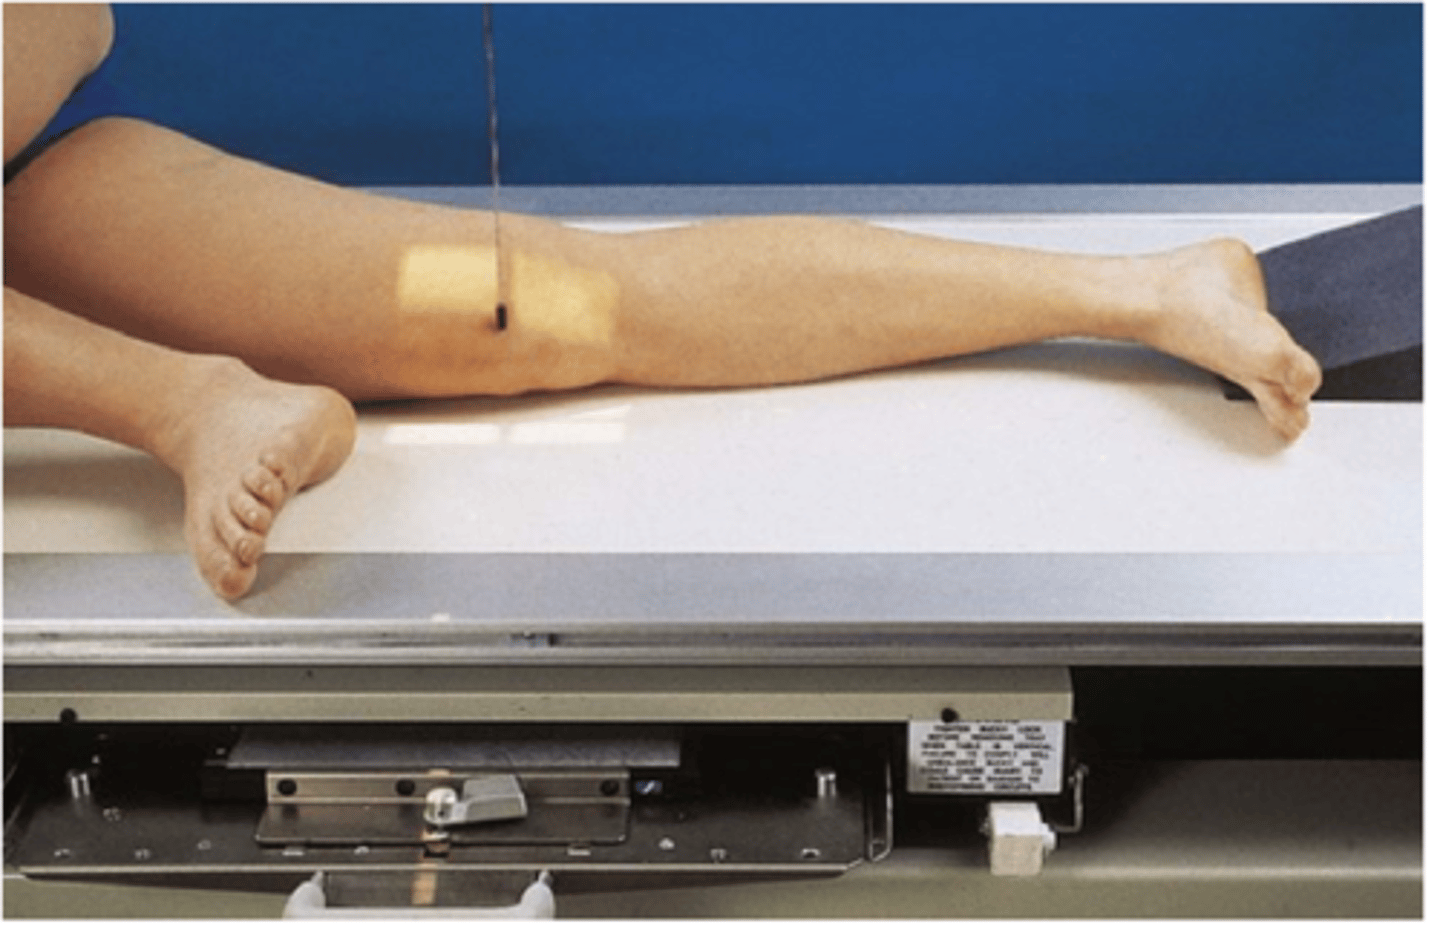
STAMPSBC for PA Settegast (sunrise)
S - shield over butt
T - 5 mAs @ 65 kVp
A - match joint space
M - correct marker
P - PT prone w/ leg flexed 90 degrees & toes flexed out of way, CR to joint space
S - 40"
B - suspension
C - 10 x 12 lengthwise
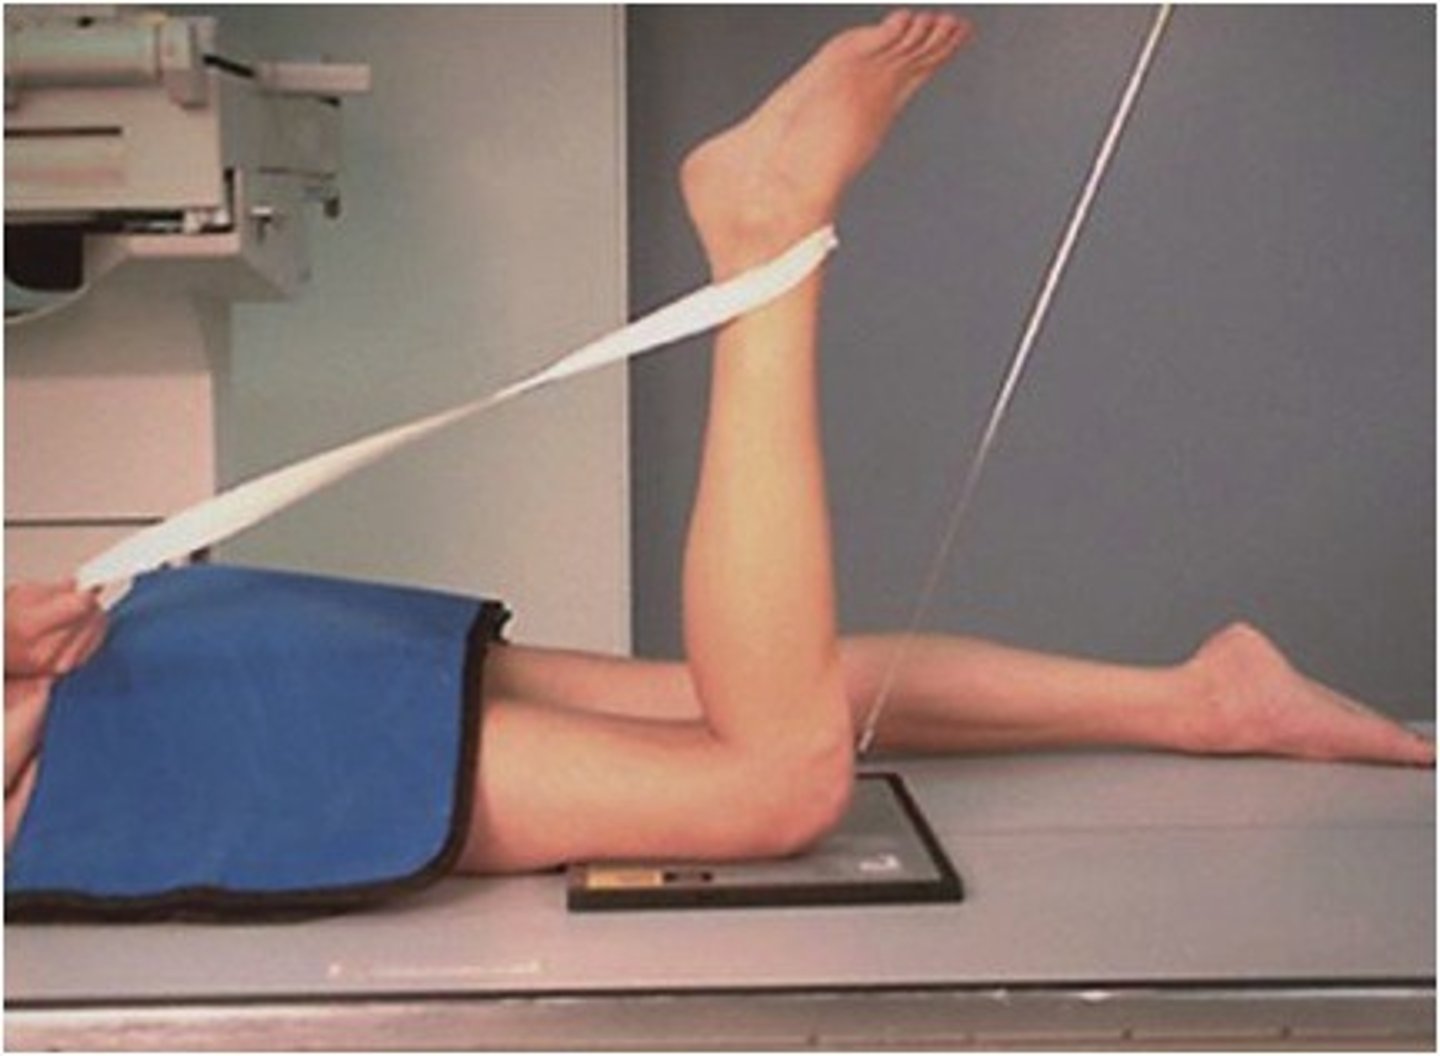
STAMPSBC for AP Femur (proximal)
S - outside light
T - 25 mAs @ 75 kVp
A - none
M - on table
P - PT supine w/ toes TP, top of cassette level w/ crest
S - 40"
B - suspension
C - 14 x 17 lengthwise
STAMPSBC for AP Femur (distal)
S - outside light
T - 25 mAs @ 75 kVp
A - none
M - on table
P - PT supine w/ toes pointed to ceiling, bottom of cassette 2" below knee joint
S - 40"
B - suspension
C - 14 x 17 lenthwise, collimate side to side
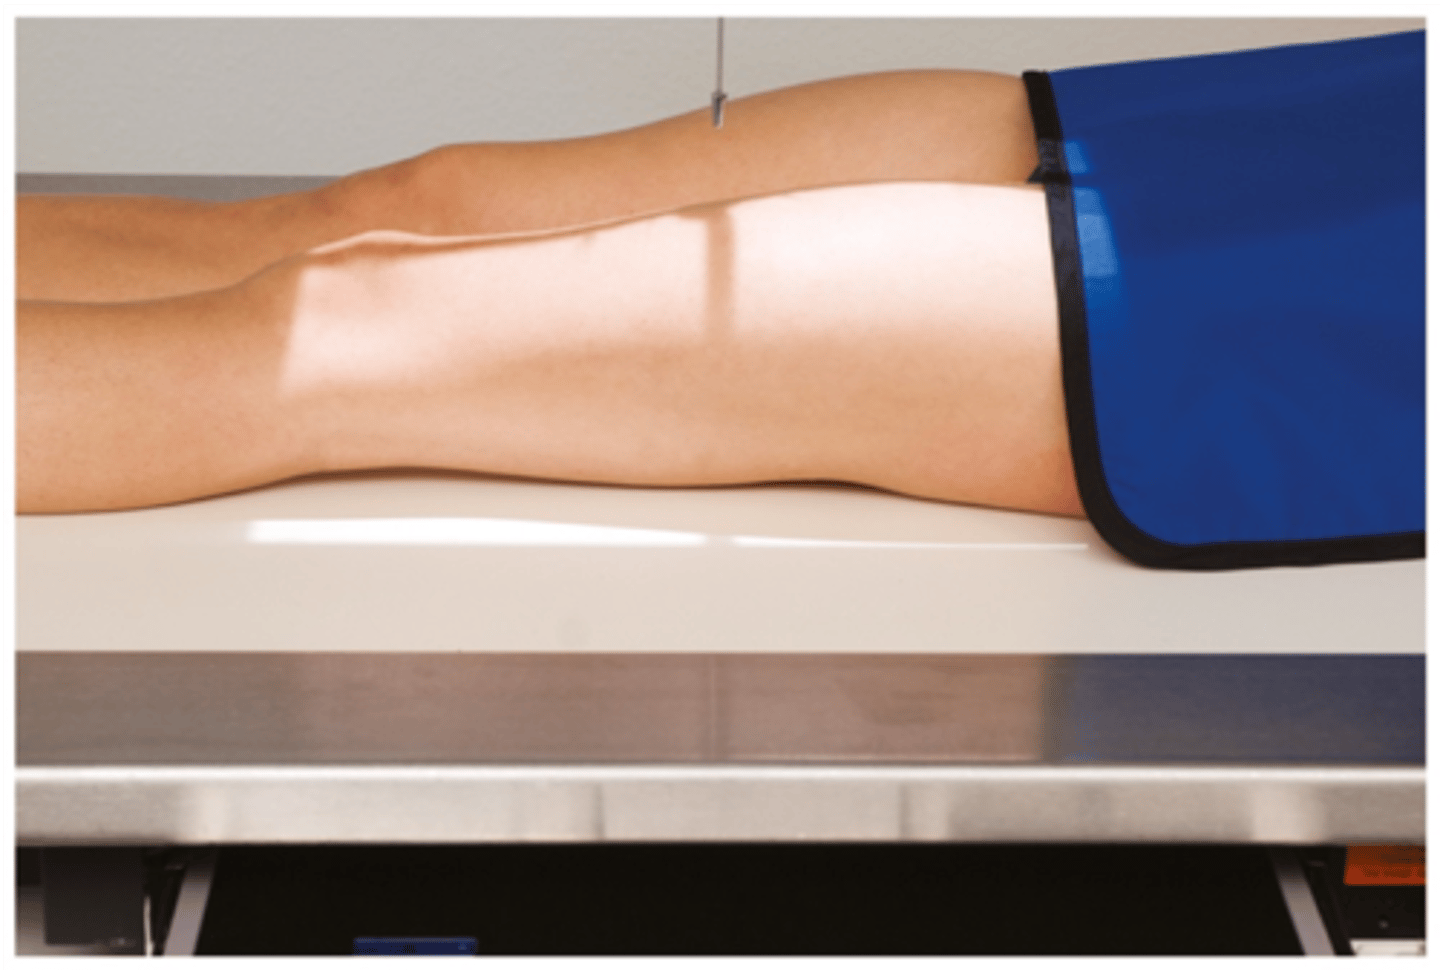
STAMPSBC for Lateral Femur (proximal)
S - on opposite side of leg being observed
T - 25 mAs @ 75 kVp
A - none
M - on table
P - PT in frog leg, top of cassette level w/ crest
S - 40"
B - suspension
C - 14 x 17 lengthwise
STAMPSBC for Lateral Femur (distal)
S - outside of light
T - 25 mAs @ 75 kVp
A - none
M - on table
P - PT on side w/ non imaged leg kicked over & patella pointing straight out, bottom of cassette 2" below knee joint
S - 40"
B - suspension
C - 14 x 17 lengthwise
STAMPSBC for AP Hip
S - outside of light
T - 25 mAs @ 75 kVp
A - none
M - correct marker in top corner
P - PT supine w/ toes TP, CR 2" in & 4" down from ASIS
S - 40"
B - suspension
C - 10 x 12 lengthwise
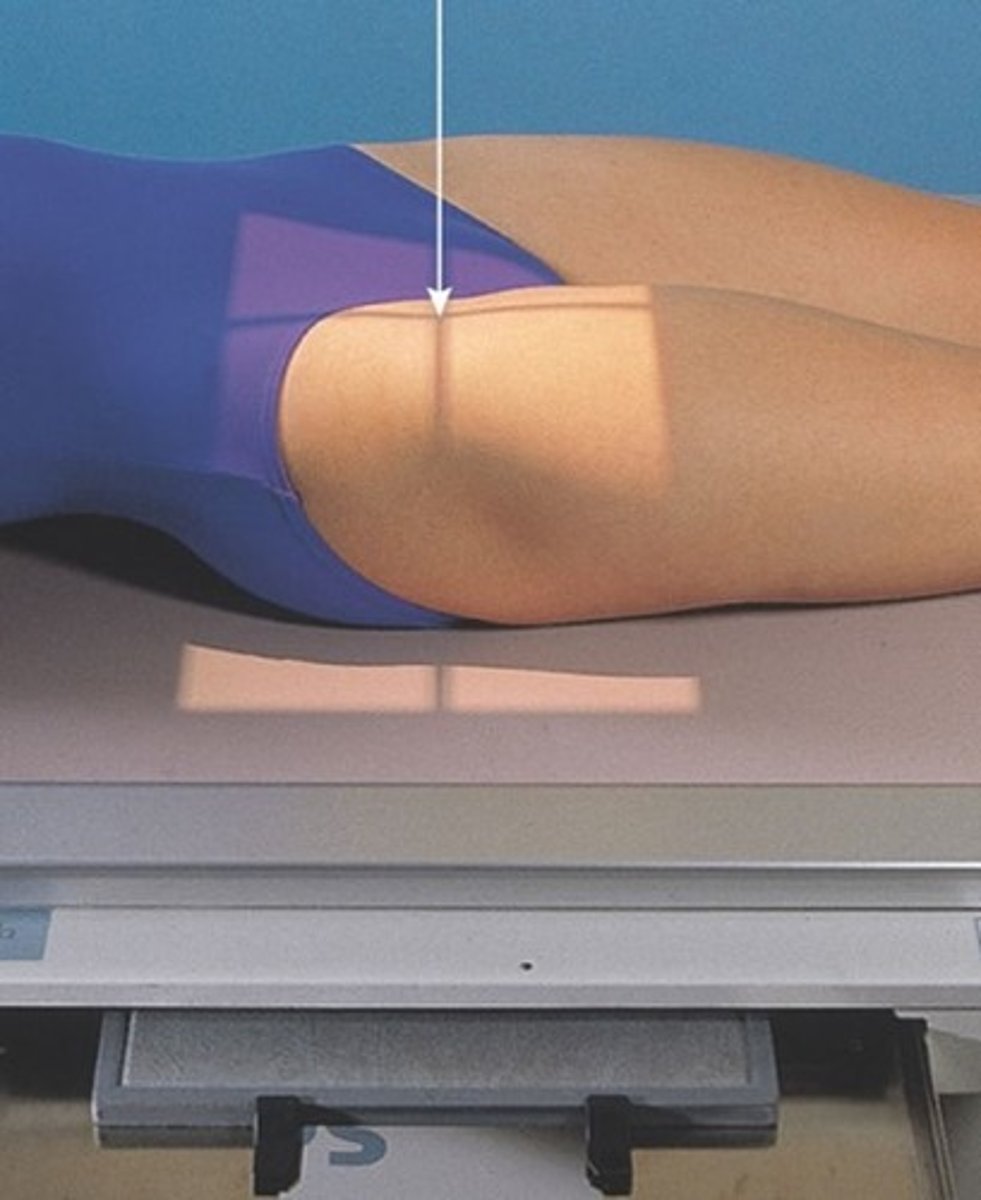
STAMPSBC for AP Hip (trauma)
S - outside of light
T - 25 mAs @ 75 kVp
A - none
M - correct marker in top corner
P - PT supine (DO NOT TP TOES ON TRAUMA), CR 2" in & 4" down from ASIS
S - 40"
B - suspension
C - 10 x 12 lengthwise
STAMPSBC for Lateral Hip
S - outside of light
T - 25 mAs @ 75 kVp
A - none
M - correct marker for correct leg
P - PT supine w/ leg bent & dropped to table, CR 2" in & 4" distal to ASIS
S - 40"
B - suspension
C - 10 x 12 lengthwise
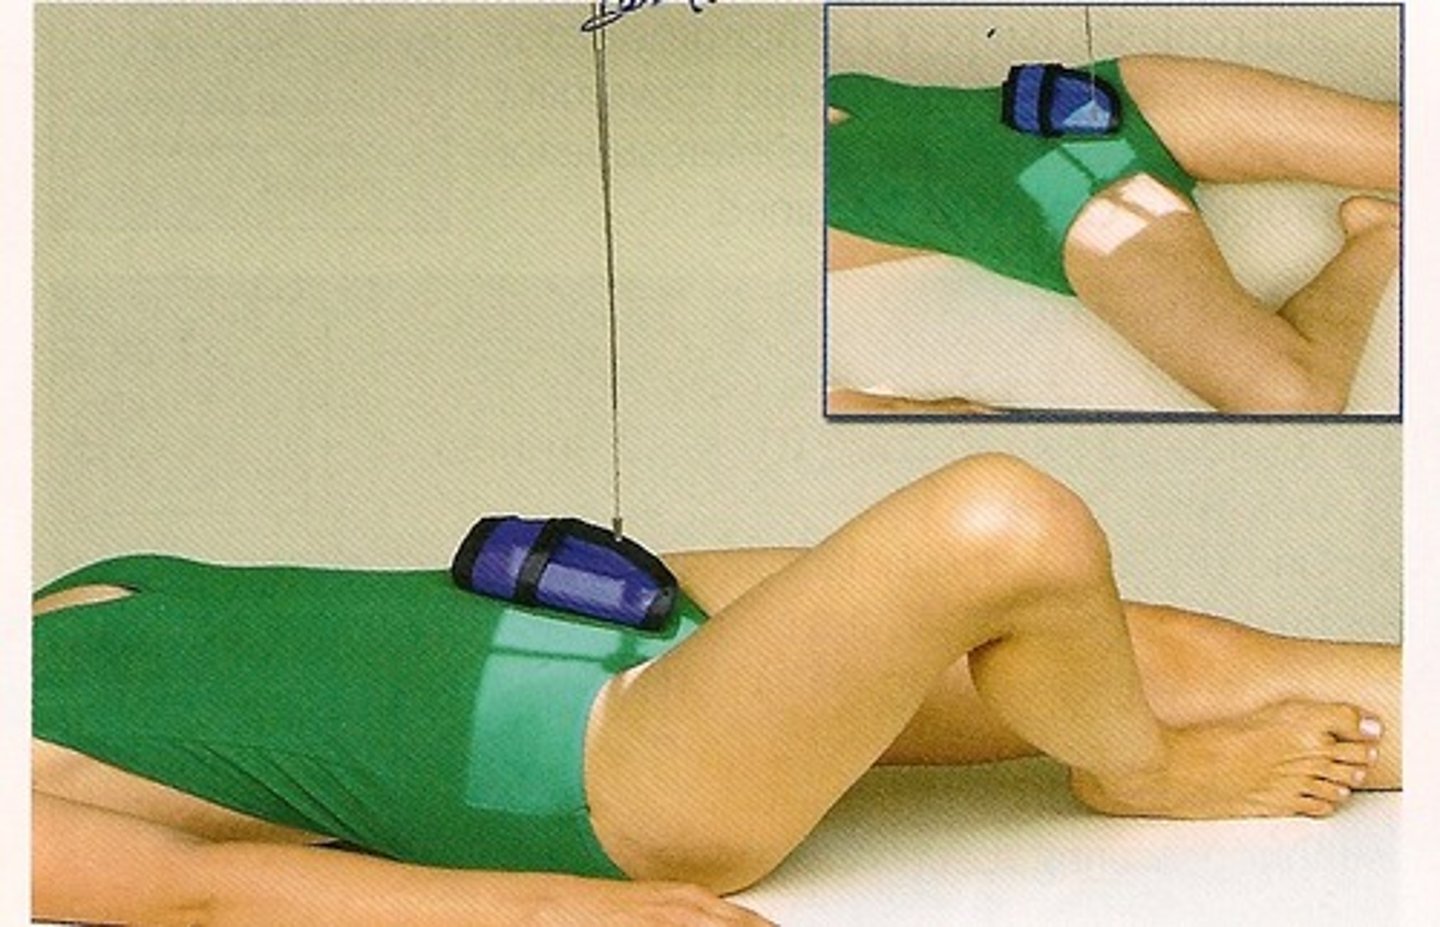
STAMPSBC for Axiolateral Hip (trauma)
S - none
T - 80 mAs @ 80 kVp
A - none
M - correct marker for correct hip
P - PT supine w/ non injured leg in stand, CR perp to mid femoral neck
S - 40"
B - suspension
C - 14 x 17 (grid cap)
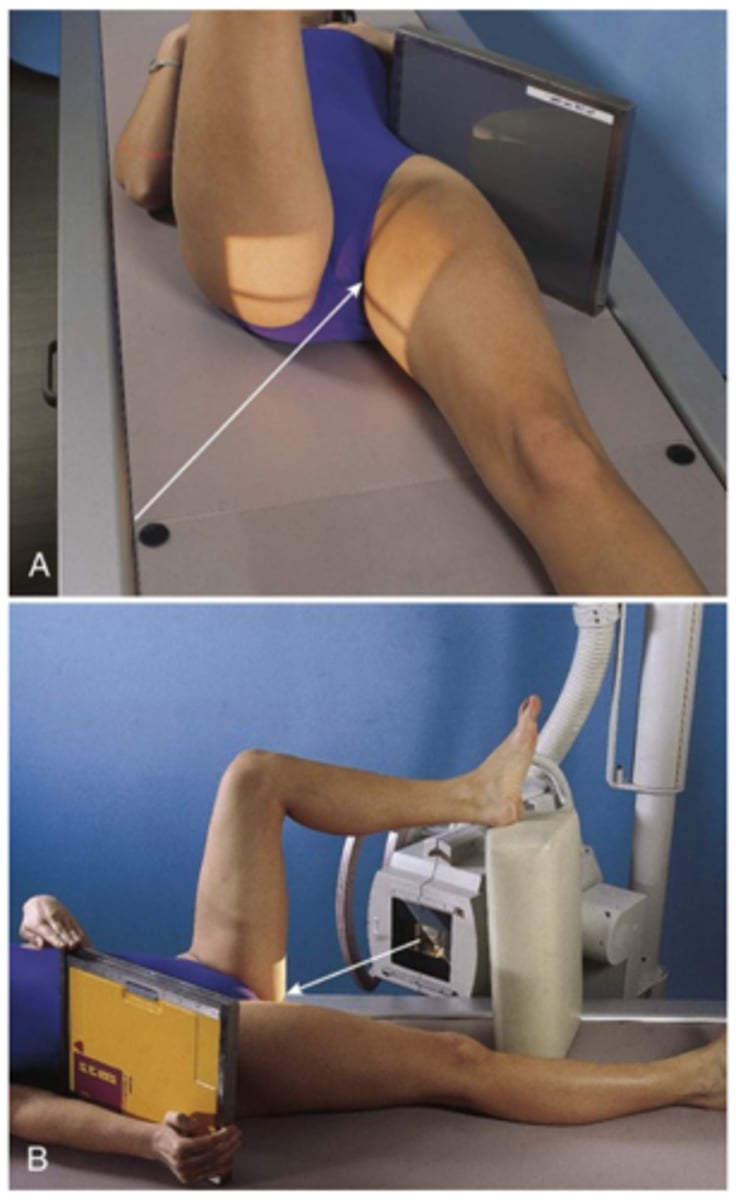
STAMPSBC for AP Pelvis
S - none
T - 25 mAs @ 75 kVp
A - none
M - correct marker on correct side
P - PT supine w/ toes TP, CR 2" below ASIS
S - 40"
B - suspension
C - 14 x 17 crosswise
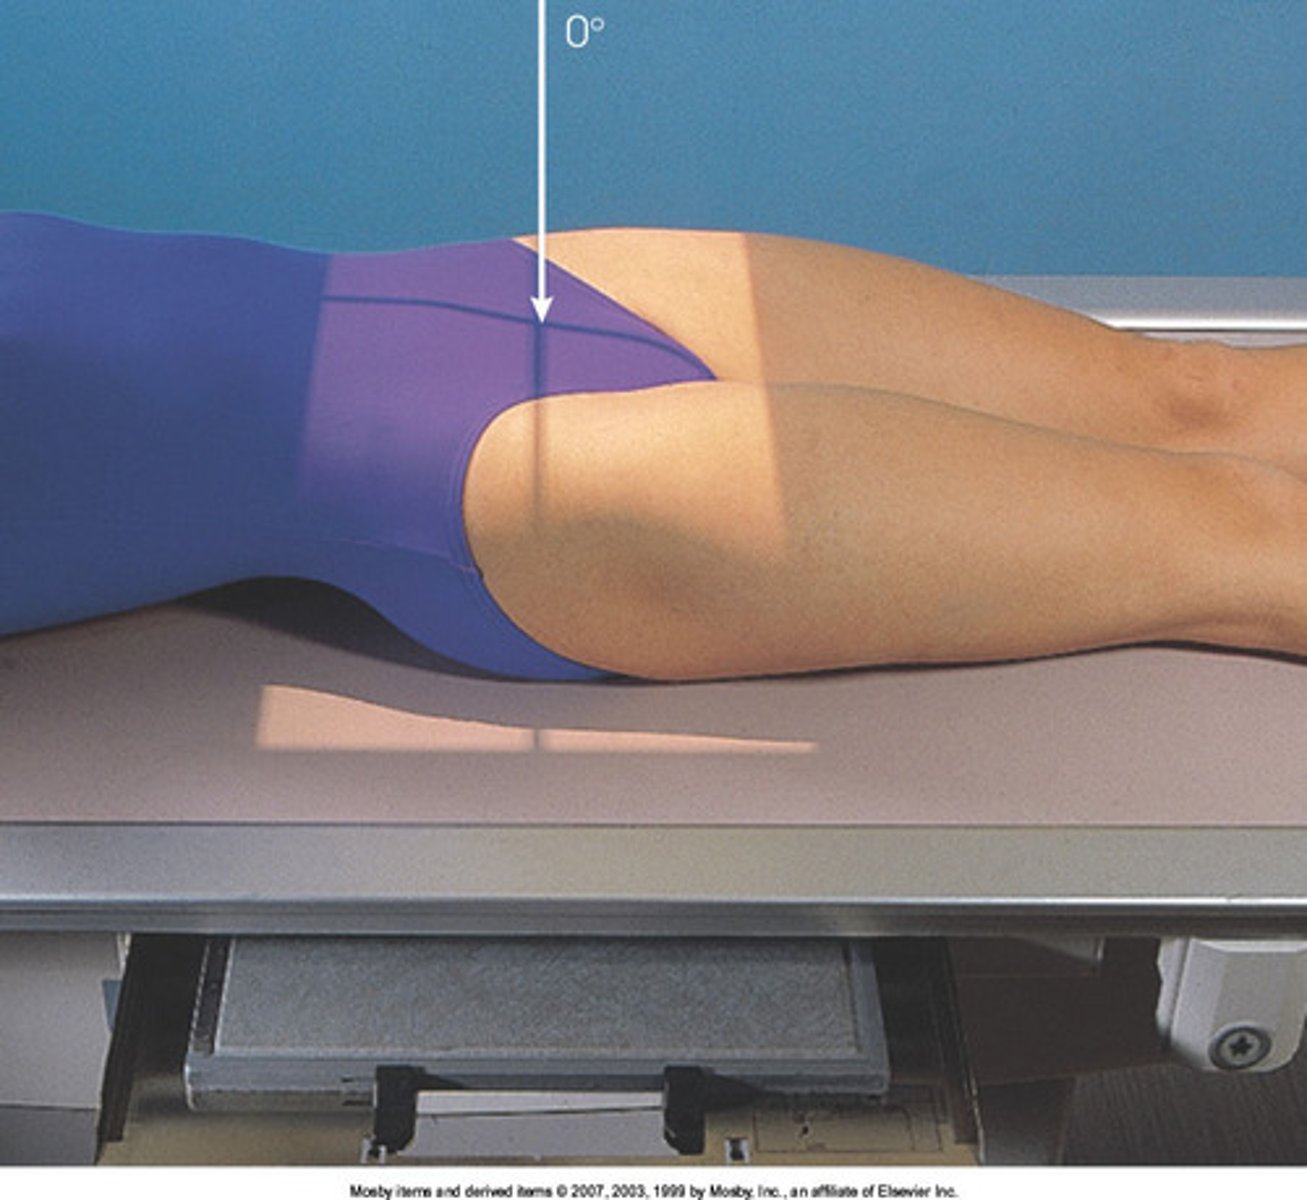
STAMPSBC for AP Pelvis (trauma)
S - none
T - 25 mAs @ 75 kVp
A - none
M - correct marker on correct side
P - PT supine (DO NOT TP TOES ON TRAUMA), CR 2" below ASIS (midline)
S - 40"
B - suspension
C - 14 x 17 crosswise
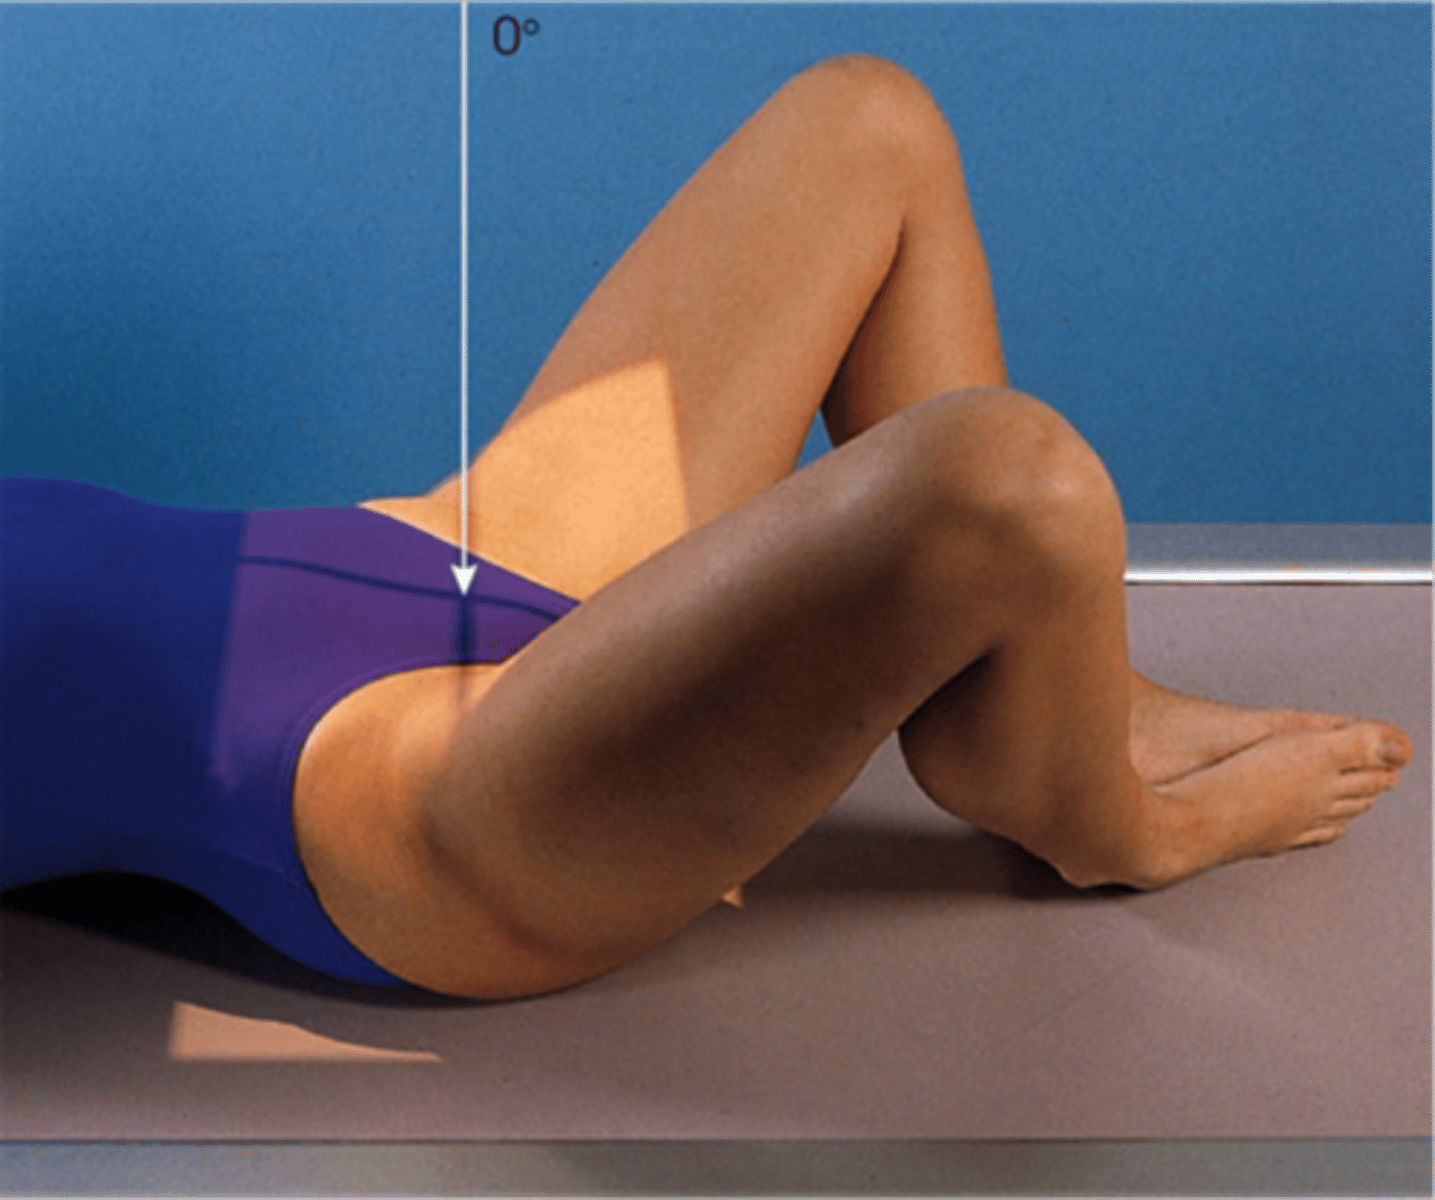
STAMPSBC for Cleaves/Frog Leg Pelvis
S - none
T - 25 mAs @ 75 kVp
A - none
M - correct marker on correct side
P - PT supine w/ bottoms of feet together & knees dropped to table, CR 3" below ASIS (midline)
S - 40"
B - suspension
C - 14 x 17 crosswise
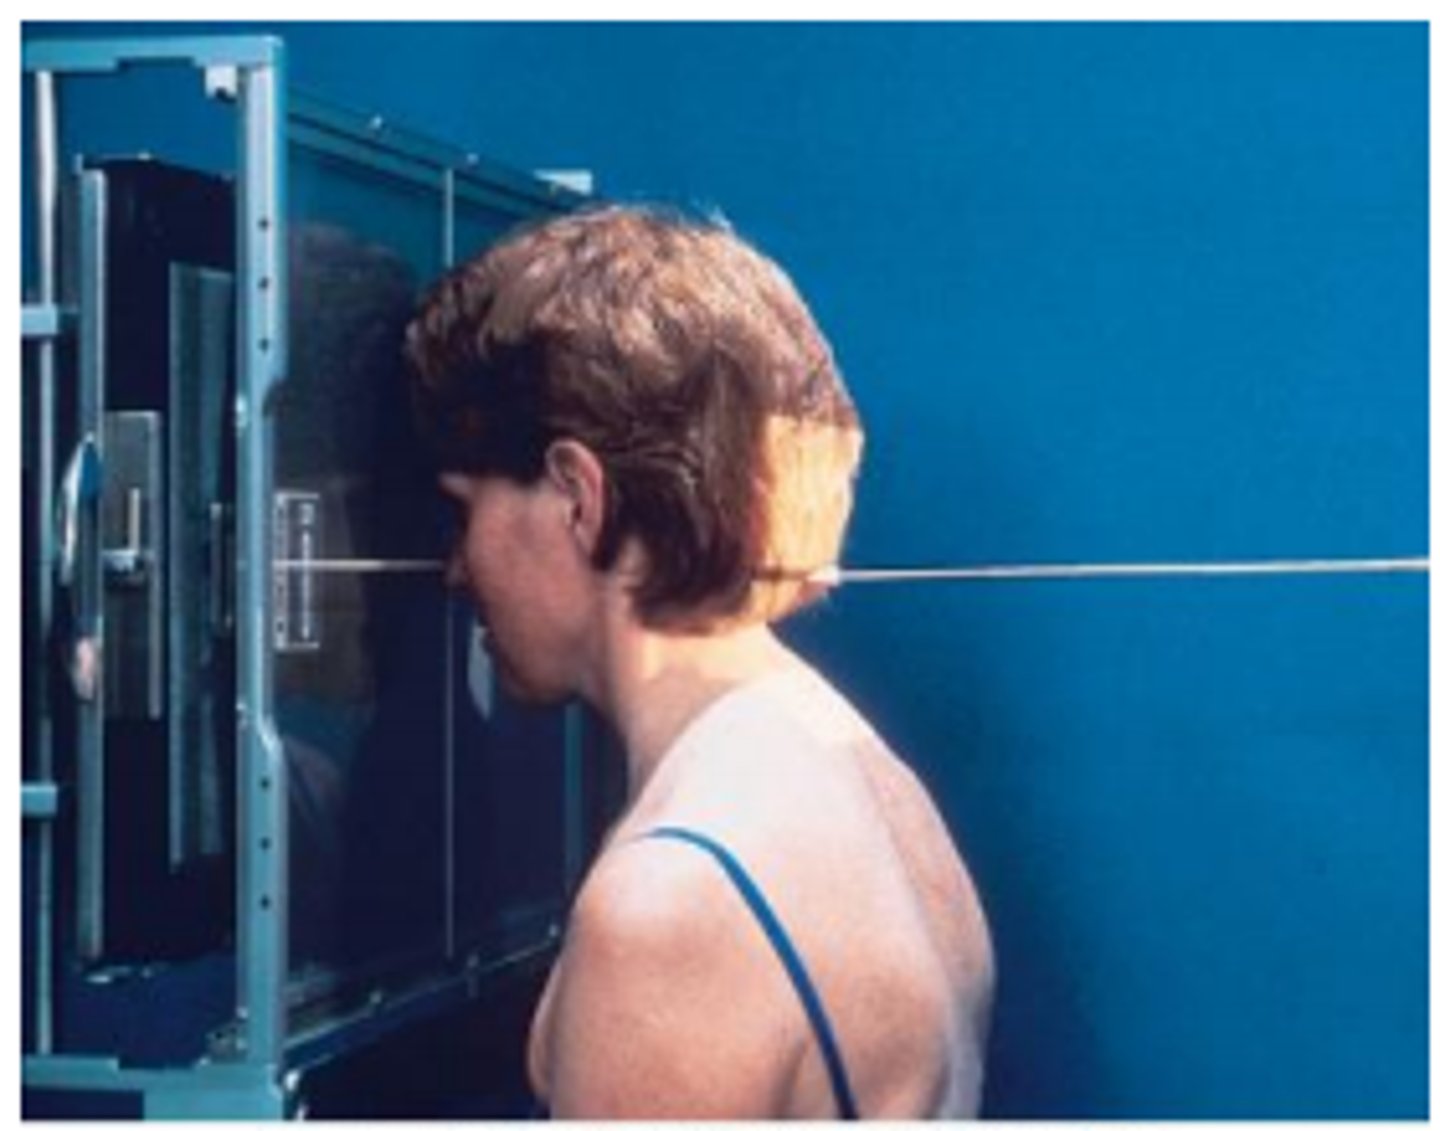
STAMPSBC for PA Mandible
S - around waist
T - center cell @ 75 kVp
A - none
M - correct marker in bottom corner
P - forehead to board & OML perp, CR exits level on lips
S - 40"
B - suspension
C - 10 x 12 lengthwise, 8 x 10 collimation
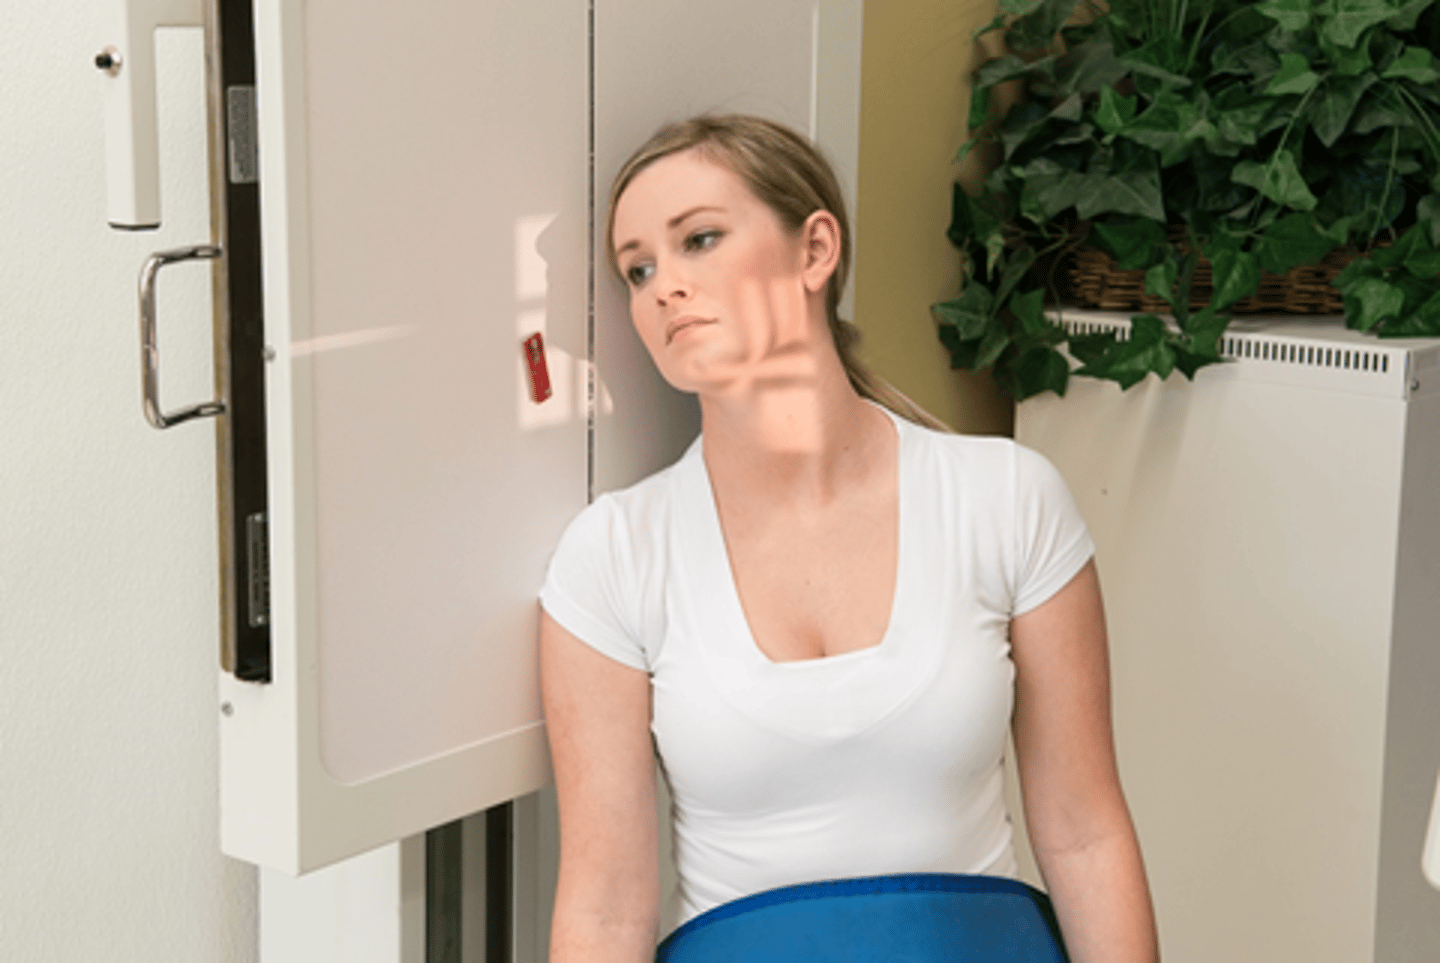
STAMPSBC for Axiolateral Oblique Mandible
S - around waist
T - 6 mAs @ 65 kVp
A - 25 degree cephalic
M - correct marker in bottom corner
P - PT stands so head is LAT but body is slightly AP obliqued w/ head tilted 15 degrees toward board, CR aimed to soft spot under chin (cut mandible in half)
S - 40"
B - suspension
C - 10 x 12 lengthwise, 8 x 10 collimation
STAMPSBC for Lateral Facial Bones
S - around waist
T - center cell, 75 kVp
A - none
M - correct side (side touching), front
P - side of interest closest to IR, IPL perp, IOML parallel, CR enters zygoma midway between outer canthus and EAM
S - 40"
B - hold
C - 10 by 12, L
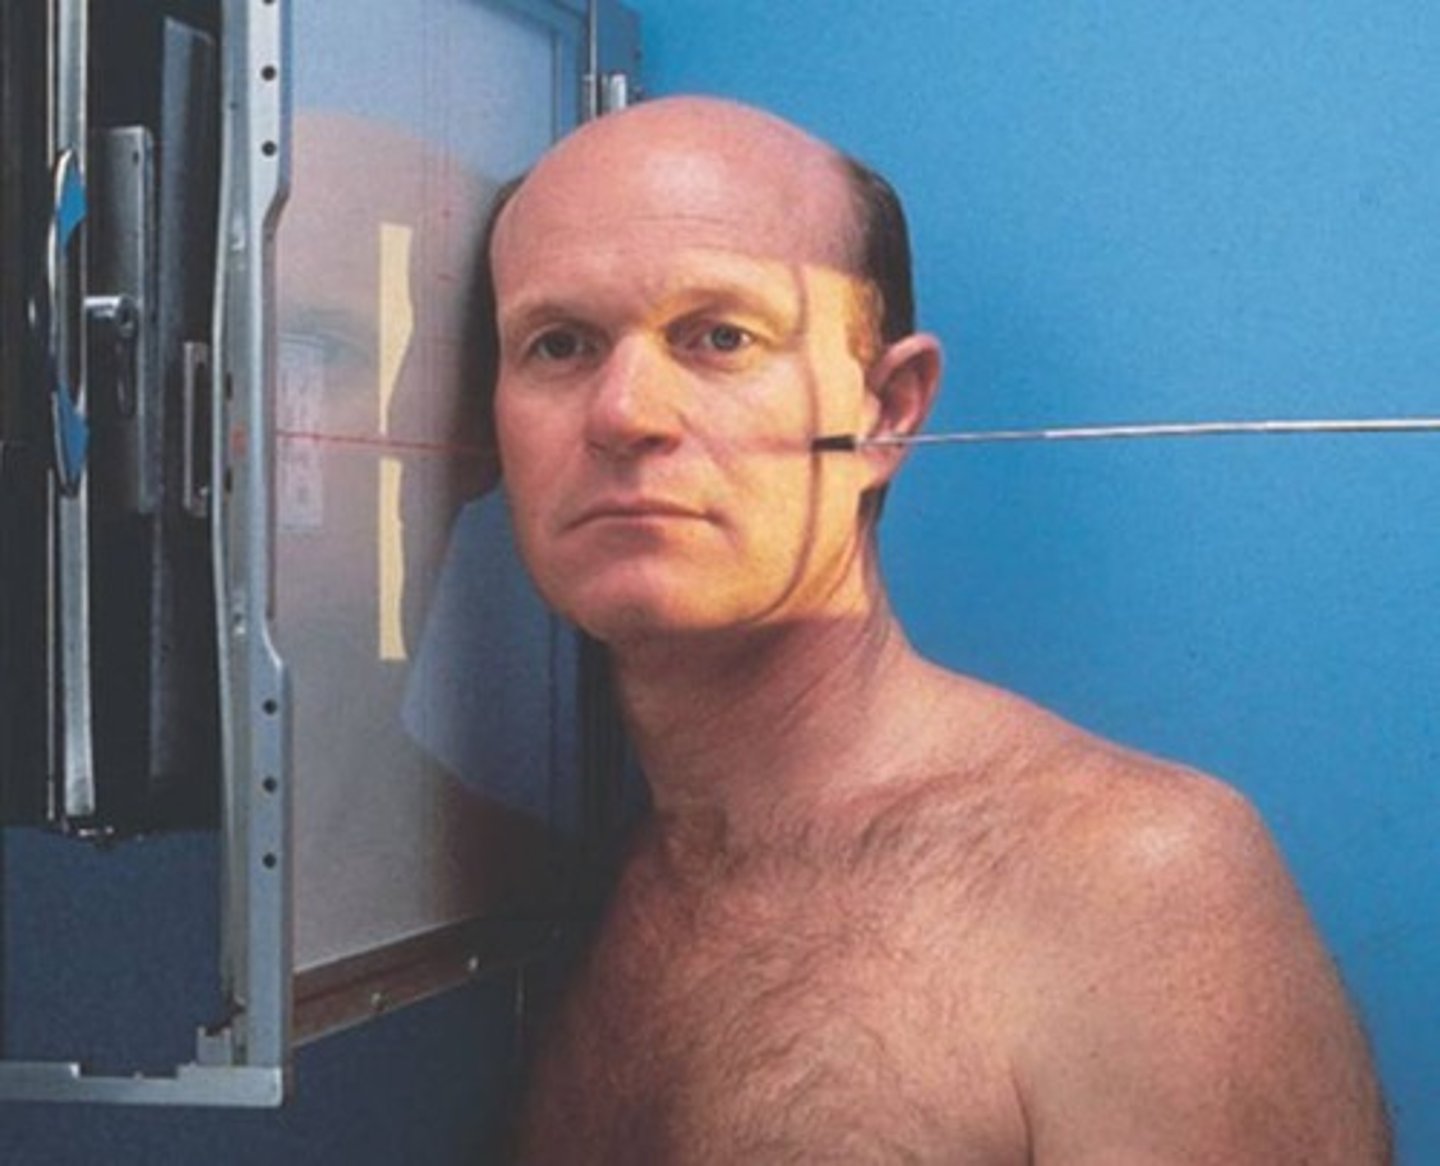
STAMPSBC for Caldwell Facial Bones
S - around waist
T - center cell, 75 kVp
A - 15 caudad (75 on tube)
M - bottom of the film
P - CR exits nasion, OML perp to IR
S - 40"
B - hold
C - 10 by 12, L
STAMPSBC for Waters Facial Bones
S - around waist
T - center cell, 75 kVp
A - none
M - correct side, bottom
P - MML perp, exits @ acanthion, chin on board
S - 40"
B - hold
C - 10 by 12, L
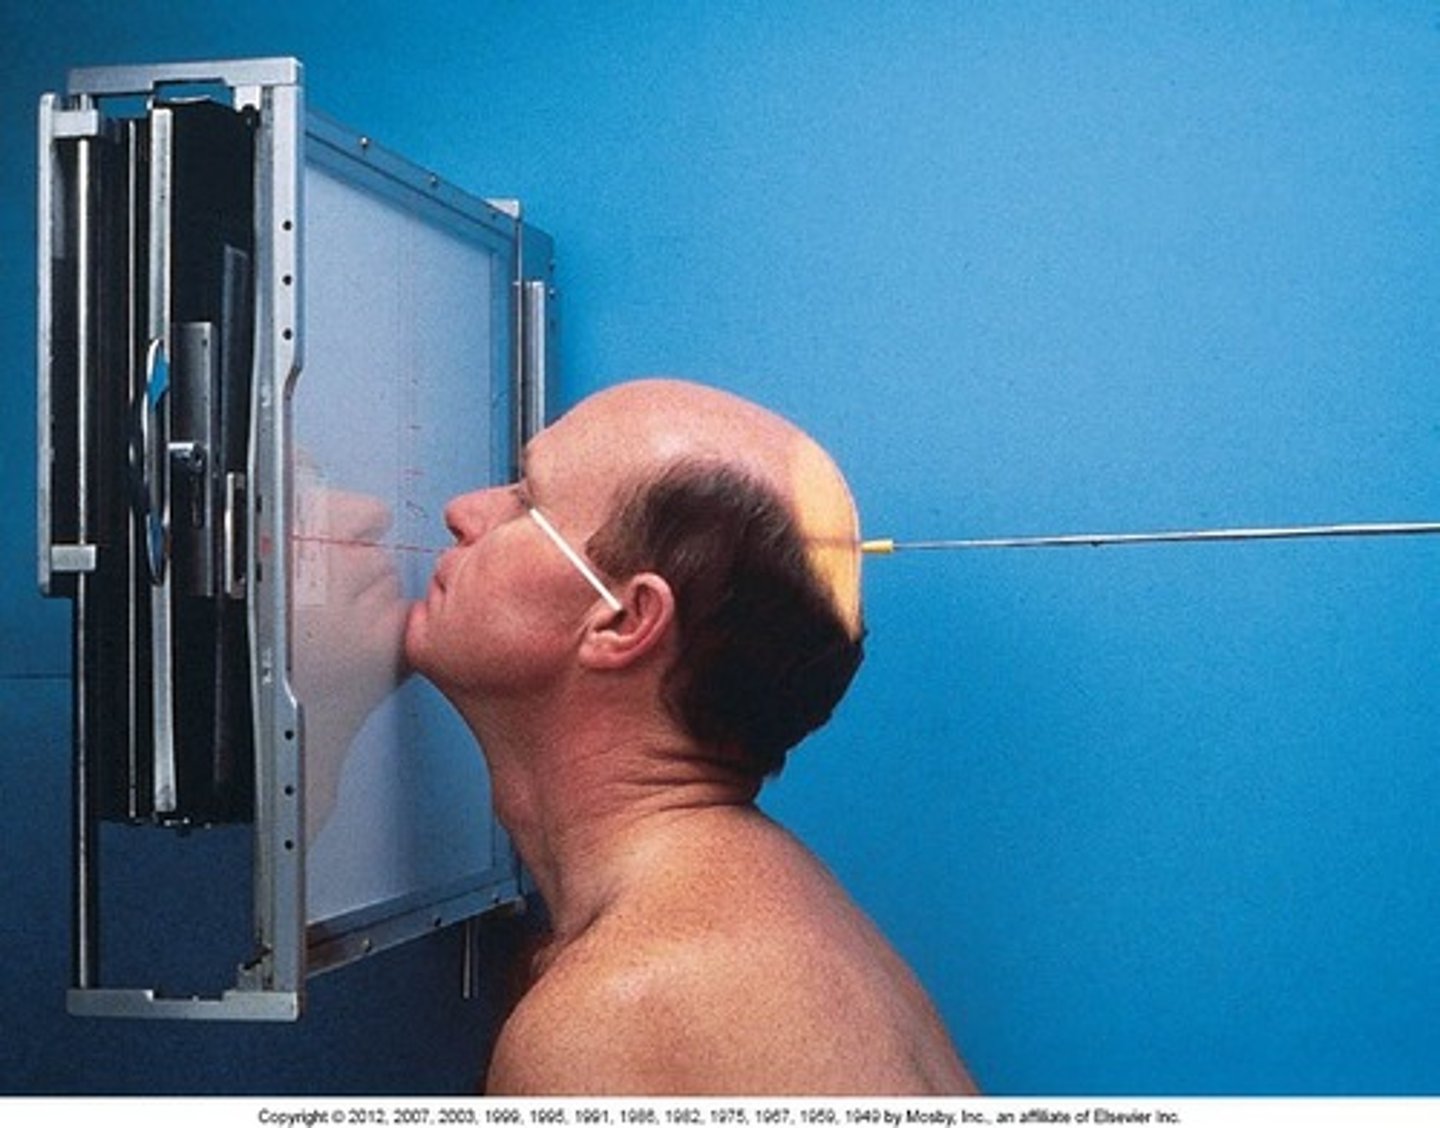
STAMPSBC for Rhese Facial Bones
S - around waist
T - center cell, 75 kVp
A - none
M - rt orbit= rt marker on rt side (opposite is true)
P - chin, cheek, and nose touching IR, AML perp, CR to downside orbit
S - 40"
B - hold
C - 10 by 12, L (collimate to 7 by 7)
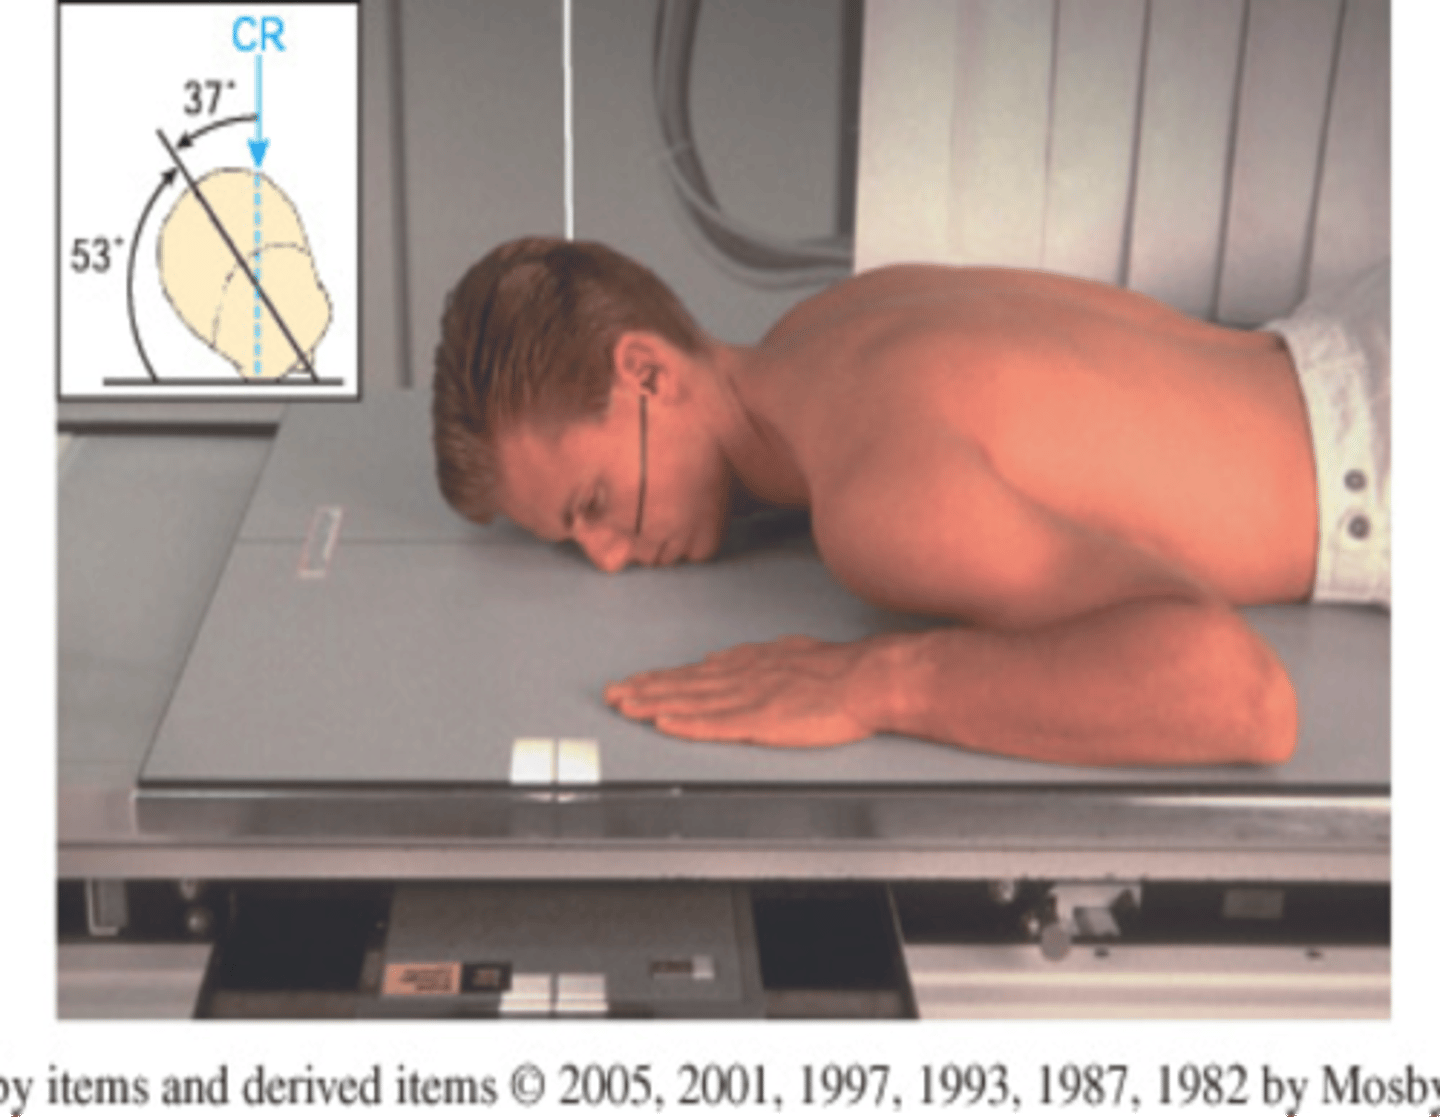
STAMPSBC for Tangential Zygoma Facial Bones
S - on lap
T - 6 mAs @ 60 kVp
A - none
M - correct side, top of film
P - start in SMV, IOML parallel, CR center of zygoma of interest, 15 degrees towards side of interest (rotation and tilt)
S - 40"
B - hold
C - 10 by 12 L, (collimate to 5 by 7)
STAMPSBC for Lateral Sinuses
S - around waist
T - center cell, 75 kVp
A - none
M - lt, front, bottom
P - IOML parallel, CR midway between outer canthus and EAM, at level of zygoma
S - 40"
B - hold
C - 8 by 10, L
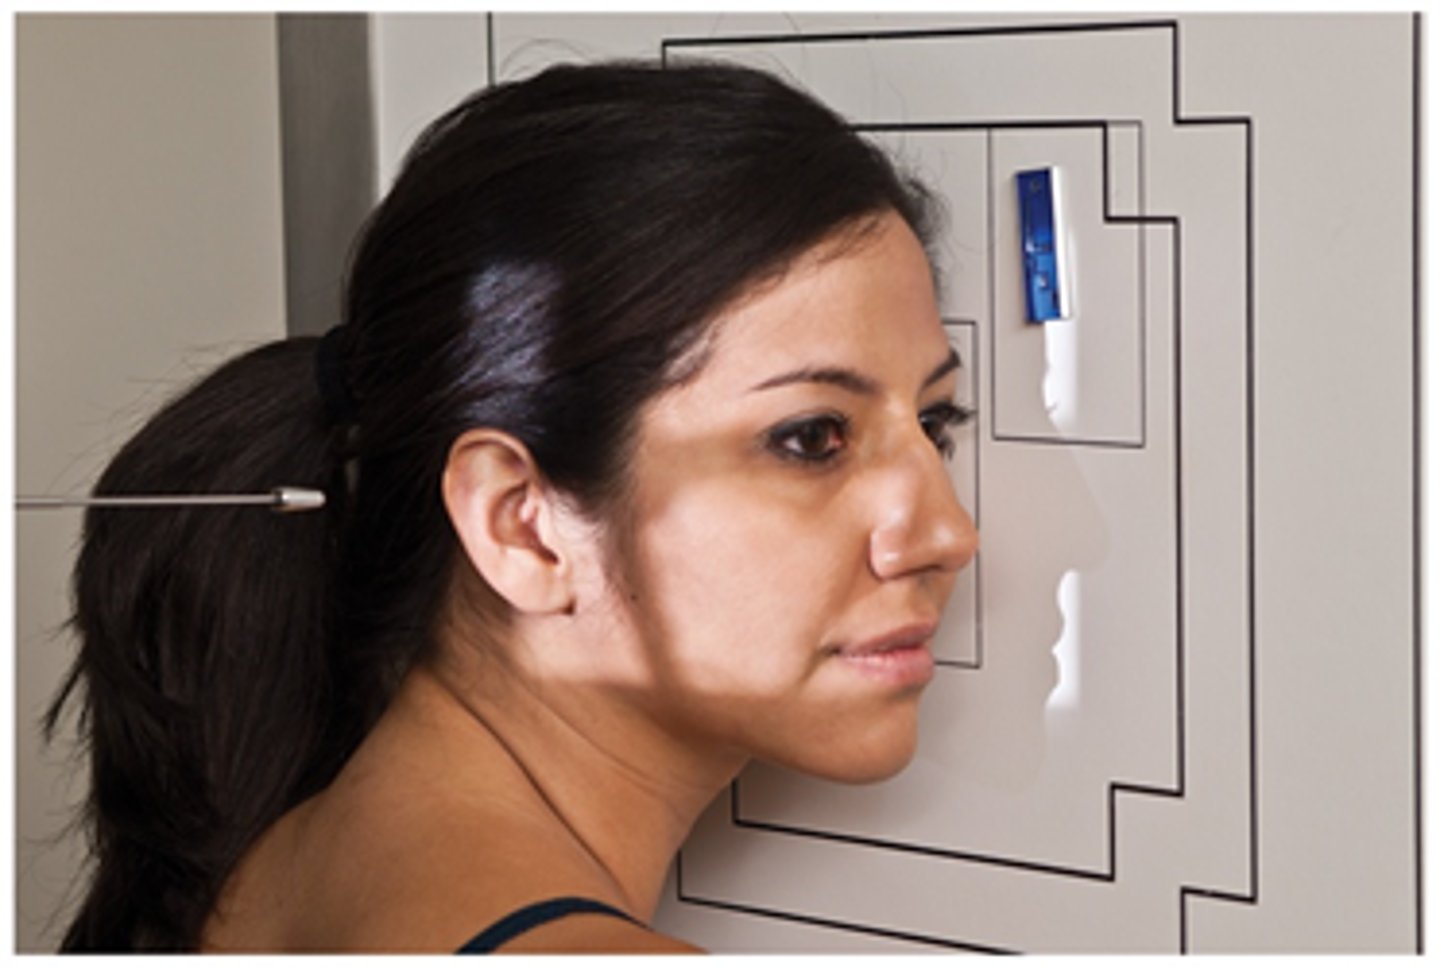
STAMPSBC for Waters Sinuses
S - around waist
T - center cell, 75 kVp
A - none
M - correct side, at the bottom
P - chin on board, MML perp, CR exits acanthion
S - 40"
B - hold
C - 8 by 10, L
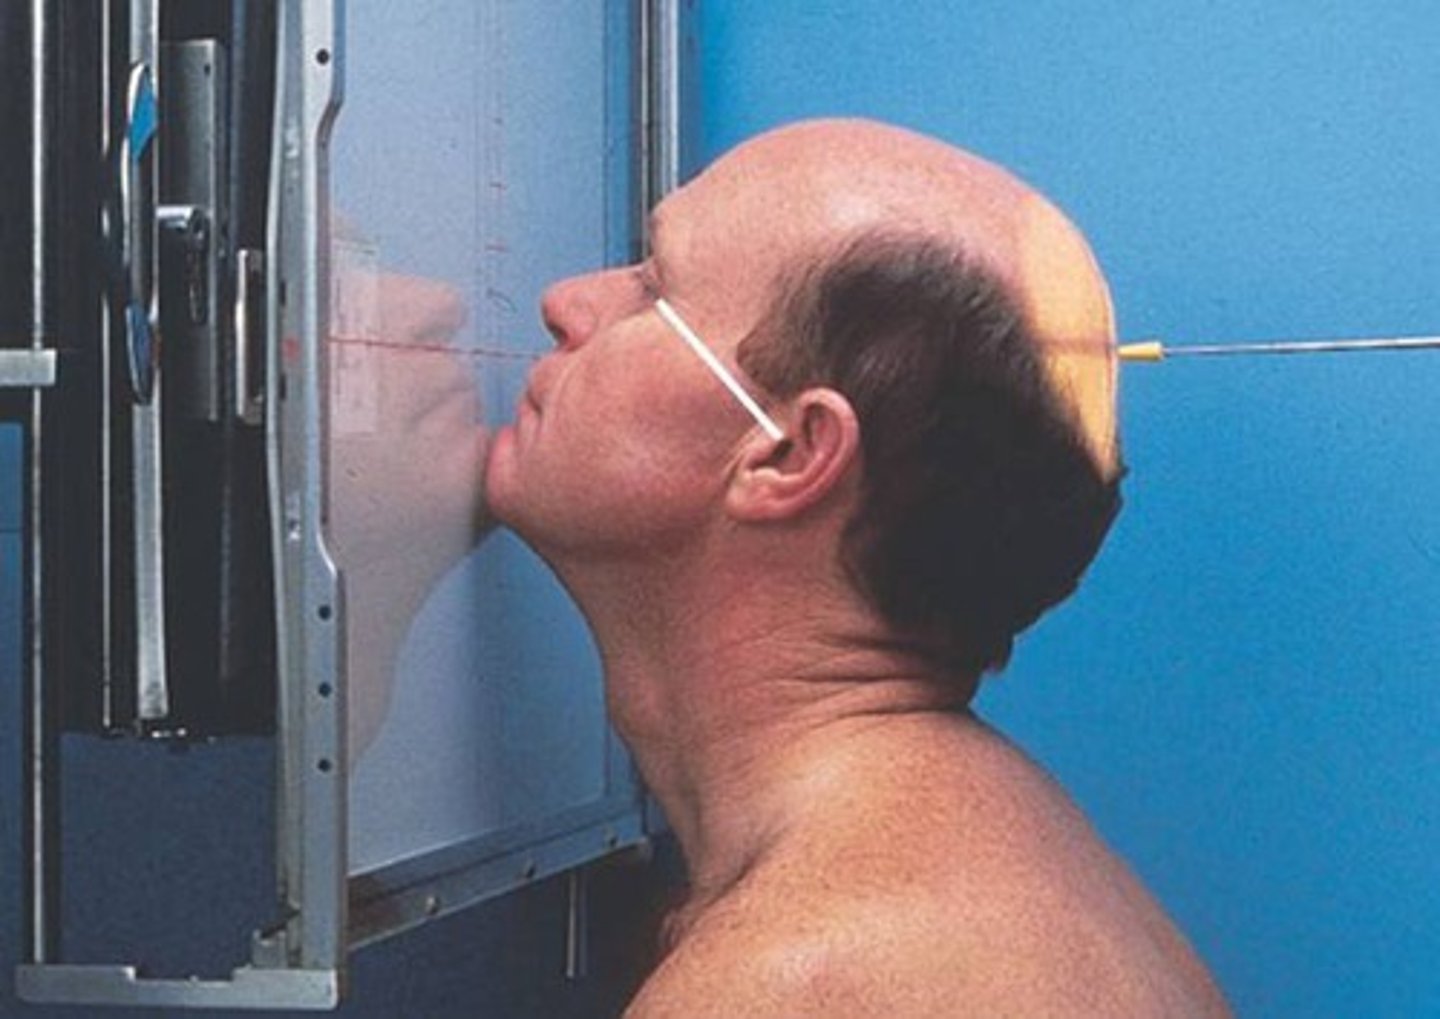
STAMPSBC for Caldwell Sinuses
S - around waist
T - center cell, 75 kVp
A - none
M - correct side, at the bottom
P - forehead to the board, CR exits nasion, line up AML and go down slightly (OML elevated 15 degrees perp)
S - 40"
B - hold
C - 8 by 10, L
STAMPSBC for SMV Sinuses
S - on lap
T - center cell @ 75 kVp
A - non
M - correct marker in top corner
P - IOML parallel w/ vertex to board, CR to level of gonions
S - 40"
B - suspension
C - 8 x 10 LW
STAMPSBC for Open Mouth Sinuses
S - around waist
T - center cell, 75 kVp
A - none
M - bottom, correct side
P - MML perp, CR exits acanthion, chin on board and then open mouth
S - 40"
B - hold
C - 8 by 10, L
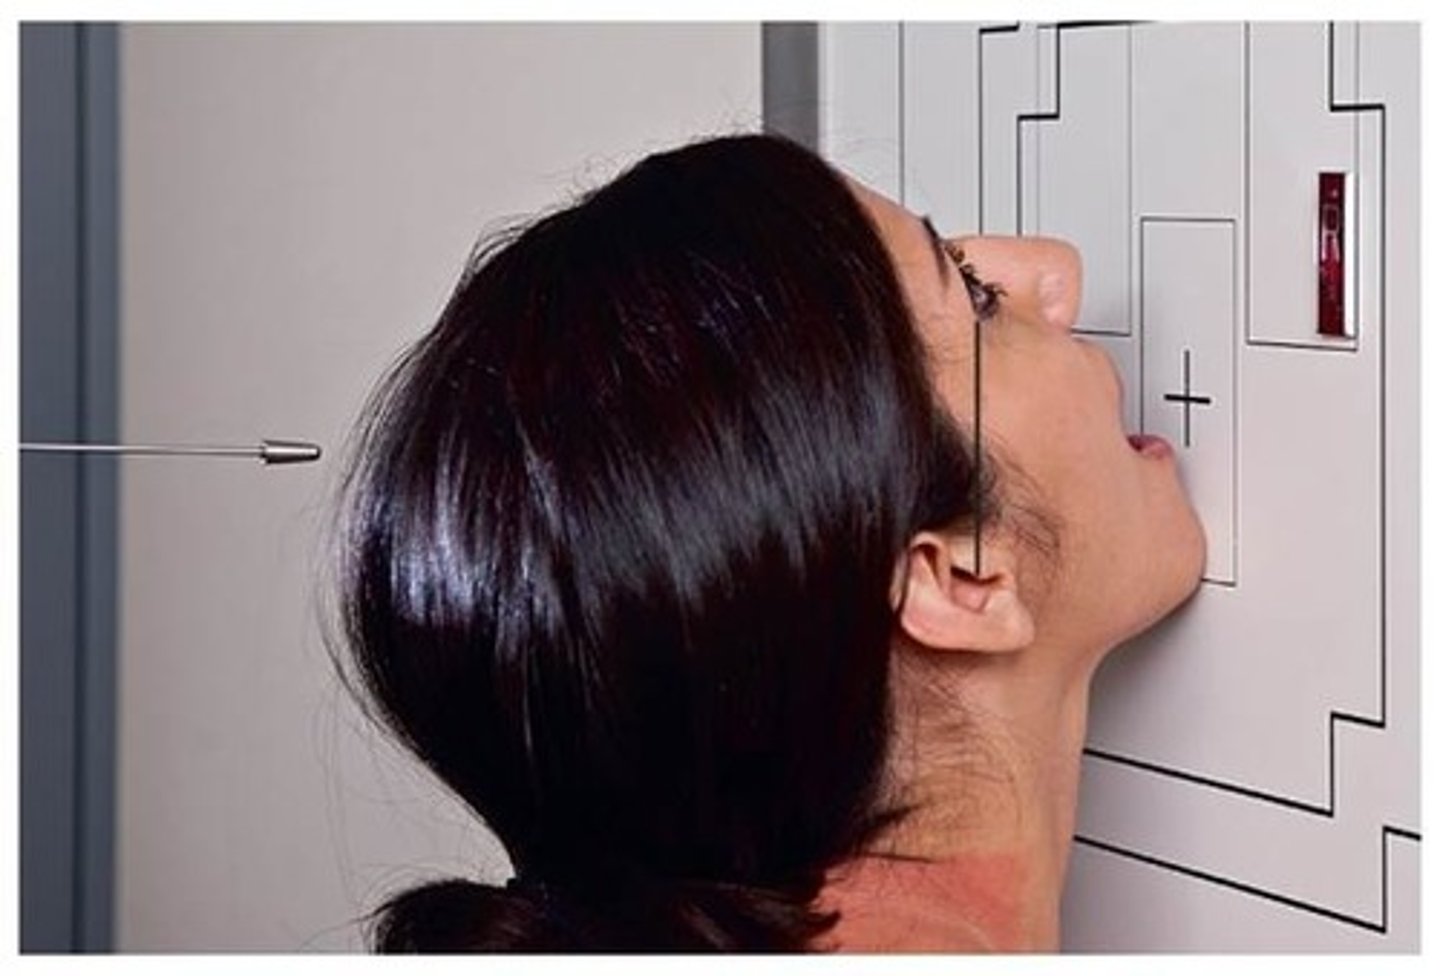
STAMPSBC for Lateral Cranium
S - shield the side farther from board
T - center cell @ 75 kVp
A - none
M - correct marker in front of PT by mandible
P - PT is side hugging bucky, IOML parallel w/ CR 2" above EAM
S - 40"
B - suspension
C - 10 x 12 crosswise
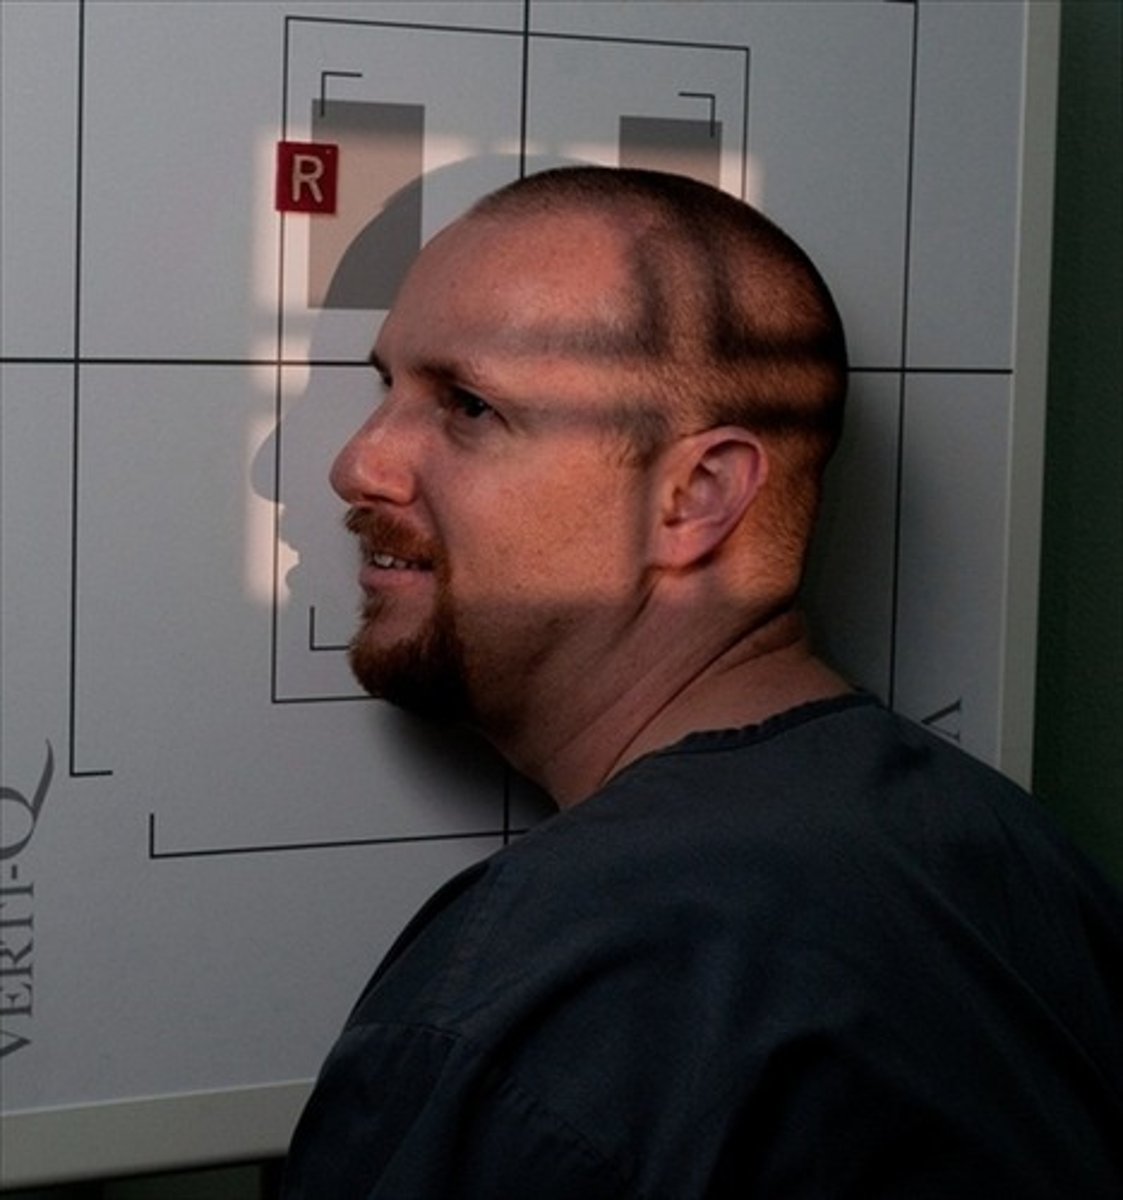
STAMPSBC for PA Cranium
S - shield over butt
T - center cell @ 75 kVp
A - none
M - correct marker in the bottom corner
P - PT has forehead on board, OML perp to bucky w/ beam exiting at the glabella
S - 40"
B - suspension
C - 10 x 12 lengthwise
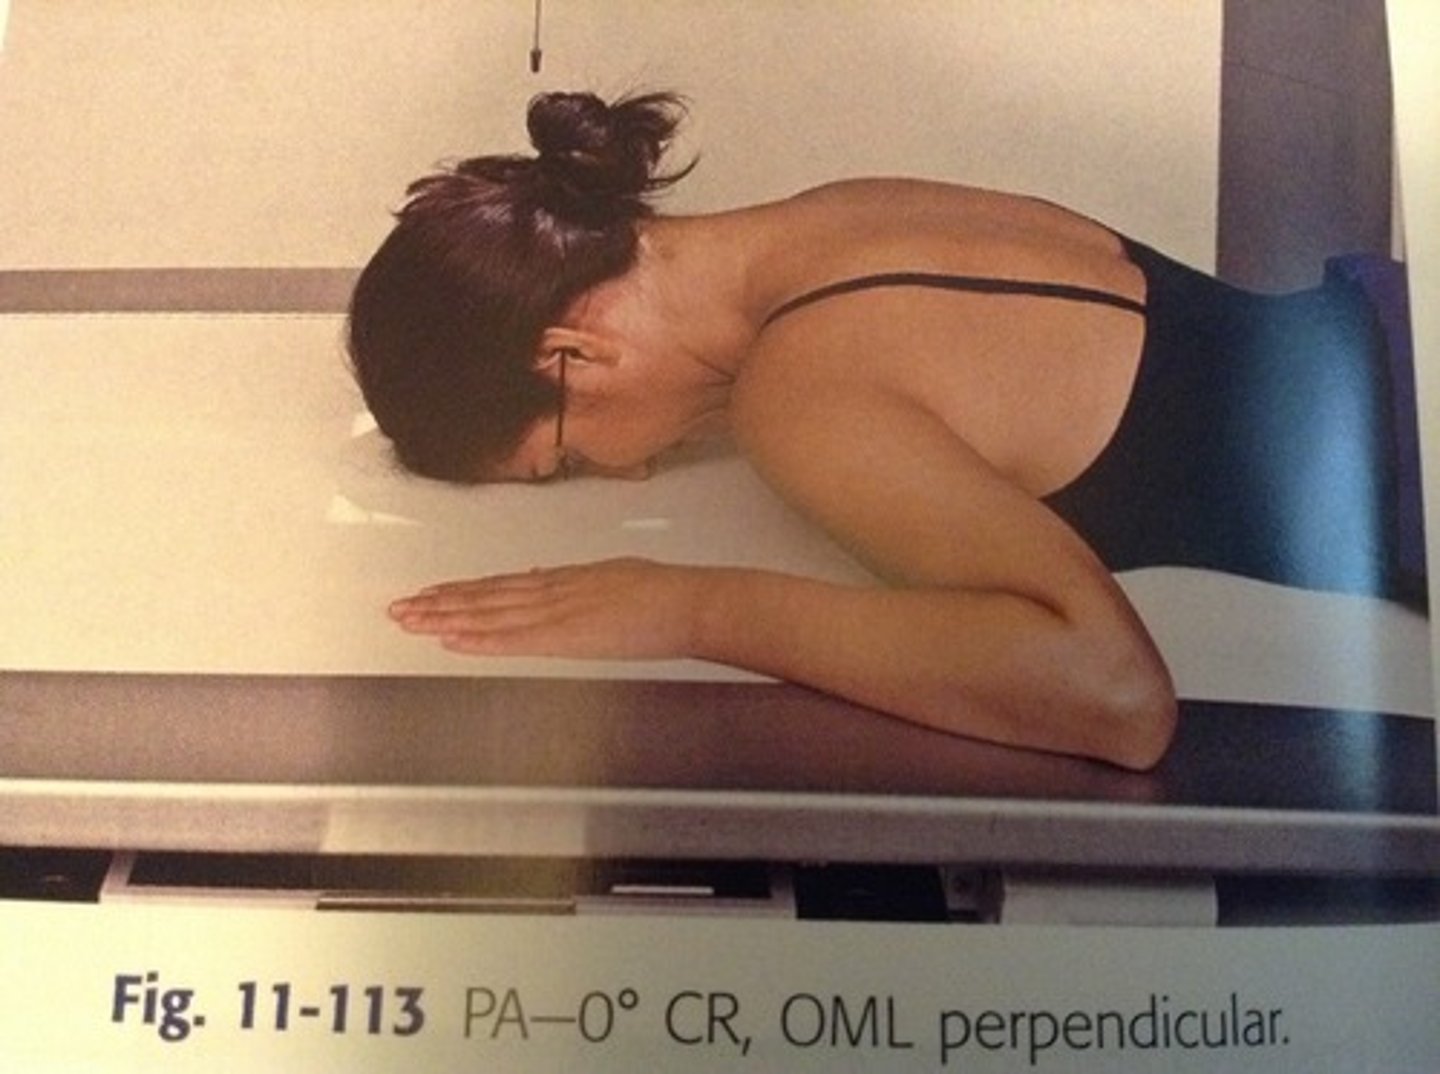
STAMPSBC for Towne Cranium
S - on lap
T - center cell @ 75 kVp
A - if using OML = 30 (from 90) caudad, IOML = 37 (from 90) caudad
M - correct marker in bottom corner
P - PT is sitting w/ CR 2 & 1/2" above glabella (starting point)
S - 40"
B - suspension
C - 10 x 12 lengthwise
STAMPSBC for SMV Cranium
S - shield over lap
T - center cell @ 75 kVp
A - none
M - correct marker in top corner
P - PT seated in front of bucky, IOML parallel w/ top of head against bucky, CR 3/4" above EAM
S - 40"
B - suspension
C - 10 x 12 lengthwise
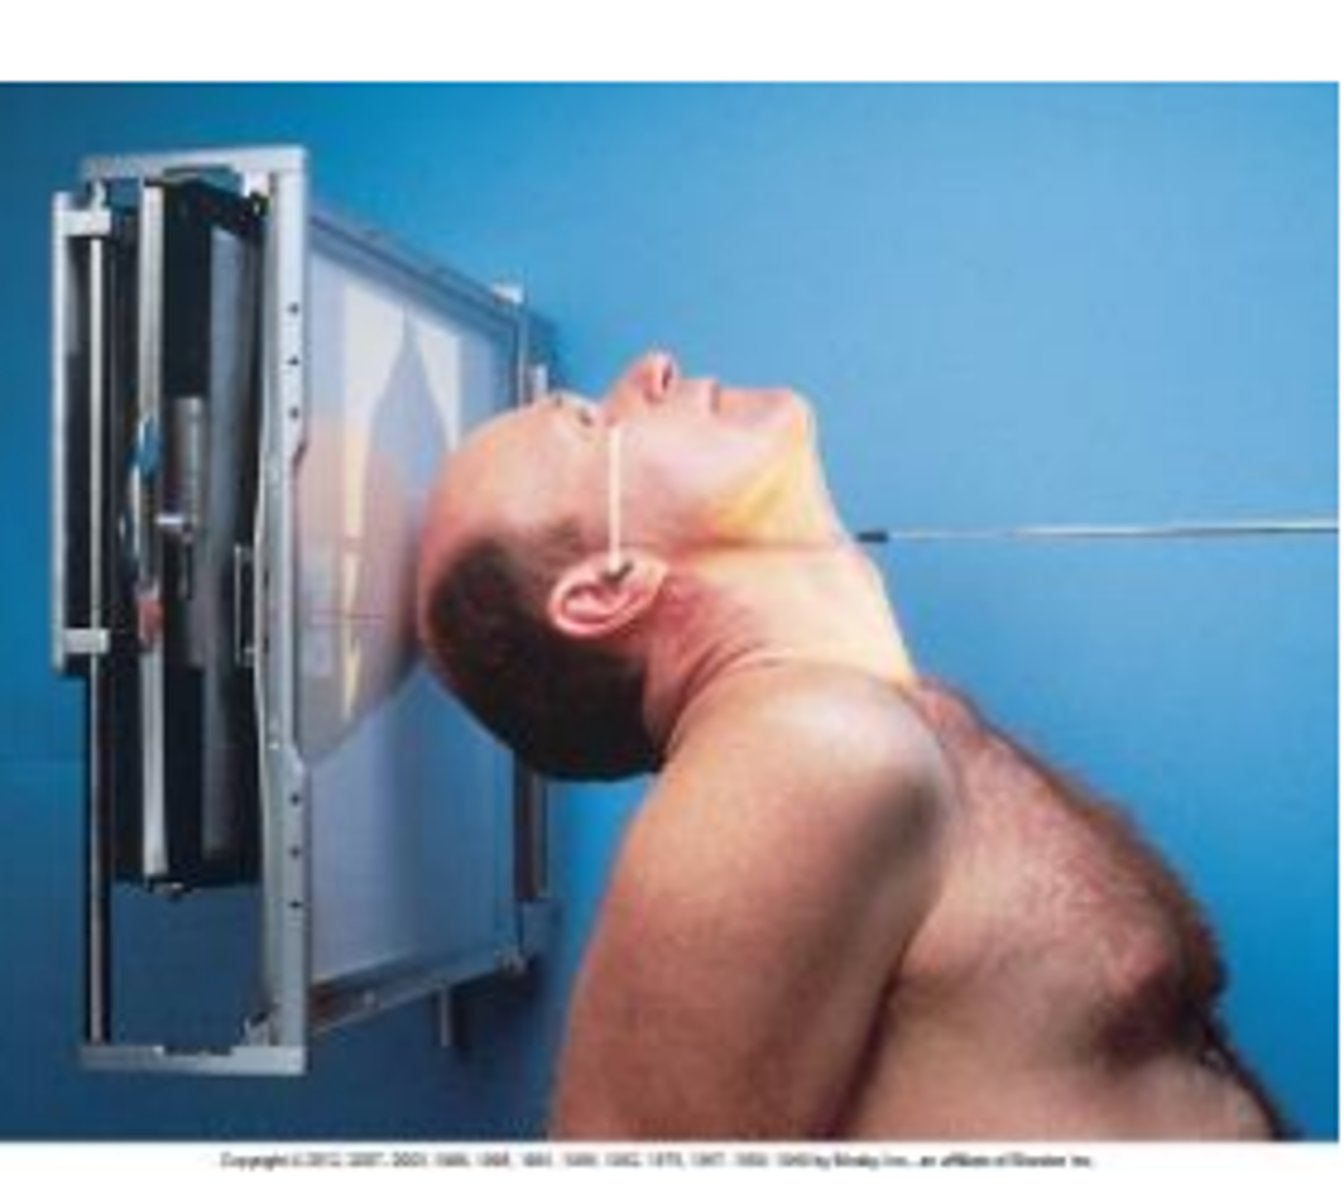
STAMPSBC for AP Axial C-spine
S - around waist
T - 18 mAs @ 75 kVp
A - 15 cephalic
M - correct marker by neck
P - PT AP w/ chin lifted slightly, CR C4-C5
S - 40"
B - suspension
C - 10 x 12 lengthwise, 8 x 10 collimation
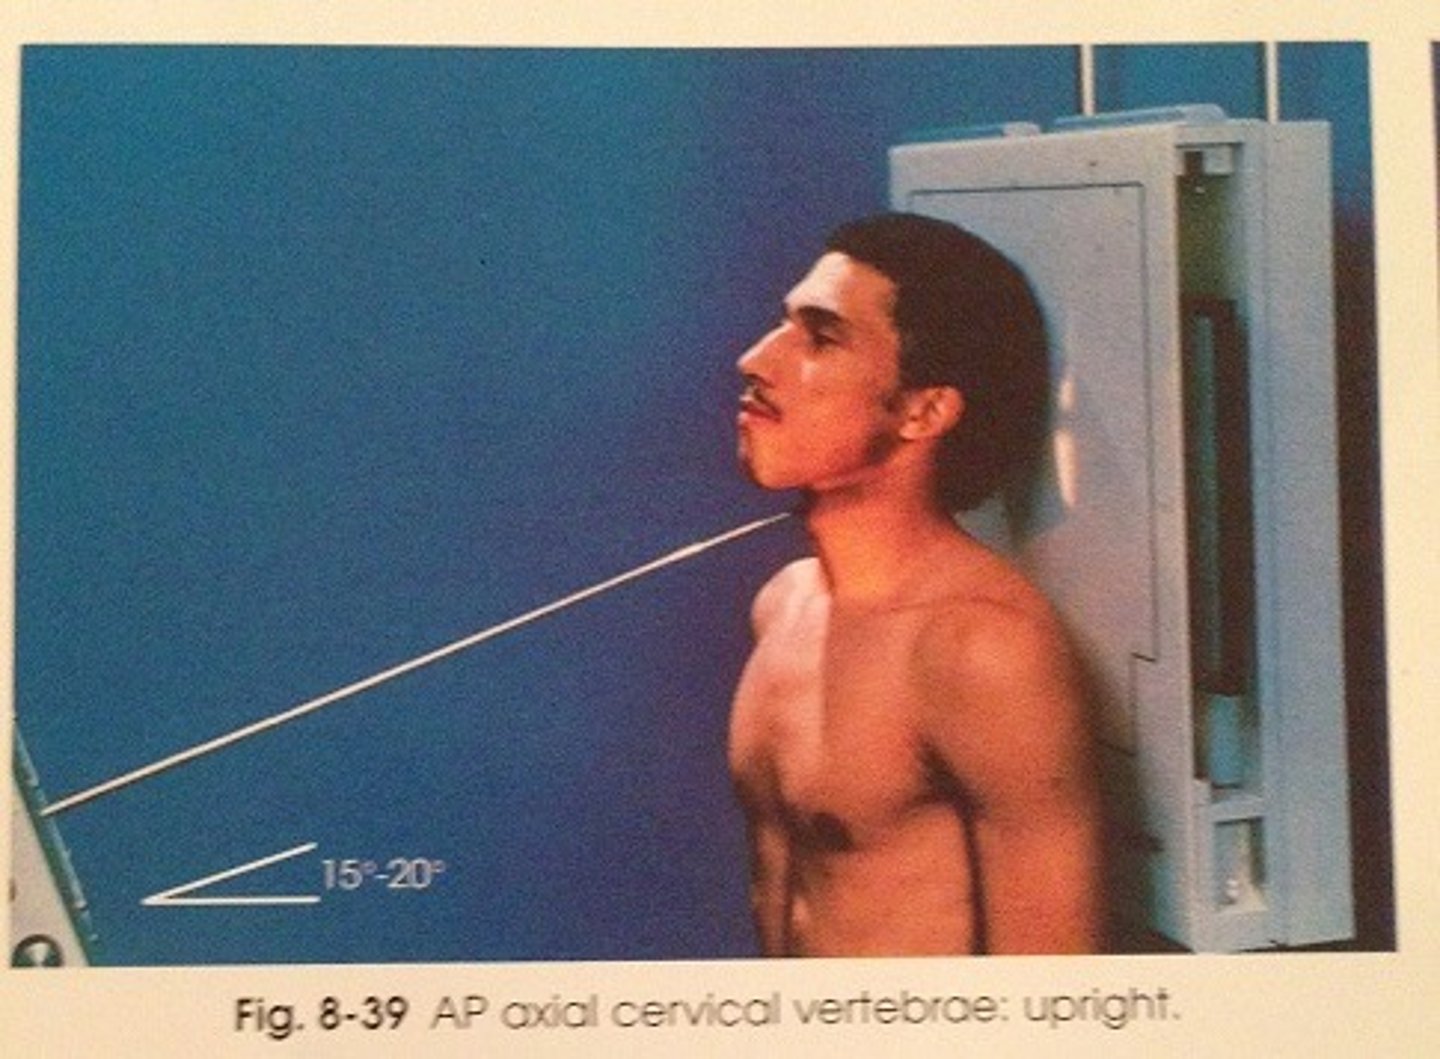
STAMPSBC for Open Mouth C-spine
S - around waist
T - 40 mAs @ 75 kVp
A - none
M - correct marker on correct side
P - back to board w/ base of skull & bottom of teeth lined up, CR center of mouth
S - 40"
B - suspension
C - 10 by 12
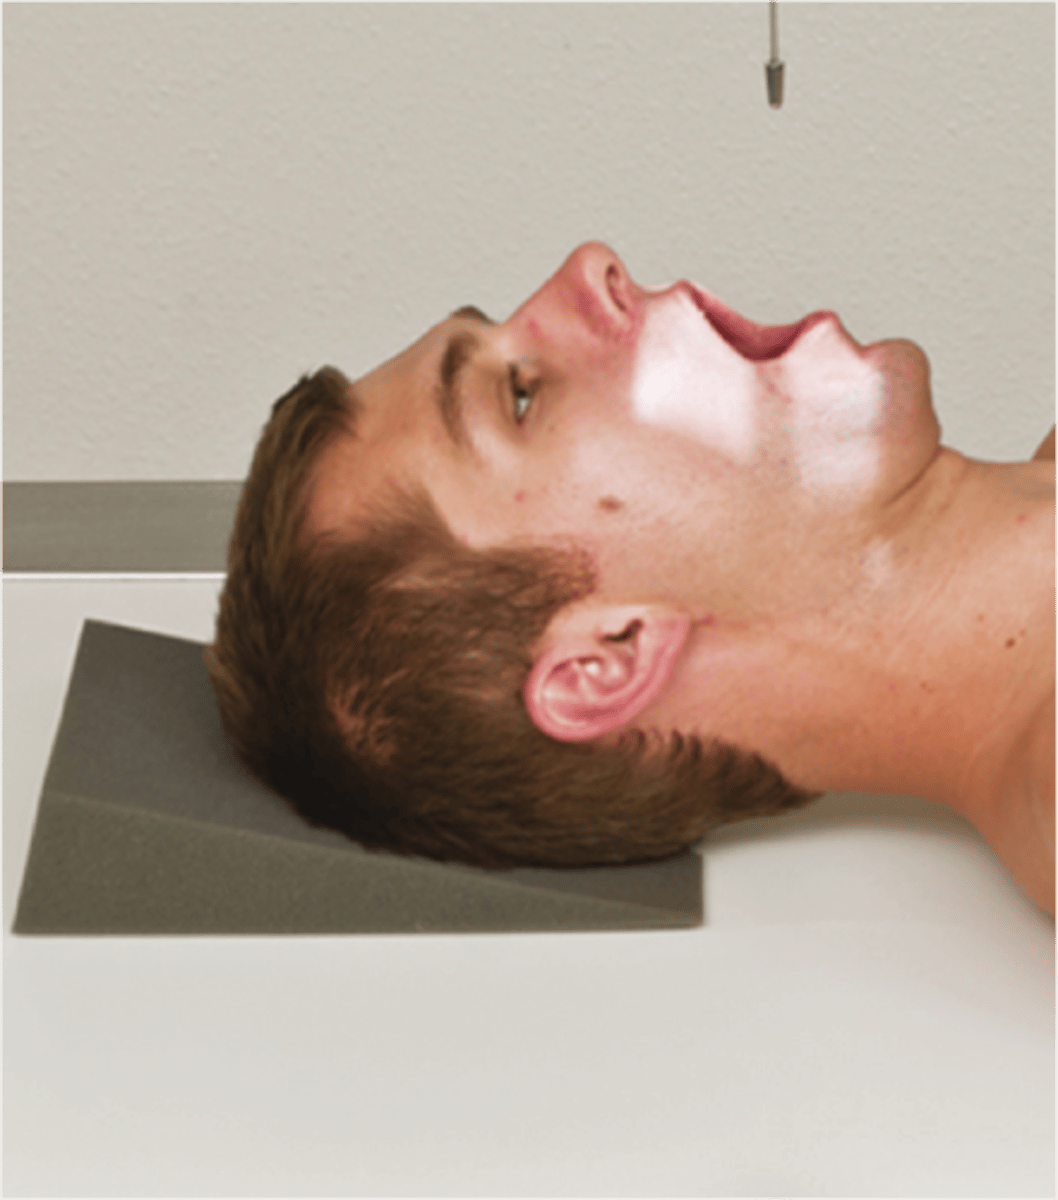
STAMPSBC for Lateral C-spine
S - around waist
T - 25 mAs @ 75 kVp
A - none
M - L marker in front of PT
P - L side to bucky w/ chin lifted slightly & shoulders relaxed, CR @ C4-C5
S - 72"
B - expiration
C - 10 x 12 lengthwise
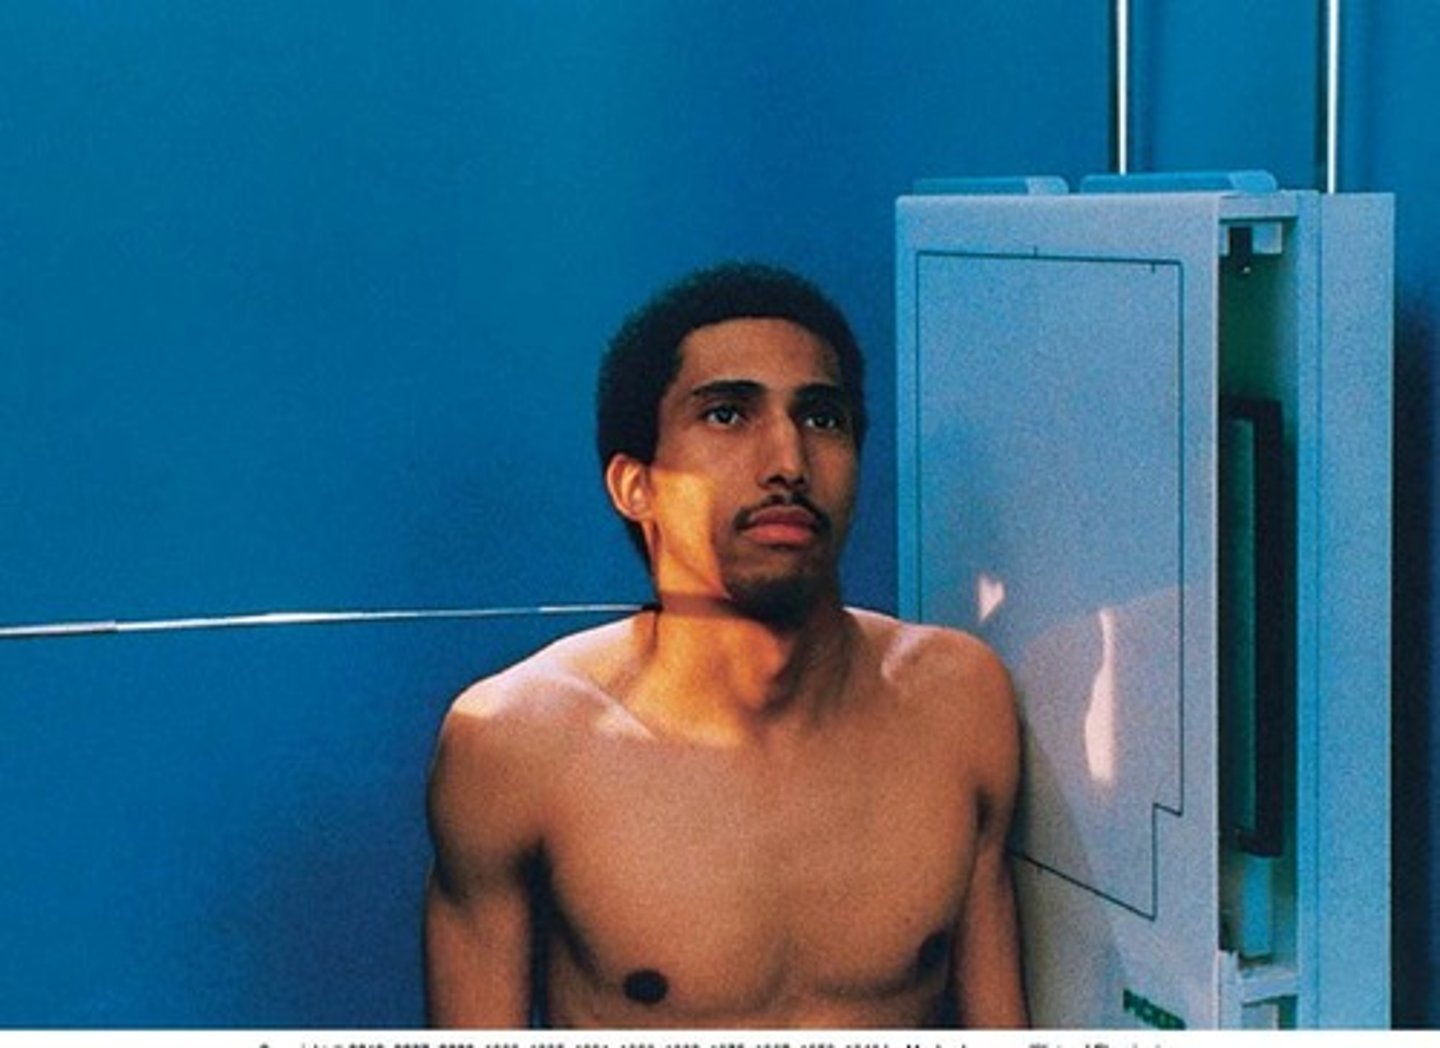
STAMPSBC for Oblique C-spine
S - around waist
T - 25 mAs @ 75 kVp
A - 15 cephalic
M - correct marker by neck shadow
P - PT is 45 degrees w/ chin lifted slightly, CR C4-C5
S - 72"
B - suspension
C - 10 x 12 lengthwise
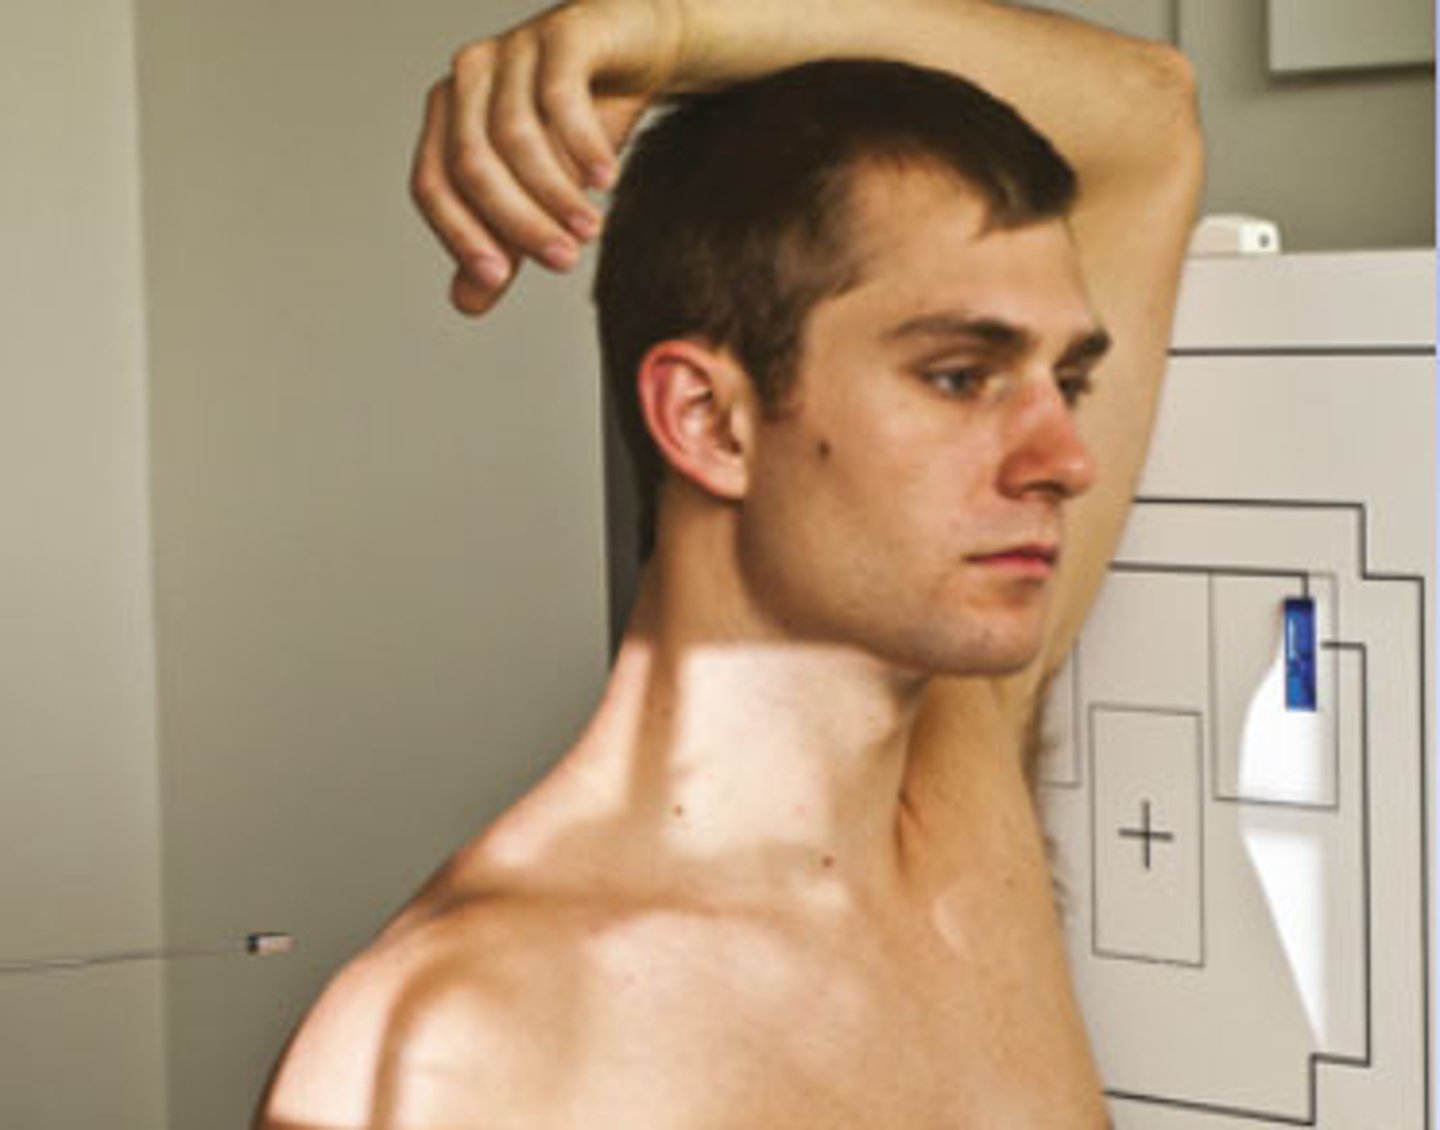
STAMPSBC for Swimmers Cervico-Thoracic
S - around waist
T - 120 mAs @ 80 kVp
A - none
M - L marker in front of PT
P - L side to bucky w/ arm closest above head, CR 1" above jug notch
S - 72"
B - expiration
C - 14 x 17 lengthwise
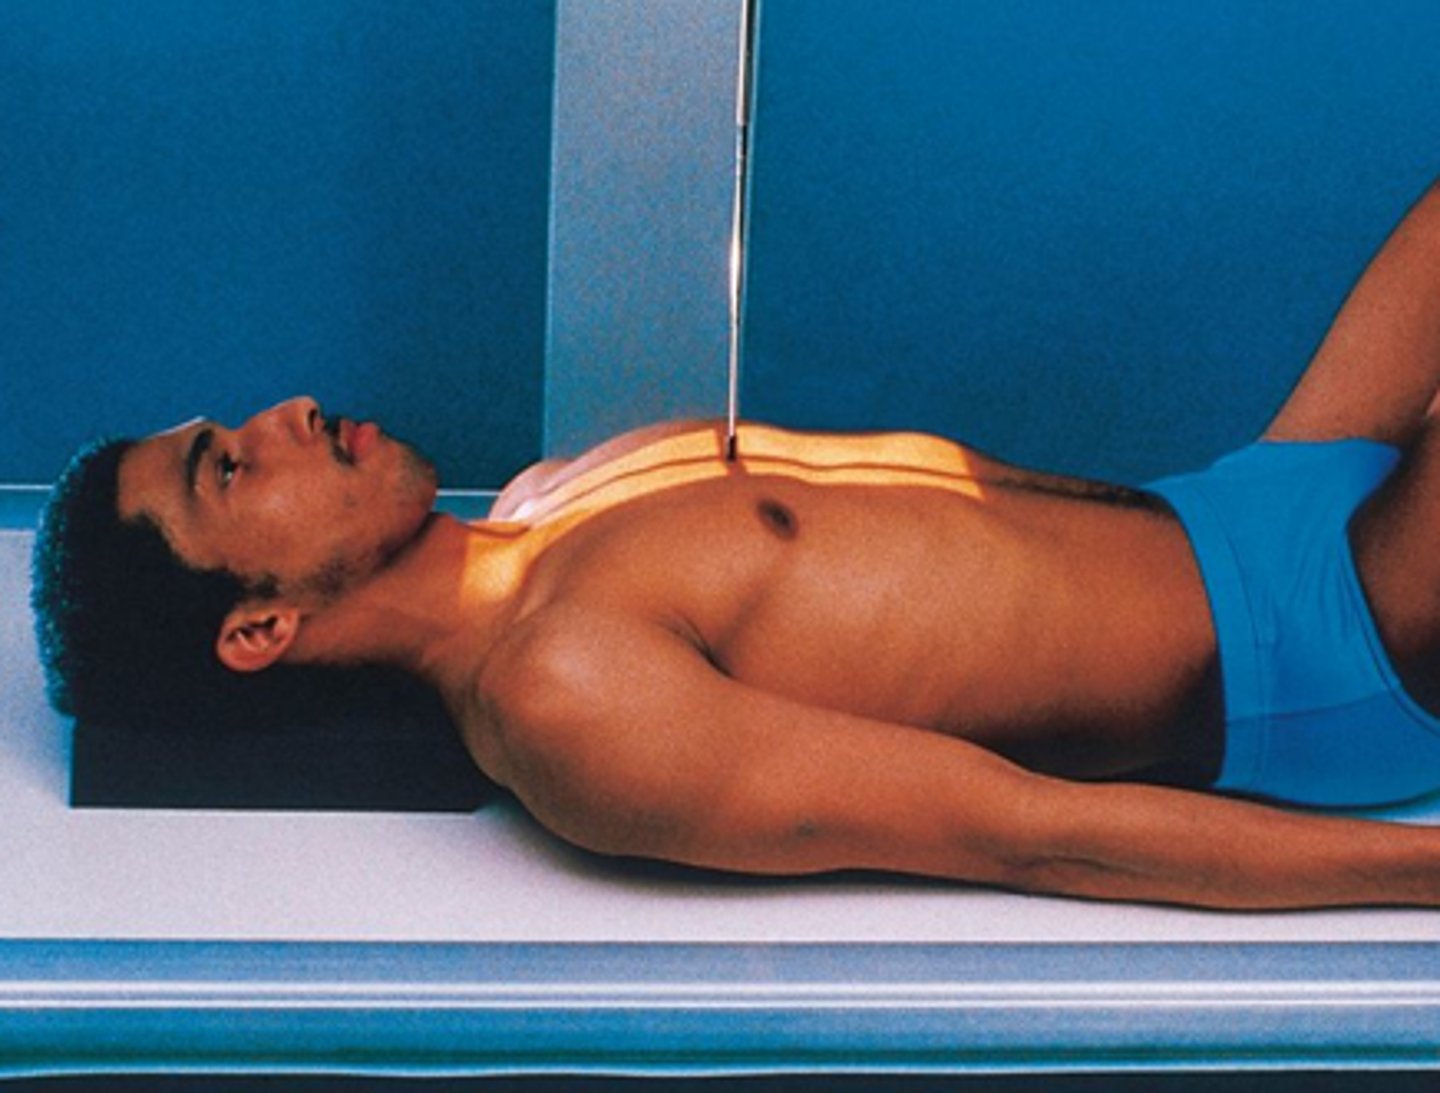
STAMPSBC for AP T-spine
S - on lap
T - 12 mAs @ 75 kVp
A - none
M - marker on cassette in collimated light field
P - on back w/ knees bent, pillow ONLY under head, CR T7
S - 40"
B - suspend after expiration
C - 14 x 17 lengthwise, can collimate side to side
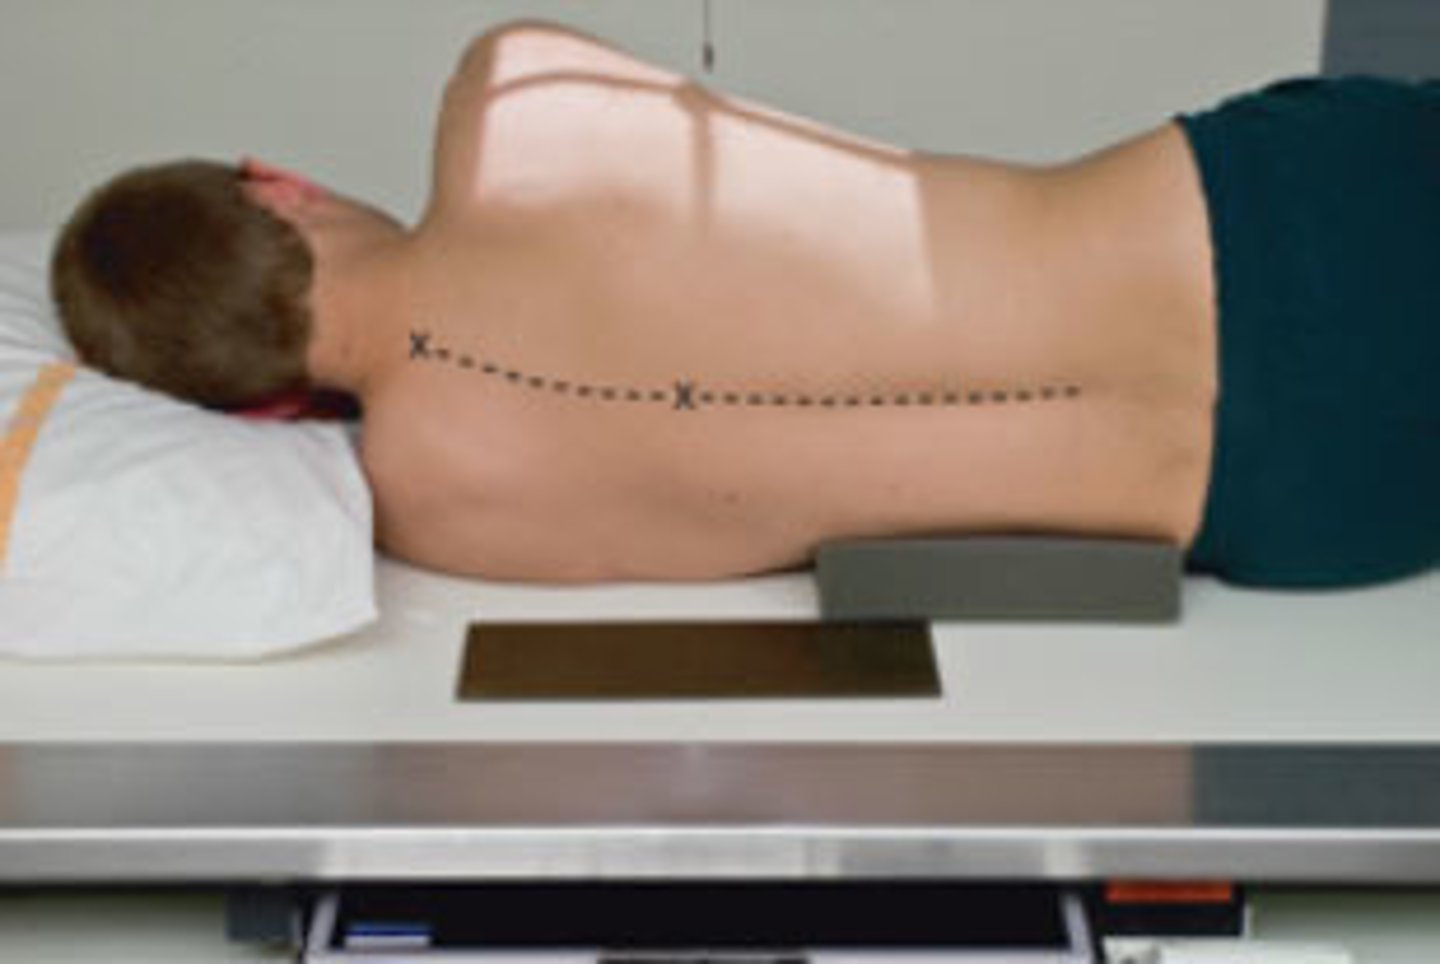
STAMPSBC for Lateral T-spine
S - over hip
T - 40 mAs @ 80 kVp
A - none
M - L marker in front of PT
P - PT on L side w/ sponge & lead blocker, CR T7 & back 1" from midcoronal plane
S - 40"
B - orthostatic
C - 14 x 17 lengthwise, can collimate in side to side
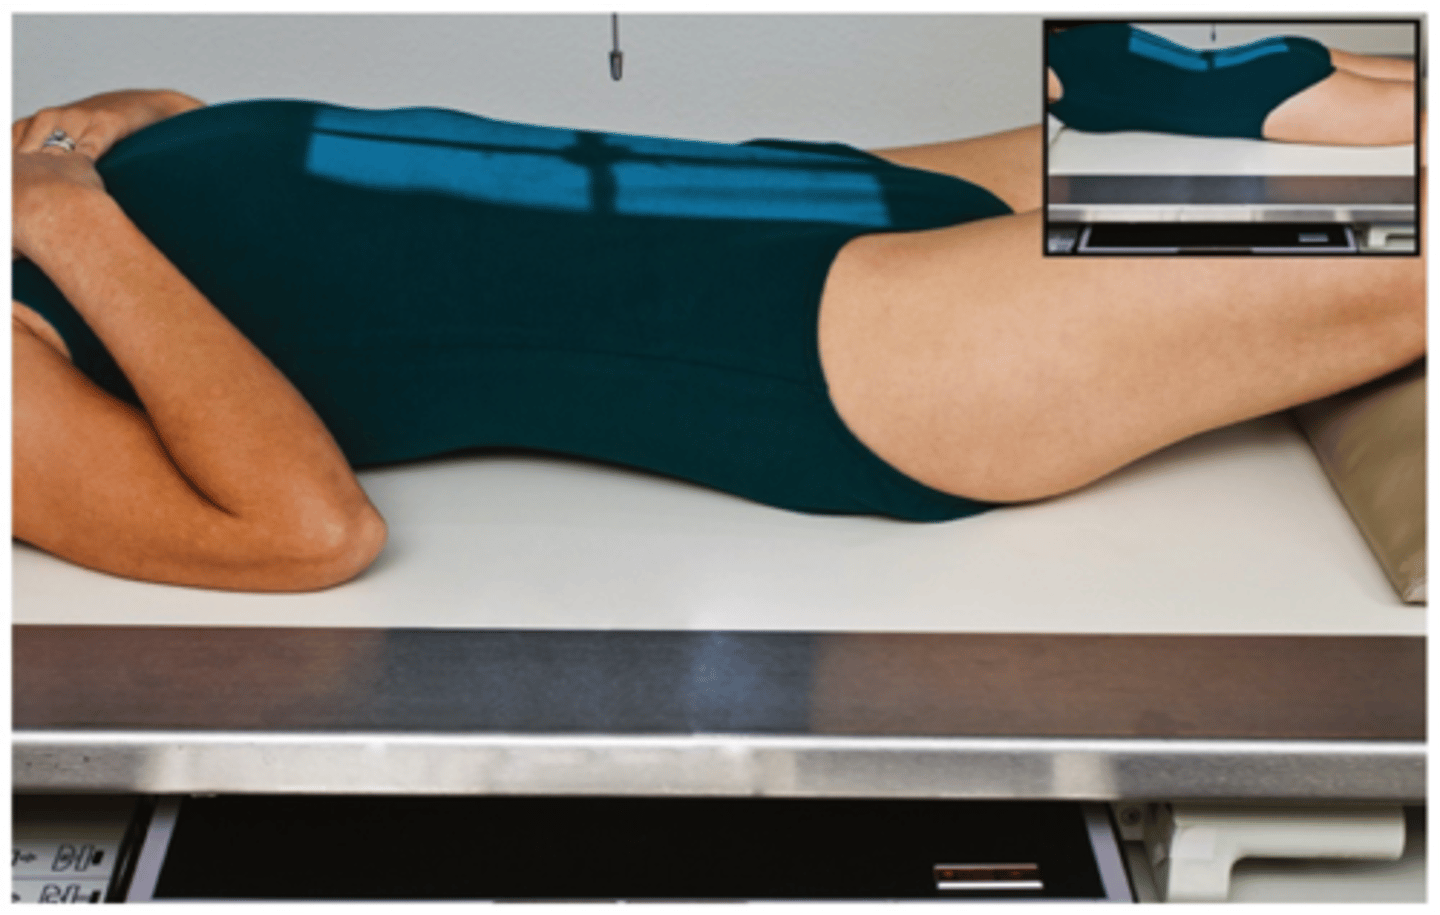
STAMPSBC for AP L-spine
S - none
T - 30 mAs @ 75 kVp
A - none
M - marker on cassette
P - PT supine w/ knees bent, CR @ crest & midline
S - 40"
B - expiration
C - 10 by 17, L
STAMPSBC for RPO L-spine
S - none
T - 40 mAs @ 80 kVp
A - none
M - correct marker on correct side
P - PT rolled 45 degrees to R side w/ upside arm over chest, CR @ crest & 2" in from ASIS
S - 40"
B - expiration
C - 14 by 17, L
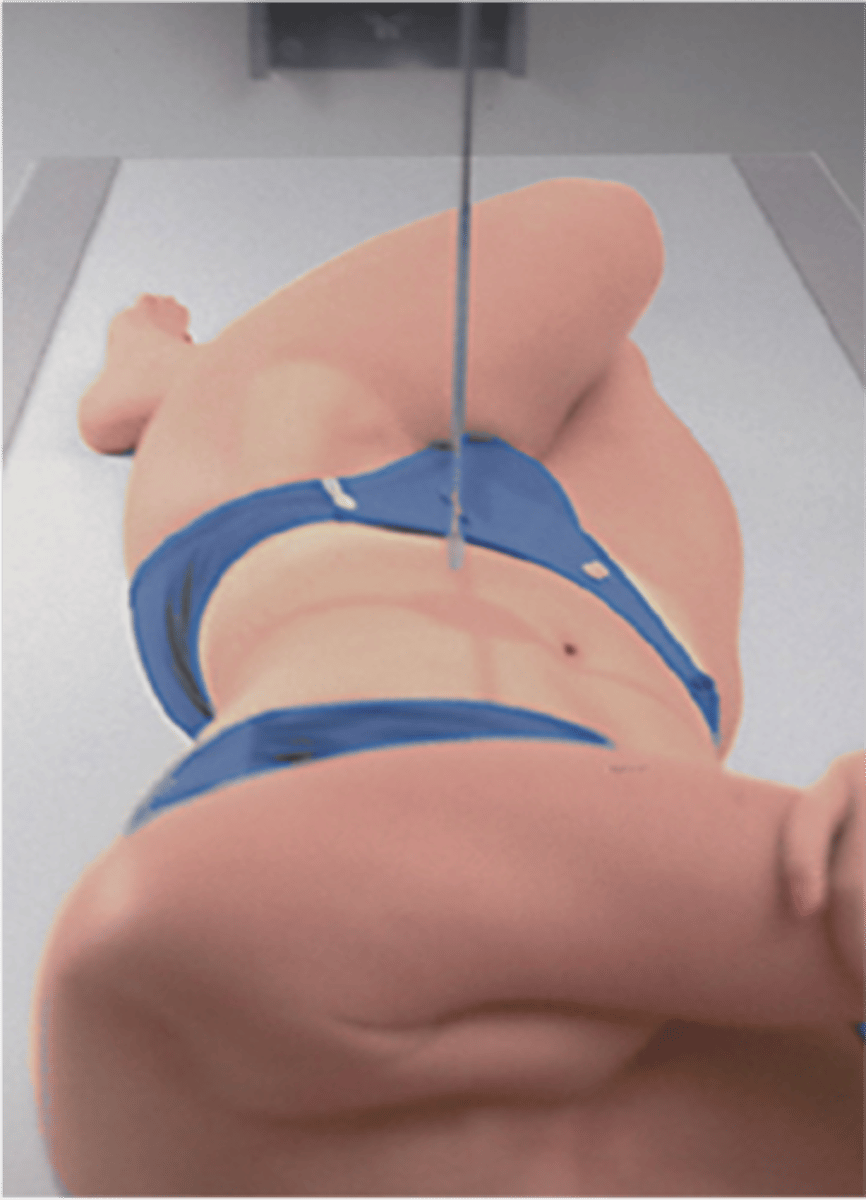
STAMPSBC for LPO L-spine
S - none
T - 40 mAs @ 80 kVp
A - none
M - correct marker on correct side
P - PT rolled 45 degrees to L side w/ upside arm over chest, CR @ crest & 2" in from upside ASIS
S - 40"
B - expiration
C - 14 by 17, L
STAMPSBC for Lateral L-spine
S - none
T - 50 mAs @ 85 kVp
A - none
M - L marker in front of PT
P - PT on L side w/ sponge & lead blocker, CR @ crest & back 1" from midcoronal plane
S - 40"
B - expiration
C - 14 x 17 lengthwise
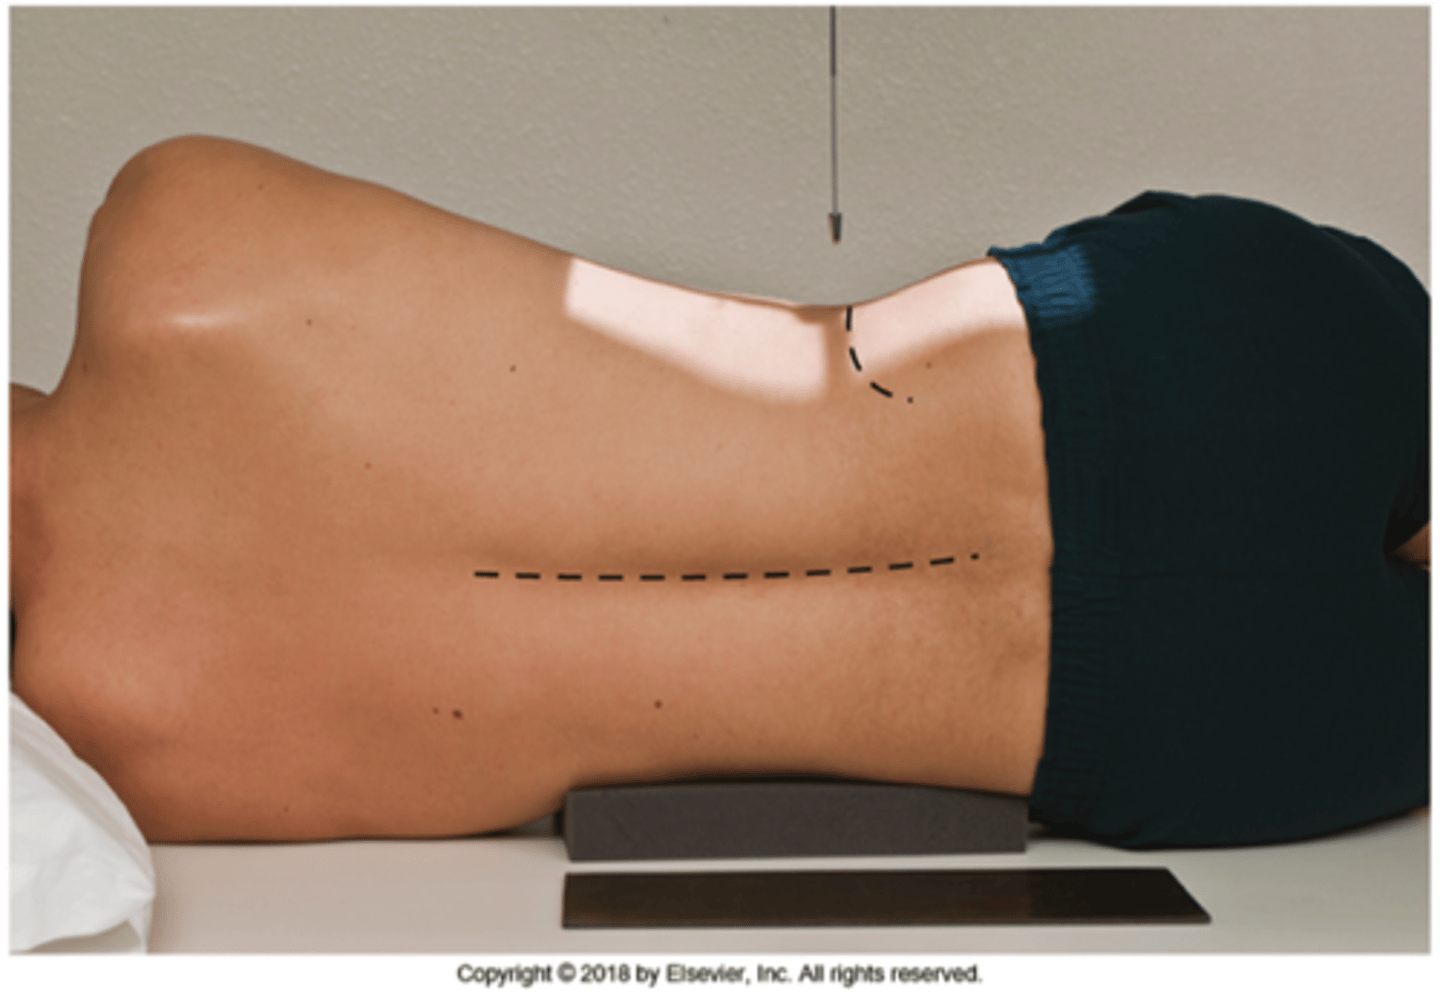
STAMPSBC for L5-S1 Lateral Spot L-spine
S - none
T - 50 mAs @ 85 kVp
A - none
M - L marker in front of Pt
P - PT on L side w/ sponge & lead blocker, CR 2" below crest & 2" back from ASIS
S - 40"
B - expiration
C - 10 x 12 lengthwise
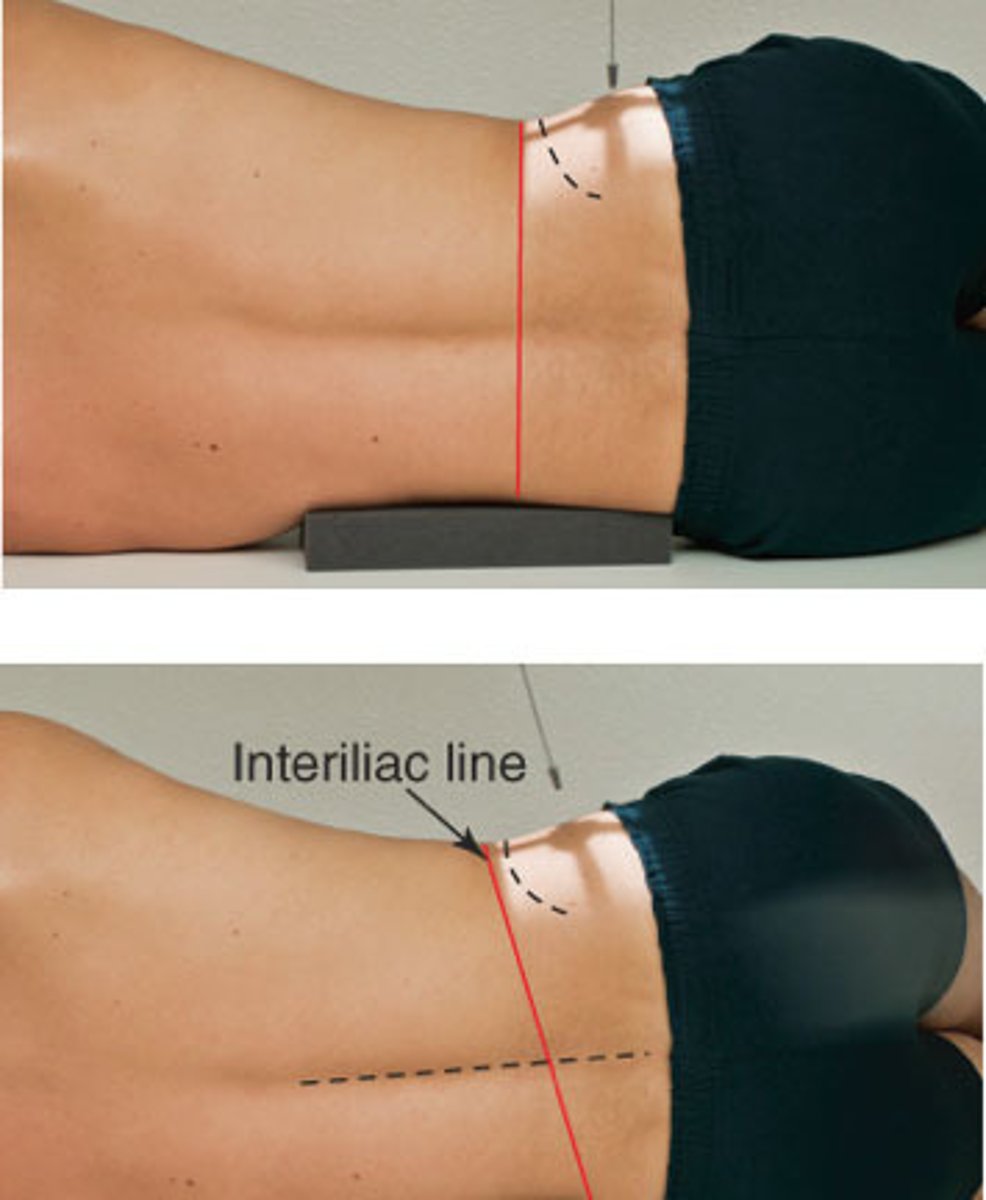
STAMPSBC for AP Axial Sacrum
S - none
T - 30 mAs @ 75 kVp
A - 15 degrees cephalic
M - correct marker on cassetee
P - PT supine w/ CR 2" below ASIS
S - 40"
B - expiration
C - 10 x 12 lengthwise
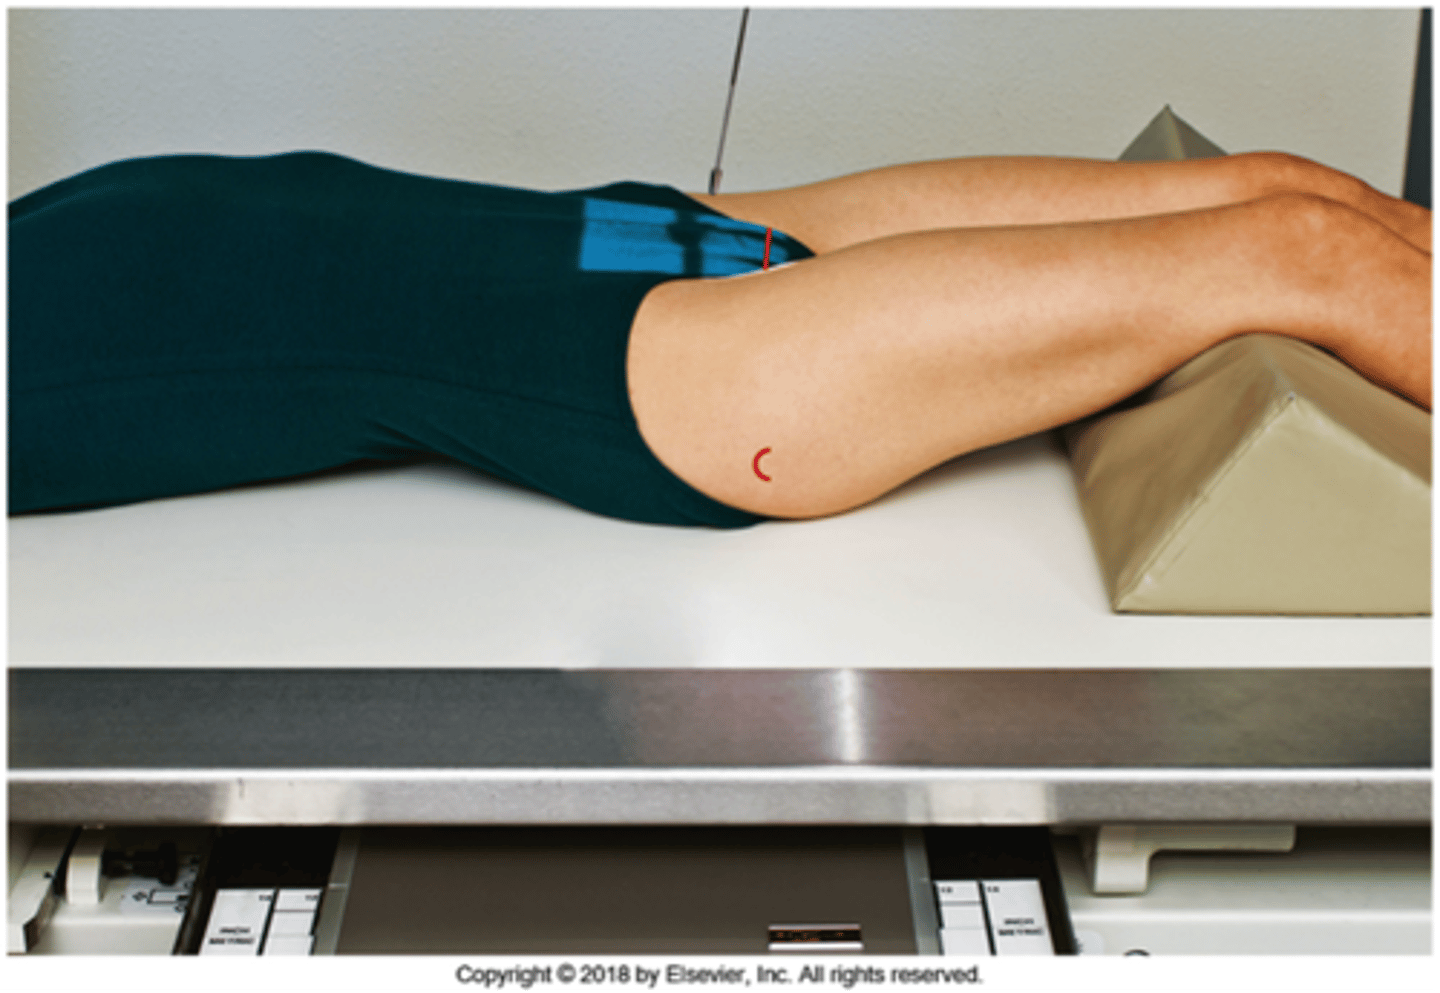
STAMPSBC for Lateral Sacrum/Coccyx
S - none
T - 50 mAs @ 85 kVp
A - no angle
M - L marker in front of PT
P - PT on L side w/ sponge & lead blocker, CR 3-4" posterior to ASIS (for coccyx go down 2" too)
S - 40"
B - expiration
C - 10 x 12 lengthwise
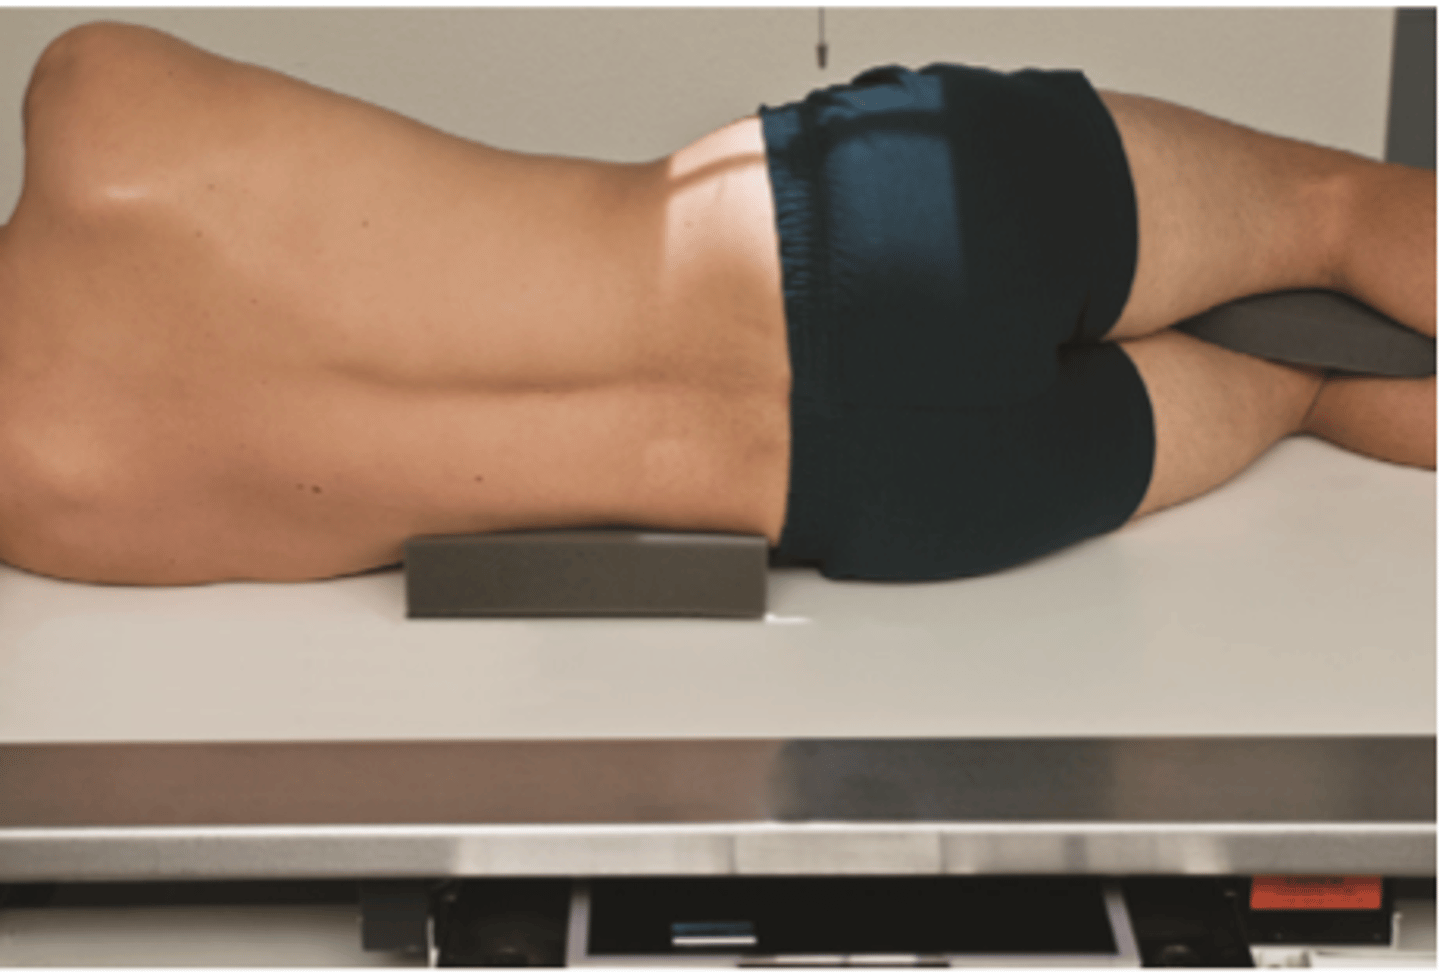
STAMPSBC for AP Axial Coccyx
S - none
T - 30 mAs @ 75 kVp
A - 10 degrees caudad
M - correct marker in lightfield
P - supine, CR 2" below ASIS
S - 40"
B - expiration
C - 10 x 12 lengthwise, collimate 7x7
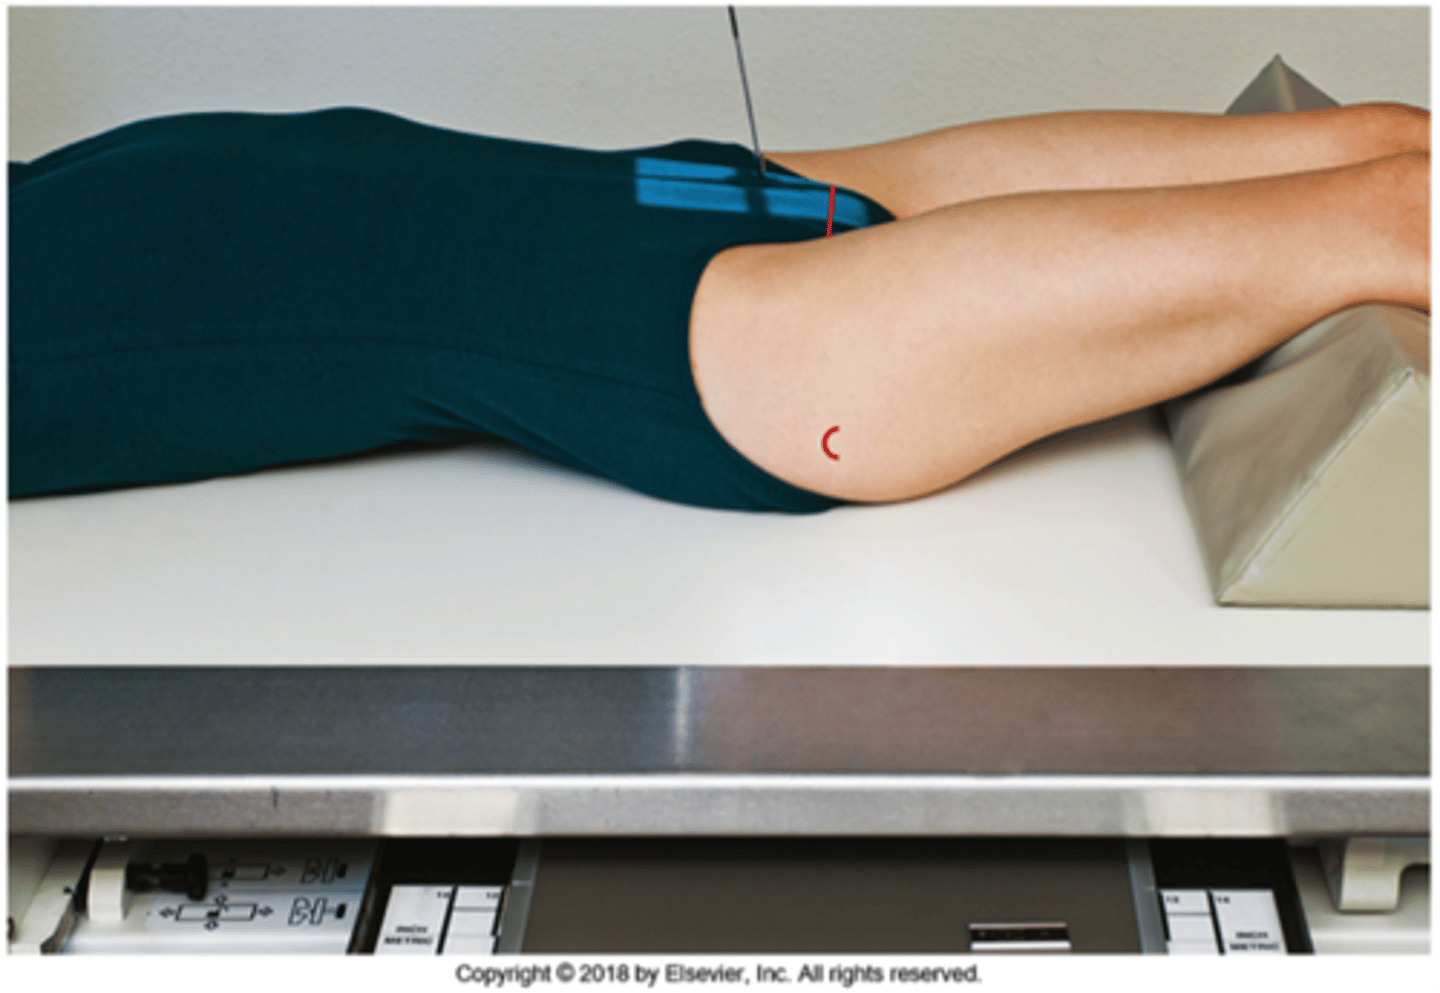
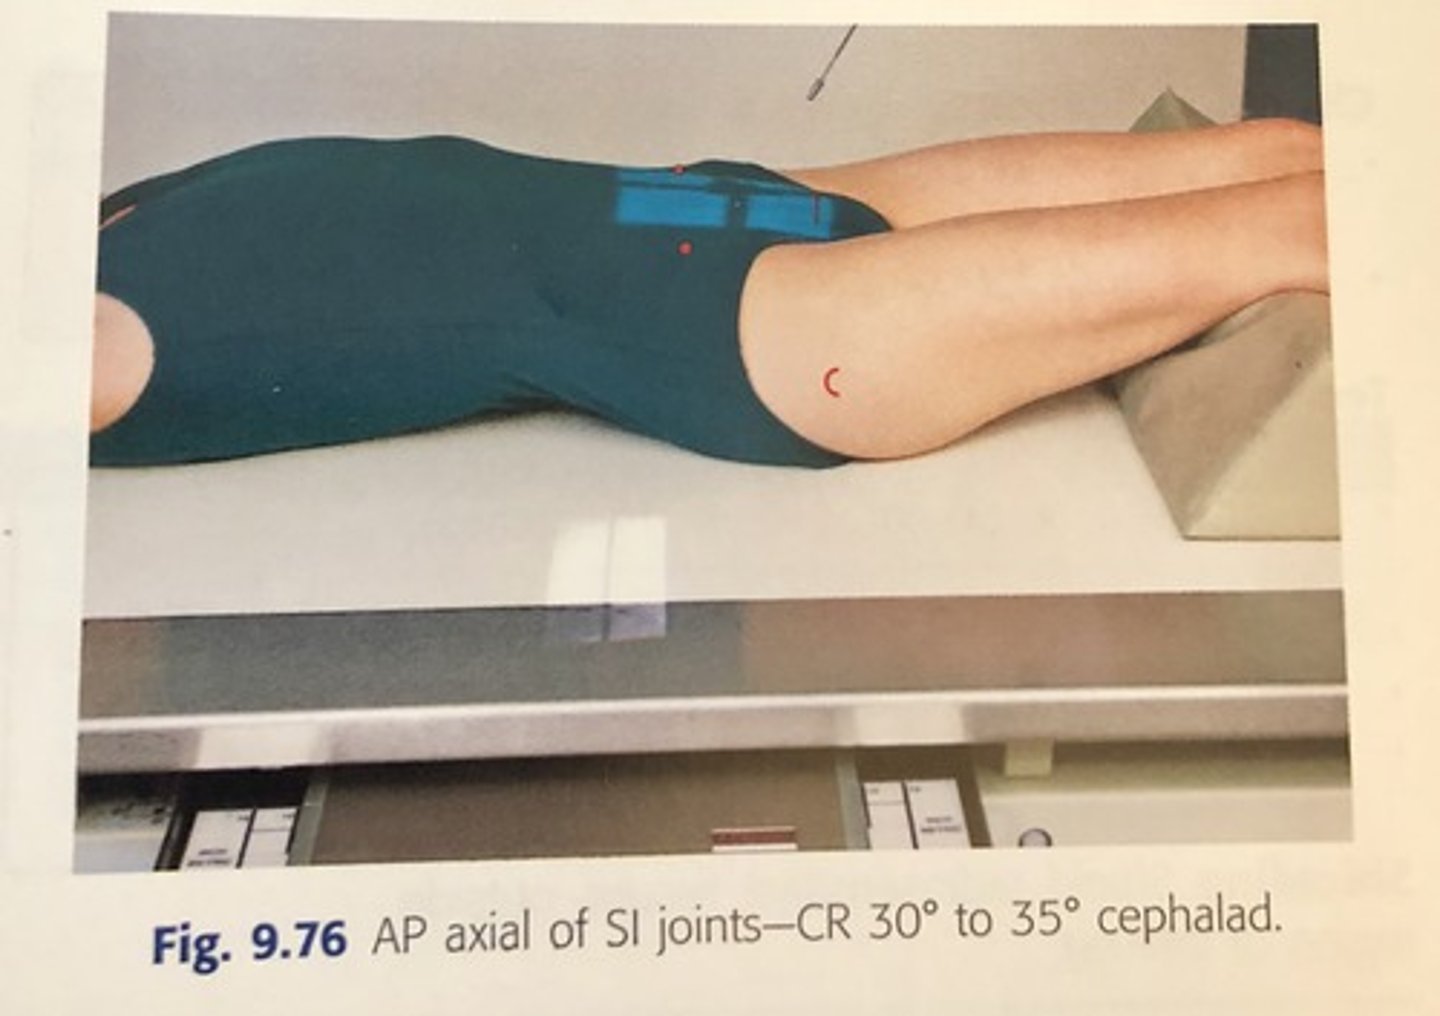
STAMPSBC for AP Axial SI Joints
S - none
T - 25 mAs @ 75 kVp
A - 30 (men) or 35 (female) cephalic
M - correct marker on correct side
P - supine, CR 2" below ASIS
S - 40"
B - expiration
C - 10 x 12 lengthwise
STAMPSBC for LPO SI Joints
S - none
T - 25 mAs @ 75 kVp
A - none
M - right marker on right side
P - PT rotated 25 - 30 degrees to left, CR 1" medial to upside ASIS
S - 40"
B - deep breath out and hold
C - 10 x 12 lengthwise
STAMPSBC for AP Flat Abdomen
S - none
T - 30 mAs @ 75 kVp
A - none
M - correct marker by hip
P - supine w/ hands abducted slightly, CR @ iliac crest
S - 40"
B - deep breath out and hold
C - 14 x 17 lengthwise
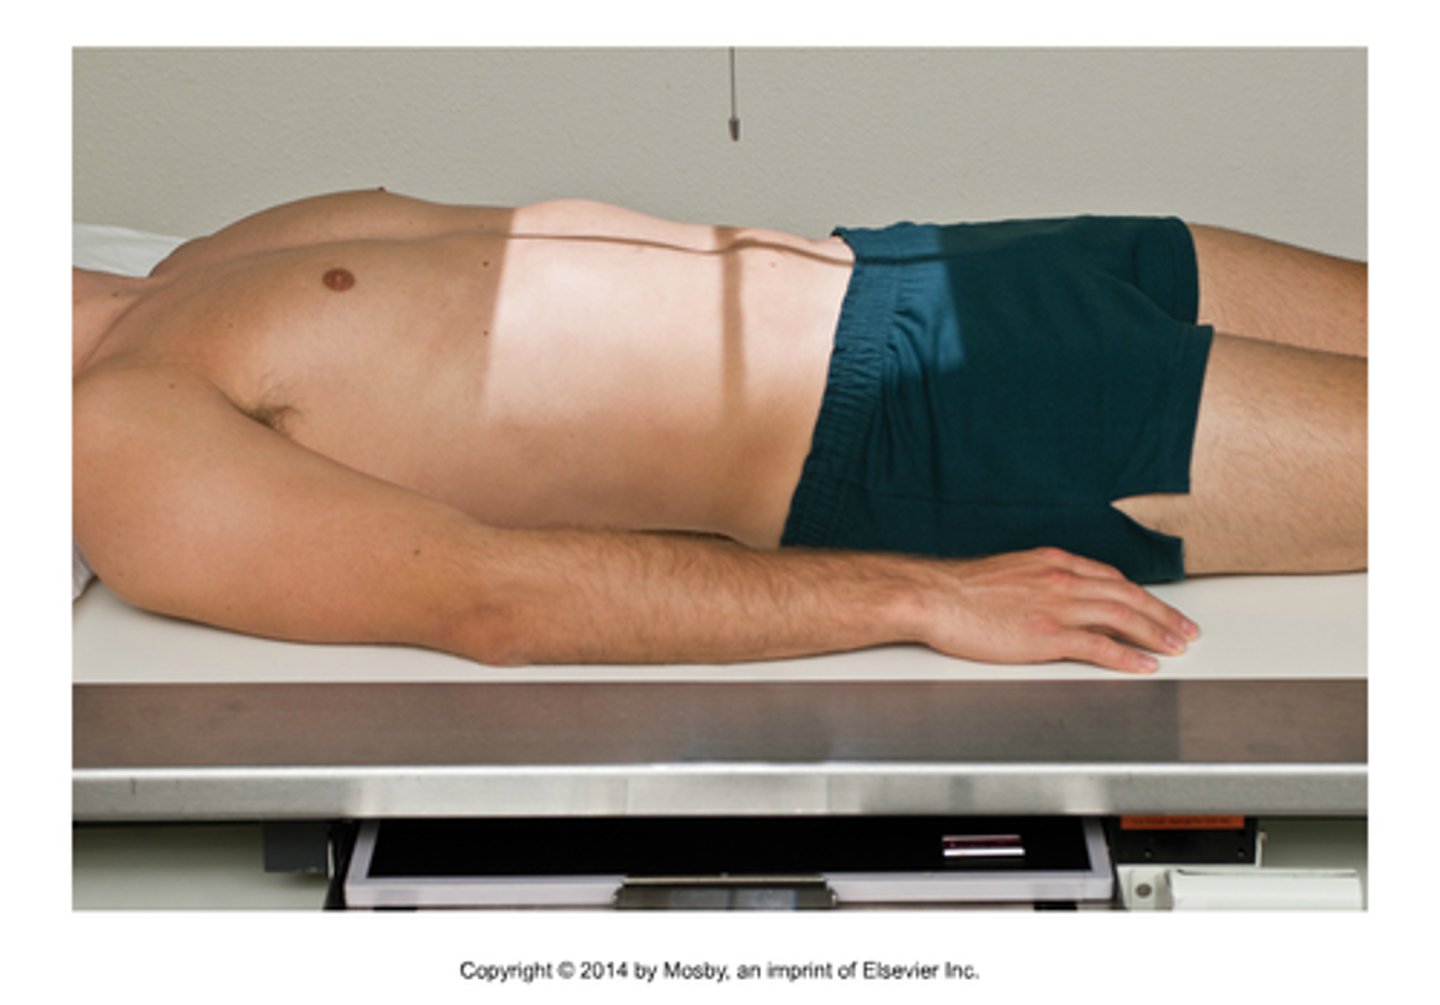
STAMPSBC for AP Upright Abdomen
S - none
T - 30 mAs @ 75 kVp
A - none
M - correct marker by hip
P - PA w/ hands grasping sides of bucky, CR 2" above iliac crest
S - 40"
B - deep breath out and hold
C - 14 x 17 lengthwise
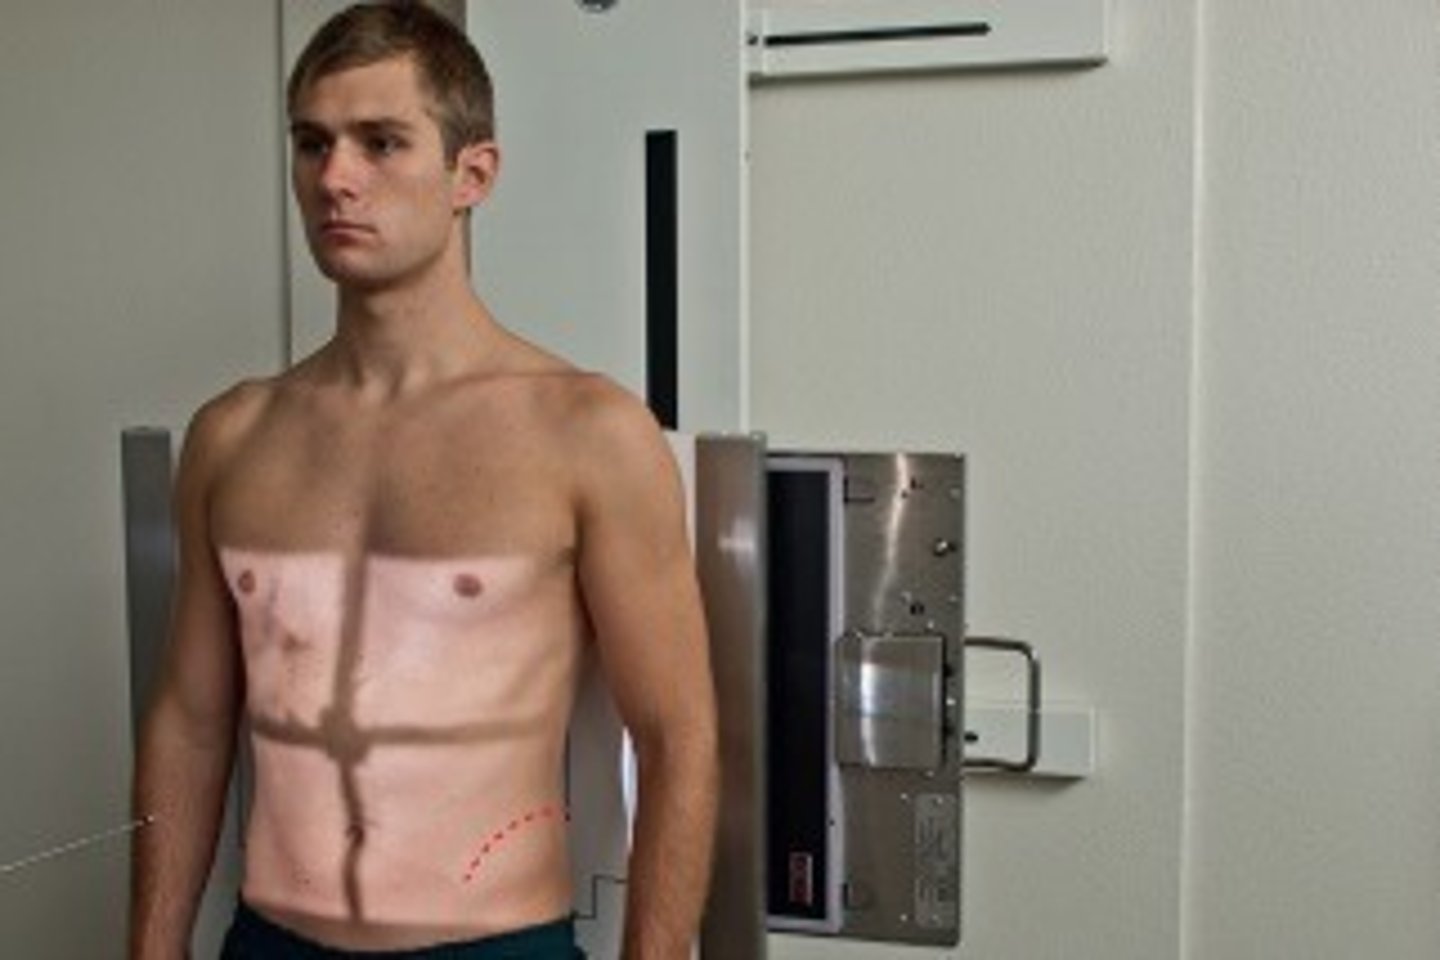
STAMPSBC for Lateral Decubitus Abdomen
S - none
T - 30 mAs @ 75 kVp
A - none
M - R marker on R side easiest
P - PT rolled on L side w/ arms up, CR 2" above crest & level w/ midsagittal plane
S - 40"
B - deep breath out and hold
C - 14 x 17 (grid cap)
STAMPSBC for PA Chest
S - shield around waist
T - 2 mAs @ 110 kVp
A - none
M - correct marker above shoulder
P - PA w/ hands on lower hips & shoulders rolled forward, chin raised slightly, CR T7
S - 72"
B - deep breath in, out, in and hold
C - 14 x17 lengthwise
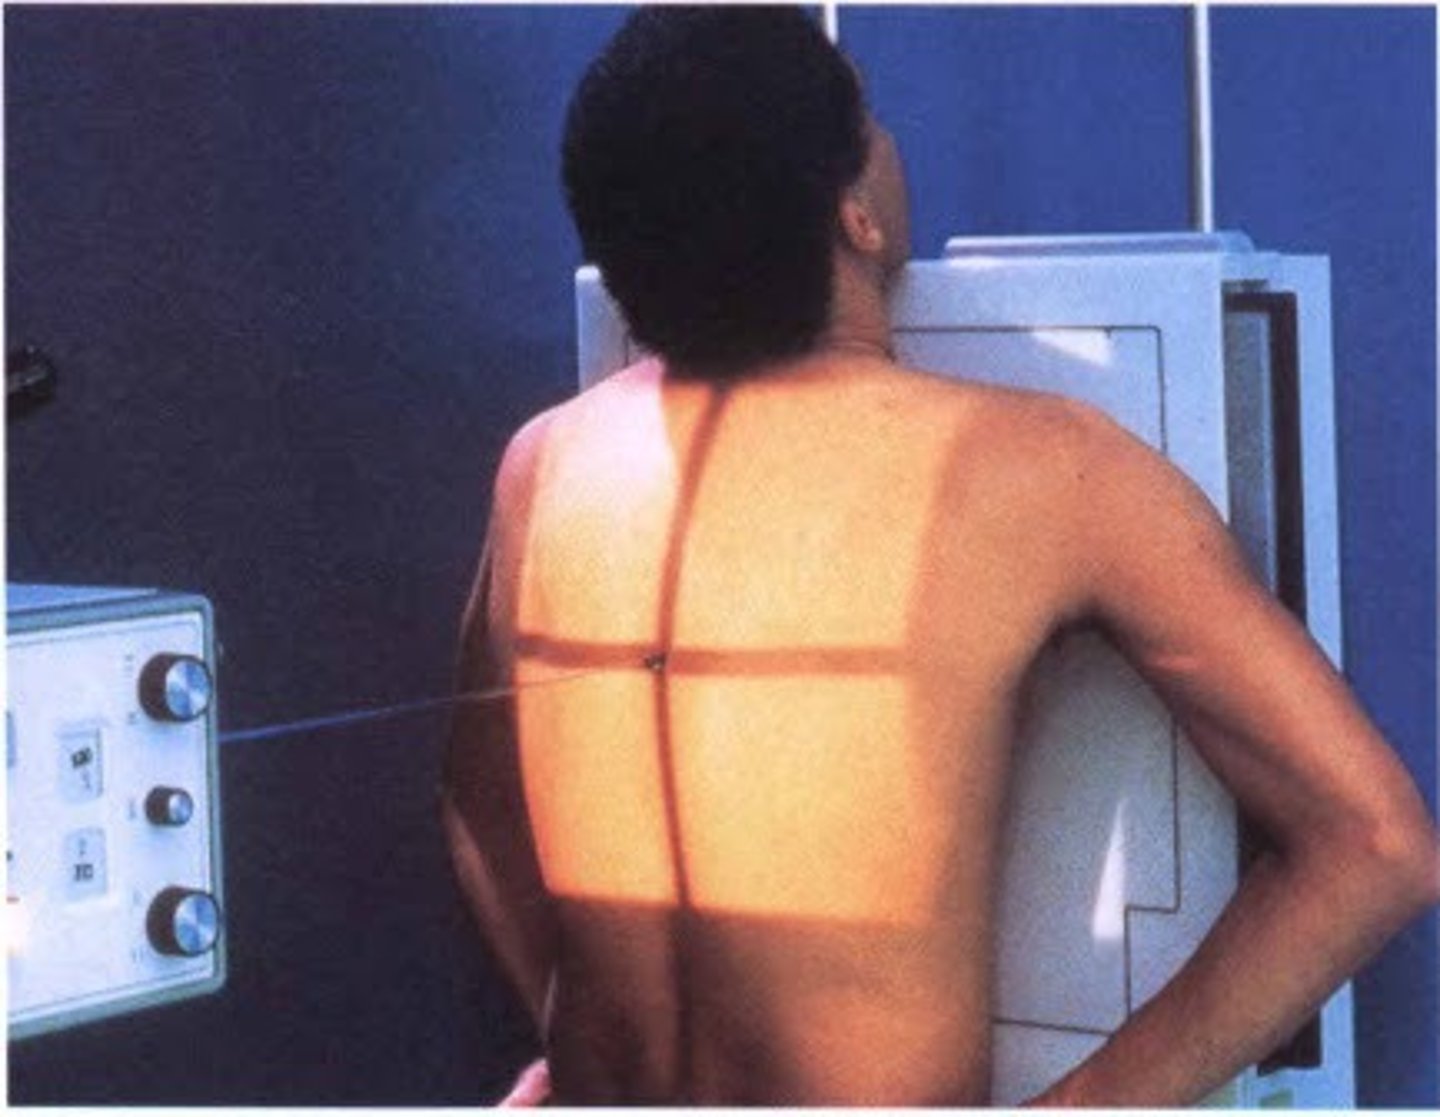
STAMPSBC for Lateral Chest
S - shield around waist
T - 4 mAs @ 110 kVp
A - none
M - left marker in front of PT
P - left side against board w/ hands behind head & elbows forward, CR T7
S - 72"
B - deep breath in, out, in and hold
C - 14 x 17 lengthwise
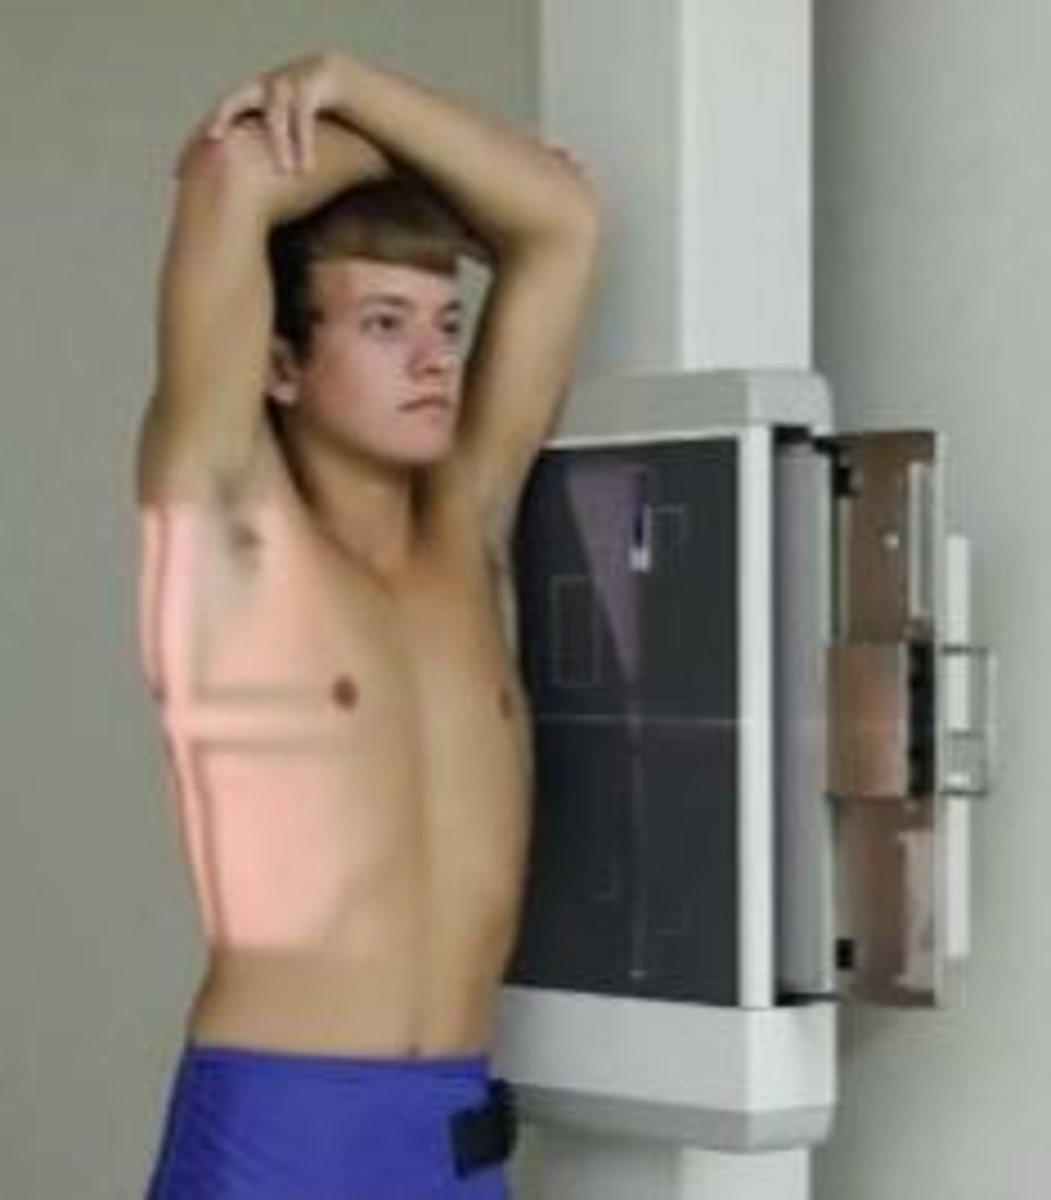
STAMPSBC for Lateral Decubitus Chest
S - over hip
T - 2 mAs @ 110 kVp
A - none
M - correct marker taped to grid cap
P - lung w/ pleural effusion goes down, lung w/ pneumothorax goes up, must be laying on decubitus sponge w/ arms above head, CR T7
S - 72"
B - deep breath in, out, in and hold
C - 14 x 17 (grid cap)
STAMPSBC for Lateral Sternum
S - shield around waist
T - 70 mAs @ 70 kVp
A - none
M - left marker by sternum
P - left side against board w/ arms behind back (chest out), CR midsternum & 1" back from chest wall
S - 72"
B - deep breath in and hold
C - 10 x 12 lengthwise