0001_Unity IDE and User Interface
1/167
There's no tags or description
Looks like no tags are added yet.
Name | Mastery | Learn | Test | Matching | Spaced |
|---|
No study sessions yet.
168 Terms

Toolbar
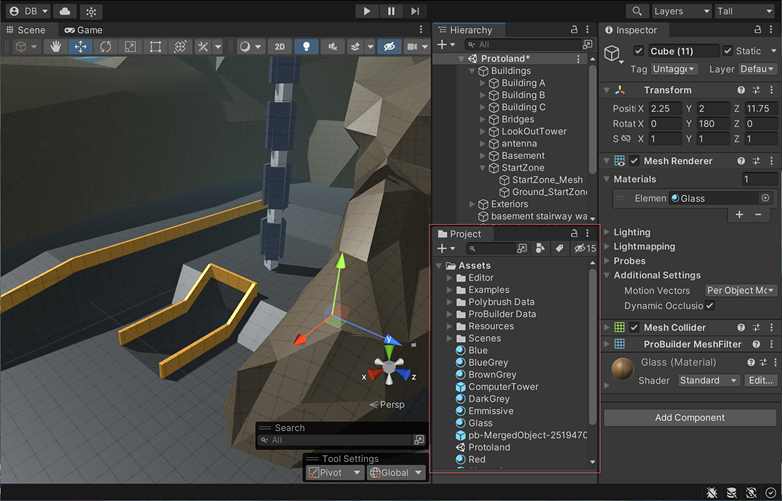
provides access to your Unity Account and Unity Cloud Services. It also contains controls for Play mode; Undo history; Unity Search; a layer visibility menu; and the Editor layout menu.
Unity Search
search sources inside of Unity and perform actions on the results
SHORT-CUT: (ctrl + k)
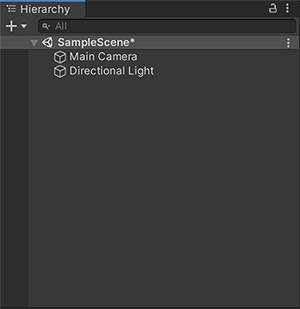
Hierarchy Window
hierarchical text representation of every GameObject in the Scene. Each item in the Scene has an entry in the hierarchy, so the two windows are inherently linked. The hierarchy reveals the structure of how GameObjects attach to each other.
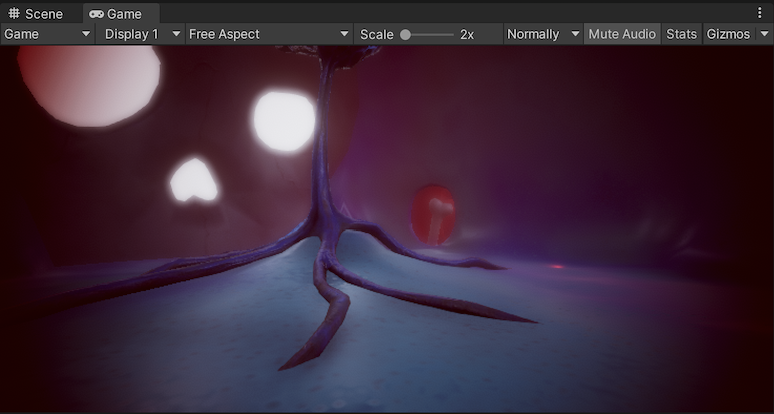
Game view
simulates what your final rendered game will look like through your Scene Cameras. When you click the Play button, the simulation begins
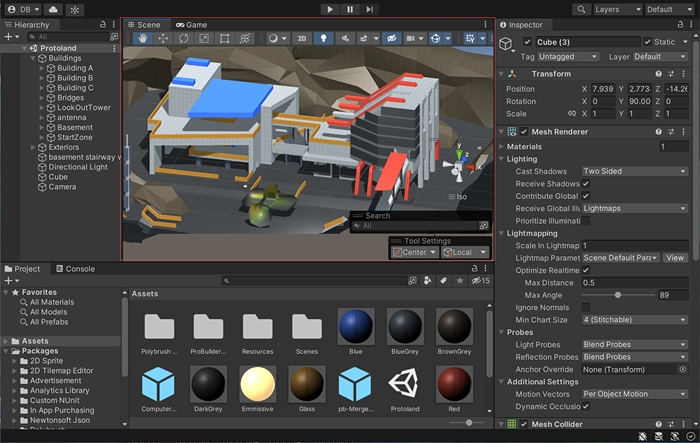
Scene view
allows you to visually navigate and edit your Scene. The Scene view can display a 3D or 2D perspective, depending on the type of Project you are working on.
Overlays
contain the basic tools for manipulating the Scene view and the GameObjects within it. You can also add custom Overlays to improve your workflow.
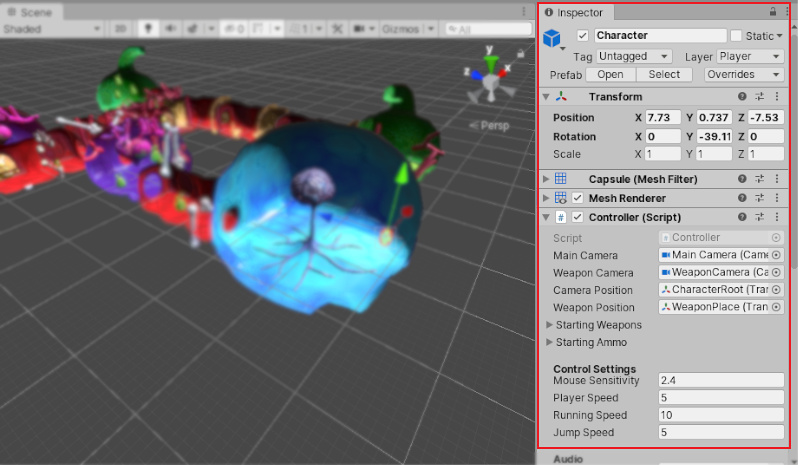
The Inspector window
allows you to view and edit all the properties of the currently selected GameObject. Because different types of GameObjects have different sets of properties, the layout and contents of the Inspector window change each time you select a different GameObject
The Project window
displays your library of Assets that are available to use in your Project. When you import Assets into your Project, appear here

The status bar
provides notifications about various Unity processes, and quick access to related tools and settings
What is the shortcut to find the project window?
Ctrl + 5
Window > General > Project
How do you move the project window?
Click and drag the window from the TOP
Where can you place the project window?
dock it into place in the Editor or make it a free-floating window
How can you change the layout?
More menu (⋮) in the top right of the window and choose from either One Column Layout or Two Column Layout.

What does the two column layout provide?
The Two Column Layout has an extra pane which shows a visual preview of each file.
What does the left panel show?
Shows the folder structure of the project as a HIERARCHICAL list
How to you collapse / expand folders in the project window?
You can click the small triangle
OR
Hold down the alt key while while you click to expand or collapse nested folders
Individual Assets are shown…
in the right hand panel as ICONS based on their type (script, material, sub-folder, etc)
How do you resize the icons in the project window?
use the slider at the bottom of the panel

What does sliding the slider of the project window do when you move them too much to the left?
they will be replaced by a hierarchical list view and are no longer icons
What does the purpose of the favorites folder in the project window?
you can keep frequently-used items for easy access. You can drag items from the Project structure list to the Favorites and also save search queries there
Toolbar: Create Menu
Displays a list of Assets and other sub-folders you can add to the folder currently selected.
Toolbar: Search Bar
Use the search bar to search for a file within your Project. You can choose to search within the entire Project (All), in the top level folders of your Project (listed individually), in the folder you currently have selected, or within the Asset Store.
Toolbar: Open in search
Opens the Unity Search tool to refine your search.
Tool bar: Search by type
Select this property to confine your search to a specific type, for example Mesh, Prefab, Scene.
Tool bar: Search by label
Select this property to choose a tag to search within
Tool bar: Save search
Saves your search under Favorites in the left panel.
Tool bar: Hidden packages count
Select this property to toggle the visibility of the packages in the Project window.
How do search filters work?
adding an extra term in the search text
(i.e. a term beginning with “t:” filters by the specified asset type, while “l:” filters by label)
Why are search filters effective?
You can type these terms directly into the search box rather than use the menu if you know what you are looking for. You can search for more than one type or label at once.
What does the Search the asset store do?
all free and paid items from the store that match your query will be displayed
What is the order of the search query of the search the asset store?
asset name → the package name → package label → package description
What happens when you select an item form the asset store?
its details will be displayed in the inspector along with the option to purchase and/or download it
What are some features of assets in the asset store?
Some asset types have previews available in this section so you can, for example, rotate a 3D model before buying. The inspector also gives the option of viewing the asset in the usual Asset Store window to see additional details
What is the order of the transform section?
Position → Rotation → Scale
What are gizmos
Handles on the object in the scene view
Alternative to using the inspector window
Move Hot Key
W
Rotate Hot Key
E
Scale Hot Key
R
RectTransform Hot Key
T
Transform Hot Key
Y
What is recttransform used for?
positioning 2D elements such as Sprites or UI elements
What does pivot do?
positions the Gizmo at the actual pivot point of the GameObject, as defined by the Transform component.
What does center do?
positions the Gizmo at a center position based on the selected GameObjects.
What does local do?
keeps the Gizmo’s rotation relative to the GameObject’s.
What does global do?
clamps the Gizmo to world space orientation.
World grid snapping
Snap a GameObject to a grid projected along the X, Y, or Z axes or transform a GameObject in increments along the X, Y, or Z axes. This is only available while using the World, or Global, handle orientation.
Surface Snapping
snap the GameObject to the intersection of any Collider.
Vertex Snapping
Snap any vertex from a given Mesh to the position of another Mesh’s vertex or surface. You can snap vertex to vertex, vertex to surface, and pivot to vertex.
What does dragging a prefab into the scene do?
Unity places them at the cursor position by default. You can preserve any offsets in the Prefab in relation to the cursor position by holding the Alt key while dragging a Prefab.
Surface Snapping Details
Make sure the Move tool is active.
Hold Shift and Control (MacOs: Cmd), then click and hold a GameObject’s tool handle.
Drag the GameObject on to another GameObject with a Collider.
What is the purpose of surface snapping?
To snap a GameObject to the intersection of a Collider
What is the purpose of vertex snapping?
To quickly assemble your Scenes
How is vertex snapping done?
Take any vertex from a given Mesh and place that vertex in the same position as any vertex from any other Mesh you choose.
(i.e) use vertex snapping to align road sections precisely in a racing game, or to position power-up items at the vertices of a Mesh
Steps for Vertex snapping
Select the Mesh you want to manipulate and make sure the Move tool is active.
Press and hold the V key to activate the vertex snapping mode.
Move your cursor over the vertex on your Mesh that you want to use as the pivot point.
Hold down the left mouse button once your cursor is over the vertex you want and drag your Mesh next to any other vertex on another Mesh.
To snap a vertex to a surface on another Mesh, add and hold down the Shift+Ctrl (Windows) or Shift+Command (macOS) key while you move over the surface you want to snap to.
To snap the pivot to a vertex on another Mesh, add and hold the Ctrl (Windows) or Command (macOS) key while you move the cursor to the vertex you want to snap to.
Release the mouse button and the V key when you are happy with the results (Shift+V acts as a toggle of this functionality).
What is the purpose of grid snapping?
Unity provides a visual grid in the Editor’s Scene view window, which can help precisely align GameObjects by snapping (moving) them to the nearest grid location.
How do you snap a game object along the grid?
Align selected GameObjects to the nearest grid point.
or
Turn on grid snapping while you move, rotate, or scale a GameObject.
How else can you use the grid without aligning it to the lines?
You need to change how much you are moving, rotating, or scaling. You can change the increment snap values
How can you change the grid?
The size of the grid (adjust the distance between the lines).
The color of the grid lines themselves.
How transparent or opaque the grid lines appear.
The position of the grid in the Scene view window (move it closer or farther).
Increase Grid Size Hot Key
Ctrl + [
Decrease Grid Size Hot Key
Ctrl + ]
Push to Grid (Align Selection to Grid) Hot Key
Ctrl + \
What is the purpose of the scene gizmo?
This displays the Scene view Camera ’s current orientation, and allows you to change the viewing angle and projection mode.
How do you return to the default angle in the scene view?
Right-click the Scene Gizmo and select Free.
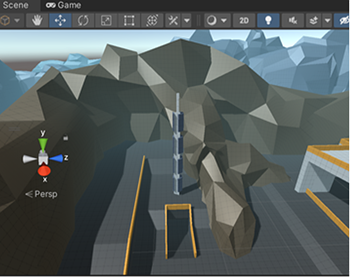
What does toggling on and off Prespective do?
This changes the projection mode of the Scene view between Perspective and Orthographic (sometimes called “isometric”).
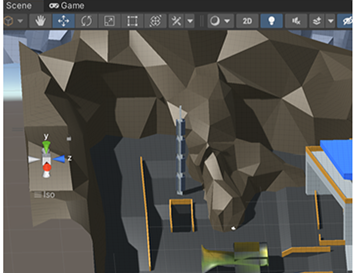
What is the purpose of the Orthographic view?
It has no perspective, and is useful in combination with clicking one of the conical axis arms to get a front, top or side elevation.
How can the arrow keys be used in the scene view?
To move around the Scene as though “walking” through it. The Up and Down arrow keys move the Camera forward and backward in the direction it faces. The Left and Right arrow keys pan the view sideways. Hold down the Shift and an arrow key to move faster
What is the short cut for the view tool?
Q
What is the Pan do in the Scene view?
Click and drag to pan the Camera around.
**ICON LOOKS LIKE A HAND
What does the Orbit do in the scene view?
Hold Alt (Windows) or Option (macOS), and left-click and drag to orbit the Camera around the current pivot point. This option isn’t available in 2D mode, because the view is orthographic.
** ICON LOOKS LIKE AN EYE
What does the Zoom do in the scene view?
Hold Alt (Windows) or Option (macOS), and right-click and drag to zoom the Scene view. On macOS, you can also hold Control, and left-click and drag instead.
** ICON LOOKS LIKE A MAGNIFYING GLASS WITH A PLUS
What key is used to increase the rate of movement and speed?
Shift
What is fly-through mode used for?
fly around the Scene view in first-person, similar to how you would navigate in many games.
(ONLY USED FOR PERSPECTIVE VIEW)
What is the first step to enable flythrough mode?
Click and hold the right mouse button.
Which keys move forward and backwards in flythrough mode?
W and S
Which keys move left and right in flythrough mode?
A and D
Which keys move up and down in flythrough mode?
Q and E
How to pan with a 3 button mouse?
Hold the middle-mouse button then drag
How to pan with a 2 button mouse?
Hold Alt+Control+left-click, then drag
How to orbit?
Hold Alt+left-click, then drag
How to zoom with a 3 button mouse?
Scroll wheel
How to zoom with 2 button mouse?
Hold Alt+right-click, then drag
Change Speed with a 3 button mouse?
Use the scroll wheel while moving.
Change speed with a 2 button mouse?
Drag with two fingers while moving
How do you center an object in the game view?
Select the GameObject in the Hierarchy, then move the mouse over the Scene view and press F
Where can the center an object feature be found?
Edit > Frame Selected.
How do you lock an object to be centered even when it is moving?
Shift+F
Where can you find the feature to lock the object in the center even when it’s moving?
This feature is also in the menu bar under Edit > Lock View to Selected
What is the purpose of toggle scence picking controls?
picking controls on and off to mark which items are pickable when you work in the Editor. By default, all items are pickable, but you can choose which Scene items Unity skips adding to the selection when you click on them (i.e. if you dont want to accidentally edit something)
What happens to an item when it becomes unpickable?
Unity continues to render them even though you can no longer select or edit them in the Scene view. The pickability state persists only in the Editor and only for the user in the Project where it was set. Changing the pick state does not “dirty” the Scene (that is, count as a modification).
How do you toggle scene picking?
Click a GameObject’s pickability icon in the Hierarchy window to toggle between enabling and disabling picking the GameObject and its children.
Toggling pickability for a GameObject and its children affects all child GameObjects, from the “target” GameObject all the way down to the bottom of the hierarchy.
How to you prevent toggling the picking for all objects on the hierarchy?
Alt + Click
What is the purpose of the pickability icon?
To help you track what’s going on and which items are pickable and which are not

You can pick the GameObject, but you cannot pick some of its children

You cannot pick the GameObject, but you can pick some of its children.

You cannot pick the GameObject nor its children.

You can pick the GameObject and its children. This icon only appears when you hover over the GameObject.
What is the purpose of the scene visibility?
Allows you to quickly hide and show GameObjects in the Scene view without changing their in-game visibility. This is useful for working with large or complex Scenes where it can be difficult to view and select specific GameObjects.
Where can you toggle visibility for individual GameObjects from the Hierarchy window?
On the very far left of the hierarchy window

the GameObject is visible, but some of its children are hidden.

the GameObject is hidden, but some of its children are visible.