Clock Positions Dental Hygiene (right handed)
1/36
There's no tags or description
Looks like no tags are added yet.
Name | Mastery | Learn | Test | Matching | Spaced |
|---|
No study sessions yet.
37 Terms
8 o'clock
-maxillary and mandibular anterior
-surfaces towards
-facial and lingual
8-9 o'clock
-head turned away
-right maxillary and mandibular posterior facials
-left maxillary and mandibular posterior lingual
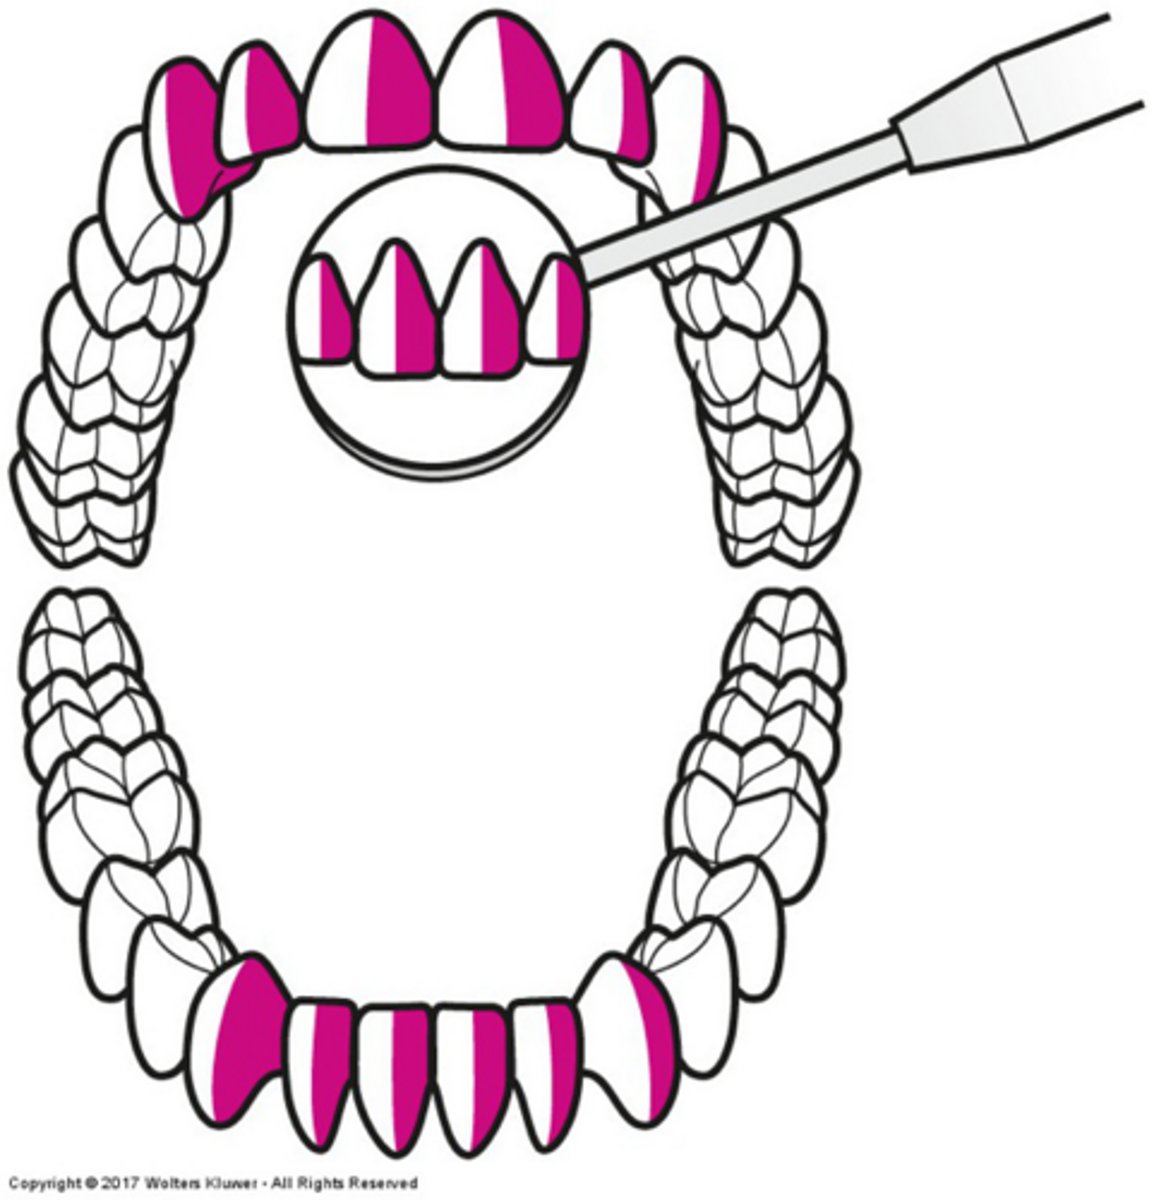
10-11 o'clock
-head turned toward operator
-right maxillary and mandibular posterior lingual
-left maxillary and mandibular posterior facial
12 o'clock
-patients head
-maxillary and mandibular anteriors
-facial and lingual
-surfaces away
6 o'clock
patients feet
maxillary arch
-chin up
-light angled up
mandibular arch
-chin down
-light straight down
ergonomics
an applied science concerned with the "fit" between people and their technological tools and environments
neutral position
-the joint is being used near the middle of its full range of motion
-results in a decreased risk of musculoskeletal injury
foundational building blocks of periodontal instrumentation
1- position
2- instrument grasp
3- mirror use
4- finger rests
5- stroke production
neutral neck position
-head tilt of 0-20 degrees
-the line from eyes to the treatment area should be as near to vertical as possible
neutral back position
-lean forward slightly form the hips
-trunk flexion of 0-20 degrees
neutral torso position
-torso in line with long axis of the body
neutral shoulder position
-shoulders in horizontal line
-weight evenly balanced when seated
neutral upper arm position
-upper arms hang parallel to the long axis of torso
-elbows at waist level held slightly away from body
neutral forearm position
-held parallel to the floor
-raised or lowered, if necessary, by pivoting at the elbow joint
neutral hand position
-little finger-side of palm is slightly lower than thumb-side of palm
-wrist aligned with forearm
neutral seated posture in char
-buttock all the way in the back of the chair
-height so feet are flat on the floor shoulder-width apart
-slight tilt forward so hips are slightly higher than knees (about 5 degrees)
-adjust lumbar support
-adjust lumbar height
-pull stomach muscles towards spine
-relax shoulders
-upper arms parallel to the long axis of the torso and elbows near body
supine position
-maxillary (and mandibular) treatment areas
-back of dental chair is nearly parallel to the floor
-nose aligns with toes
semi-supine position
-mandibular (and maxillary) treatment areas
-back of the dental chair is slightly upright
trendelenburg
- brain lower than heart with feet slightly elevated
-used when patient may faint
patient head position
-head must be even with top edge of headrest
-young child may need to cross the legs in order to keep from sliding down the chair
height of patient chair
2-8 in. below clinicians elbow
light and bracket table distance from clinician
-arms length away
-not too close to patient in a way that would make them hot/ uncomfortable
sequence for practicing patient/clinician position
1- ME: assume the clock position for the treatment area
2- MY PATIENT: establish patient chair and head position
3- MY EQUIPMENT: adjust the unit light; pause and self-check the clinician, patient, and equipment position
4- MY NONDOMINANT HAND: hold mirror
5- MY DOMINANT HAND: hold instruments
anterior surfaces towards clinician
-8-9 o'clock

anterior surfaces away from clinician
11-1 o'clock
posterior surfaces toward clinician
9 o'clock

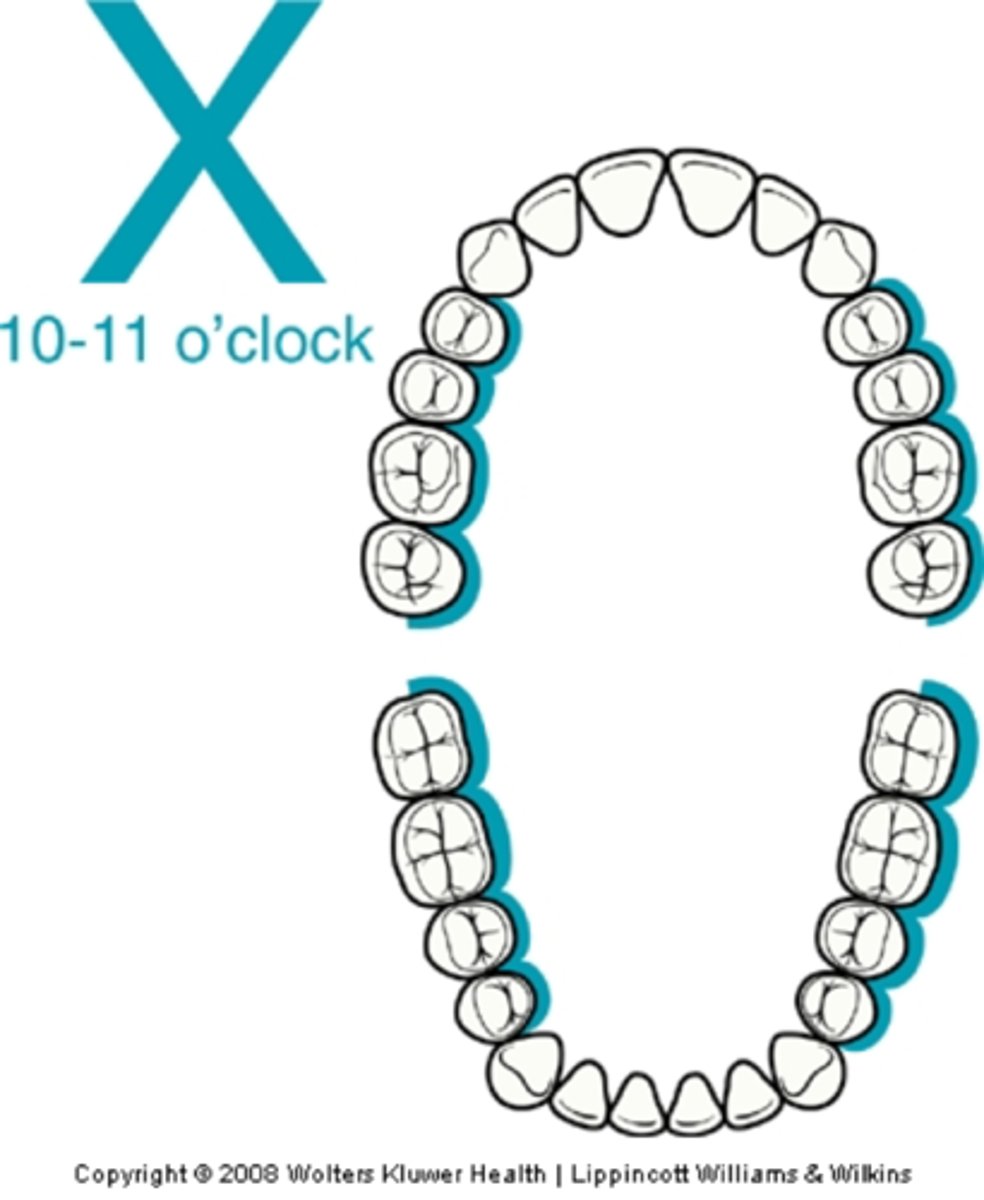
posterior surfaces away clinician
10-11 o'clock

mandibular posterior surfaces toward clinician
-9 o'clock
-chin down
-head neutral or slightly away
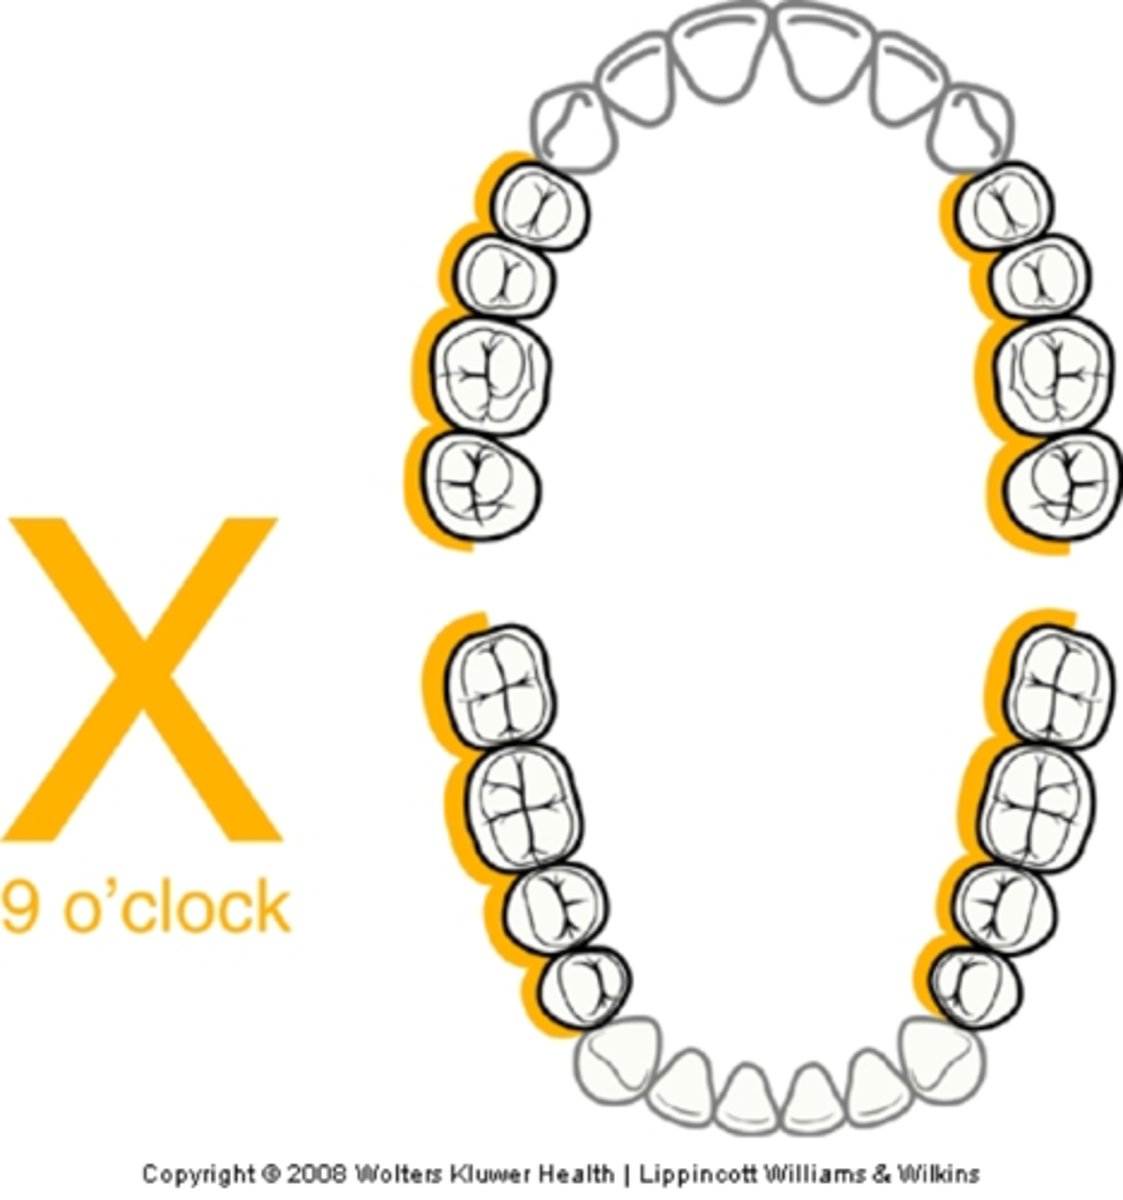
maxillary posterior surfaces toward
-9 o'clock
-chin up
-head neutral or slightly away

mandibular posterior surfaces away
-10-11 o'clock
-chin down
-mandibular occlusal plan as parallel to floor as possible
-head towards

maxillary posterior surfaces away
-10-11 o'clock
-chin up
-maxillary occlusal plane perpendicular to floor
-head toward
ancillary equipment
-helpful during periodontal instrumentation
-coaxial illumination
-magnification loupes
coaxial illumination
-spectacle mounted or headband mounted lights
-light beam parallel to clinicians line of vision
magnification loupes
-magnifies treatment area
-improves visual sharpness
-reduces strain to clinician's back and shoulders
-decreases eyestrain
field of vision without loupes
-learning the skills of positioning, mirror use, and finger rests, the clinician needs a normal field of vision
-permits self-evaluation of skills