SI joints/ sacrum and coccyx positioning quiz
1/46
There's no tags or description
Looks like no tags are added yet.
Name | Mastery | Learn | Test | Matching | Spaced |
|---|
No study sessions yet.
47 Terms
Position of patient for the AP oblique (RPO/LPO) SI joints
patient is in supine position and the head is elevated on a firm pillow
Position of part for AP oblique (RPO/LPO) SI joints
elevate side of interest approx 25 to 30 degrees and support the shoulder, lower thorax and upper thigh
Side being examined is the farther from the IR. Use the LPO position to show right joint and the RPO position to show left joint
Adjust patients body so that its long axis is parallel with long axis of the table
Align body so that a Sagittal plane passing 1 inch medial to the ASIS of the elevated side is centered to the midline of the table
Check rotation at several points along the back
Center IR at level of the ASIS
Respiration for AP oblique (RPO/LPO) SI joints
Suspend
Central ray for AP oblique (RPO/LPO) SI joints
Perpendicular to the center of the IR entering 1 inch medial to the elevated ASIS
Collimation for AP oblique (RPO/LPO) SI joints
6×10
Structures shown for AP oblique (RPO/LPO) SI joints
Sacroiliac joint farthest from IR and an oblique projection of adjacent structures. Both sides examined for comparison
Evaluation criteria for AP oblique (RPO/LPO) SI joints
evidence of collimation
Side marker
Open sacroiliac joint space farthest from IR with minimal overlapping of the ilium and sacrum
Joint centered on radiograph
Central ray for AP Axial oblique (RPO/LPO) SI joints
20 to 25 degrees cephalad entering 1 inch medial and 1 ½ inches distal to the elevated ASIS
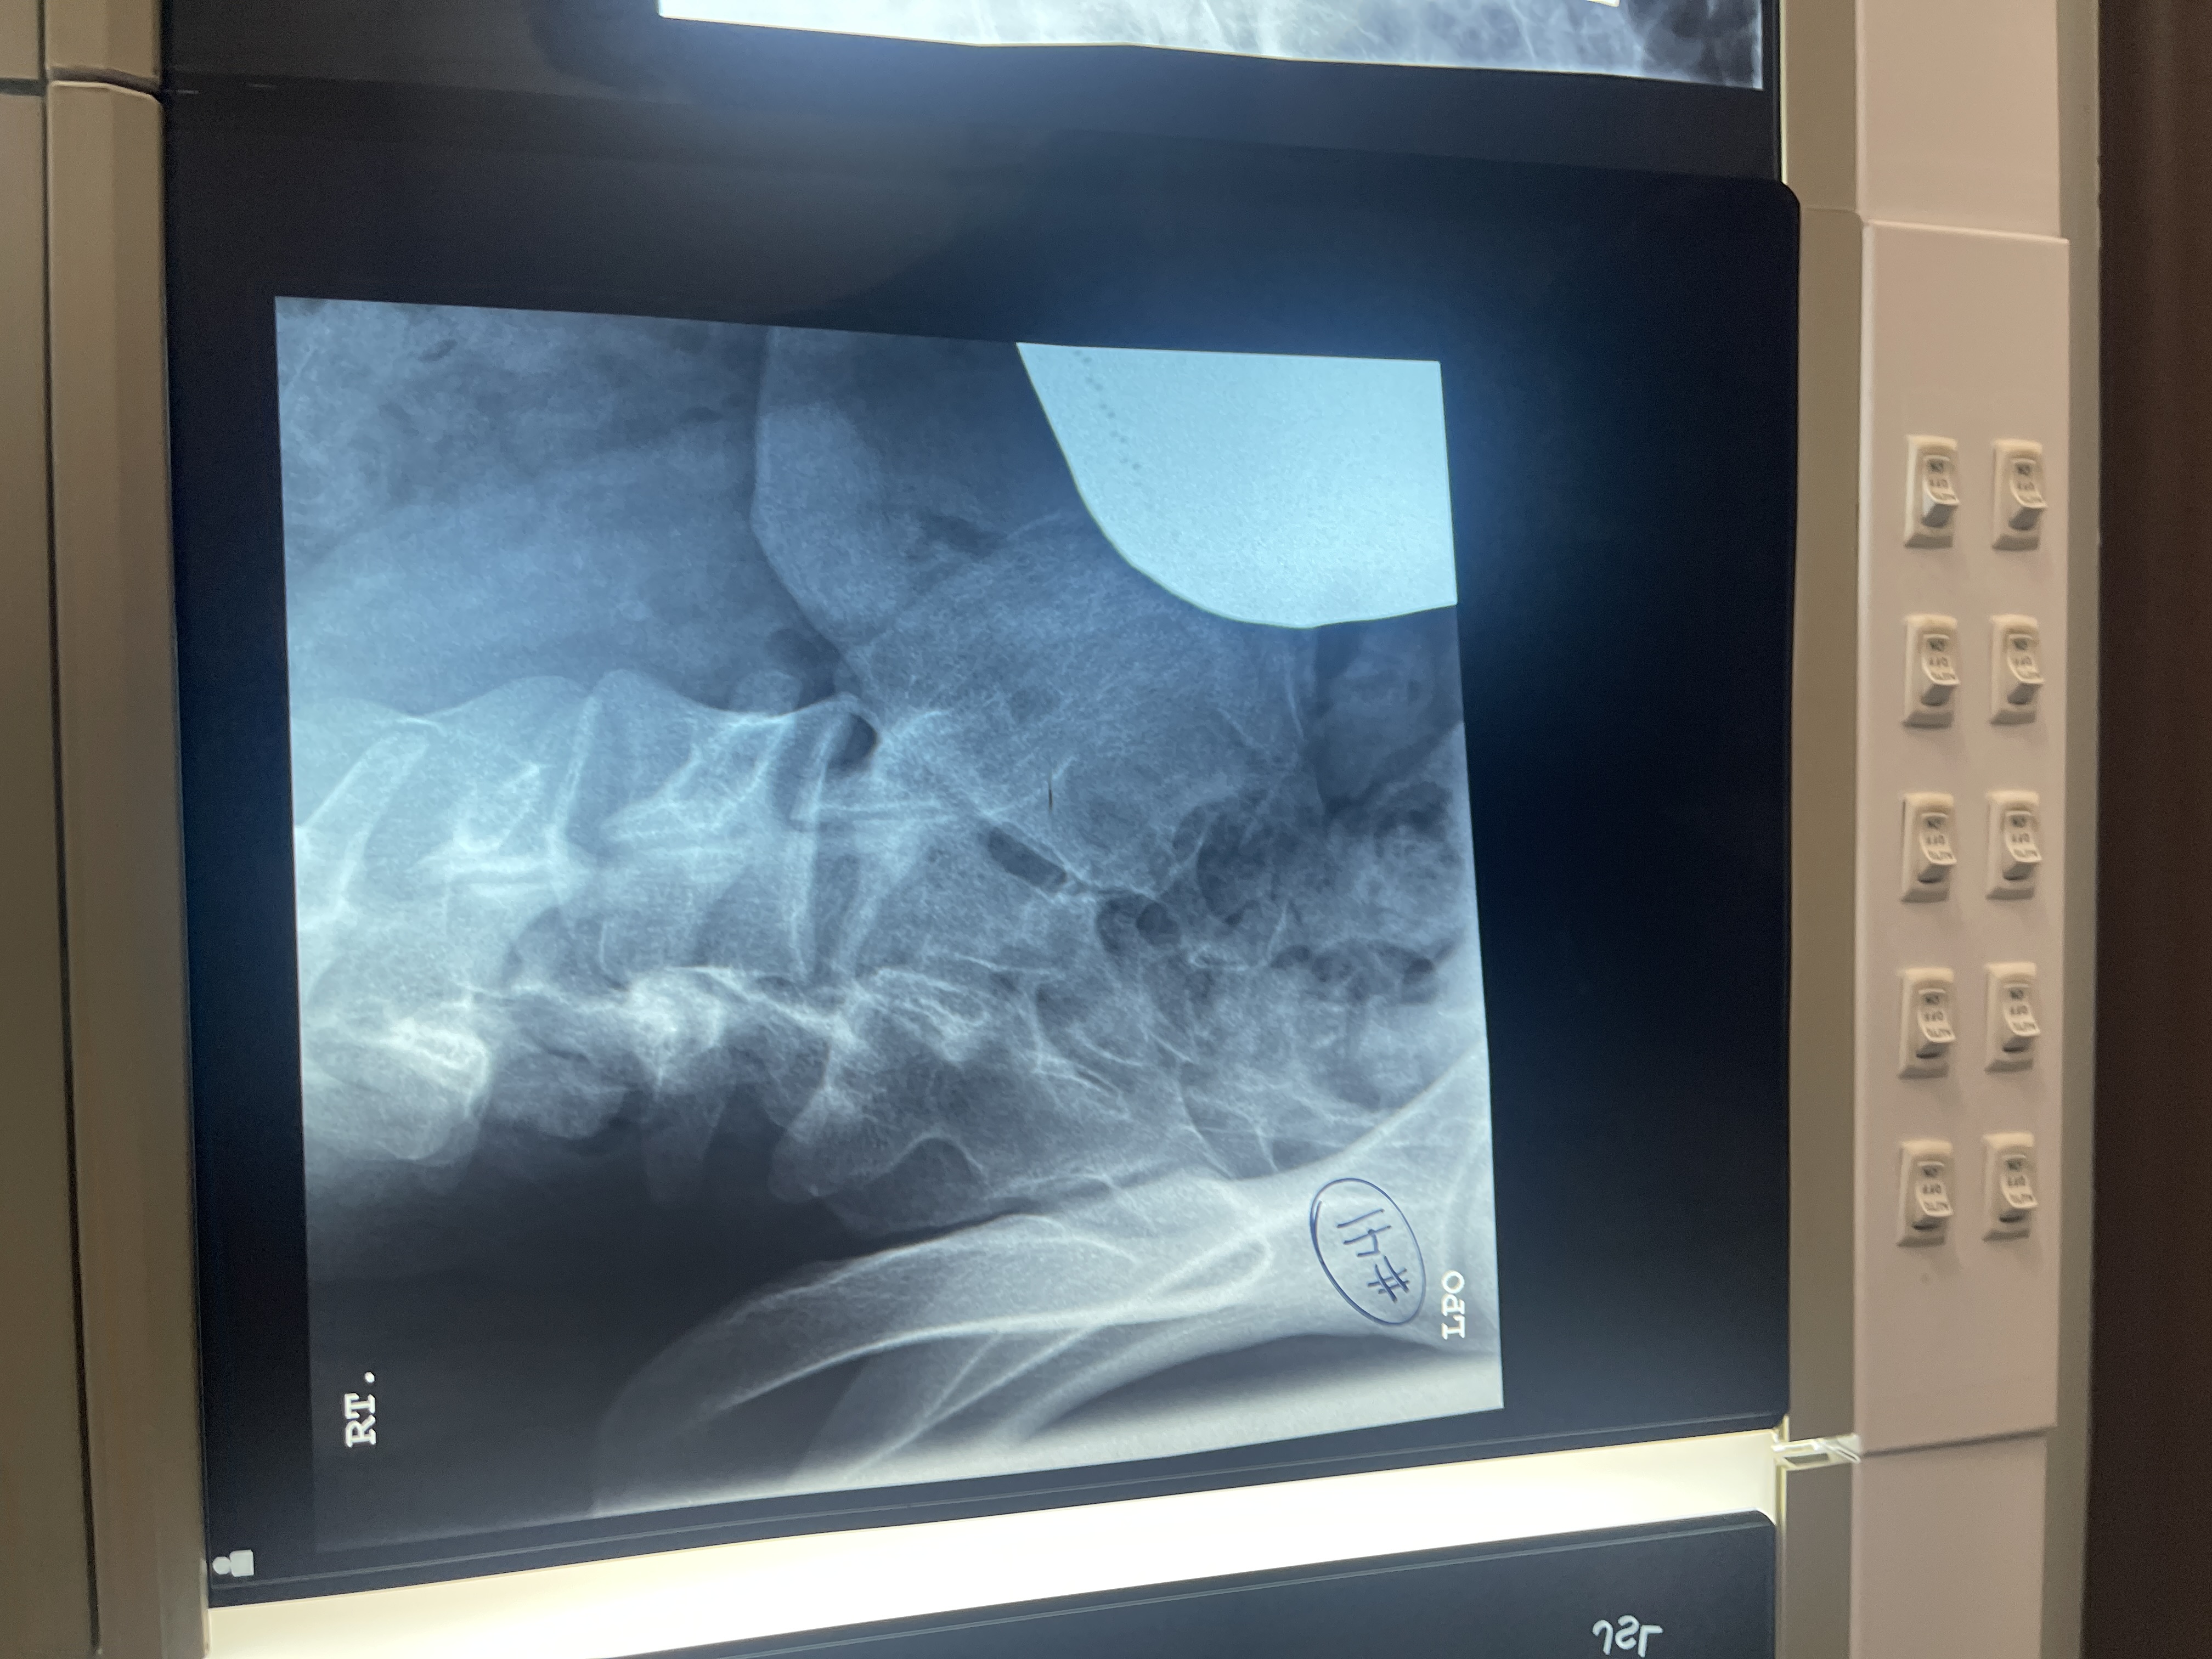
What’s wrong with #41 AP axial oblique of the right SI joint
centered too medial
No lead letter
Too obliqued/ rotated
Not collimated
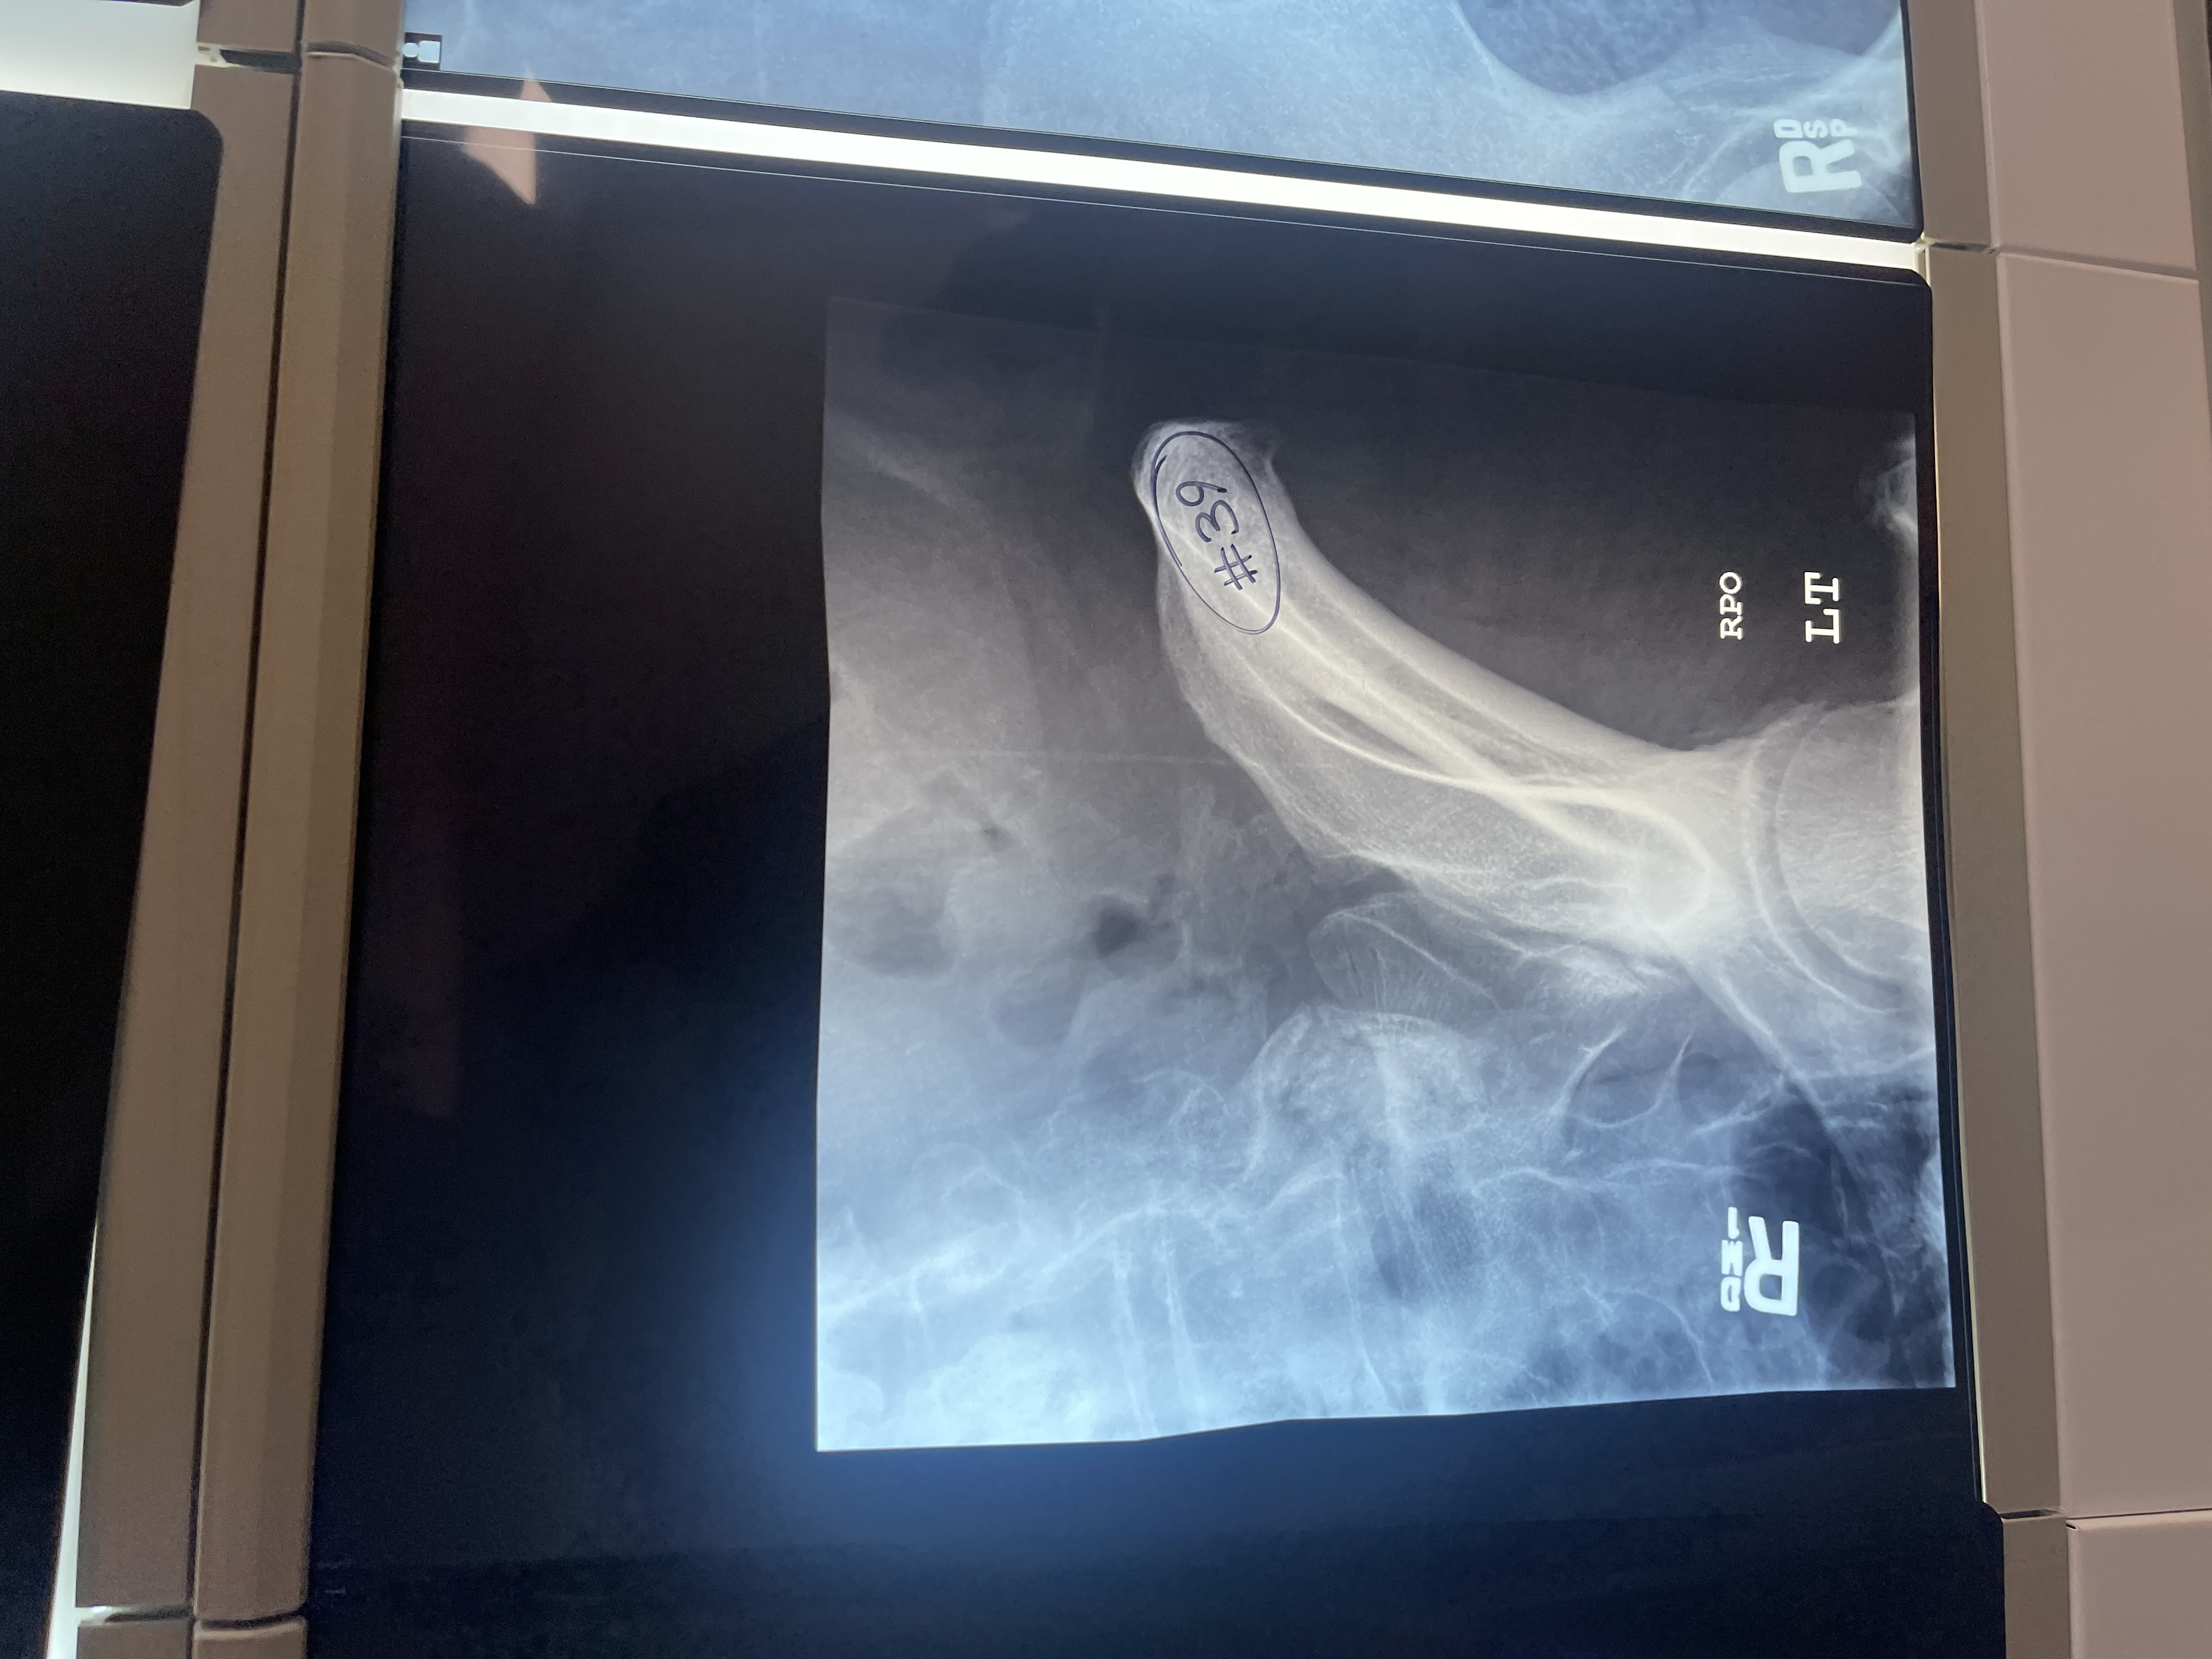
what’s wrong with # 39 AP axial oblique of the left SI joint
centered too superior
SI joint not opened
Too rotated
Tube/ Bucky not aligned
Not marked correctly/ marker is placed side down instead of up
Not collimated
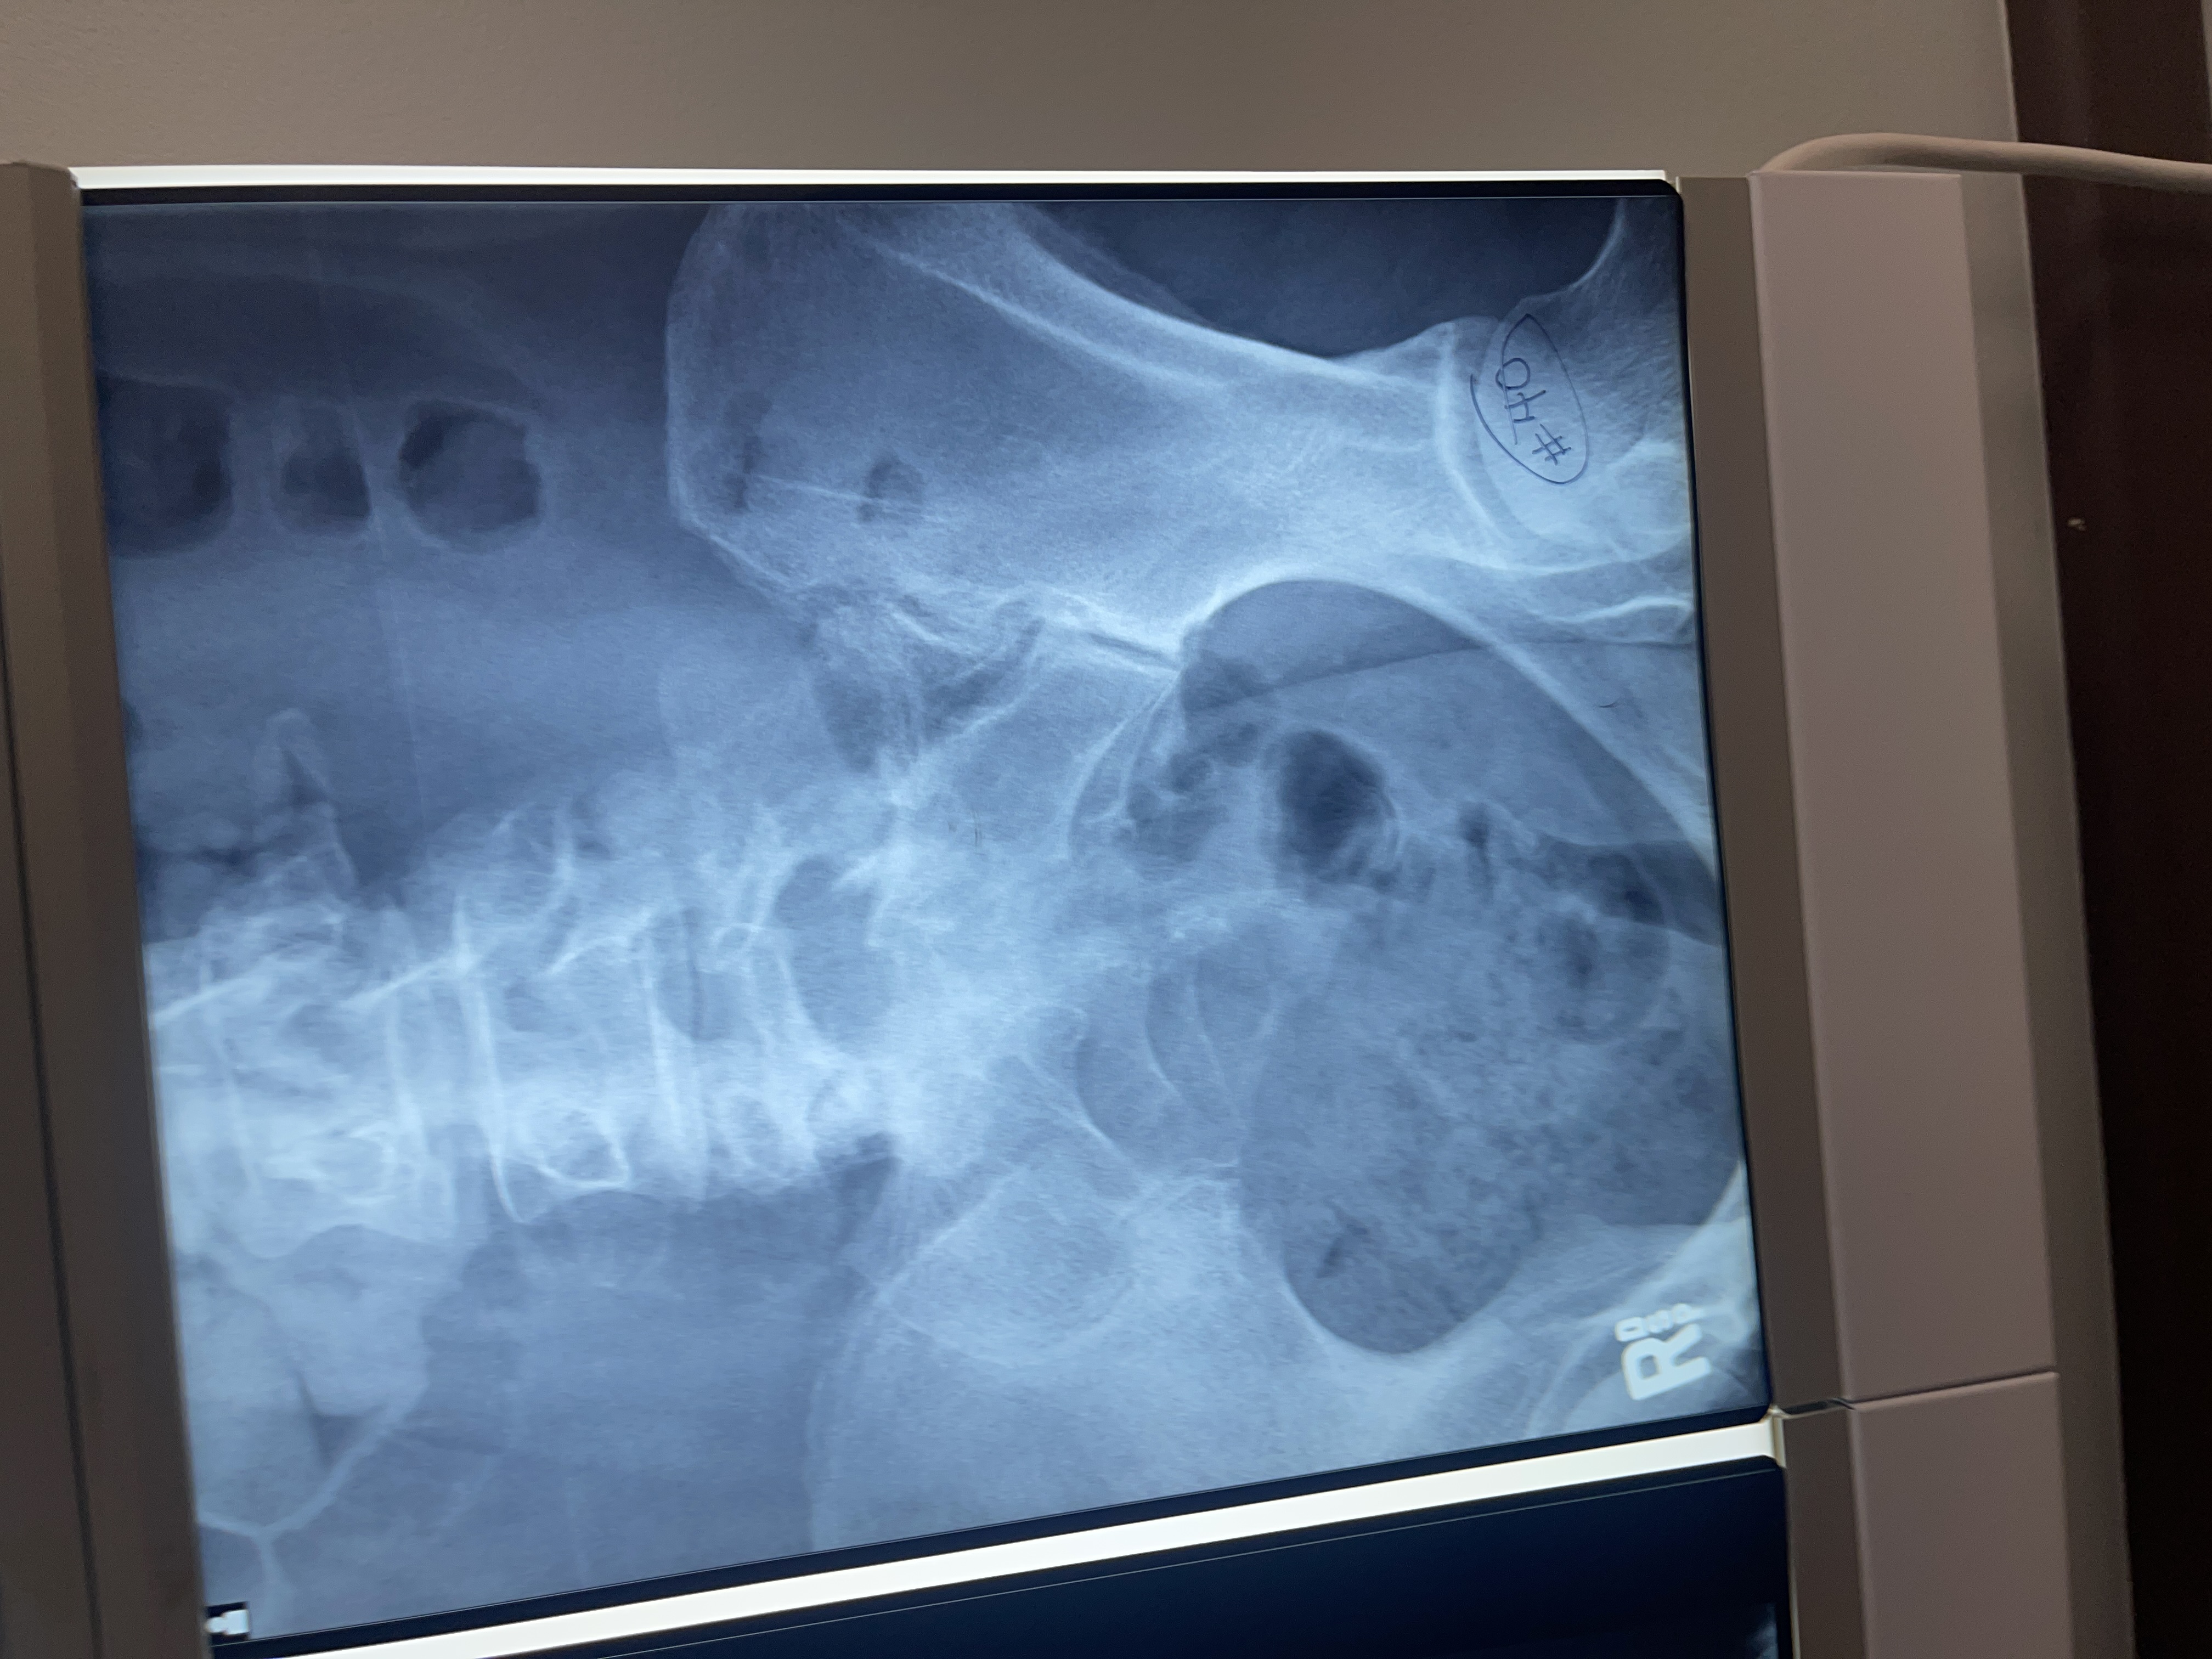
What’s wrong with #40 AP axial oblique of the left SI joint
not obliqued enough
Centered too medial
not collimated
Marked side down instead of up
Position of patient for PA oblique (RAO/LAO) SI joints
patient prone
Place small firm pillow under the head
Position of part for PA oblique (RAO/LAO) SI joints
adjust patient by rotating side of interest toward table until body rotation of 25 to 30 degrees is achieved. Have patient rest on forearm and flexed knee of elevated side
Side being examined should be closer to the IR. Use the RAO position to show right joint and LAO position to show left joint
Check degree of rotation at several points along anterior surface of the patients body
Adjust patients body so that it’s long axis is parallel with the long axis of the table
Center body so that a point 1 inch medial to the ASIS closest to the IR is centered to the grid
Center IR at level of ASIS
Respiration for PA oblique (RAO/LAO) SI joints
Suspend
Central ray for PA oblique (RAO/LAO) SI joints
Perpendicular to the IR and centered 1 inch medial to the ASIS closer to the IR
Collimation for PA oblique (RAO/LAO) SI joints
6×10
Structures shown for PA oblique (RAO/LAO) SI joints
SI joint closest to the IR
Evaluation criteria for PA oblique (RAO/LAO) SI joints
proper collimation
Side marker
Open sacroiliac joint space closest to the IR or minimal overlapping of the ilium and sacrum
Joint centered on radiograph
Central ray for PA axial oblique (RAO/LAO) SI joints
20 to 25 degrees caudad to enter the patient at the level of the transverse plane, passing 1 ½ inches distal to the L5 spinous process and exit at the level of the ASIS
What should be done before examination of the AP/PA axial sacrum and coccyx? Why?
Empty the urinary bladder and bowel content because it may interfere with the image
Position of patient for the AP/PA axial sacrum and coccyx
place patient in supine position for AP
Prone position can be used without appreciable loss of detail and is particularly appropriate for patients with a painful injury or destructive disease
Position of part for the AP/PA axial sacrum and coccyx
with the patient either supine or prone center the MSP of the body to the midline of the table grid
Adjust patient so that the ASIS are equidistant from the grid
Have patient flex elbows and place the arms in a comfortable bilaterally symmetric position
When supine position is used, place a supper under the patients knees
Respiration for AP/PA axial sacrum and coccyx
Suspend
Central ray for AP/PA axial sacrum
with patient supine direct the CR 15 degrees cephalad and center it to a point 2 inches superior to the pubic symphysis
With patient prone angle the CR 15 degrees caudad and center it to the clearly visible sacral curve
Central ray for AP/PA axial coccyx
with the patient supine, direct the CR 10 degrees caudad and center it to a point 2 inches superior to the pubic symphysis
With the patient prone, angle the CR 10 degrees cephalad and center it to the easily palpable coccyx
Center IR to CR
Collimation for AP/PA axial sacrum
10×12
Collimation for AP/PA axial coccyx
8×10
Structures shown for AP/PA axial sacrum and coccyx
Sacrum and coccyx free of superimposition
Evaluation criteria for AP/PA axial sacrum
proper collimation
Sacrum centered and seen in its entirety
Sacrum free of foreshortening, with the sacral curvature straightened
Pubic bones not overlapping sacrum
No rotation of the sacrum, as demonstrated by symmetric alae
Evaluation criteria for AP/PA axial coccyx
proper collimation
Coccyx centered and seen in its entirety
Coccygeal segments not superimposed by pubic bones
No rotation of coccyx, as demonstrated by distal segment in line with pubic symphysis
Label # 42 AP axial sacrum
A. Coccyx
B. Sacrum
C. Pubic symphysis
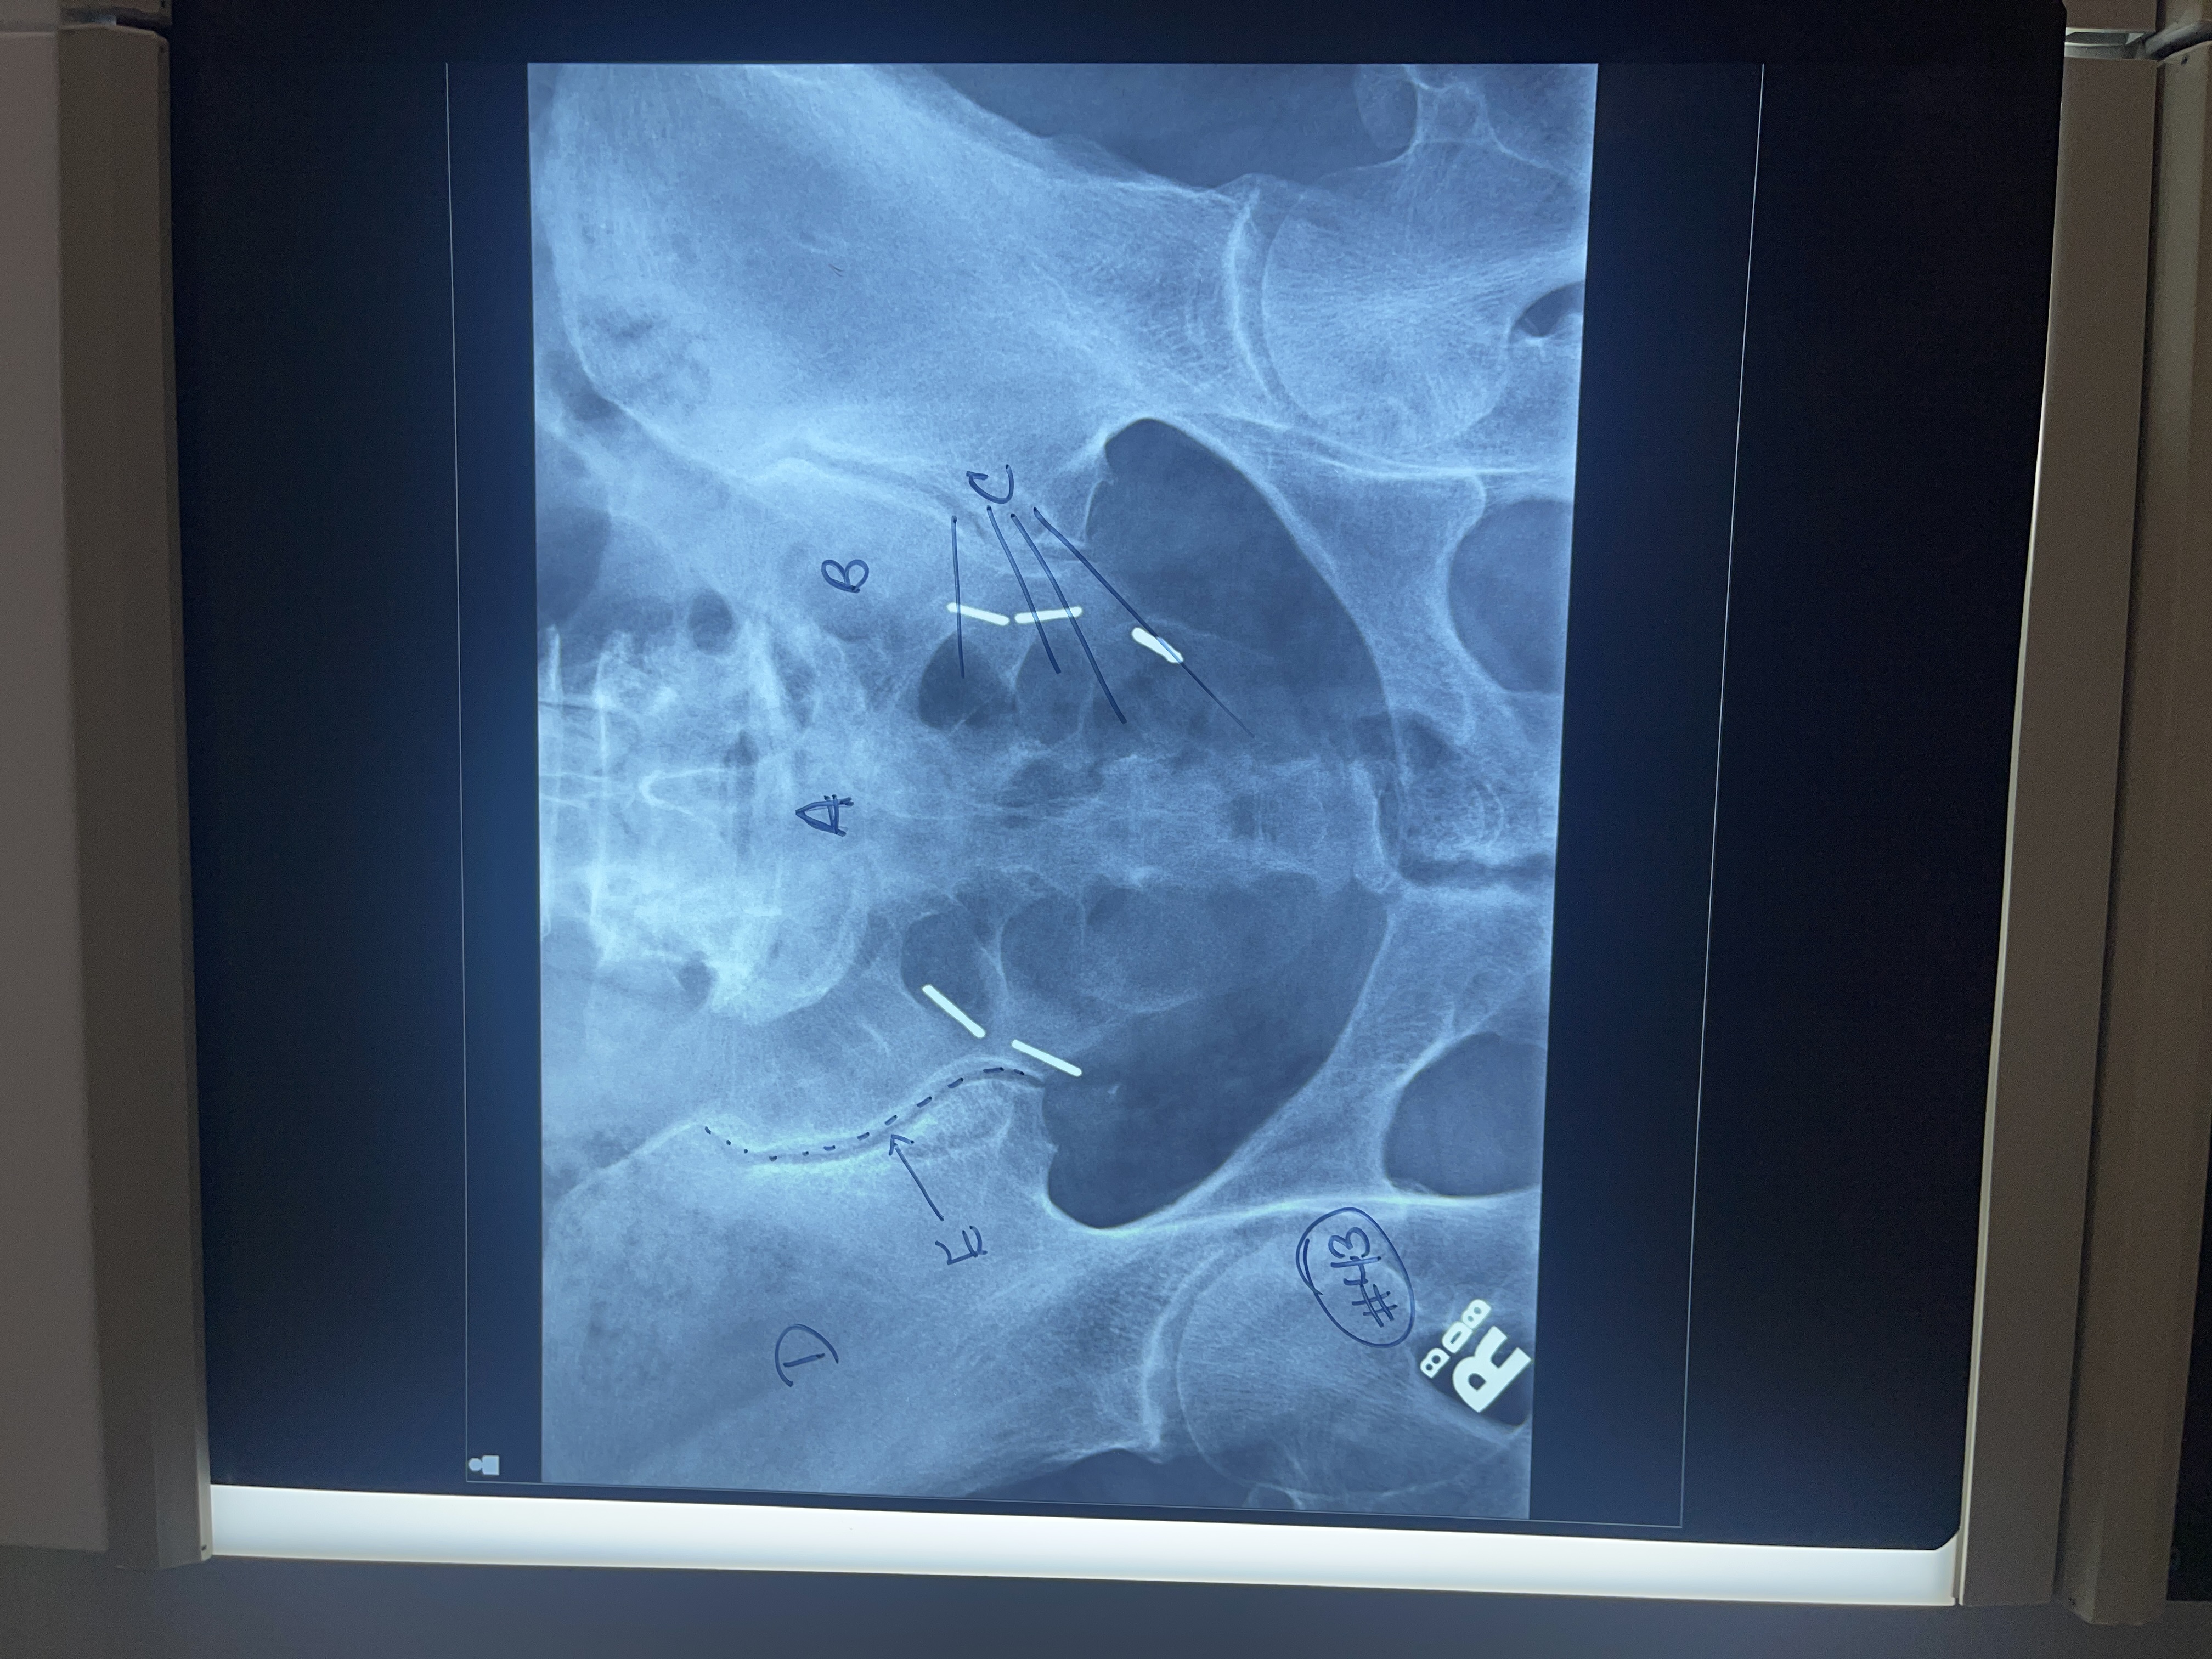
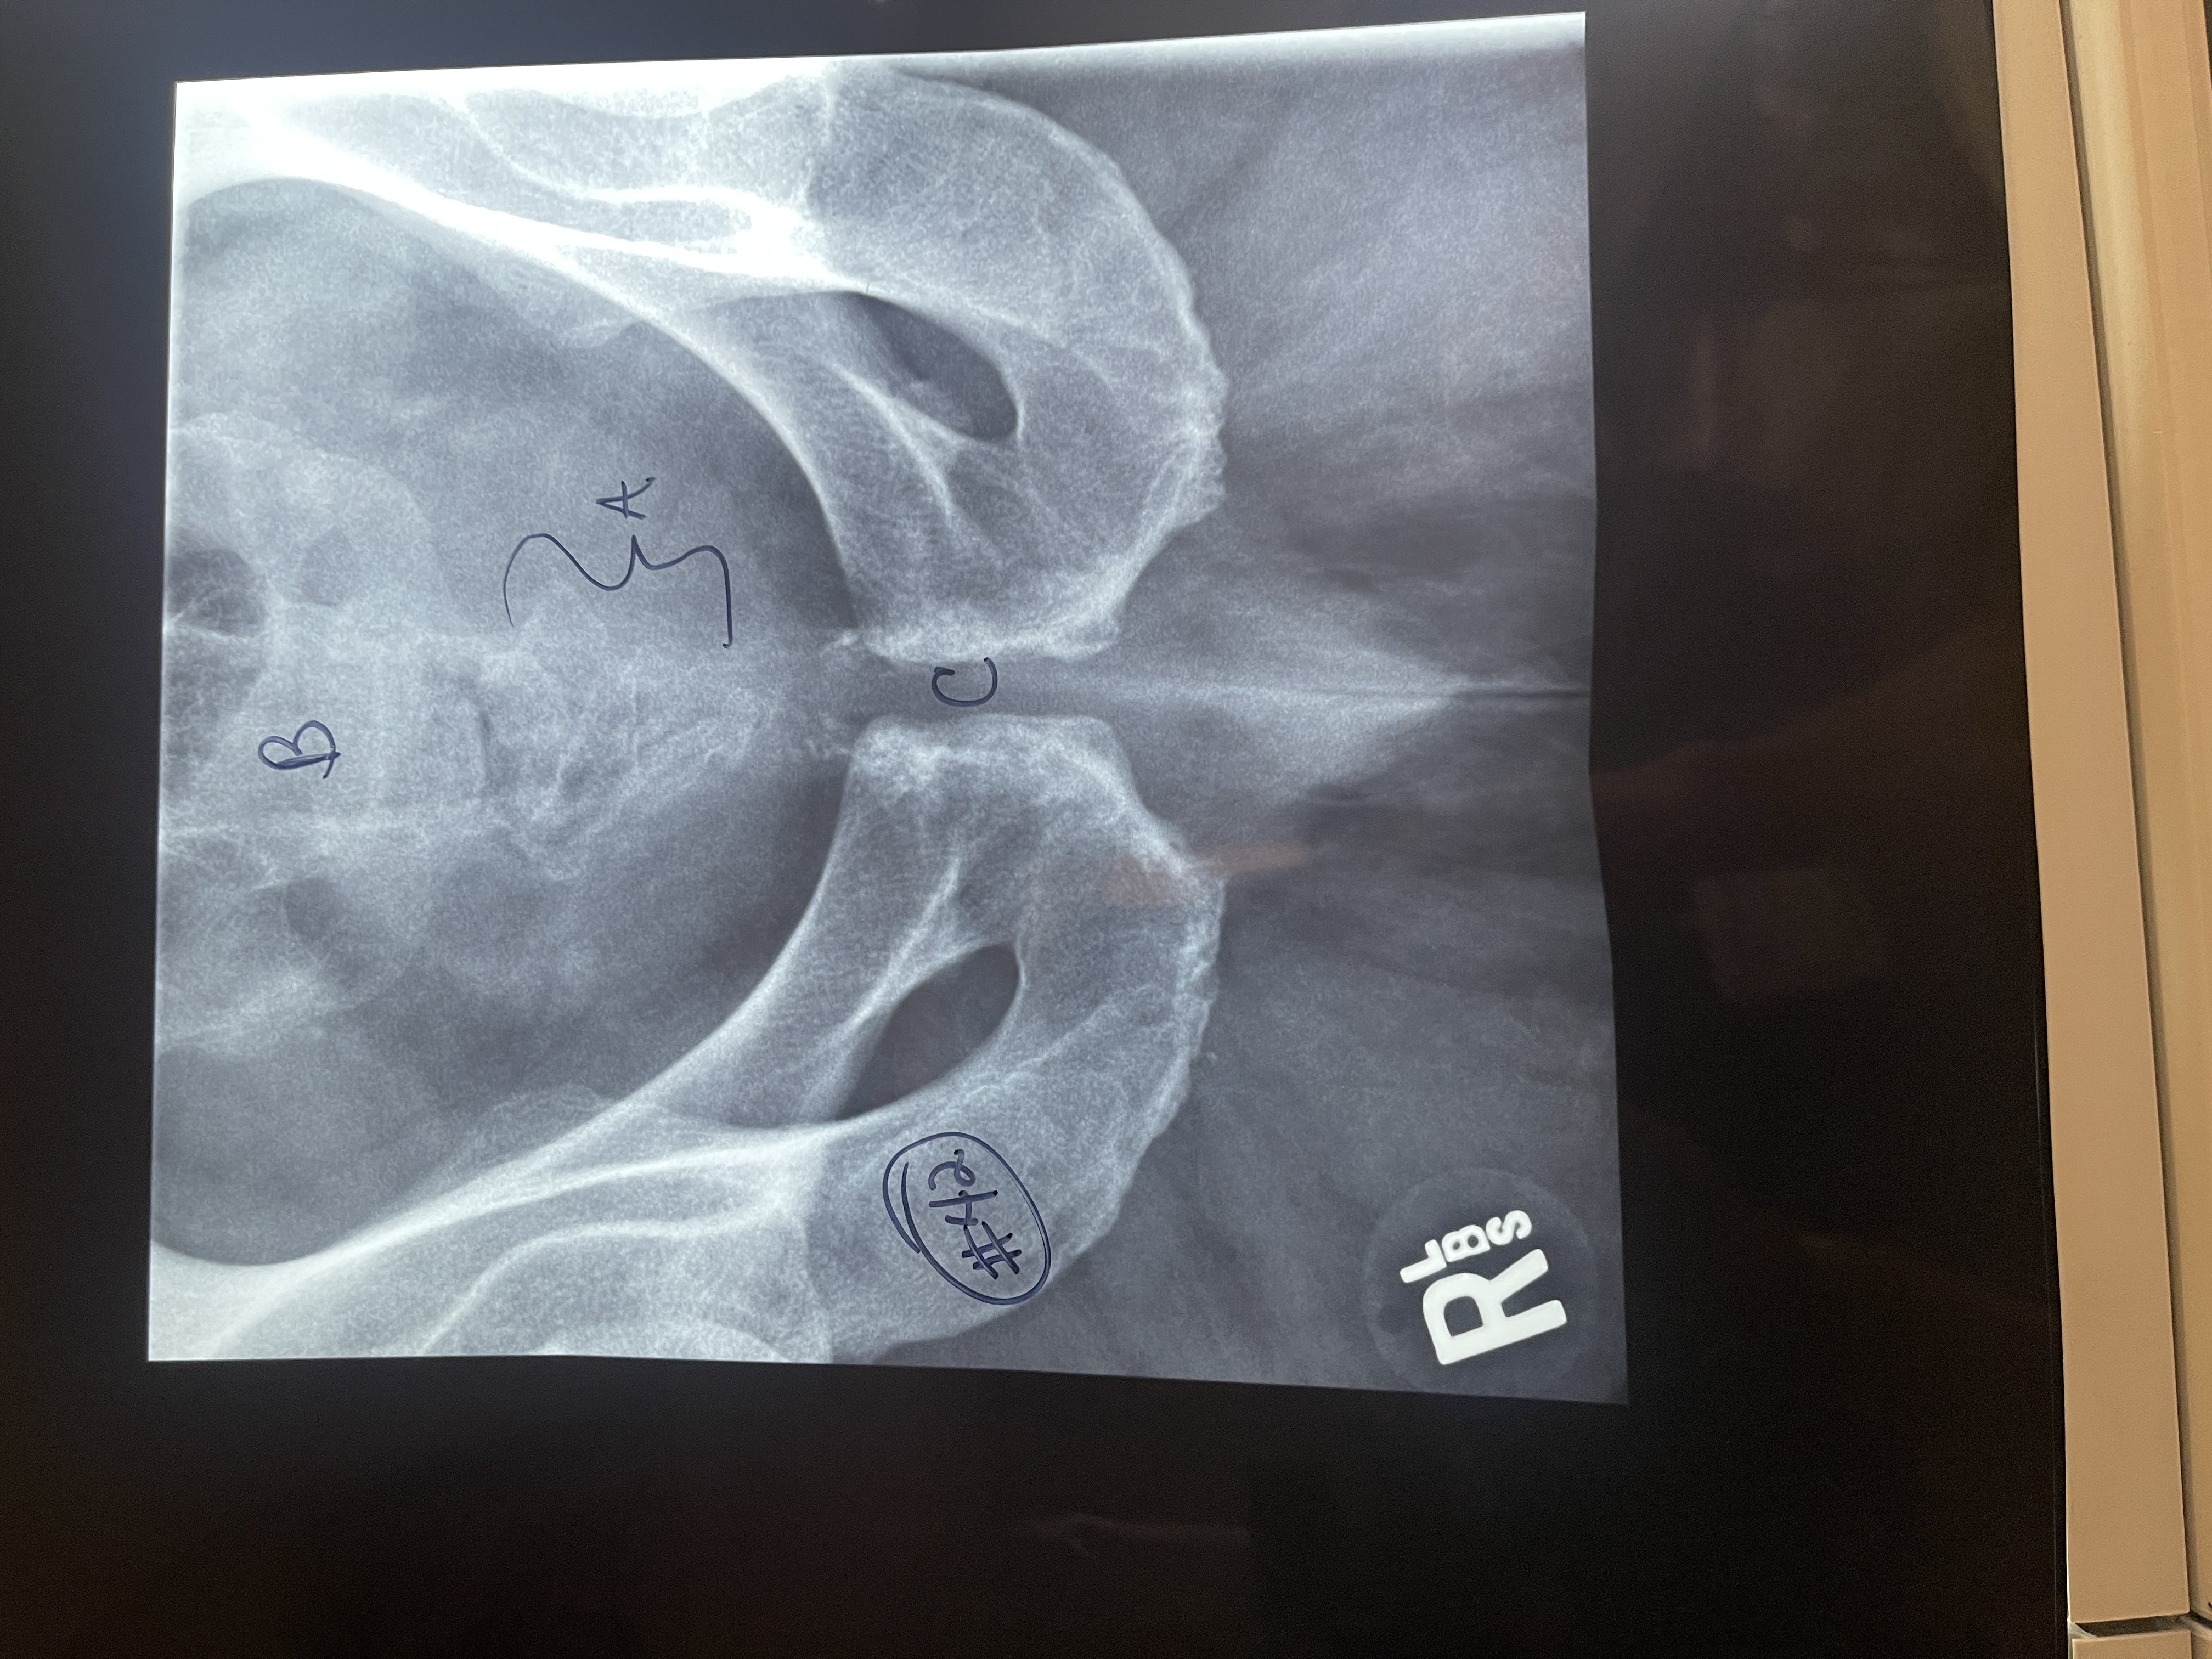
Label #43 AP axial sacrum
A. Sacrum
B. Left sacral wing
C. Sacral foramina
D. Right Ala
E. Right sacroiliac joint
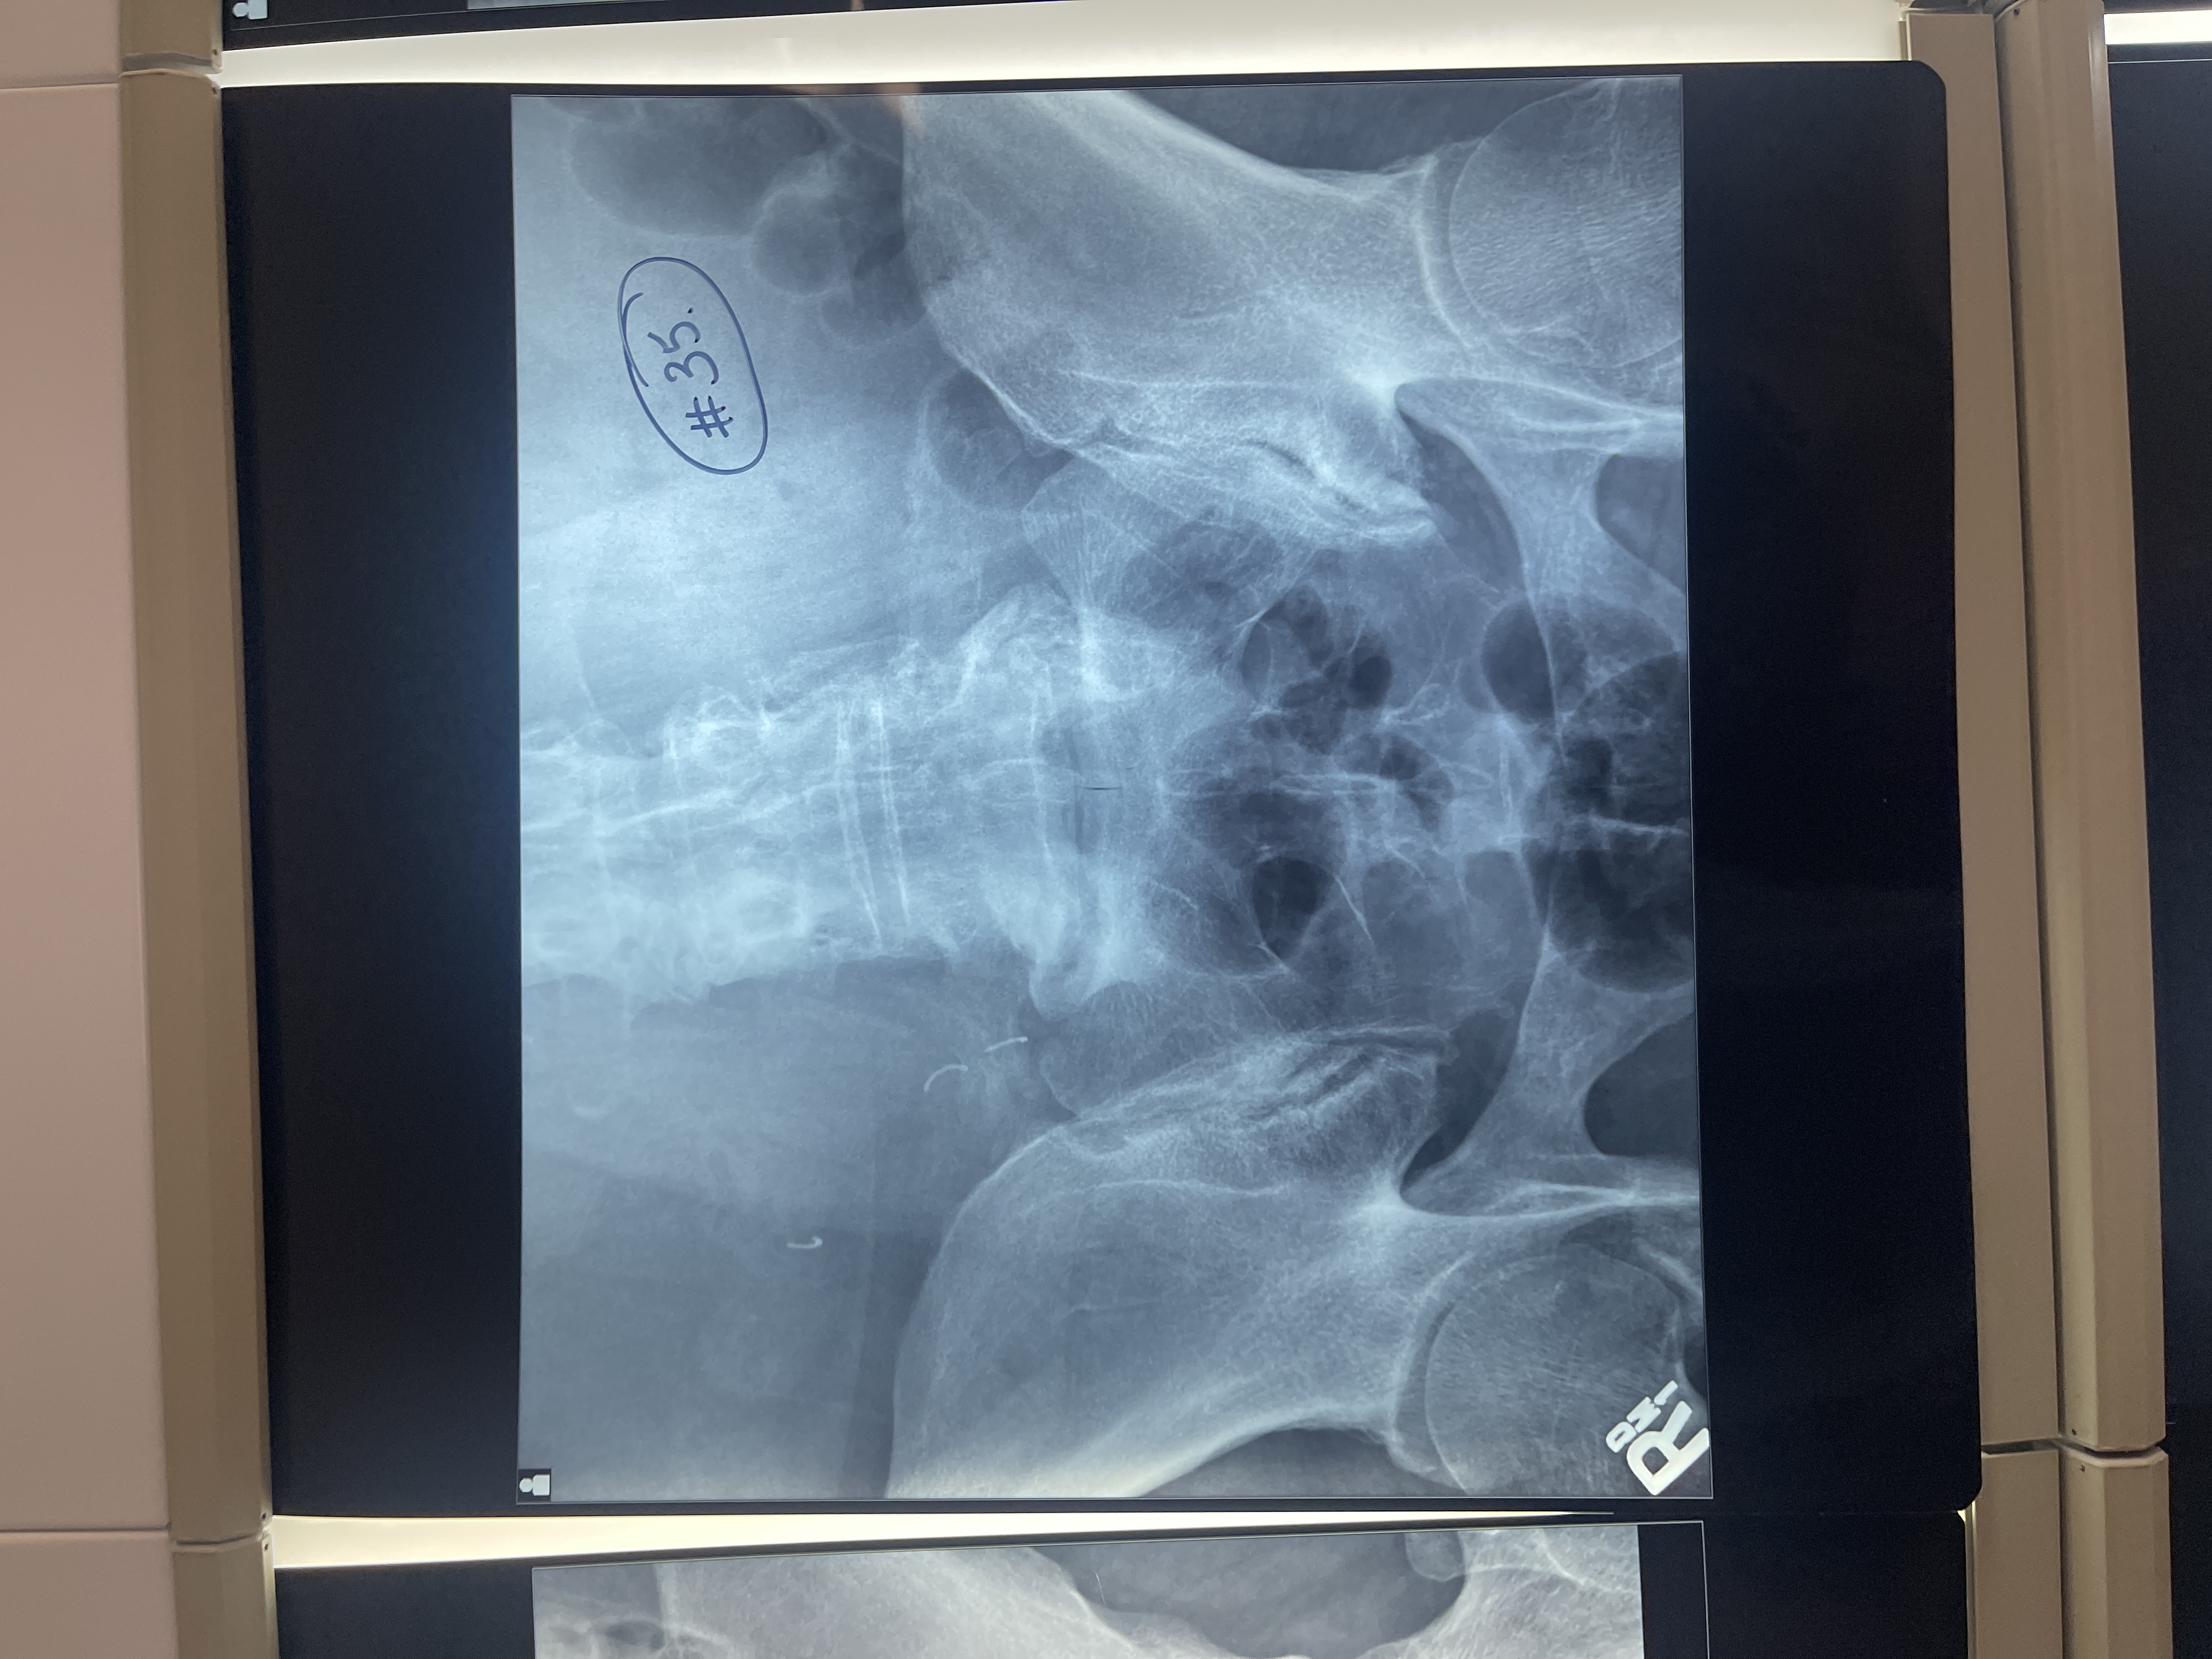
What’s wrong with #35 AP axial sacrum
centered too superior
Entire sacrum not shown
Need to decrease angle to see all of sacrum
Rotated/ slightly RPO
patient has not voided
Not collimated
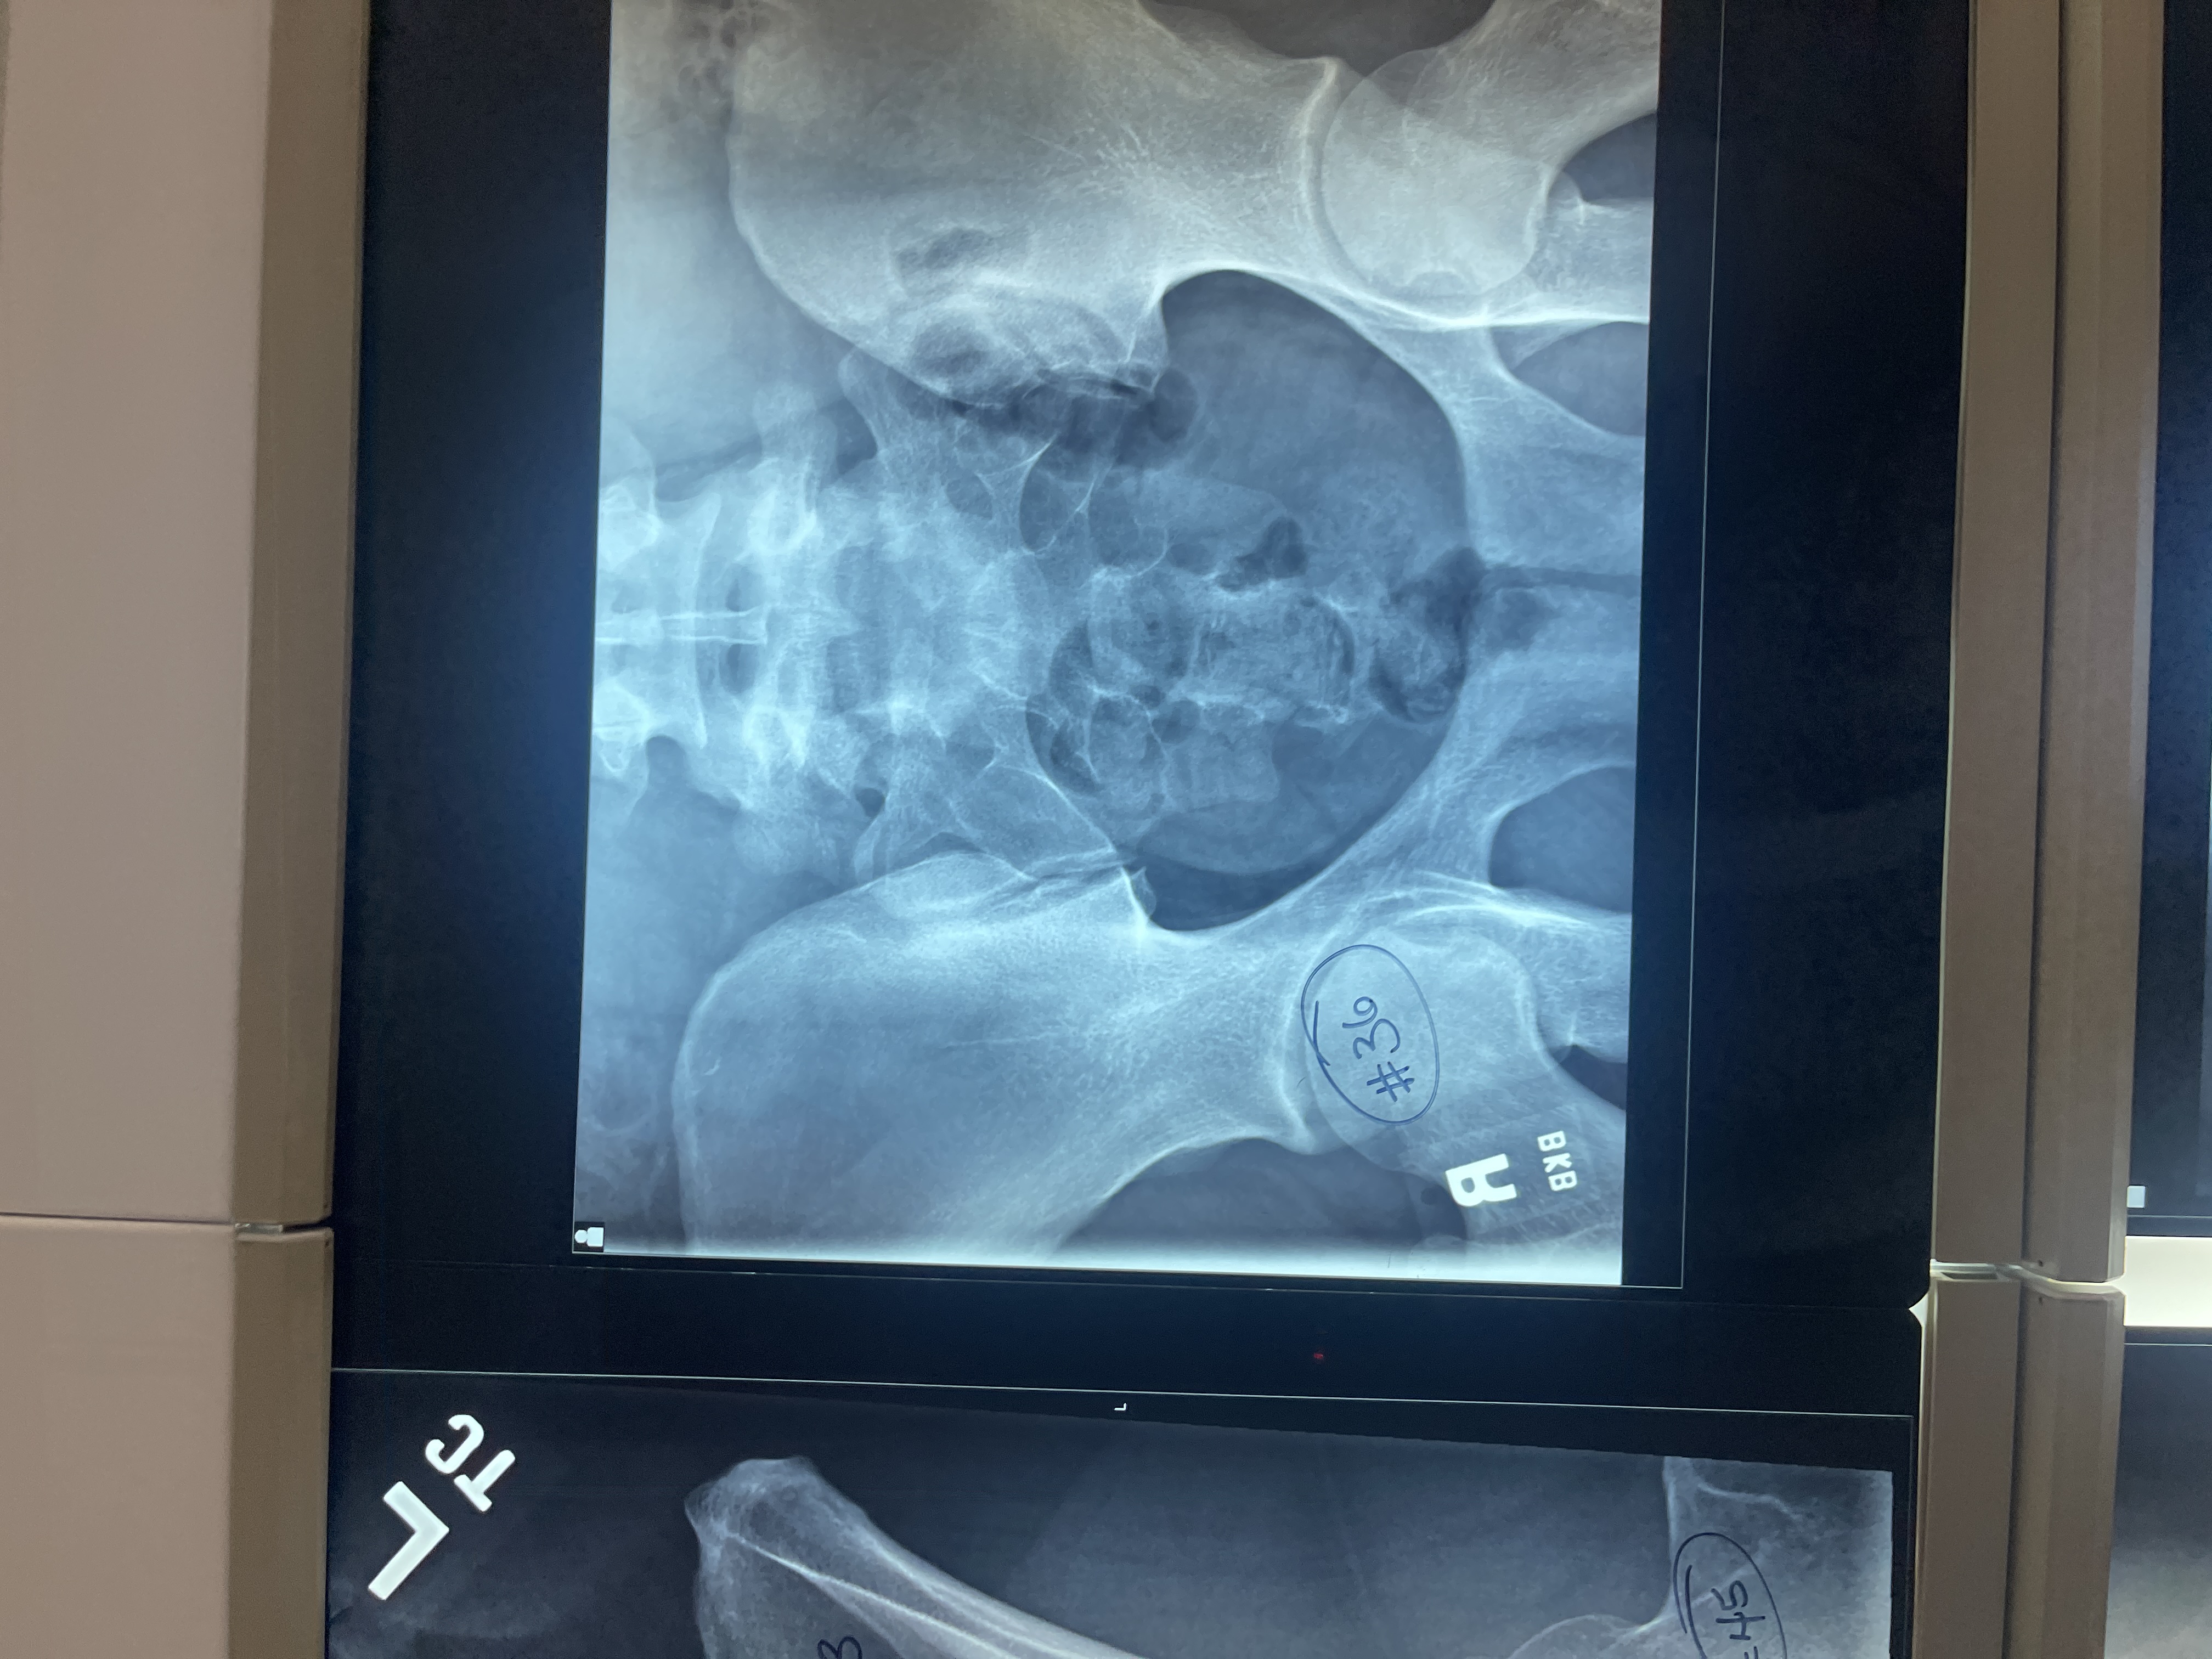
What’s wrong with #36 AP axial sacrum
not voided
Rotated too much to the left
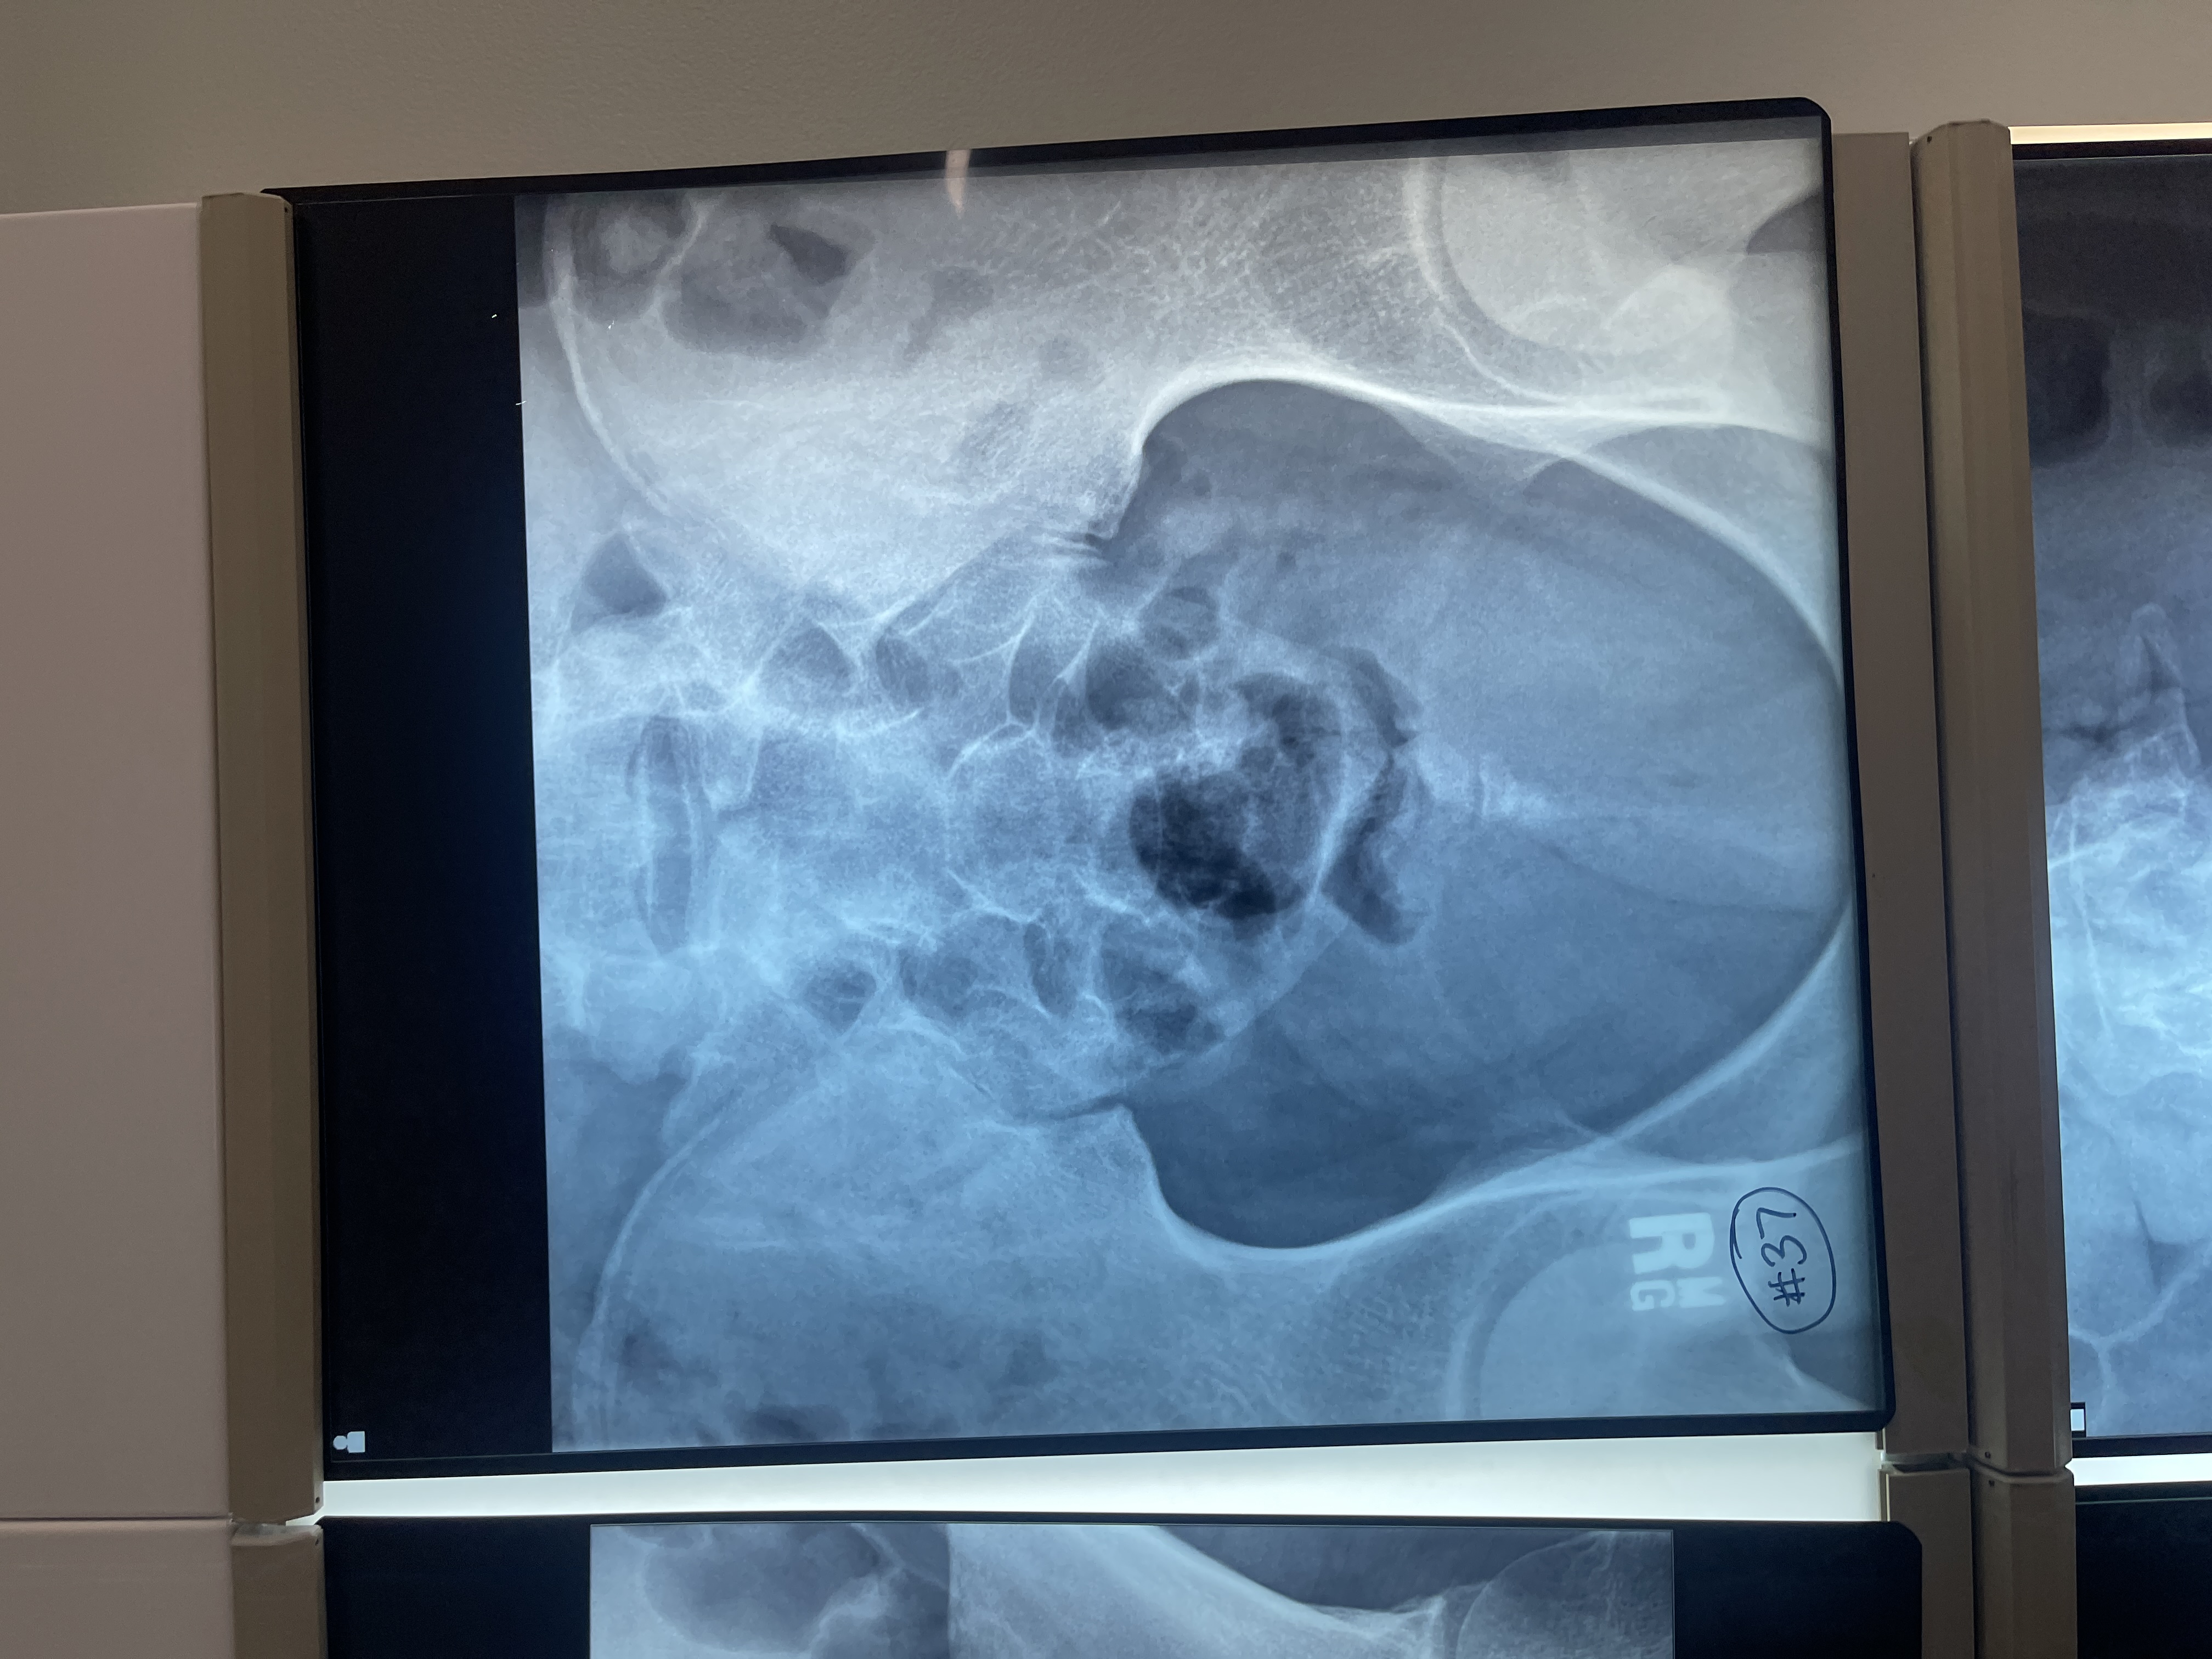
What’s wrong with #37 AP axial coccyx
not collimated
Centered superiorly
Not voided
Position of patient for lateral sacrum/ coccyx
ask patient to turn onto indicated side and flex hips and knees to a comfortable position
Position of part for lateral sacrum/ coccyx
adjust arms in a position at right angles to the body
Superimpose the knees and if needed place positioning sponges under and between the ankles and between the knees
Adjust a support under the body to place the long axis of the spine horizontal. Interiliac plane should be perpendicular to the IR
Adjust the pelvis and shoulders so that the true lateral position can be maintained
Center the sacrum or coccyx to the midline of the grid for accurate positioning
Respiration for lateral sacrum/ coccyx
Suspend
Central ray for lateral sacrum
Elevated ASIS is easily palpated and found on all patients when they are lying on their side
Perpendicular and directed to the level of the ASIS and to a point 3.5 inches posterior
Exact position of the sacrum depends on pelvic curve
Central ray for lateral coccyx
Elevated ASIS is easily palpated and found on all patients when they are lying on their side
Perpendicular and directed toward a point 3.5 inches posterior to the ASIS and 2 inches inferior
Exact position of the coccyx depends on the pelvic curve
Center IR to CR
Collimation for lateral sacrum
10×12
Collimation for lateral coccyx
6×8
Structures shown for lateral sacrum/ coccyx
Sacrum or coccyx
Evaluation criteria for lateral sacrum/ coccyx
proper collimation
Presence of lead rubber behind sacrum
Sacrum and coccyx
Closely superimposed posterior margins of the ischia and ilia, demonstrating no rotation
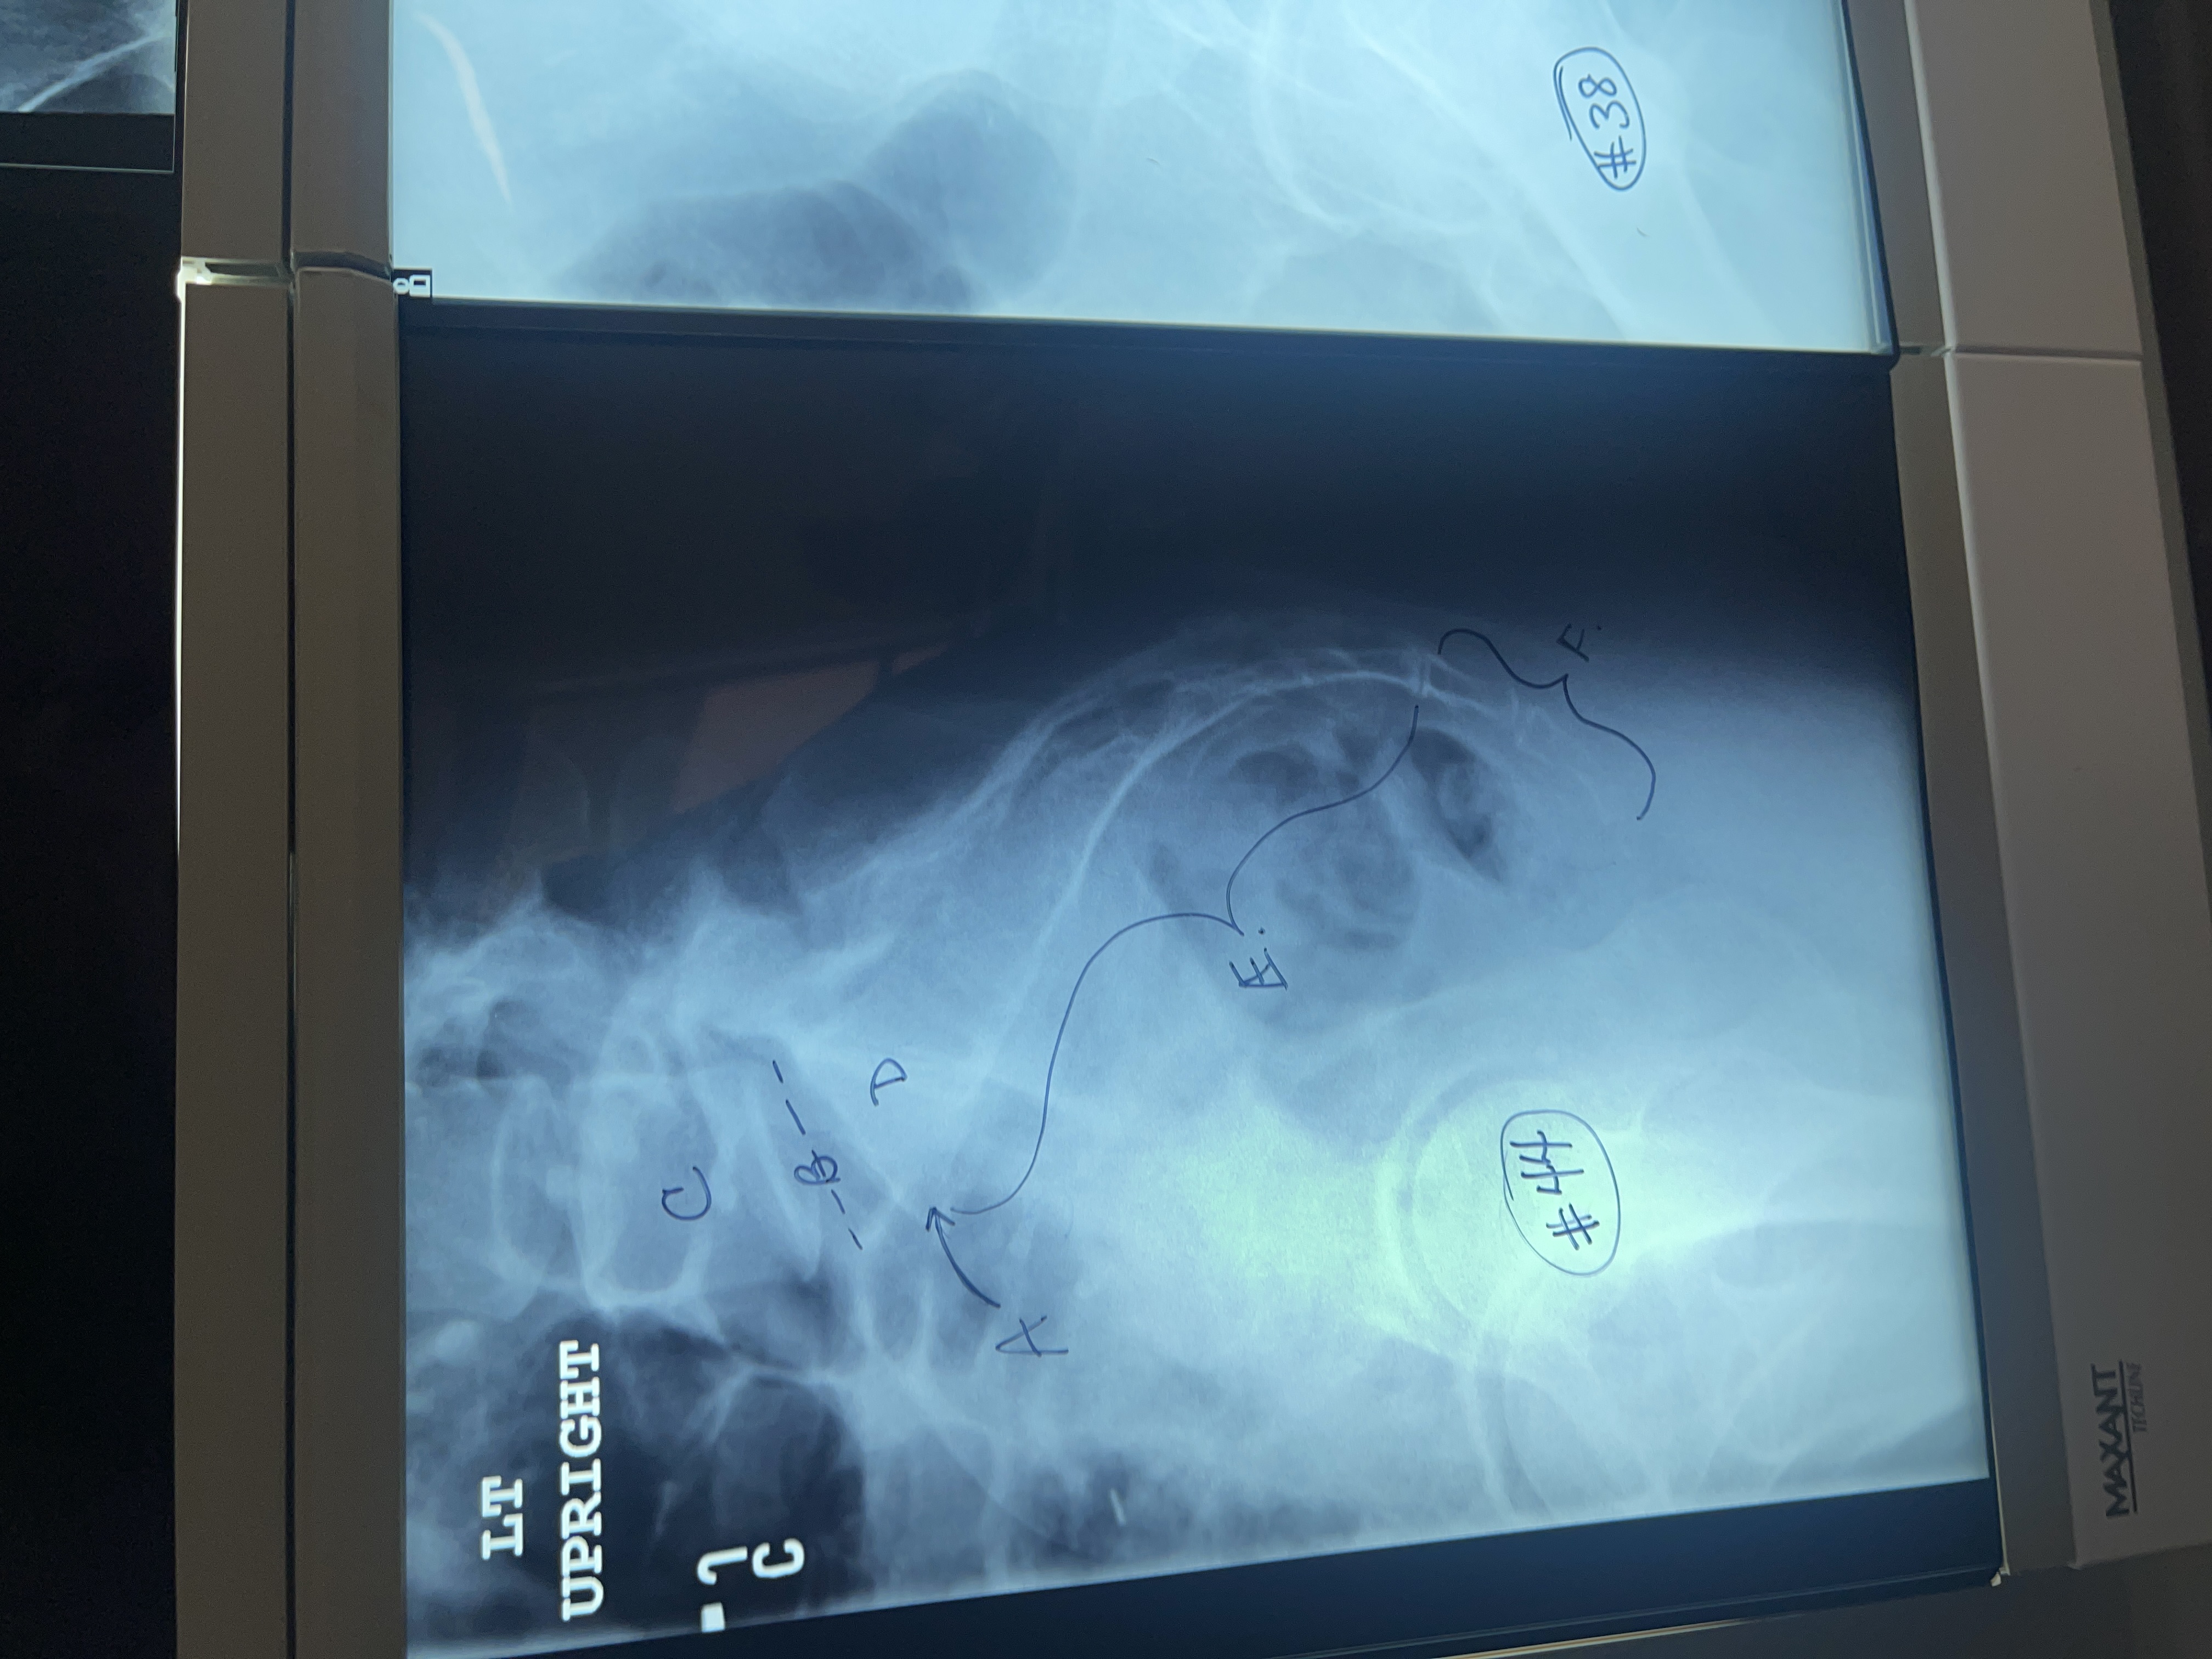
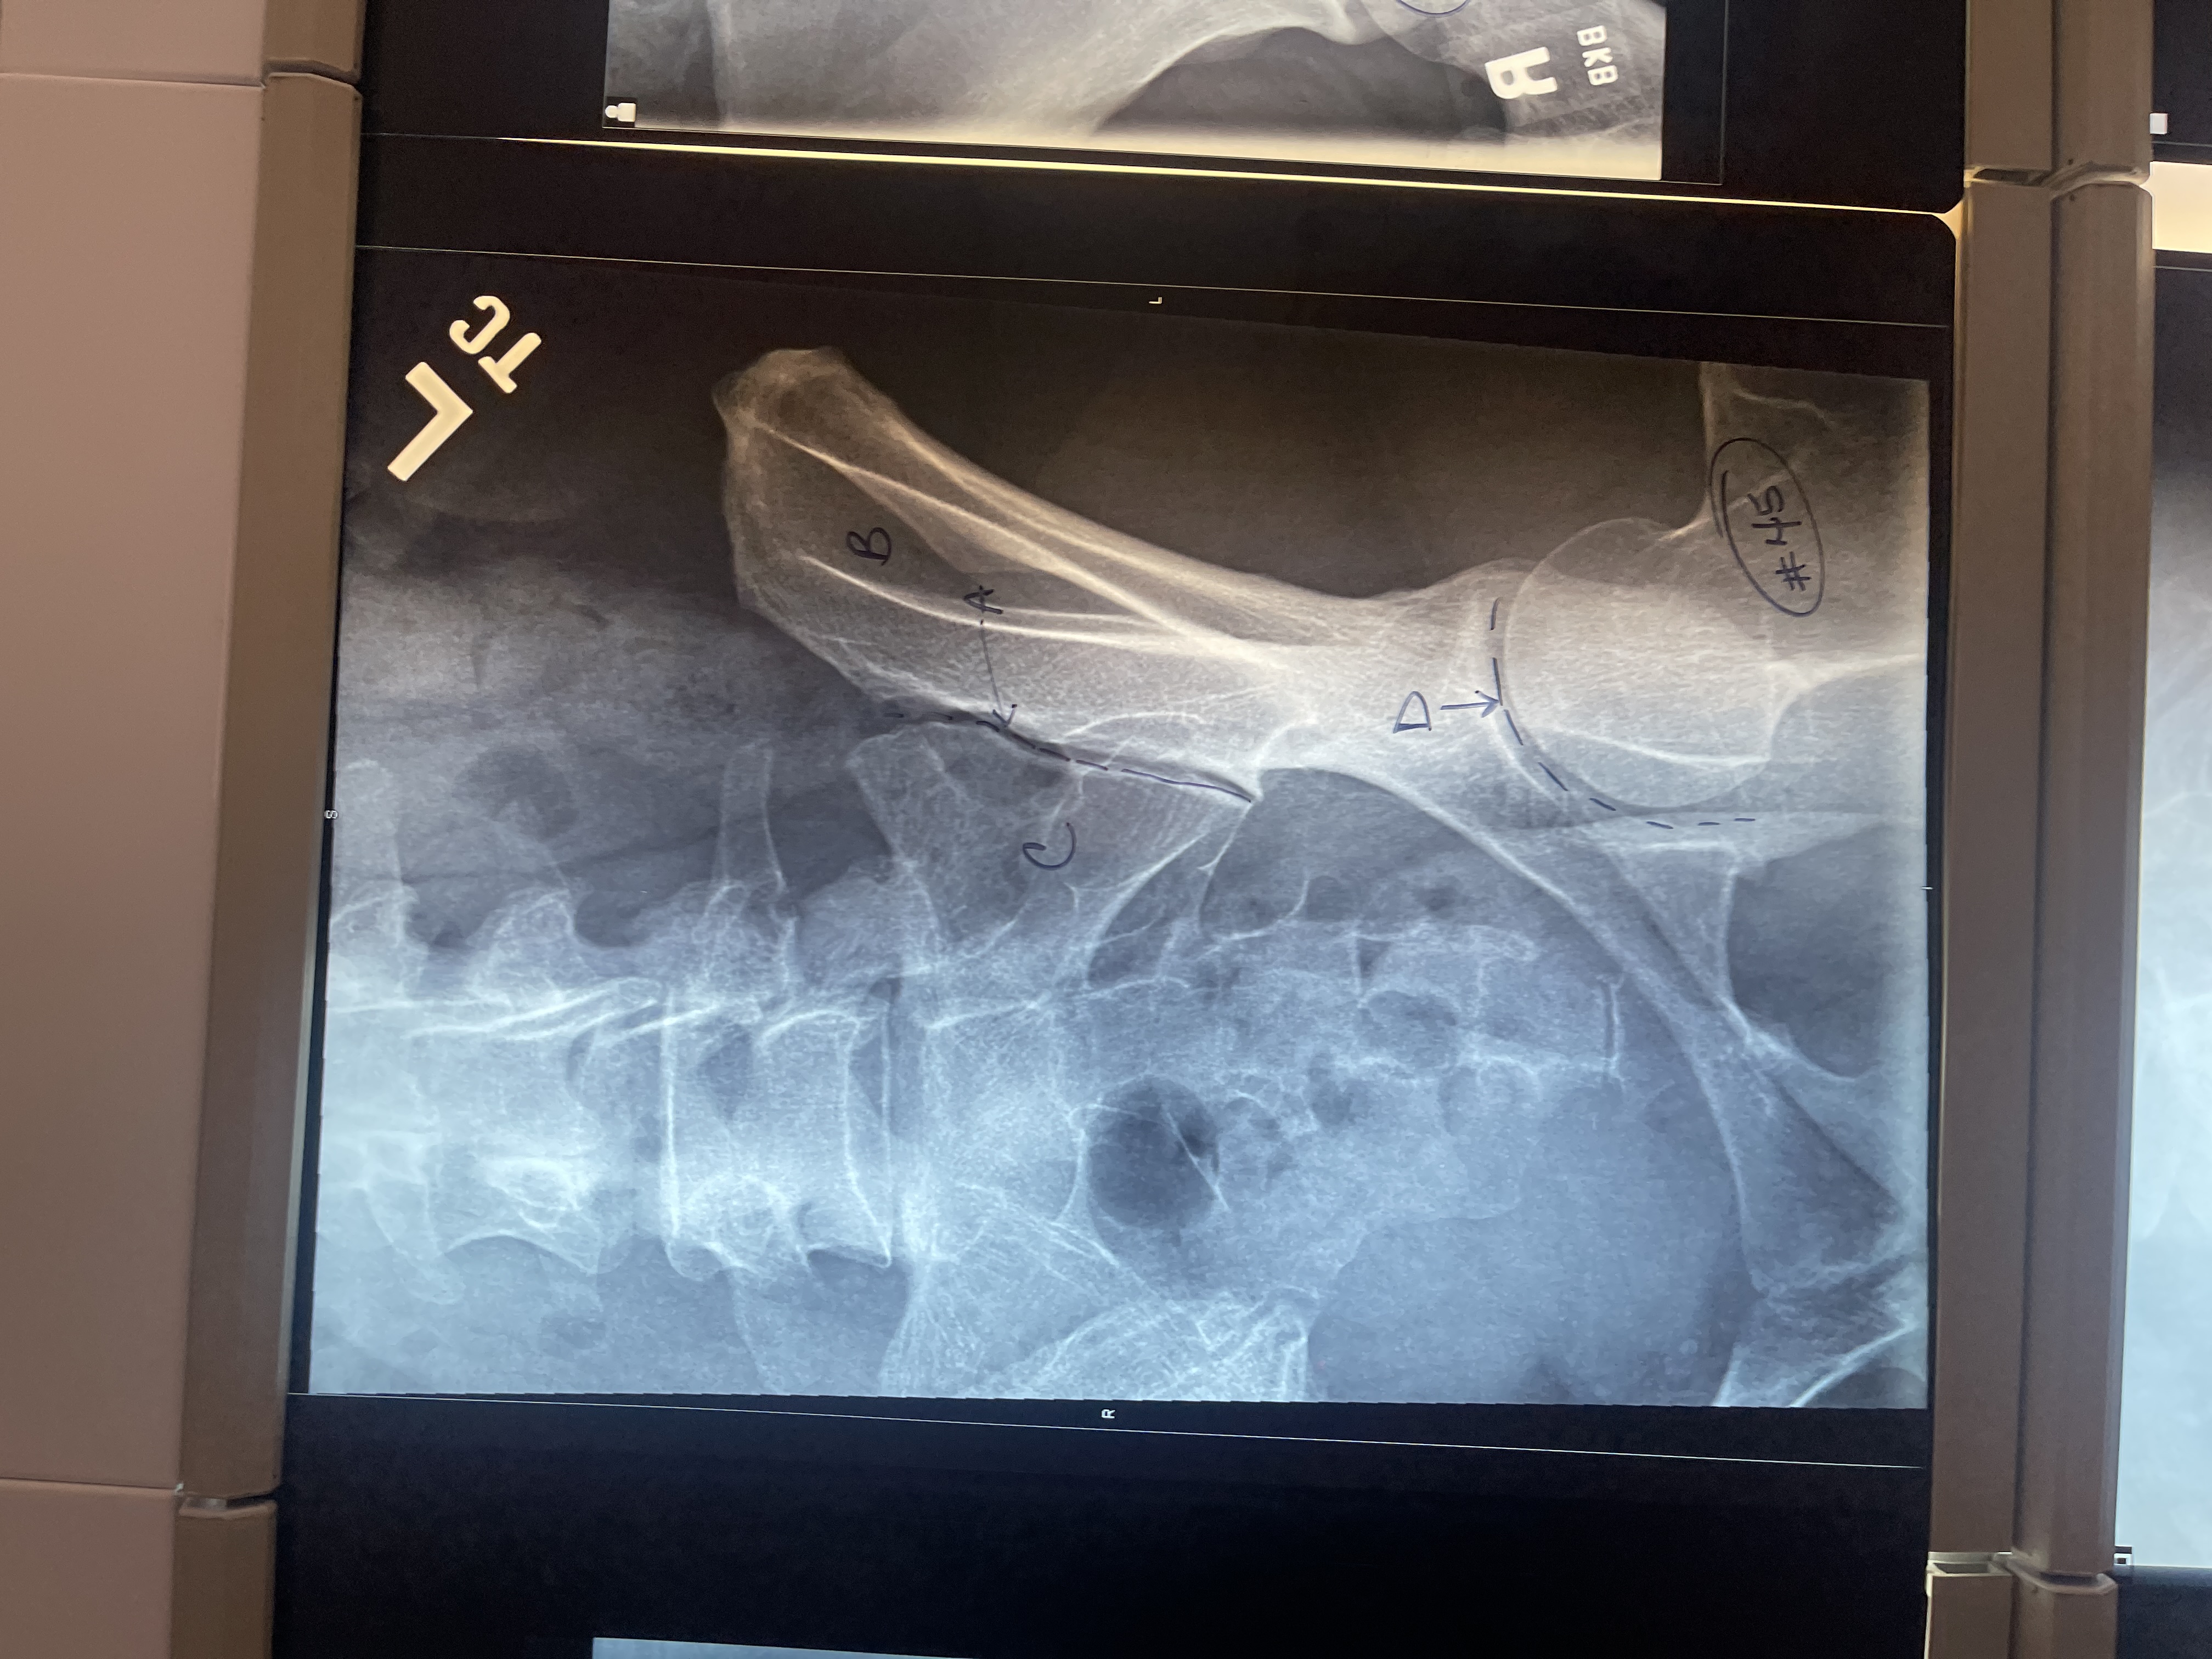
Label # 44 lateral sacrum/ coccyx
A. Sacral promontory
B. L5-S1 intervertebral joint space
C. Vertebral body of L5
D. First sacral segment
E. Sacrum
F. Coccyx
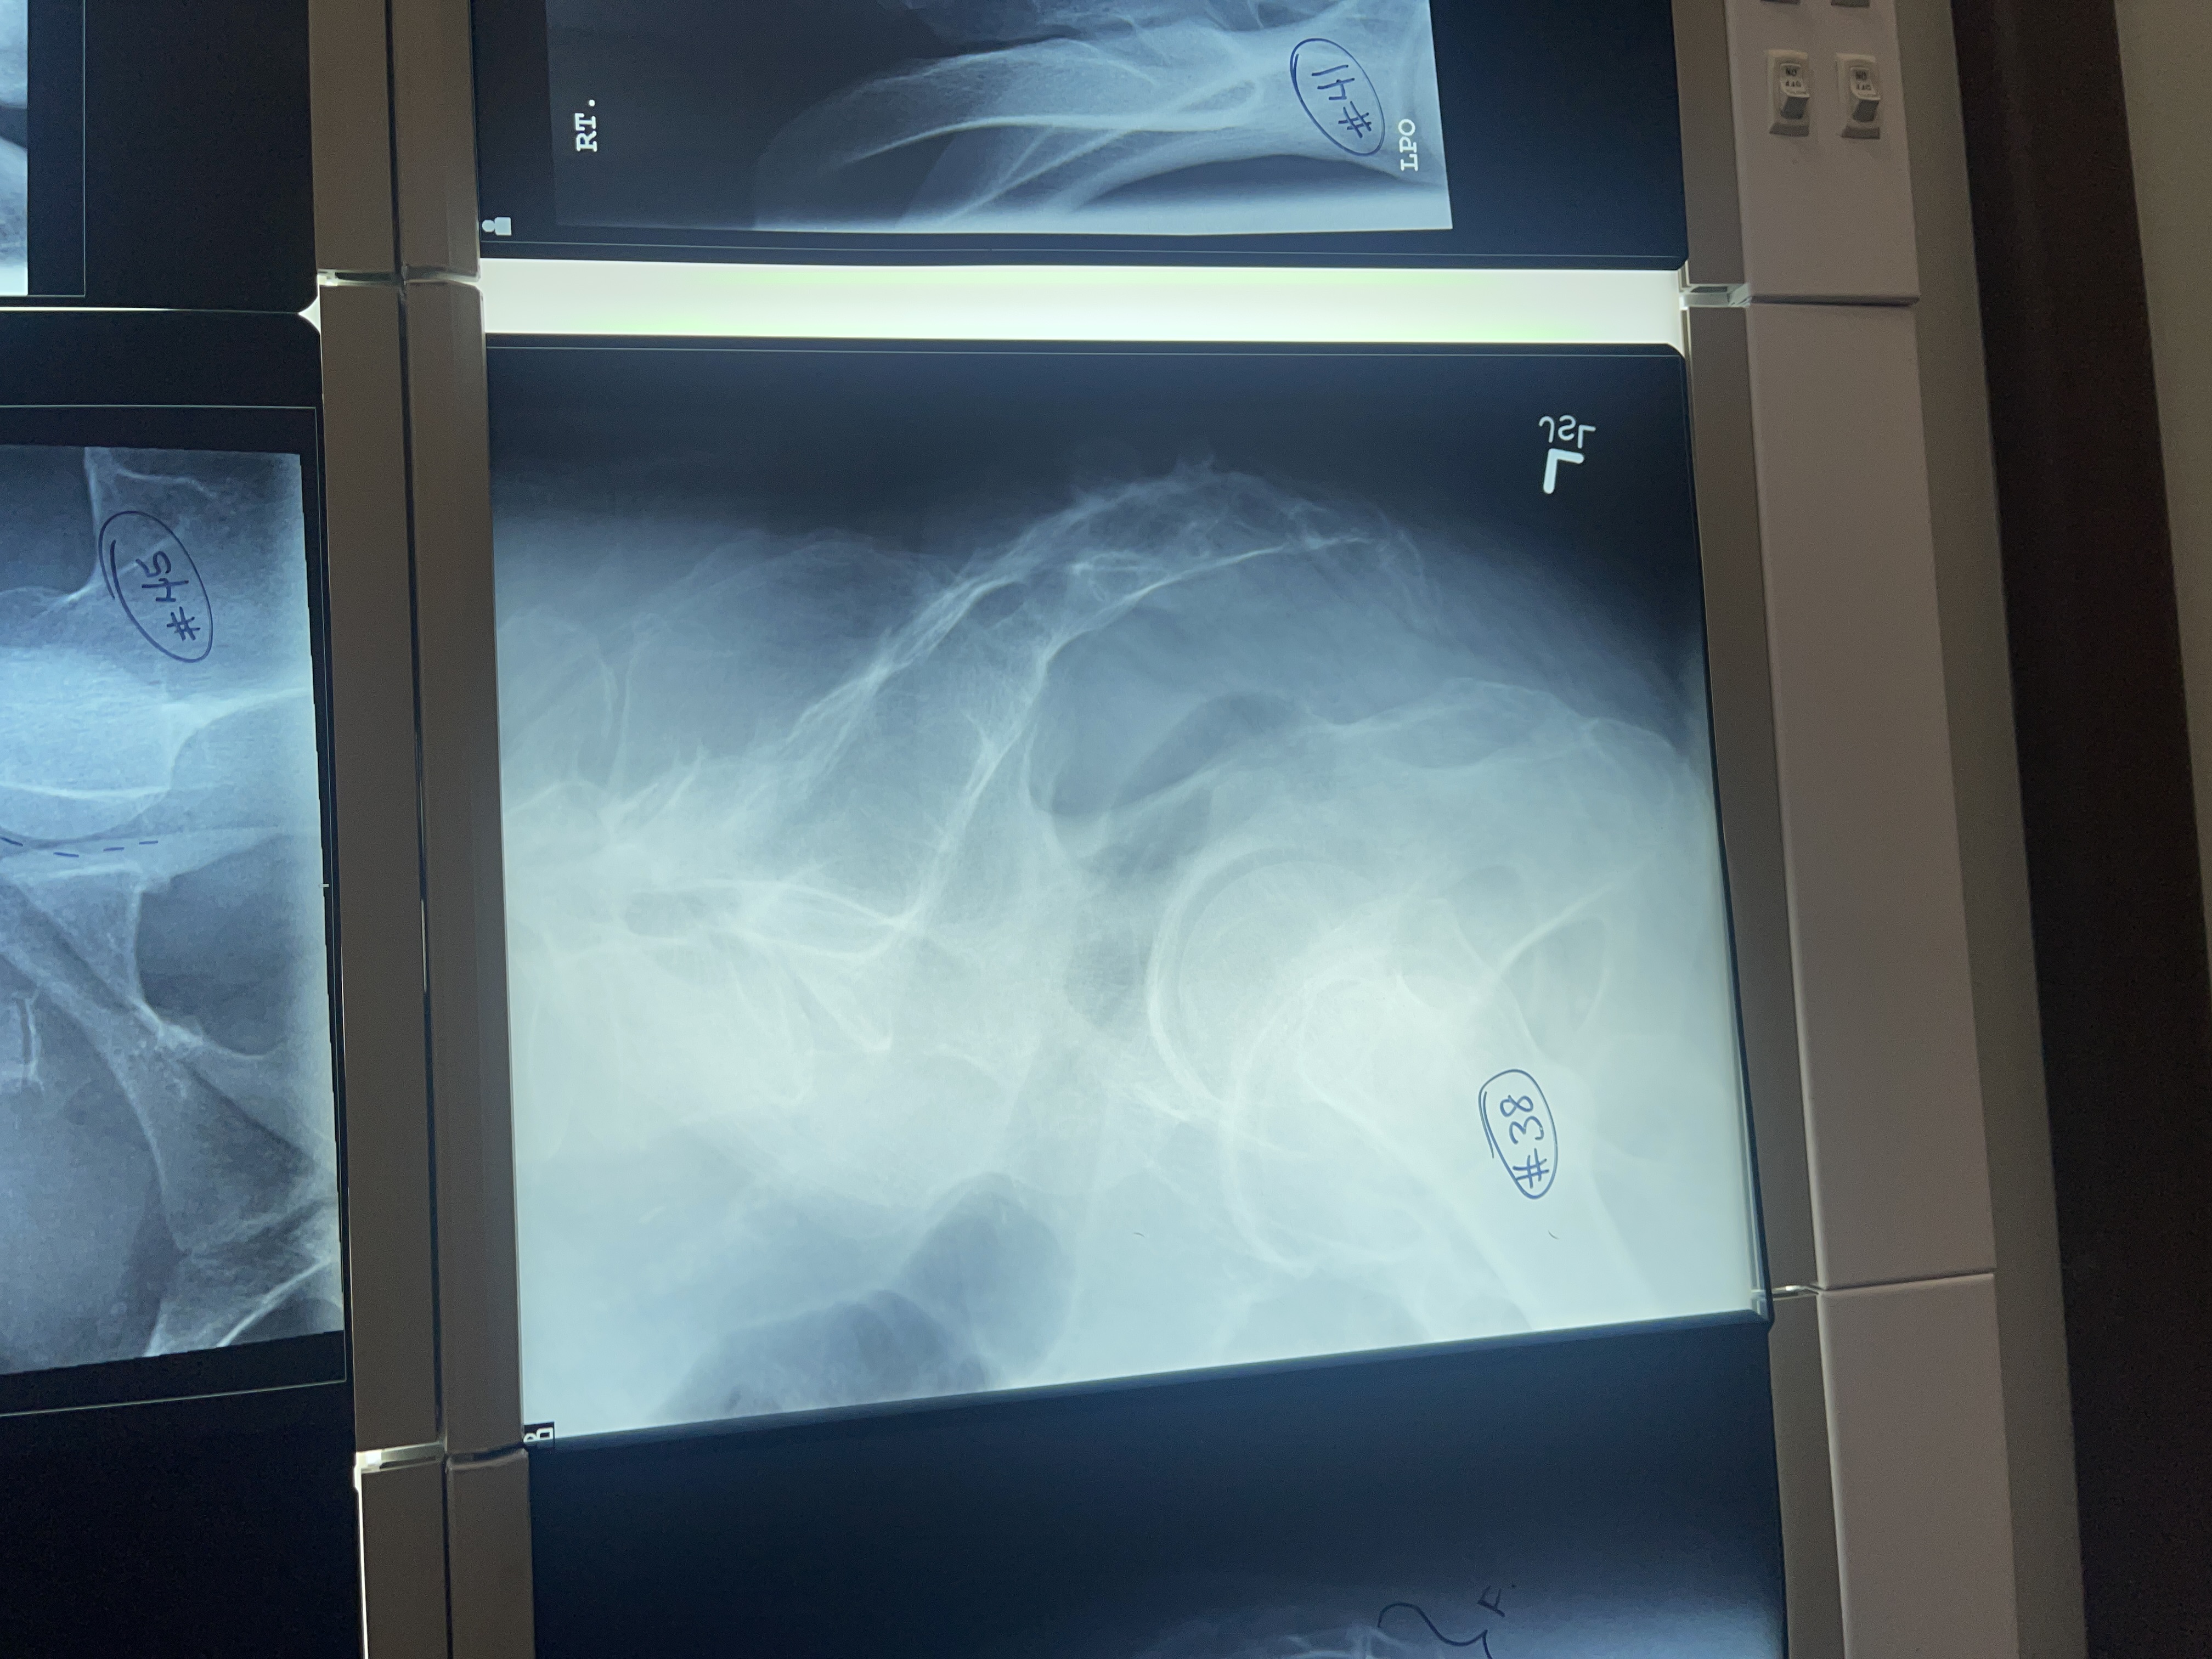
What’s wrong with #38 lateral sacrum/ coccyx
not marked anterior
Too light
Too inferior and anterior
Ala are not superimposed
Rt femoral head is more anterior
Rolled forward
Not collimated