art study
1/24
There's no tags or description
Looks like no tags are added yet.
Name | Mastery | Learn | Test | Matching | Spaced | Call with Kai |
|---|
No analytics yet
Send a link to your students to track their progress
25 Terms
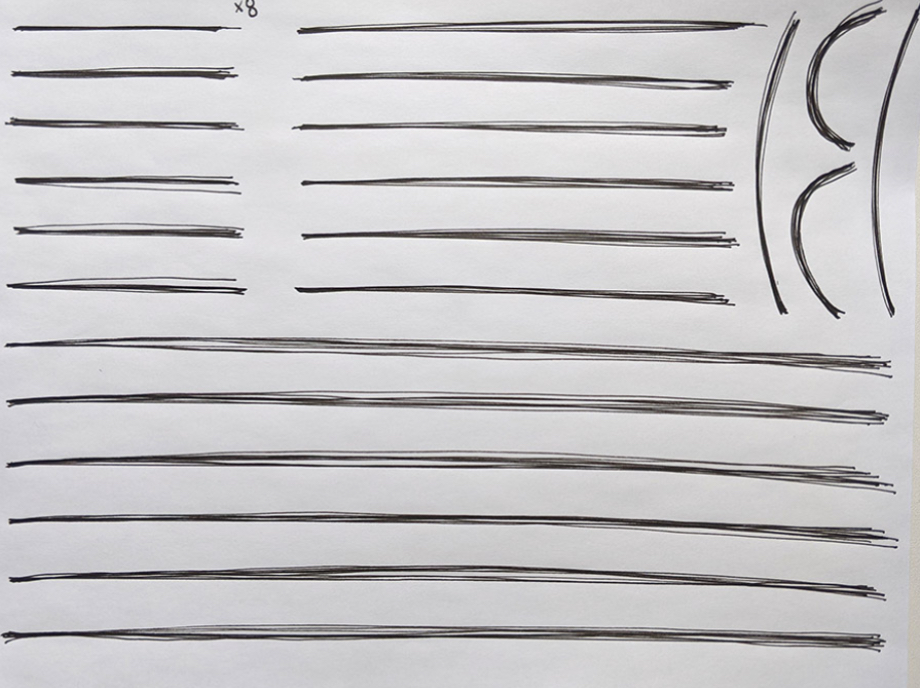
Superimposed lines
start out with a simple straight line with a ruler or a straight edge of some sort.
Now, draw directly on top of that guideline and repeat the stroke freehand 8 times
Make sure to use your shoulder and not the wrist
Be confident and trust your muscle memory
Use the ghosting method before making any mark
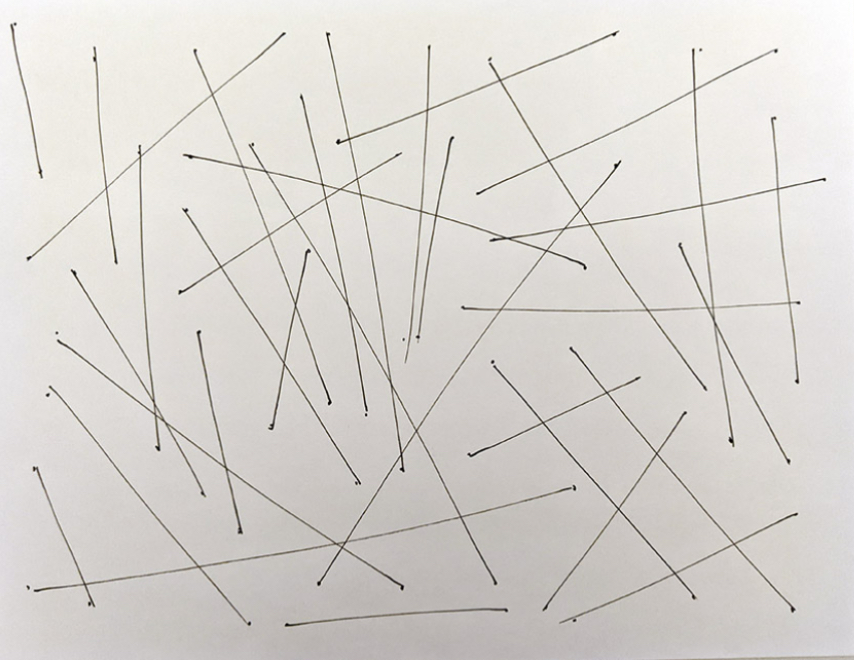
Ghosted lines
• put two mark on the page than connect them with a line.
• Make sure the line is straight, smooth, consistent without wobbling.
• Make sure the line starts right at one point and ends exactly at the other.
Don’t make a mark without a purpose
Identify the path you want the mark you want to follow
Don’t rush
After making the mark, we need to familiarise with the motion and the movement of the body
Make sure you’re sitting with a good posture that your able to engage your whole arm and start ghosting
Ghosted planes
• start out by planning out our marks.
• we want to produce some sort of quadrilateral.
• go ahead and construct lines between the corners of our plane.
• drawing a cross through the center of the X we created in the previous step.
Remember to use the ghosting method for every mark you draw
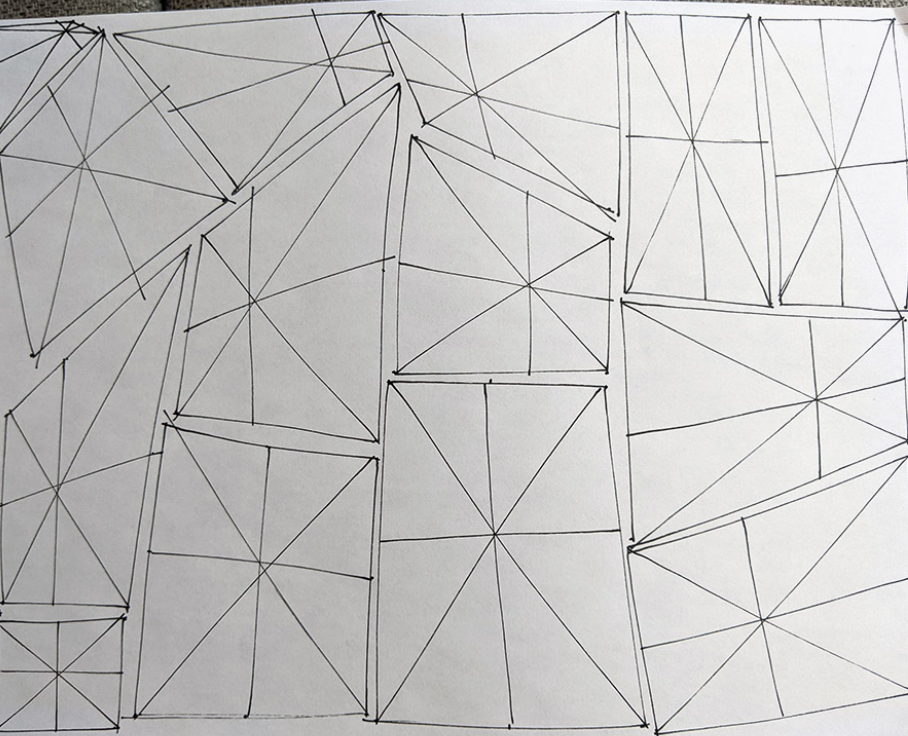
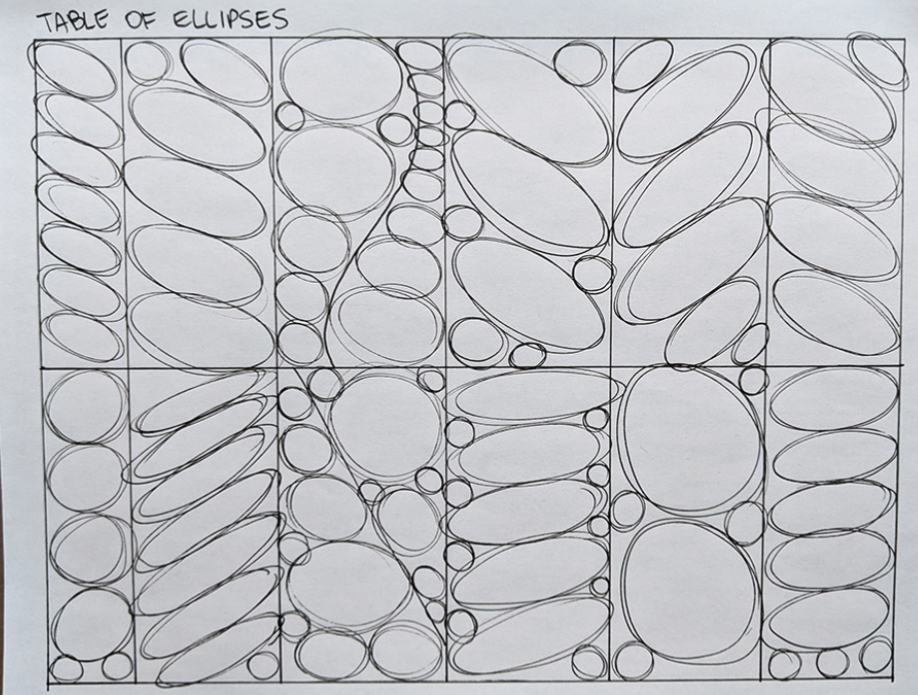
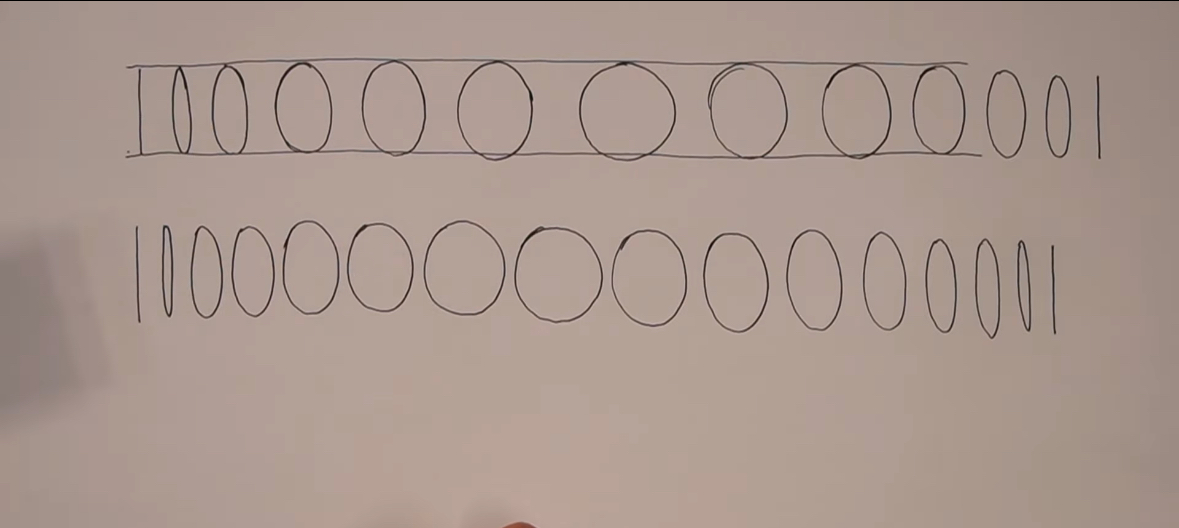
Table of ellipses
Start off by taking your piece of paper and dividing it into a table with two columns and a bunch of rows.
For this one, you draw a circle starting from the far left of the box. Then, draw another beside it. Keep repeating it until you fill in the whole box. try to make your circles touch the top and bottom of the box, as well as the line to the left of it.
Draw a wave through the section, dividing it into irregular pockets of space. Then fill these spaces with circles or ellipses, trying to keep them touching the bounds of the section as well as the curve. Everything should fit in there snugly, and nothing should be floating around.
This exercise is meant to get you used to drawing ellipses, in a variety of sizes, orientations and degrees.
It also sets out a clear space each ellipse is meant to occupy, giving us a means to assess whether or not an ellipse was successful, or if there were visible mistakes
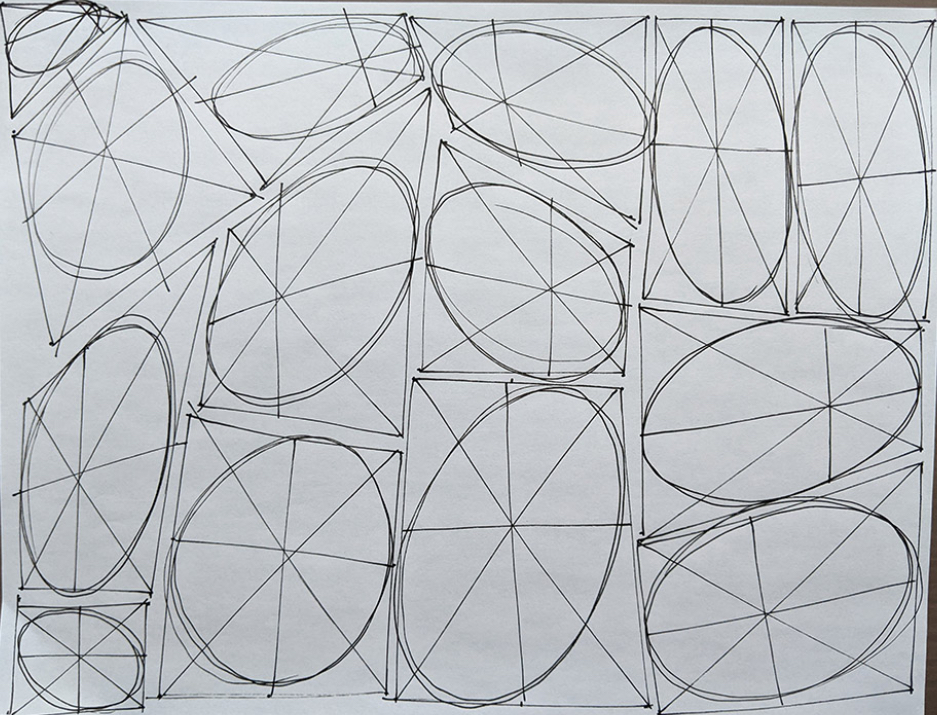
Ellipses in planes
Draw plane
Put an ellipse in there
Make it smooth and evenly shaped, and have it touch all four edges
Make sure to use the ghosting method
This exercise is the intro to constructing cylinders.
The purpose is to maintain the smooth, even shape.
The second purpose is to try to make the ellipses touch at sides of the plane
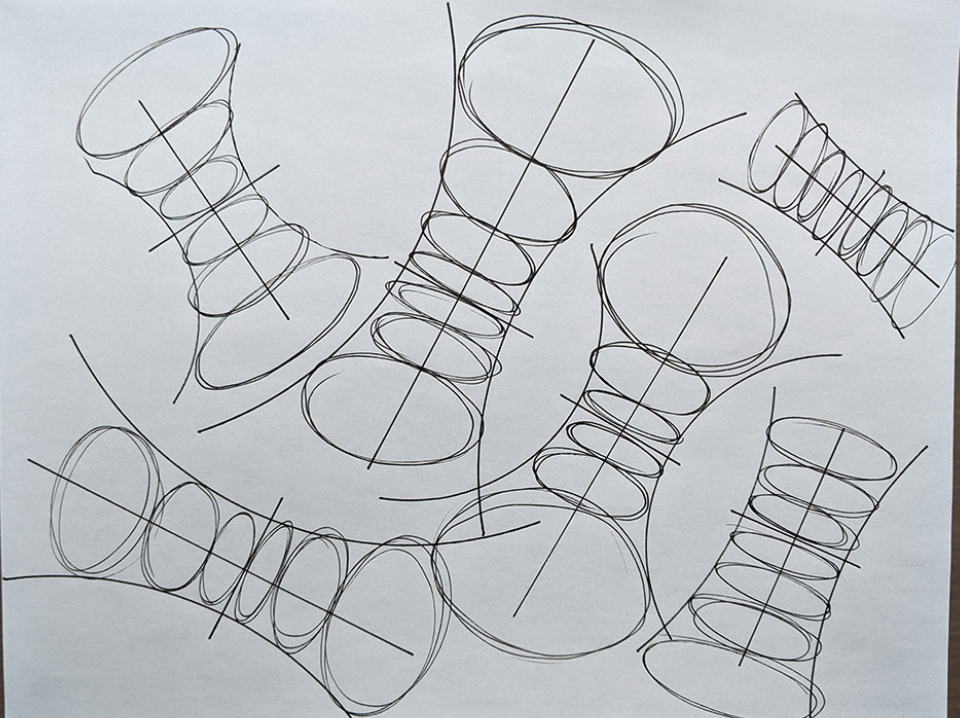
Funnels
Start out by drawing a long line with a shorter one across it marking out its middle (use ruler)
Along either side of the long line, draw an arc.
In the space inside of the funnel, draw your ellipses.
Keep your ellipses snugly against one another - don't leave large spaces between them
This exercise is about getting used to the use of minor axis line, as well as continuing on getting the ellipses to fit the shapes we want.
You want to make sure that the minor axis cuts each ellipse into two equal, symmetrical halves, down their narrower dimension.
Rough perspective
Use a ruler to draw a line and add a single vanishing point in the centre.
Draw a rectangle
Place the four corners
Draw the missing edges
When your done use a ruler and pen with a different colour and extend them wheee they meet the horizon
This exercise helps you stop obsessively drawing every vanishing point and trust that parallel lines naturally converge.
You can’t plot every point in a complex scene—it’s too time-consuming and kills creativity.
Use one vanishing point
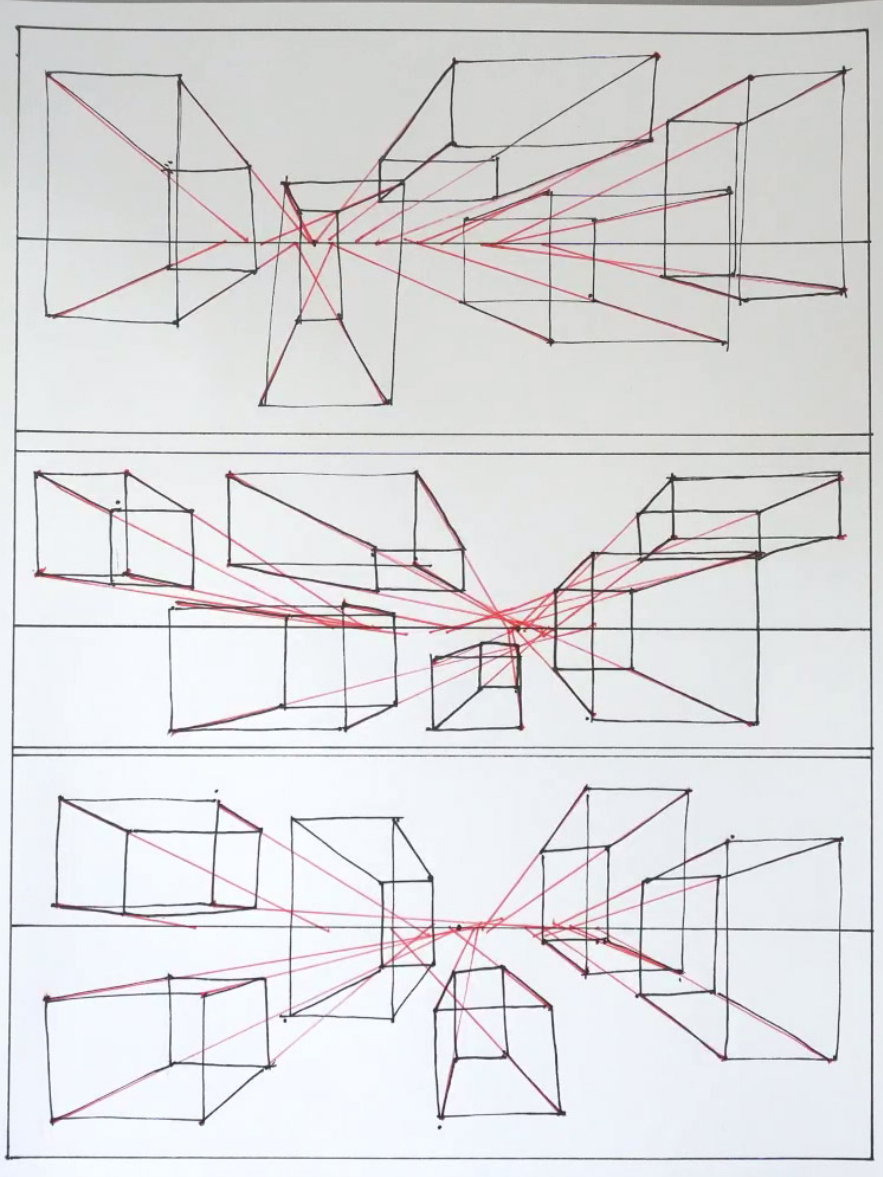
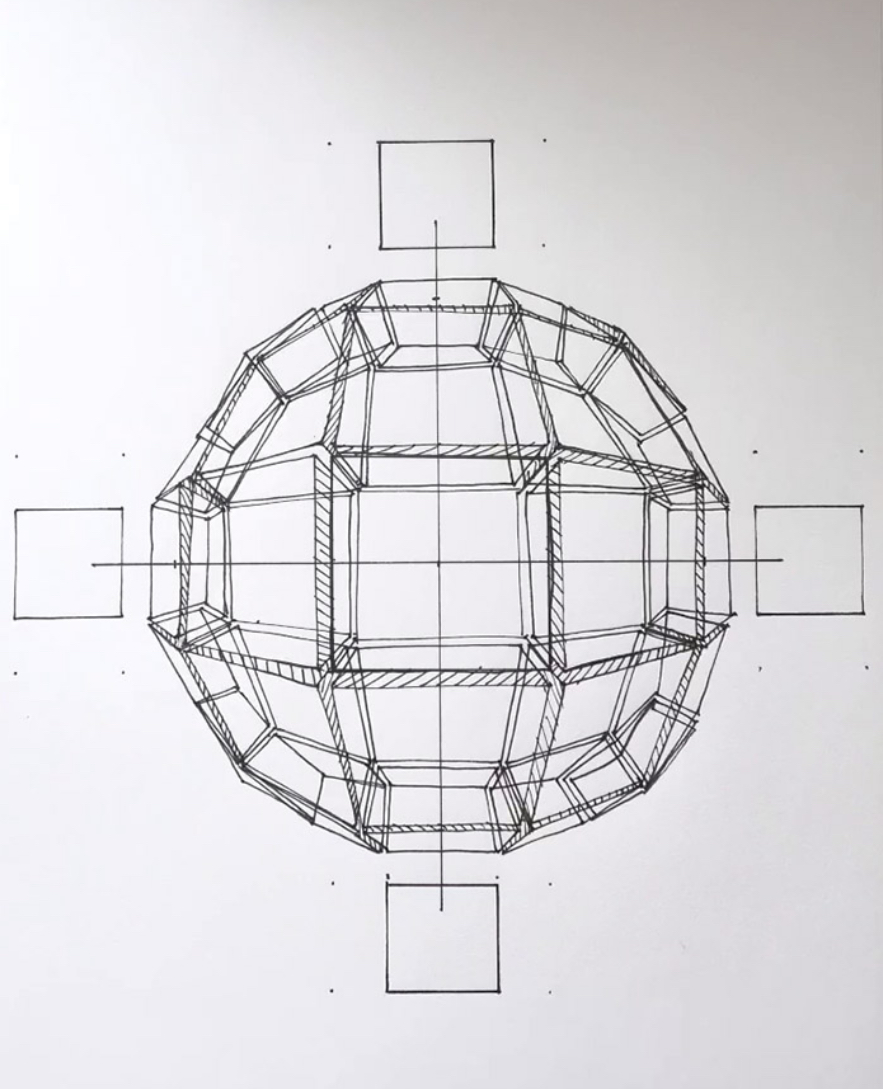
Rotated boxes
using a ruler we draw a horizontal and vertical axis in the middle of our page.
Next, draw a square centered on the middle of the two axes, once again using your ruler.
Place another square at the end of each axis
Using the ghosting method, draw the rest of the central box by placing a smaller square inside the outer one.
Pick a side of the central box, and on that side, draw a single plane.
Estimating rotation
Draw the remainder of the box
Repeat the process
Draw the rest of the boxes
Make sure the boxes are aligned not rotating
Keep the gaps between boxes narrow
Draw through the boxes
Organic perspective
Draw a path for our boxes to follow
Draw a Y for your first box
Draw the rest of the box
Fill in the rest of the frame
Keep in mind that as you draw boxes farther away along your given path, they'll be getting smaller.
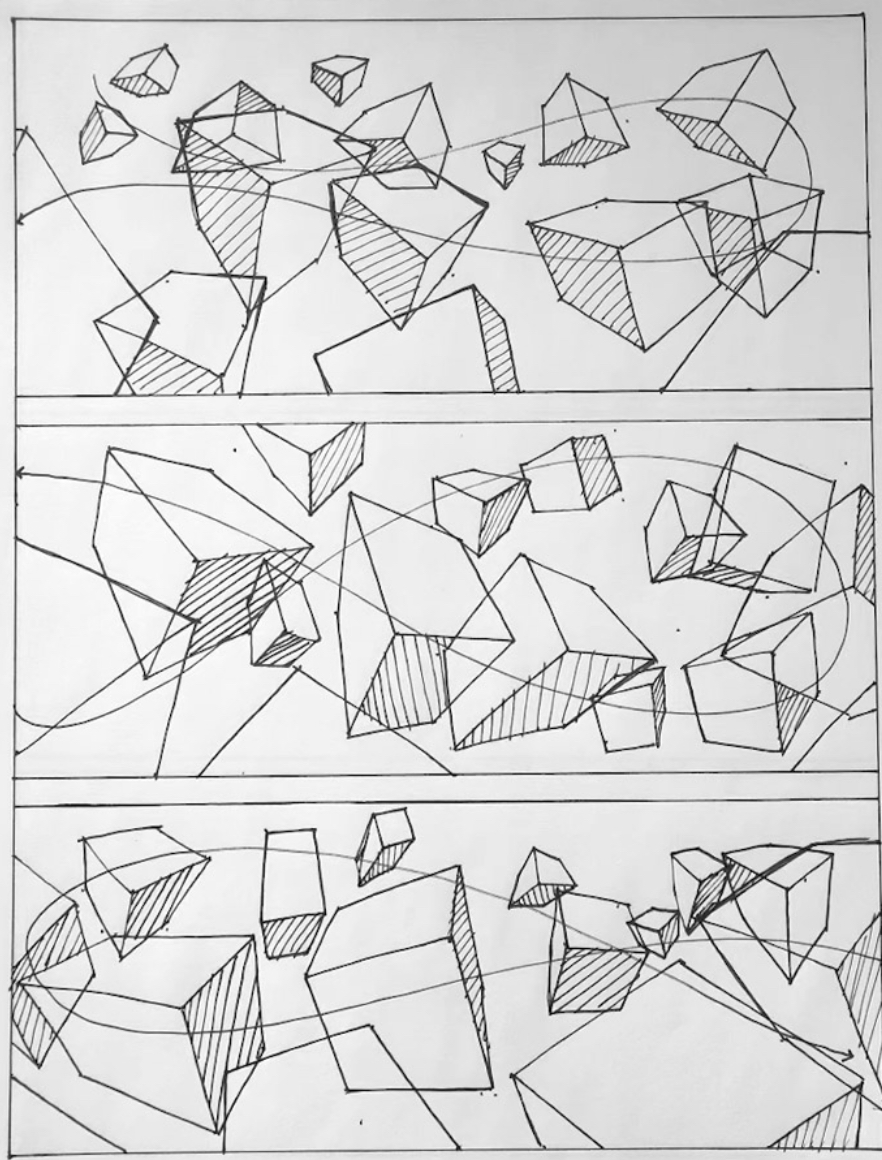
Draw 10 boxes and make sure there different. Draw some boxes with foreshortening
Place your pen at this center point and extend lines back along each arm, moving away from you
· This guarantees you're extending in the right direction
Draw through the form
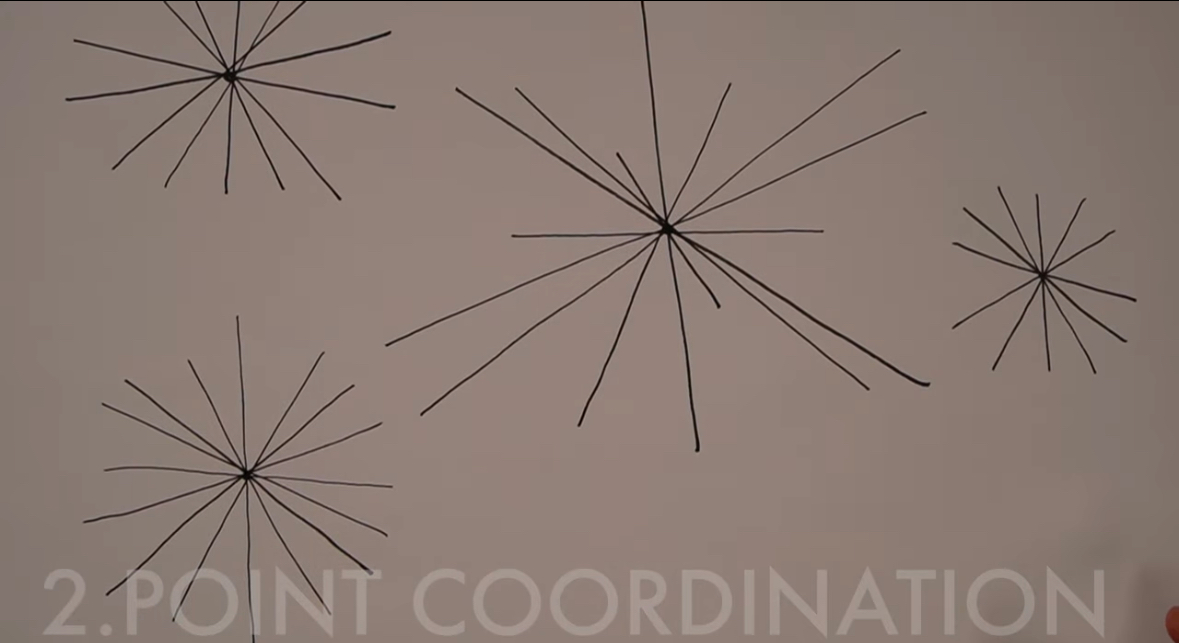
Point coordination
Put a point on the paper
Draw a straight line through it
Try to match the distance of the line, so that it’s equal on both ends
Make lines in every direction until you start to make a radial pattern
Get your hand used to drawing in every direction.
This will train your line confidence
Coin flip
Imagine your drawing a coin gradually rotating from its side to its face.
It’s Gina go from flat to gradually tilted to until it’s full circle.
Draw to parallel lines and then draw the ellipses in side of them
This exercise trains your hands to draw all the degrees of an ellipse.
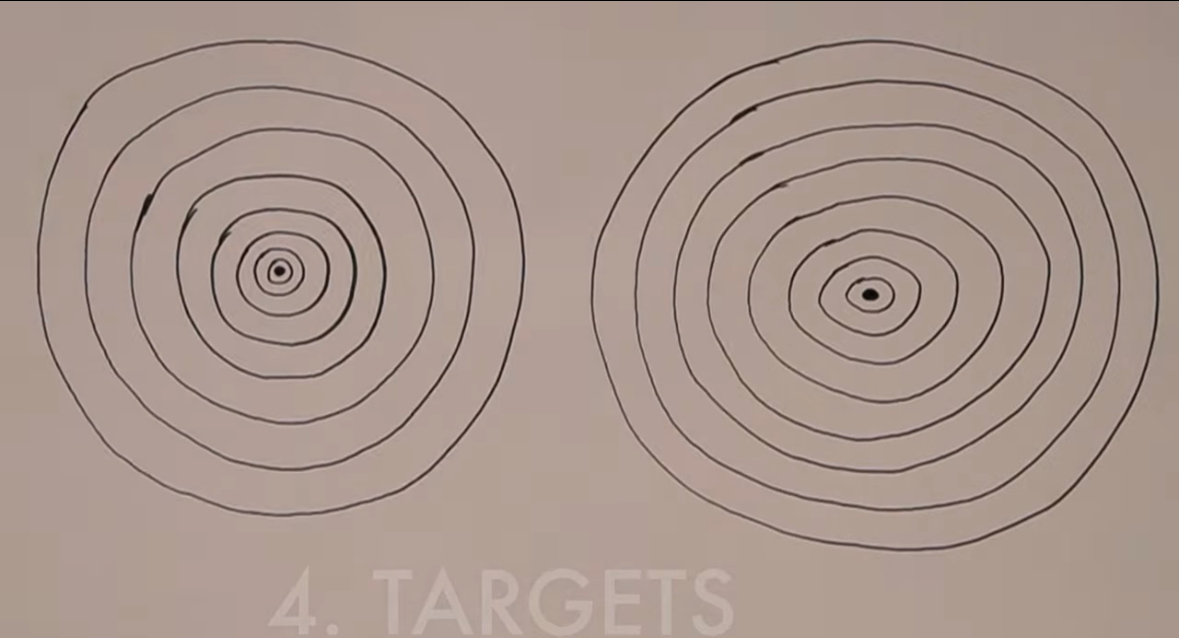
Targets
Make a point then draw a circles getting bigger and bigger around the point until it looks like a target.
Now try to do the same but in reverse
Make sure the distance between the gaps in the circle are always the same
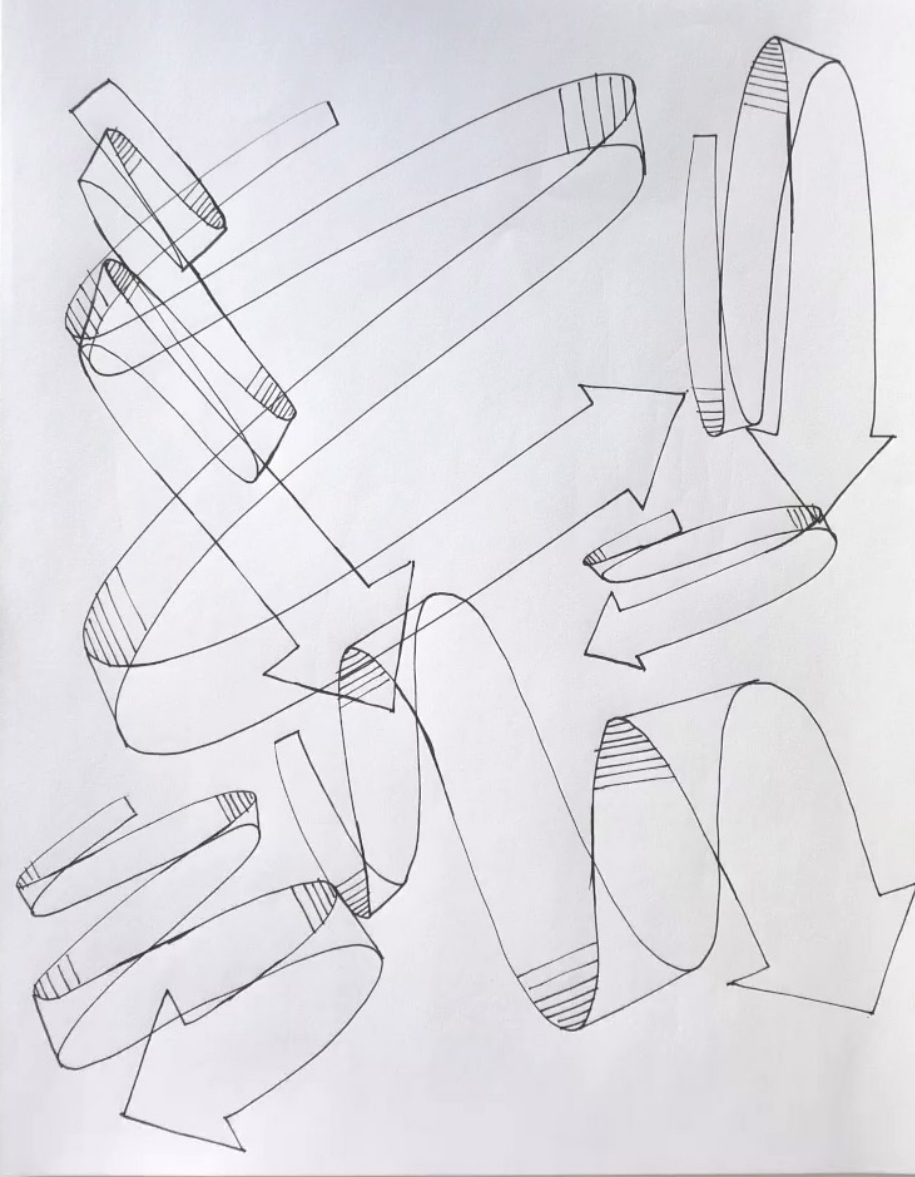
Organic arrows
Draw and s curve
Draw a second edge
Close of the structure
Add hatching at the bends
Use foreshortening to compress the gaps between zigzags: wider gaps in front, narrower in back, even to the point of overlapping—which is fine. Start with a simple S-curve, then try more zigzags to practice the effect.
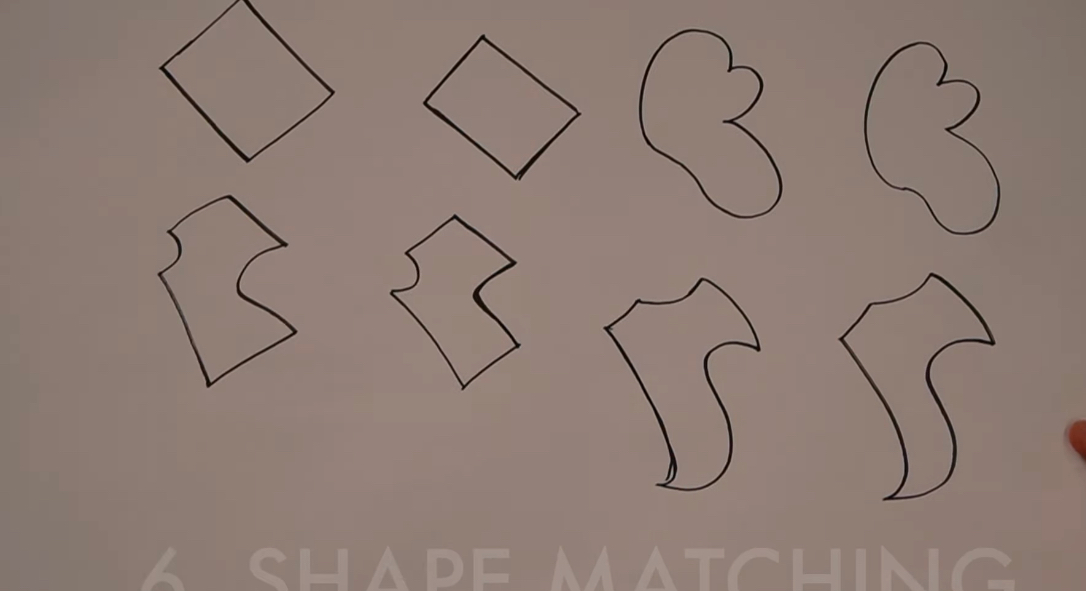
Shape matching
Draw a shape and try to replicate it as accurately as possible.
this exercise will correct observational errors.
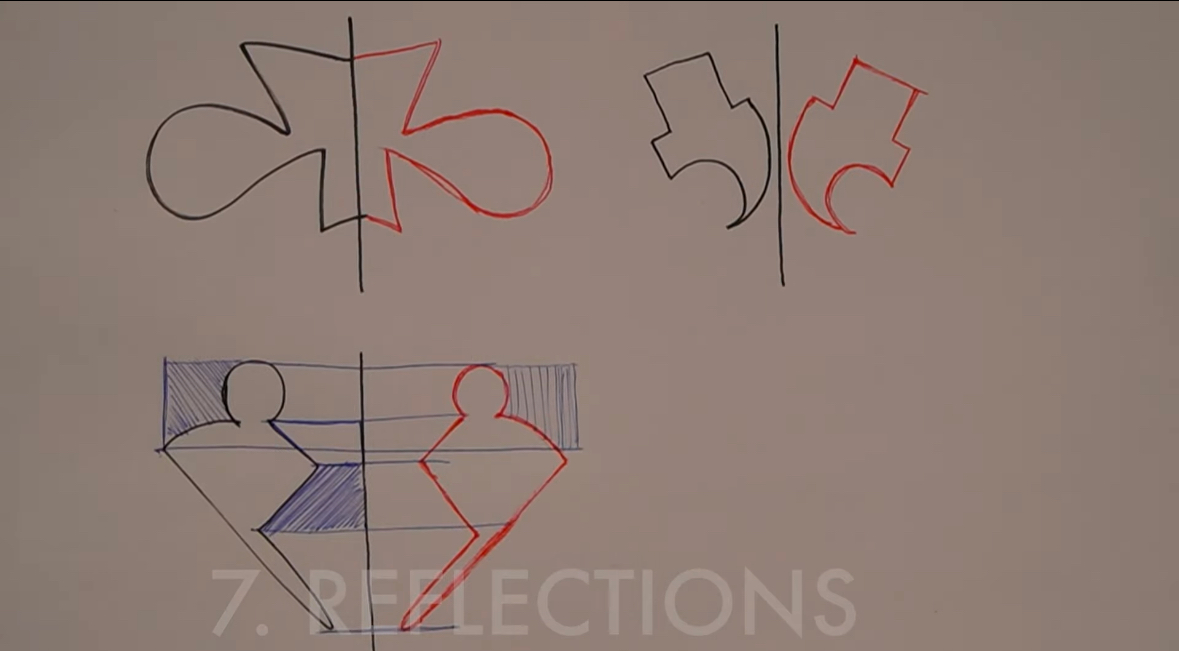
Reflections
Draw a shape out a line in the middle and try to match it as a reflection
To get more accurate shape you have to measure out using straight lines.
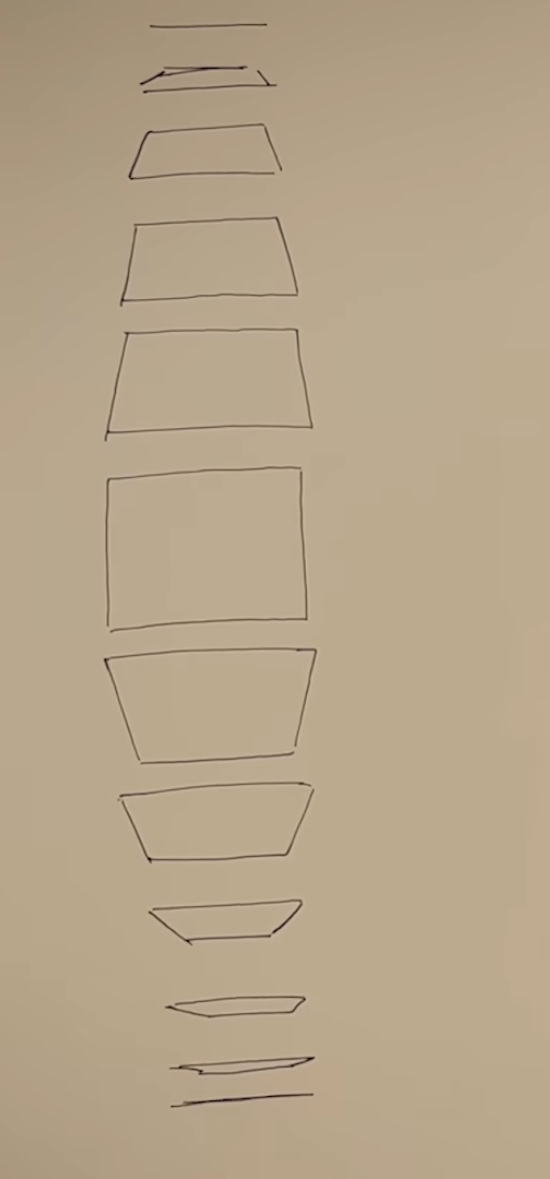
Flatting planes
Draw a progressing series of squares starting straight line turning inward until you reach the flat facing square.
Then rotating away until the square becomes flat again.
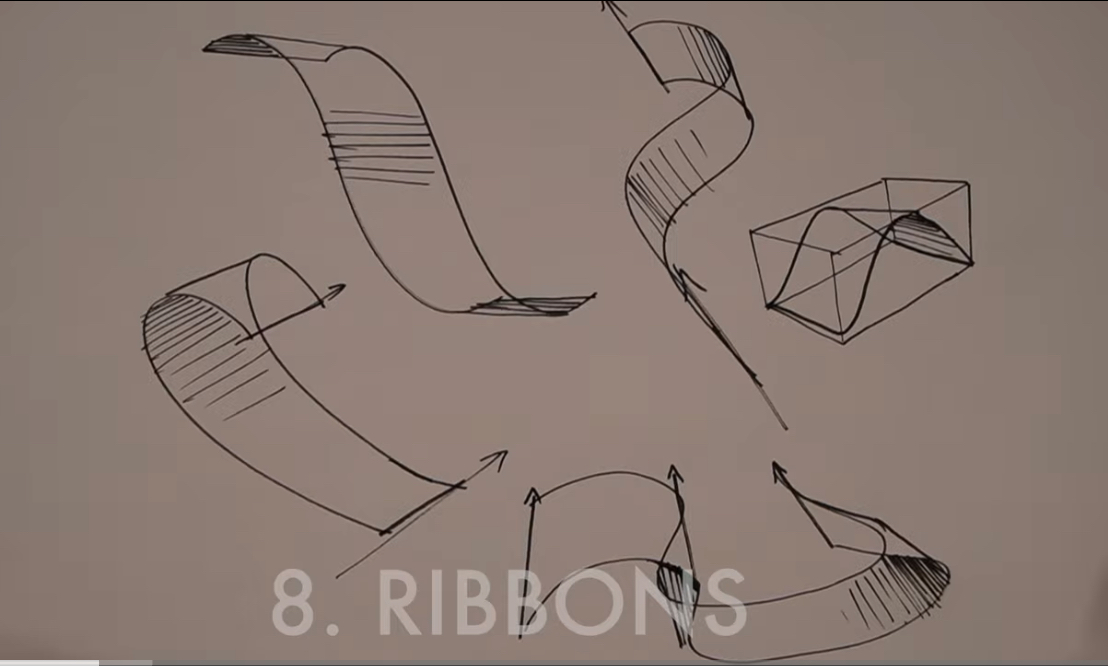
Ribbons
Draw a curved line and then repeat it. Then connect both lines at the edges to create a curved plane.
This exercise helps with creating depth you can also do this in perspective using the boxe.
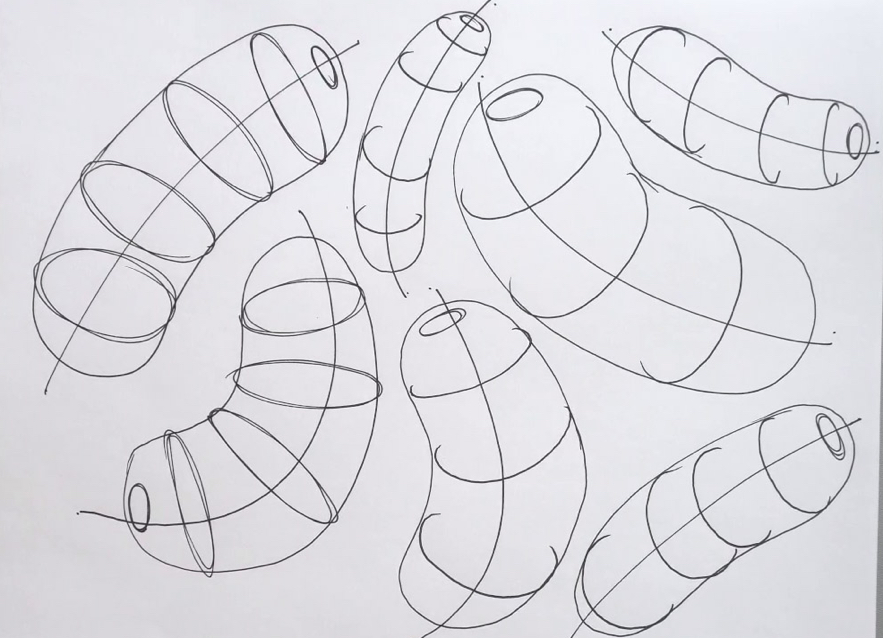
Sausages with contour lines
Draw a sausage form
Draw minor axis line through the sausage
Add contour lines ( complete ellipses and one where we draw only the visible portion of those contour lines, resulting in contour curves.)
Your first priority is always going to be to draw these contour ellipses confidently, so as to maintain even shapes.
make sure the Ellipses fit inside the sausage
give your ellipses a bit of a shift in their degree as you run through the length of the form.

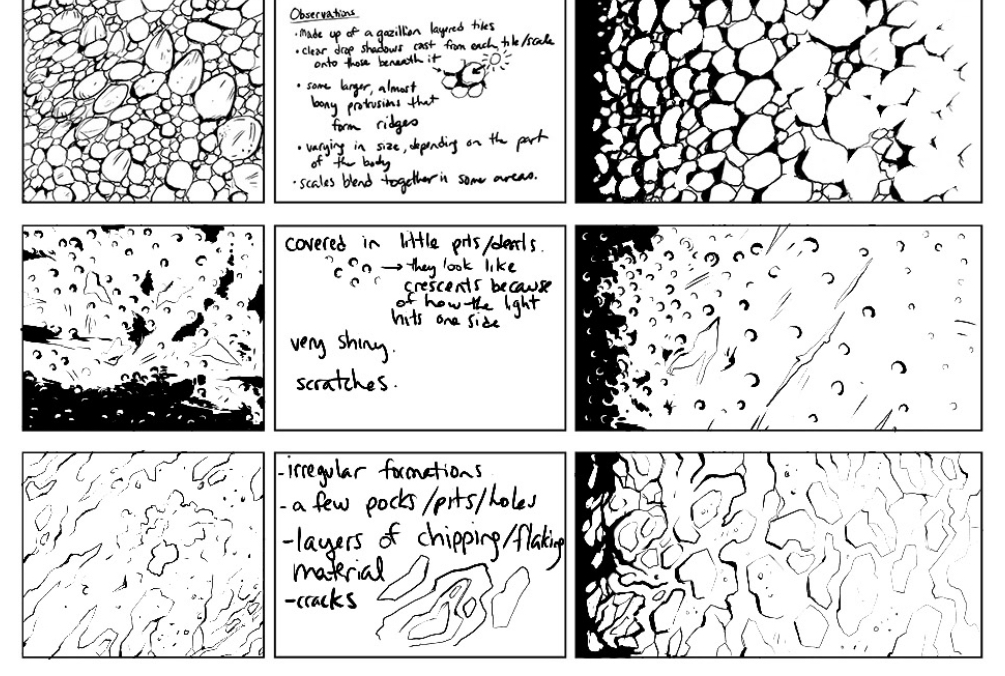
Draw boarders as shown
In the first square you will do a study of your reference. Try to copy it to your best ability
Second square you will write notes about the what you learned and noticed.
You will do the study and note dose to all three squares and then you do the third.
Third square you will take what you learned and will make transition, it start dark and end light you will draw your texture gradually.
Don’t scribble
Draw the impact the forms make not the forms themselves
Make sure you draw the transition.
One point perspective
Make a point.
Draw lines protruding from that point, from all directions.
Then draw boxes in the grid you just made.
Make sure that horizontal and vertical lines are parallel to each other.

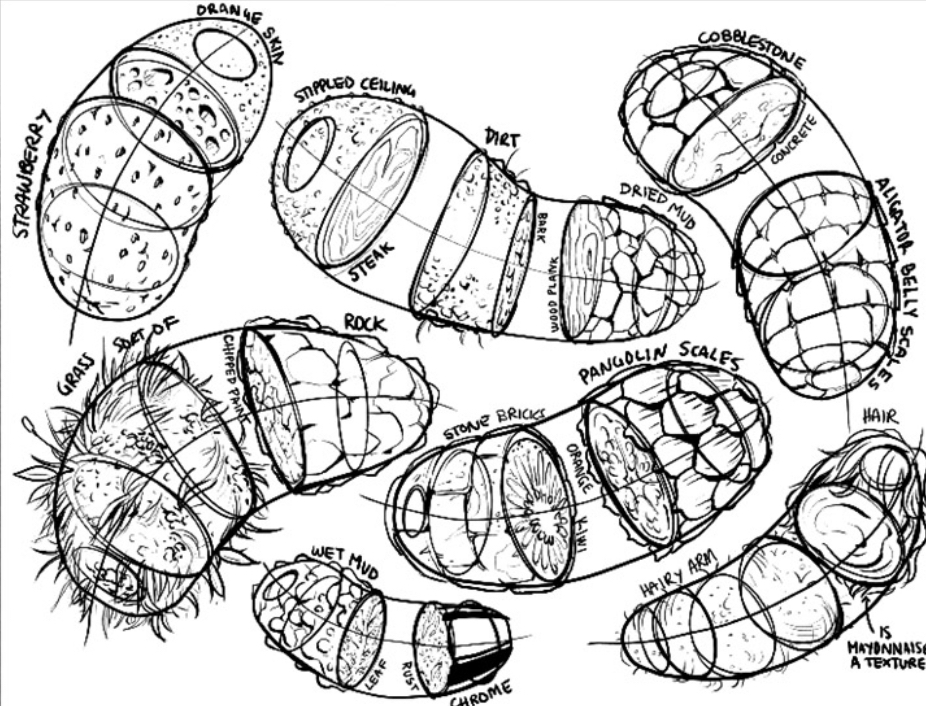
Dissection
Draw an organic form with contour lines.
Pick two sections add a bit of line thickness.
Pick reference photos.
And apply them in the dissections.
DONT SCRIBBLE OR DRAW RANDOMLY.
Mind the curve make sure that the texture gets compressed and warped.
Break the silhouette
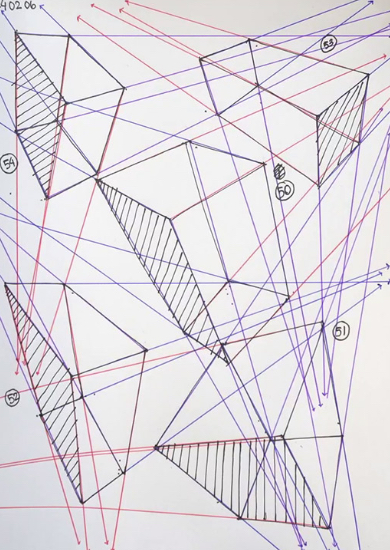
Form intersection
Draw a box
Draw a bunch of forms
Make it look like one form is intersecting with other forms
don’t draw forms that stretch
Don’t use hatching as shading
Use hatching to demonstrate which side is facing the viewer
Don’t draw separate groups of forms. Draw one big connected group
No clean up passes
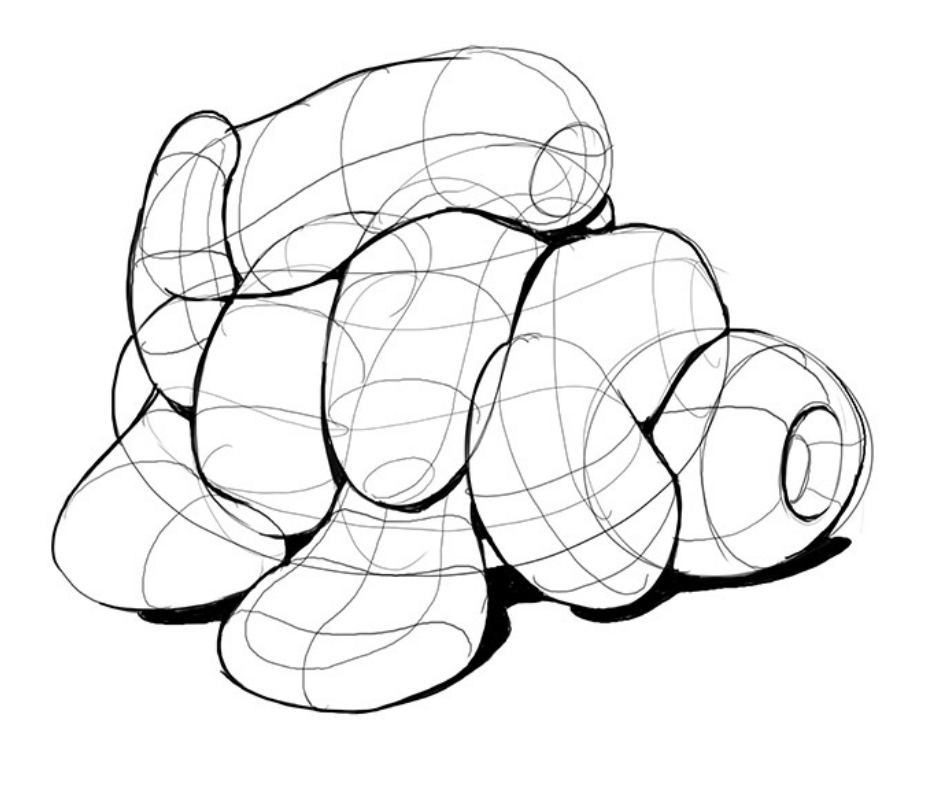
Organic interactions
Draw a simple organic form
Add some contour lines to give it volume
Draw another on top of it etc
You can drop more organic forms on top, or you can play with wrapping them around each other
Draw how the forms cast shadow
stay away from long or more complex forms
Don’t lay the sausage parallel to each other
Don’t let the shadow adhere too closely to the form casting it, resulting in some illusion-breaking shadow play.
Our cast shadow does not remain along the silhouette of the form casting it - rather, it is "projected", or thrown at the surface that receives it, because the form doing the casting is actually blocking that light from ever reaching the underlying surface.
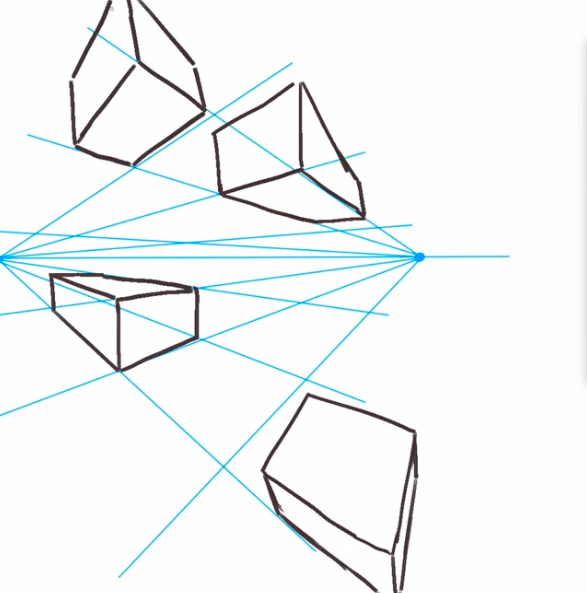
2 point perspective
Draw a horizontal line and point on opposite sides
Draw lines from the points towards each other
Now that u have the grid draw boxes