Odyssey Technical Training - Block 1
1/63
There's no tags or description
Looks like no tags are added yet.
Name | Mastery | Learn | Test | Matching | Spaced | Call with Kai |
|---|
No analytics yet
Send a link to your students to track their progress
64 Terms
Hugo RAS System Marketing Messages
Flexible (modular footprint), adaptable across care sites, Accessible: open console to connect with bedside team, Digital ecosystem, Collaborative
System Tower Marketing Messages
Interactive Display (ORTI), Advanced visualization - Karl Storz Rubina to visualize 4 fluorescence imaging modes, Advanced energy platform with FT10 energy, EVA15 Insufflator: intelligent insufflation, smoke management, Touch Surgery Ecosystem: ability to live stream, record, store and analyze surgeries
Surgeon Console Marketing Messages
Open console with easy grip controllers, ergonomic, control pad, task simulator
Arm Carts Marketing Messages
Empowers surgeons to choose the surgical approach for each patient, 3/4-arm configuration, one arm configuration t assist with standard laparoscopic procedures
Surgeon Console Components (5)
1 power cord that requires a dedicated circuit, Light green data cable; (1) 3D display, (2) Head tracking system, (3) Surgeon interactive Display (2D); (4) Ergonomic controls; (5) Foot Pedals
What can be visualized from the Surgeon's 3D Display
Endoscope view, information on status (i.e. arm carts, endoscope, instruments)
What is the Head tracking system?
Follows position of surgeon's 3D glasses
What happens when a surgeon is looking away from the headtracking system?
The hand controllers will clutch (lock) as a safety feature
What can be visualized on the surgeon interactive display?
2D, manage arm views/adjust settings
Where is the surgeon interactive display (SID) located?
To the right of the surgeon console 3D display
How can the surgeon console be set up ergonomically?
Armrest height, distance between foot pedals and surgeon (foot pedal depth), surgeon 3D display height; a recommended ergonomic configuration based on entering surgeon's height onto surgeon interactive display
Where are the ergonomic controls located?
To the right of surgeon hand controller on surgeon console
What do the foot pedals control (4)?
Clutching (repositioning) of hand controllers, swapping between active/reserve arms, repositioning endoscope movement, activating electrosurgical energy
System Pause Button
Located to the left of the surgeon hand controller, interrupts the surgeon console/bedside control of arms (HOLD)
Hand sensor
Detect's presence of surgeon's hand
What happens when the hand sensor does not detect presence of surgeon's hand?
LOCK state (hold position to prevent unintended instrument motion) NOTE: both ORTI screen and Surgeon Console will state 'READY'
Lever
Middle/index finger, instrument jaw opening/close = dissection use
Trigger
Clutch/lock
How/when do you activate clutch?
Pressing on the trigger, used when you want to reposition hand controllers without moving the instruments
LEDs on Hand controller
Located distal to thumbs, yellow = locked
If arms are locked, how do you reactivate arm?
Click triggers or tap clutch pedal
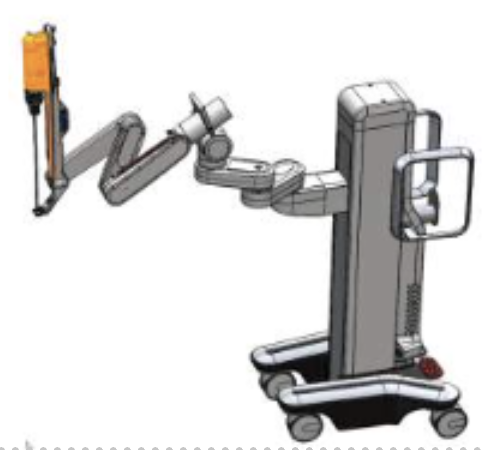
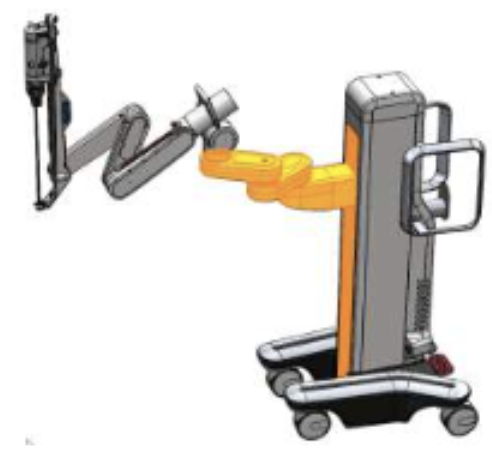
Arm Carts
Each arm supports/moves instrument/endoscope. Surgeon or OR staff can also move at bedside or surgeon console
How are the arm carts connected?
Connects to system tower, 3 power cords (26 ft), up to 4 blue data cable (33 ft)
What is the order for system set up?
Surgeon console > Arm carts > System Tower; power on, 10 minute timer countdown, if system is unable to start up properly, power off and restart, confirm # of arm carts and console are all properly connected, calibrate arms
During calibration (set up), what is the last component for set up?
Surgeon console
System Tower components
3 power cords, blue arm data cable, green console data cable, FT10 (energy), STORZ cables (vision system), backup battery,
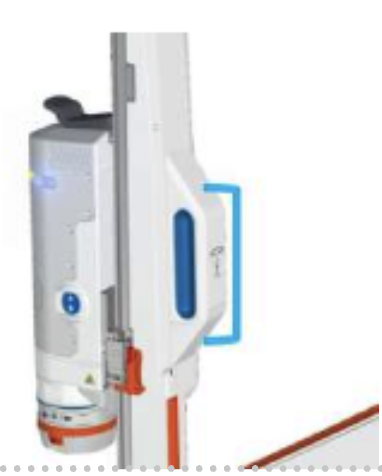
*What color is the ARM Cart LED during calibration?
Pulsing Blue
*What does the steady blue LED on the HugoRAS Arm cart indicate?
Arm is in motion, system is engaged and surgeon is driving instrument
*What color LED light indicates that the HugoRAS arm cart is undocked and braked?
Solid green
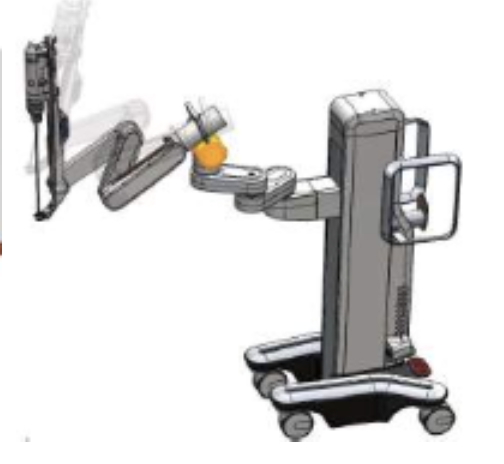
What are the 3 arm cart configurations?
Transport & storage, compact, draping
Transport & Storage configuration
Powering down, storage/transport outside the OR, safe movement in the hospital. Needs to be completed before power shut down/disconnecting from system
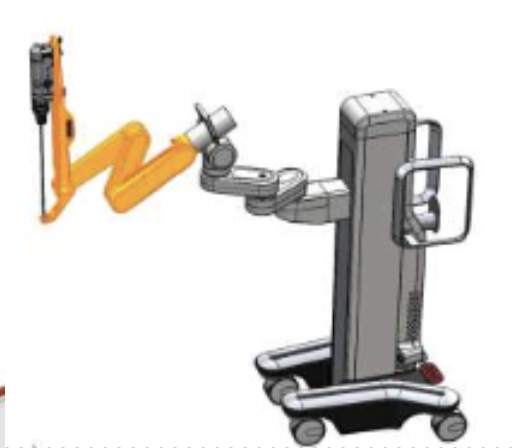
Compact Configuration
This configuration is used post draping in the OR to remain sterility
Draping Configuration
Arms are extended
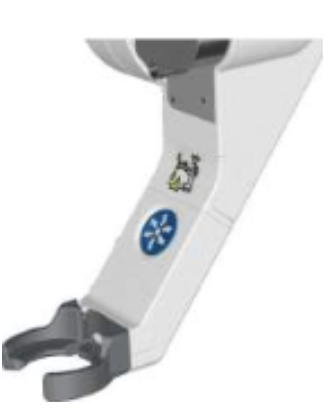
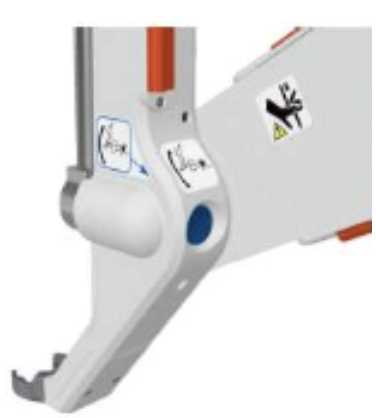
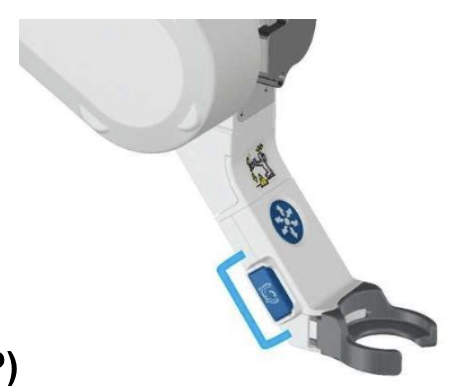
*What is the function of the fulcrum handle?
Moves fulcrum point (thick black band) where abdominal wall meets, important site as there is little trauma/movement at trocar site
*Which HugoRAS configuration of the arm is used to help maintain sterility after the robotic arm and upper arm cart drapes are applied?
Compact configuration
*In what direction can the HugoRAS arm cart move when the brake pedals are level?
All directions, freedom of motion (both red and green brake pedals are level)
*How many types of drapes does the HugoRAS System have?
Robotic arm drape, upper arm cart, lower arm cart (optional)
*Which HugoRAS drape is optional based upon the procedure and the arm tilt?
Lower arm cart
*What is the correct order in which you would place the drapes onto the HugoRAS Arm cart
Robotic arm, upper arm cart, lower arm cart (if needed)
*T/F: HugoRAS System drapes come in sterile packaging and can only be used for one procedure.
TRUE
*Which HugoRAS configuration of the arm is used to help maintain sterility after the robotic arm and upper arm cart drapes are applied?
Compact configuration
What is the recommended distance from arm cart to OR table?
45-60 cm (18-24 in), also serves as safety element for patient access
Why is the order of arm configuration important?
Docking orders prevents breaking sterility
What is the minimum distance between robotic ports?
8 cm
What is the minimum distance between assistant ports?
5 cm, access to target anatomy, avoid collision
What is the minimum distance to bony prominences?
2 cm (iliac crest, rib cage), avoid hitting bony prominence
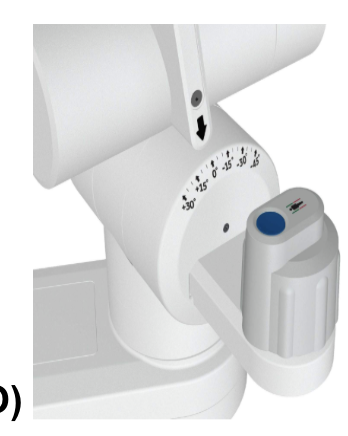
*What are the docking steps of the HugoRAS Arm Cart according to the setup guide?
Adjust tilt, 2. Place cart and set laser, 3. Dock to port, 4. Check and confirm
*Prior to docking the HugoRAS Arm Carts, the laser should be aligned with the green laser in the direction of?
The patient's head
*According to the port placement principles, what is the minimum required distance between two adjacent robotic ports?
8 cm
What are the port placement principles?
16cm further point of target anatomy to endoscope port
5 cm caudal offset between endoscope port and surgeon hand ports
8 cm between adjacent robotic ports/5 cm between assist port
2cm between all ports and bony prominences
Hand Sensor
Hand sensors detect the presence of the surgeon’s hand. When the surgeon’s hand is not on the handle, the corresponding arm goes into LOCK state (the hand controller will hold position to prevent any unintended instrument motion) and the surgeon console and the operating room team displays show the arm as READY.
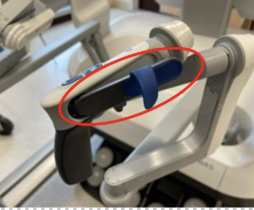
Lever
The lever is for the middle or index finger. The lever has a flexible finger loop that facilitates opening the instrument jaws precisely for dissection.
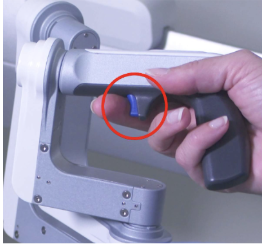
Trigger
A trigger to clutch or LOCK the handle. Clutch enables the user to move the surgeon hand controllers without moving the instruments (the hand controller will hold position to prevent any unintended instrument motion).
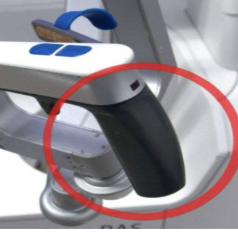
Palm Rest
The palm rest is shaped like a small pistol grip to help steady the surgeon’s hand.
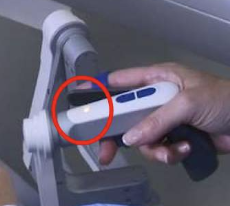
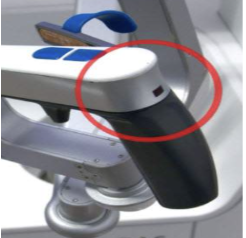
LED
Each surgeon hand controller at the surgeon console has an LED located on the top surface distal to the thumb buttons.
The hand controller LED will turn yellow when that hand controller is locked; for example, when the surgeon clicks the trigger to lock it.
Some alarms interrupt surgeon control for safety. When this happens, the surgeon hand controller LEDs will yellow to show that the hand controllers are locked, and the surgeon must regain control by clicking the triggers or tapping the clutch pedal.
Instrument Drive Button: move along instrument track, manually insert/withdraw instruments