Microscopy, Bacteria, and Blood Types: Key Concepts for Biology
1/59
There's no tags or description
Looks like no tags are added yet.
Name | Mastery | Learn | Test | Matching | Spaced | Call with Kai |
|---|
No analytics yet
Send a link to your students to track their progress
60 Terms
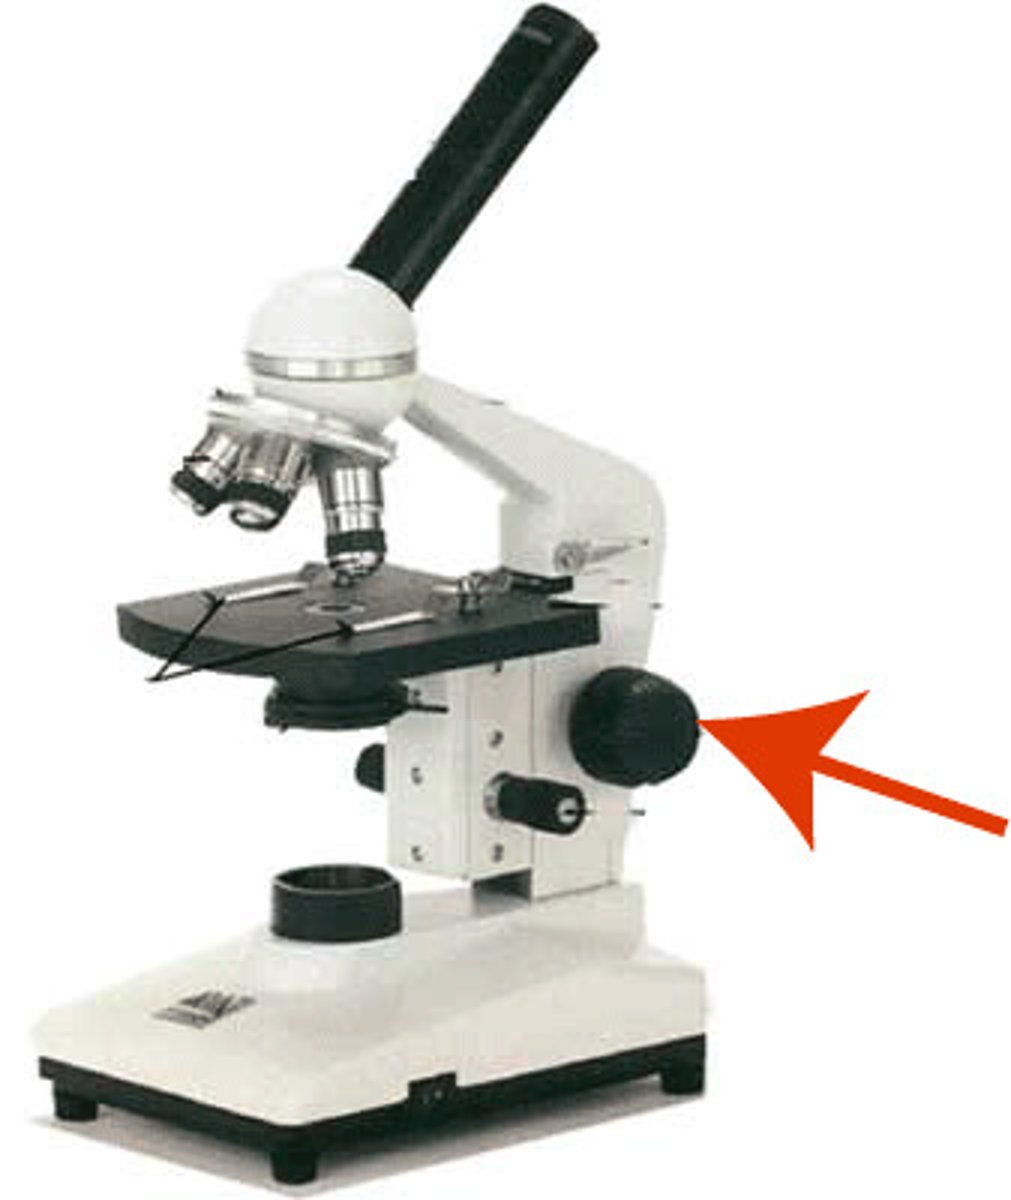
Course Adjust Focus
Larger knob, only used when scanning objective is engaged.
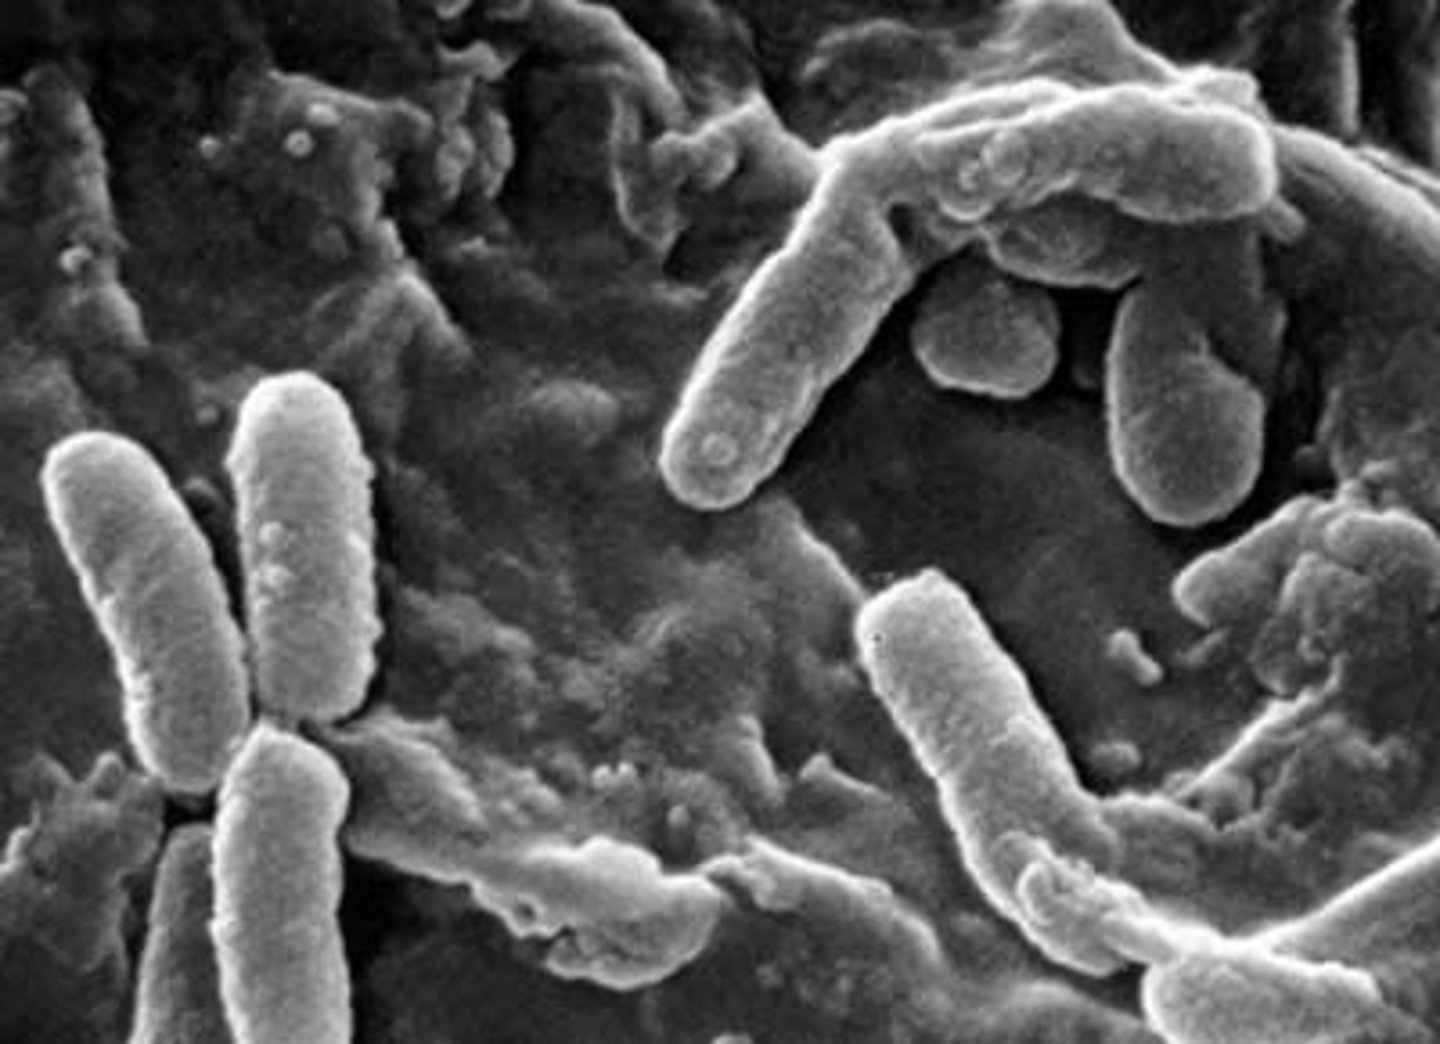
Pseudomonas aeruginosa
A gram-negative, rod-shaped bacterium.
Neisseria meningitides
A gram-negative, cocci-shaped bacterium.
Clostridium botulinum
A gram-positive, rod-shaped bacterium.
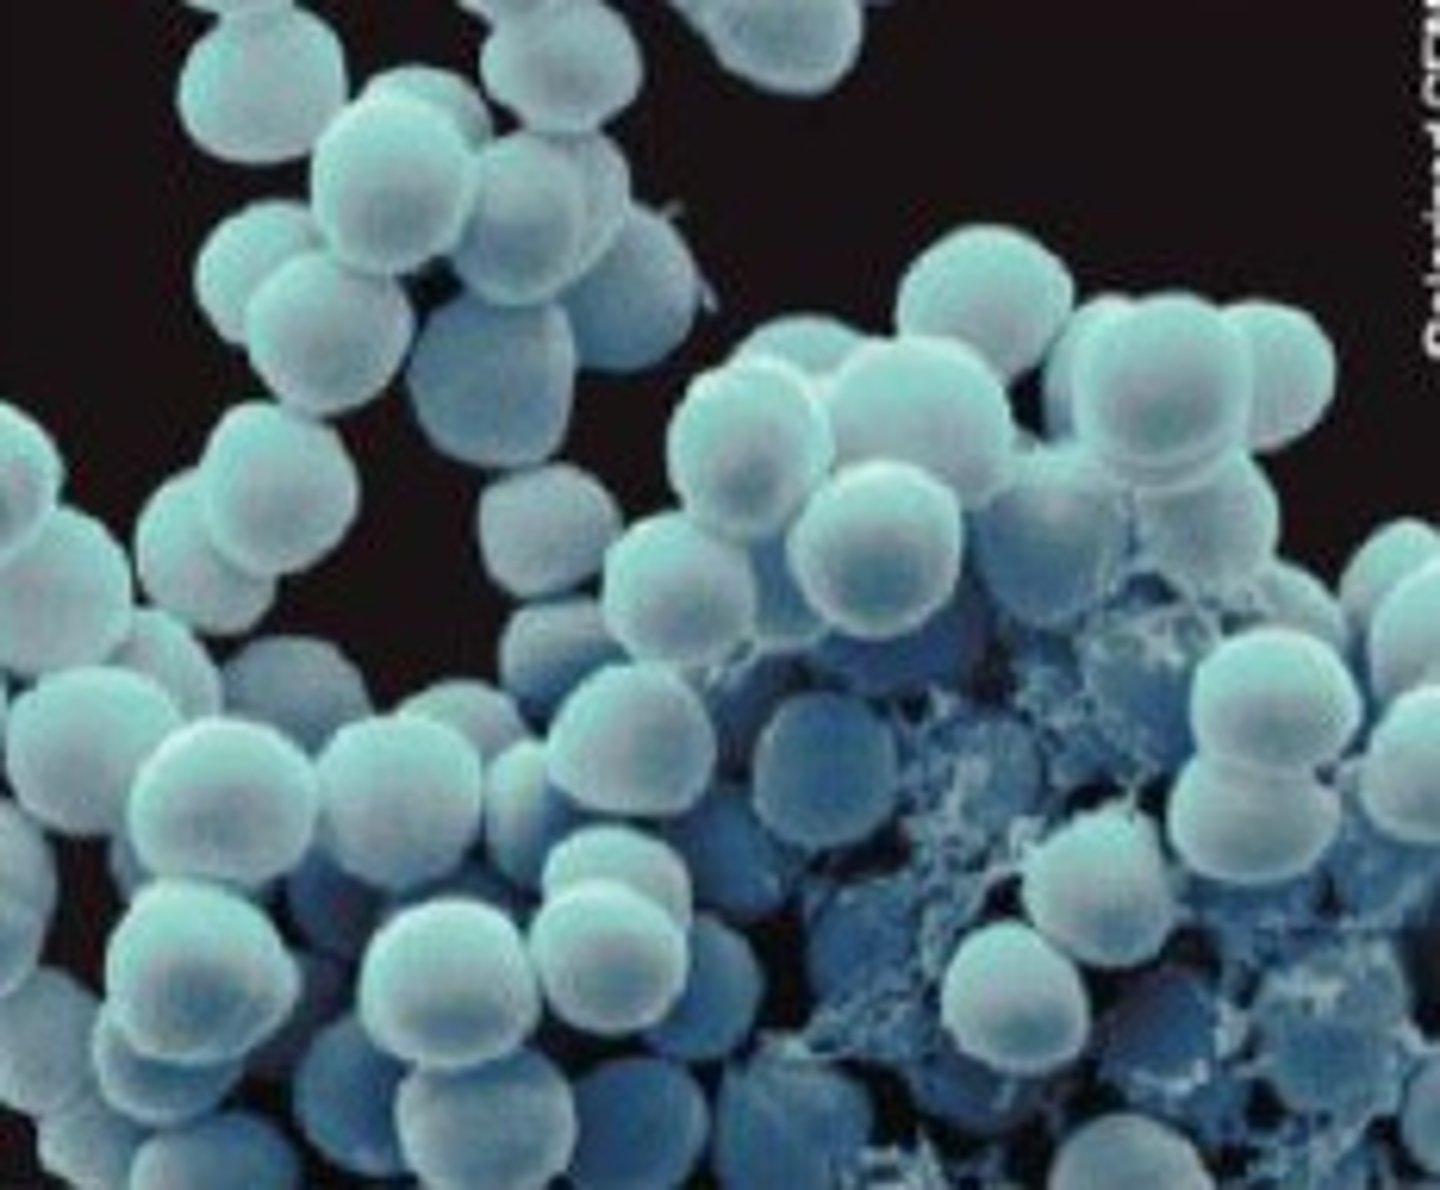
Streptococcus pyogenes
A gram-positive, cocci-shaped bacterium.
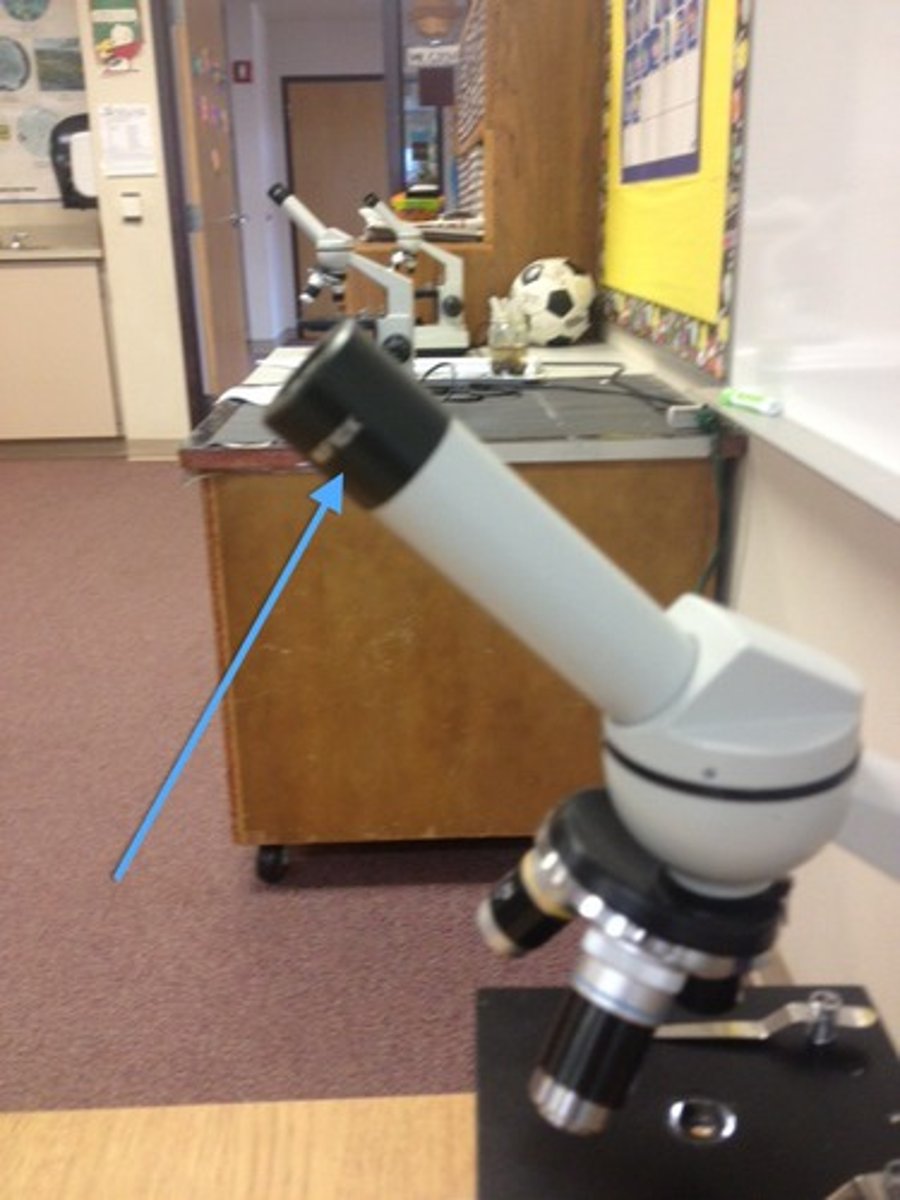
Eyepiece Lenses
Part of a microscope used to view the specimen.
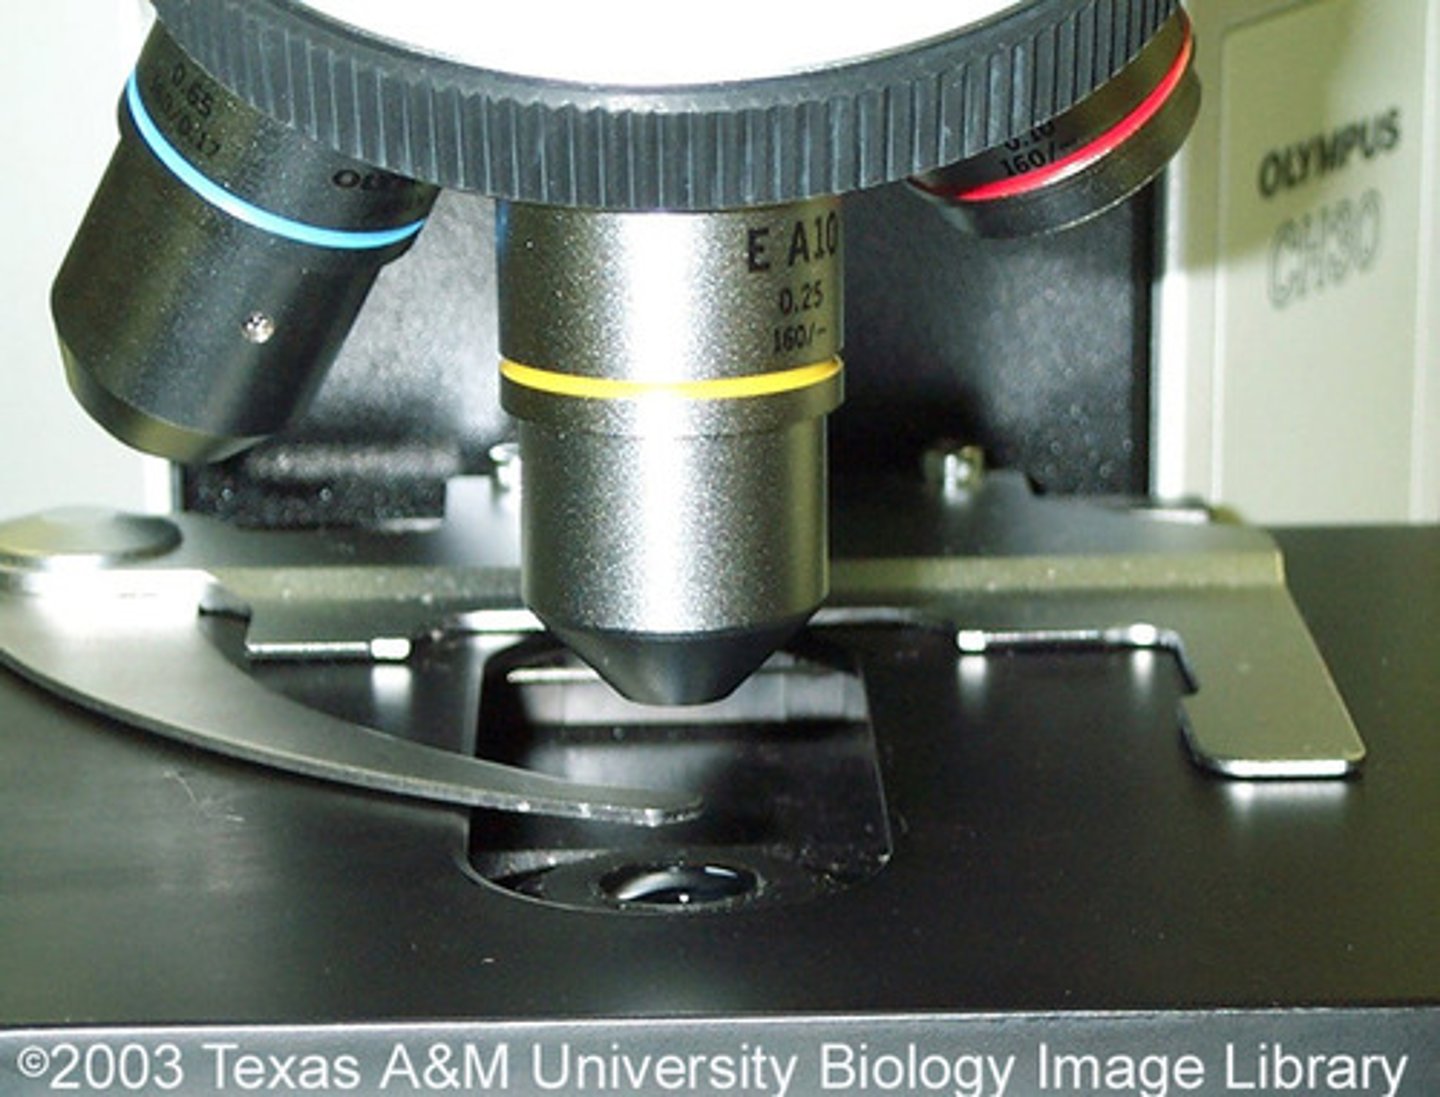
Objectives
Lenses on a microscope that magnify the specimen.
The Stage
Platform on a microscope where slides are placed.

The Arm
Part of a microscope that supports the body tube.
Power Switch
Controls the power supply to the microscope.
The Base
Supports the microscope and houses the light source.
Diaphragm
Controls the amount of light reaching the specimen.
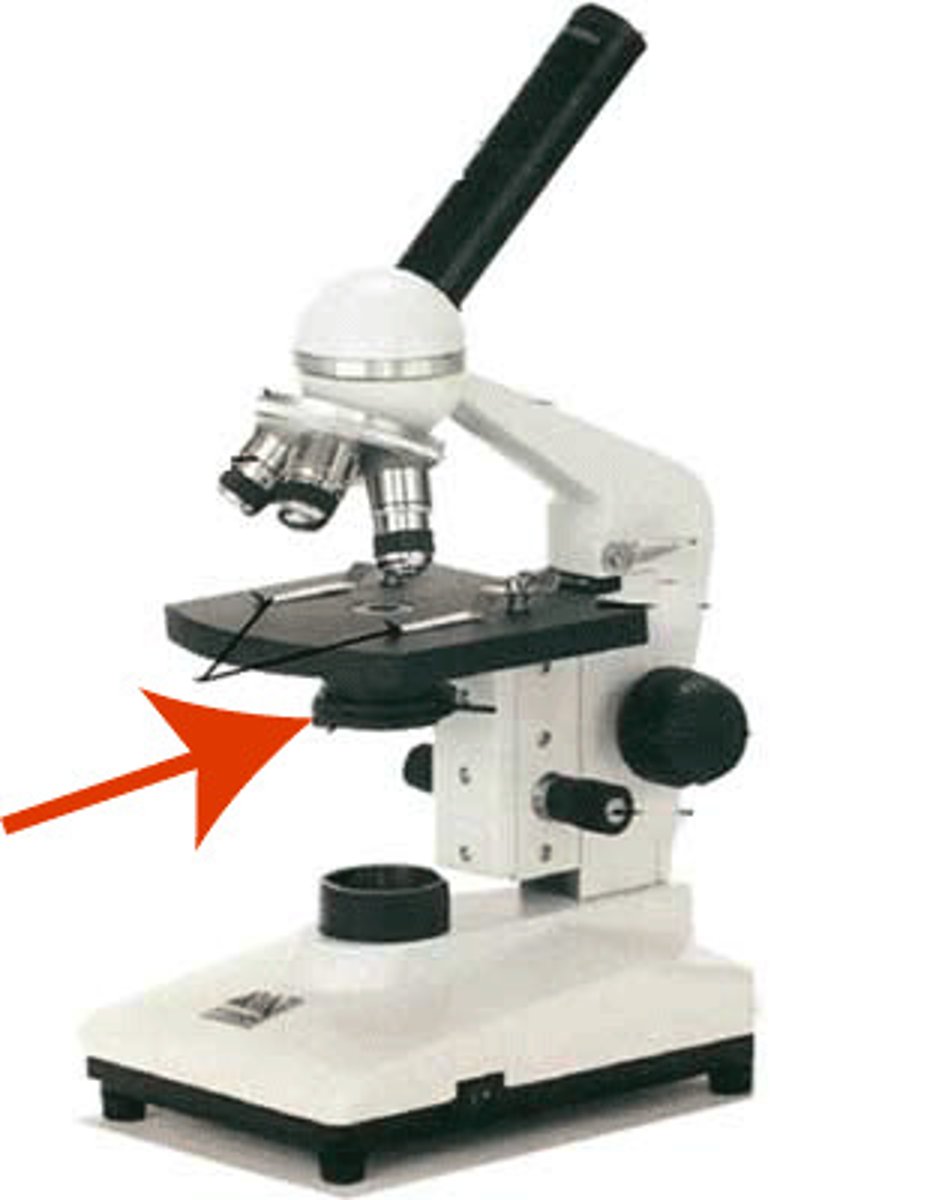
Metal Clamp
Holds the slide in place on the stage.
Focus Knobs
Used to bring the specimen into focus.

Adjust Focus Knob
Fine-tunes the focus of the microscope.
Fine Focus Knob
Allows for precise focusing of the specimen.

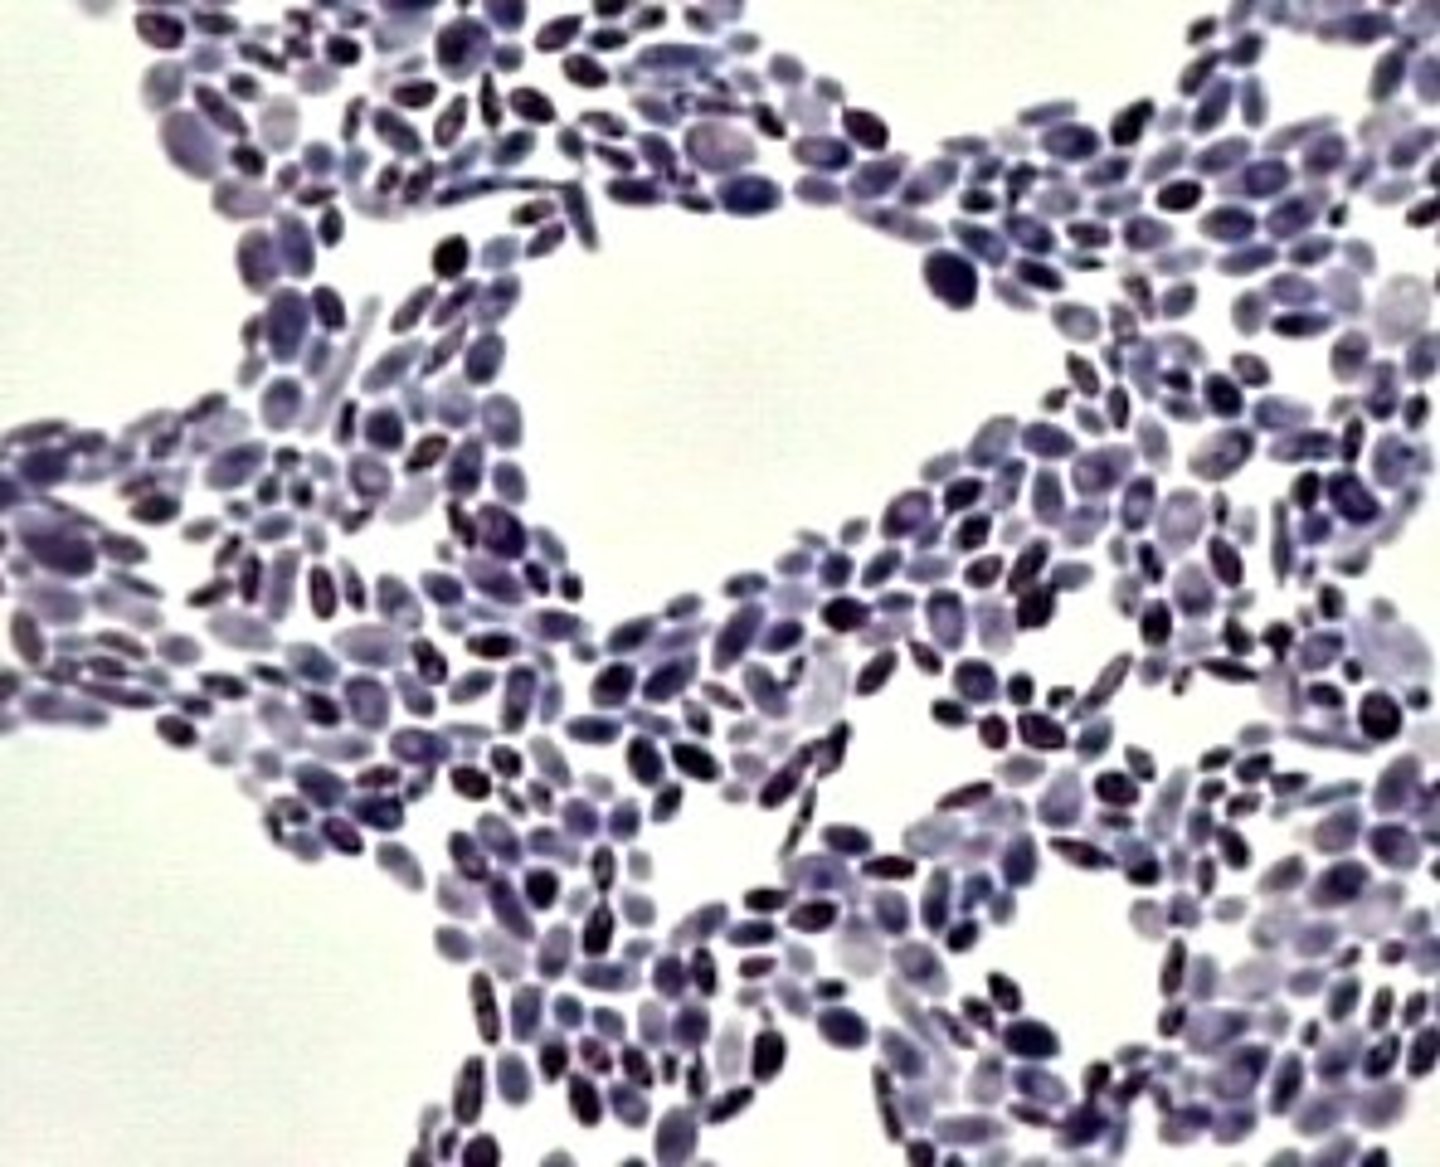
Yeast
Single-celled organism, fungal pathogen, eukaryotic.
Molds
Multicellular organism, fungal pathogen, eukaryotic.
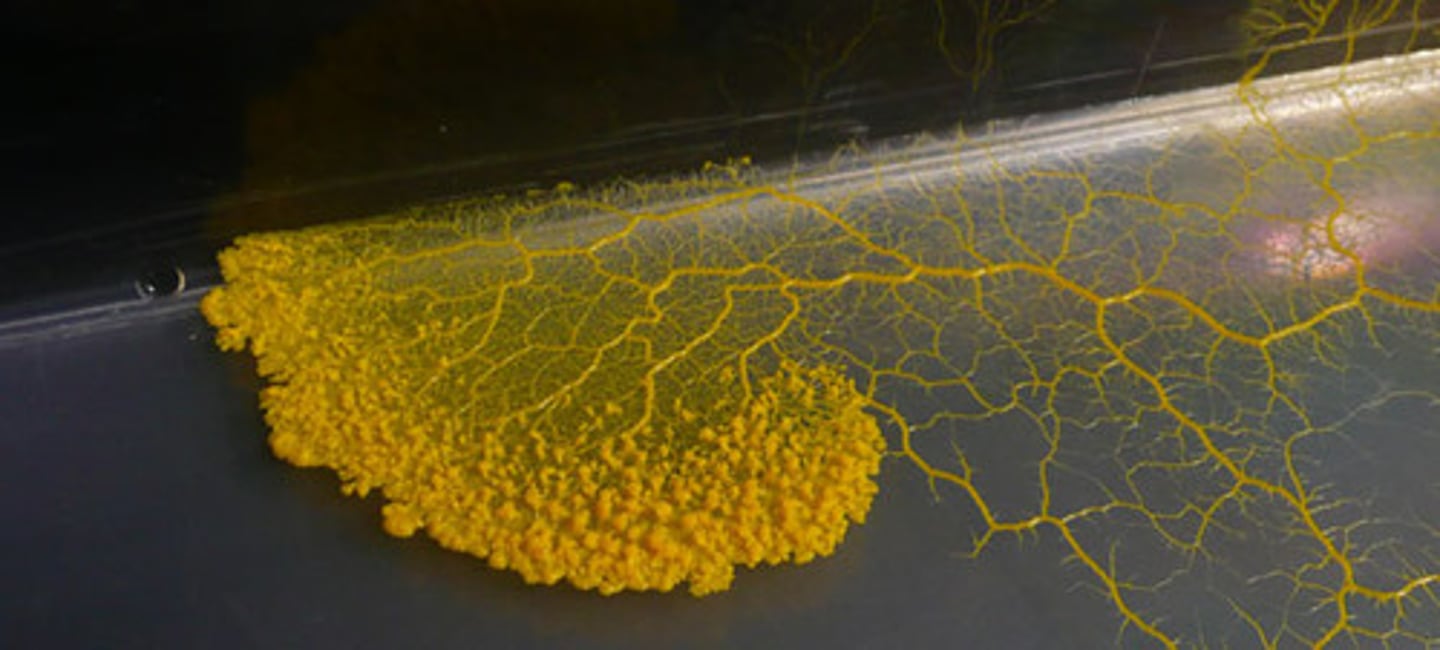
Hyphae
Filaments of cells in molds organized into mycelium.
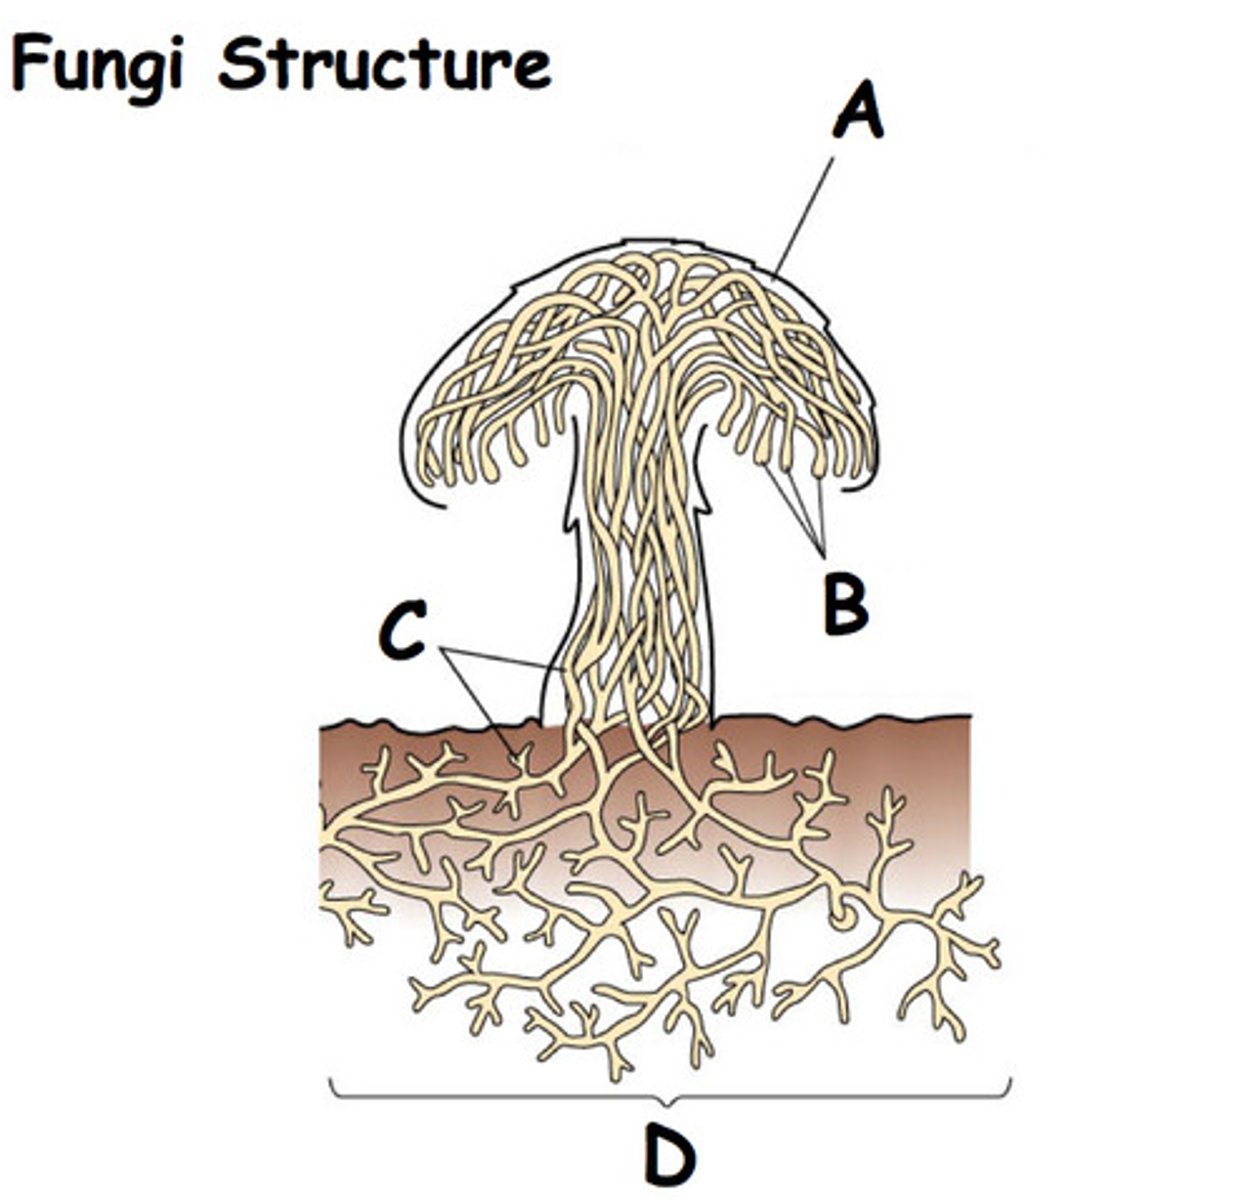
Mycelium
Bunches of hyphae that make spores for asexual reproduction.
Index Case
The first person infected in a virus outbreak.
Percent of Infection
Calculated as Infected/Exposed.
R₀
Average number of people an infected person will spread the disease to.
Gram + vs Gram -
Gram + has a thick outer peptidoglycan layer; Gram - has a thin layer and outer membrane.
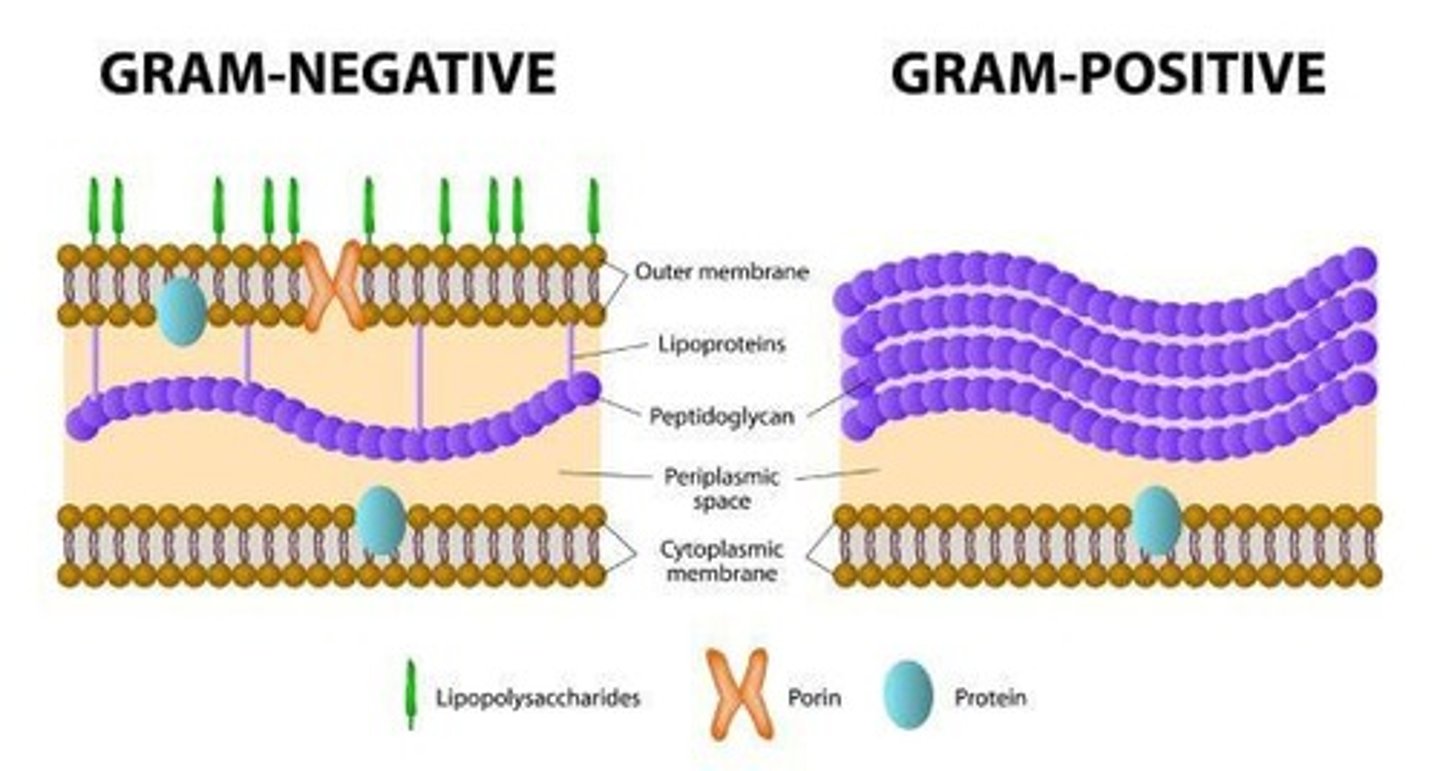
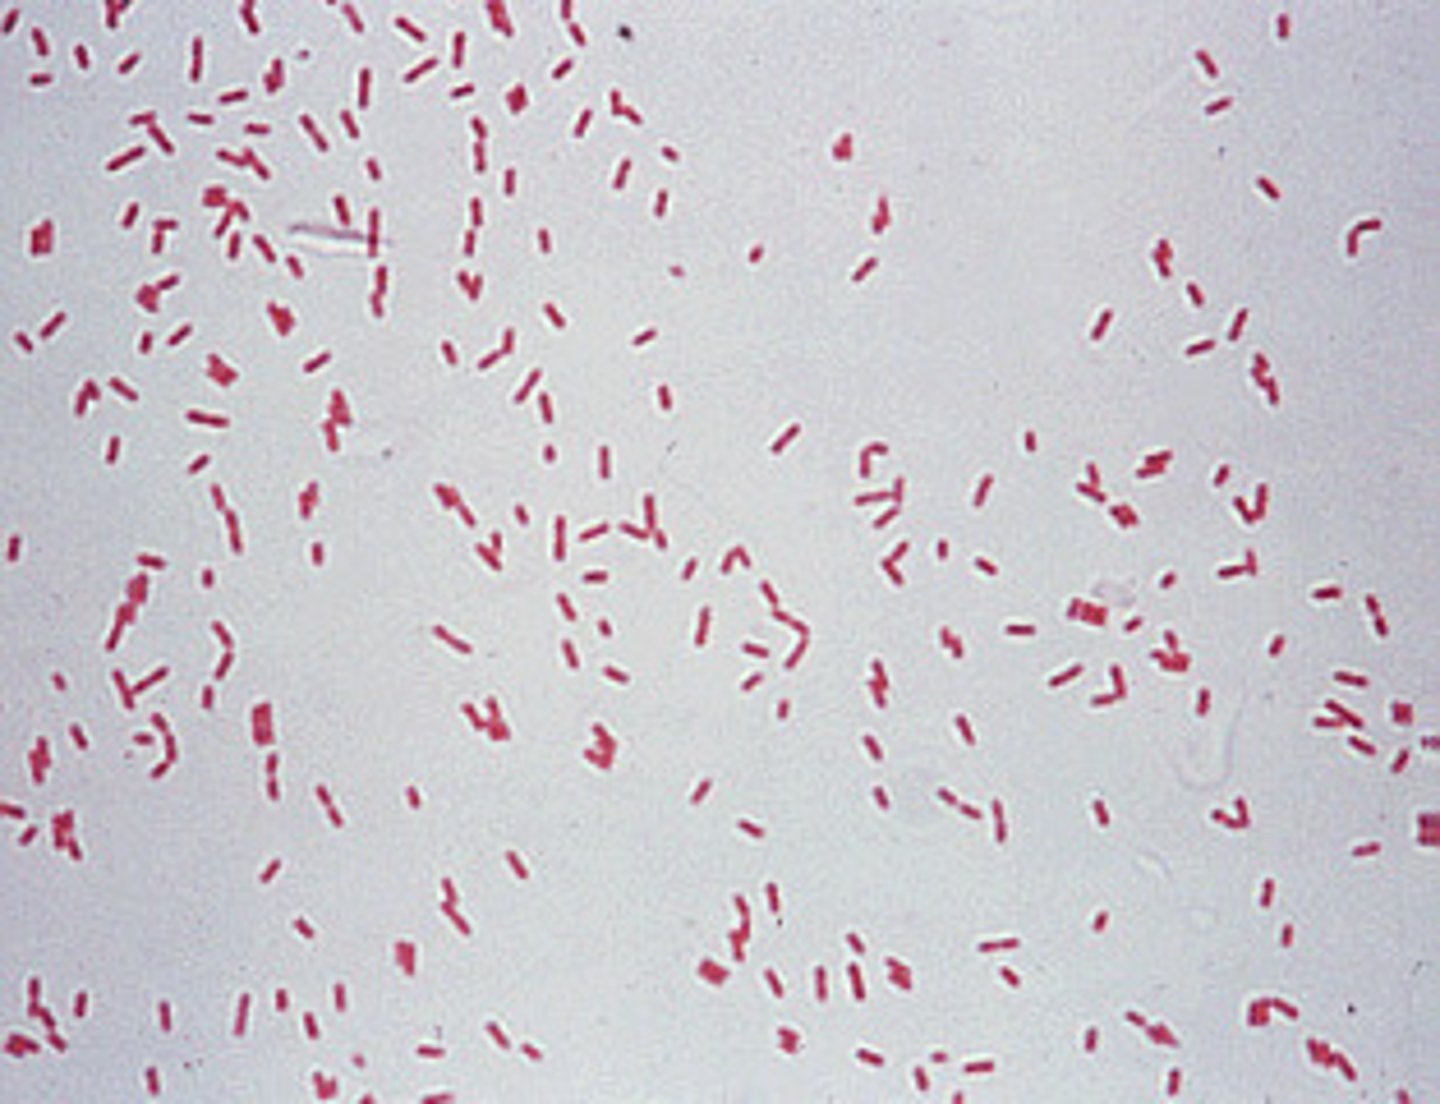
Color results of Gram stain
Gram + stains purple; Gram - stains pink or red.
ELISA test (HIV) - conducting
Add drops of antigens, primary antibodies, secondary antibodies, and substrate to test strip.
ELISA test (HIV) - reading results
Clear indicates no HIV antibodies; Pink indicates HIV antibodies present.
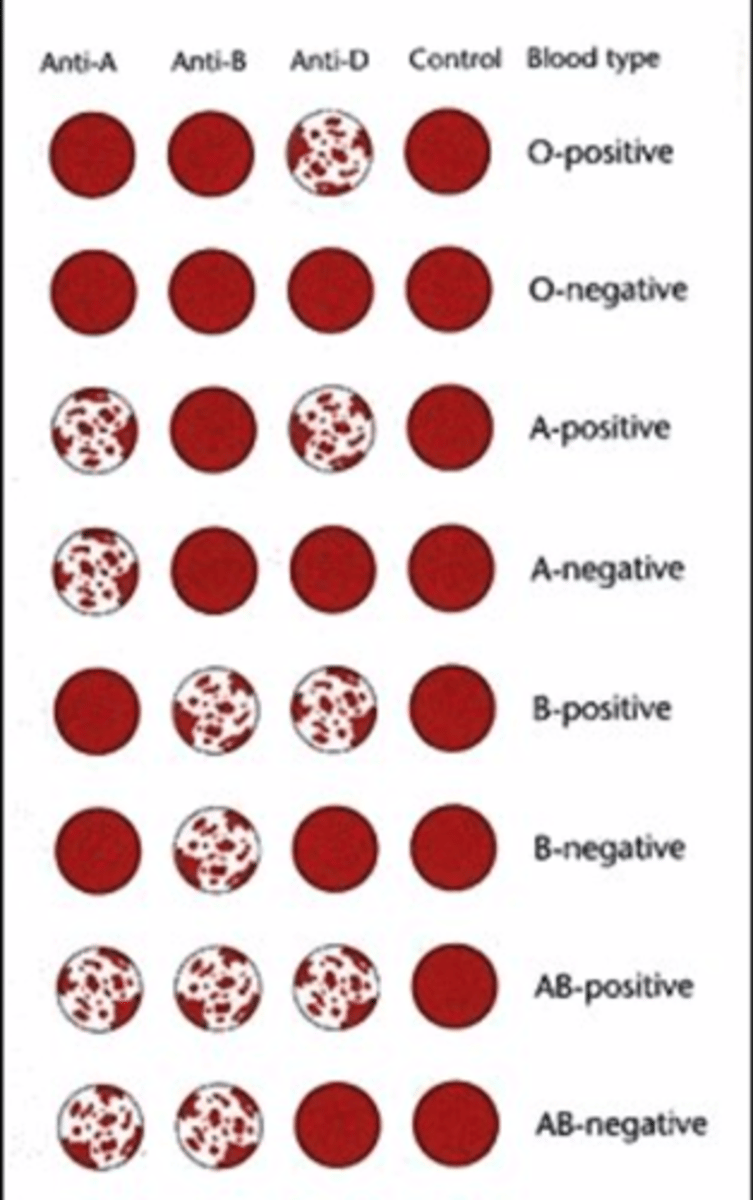
Blood groups A
Antigens (A), Antibodies (Anti-B).
Blood groups B
Antigens (B), Antibodies (Anti-A).
Blood groups AB
Antigens (Both), Antibodies (Neither).
Blood groups O
Antigens (Neither), Antibodies (Both).
Scanning Objective
Red- 4x
Low Objective
Yellow- 10x
High Objective
Blue- 40x
Brightfield Objective
Black- 100x
Calculating Total Magnification
take ocular lens power (10x) times the objective lens power ex: 10 × hp (40)= 400
30 Degrees Celsius Incubator
Fungi
37 Degrees Celsius Incubator
Bacteria and Cell Culture
Inoculating Liquid Culture
1. Sterilize the microscope slides by rinsing it with Ethanol. Let it dry.
2. Sterilize the inoculation loop and let cool.
3. Dip wire loop into media and transfer a small amount of liquid to your slide.
4. Add a cover slip over the material.
Transfer bacteria to microscope slide
1. Get a microscope slide and label it with sample.
2. Vortex the solutions in the tube to break up clumps of bacteria.
3. Use an inoculation loop to transfer several loops of liquid culture to slide.
4. Gently spread in the middle. Allow the slide to dry for 5-10 minutes.
Methylene Blue stain
1. Place 2-3 drops of Methylene Blue stain over your bacteria smear.
2. Leave the stain for 2 minutes.
3. Do not squirt directly onto the sample, rinse stain off by squirting water until it runs clear.
4. Blot dry the underside of the surface of the slide with kim wipe.
5. Once the slide is dry, place a single drop of water into the center of the stained specimen.
Heat fixing a sample
1.Secure end of slide with clothespin.
2. One partner holds a lighter flame, and passes the slide through the flame. Specimens side up and opposite of flame 3-4 times causing the bacteria to stick.
Inoculating a plant leaf (virus)
1. For each plant loosely tie a white string on the control leaf and a colored one on the treatment leaf.
2. Dip clean applicator into a vial of abrasive powder and dab the powder onto the upper surface of the control leaf. Repeat with other control leaves using the same applicator.
3. Use a clean applicator to gently paint on Control Suspension onto the upper surface of control.
4. Dip clean applicator into a vial of abrasive powder and dab the powder onto the upper surface of the treatment leaf. Repeat with other treatment leaves using the same applicator.
5. Use a clean applicator to gently paint on Control Suspension onto the upper surface of treatment.
6. Allow to dry.
7. Rinse leaves with a soft drip from a water bottle for 3 seconds.
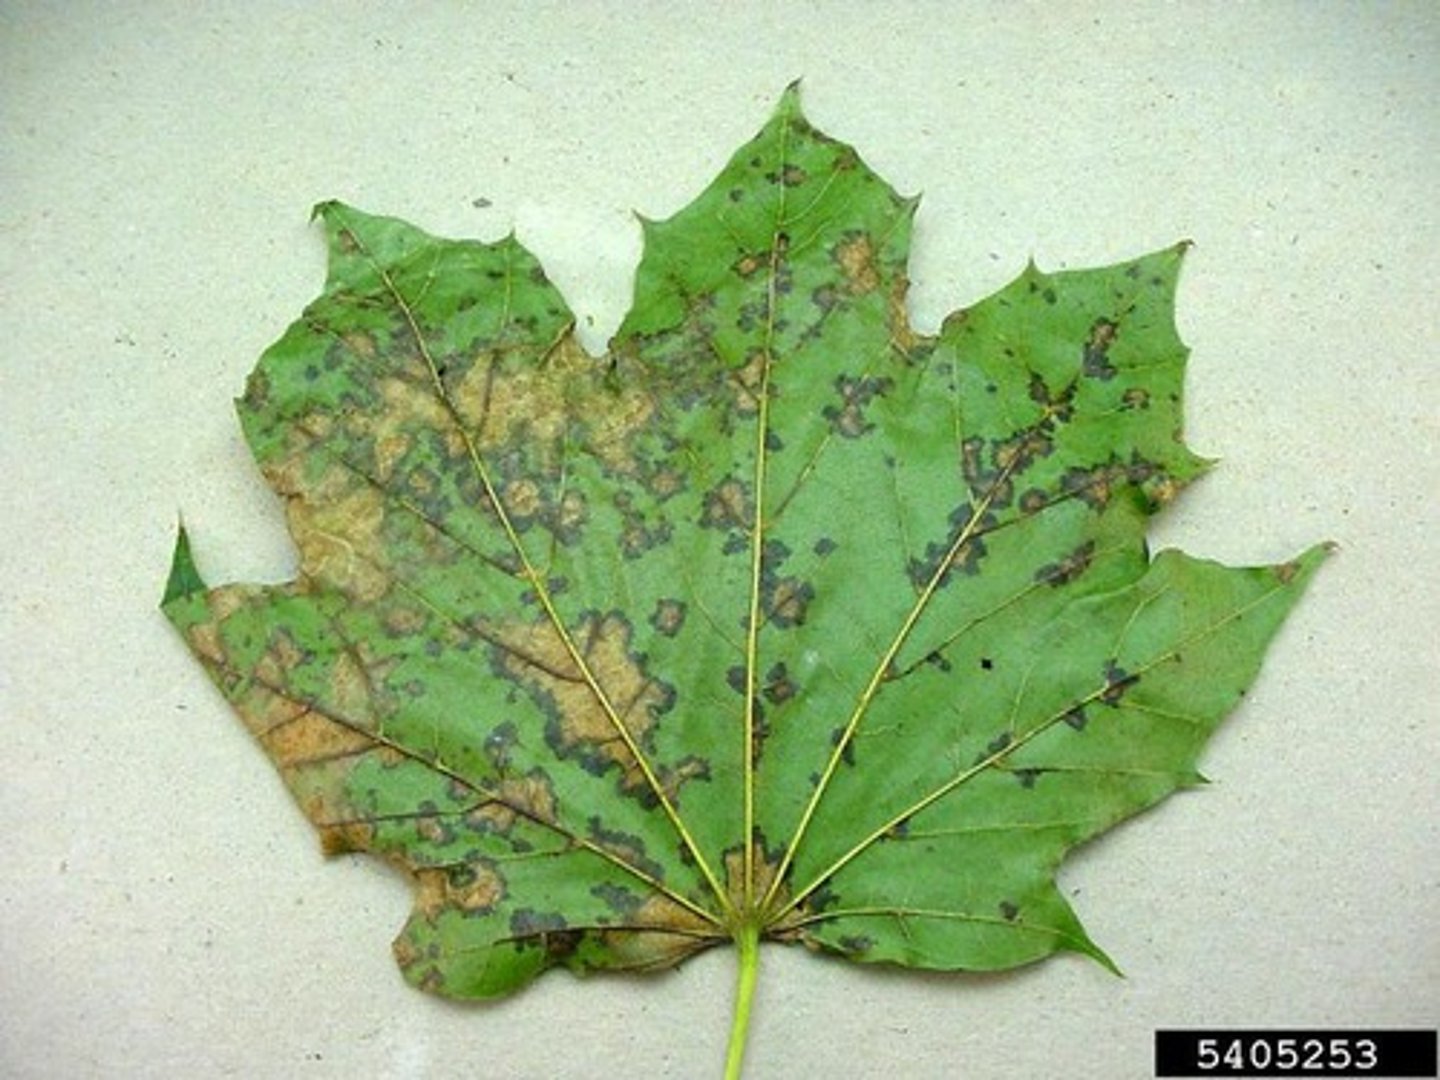
Permissive Hosts in Plants
Plants that get infected by TMV are permissive hosts. In permissive hosts, like tobacco, the virions penetrate the leaf epidermis and enter the plant's vascular system where they travel to other parts of the plant. They infect the plant cells and start reproducing while killing the cells causing symptoms to appear. The symptoms appear as chlorotic mottling (yellowing) on the surface of the plant.
Restrictive Hosts in Plants
Some plants like pinto beans are hypersensitive hosts for TMV. When virions are inserted into the plant, they do not infect the plant. The plant traps the virions in the exposed area and signals cells in that region to die. The death of the cells creates a necrotic region which is tiny dead spots on the exposed leaf. Infection is unsuccessful because the virus does not spread and reproduce inside the host.
Pour agar for gel electrophoresis
1. Make sure the "bubble" on the casting tray is the center of the circle.
2. Place the comb for casting wells into the casting tray with 8 "teeth" DOWN.
3. Make sure there is space between the teeth of your comb and bottom of the tray.
4. Slowly pour the agarose into tray until the teeth are 80%-90% submerged.
5. Gel will become cloudy as it solidifies (10 minutes).
6. When agarose has set, carefully remove the comb.
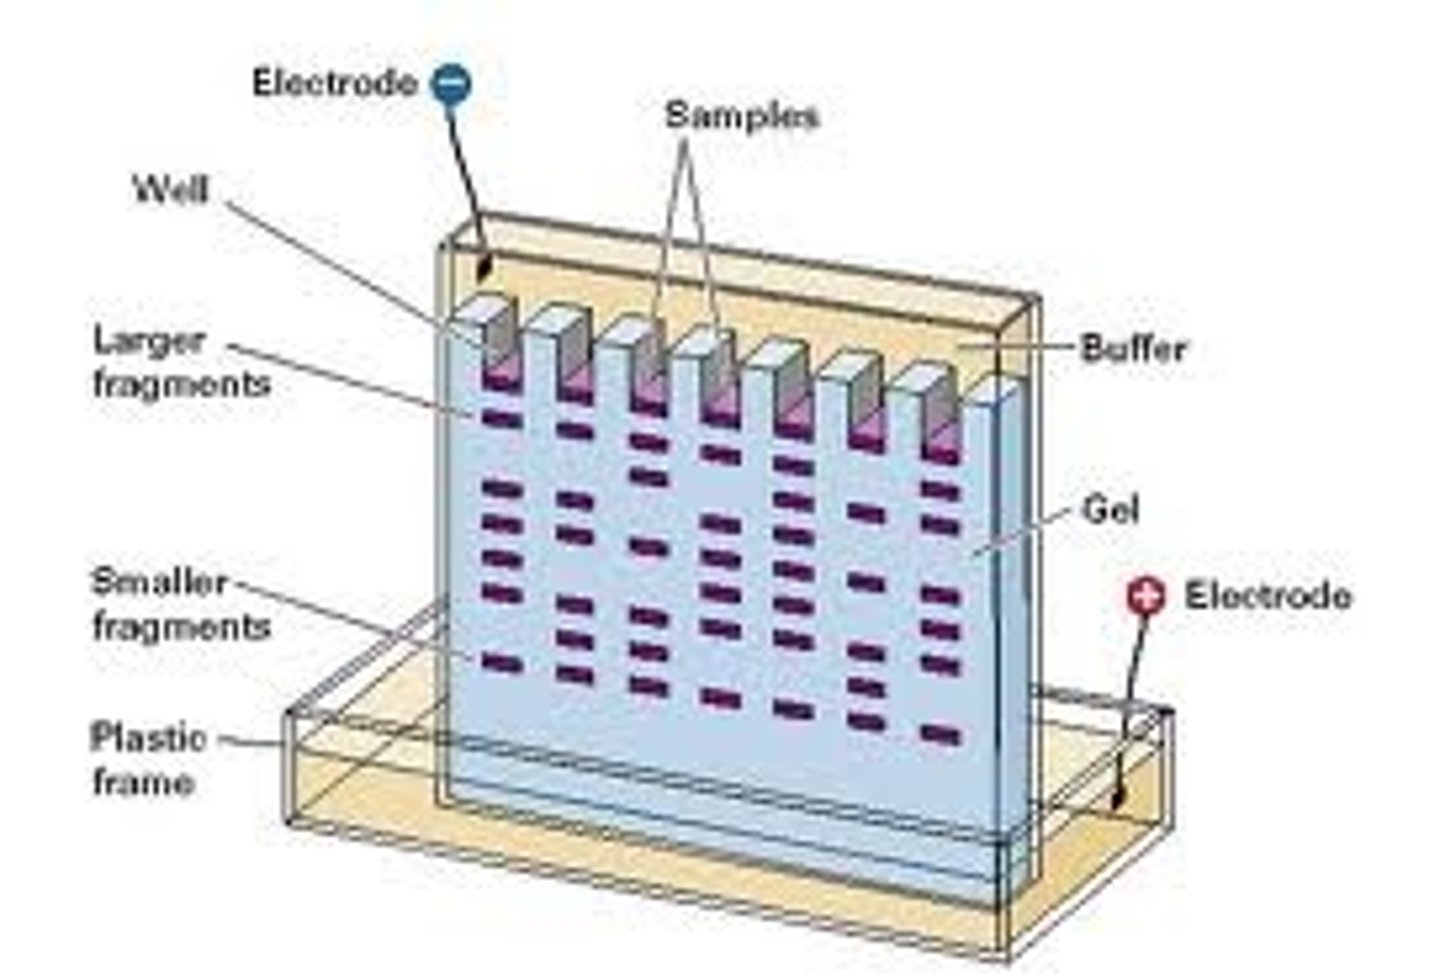
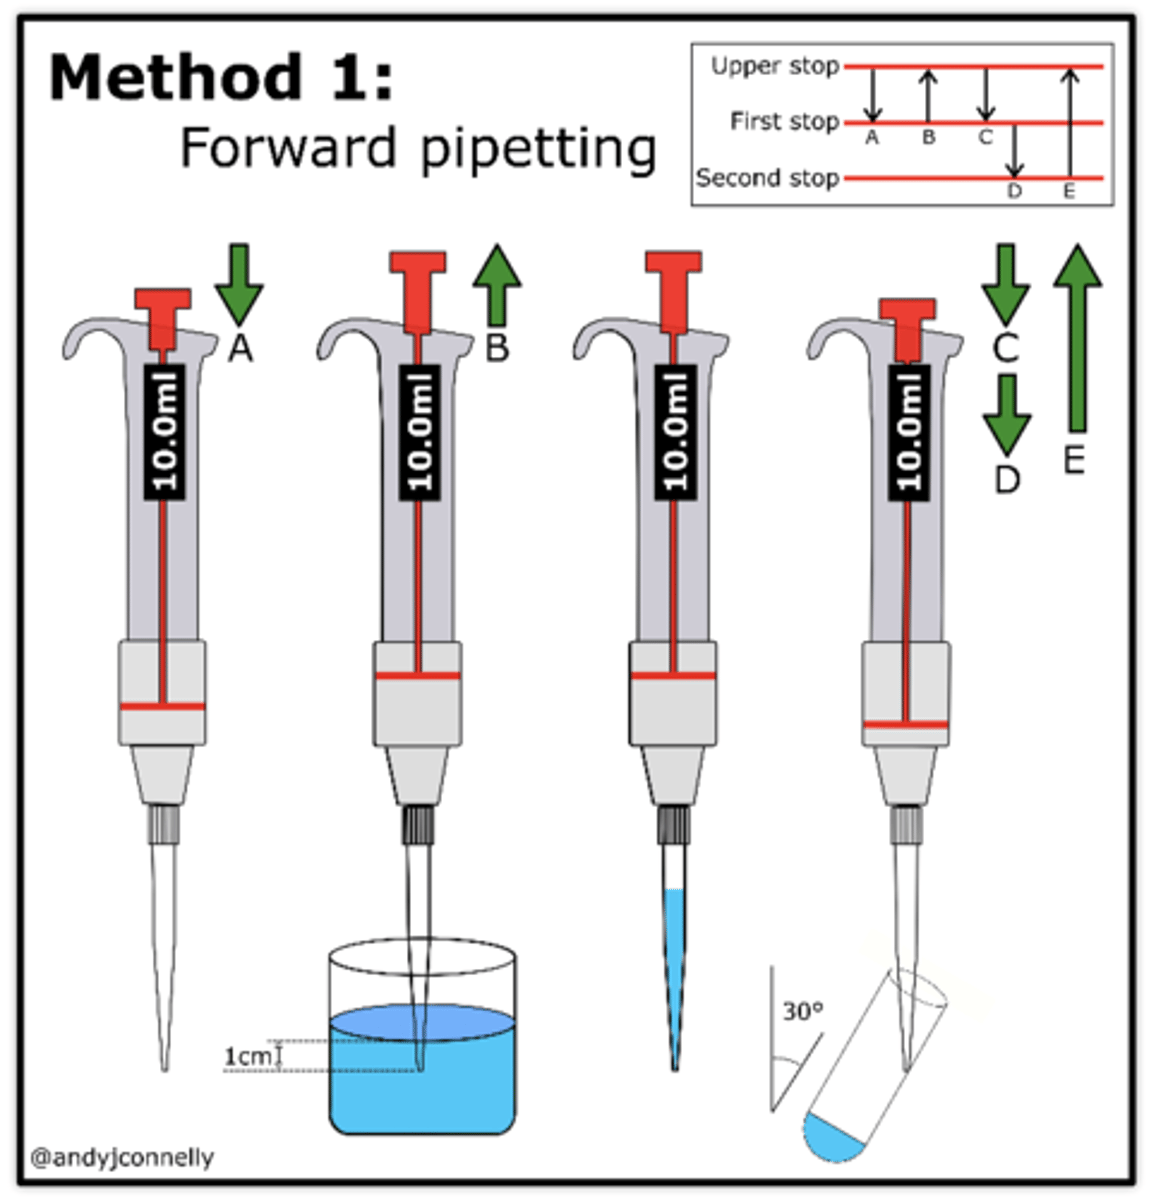
Micropipette use
1. Wells must be at the negative (back) end.
2. Fill the box with a TAE buffer to level that just covers the entire surface of gel.
3. Use a pipette set to 20 and load fresh pipette tips.
4. Draw 20 of the first sample into the pipette tip.
5. Steady the tip using two hands while holding the plunger.
6. Dip pipette tip into surface of buffer into the well and slowly push out each sample.
Gel ring setup
Connect the lid to the power supply, anode to anode (red-red) and black to black. It will take up to 45 minutes.
DNA electrophoresis results
1. Turn off power supply.
2. Lift out the gel tray.
3. Carefully slide felt from tray into numbered tray on the side bench.
4. View gel in transilluminator.
Blood Type A
A antigens and anti-B antibodies
Blood Type B
antigen B, antibody A
Blood Type AB
antigens: A and B, antibodies: none
Blood type O
no antigens, anti-A and anti-B antibodies
Aggultination
occurs when the antibodies bind to the foreign antigens causing a antivody-antigen reaction, appears as clumps of bright red in the sample
Steps to Conduct ELISA Test (HIV)
1. Get a test strip.
2. Add 1 drop of antigens found in HIV inside the circle of the strip.
3. Add 1 drop of primary antibody from each person (blood serum samples).
4. Add 1 drop of secondary antibodies.
5. dd 1 drop of substrate to each circle and read your results.
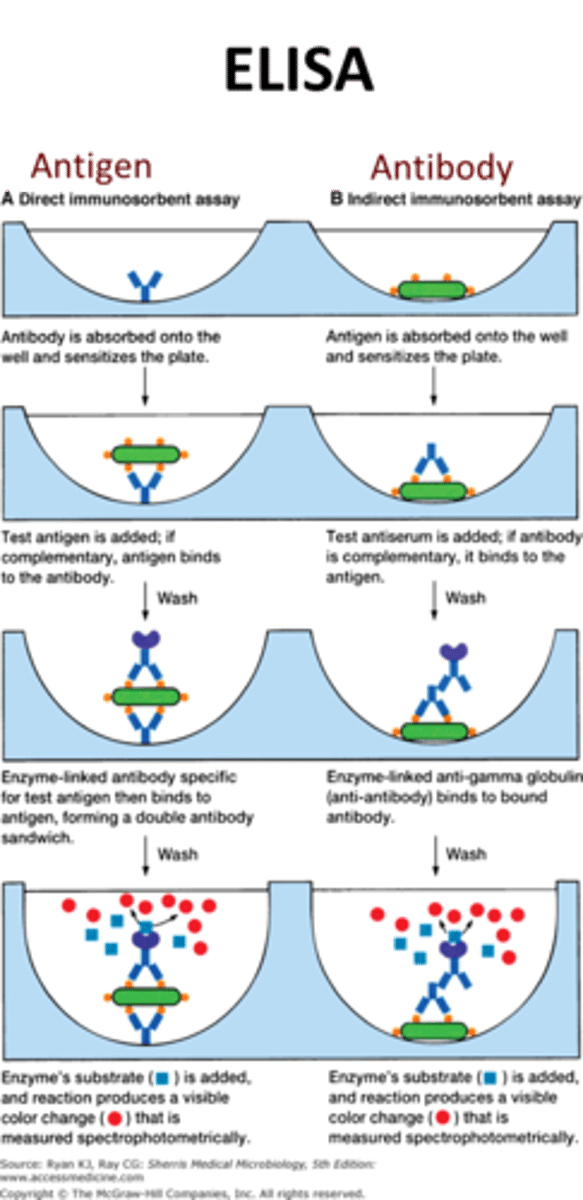
ELISA Test- Reading Results
Clear: No HIV antibodies present
Pink:HIV antibodies present
Cocci
round shaped bacteria
Bacillus
Rod shaped bacteria
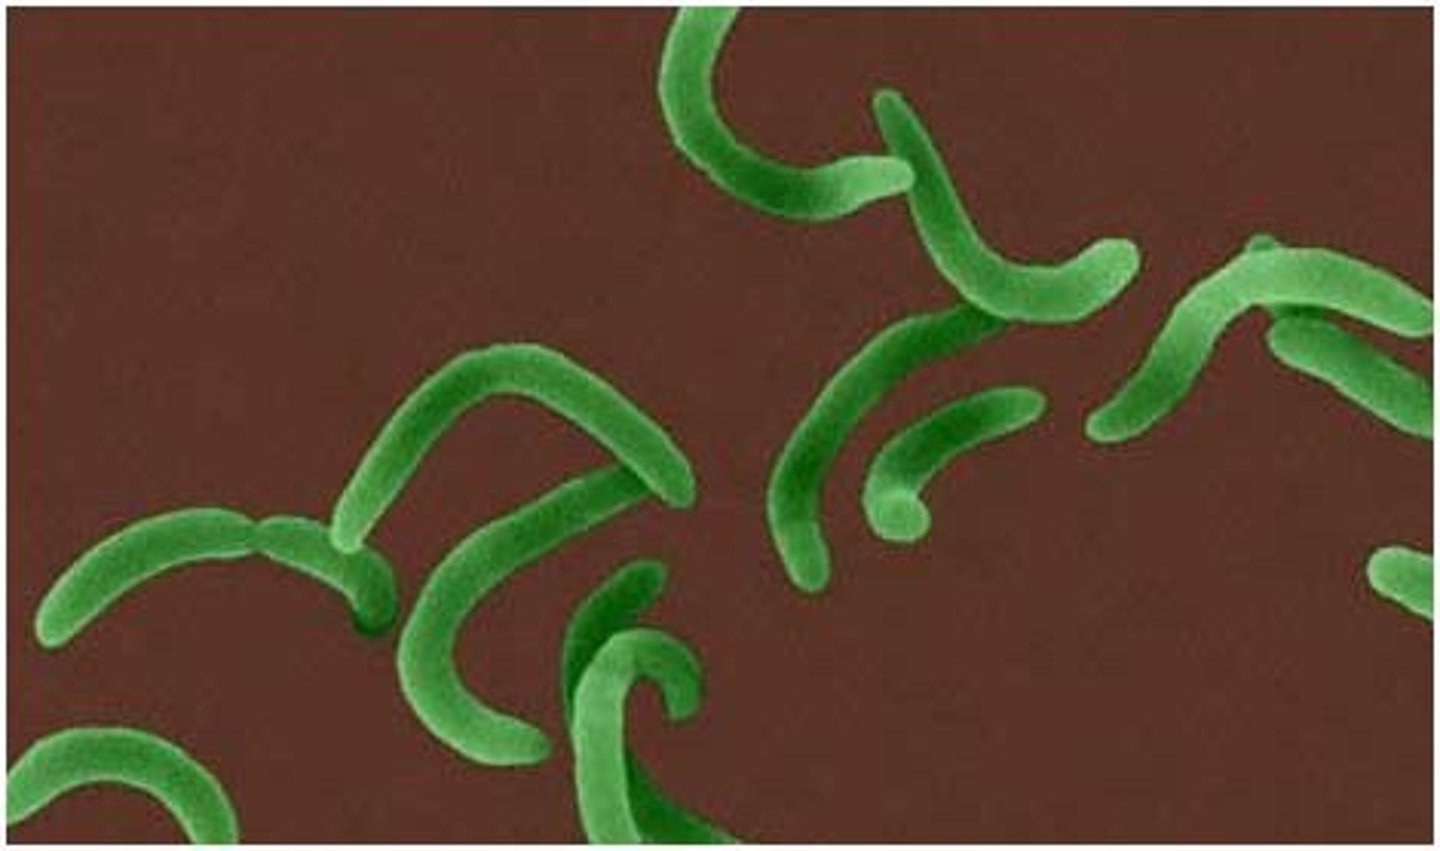
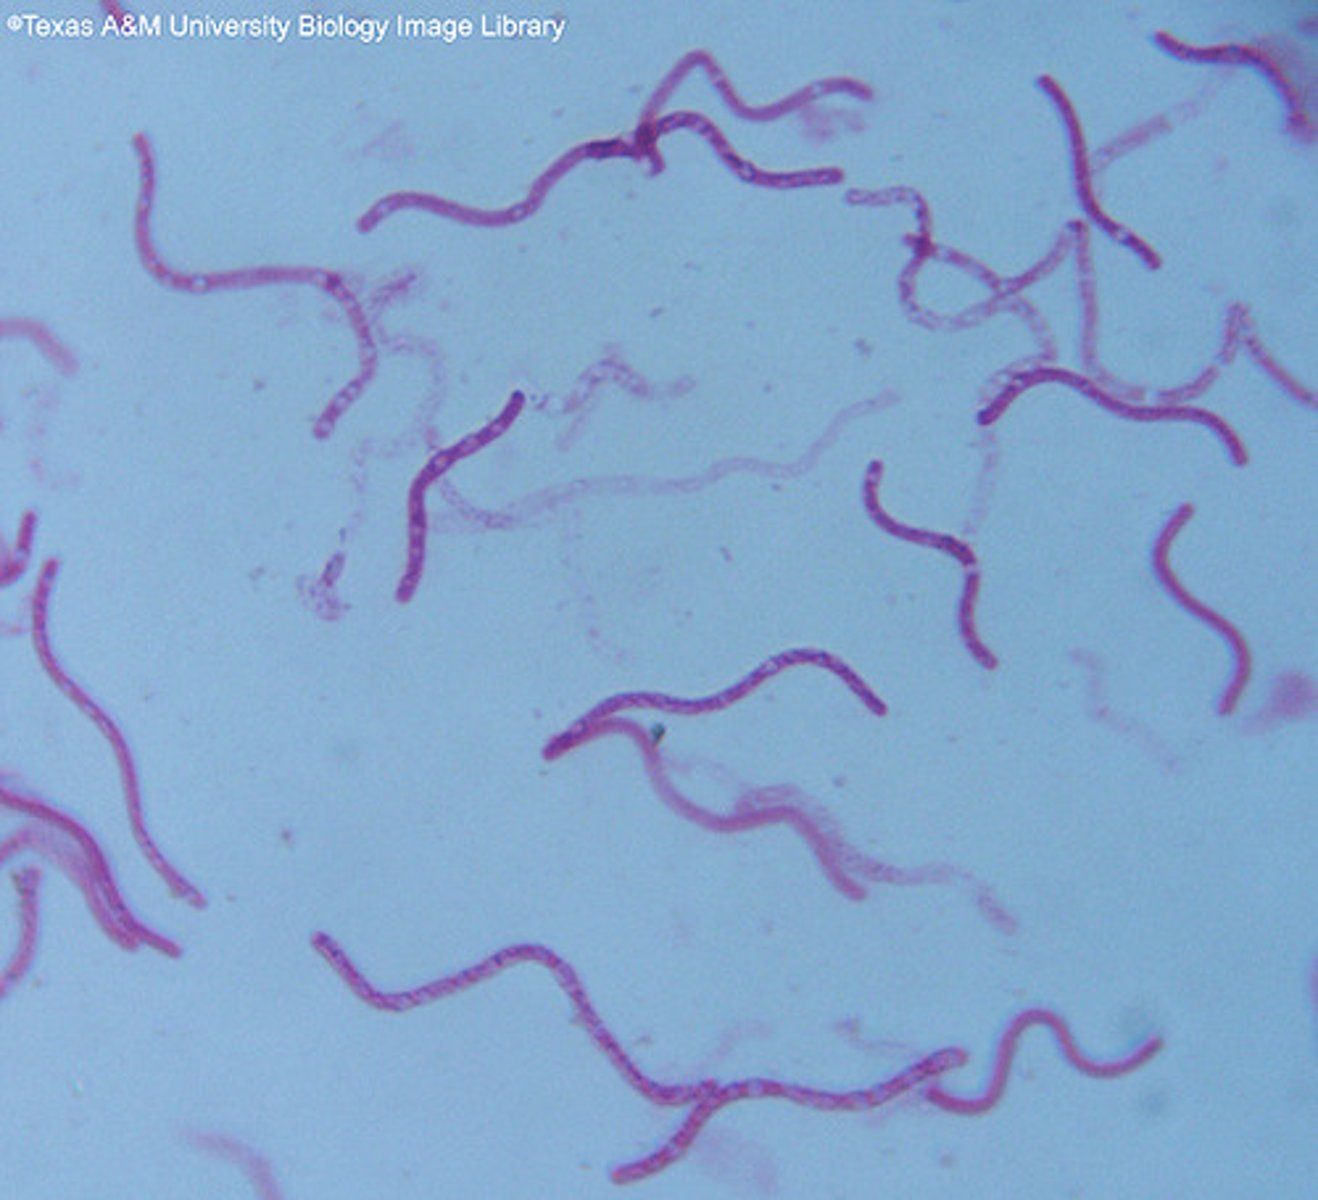
Spiral
DNA shaped bacteria
Vibrio
comma shaped bacteria