PTRS 703 midterm - lab material
1/88
There's no tags or description
Looks like no tags are added yet.
Name | Mastery | Learn | Test | Matching | Spaced | Call with Kai |
|---|
No analytics yet
Send a link to your students to track their progress
89 Terms
Hip flexion normative value
120
Hip extension normative value
20
Hip abduction normative value
45
Hip adduction normative value
30
Hip internal rotation normative value
45
Hip external rotation normative value
45
Knee flexion normative value
135
Knee extension normative value
0
Ankle/talocrural dorsiflexion normative value
20
Ankle/talocrural plantar flexion normative value
50
Ankle/tarsal inversion normative value
35
Ankle/tarsal eversion normative value
15
Subtalar inversion normative value
5
Subtalar eversion normative value
5
Great toe flexion normative value
45
Great toe extension normative value
70
Thoracolumbar spine flexion normative value
10cm
Thoracolumbar spine extension normative value
5cm
Thoracolumbar spine lateral flexion normative value
35
Thoracolumbar spine rotation normative value
45
Lumbar spine flexion normative value
6.5cm
Lumbar spine extension normative value
1.5cm
Hip extension end-feel
firm
Hip flexion end-feel
soft or firm
Hip abduction end-feel
firm
Hip adduction end-feel
firm
Hip internal rotation end-feel
firm
Hip external rotation end-feel
firm
Knee flexion end-feel
soft or firm
Knee extension end-feel
firm
Ankle/talocrural dorsiflexion end-feel
firm
Ankle/talocrural plantar flexion end-feel
firm
Ankle/tarsal inversion end-feel
firm
Ankle/tarsal eversion end-feel
firm
Subtalar inversion end-feel
firm
Subtalar eversion end-feel
firm or hard
Great toe flexion end-feel
firm
Great toe extension end-feel
firm
ALL lumbar + thoracic spine end-feels are...
firm
Hip flexion ROM
supine
stationary arm: midline of pelvis
fulcrum: greater trochanter
moving arm: lateral epicondyle
Hip extension ROM
prone
stationary arm: midline of pelvis
fulcrum: greater trochanter
moving arm: lateral epicondyle

Hip abduction ROM
supine
stationary arm: between ASISes
fulcrum: ipsilateral ASIS
moving arm: center of patella
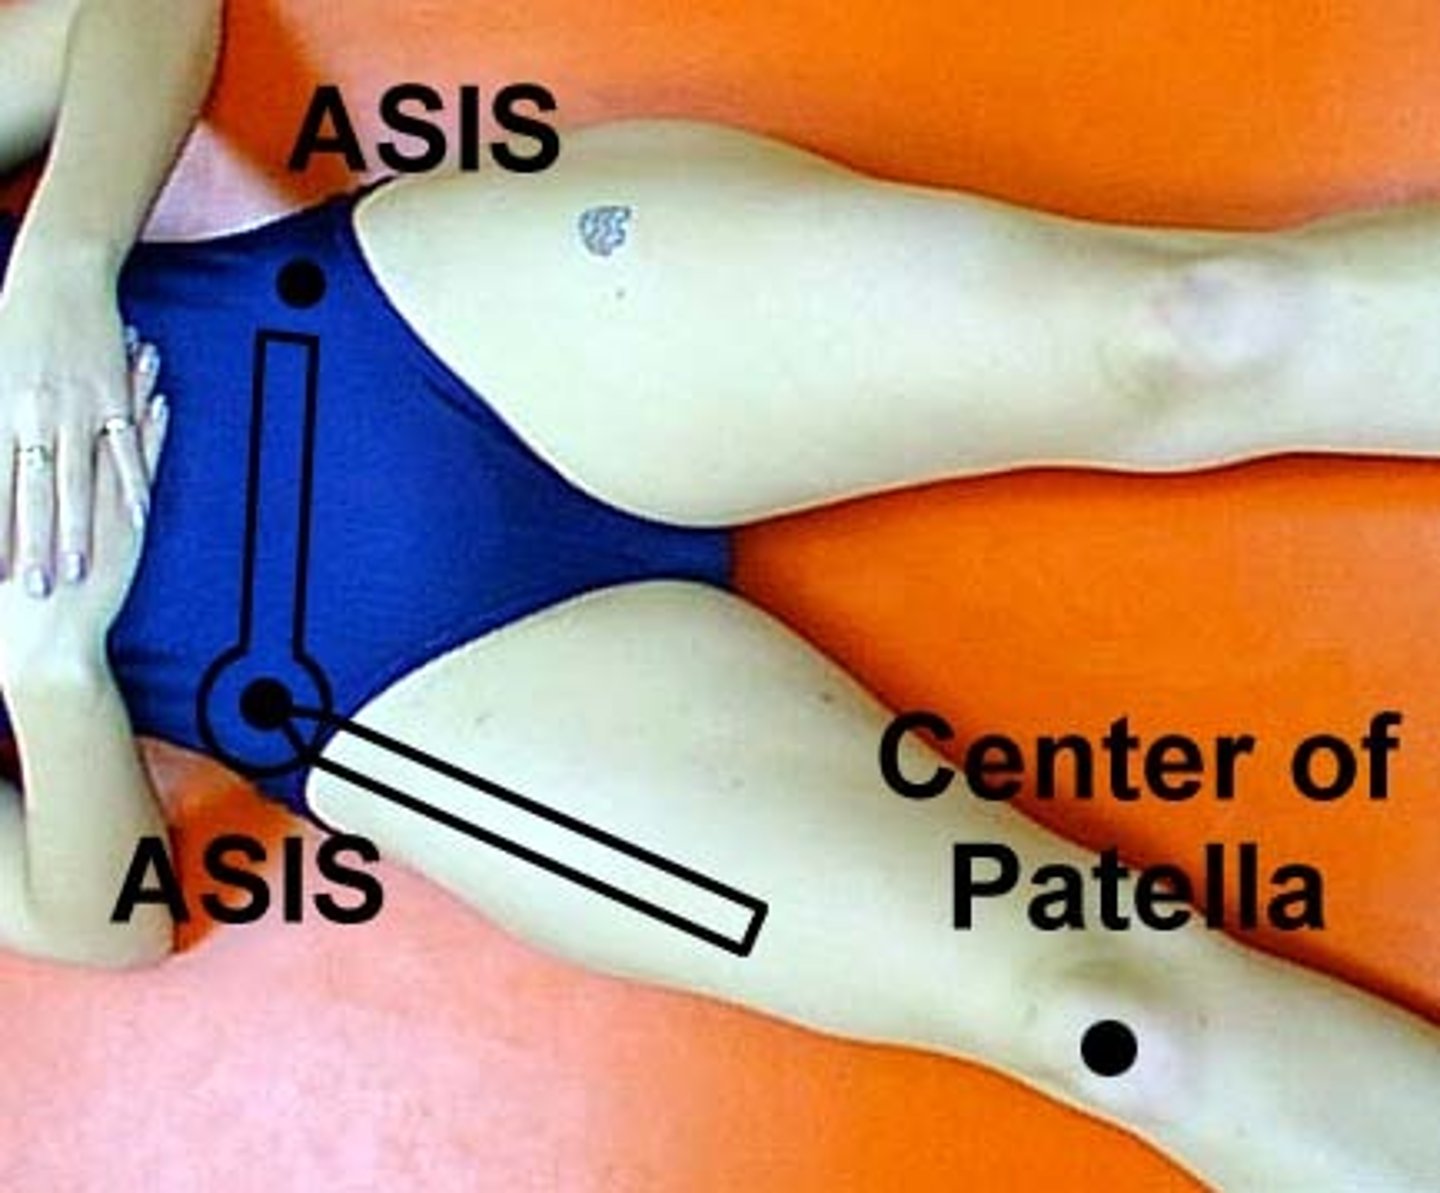
Hip adduction ROM
supine
stationary arm: between ASISes
fulcrum: ipsilateral ASIS
moving arm: center of patella

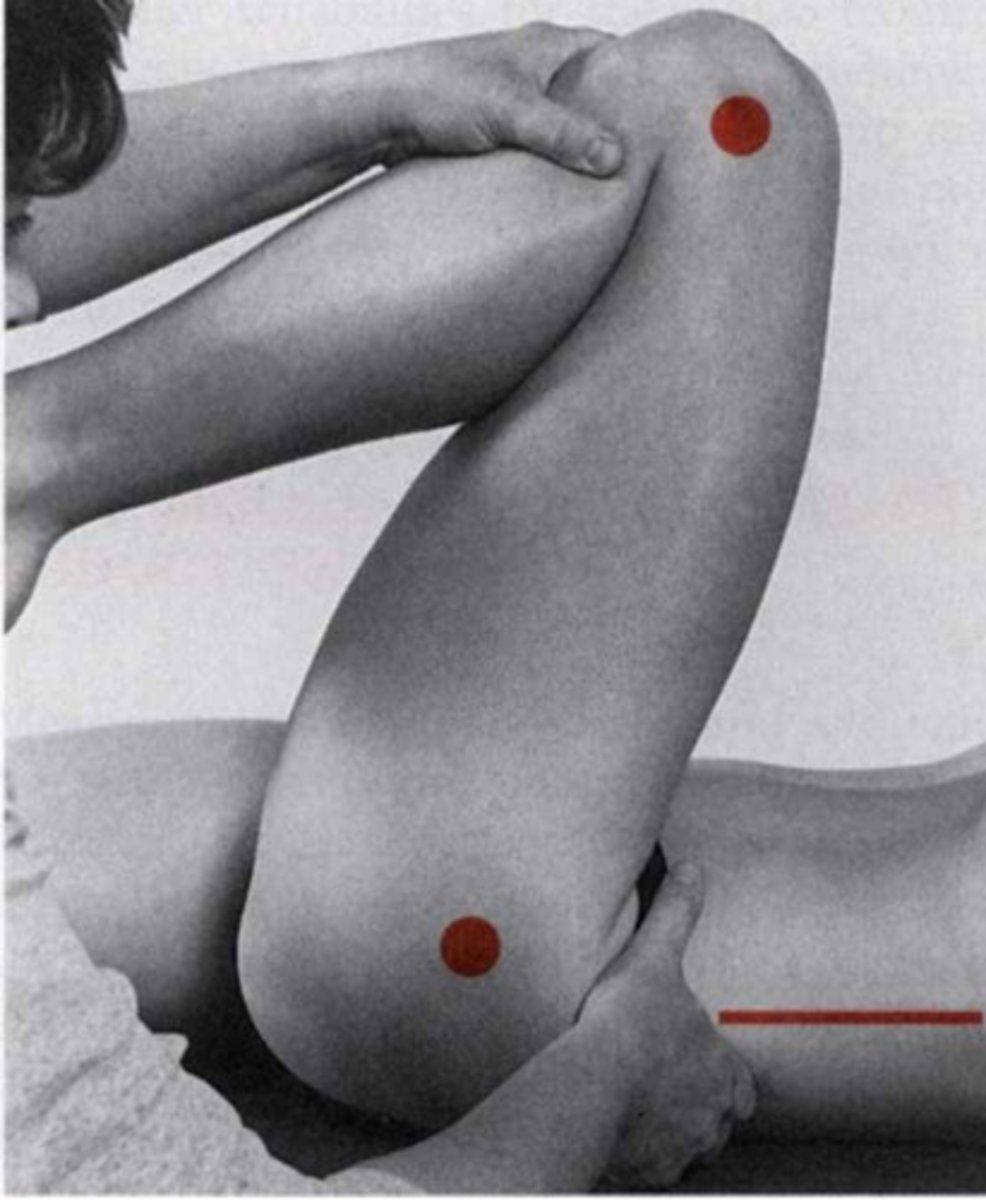
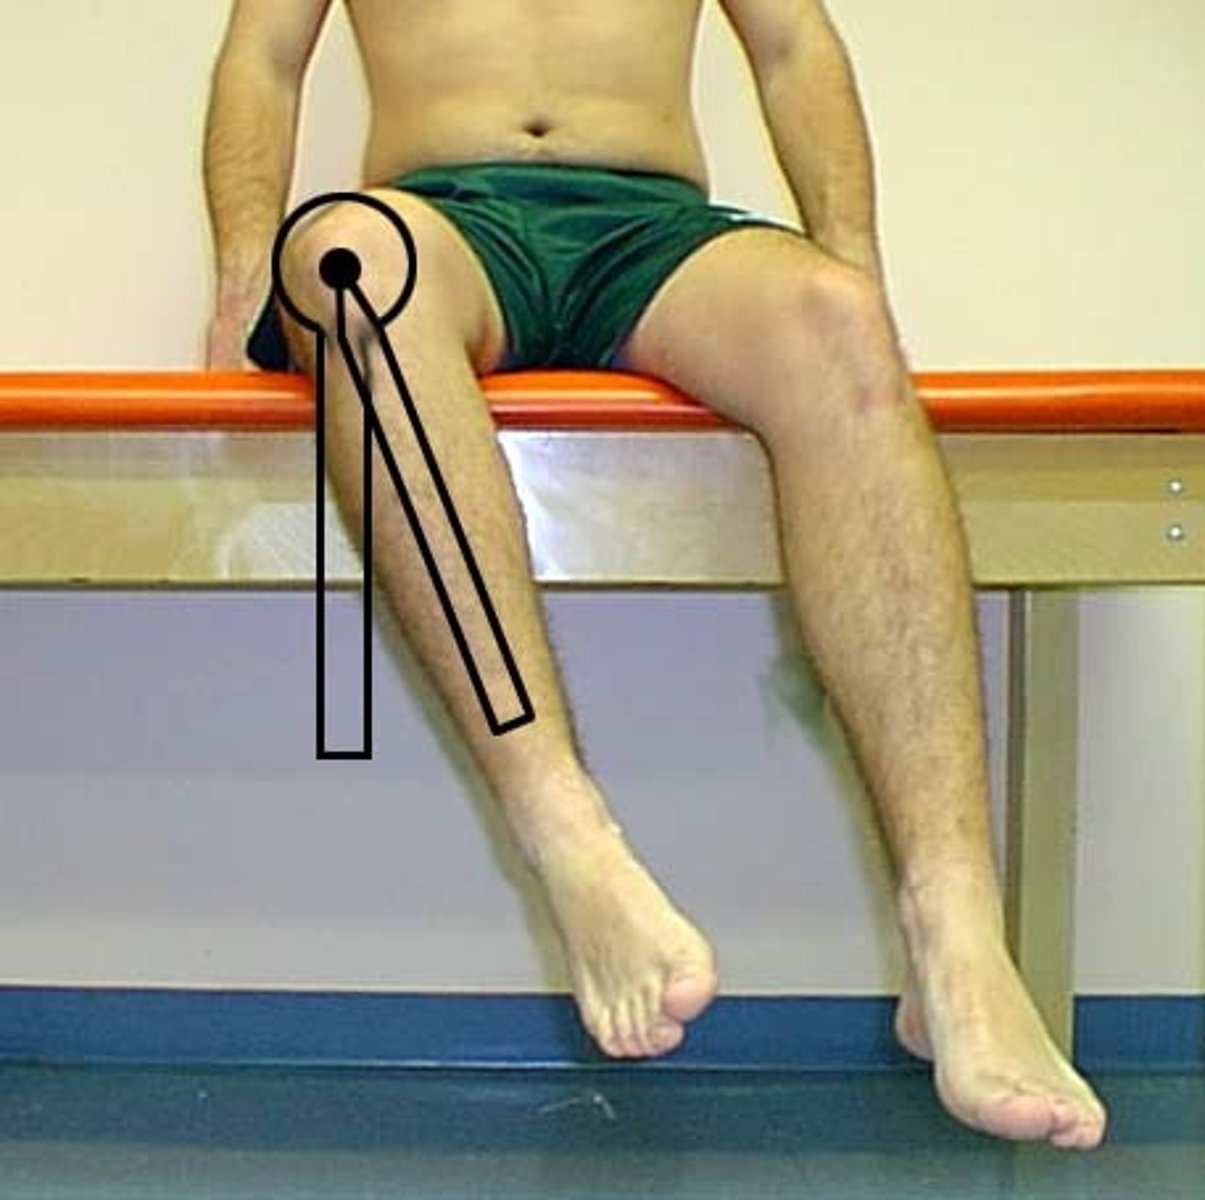
Hip internal rotation ROM
seated
stationary arm: perpendicular to floor
fulcrum: center of patella
moving arm: talocrural joint (between malleoli)
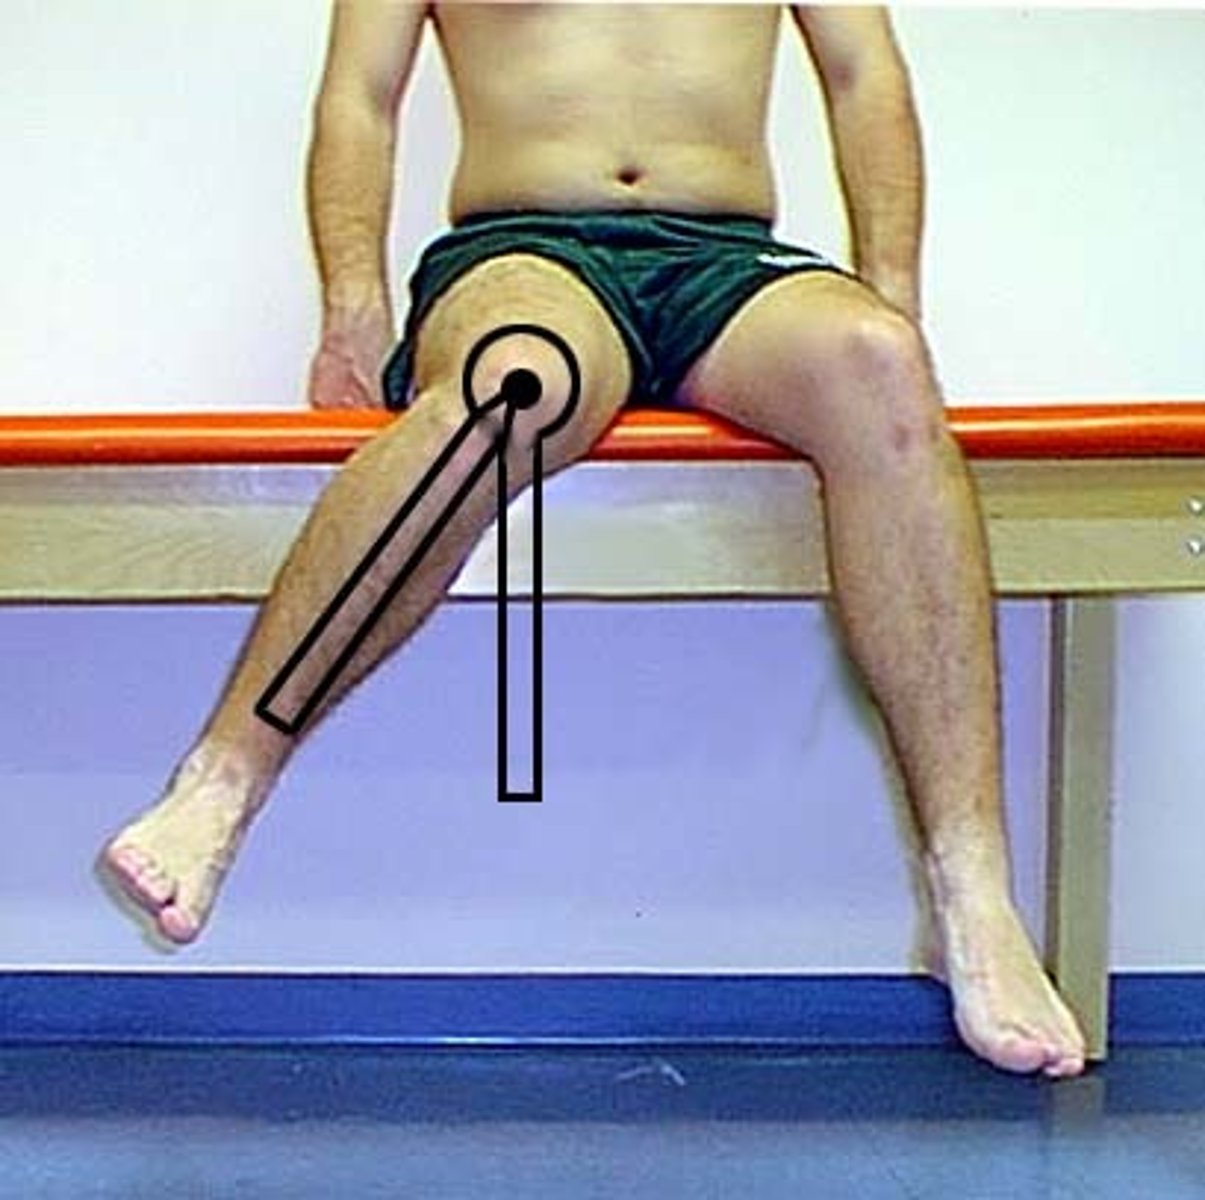
Hip external rotation ROM
seated
stationary arm: perpendicular to floor
fulcrum: center of patella
moving arm: talocrural joint (between malleoli)
Knee flexion ROM
supine
stationary arm: greater trochanter
fulcrum: lateral epicondyle
moving arm: lateral malleolus
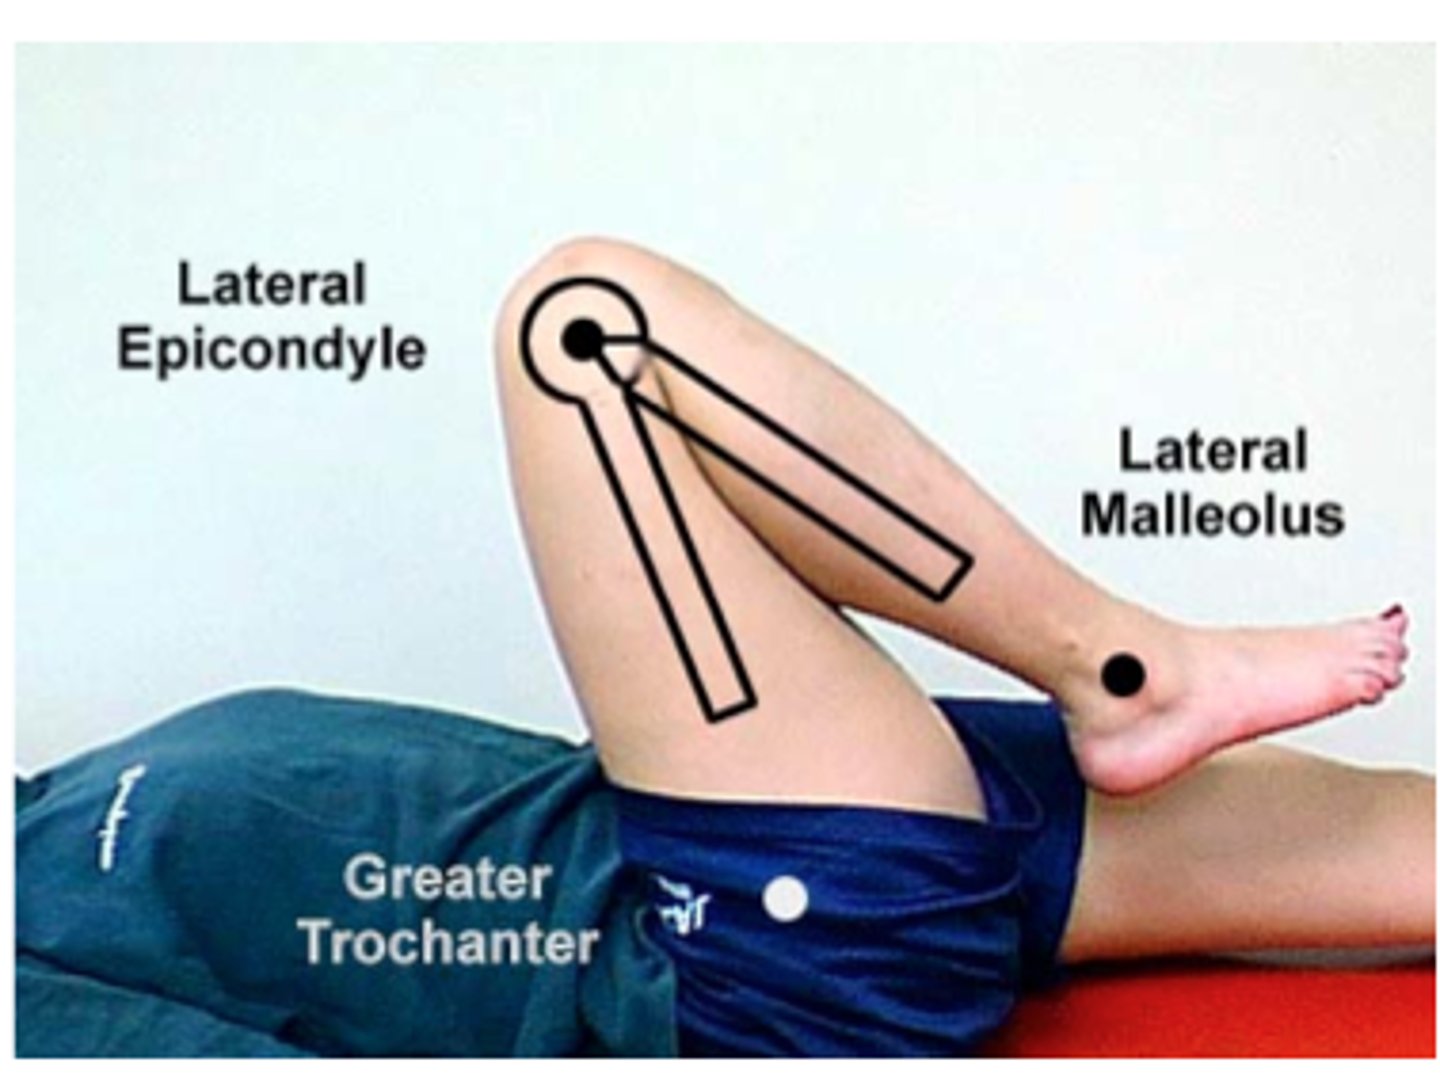
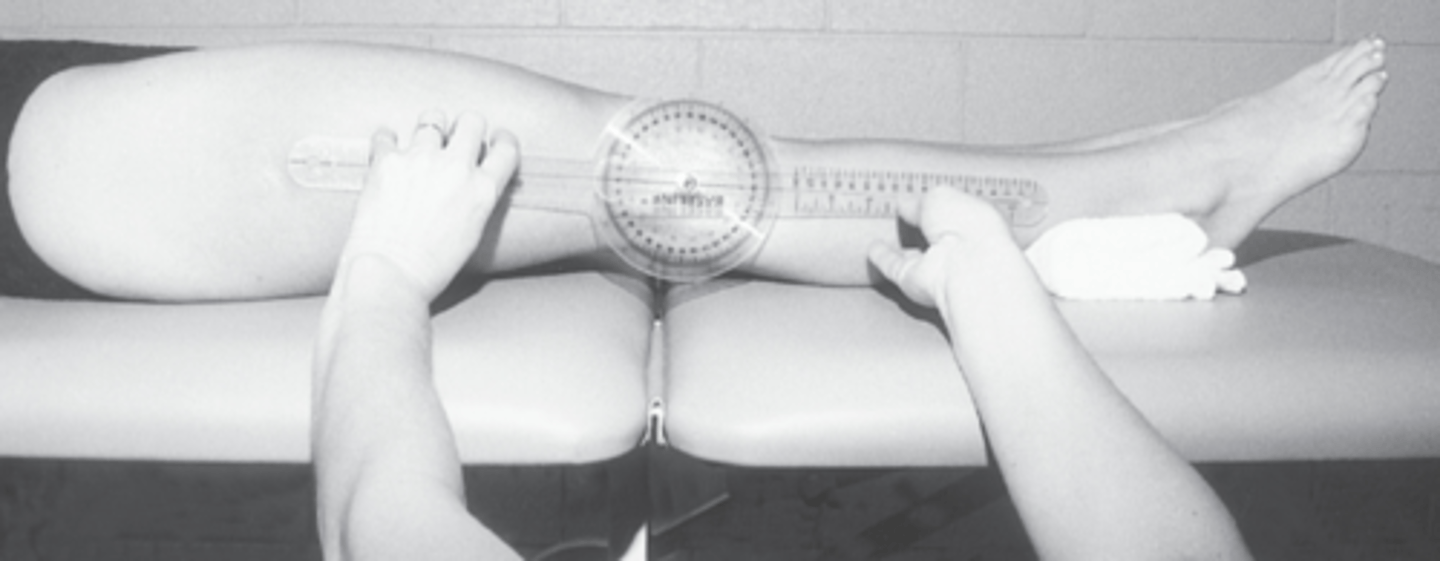
Knee extension ROM
supine, ankle supported
stationary arm: greater trochanter
fulcrum: lateral epicondyle
moving arm: lateral malleolus
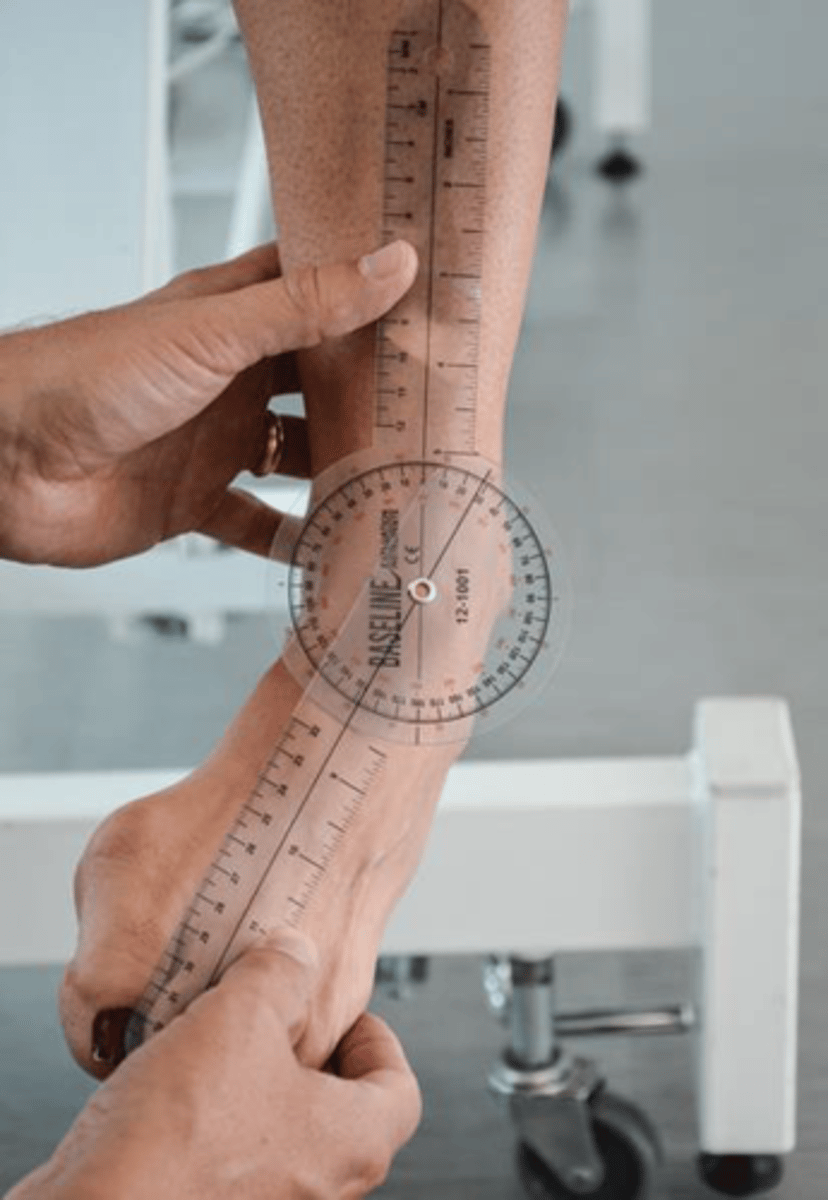
Ankle/talocrural dorsiflexion ROM
seated
stationary arm: lateral epicondyle
fulcrum: lateral malleolus
moving arm: parallel to 5th metatarsal

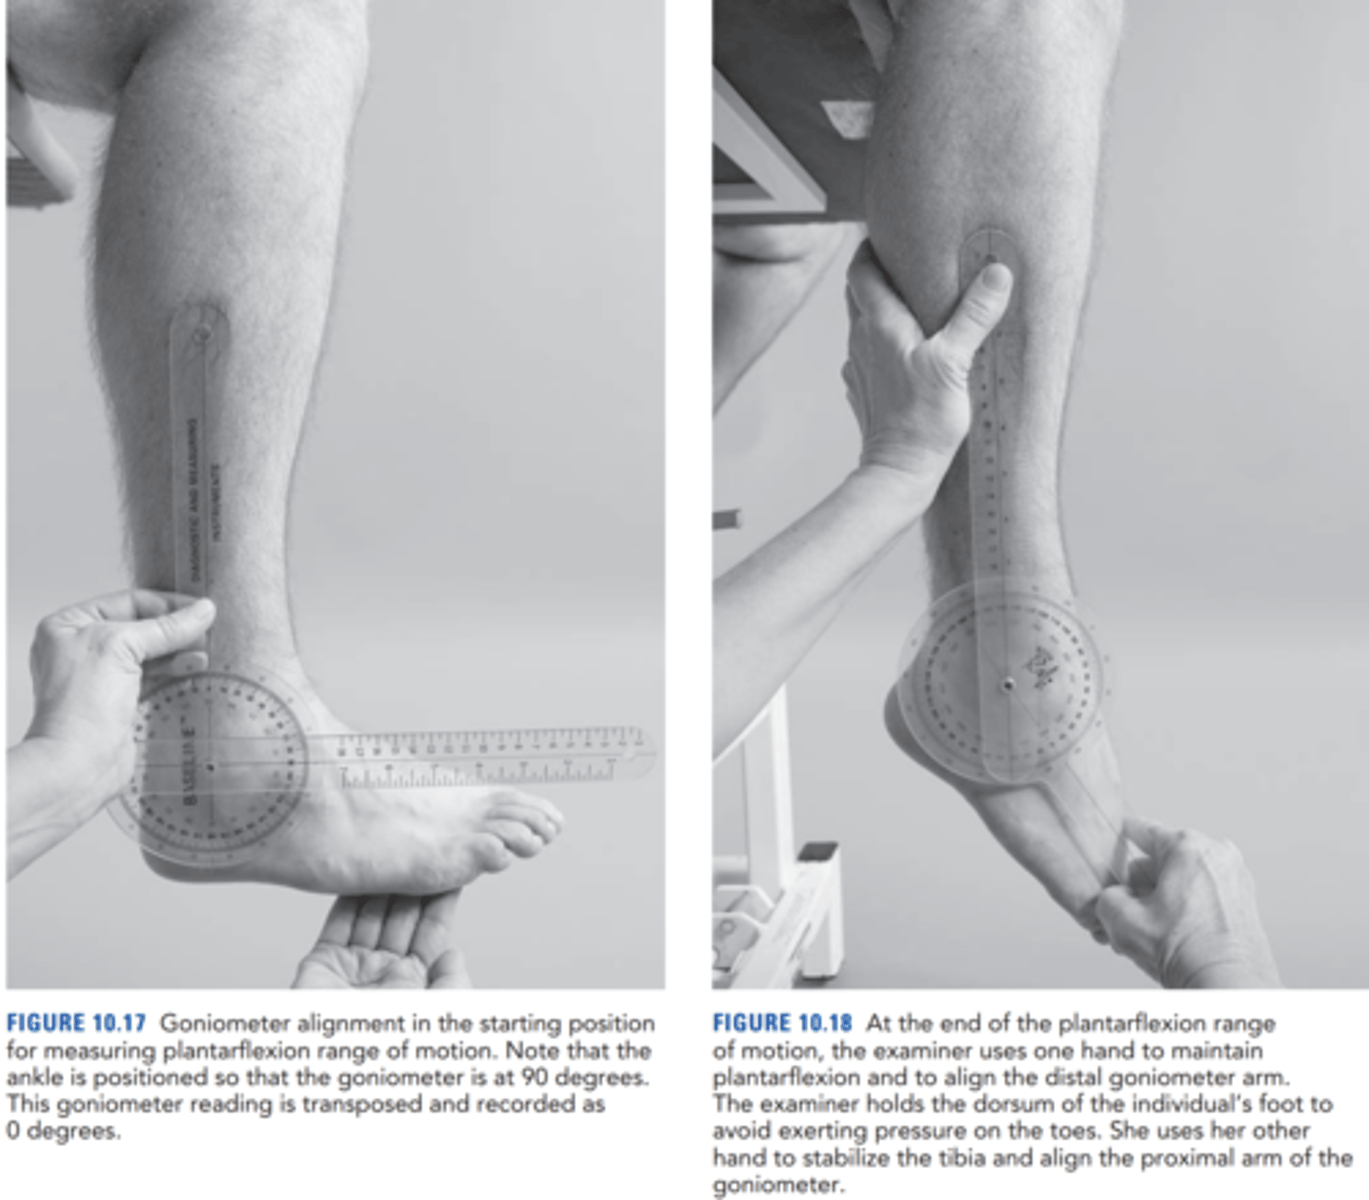
Ankle/talocrural plantar flexion ROM
seated
stationary arm: lateral epicondyle
fulcrum: lateral malleolus
moving arm: parallel to 5th metatarsal
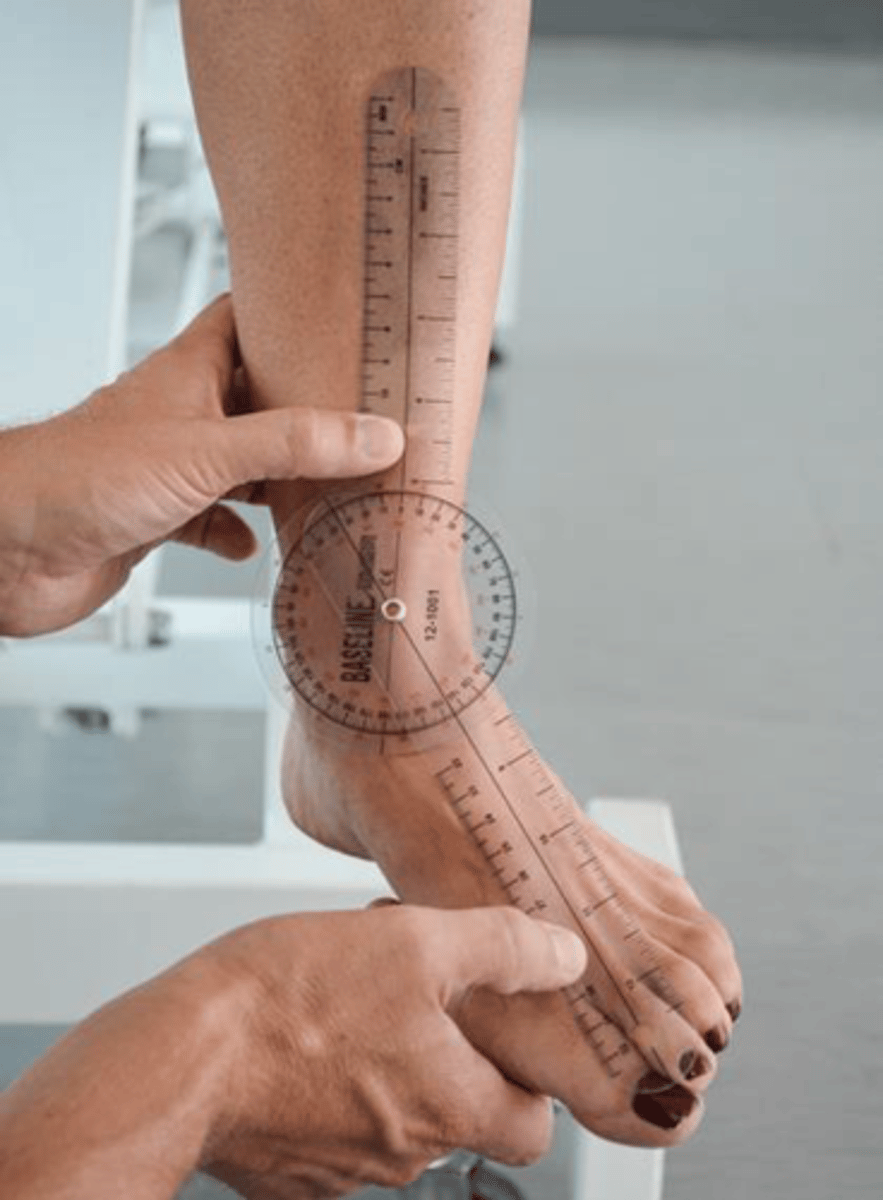
Ankle/tarsal inversion ROM
seated
stationary arm: tibial tuberosity
fulcrum: talocrural joint (between malleoli)
moving arm: 2nd metatarsal
Ankle/tarsal eversion ROM
seated
stationary arm: tibial tuberosity
fulcrum: talocrural joint (between malleoli)
moving arm: 2nd metatarsal
Subtalar inversion ROM
** passive + active!
prone, feet off table
stationary arm: middle of gastrocnemius/calf
fulcrum: posterior talocrural joint (between malleoli)
moving arm: middle of calcaneus
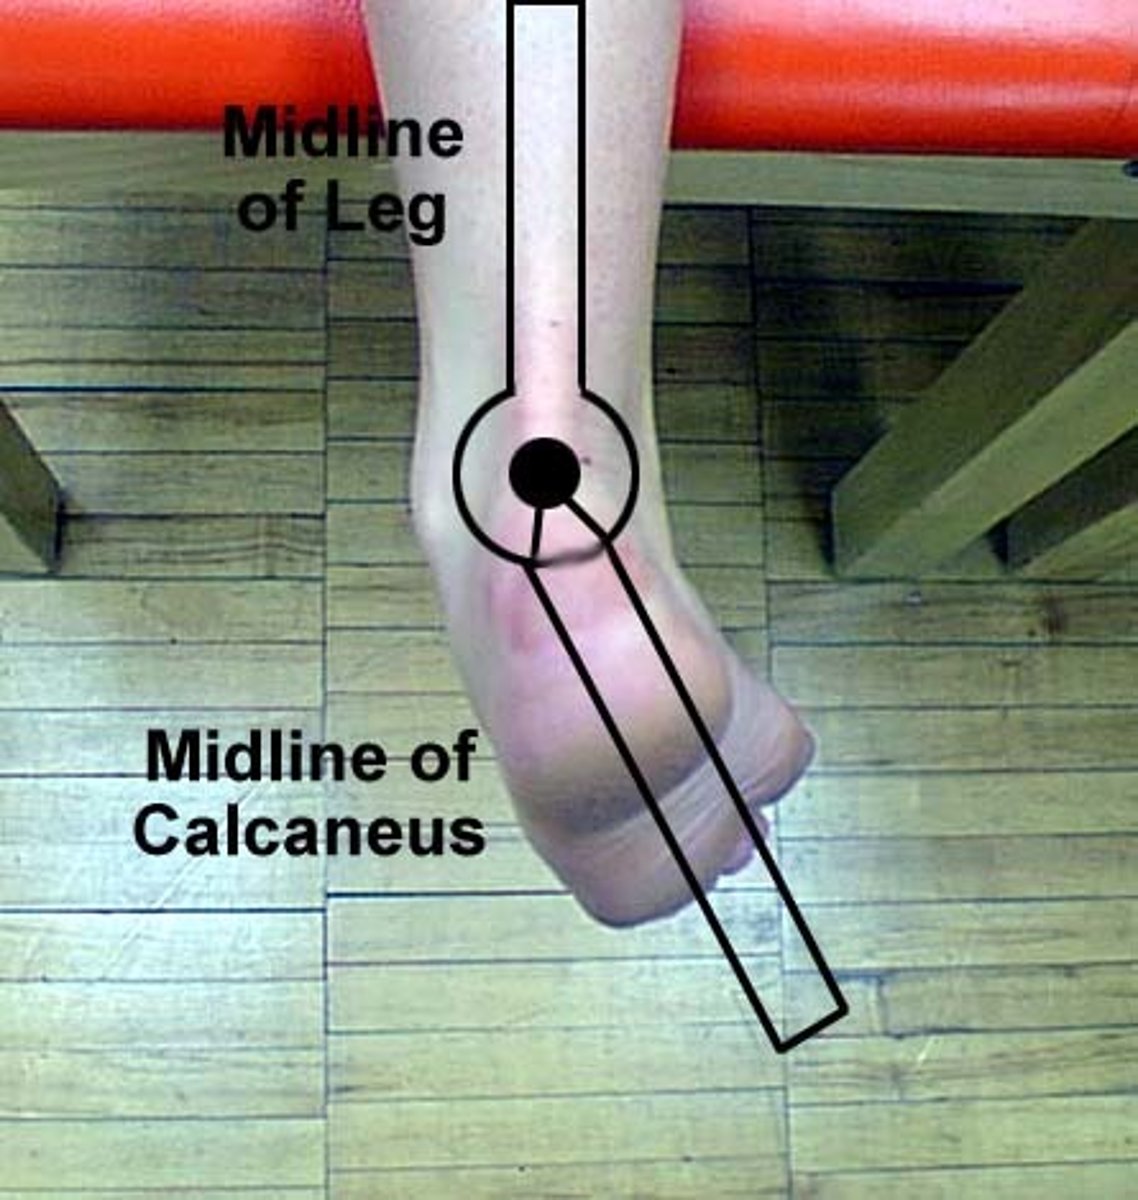
Subtalar eversion ROM
prone, feet off table
stationary arm: middle of gastrocnemius/calf
fulcrum: posterior talocrural joint (between malleoli)
moving arm: middle of calcaneus

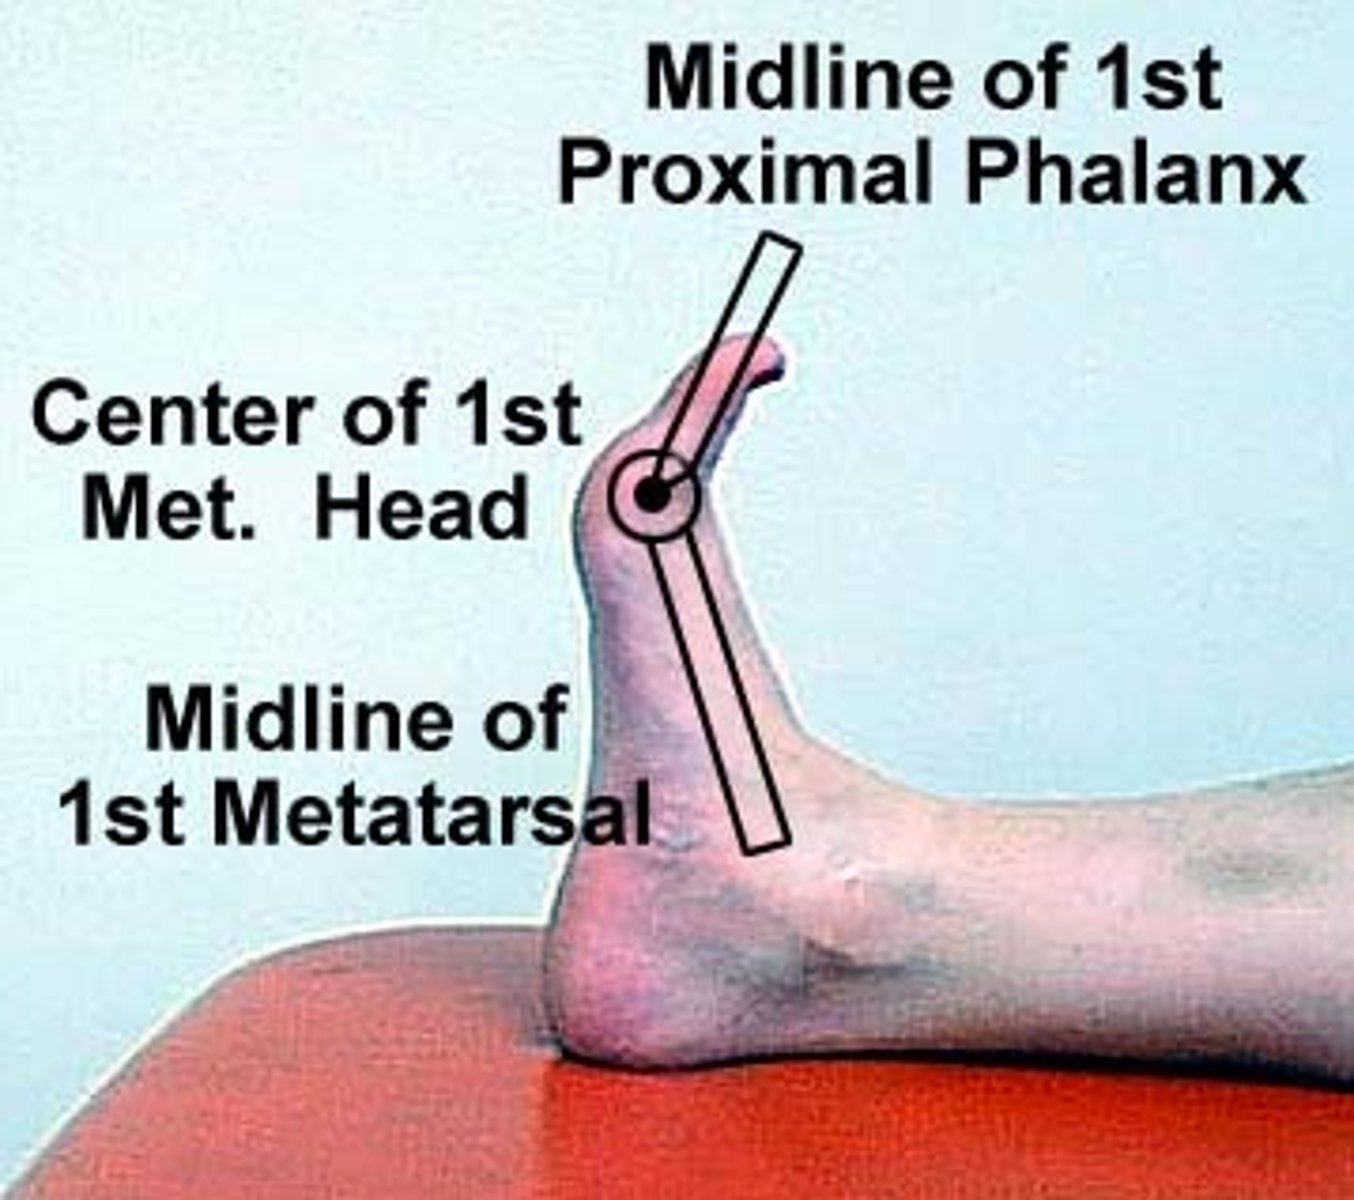
Great toe flexion ROM
supine, feet off table
stationary arm: 1st metatarsal
fulcrum: 1st MTP joint
moving arm: 1st phalange
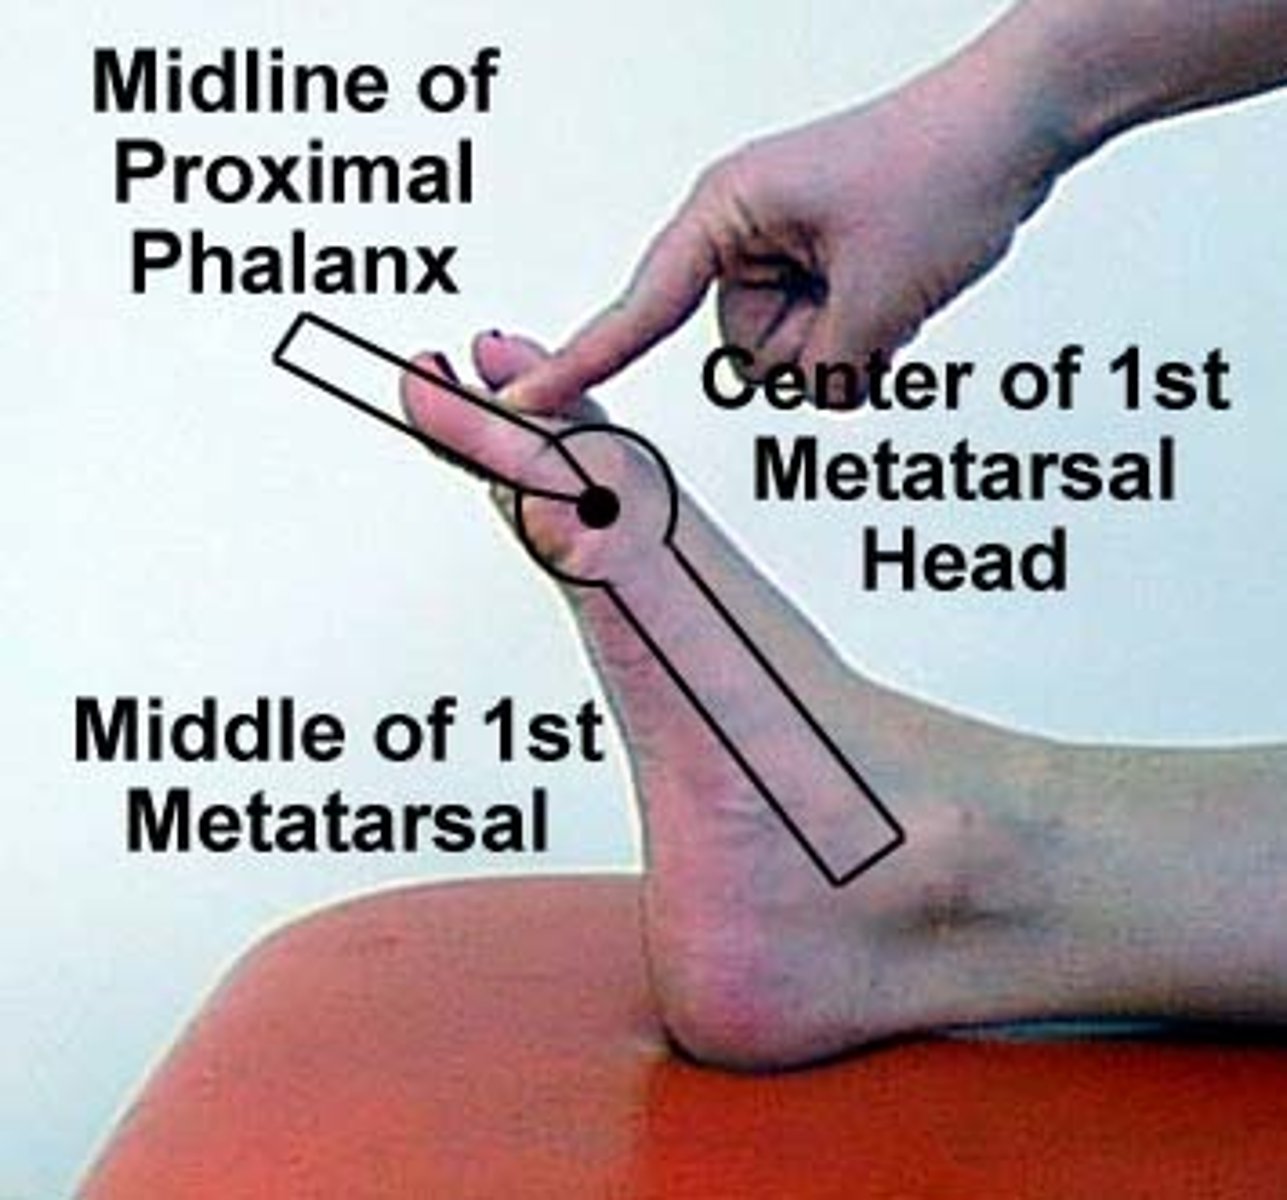
Great toe extension ROM
supine, feet off table
stationary arm: 1st metatarsal
fulcrum: 1st MTP joint
moving arm: 1st phalange
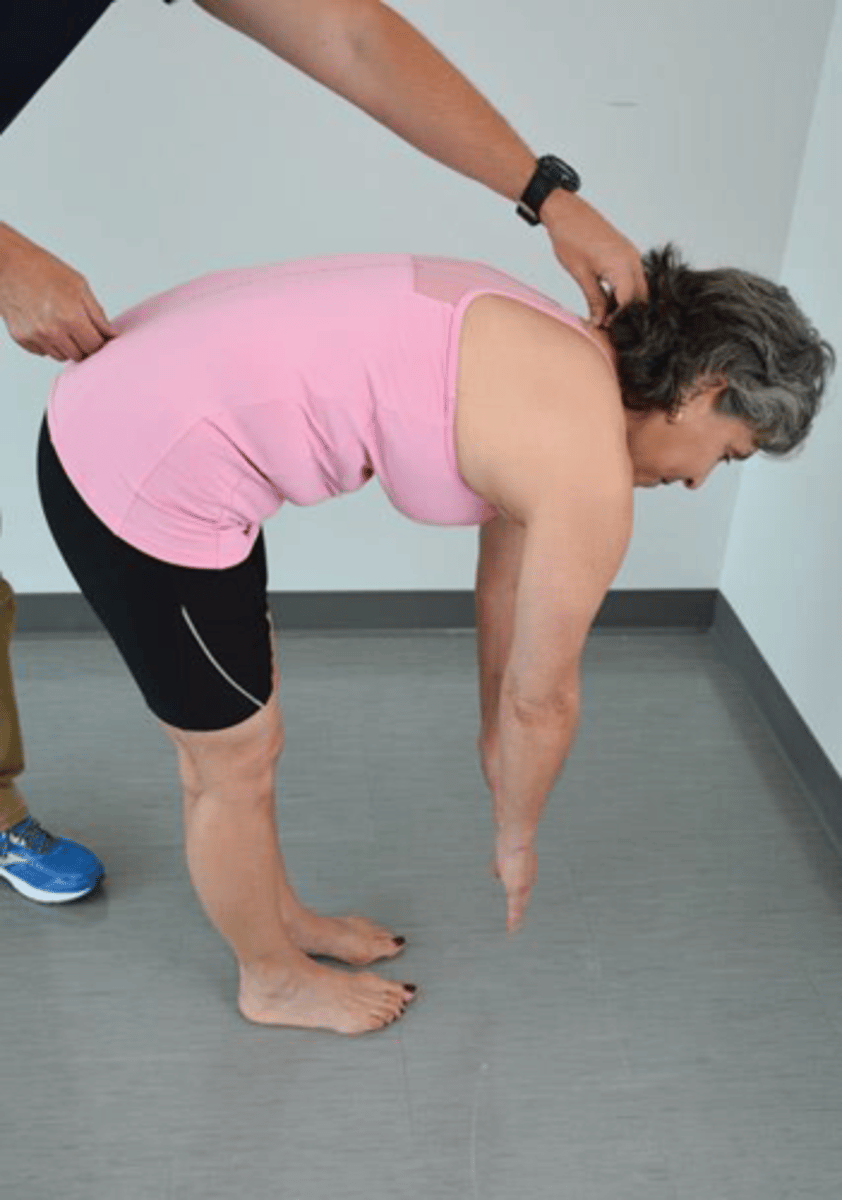
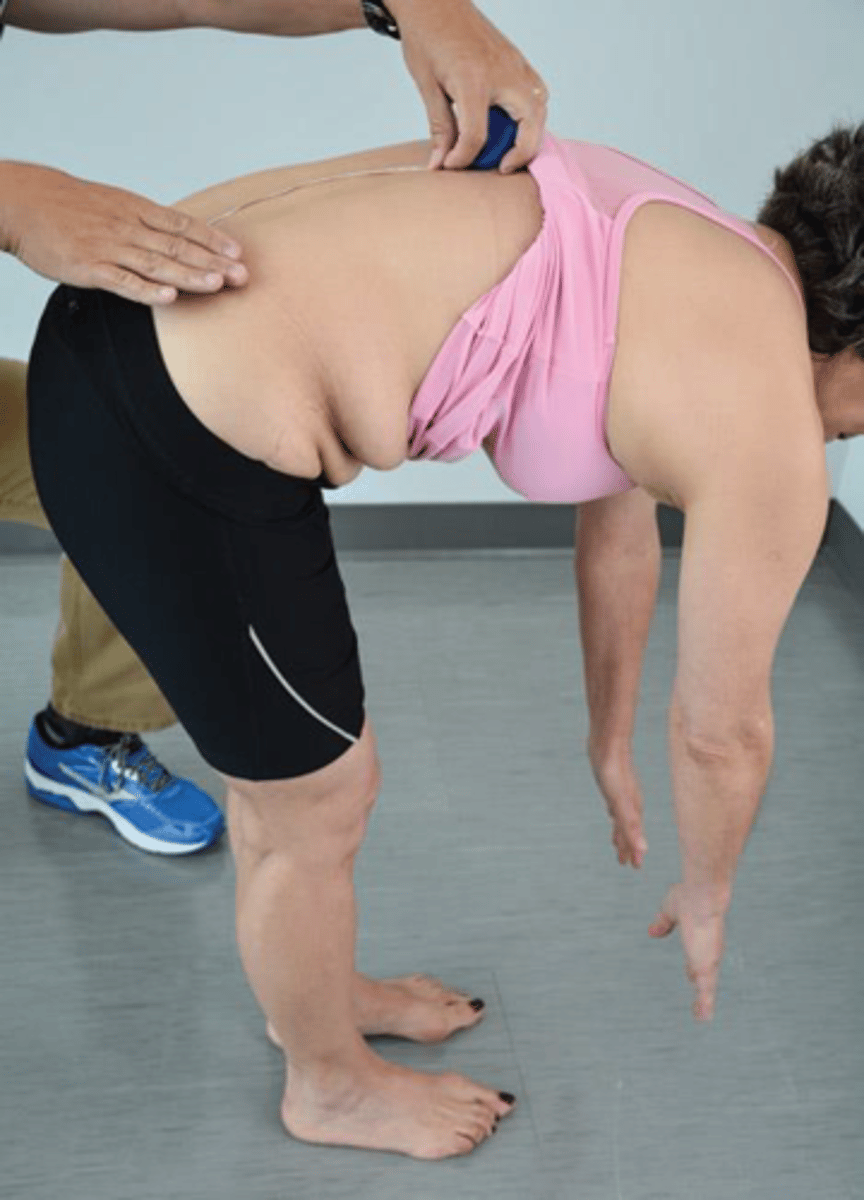
Thoracolumbar flexion ROM (tape measure)
standing
superior point: C7
inferior point: S2/PSIS
measure cm from C7-S2, flex trunk, measure difference (longer)
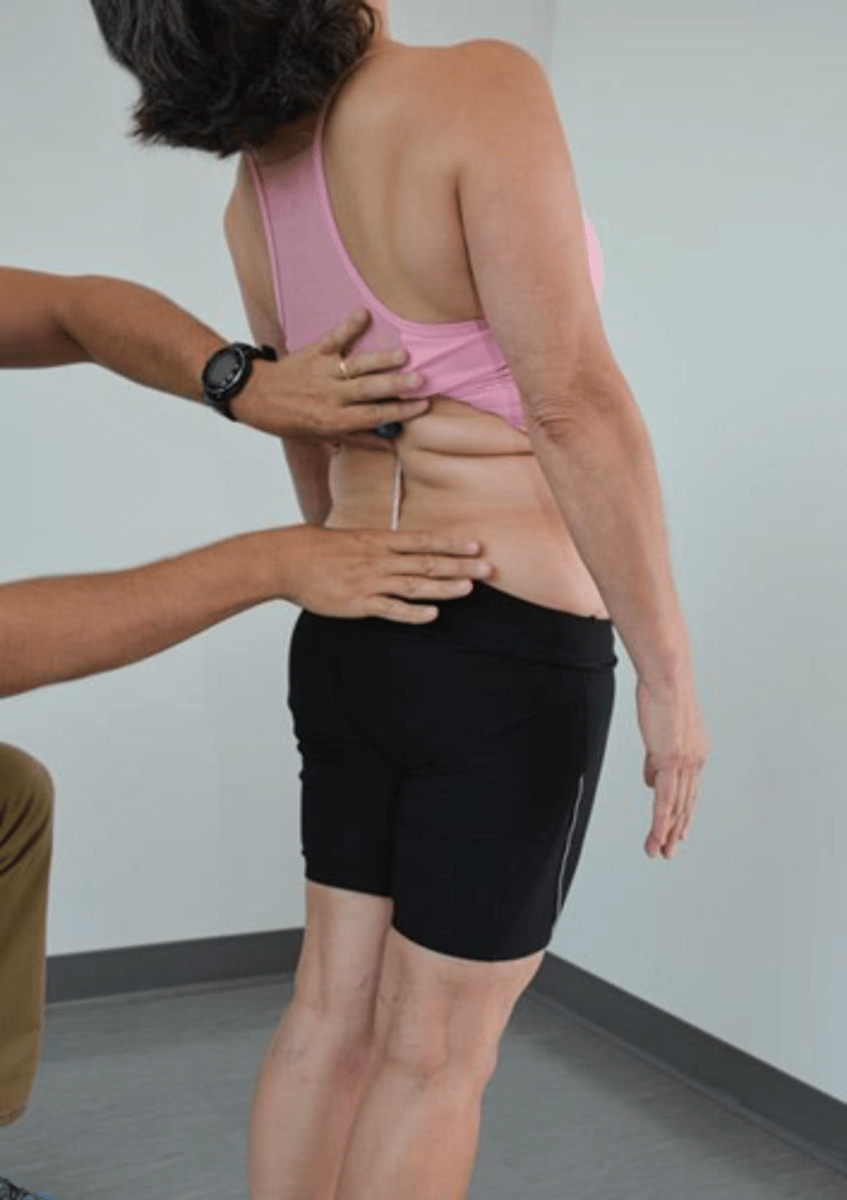
Thoracolumbar extension ROM (tape measure)
standing
superior point: C7
inferior point: S2/PSIS
measure cm from C7-S2, extend trunk, measure difference (shorter)

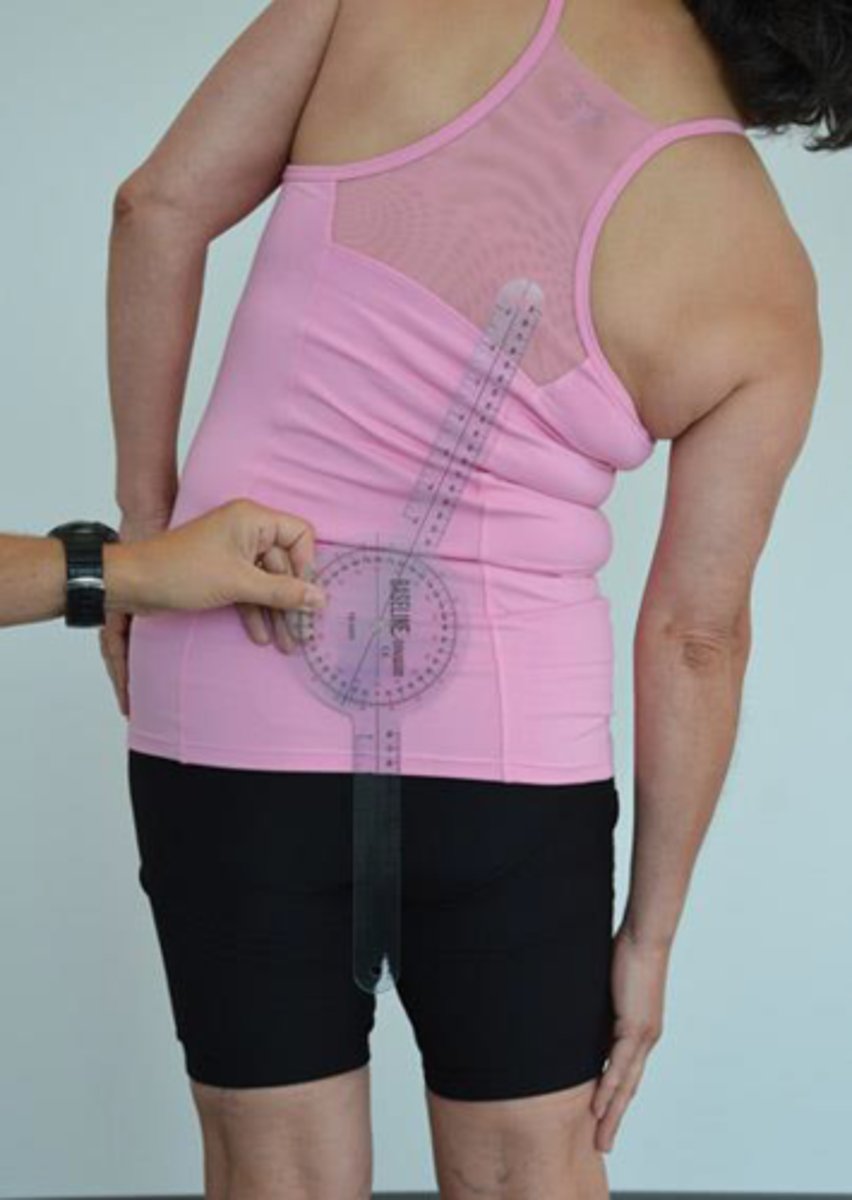
Thoracolumbar lateral flexion ROM (goniometer)
standing
stationary arm: perpendicular to floor
fulcrum: S2 (between PSISes)
moving arm: C7
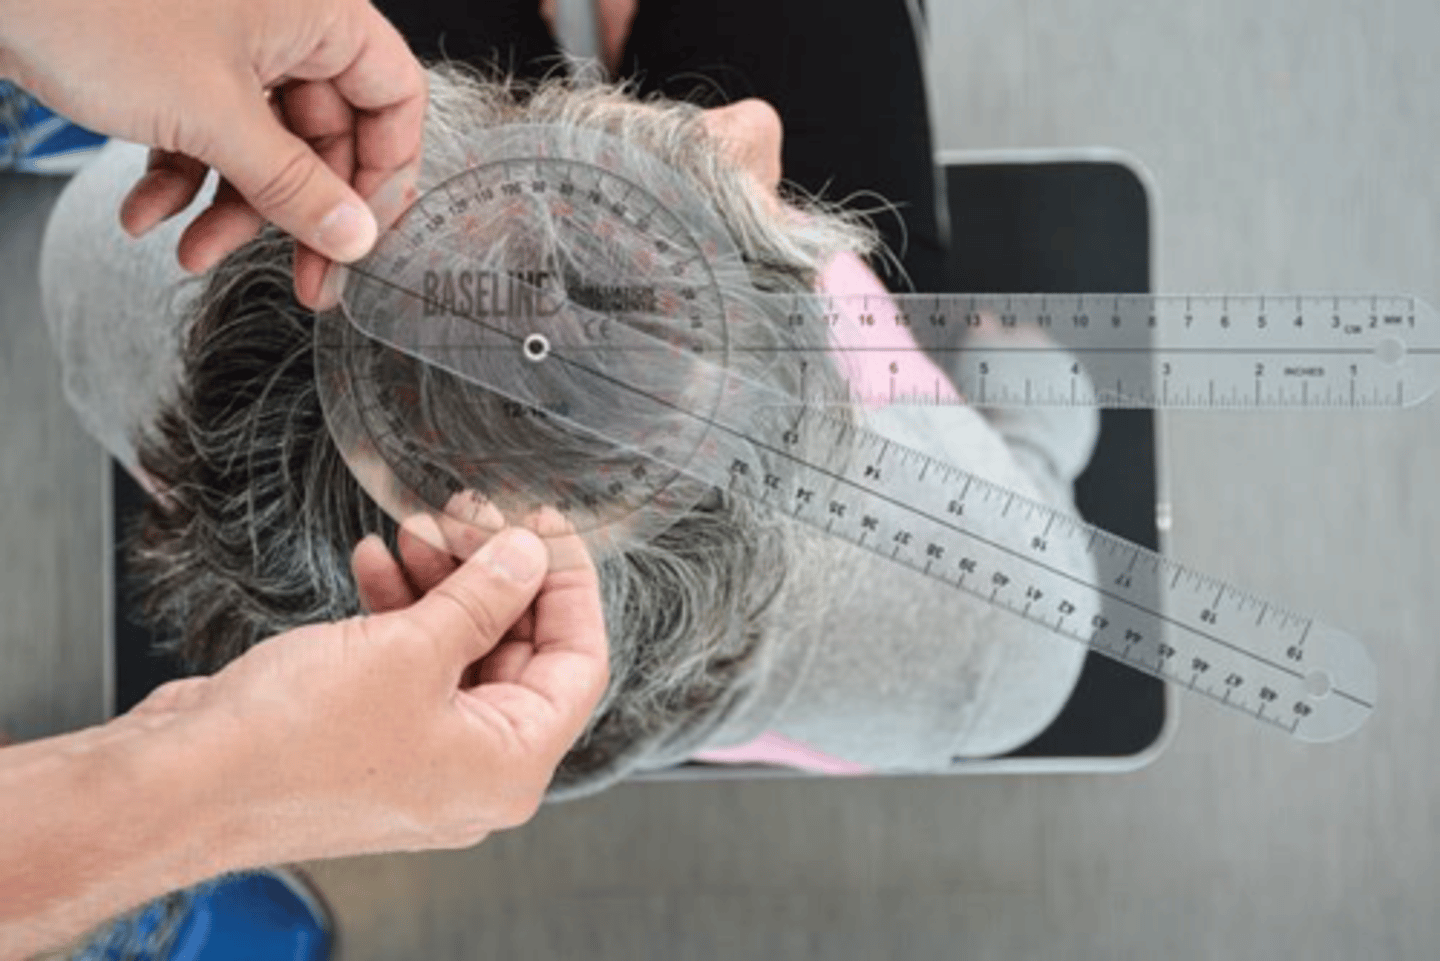
Thoracolumbar rotation ROM (goniometer)
seated
stationary arm: iliac crests
fulcrum: center of head
moving arm: acromion processes
Lumbar flexion ROM (tape measure)
standing
superior point: T12 (end of ribs)
inferior point: S2/PSIS
measure from T12-S2, flex trunk, measure difference (longer)
Lumbar extension (tape measure)
standing
superior point: T12 (end of ribs)
inferior point: S2/PSIS
measure from T12-S2, extend trunk, measure difference (shorter)
Dermatome testing procedure
1) Gather materials
2) Explain the test to the patient
3) Let the patient feel what the light touch will feel like
4) Position your patient appropriately (area exposed and comfortable) BEFORE
starting the procedure
5) Ask the patient to say "yes" when the cotton ball is felt and if it feels different from
side to side
6) Ask the patient to close the eyes
7) Conduct light touch sensation with short and light strokes in the appropriate region
and with equal pressure applied bilaterally (avoid moving the body part)
8) Test each level bilaterally before moving on to the next level
9) Avoid touching the patient (e.g., to reposition arms or legs) while testing sensation
10) Document your findings
Myotome testing procedure
1) Explain the test to the patient (** "maximal test!")
2) Position patient appropriately to test the correct muscle (a mechanical advantage
may be desired)
3) Test the myotome with maximal resistance for 5-6 seconds
4) Test each level bilaterally before moving on to the next level
5) Document your findings
Reflex testing procedure
1) Gather materials
2) Explain the test to the patient
3) Let the patient feel what the tap of the hammer will feel like
4) Position your patient appropriately (be sure to fully support a limb if appropriate)
5) Ask the patient to RELAX before you test the reflex
6) Test the reflex in the appropriate region with equal pressure applied bilaterally. Tap 3 times for each reflex or until a response is elicited.
7) Test each level bilaterally before moving on to the next level
8) If no reflex is elicited, try doing it again while the patient is performing a Jendrassik maneuver for the LE (or clenched jaw for UE)
9) Document your findings
How do you introduce myotome testing in a segmental neuro exam?
Is it okay with you if I test the strength of some of your muscles?
This test will be a maximal test, so the pressure I will apply will feel fairly strong to you. I ask that you withstand this pressure and don't let me move you for around 5 seconds. How does that sound?
Introduce the specific test next.
How do you introduce reflex testing in the segmental neuro exam?
Next I need to test some of your muscle reflexes by giving you a tap with this hammer. Is that okay with you?
Okay, how about I show you how the reflex hammer will feel. Do you mind holding your hand out for me? Please relax your hand as much as you can.
hit the hammer on palm of hand a few times
Okay now let's get started... (explain the specific reflex you will be testing)."
What is the patient's position for a lower segmental neuro exam?
supine
L1 Dermatome
Groin
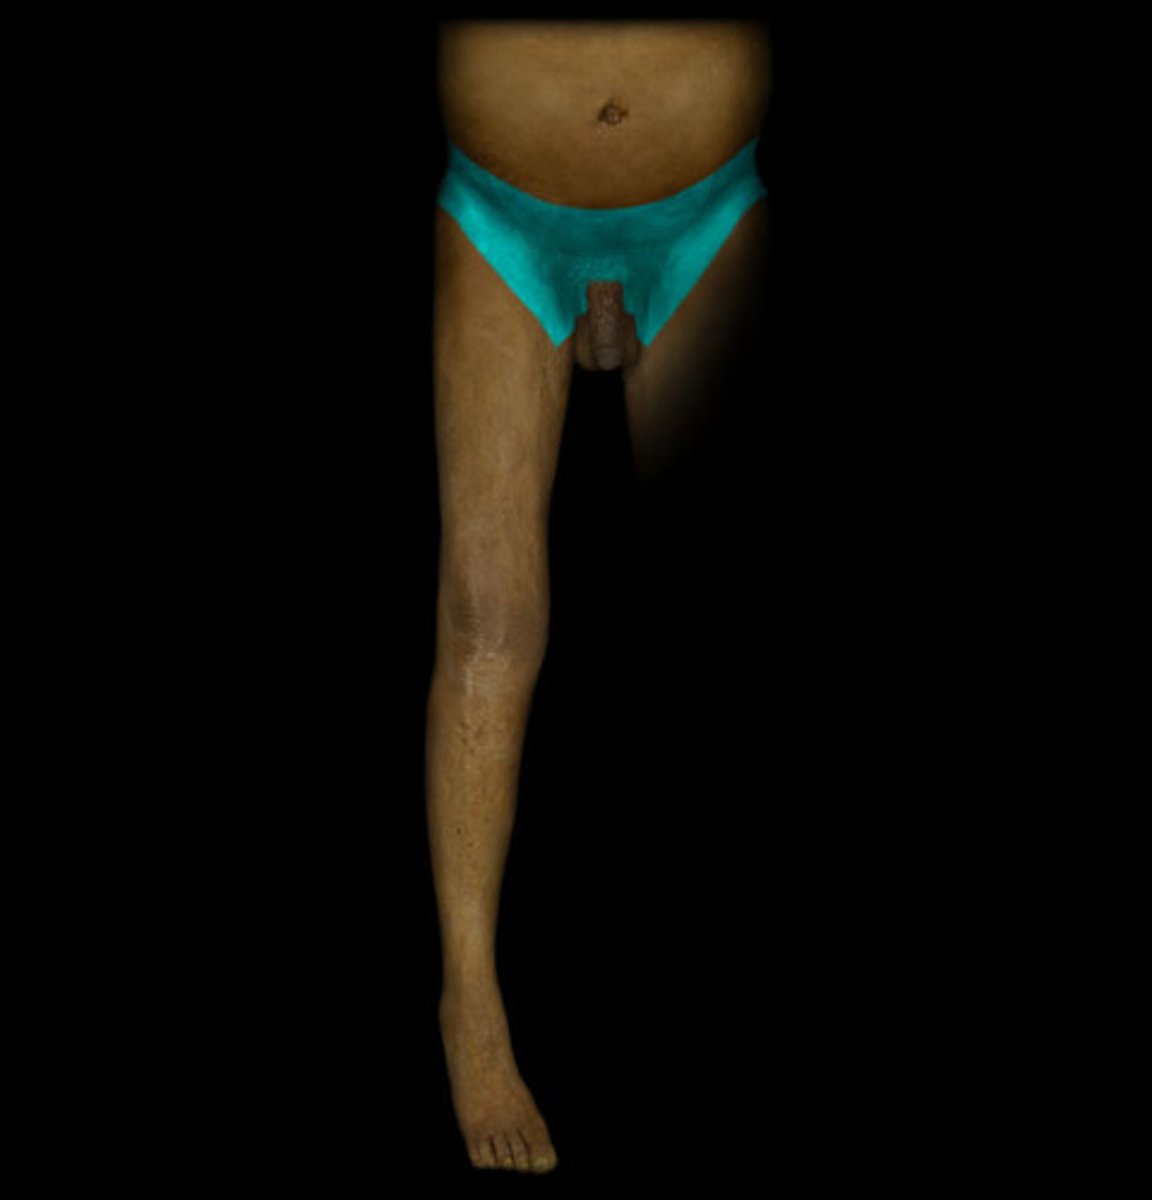
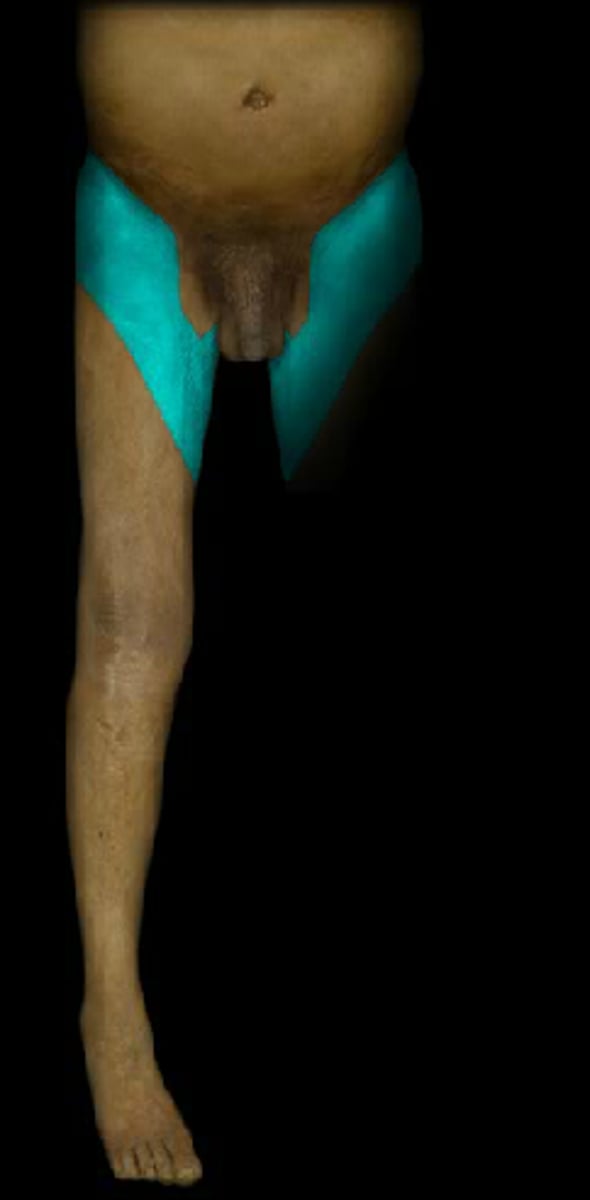
L2 dermatome
Anterior proximal thigh
L3 dermatome
Medial knee
L4 dermatome
Lateral knee
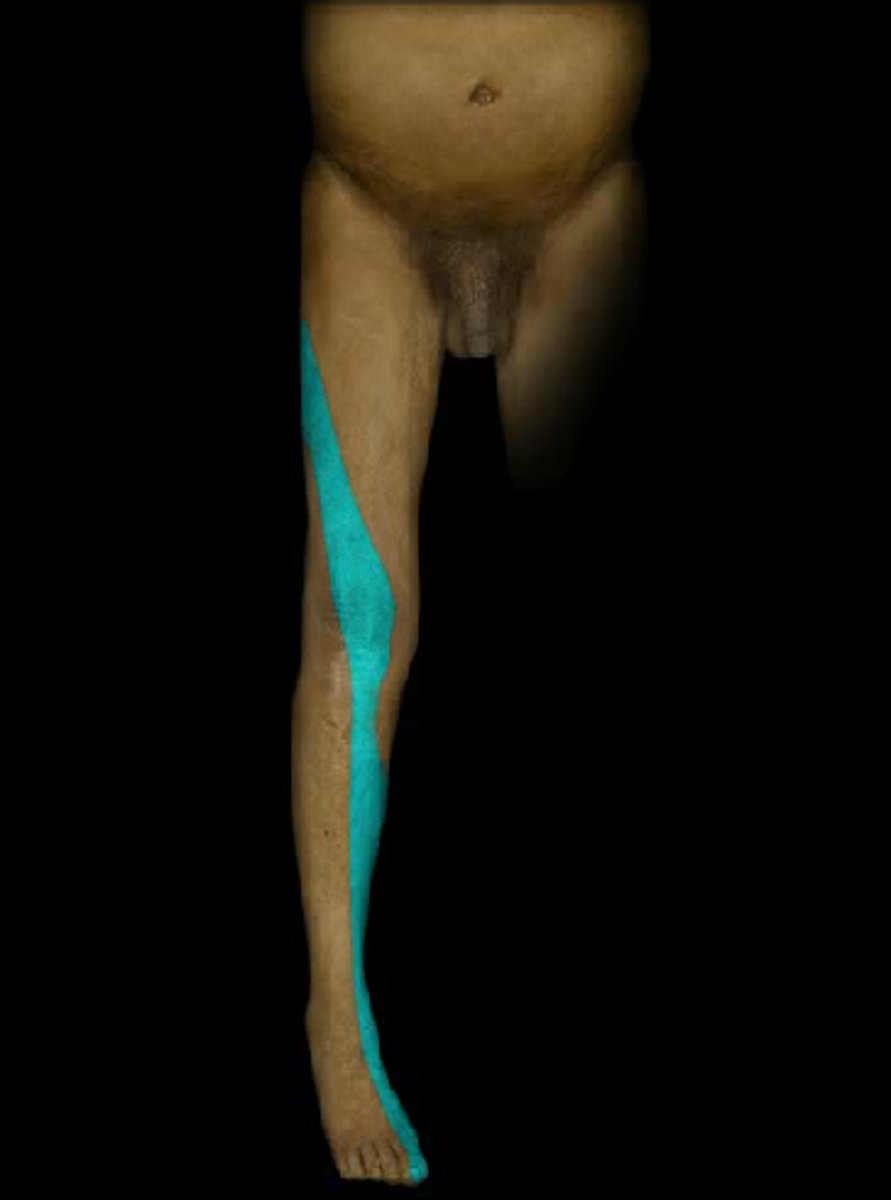
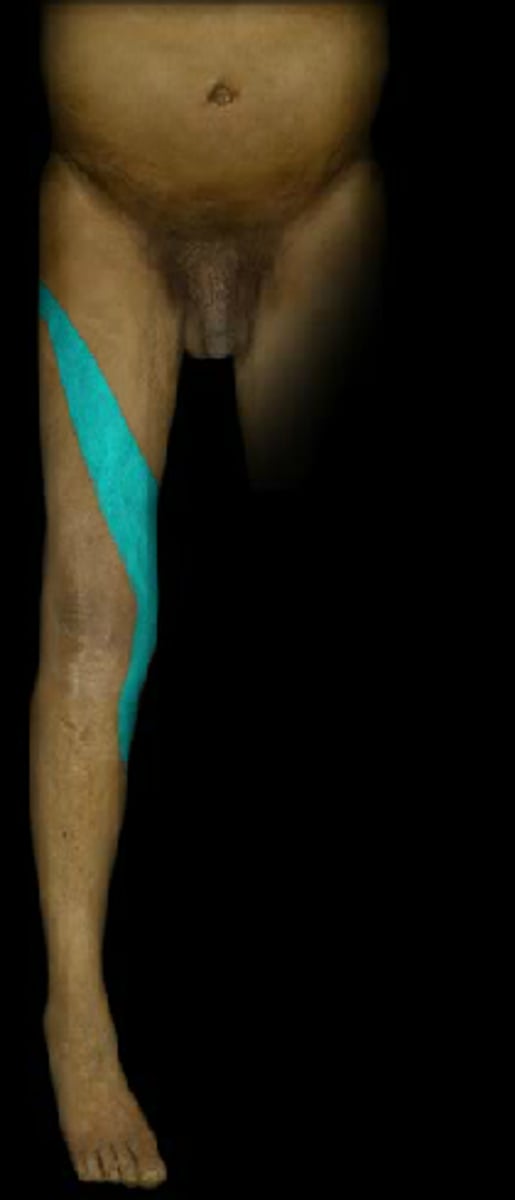
L5 dermatome
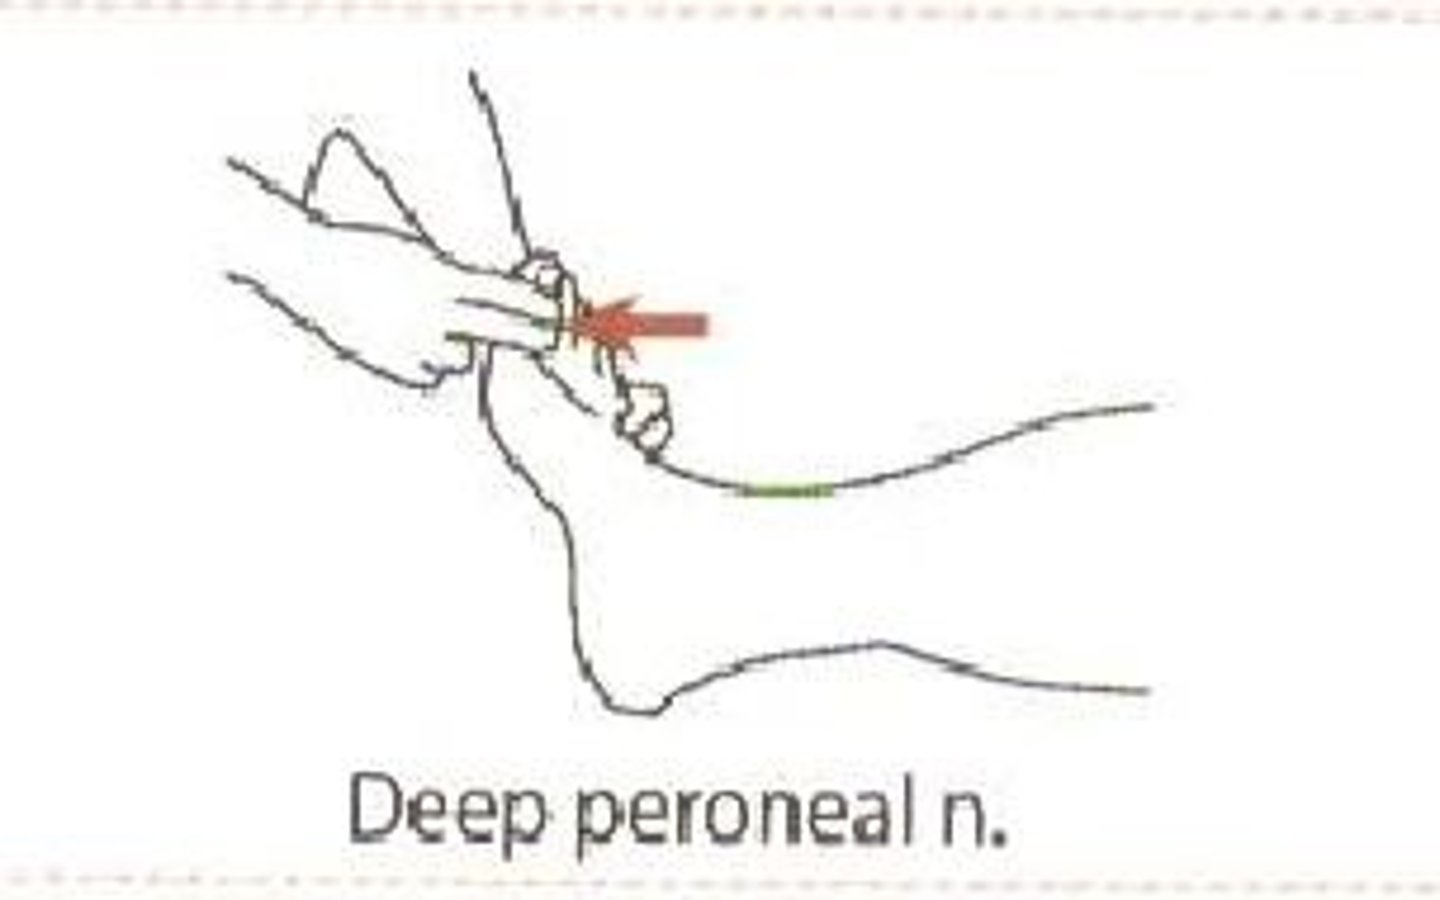
dorsum of foot
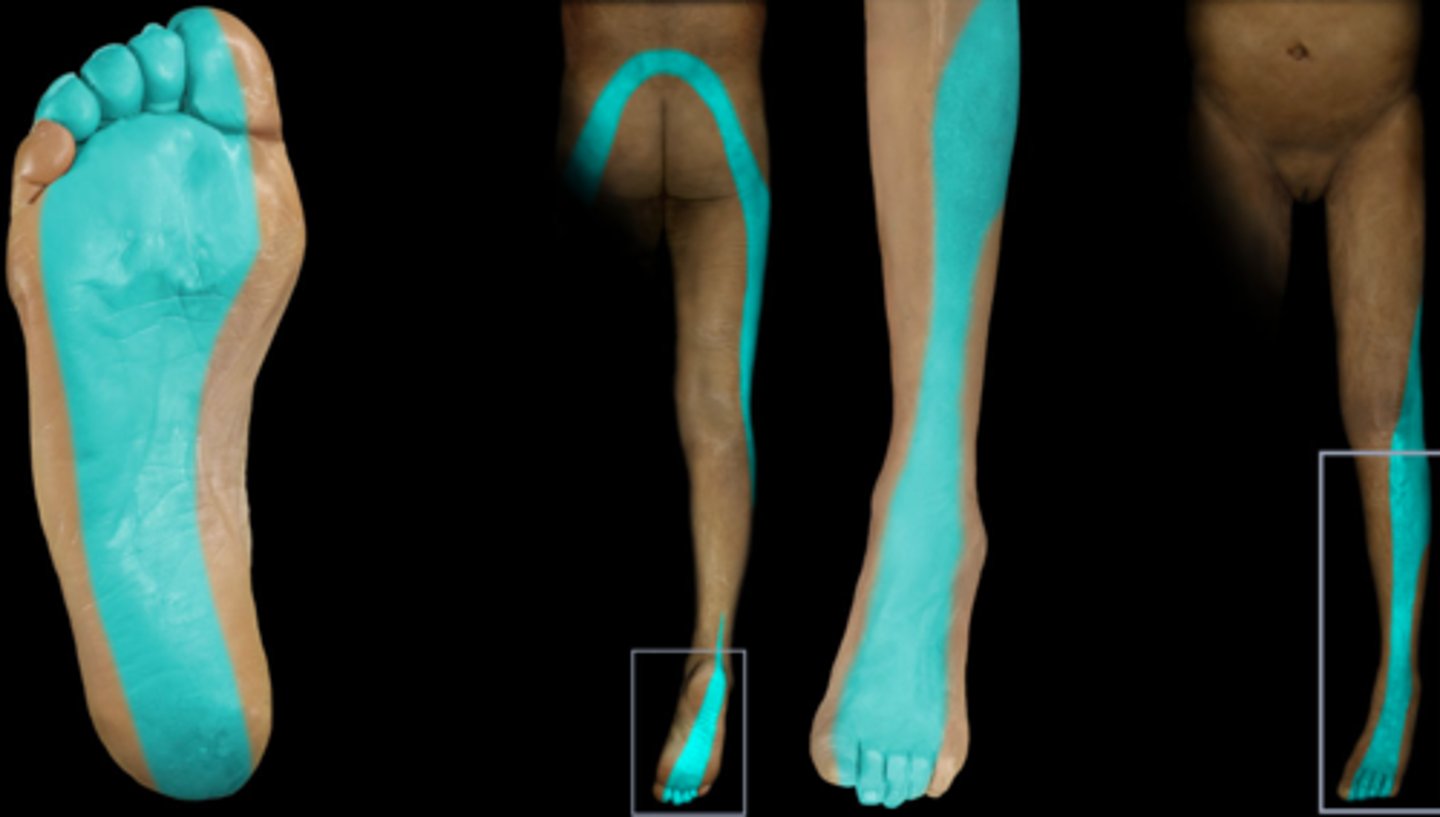
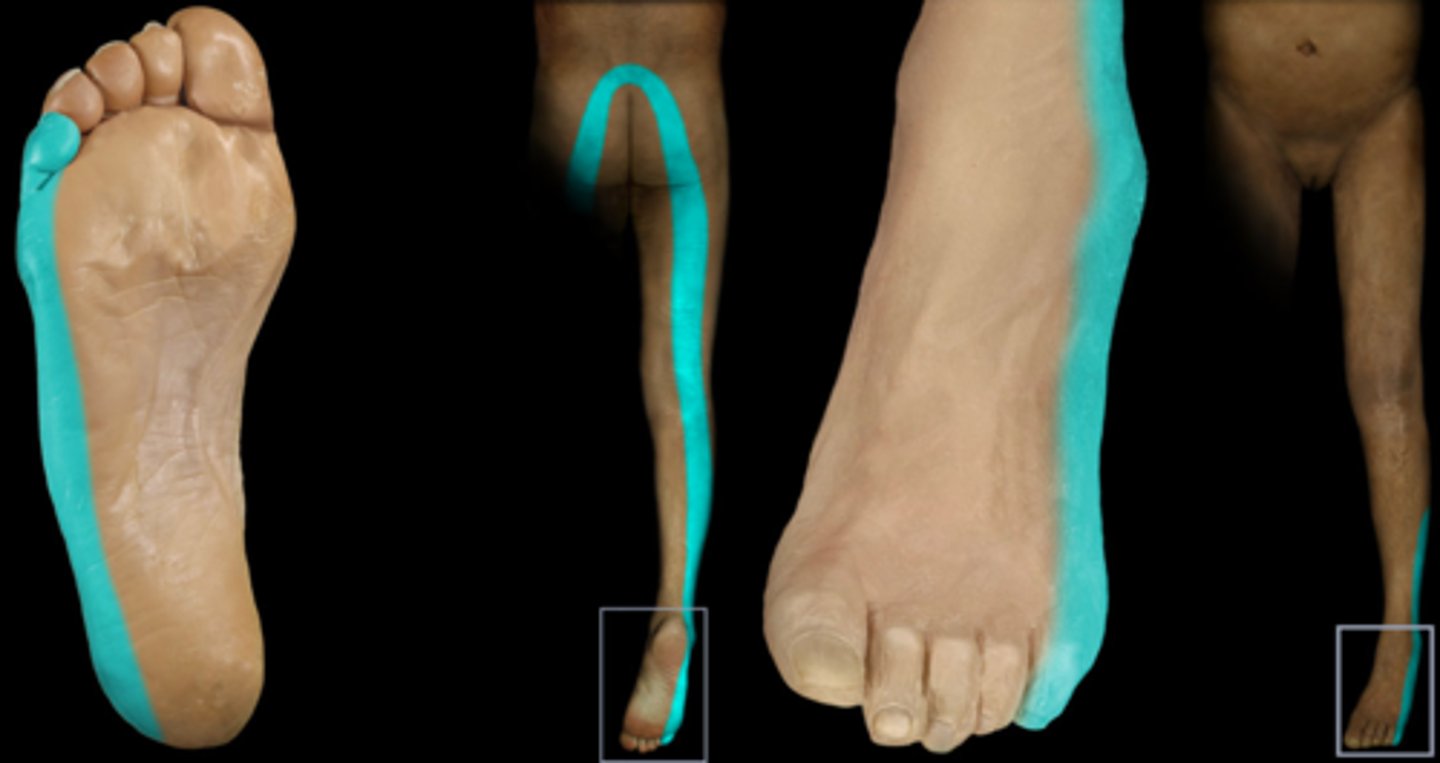
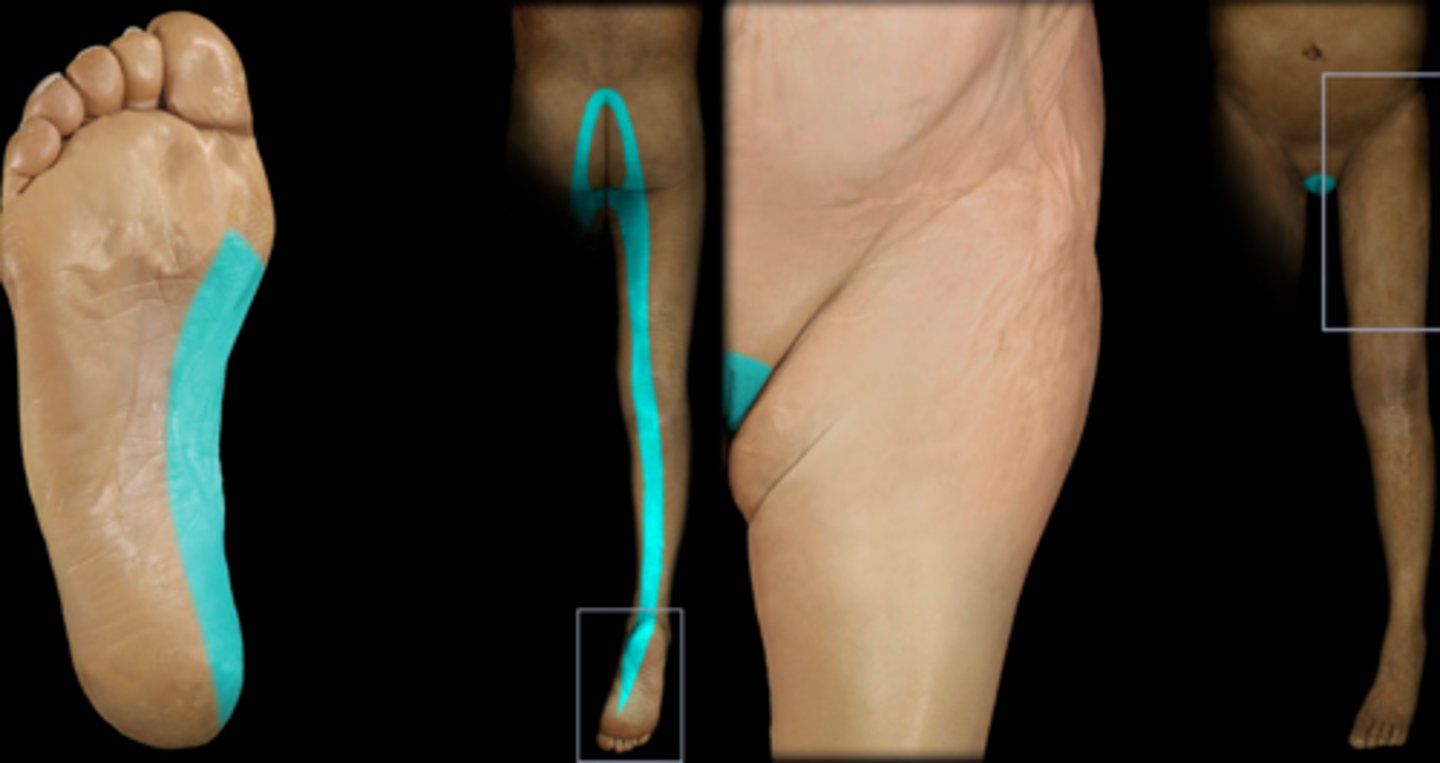
S1 dermatome
Lateral foot (over fifth metatarsal)
S2 dermatome
Medial aspect of heel (where heel goes into the arch of the foot)
L2 myotome
Hip Flexion
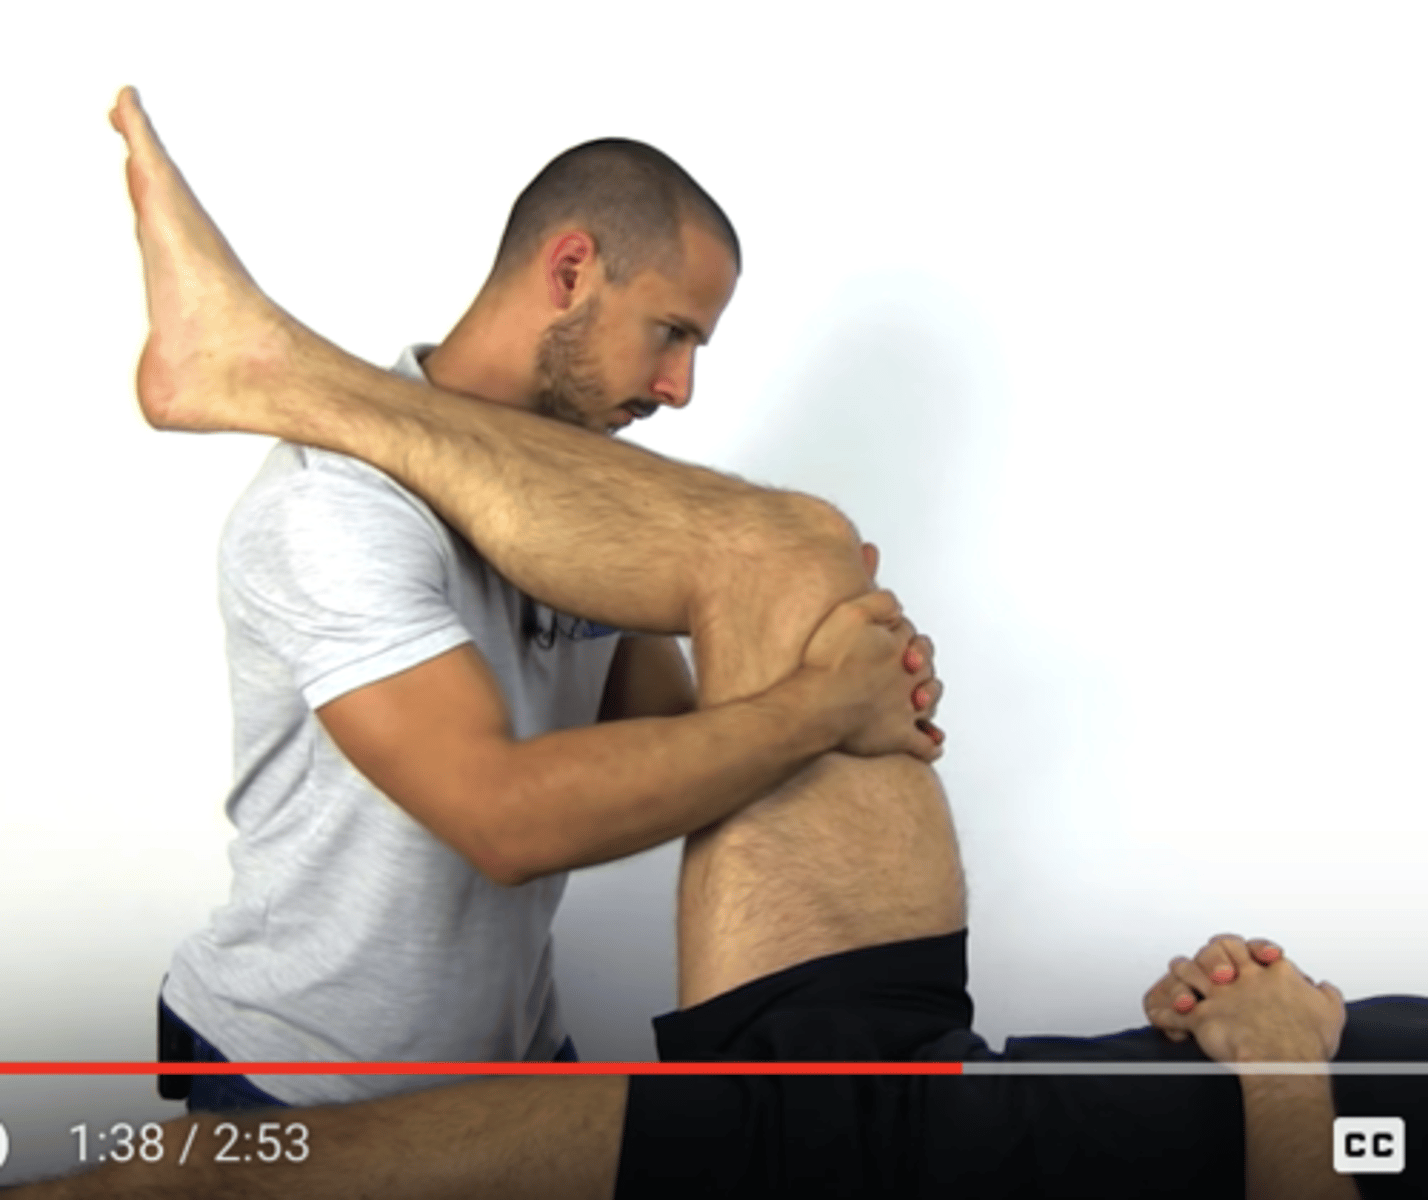
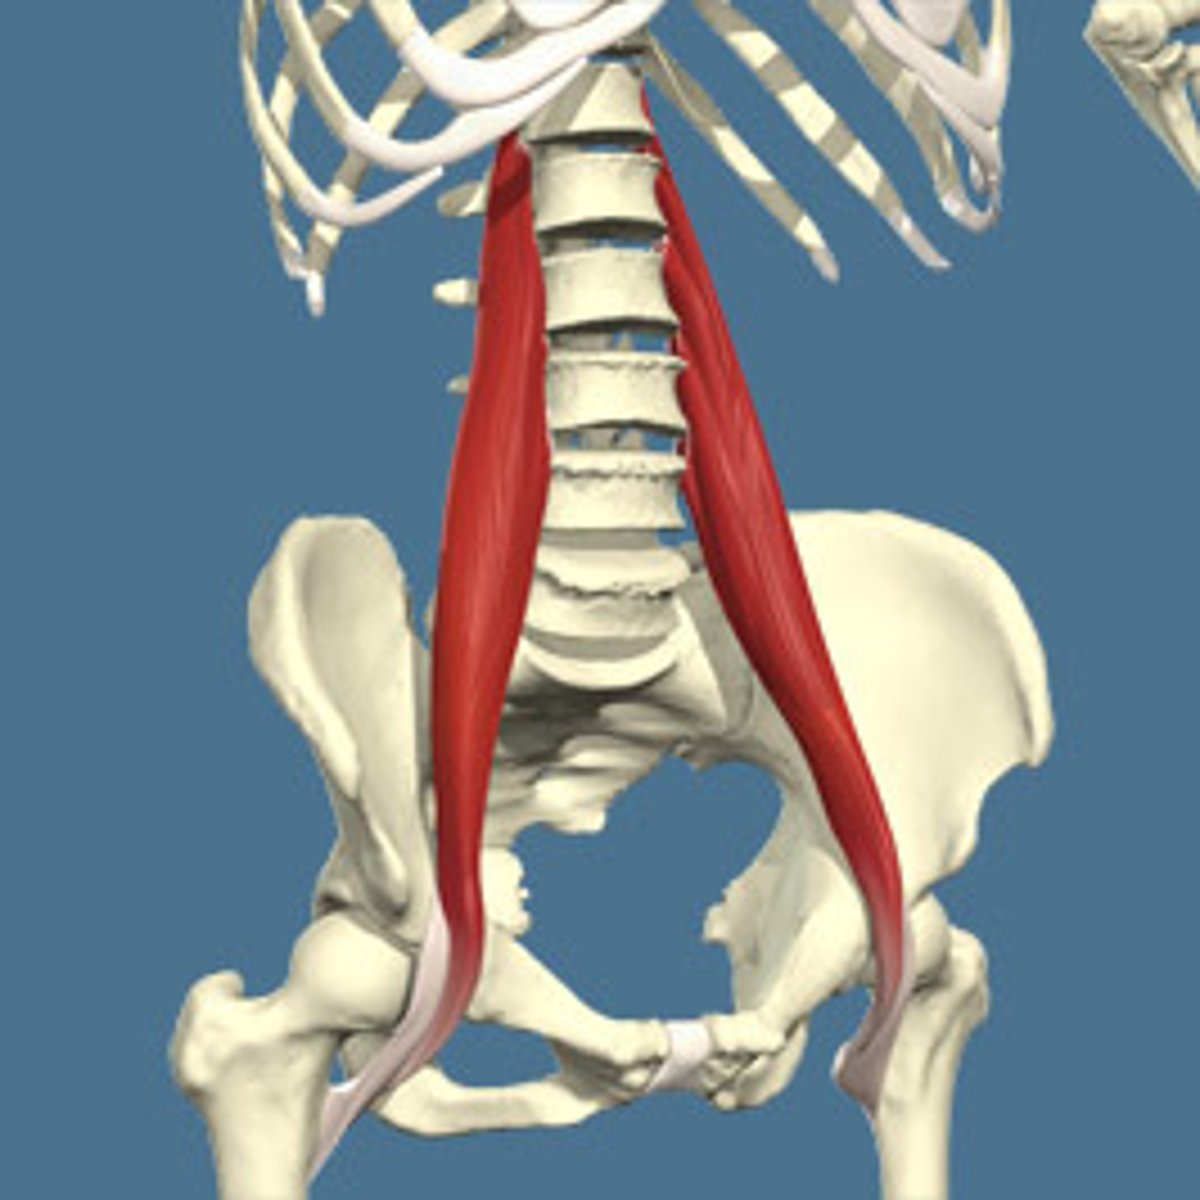
L2 myotome muscle
Psoas
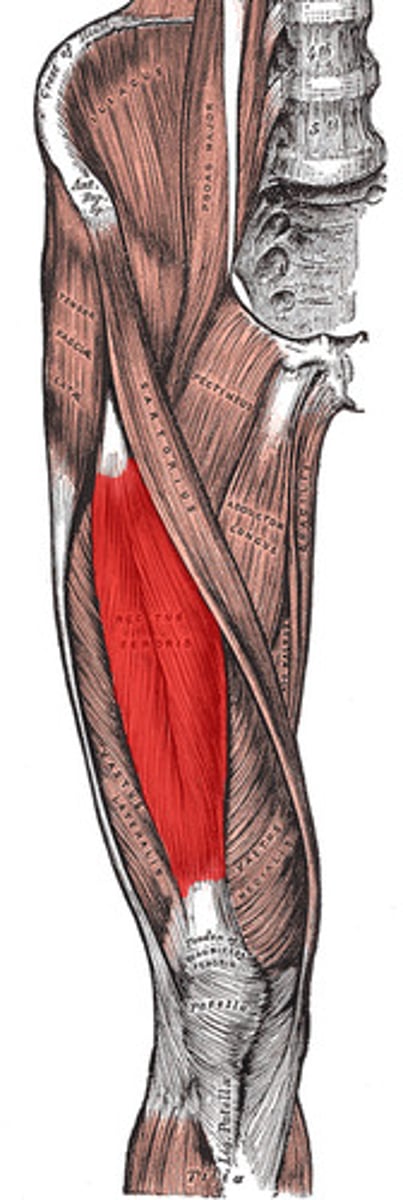
L3 myotome
Knee extension
L3 myotome muscle
Quadriceps
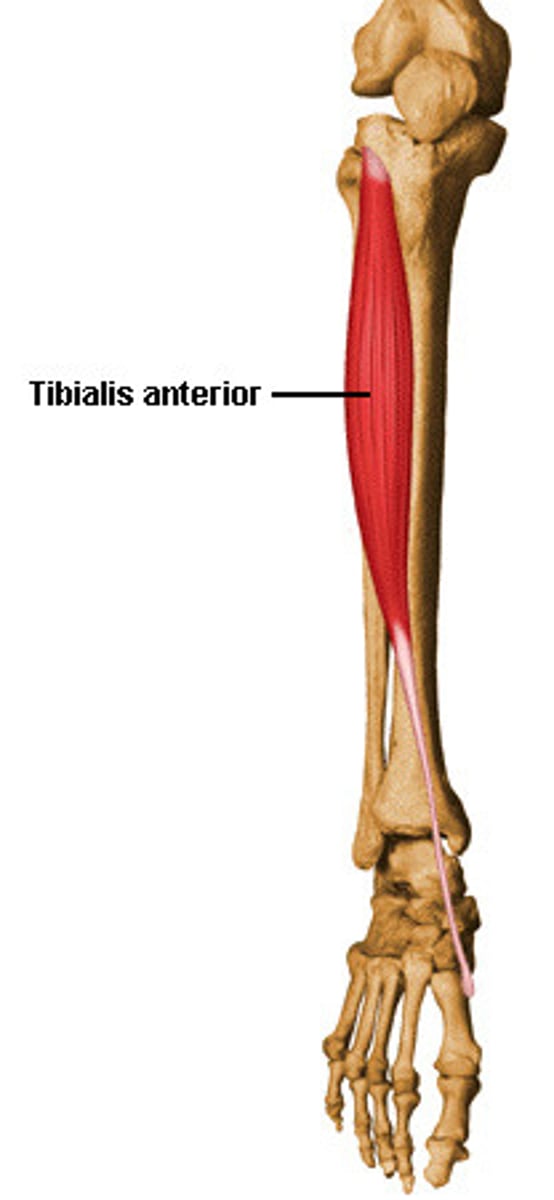
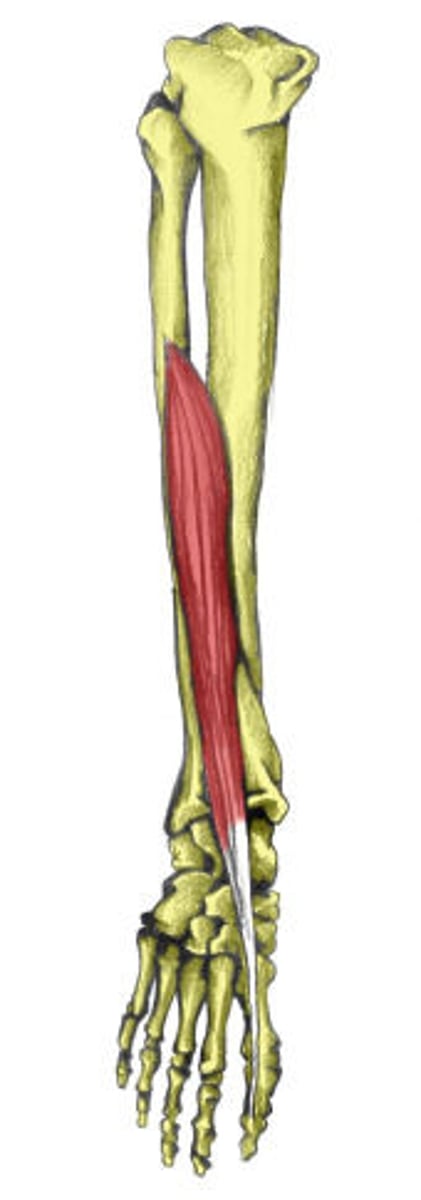
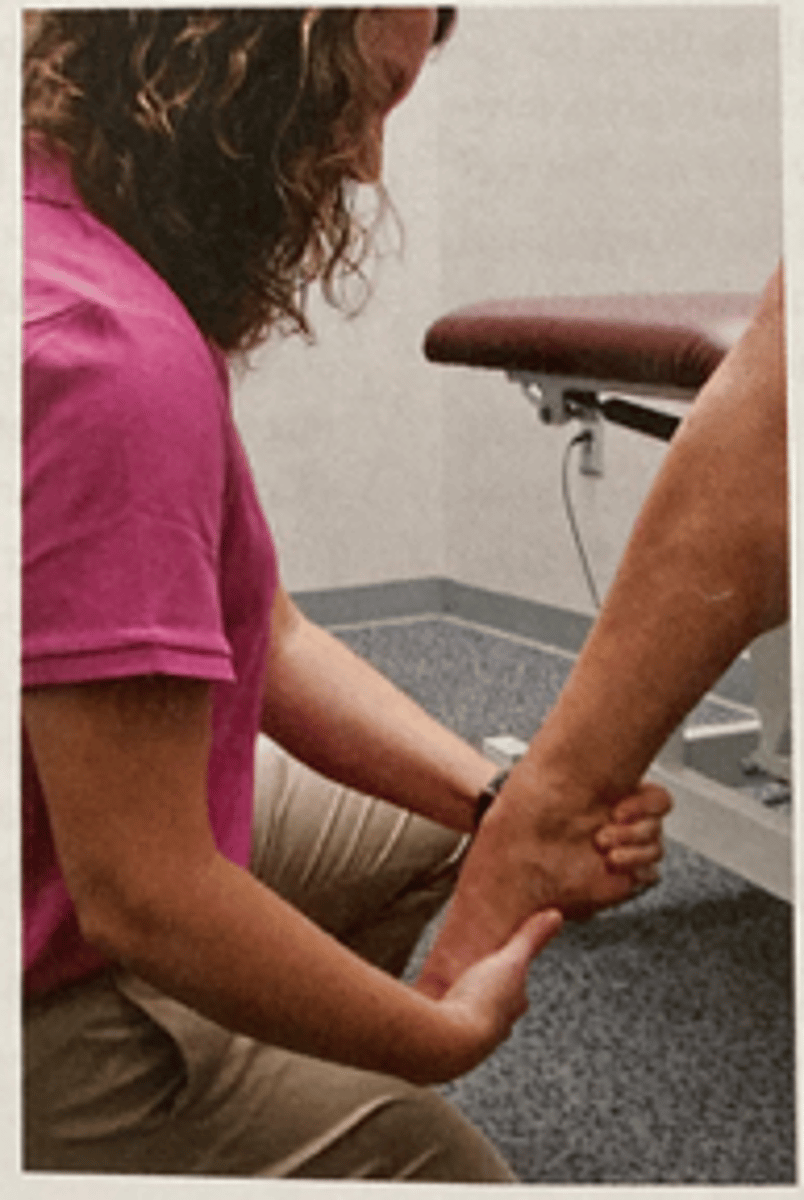
L4 myotome
dorsiflexion + inversion
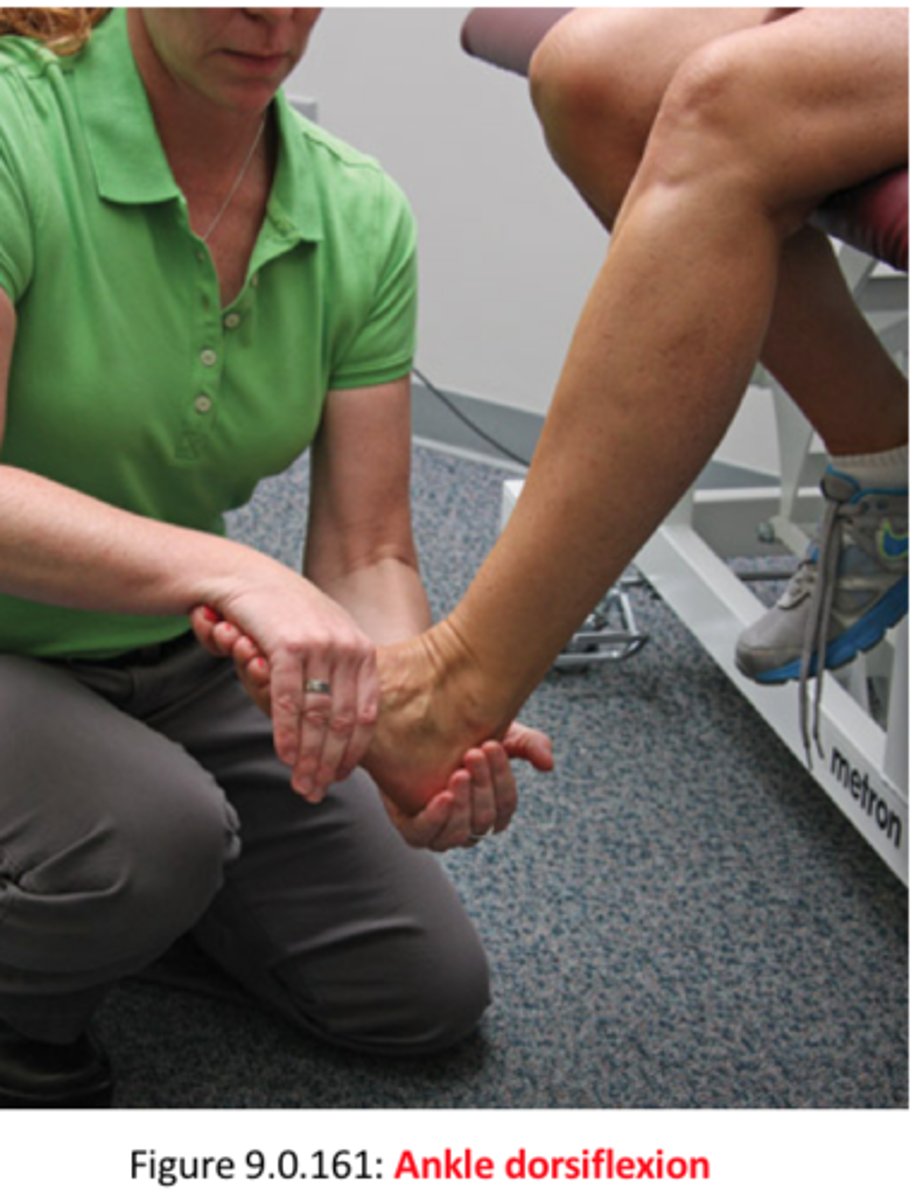
L4 myotome muscle
Anterior tibialis
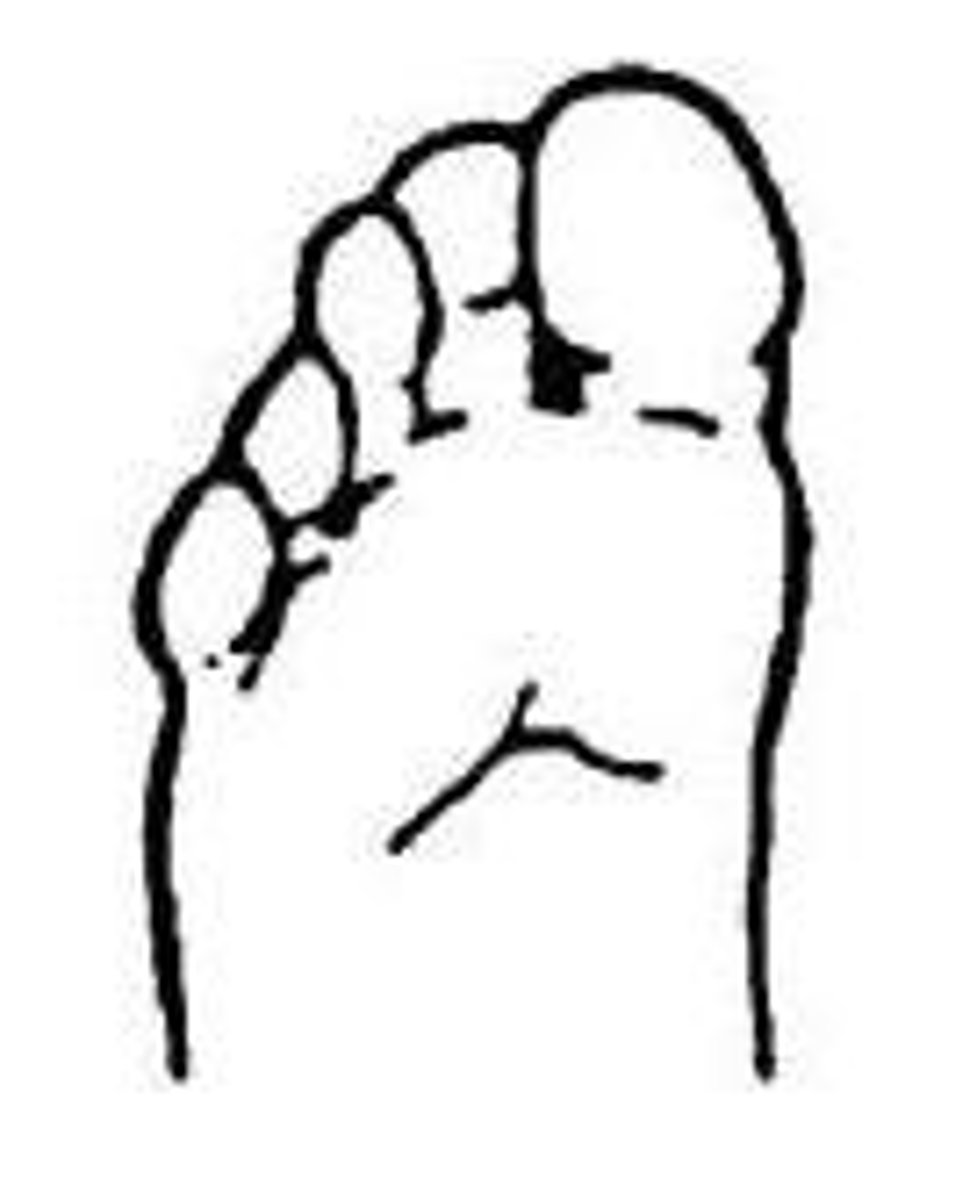
L5 myotome
Toe extension
L5 myotome muscle
Extensor hallucis longus
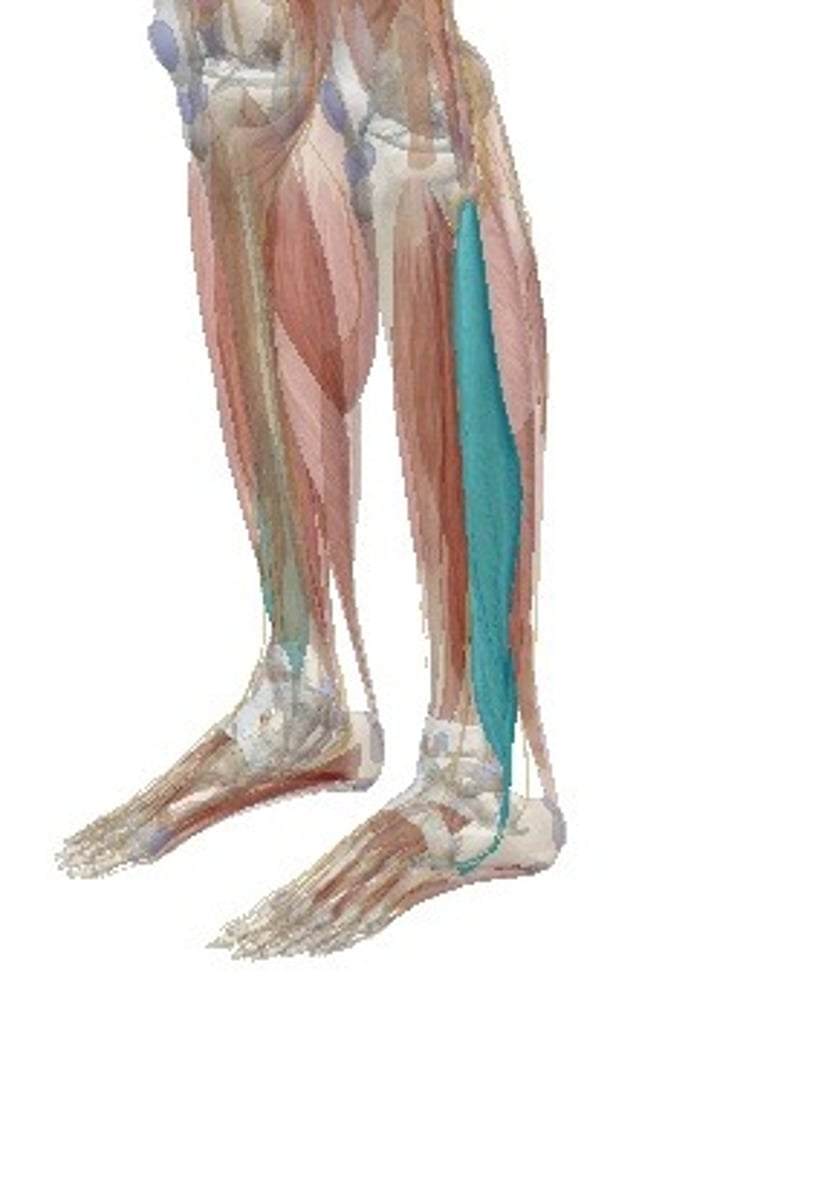
S1 myotome
Foot Eversion
S1 myotome muscle
Peroneals
S2 myotome
toe flexion
S2 myotome muscle
Flexor digitorum longus
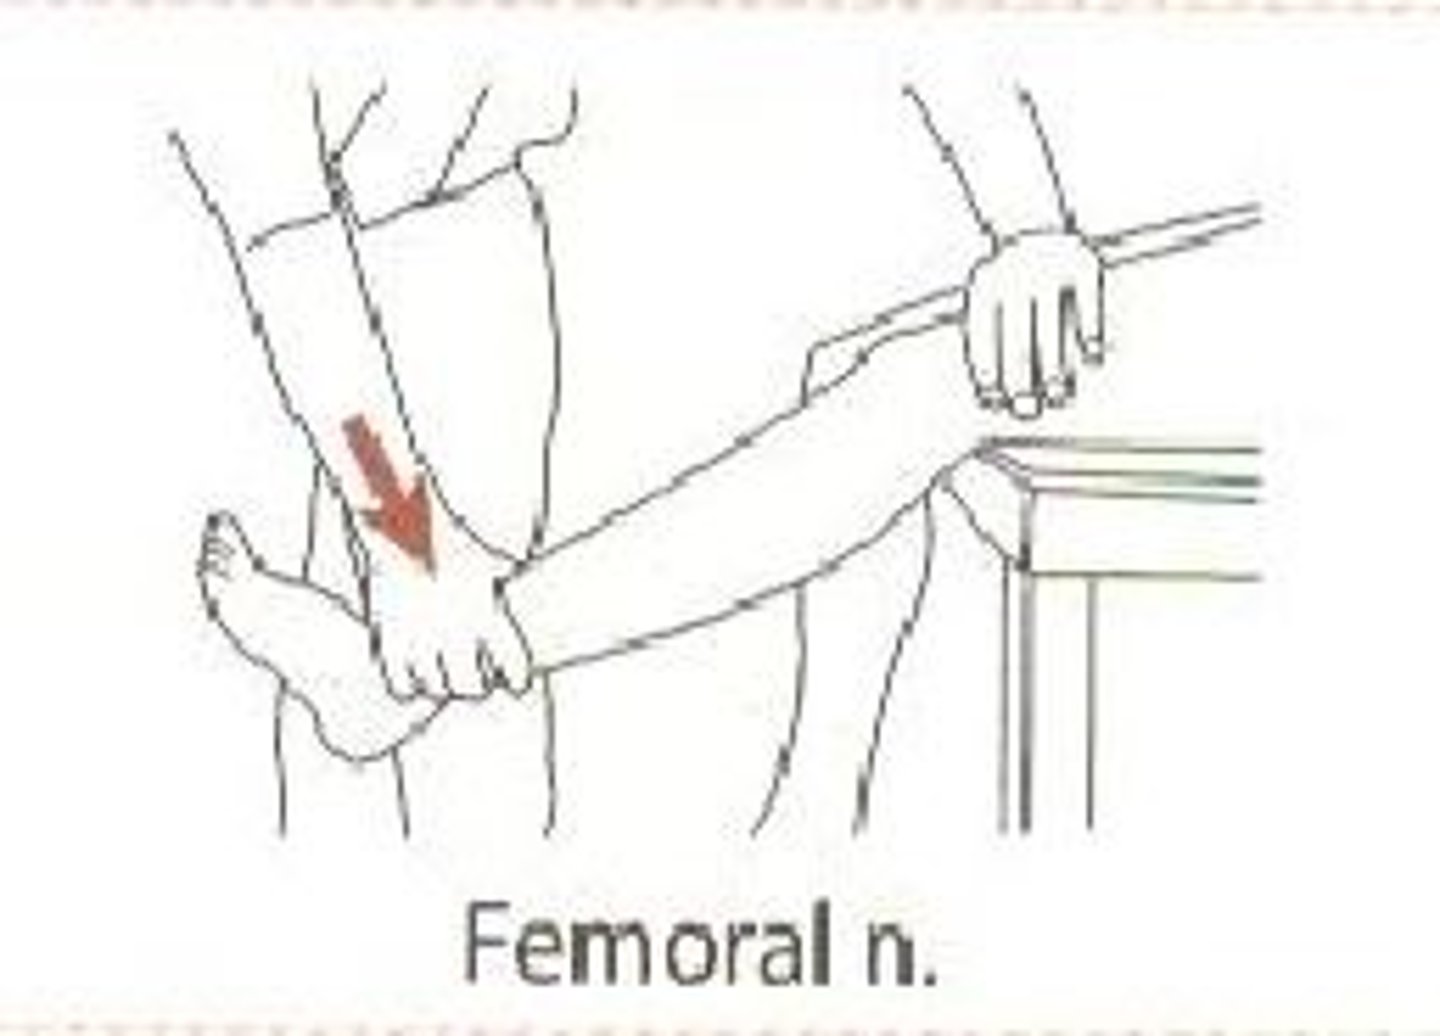
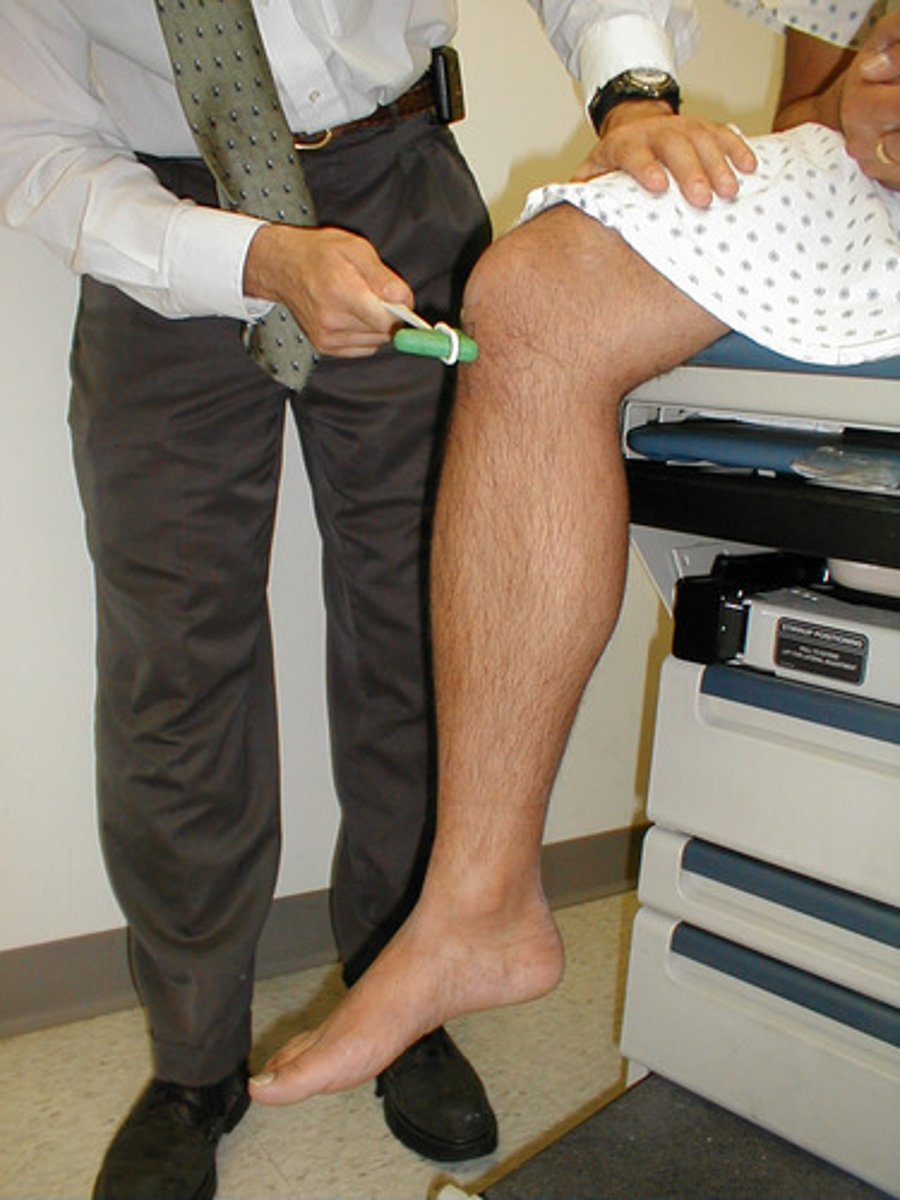
L3 reflex test
patellar tendon
L5 reflex test
medial hamstring tendon
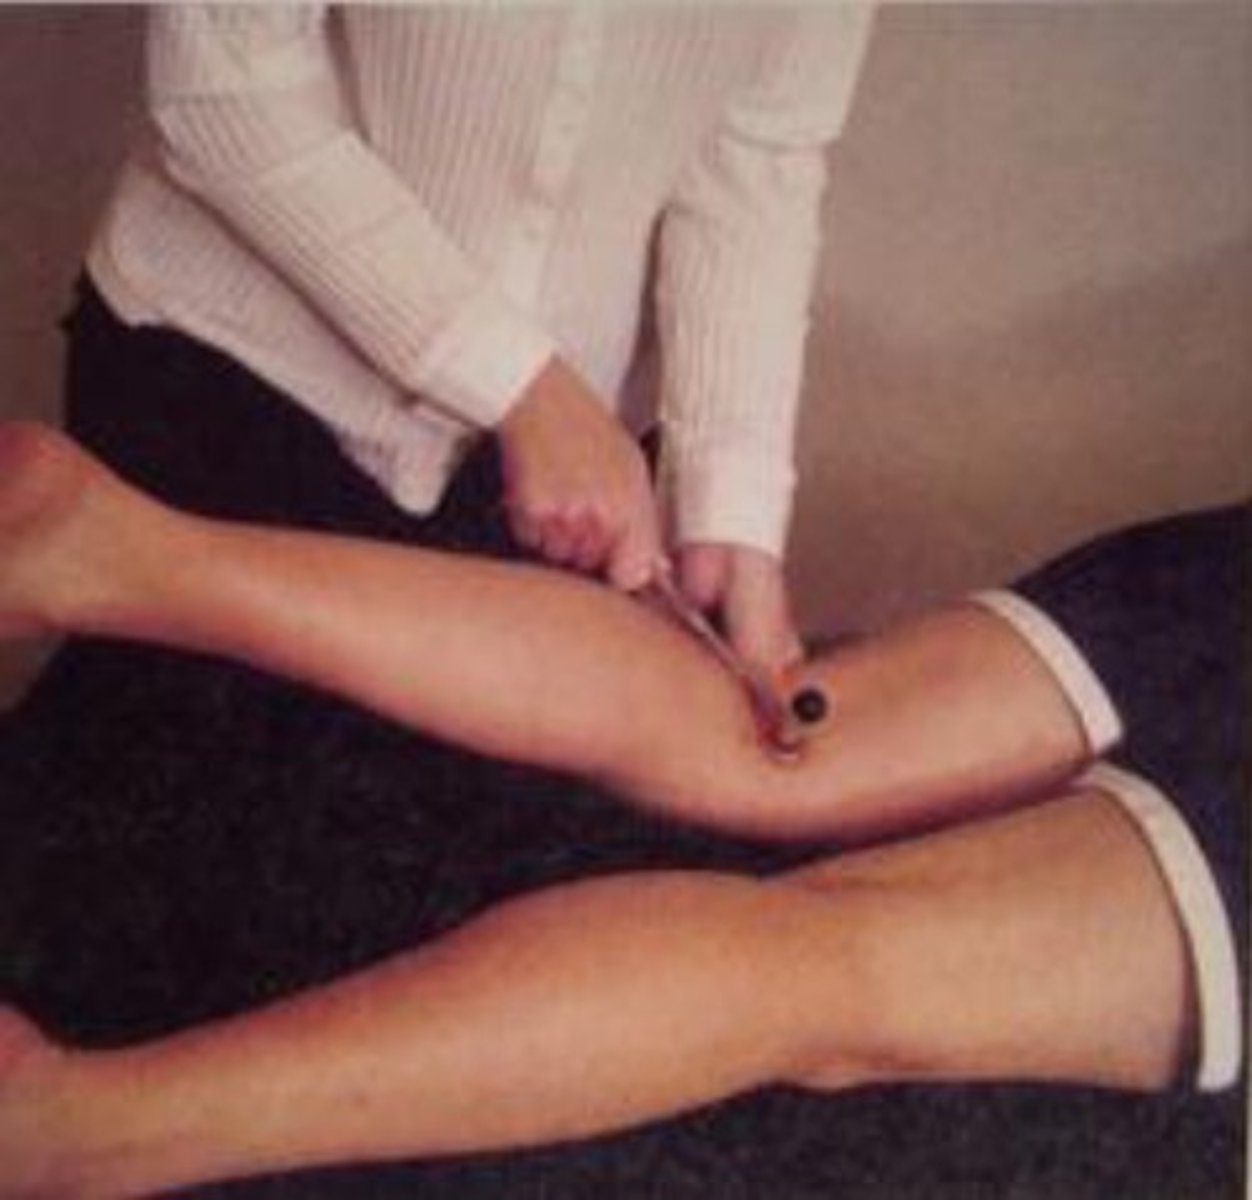
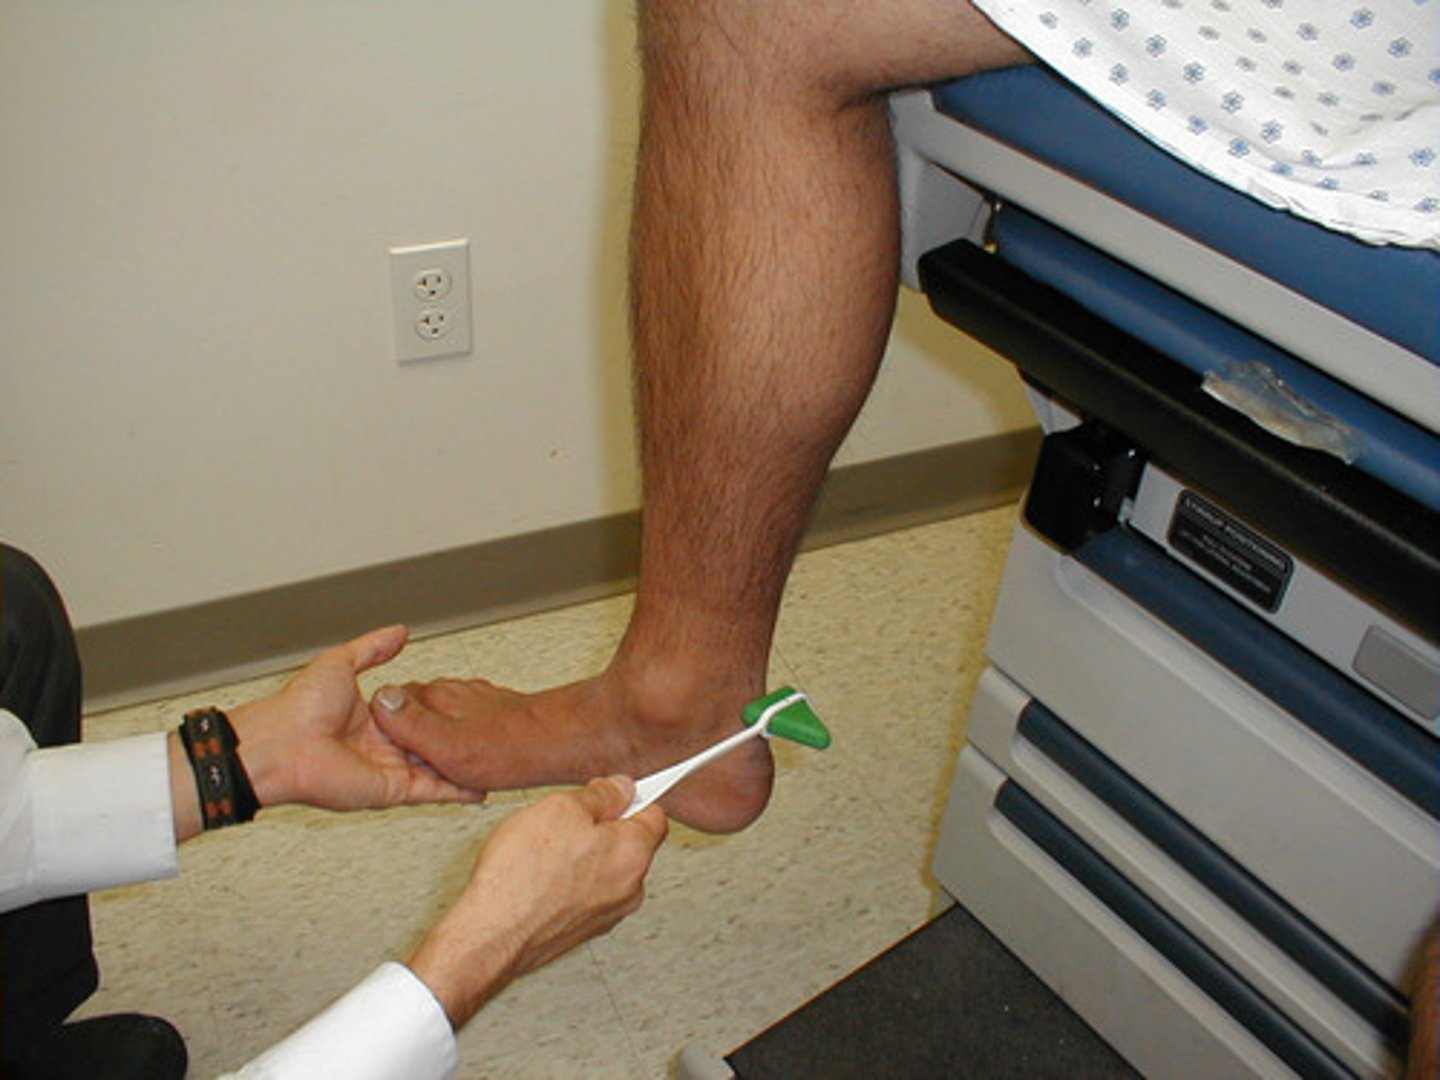
S1 reflex test
achilles tendon