Pelvis and hip
 Call Kai
 Learn
 Practice Test
 Spaced Repetition
 Match
 Flashcards
 Knowt Play
1/6

There's no tags or description
Looks like no tags are added yet.
7 Terms
Sacrum AP
kVp/mAs: EST. 70/20 (NOT charted) | TT: 20° cephalad | CR: Midline midway between ASIS and greater trochanter | Position: Upright, back against bucky, facing away from bucky as taught | Breathing: Normal shallow breathing | Collimation: M-L: include both SI joints; S-I: iliac crests to greater trochanters | Important: Avoid shielding that obscures sacrum.

Coccyx AP
kVp/mAs: EST. 75/20 (NOT charted) | TT: 10° caudad | CR: Midline midway between pubic symphysis and ASIS | Position: Upright facing away from bucky; supine alternative if needed | Breathing: Normal slow shallow breathing | Collimation: M-L: include SI joints; S-I: iliac crest to greater trochanter (manual boundaries) | Important: Avoid shielding that obscures coccyx.

SacroCoccygeal Lateral
kVp/mAs: EST. 75/20(NOT charted) | CR: 5 cm anterior to posterior sacrum at ASIS level | Position: Upright true lateral against bucky | Breathing: Normal shallow breathing | Collimation: A-P: include sacrum; S-I: L5 to coccyx | Important: Avoid shielding that obscures anatomy.

Sacroiliac Joints AP Oblique
kVp/mAs: EST. 75/20NOT charted) | CR: 2.5 cm medial to ASIS of anteriorly rotated side | Position: Upright, back to bucky; rotate joint of interest 25° AWAY from bucky; support stance | Collimation: Tight to SI joint of interest; precise numerical boundaries not provided | Important: No shielding obscuring SI joint.

Pelvis AP
kVp/mAs: Small 70/15; Medium 75/20; Large 80/25 | CR: Midway between ASIS level and pubic symphysis | Position: Weight-bearing facing tube against bucky with hips internally rotated 15–20°; supine alternative if required | Collimation: M-L: both greater trochanters; S-I: approximately 2 cm above iliac crests through ischial tuberosities and lesser trochanters | Important: Do not internally rotate if fracture suspected.
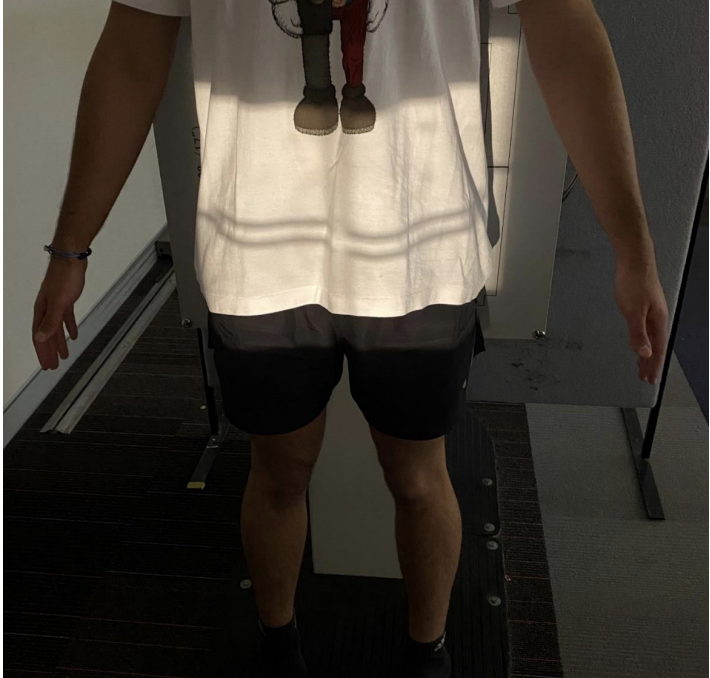
Hip AP
kVp/mAs: Small 70/15; Medium 70/20; Large 75/30 | CR: Femoral neck, 2.5 cm below midpoint of ASIS–pubic symphysis line | Position: Upright facing tube against bucky; affected leg internally rotated 15–20° if safe | Collimation: M-L: pubic symphysis to lateral hip soft tissues; S-I: ASIS to proximal third of femur | Important: Do not force rotation if fracture suspected.

Hip Lateral-Oblique
kVp/mAs: EST. 70/20 (small) | CR: Mid femoral neck | Position: Upright unilateral frog-leg; affected hip abducted approximately 45° close to bucky; tabletop alternative if suitable | Collimation: M-L: lateral hip soft tissues; S-I: ASIS to proximal third of femur | Important: NEVER frog-leg or force movement if acute hip fracture suspected.
