
Chap 4- Finger, hand, wrist
Positioning Considerations:
4 sided collimation when possible
long axis of part to long axis of IR
patient ID and side marker
40 SID
Trauma Terminology:
dislocation- displacement from joint
subluxation- partial dislocation
sprain- rupture or tearing of CT
contusion- bruise
fracture
simple- closed fx
compound- open/breaks through skin
comminuted- splintered or crushed
impacted- fragments driven into each other
Positioning
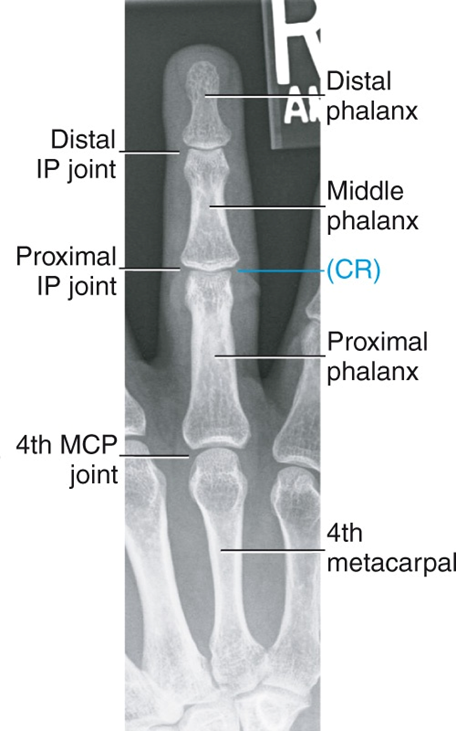
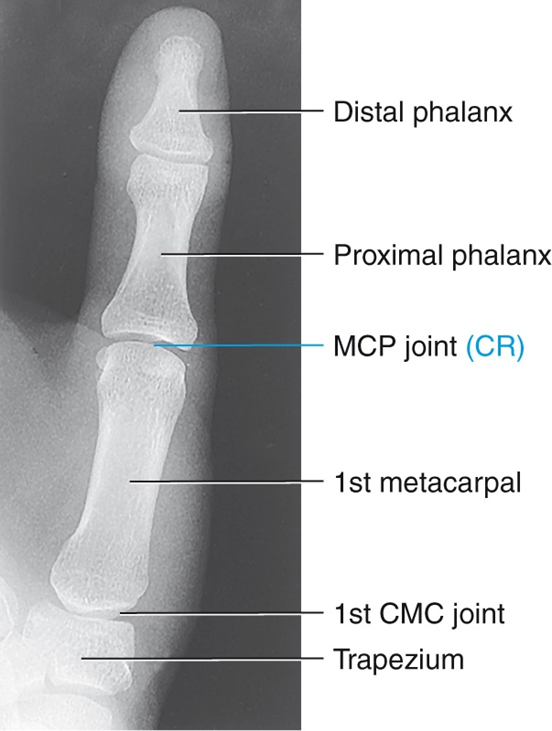
PA finger
CR to PIP
entire finger and minimum of 1/3 of MCP demonstrated
no rotation of phalanges
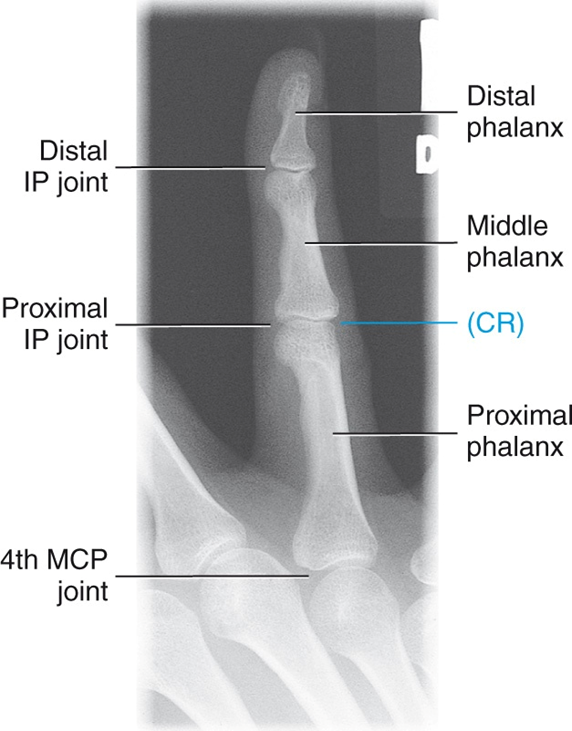
PA Oblique finger
digit parallel to IR
CR to PIP
entire phalanx and MCP joint demonstrated
IP and MCP joints open
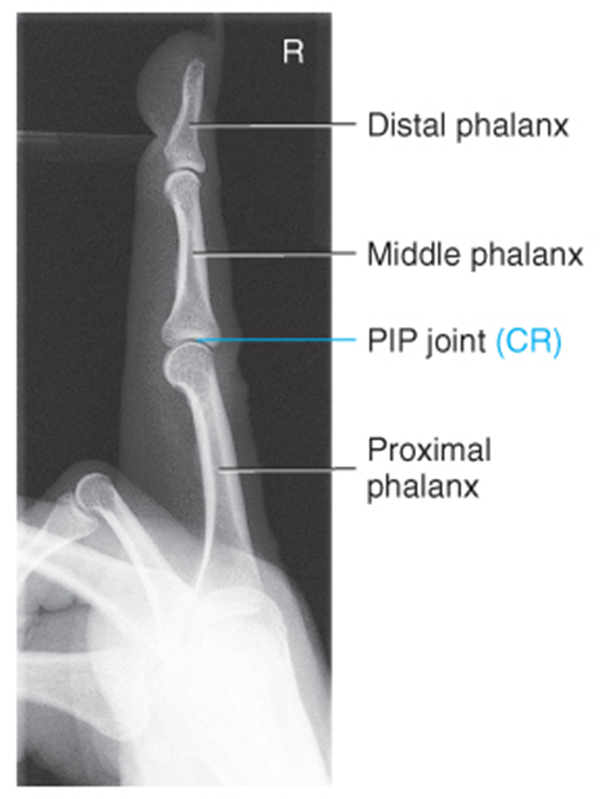
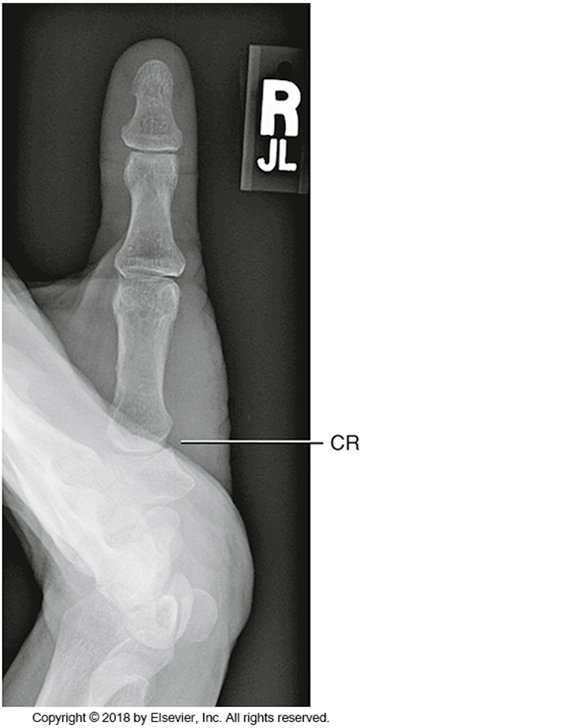
Lateral finger
digit parallel to IR
CR to PIP
entire phalanx and MCP joint demonstrated
concavity on anterior side
AP Thumb
CR to first MCP joint
entire thumb should be demonstrated (including first CMC joint)
can also do a PA thumb
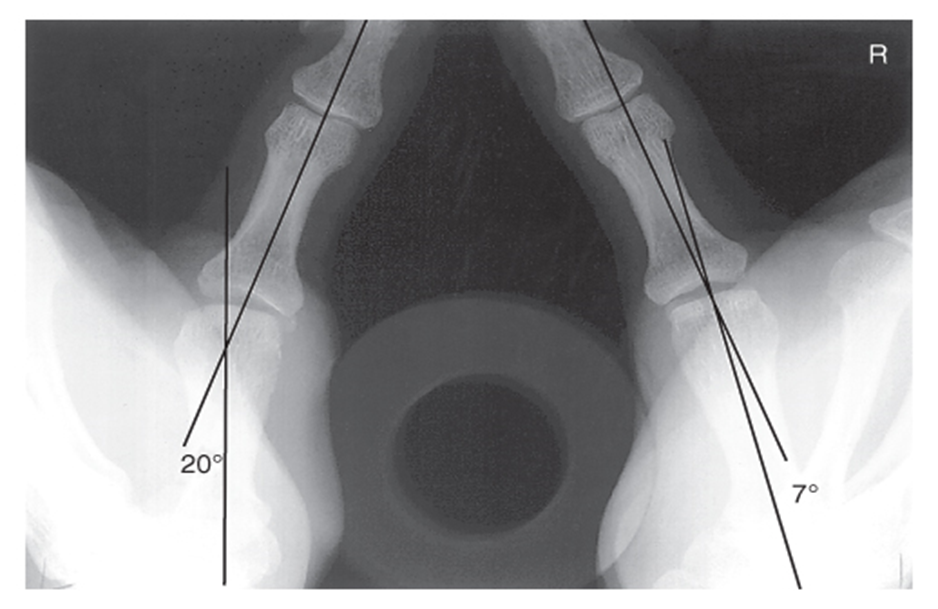
Modified Robert’s’ Method
CR 15 degrees proximal to first CMC joint
base of first metacarpal and trapezium must be clearly visualized
PA Stress (Folio Method)
bilateral stress projection for possible ulnar collateral ligament injury
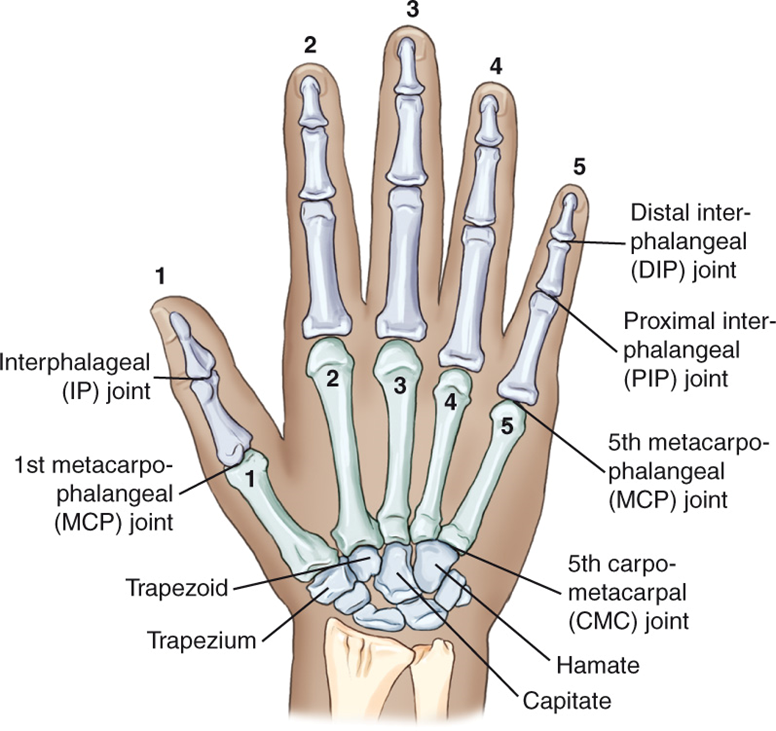
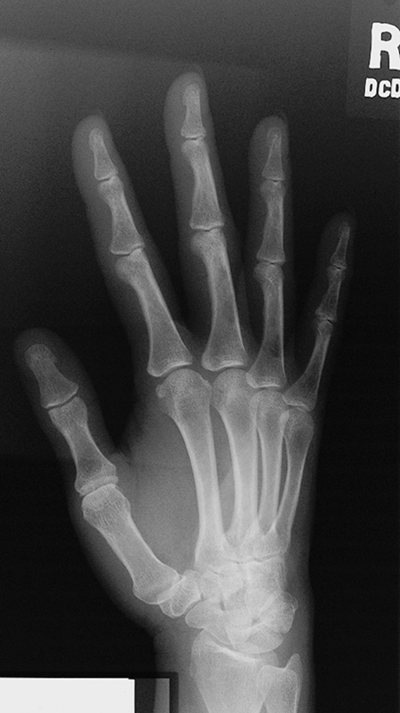
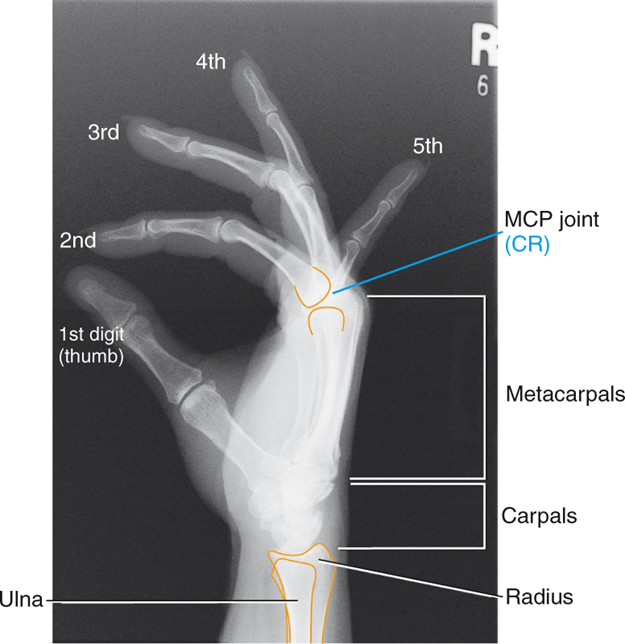
PA Hand
CR to third MCP joint
entire hand and carpal demonstrated
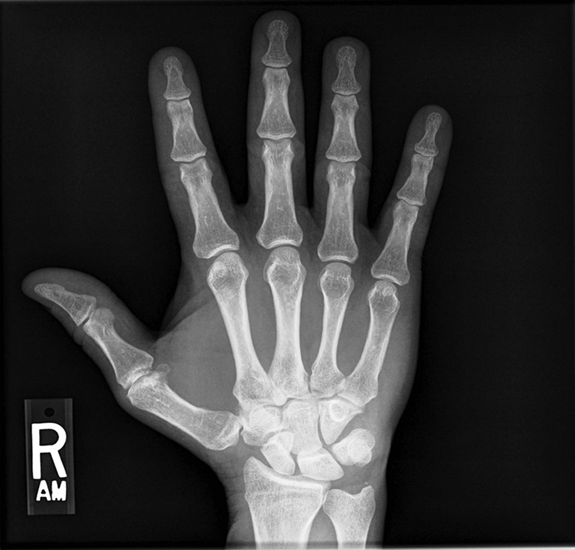
PA Oblique projection (hand)
digits should be parallel to IR
joints open
adequate separation of phalanges and metacarpals
small space between digits 5-3, larger space between digits 2 and 3 (stairstep)
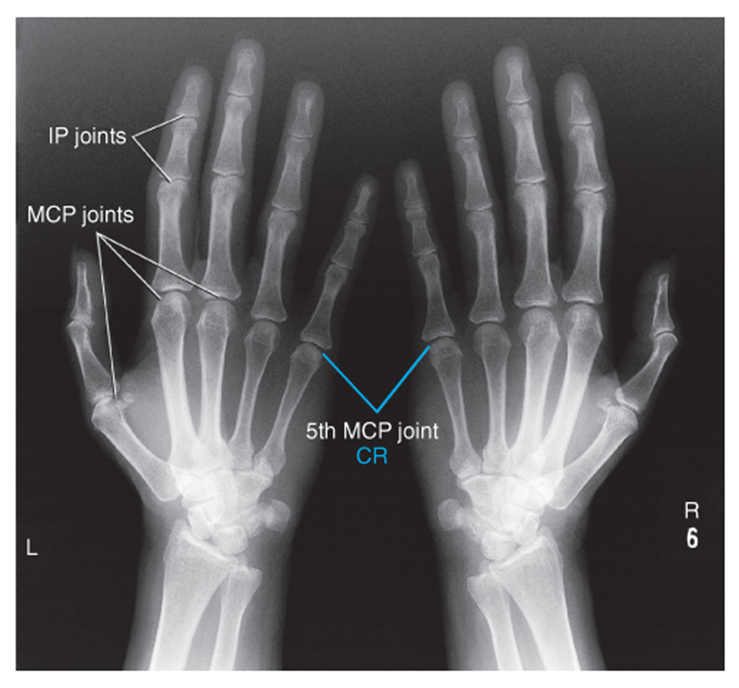
“Fan” lateral hand
CR to second MCP joint
fingers equally separated
superimposition of metacarpals
Norgaard Method
CR level of 5th MCP joint
bilateral hands in 45 degree oblique
midshafts of 2nd and 5th metacarpals and base of phalanges not overlapped
MCP joints should be open
identifying rheumatoid arthritis
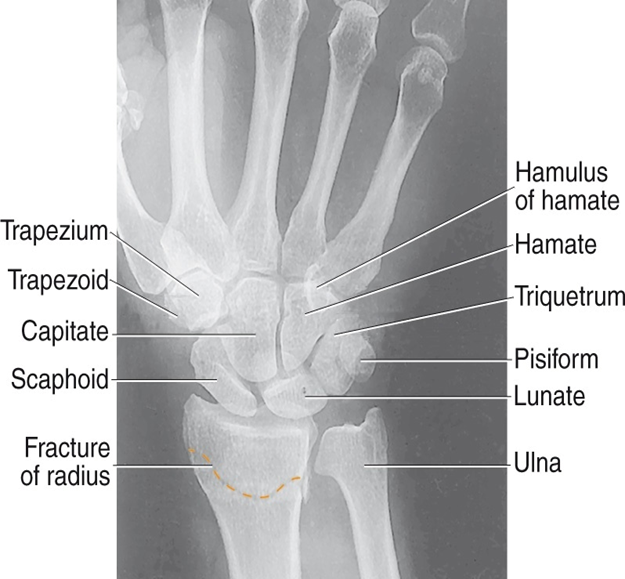
PA Wrist Projection
CR to midcarpal area (big bump on wrist)
about 1in. of distal radius, ulna, and carpals demonstrated
PA Oblique wrist
distal radius, ulna, and carpals demonstrated
trapezium seen in its entirety
Positioning Notes
ask yourself what your looking at (KUB, Upright, decub)
look at anatomy (KUB) → psoas, kidneys, L spine, floating ribs behind kidneys, spinous processes (teardrops), transverse processes (rotation)
Upright
diaphragm, centered 2 in. above crest, liver, will be able to see bowel or any air in bowel (flatlining), may not see psoas muscles
*if right wing is wider than left they would be in a slight RPO
2 Crosswise
top of cassette at styloid process, bottom at crest (overlap)
Positioning Considerations:
4 sided collimation when possible
long axis of part to long axis of IR
patient ID and side marker
40 SID
Trauma Terminology:
dislocation- displacement from joint
subluxation- partial dislocation
sprain- rupture or tearing of CT
contusion- bruise
fracture
simple- closed fx
compound- open/breaks through skin
comminuted- splintered or crushed
impacted- fragments driven into each other
Positioning
PA finger
CR to PIP
entire finger and minimum of 1/3 of MCP demonstrated
no rotation of phalanges
PA Oblique finger
digit parallel to IR
CR to PIP
entire phalanx and MCP joint demonstrated
IP and MCP joints open
Lateral finger
digit parallel to IR
CR to PIP
entire phalanx and MCP joint demonstrated
concavity on anterior side
AP Thumb
CR to first MCP joint
entire thumb should be demonstrated (including first CMC joint)
can also do a PA thumb
Modified Robert’s’ Method
CR 15 degrees proximal to first CMC joint
base of first metacarpal and trapezium must be clearly visualized
PA Stress (Folio Method)
bilateral stress projection for possible ulnar collateral ligament injury
PA Hand
CR to third MCP joint
entire hand and carpal demonstrated
PA Oblique projection (hand)
digits should be parallel to IR
joints open
adequate separation of phalanges and metacarpals
small space between digits 5-3, larger space between digits 2 and 3 (stairstep)
“Fan” lateral hand
CR to second MCP joint
fingers equally separated
superimposition of metacarpals
Norgaard Method
CR level of 5th MCP joint
bilateral hands in 45 degree oblique
midshafts of 2nd and 5th metacarpals and base of phalanges not overlapped
MCP joints should be open
identifying rheumatoid arthritis
PA Wrist Projection
CR to midcarpal area (big bump on wrist)
about 1in. of distal radius, ulna, and carpals demonstrated
PA Oblique wrist
distal radius, ulna, and carpals demonstrated
trapezium seen in its entirety
Positioning Notes
ask yourself what your looking at (KUB, Upright, decub)
look at anatomy (KUB) → psoas, kidneys, L spine, floating ribs behind kidneys, spinous processes (teardrops), transverse processes (rotation)
Upright
diaphragm, centered 2 in. above crest, liver, will be able to see bowel or any air in bowel (flatlining), may not see psoas muscles
*if right wing is wider than left they would be in a slight RPO
2 Crosswise
top of cassette at styloid process, bottom at crest (overlap)