Practical: Microscopy
Your specimen needs to let light through it so you’ll need a thin slice of it to start with
Take a clean slide and use a pipette to put one drop of water in the middle of it - this’ll secure the specimen in place. Then use tweezers to place your specimen on the slide
Add a drop of stain if your specimen is completely transparent or colourless - this makes the specimen easier to see (diff stains highlight different structures within the cells e.g. methylene blue stains DNA)
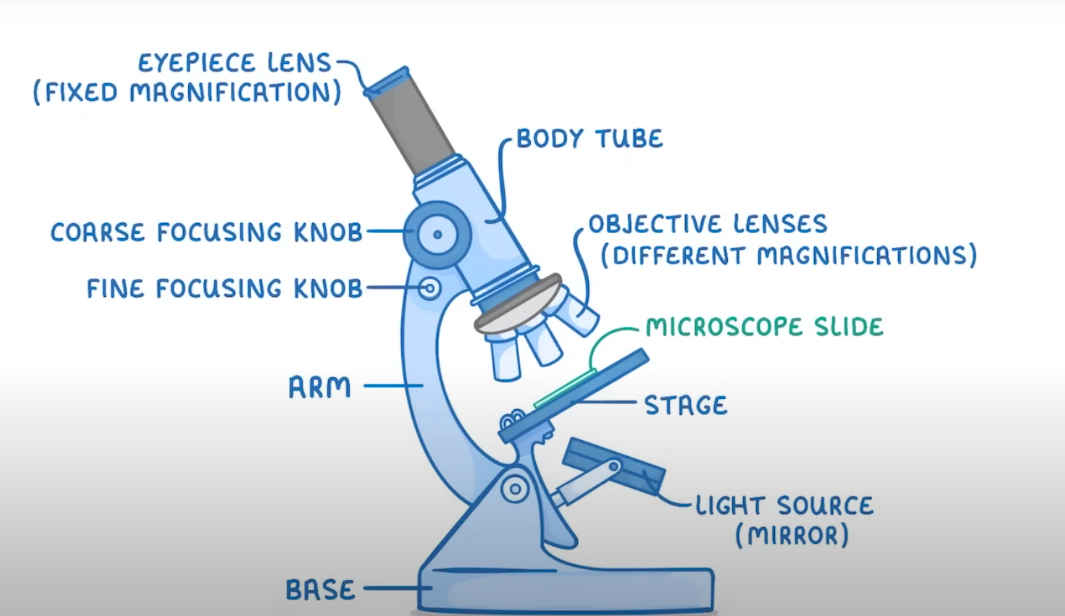
Place a cover slip at one end of the specimen, holding it at an angle with a mounted needle and carefully lower it onto the slide. Press it down gently so that no air bubbles are trapped under it. Then clip the slide onto the stage
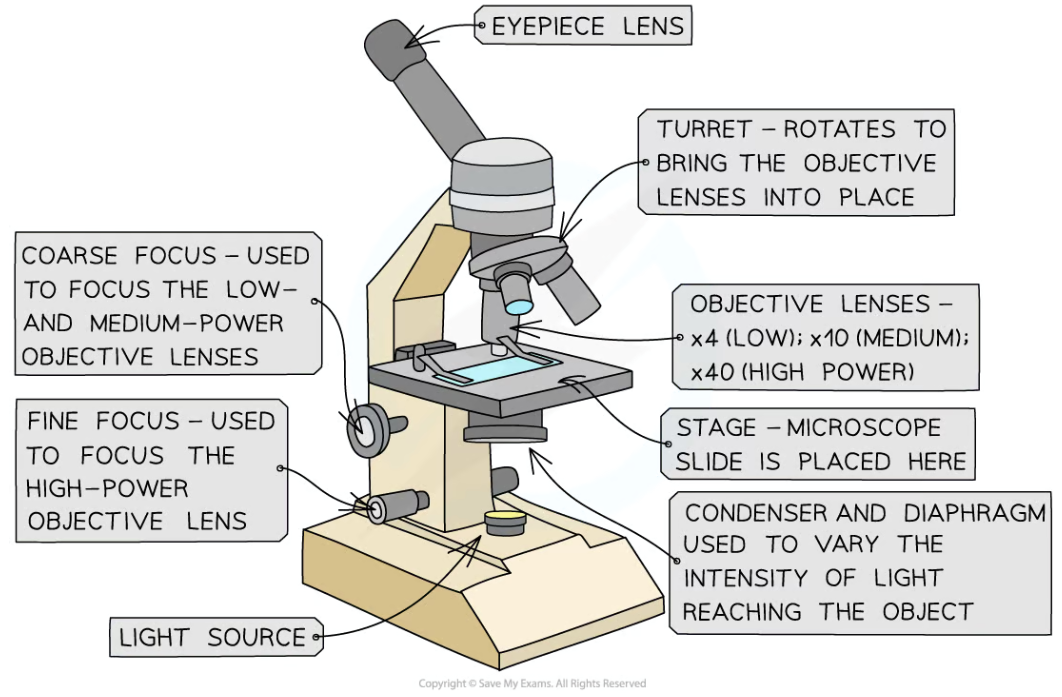
Select the lowest powered objective lens
Use the coarse adjustment knob to move the stage up so that the slide is just underneath the objective lens. Then, looking down the eyepiece, move the stage downwards (so it doesn’t accidently crash into the lens) until the specimen is nearly in focus
Then adjust the focus with the fine adjustment knob, until you get a clear image. Position a clear ruler on the stage and use it measure the diameter of the circular area visible - your field of view (FOV)
If you need to see your specimen with greater magnification, swap to a higher-powered objective lens, refocus and recalculate your FOV accordingly