OpenCV Module 4: Image Enhancement
Basic Image Enhancement Using Mathematical Operations
Image Processing Techniques take advantage of matematical operations to achieve different results.
Arithmetic Operations like addition, multiplication, etc.
Thresholding & Masking
Bitwise operations like OR, AND, & XOR
Original image
img_bgr = cv2.imread("New_Zealand_Coast.jpg", cv2.IMREAD_COLOR)
img_rgb = cv2.cvtColor(image_bgr, cv2.COLOR_BGR2RGB)

#Display 18x18 pixel image.
Image(filename='New_Zealand_Coast.jpg')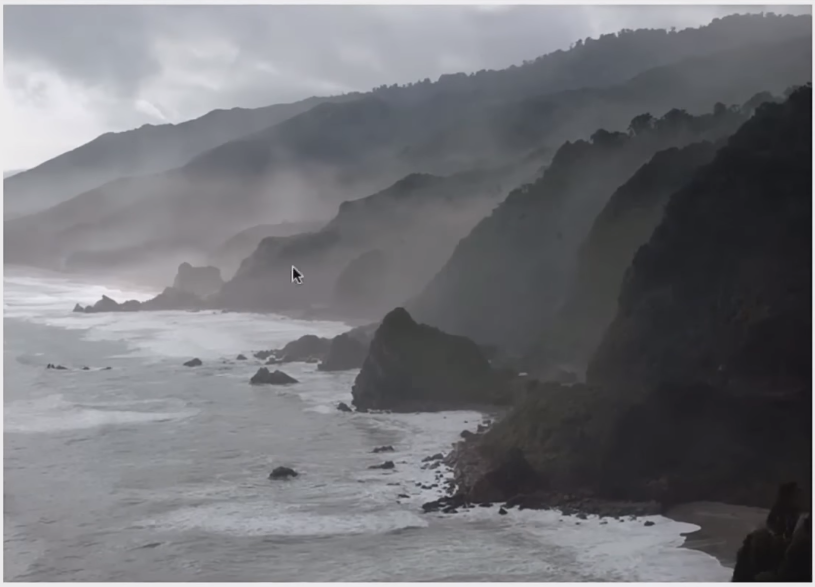
Addition or Brightness
By using addition, we’re just increasing the intensity values of each pixel by the same amount, which will result in a global increase/decrease in brightness.
matrix = np.ones(img_rgb.shape, dtype = "uint8") *50

#Using a matrix of 50s to add/subtract from the original image
img_rgb_brighter = cv2.add(img_rgb, matrix)
img_rgb_darker = cv2.subtract(img_rgb, matrix)

#Show the images
plt.figure(figsize = [18,5])
plt.subplot(131); plt.imshow(img_rgb_darker); plt.title("Darker");
plt.subplot(132); plt.imshow(img_rgb); plt.title("Original");
plt.subplot(133); plt.imshow(img_rgb_brighter); plt.title("Brighter");
Multiplation or Contrast
Just like how addition changes brightness, multiplication can be used to change contrast.
matrix1 = np.ones(img_rgb.shape) * .8
matrix2 = np.ones(img_rgb.shape) * 1.2

img_rgb_darker   = np.uint8(cv2.multiply(np.float64(img_rgb), matrix1))
img_rgb_brighter = np.uint8(cv2.multiply(np.float64(img_rgb), matrix2))

#Show the images
plt.figure(figsize = [18,5])
plt.subplot(131); plt.imshow(img_rgb_darker); plt.title("Lower Contrast");
plt.subplot(132); plt.imshow(img_rgb); plt.title("Original");
plt.subplot(133); plt.imshow(img_rgb_brighter); plt.title("Higher Contrast");
Note: Because max value is 255, some values after multiplying by a higher number causes overflow where the value goes over 255 and rolls back to a value closer to 0, resulting in the Higher Contrast image looking as such
Handling Overflow using np.clip
matrix1 = np.ones(img_rgb.shape) * .8
matrix2 = np.ones(img_rgb.shape) * 1.2

img_rgb_darker   = np.uint8(cv2.multiply(np.float64(img_rgb), matrix1))
#Using np.clip and using the min and max values of 0 and 255
img_rgb_brighter = np.uint8(np.clip(cv2.multiply(np.float64(img_rgb), matrix2),0,255))

#Show the images
plt.figure(figsize = [18,5])
plt.subplot(131); plt.imshow(img_rgb_darker); plt.title("Lower Contrast");
plt.subplot(132); plt.imshow(img_rgb); plt.title("Original");
plt.subplot(133); plt.imshow(img_rgb_brighter); plt.title("Higher Contrast");
Image Thresholding
Used to create binary images to allow you to selectively modify portions of an image while leave other portions intact.
Normal Threshold Function Syntax
retval, dst = cv2.threshold( src, thresh, maxval, type[, dst] )
dst: The output array of the same size and type and the same number of channels as src.
The function has 4 required arguments:
src: input array (multple-channel, 8-bit or 32-bit floating point)
thresh: threshold value
maxval: maximum value to use with the THRESH_BINARY and THRESH_BINARY_INV thresholding types.
type: thresholding type (see ThresholdTypes)
Adaptive Threshold Function Syntax
dst = cv.adaptiveThreshold( src, maxValue, adaptiveMethod, thresholdType, blockSize, C[, dst] )
The function has 6 required arguments:
src: Source 8-bit channel image
maxValue: Non-zero value assigned to the pixels for which the condition is satisfied
adaptiveMethod: Adaptive thresholding algorithm to use, see AdaptiveThresholdTypes.
thresholdTypes: must be either be THRESH_BINARY or THRESH_BINARY_INV
blockSize: Size of a pixel neighborhood that is used to calculate a threshold value for the pixel: 3, 5 ,7 and so on.
C: Constant subtracted from the mean or weighted mean. Notmally, it is positive but may be zero or negative.
img_read = cv2.imread("building-windows.jpg", cv2.IMREAD_GRAYSCALE)
retval = img_thresh = cv2.threshold(img_read, 100, 255, cv2.THRESH_BINARY)

#Show the images
plt.figure(figsize=[18,5])
plt.subplot(121);plt.imshow(img_read, cmap="gray");   plt.title("Original");
plt.subplot(122);plt.imshow(img_thresh, cmap="gray"); plt.title("Thresholded");

print(img_thresh.shape)
(572, 800)
Application: Sheet Music Reader
#Read the original image
img_read = cv2.imread("Piano_Sheet_Music.png", cv2.IMREAD_GRAYSCALE)
#Perform global thresholding (First try)
retval, img_thresh_gbl_1 = cv2.threshold(img_read, 50, 255, cv2.THRESH_BINARY)
#Perform global thresholding (second try)
retval, img_thresh_gbl_2 = cv2.threshold(img_read, 130, 255, cv2.THRESH_BINARY)
#Perform global thresholding (adaptive)
img_thresh_adp = cv2.adaptiveThreshold(img_read, 255, cv2.ADAPTIVE_THRESH_MEAN_C, cv2.THRESH_BINARY, 11, 7)
#Show the images
plt.figure(figsize=[18,5])
plt.subplot(221);plt.imshow(img_read, cmap="gray"); plt.title("Original");
plt.subplot(222);plt.imshow(img_thresh_gbl_1,cmap="gray"); plt.title("Thresholded (global: 50)");
plt.subplot(223);plt.imshow(img_thresh_gbl_2,cmap="gray"); plt.title("Thresholded (global: 130)");
plt.subplot(224);plt.imshow(img_thresh_adp , cmap="gray"); plt.title("Thresholded (adaptive)");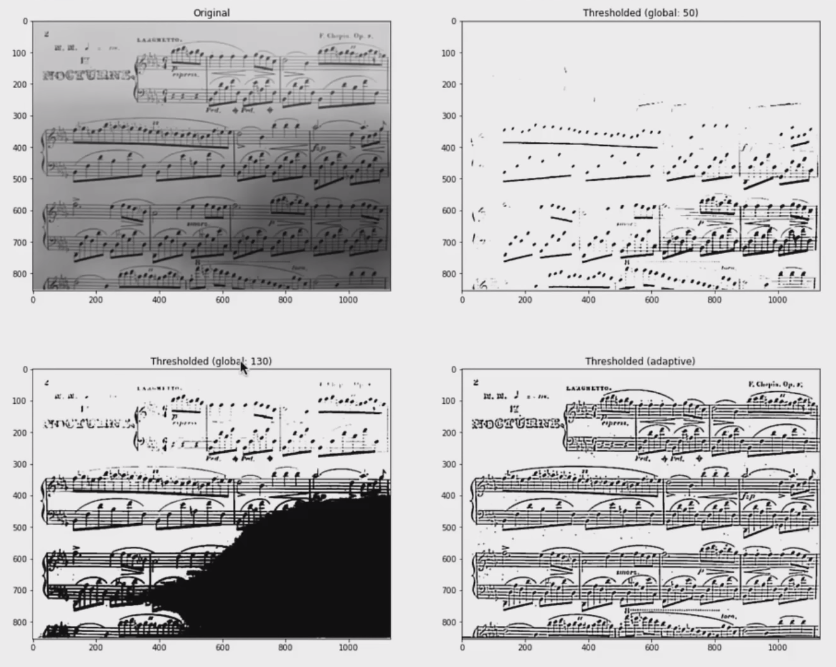 » Using a singular global value may not be particularly useful most of the time and adaptive thresholding adapts to the original image given
Bitwise Operations:
Normal Threshold Function Syntax
Example API for cv2.bitwise_and(). Others include: cv2.bitwise_or(), cv2.bitwise_xor(), cv2.bitwise_not()
retval = cv2.bitwise_and( src1, src2[, dst[, mask]] ) )
dst: The output array of the same size and type as the input arrrays
The function has 2 required arguments:
src1: first input array or a scalar
src2: second input array or a scalar
An important optional argument is:
mask: optional operastion mask, 8-bit single channel array, that specifies elements of the output array to be changed.
img_rec = cv2.imread("rectangle.jpg", cv2.IMREAD_GRAYSCALE)
img_cir = cv2.imread("circle.jpg", cv2.IMREAD_GRAYSCALE)

#Show the images
plt.figure(figsize=[20,5])
plt.subplot(121);plt.imshow(img_rec, cmap="gray")
plt.subplot(122);plt.imshow(img_rec, cmap="gray")

print(img_rec.shape)
Bitwise AND Operator:
result = cv2.bitwise_and(img_rec, img_rec, mask = None)
plt.imshow(result, cmap = 'gray')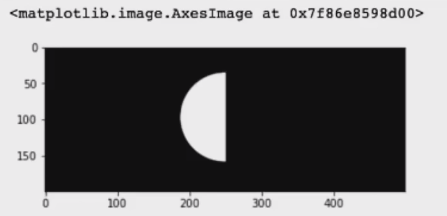 Note: value returned is white when the corresponding pixels in both images return white (AND operation)
Bitwise OR Operator:
result = cv2.bitwise_or(img_rec, img_rec, mask = None)
plt.imshow(result, cmap = 'gray')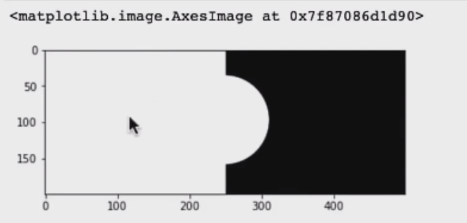
Bitwise XOR Operator:
result = cv2.bitwise_xor(img_rec, img_rec, mask = None)
plt.imshow(result, cmap = 'gray')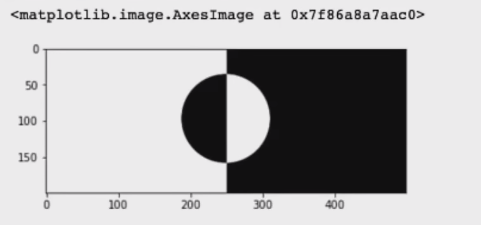
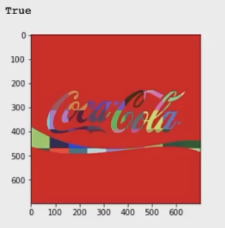
Application: Logo Manipulation:
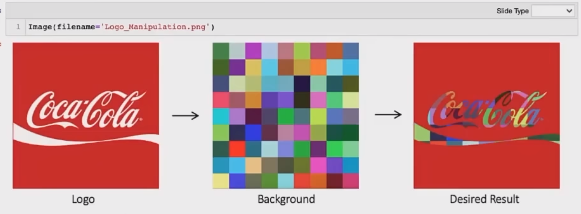
1) Read Foreground Image:
img_bgr = cv2.imread("coca-cola-logo.png")
img_rgb = cv2.cvtColor(img_bgr, cv2.COLOR_BGR2RGB)
plt.imshow(img_rgb)
print(img_rgb.shape)
logo_w = img_rgb.shape[0]
logo_h = img_rgb.shape[1]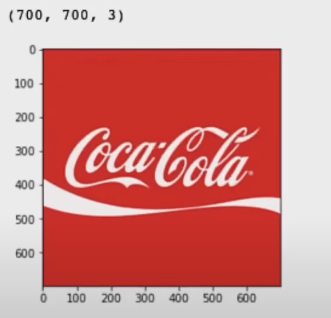
2) Read Background Image:
#Read in image of color checkerboard background
img_background_bgr = cv2.imread("checkerboard_color.png")
img_background_rgb = cv2.cvtColor(img_background_bgr, cv2.COLOR_BGR2RGB)

#Set desired width (logo_w) and maintain image aspect ratio
aspect_ratio = logo_w / img_background_rgb.shape[1]
dim = (logo_w, int(img_background_rgb.shape[0] * aspect_ratio))

#Resize background image to same size as logo image
img_background_rgb = cv2.resize(img_background_rgb, dim, interpolation=cv2.INTER_AREA)

plt.imshow(img_background_rgb)
print(img_background_rgb.shape)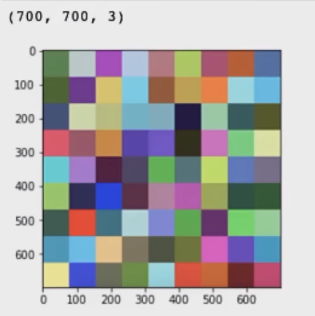
3) Create Mask for Original Image:
img_gray = cv2.cvtColor(img_rgb, cv2.COLOR_RGB2GRAY)

#Apply global thresholding to create a binary mask of the logo
retval, img_mask = cv2.threshold(img_gray, 127, 255, cv2.THRESH_BINARY)

plt.imshow(img_mask, cmap="gray")
print(img_mask.shape)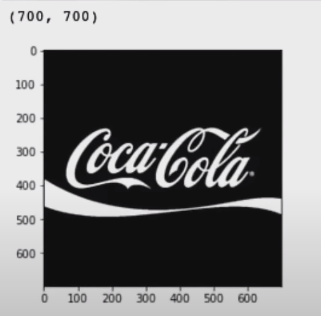
4) Invert the mask:
#Create an inverse mask
img_mask_inv = cv2.bitwise_not(img_mask)
plt.imshow(img_mask_inv, cmap="gray")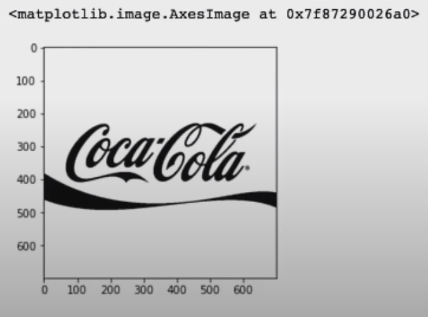
5) Apply background to the Mask:
#Create colorful background behind the logo lettering
img_background = cv2.bitwise_and(img_background_rgb, img_background_rgb, mask=img_mask)
plt.imshow(img_background)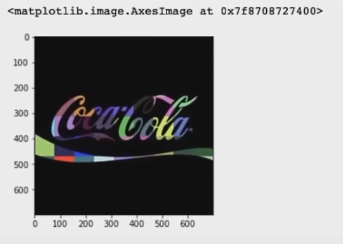
6) Isolate foreground from image:
#Create colorful background behind the logo lettering
img_foreground = cv2.bitwise_and(img_background_rgb, img_background_rgb, mask=img_mask_inv)
plt.imshow(img_foreground)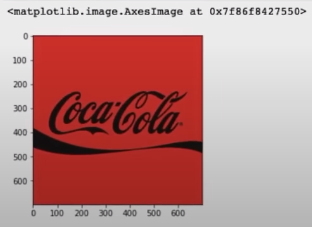
7) Result: Merge Foreground and Background
result = cv2.add(img_background, img_foreground)
plt.imshow(result)