The Basics
5 techniques
Blunt cutting: classic finish
Point cutting: sharp movement in the ends
Reverse point cutting: softer movement in the ends
Weight reduction: remove bulk
Soft notching: great layer and graduation
5 areas of the head, the technique that influences the haircut:
fringe
Top

Sides

Back

Nape

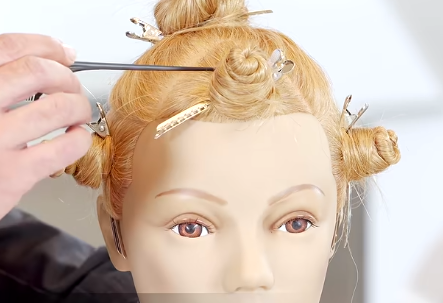
Fringe area: Apex of the head to either recession
—Apex can be founded by laying a comb on top of the head, once it starts leaving the head → fringe area starts
Side areas: Starts at the recession, follows the parietal ridge, then comes down to the top of the back of the ear…p.s at the front of this section the hair would be more fine and a little bit less dense
Top area: Starts at the recession, goes through the parietal ridge and then through the lower crown → visual higher density, since all of the hair covers so much area. Generally where layers are cut.
Back/occipital bone area: Behind the sides and below the top, excluding the nape → more coarse and a transitional area from the top to the nape.
Nape area: Top of the ear and across the lower occipital to the other side of the top the ear. → determines the length and shape SOMETIMES
HAIRCUTTING CONSIDERATIONS:
Elevation
Graduation: elevation lower than 89 degrees

Layers: elevation higher than 90 degrees

Overdirection determines the shape of the haircut!!!

Cutting texture
More diffused, the softer the finish would be.

More open texture, the more definition.

Moisture level
—the more damp = the more it stretches, the more dry = the less it stretches
Curl pattern
—Curly hair = the finished result will always look shorter than the haircutting process
small tip: the sides, occipital and nape will be cut first. —> isolate the sides, then work back from the nape to the occipital.
3 cutting techniques:
Point cutting
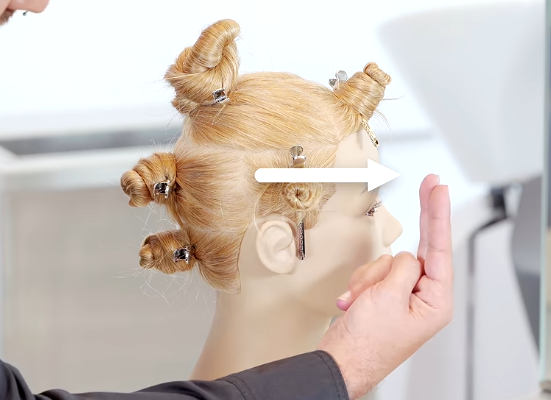
Example: He’ll be working with an 1 ½ subsection for his point cutting to create visible texture from the bottom. It’s important to maintain consistent moisture level throughout the haircut. He creates open space within the subsection (1). note: since you are cutting texture, you want short and long hair next to eachother. Common mistake: when people move to the next section (occipital area), they grab their previous section and point cut that again. Make sure you can see the previous section and slightly elevate it. Best to get close with eye level to really see what you are doing. As you move to the sides, you connect the sides to the back, so start from the back of that section to the front in order to know where your guide is. TIP: to make sure you have the length you want, use your mirror to create distance between you and that haircut. TIP: need straight sectioning? Put your finger where you want the section to end, the comb straight to your finger.

Blunt cutting
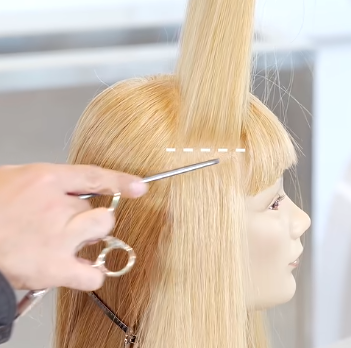
Example: He’ll be creating a fringe right by the eyebrows, since he’ll be using blunt cutting: he’ll need smaller subsections. REMEMBER: when working with blunt lines, the more tension = the softer the finish will be. He’ll be using the most tension. However, he has a slight eleveation (1) and it’ll give him a slight graduation. When creating a graduation, it’ll make a softer finish. Make sure to have a consistent moisture level and consistent tension throughout. He’s creating a very square line area (2), which will make the corners slightly longer. Unlike the previous sections, take your entire section to make sure you are cutting directly on that line (3). TIP: Use your shears to pull up and find your guide, if the section is to thick.


Reverse point cutting
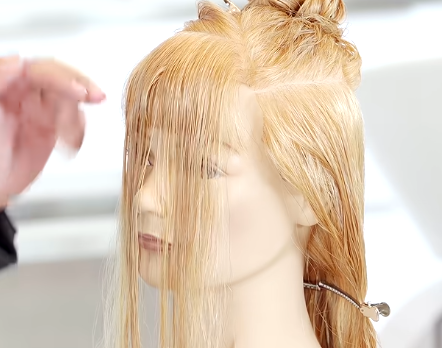
Example: Rather tha cutting into the hair, you’ll be cutting towards the ends of the hair. He’ll be working with radiating sections like a pie going all the way around the head (1). He’ll be connecting the lower section straight across through the top. He’ll bring up the (1.1) subsection until his bottom section starts to fall out (2). Once he gets to the parietal ridge area (2.1). He’ll know that it will be his guide to cut straight across here (2.2 & 2.3). He’ll be cutting the subsections independently in order to not recut hair that has already been cut. Repeat, but unlike the first look at the lower section and pull a new guide as visual to know where to start.(3). To make sure its blended, pull from both sides and it doesn’t really have to be clean sections. It allows you to get any little hair you may have missed (4)