LO2 LS2 - Describe Manual and Automatic Film Processing Procedures
Step 2: Describe Manual and Automatic Film Processing Procedures
What is film processing?
Processing is used for conventional films and means the steps that change the latent image on the exposed film into a radiograph. This occurs by producing a visible image on the film. Processing is not required for digital radiography.
Proper processing is an important skill for dental assistants and is as important as the exposure technique in producing diagnostic quality radiographs. Often, radiographs that are not diagnostic may be because of poor processing techniques. These radiographs must be retaken, and this causes unnecessary exposure of the client to more radiation. Dental assistants must be able to troubleshoot to determine if errors on films are due to film processing.
In oral health care facilities that still use film, films are often processed in an automatic processor. However, it is necessary to know how to process a film manually if a dental office utilizes a manual processing system.

2.1 Reading: Manual and Automatic Film Processing Procedures
Radiographs that are not diagnostic may be due to poor processing techniques; therefore, proper processing is an important skill for dental assistants. It is as important as the exposure technique in producing diagnostic quality radiographs.
Modern Dental Assisting, read Chapter 39
2.2 Types of Processing Procedures
There are two types of processing procedures:
Manual Processing: Used before automatic processors were developed and require the dental assistant to manually place the film into various solutions to develop the radiograph. Some dental offices may still use manual processing procedures.
Automatic Processing: Films are placed in the automatic processor and go through a series of chemicals to produce the image.
2.3 Manual Processing Requirements
Manual processing requirements include:
Darkroom: light-tight, ample space and ventilation
Solutions: developer and fixer
Temperature to be correct
Film holders
Rinsing
Drying
Timing
Regular solution replacement

2.4 Automatic Processing Requirements
Automatic processing requirements include:
Darkroom and/or daylight loader
Solutions: developer and fixer
Temperature to be correct
Film holders
Rinsing
Drying
Timing: 4 or 6 minutes
Replace solutions every 2–4 weeks
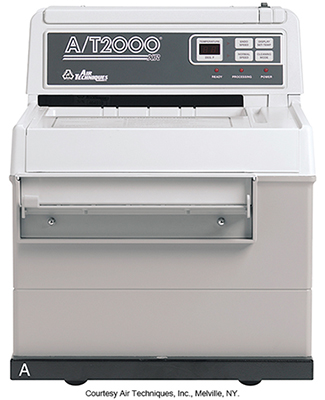

A daylight loader may be attached to the top of an automatic processor if a darkroom is not available.
2.5 The Darkroom
A darkroom facilitates the processing of dental x-ray films and must:
Have adequate working space.
Proper lighting.
Good ventilation.
Be clean at all times.
Be equipped with the necessary devices and supplies.
Lighting
The darkroom must be completely dark. “Light-tight” is often used to describe the darkroom and to be light-tight, no light leaks can be present.
Any white light that “leaks” into the darkroom, such as from around the door, is called a light leak.
When in the darkroom with the light turned off, no white light should be seen.
Any light leaks around the door, such as through a vent or a keyhole, this must be corrected with weatherstripping or black tape.
X-ray film is extremely sensitive to visible white light and any leaks of white light can cause film fog.
A fogged film appears dull gray, lacks contrast, and is not diagnostic.
2.6 Type of Darkroom Lighting
There are two types of lighting essential in a darkroom: room lighting and safelighting.
Room Lighting
Darkroom must have an overhead white light that provides adequate lighting when performing tasks such as cleaning, restocking materials, and mixing chemicals.
Safelighting
A safelight is a low-intensity light in the red-orange spectrum and safelighting provides enough illumination in the darkroom to process films safely without exposing or damaging the film. A safe distance must be maintained between the light and the working area. Exposure to the safelight must be kept as short as possible by working quickly.
Any unwrapped films that are left too close to the safelight or that are exposed to the safelight for longer than 2 to 3 minutes will appear fogged.
A safelight must be placed at least 4 feet away from the film and working area used.

The safelight may be mounted on the wall or ceiling in the darkroom and should be at least 4 feet from the work surface.

2.7 Safelight Test
The light-tightness of the darkroom must be confirmed before you can test the effectiveness of the safelight. The coin test can be used to check the safelight. You will learn more about this when you study how to perform quality assurance tests.
Turn off all the lights in the darkroom, including the safelight.
Unwrap one unexposed film. Place the film on a flat surface at least 4 ft away from the safelight. Place a coin on top of the film.
Turn on the safelight. Allow the film and the coin to be exposed to the safelight for 3 to 4 minutes.
Remove the coin and process the film as usual.
Check the results.
If no image is visible on the film, the safelight is functioning, and it is safe to process other films.
If the image of the coin and a fogged background appear on the processed film, the safelight is not safe to use with that type of film.
Safelighting problems must be corrected before film processing is continued.


2.8 Review Activity
When processing conventional film, there are two types of procedures that can be used: manual processing and automatic processing.
For manual processing, a darkroom is used with ample light, space, and ventilation. Developer and fixer solutions are housed in tanks with a separate water bath. Film holders are used to place the undeveloped film into the tanks for specified amounts of times, the films are then rinsed with water and allowed to dry.
For automatic processing, a processor transports the film from developer-fixer-water-dryer in 4 to 6 minutes. It does require time to warm up prior to usage.
Follow the manufacturer’s instructions on storage and usage but solutions should be replaced every 2 to 4 weeks depending on the number of films processed.