Elimination
Overview
Page 1
Learning Objectives
Discuss body functions related to the production of urine and feces.
Explore expected and unexpected findings related to elimination.
Discuss conditions that alter a client’s elimination patterns.
Examine the use of diversions to manage altered elimination.
Identify diagnostic tests related to elimination and the nurse’s role in obtaining specimens.
Discuss nursing interventions that can facilitate or maintain a client’s elimination patterns.
Apply the nursing process through the use of clinical judgment functions while providing care to clients experiencing alterations in elimination.
Scope of Practice Note
For differences in the scope of practice between RNs and PNs, Engage Fundamentals includes callout boxes focused on PN practice considerations. In addition, PN scope of practice varies by state. For example, some states may allow the PN to contribute directly to a plan of care, while other states limit PN participation to assisting the RN to develop the plan of care. Similarly, most states require the PN to be under the supervision of an RN. As such, PN students should reframe certain discussions in this product to align with their state’s scope of practice. Ultimately, the PN is responsible for functioning within their scope by knowing and abiding by state guidelines for safe practice.
Introduction
Bowel and urinary elimination are essential bodily functions. Stool and urine production is a constant process that occurs unconsciously. While clients may often feel embarrassed about discussing these topics with health care personnel, clients need to have fully functional urinary and gastrointestinal tracts to maintain proper elimination of bodily waste and remain healthy. Although elimination patterns may vary between clients, alterations in expected function need to be evaluated to determine if something is wrong, and if so, to appropriately intervene so that clients can return to their usual function, or establish a new pattern of waste elimination.
This lesson explores bodily functions related to the production of urine and feces. It reviews both expected and unexpected findings related to elimination, discusses conditions that alter a client’s elimination patterns, and examines the use of urinary or bowel diversions to manage altered elimination. Identification of diagnostic tests related to urinary or bowel elimination and the nurse’s role in obtaining specimens are discussed, as well as nursing interventions that can facilitate or maintain a client’s usual elimination patterns.
The Urinary Tract
The urinary tract (urinary system) has several functions. Its primary function is to convert and remove excess waste and fluids from the body in the form of urine. Urine travels through the urinary system, also called the urinary tract, which consists of the kidneys, ureters, bladder, and urethra, before exiting the body. When a person is healthy, the kidneys regulate electrolyte levels and production of red blood cells, produce hormones that are important for blood pressure regulation, and help to strengthen bones.
The kidneys—the first stop along the urinary tract—are two bean-shaped organs located below the ribcage, each adjacent to the spine. They filter blood at a high rate and convert waste products and excess fluid into urine to be removed from the body. From the kidneys, urine is transported to the bladder by ureters, which are thin, muscular tubes. Each kidney has one ureter.
Next, urine reaches the bladder, a hollow, balloon-shaped muscle. The bladder begins to fill and stretches to accommodate the urine, comfortably holding 300 to 400 mL in adults. As the bladder fills with urine, the bladder muscles remain relaxed. Once the bladder reaches capacity, receptors inside the bladder send signals to the brain to let the client know it is time to empty the bladder. The amount of urine produced is determined by kidney function. Once the bladder has filled, the body releases the urine through the urethra and out of the body, a process known as urination.
urination
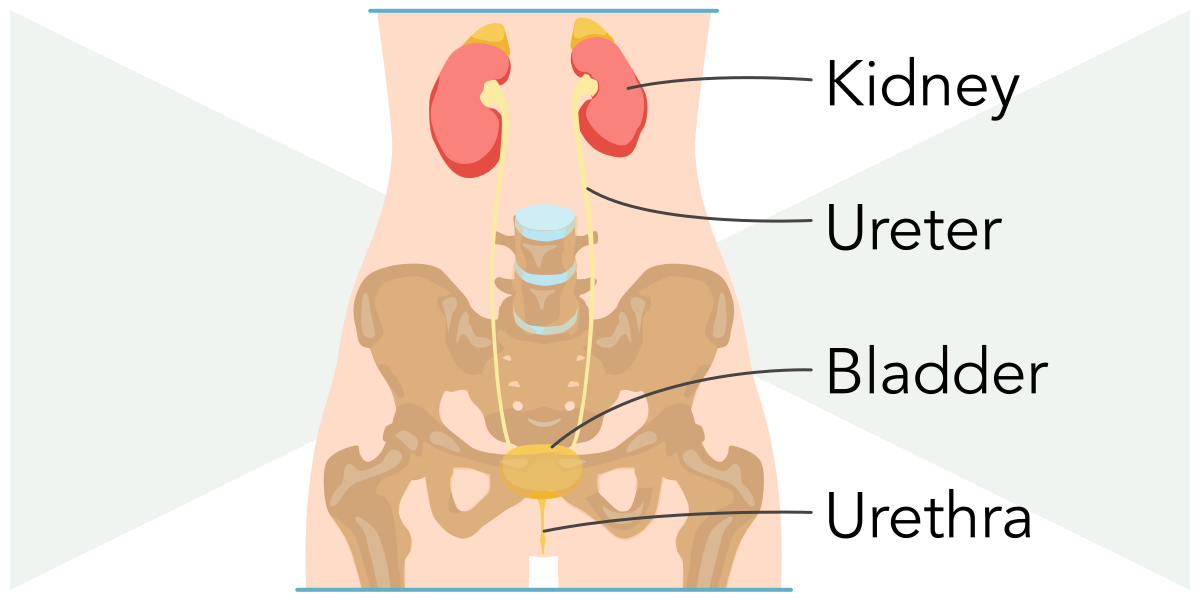
Urinary tractUrine travels through the urinary tract, also called the urinary system, which consists of the kidneys, ureters, bladder, and urethra, before exiting the body.
Three sets of muscles work together to prevent accidental urination. The first muscle, the urethra, connects to the bladder at the bladder neck. The bladder neck consists of an internal sphincter (the second muscle), which holds urine inside the bladder. The last set of muscles, known as the pelvic floor muscles, along with the external sphincter, helps to support the urethra.
Place the following organs in the correct order in which they produce and transport urine along the urinary tract.
Drag the options on the left to the corresponding category on the right (or click the option on the left and then the corresponding category on the right).
1
2
3
4
The Production of Urine
Urine is extra fluid and waste that the body no longer needs. Urine production is driven by renal filtration and tubular reabsorption and varies based on several factors, including how much liquid and food a client consumes. Other factors, such as breathing, sweat-producing exercise, and medications (diuretics), also influence urine production by affecting the glomerular filtration rate (GFR) and water–electrolyte balance.
In a healthy person, urine is usually a light-yellow color, clear, and without cloudiness. Deviations may include dark yellow or amber-colored urine, which can indicate concentrated urine/dehydration; brown or tea-colored urine, which may reflect bile pigments or other pathology (liver disease) or certain medications; and a red tint to the urine, which may be caused by blood in the urine.
Daily urine volume varies with intake and individual physiology. In healthy adults, the kidneys filter about 200 L of plasma water each day and then reabsorb most of it, excreting only what is needed to maintain fluid and electrolyte balance. However, age can affect urine production. Expected urine output (mL/kg/hr) is higher in infants and young children and gradually decreases toward adult values. This expected age-related trend reflects differences in body water composition, renal tubular maturity, and metabolic needs across the lifespan. Infants have more total body water, greater insensible losses, and immature renal tubules that reabsorb sodium and water less efficiently. Together, these factors lead to higher urine output per kilogram compared with older children and adults. As children grow, tubular reabsorption/concentrating abilities improve and metabolic water needs per kilogram fall, so the expected mL/kg/hr progressively declines toward adult levels (where about 0.5 mL/kg/hr marks the commonly accepted lower limit).
Infants produce approximately 1 to 2 mL/kg/hr of urine, children produce 0.5 mL/kg/hr of urine, and adults’ produce approximately 0.5 mL/kg/hr, or 30 to 40 mL/hr. Observing the amount and characteristics of urine is an important assessment skill, because deviations from the client’s norm may suggest health issues such as dehydration or kidney dysfunction.
Dietary Considerations That Affect Urine Production
The amount of urine produced as well as the color and odor of urine can be affected by the amount and type of liquid and food a client consumes, as well as the ingestion of certain medications. Drinking a larger amount of fluid may result in greater urine volume and clearer, less odorous urine. In contrast, consumption of foods such as blackberries, beets, and rhubarb may turn urine a reddish color, making it appear to be blood. Certain food dyes can also pass through the urine, turning it blue or green. Dark brown urine may occur after eating aloe or fava beans. Asparagus can turn urine slightly green and increase its odor. However, similar deviations in the color and odor of urine can also represent medical problems when not related to diet.
At times, clients need will need to increase their fluid intake due to exercise or strenuous activities such as yard work that may increase their risk of dehydration due to sweating. In contrast, drinking certain beverages can increase urine production. Alcohol and caffeinated beverages such as cola, coffee, and tea all increase urine production and may be dehydrating if not balanced with water consumption. Foods such as soups or other highly processed meals or snacks, which tend to be high in sodium, can also increase urine production.
Age-Related Considerations
Age influences urine production. Expected urine output (mL/kg/hr) is highest in infancy and then decreases with increasing age toward adult values. This trend reflects age-related differences in total body water, renal tubular maturity, and metabolic needs across the lifespan. Infants have more total body water, greater insensible losses, and immature renal tubules that reabsorb sodium and water less efficiently, resulting in higher urine output per kilogram than older children and adults. As children grow, their ability to concentrate urine improves, and metabolic water needs per kilogram decline, leading to the expected mL/kg/hr to progressively approach adult levels, with 0.5 mL/kg/hr being considered the lower expected limit of normal output.
Although urination is an expected physiological process, aging can alter urinary frequency and bladder function. With advancing age, kidney function declines due to loss of kidney tissue and nephrons (the filters in the kidney) and reduced blood flow, contributing to decreased urine production. Loss of bladder tone—another age-related change—may lead to issues such as urinary leakage, urinary incontinence, or urinary retention.
The Gastrointestinal Tract
The digestive system consists of the liver, pancreas, gallbladder, and a series of hollow organs that originate at the mouth and terminate at the anus. These organs, which include the mouth, esophagus, stomach, small and large intestines, and anus, make up the gastrointestinal (GI) tract. The GI tract works with the organs of the digestive system in a coordinated fashion to digest the food and beverages a person eats so that the body can utilize them and properly function.
Food and liquid enter the body at the mouth. Once chewing begins, food is broken down and pushed into the throat and swallowed. A small flap of cartilage, the epiglottis, prevents food and liquid from entering the airway, but allows them to continue into the esophagus. In the esophagus, a process called peristalsis moves food toward the stomach. Once in the stomach, food and liquid are mixed with digestive secretions before slowly being emptied into the small intestine.
peristalsis
In the small intestine, food and liquid continue to mix with digestive secretions from the pancreas, liver, and small intestine as peristalsis continues to aid in the transport of food to the large intestine. Digested nutrients are absorbed by the intestinal walls and enter the bloodstream, which transports them to other tissues for use by the body.
Digested products that are not utilized by the small intestine continue onward into the large intestine. Once in the large intestine, liquid is absorbed from the waste byproduct, and stool begins to form. Peristalsis continues to move the forming stool through the large intestine until it reaches the rectum and is pushed out of the body through the anus during a bowel movement.
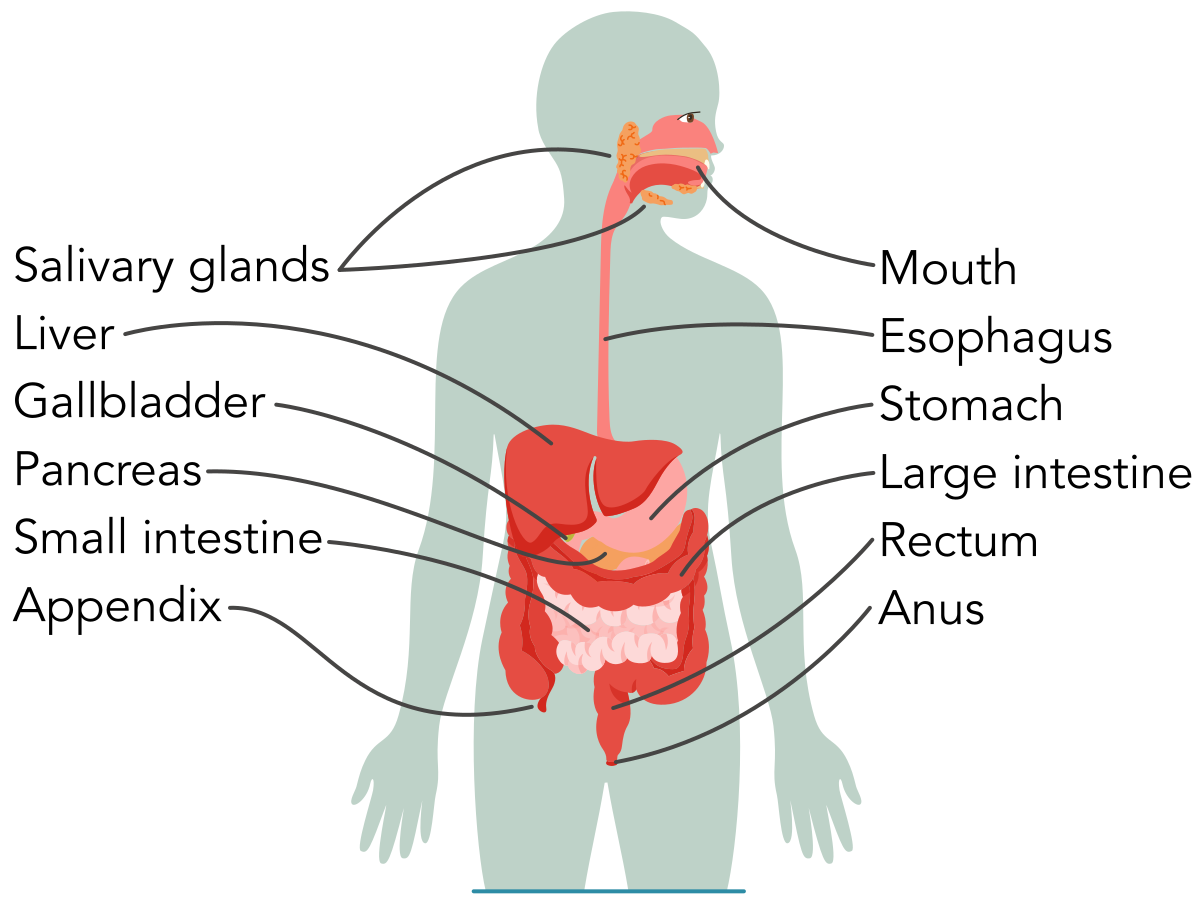
Digestive systemThe digestive system consists of the liver, pancreas, gallbladder, and GI tract, which originates at the mouth and terminates at the anus.
Identify the correct order in which food or liquid contents are transported through the gastrointestinal tract.
Drag the options on the left to the corresponding category on the right (or click the option on the left and then the corresponding category on the right).
1
2
3
4
5
6
Production of Feces
From the moment food and liquid enter the mouth, the production of feces begins. Food is broken down into smaller, easy-to-digest parts by chewing and by the action of digestive enzymes. Once food reaches the stomach, further digestion occurs through the mixing of stomach acid and other enzymes, aided by the stomach muscles, which help mix the contents. Once the stomach’s contents are emptied into the small intestine, the pancreas, liver, and gallbladder secrete more digestive enzymes into the small intestine to further assist with the breakdown of carbohydrates, fats, proteins, and vitamins. Bacteria within the small intestine also secrete their own digestive enzymes during this process. As food and liquid are transported through the small intestine, nutrients are absorbed that support the body by providing for energy, growth, and cellular repair. Once in the large intestine, stool forms from unused food, liquid, and cells from the GI tract. Bacteria in the large intestine continue to break down any remaining nutrients and produce vitamin K, a nutrient important for blood clotting and strong bones. At the terminal end of the large intestine, the rectum stores stool until it is expressed from the anus in the form of a bowel movement.
Like urine production, the amount of stool or feces produced depends on the amount of food and liquid consumed. The frequency of bowel movements varies significantly from person to person. Whereas some individuals may have daily bowel movements, others may evacuate stool one to three times a day, every other day, or only three times a week. Although the amount and frequency may vary, passing stool should not be difficult, and stool should be soft, not hard or liquid. The Bristol Stool Chart is a tool used to describe stool consistencies: it places stool on a continuum from constipation (types 1 and 2) to expected or ideal stools (types 3 and 4) to diarrhea (types 5 to 7).

bristol stool chartThis tool is used to describe stool consistencies.
Dietary Considerations That Affect Stool Production
Diet can influence stool production. For example, fecal incontinence, otherwise known as accidental bowel leakage or the accidental passing of stool, can be affected by diet. Fecal incontinence can be caused by diarrhea, so avoiding dietary factors that increase diarrhea is an important preventive step. These factors include the following foods and beverages, which are known to increase the risk of diarrhea.
Alcohol
Caffeinated beverages and foods
Dairy (milk, cheese, cream, and ice cream)
Foods that are high in fat or are highly greasy
Beverages that contain fructose
Spicy foods
Apples, peaches, and pears
Products that contain sweeteners, such as sorbitol, mannitol, xylitol, and maltitol
Age-Related Considerations
As is true of many other organ systems, aging influences the function of the digestive system. With age, esophageal contractions decrease, but the passage of food or liquid from the mouth to the stomach does not change. Once food or liquid enters the stomach, age-related changes to the stomach lining may increase the risk of peptic ulcer disease, especially in clients who take aspirin or other nonsteroidal anti-inflammatory (NSAID) drugs. Stomach elasticity also diminishes with age, so the amount of food the stomach can hold changes, as does the rate of emptying. Movement through the small intestine is not significantly affected by age, but nutrient and vitamin absorption may be impaired by bacterial overgrowth. Lactose intolerance may develop as lactase levels decrease.
The pancreas, liver, and gallbladder may undergo cellular changes and size reductions in older adults, but their overall function may be preserved. During aging, minor changes in the large intestine and enlargement of the rectum may also occur. As the body ages, instances of constipation may increase, requiring greater straining to evacuate the bowel, a decrease in expected frequency, or stool classified as hard (types 1 and 2) per the Bristol Stool Chart. Specific changes in the digestive system related to aging can account for this change in stool characteristics. These physiological changes include decreased peristalsis and bowel muscle tone. Finally, changes in lifestyle often linked to aging can affect bowel movements, including inactivity, decreased fluid and fiber intake, and ingestion of medications, such as some antihypertensives and antacids.
A nurse is caring for an older client and is considering age-related GI changes and their potential effects on GI function. Match each age-related physiological change with its associated clinical effect.
Drag the options on the left to the corresponding category on the right (or click the option on the left and then the corresponding category on the right).
Reduced stomach capacity and slower gastric emptying
Development of lactose intolerance
Impaired absorption of nutrients and vitamins
Increased risk of constipation
Increased straining and harder stool evacuation
Expected Elimination Characteristics
Elimination patterns can vary for many reasons and may not be a cause of concern. On average, urine should be clear, light yellow in color, and odorless. The amount and frequency will depend on the amount of fluids ingested, activity level, and medications taken, such as diuretics. Expected stool patterns can also vary. Some clients may have a daily bowel movement, whereas others may have fewer or more frequent bowel movements. Healthy bowel elimination should result in soft but formed stool that is easy to pass without straining.
Altered Urinary Elimination
Changes in urinary patterns, such as urinary incontinence and retention, may occur and cause the client distress. These altered elimination patterns can lead to urgency, hesitancy, dribbling, changes in urine color, clarity, odor, output, and other health problems, such as skin breakdown.
Urinary Incontinence
Urinary incontinence (UI) is the involuntary leakage of urine due to loss of bladder control. This common bladder control problem has multiple causes and can affect both storage (holding) or voiding (release) functions of the lower urinary tract (NIDDKD, 2021a).
urinary incontinence (UI)
Both female and male clients can be affected by this problem. In females, UI may occur during pregnancy and after childbirth due to increased intra-abdominal pressure and pelvic floor/urethral support changes. Stress incontinence associated with pressure-raising activities such as coughing, sneezing, laughing, or exertion may occur. UI usually resolves following childbirth and does not require treatment. However, some females may experience pelvic organ prolapse or nerve damage after childbirth, resulting in lasting issues with bladder control if not treated. In males, UI may occur due to an enlarged prostate constricting the flow of urine from the bladder, which can cause incomplete bladder emptying and leakage of urine following urination. In addition, UI can occur after transurethral resection of the prostate (TURP), which is used to treat bladder outlet obstruction. Post-TURP incontinence is usually short-lived, with most clients regaining continence over about 3 months, with persistent, severe incontinence being uncommon.
Several kinds of UI are distinguished.
Stress incontinence: Leakage with laughing, coughing, sneezing, or physical activity that increases intra-abdominal pressure on the bladder.
Urge incontinence: A strong need or urge to urinate with leaking before reaching the toilet.
Reflex incontinence: Urinary leakage as a result of nerve damage with involuntary bladder reflex contractions.
Overflow incontinence: Incomplete bladder emptying that leads to overfilling and leakage. This happens when the bladder muscle cannot squeeze strongly enough or the urine outlet is partly blocked.
Functional incontinence: Leakage due to a physical or environmental barrier to toileting, such as being a wheelchair user or having arthritis of the hands, which can hinder the fine motor skills needed to unbutton clothing.
Nocturnal enuresis (nighttime bedwetting): Common in children but may occur in adults who have consumed too much alcohol, who consume caffeine at night, or who take certain medications.
stress incontinence
urge incontinence
reflex incontinence
overflow incontinence
functional incontinence
nocturnal enuresis
A nurse is caring for clients who have urinary incontinence. Match the type of urinary incontinence with the appropriate description.
Drag the options on the left to the corresponding category on the right (or click the option on the left and then the corresponding category on the right).
Leakage that occurs when the bladder is full due to incomplete emptying
Leakage that occurs from an inability to reach the toilet in time due to physical impairment
Leakage that occurs when pressure on the bladder is increased by physical activity
Urine leakage that occurs before reaching the toilet due to a sudden need to urinate
Leakage that occurs due to nerve damage, often without a usual sensation to void
Interventions can include lifestyle modifications, including improving diet and exercising to prevent constipation; reducing caffeine or alcohol intake; avoiding medications that cause urinary incontinence, if possible; and quitting smoking. Other interventions include pelvic floor muscle exercises, bladder training, medications, medical devices (pessaries, urethral plugs), and surgery, based on the type of incontinence and response to conservative care.
Even with all the prevention and treatment options, clients may still experience some urine leakage. This can be very irritating to the surrounding skin. Products such as pads, incontinence briefs, and waterproof undergarments can help absorb any leaking urine and keep it away from the skin, reducing irritation and odor. In addition, some cleansing products and skin-protective barrier creams are made especially for urinary incontinence and can further protect the skin.
Urinary Retention
Urinary retention is a condition in which the bladder does not completely empty with urination. Health problems such as prostate enlargement or pelvic organ prolapse/cystocele can prevent urine from leaving the bladder fully. This condition can be acute or sudden, or it can develop over time and be a chronic problem. Males are more likely to develop urinary retention due to an enlarged prostate (benign prostatic hyperplasia [BPH]), whereas females are less likely to develop urinary retention. If not addressed, urinary retention can lead to urinary tract infections, bladder damage, hydronephrosis and kidney dysfunction, and overflow urinary incontinence.
urinary retention
Findings associated with urinary retention include difficulty urinating, pain/suprapubic discomfort, abdominal distention, urinary frequency, urinary hesitancy, weak or slow urine stream, and urinary leakage (overflow). Interventions to resolve urinary retention aim to empty the bladder and then treat the underlying cause. Initial management is urinary catheter drainage (indwelling urinary catheter, clean intermittent self-catheterization, or suprapubic tube as indicated). Subsequent evaluation/treatment is directed by the cause (obstructive, neurological, pharmacological).
urinary hesitancy
In males, if urinary retention is due to an enlarged prostate, interventions focus on determining the cause of prostate enlargement and treating it accordingly with medications or procedures/surgery. Other procedures, such as cystoscopy, are performed to look inside the urethra and bladder for causes such as stones, strictures, or lesions that may need to be removed. For females with bladder prolapse, a vaginal pessary can support the prolapse and improve bladder emptying. Surgery or pelvic floor physical therapy are other interventions that may be utilized.
Postoperative urinary retention is the inability to void after surgery despite a full bladder. It occurs more often with spinal or epidural anesthesia, longer procedures, or larger intraoperative IV fluid volumes and with medications that impair bladder emptying (systemic opioids). Initial management is the same as other acute retention: confirm bladder fullness (bladder scan) and decompress with catheterization, followed by addressing reversible contributors, such as early ambulation and reducing opioid use.
A nurse is caring for a group of clients and is reviewing factors that may contribute to urinary incontinence or retention. Sort each factor into the correct category based on the condition it most commonly causes.
Drag the options on the left to the corresponding category on the right (or click the option on the left and then the corresponding category on the right).
Urinary incontinence
Urinary retention
Altered Bowel Elimination
Constipation
Constipation occurs when a client has infrequent bowel movements, often defined as three or fewer bowel movements per week. Additionally, these stools are hard, lumpy, and difficult to pass. Constipation can affect all age groups but is more common in older adults. The risk of constipation increases with low fiber intake, inadequate fluid intake, sedentary lifestyle, and certain medications (opioids, iron). Constipation is more common in clients who have neurological disorders.
constipation
Manifestations that require medical attention include abdominal pain, rectal bleeding, vomiting, low back pain, unexplained weight loss, inability to pass flatus, and abdominal mass. If constipation is chronic, fecal impaction can occur and lead to complications (bowel obstruction, perforation). Hardened stool clumps together, preventing evacuation of the bowel and potentially leading to intestinal obstruction or rectal injury. This extreme form of constipation happens more often in clients who are immobile or have a nervous system injury.
Interventions to treat constipation include eating a high-fiber diet, staying well hydrated, engaging in regular exercise, scheduled toileting/bowel training, and, when needed, using stool-softening medications to draw water into the bowel to help stool move or stimulant medications to help the bowels contract. If the constipation has advanced to an impaction, treatment options include manual removal (disimpaction) when stool is palpable in rectum, rectal enemas/suppositories for impaction in the lower bowel, and oral bowel-cleansing solutions for stool higher in the colon once mechanical obstruction has been excluded. Findings that may indicate the need for urgent medical intervention include severe abdominal pain and cramping with the inability to pass stool or flatus, progressive distention, and the presence of the manifestations noted earlier.
Knowledge Check
The nurse is caring for a client.
Nurses' Notes
Food Diary
6 months ago
Client reports occasional constipation and hemorrhoids. Identifies stool as type 3 on the stool chart.
Today
Client reports having fewer than three bowel movements this week. Stools are described as hard and lumpy. Identifies stool as type 1 on the stool chart. Client reports discomfort and difficulty during defecation.
Complete the following sentence by using the list of options.
The
nurse
should
first
discuss
Select...
,
followed
by
Select...
.
Diarrhea
Diarrhea is a condition in which the client experiences frequent loose, watery stools, typically three or more in 24 hr. It can be acute (14 days or fewer); persistent, lasting longer than 2 weeks but less than 4 weeks; or chronic, lasting longer than 4 weeks. Risk factors and frequent causes for diarrhea include infection, medication use (antibiotics), GI disorders (irritable bowel syndrome), and diet/exposures (high-risk foods, untreated water, travel, milk/milk products that contain lactose).
diarrhea
Findings with diarrhea include frequent, loose/watery stools with an urgent need to defecate, plus abdominal cramping, bloating, and nausea. With persistent or chronic diarrhea, dehydration, electrolyte disturbances, and malabsorption/malnutrition can occur and can be life-threatening if severe. In adults, manifestations that require medical follow-up include fever (39° C [102.2° F] or higher), vomiting that prevents oral hydration, diarrhea lasting longer than 2 days or six or more bowel movements a day, severe abdominal pain, presence of blood or black feces, immunocompromise, or findings of dehydration. Clients who are older adults, are children, or have an impaired immune system should receive medical care immediately if these findings are present.
Clinical findings of dehydration that might be present and should cause concern include dry mucous membranes/decreased tears, decreased urine output (oliguria/anuria), urine that is very concentrated or dark in color, sunken or recessed eyes, prolonged capillary refill time, tachycardia, and, in infants, a depressed or sunken fontanelle. Decreased skin turgor—meaning the skin does not return to its original state after being pinched upward—is a classic finding of dehydration.
Interventions aim to remove aggravating factors and ensure rehydration (oral rehydration solutions for most; IV fluids if severe or unable to maintain oral intake). If the client is experiencing uncomplicated, acute watery diarrhea, short-term use of over-the-counter antidiarrheal medications (loperamide or bismuth subsalicylate) may be used to reduce the stool frequency, but should be avoided if there is blood in the stool or high fever. Probiotics can help shorten the duration and severity of acute diarrhea in some cases. Antibiotics are not routinely indicated for acute diarrhea of short duration and are reserved for specific identified infections or more severe illness.
Bowel Incontinence
Bowel incontinence, sometimes referred to as fecal incontinence or accidental bowel leakage, is more common in older adults and in clients who are hospitalized or in nursing homes. In children, bowel incontinence is referred to as encopresis. Of the various types of bowel incontinence, urge incontinence is defined as the desire to defecate but an inability to reach the toilet in time. This type of incontinence may result from nerve damage, weak pelvic floor/anal sphincter muscles, or decreased physical mobility. In passive incontinence, leakage of feces occurs without the person being aware. Bowel incontinence can lead to perianal skin irritation and is associated with reduced self-esteem and well-being.
Alterations in Elimination Risk Factors
Many clients experience urinary and bowel elimination without difficulty. However, several factors can increase the risk of altered urinary and bowel elimination patterns. Age, sex, medications, and psychological stress due to lack of privacy are all factors that can influence urinary and bowel elimination. From anatomical to psychological issues, the most common risk factors are addressed next.
Urinary Anatomy
By 1 year of age, urinary tract infections (UTIs) are more likely to develop in females than in males due to improper wiping techniques. Prior to age 1, males who have not been circumcised are more likely to develop UTIs compared to males who have been circumcised. Males older than 40 years with a family history of BPH are more likely to develop impaired urinary patterns. These can range from increased urination to urinary urgency (a strong desire to urinate) to changes in the flow of the urinary stream and urinary retention.
urinary urgency
Privacy
Privacy and comfort, or the lack of either, during elimination can also affect urinary and bowel patterns. When hospitalized, clients may need to use hospital devices such as bedside commodes, bedpans, or handheld urinals due to the inability to easily move to the bathroom. Clients may have medical devices such as intravenous lines and pumps that make transferring to a bathroom more difficult and time-consuming than what they are used to. Hospitals may not allow clients enough time to completely finish urinating or defecating due to routine nursing interventions; scheduled tests, such as computed tomography (CT) or magnetic resonance imaging (MRI); or visits from family or friends. Compared with home environments, hospital environments may offer less privacy and more interruptions, which can affect comfort with elimination and the client’s sense of dignity.
Medications
Certain medications can contribute to alterations in elimination patterns. Reviewing a client’s current medication list and understanding which medications affect urinary or bowel elimination are essential roles of the nurse.
Medications That Affect Urine Production
The group of medications called diuretics increases urination by increasing urine production in the kidneys. These medications rid the body of excess fluid and salt, primarily to reduce blood pressure, but also to treat conditions such as heart failure and edema. Three categories of diuretics are widely used: thiazide diuretics, loop diuretics, and potassium-sparing diuretics.
Types of Diuretics
Thiazide diuretics |
|
Loop diuretics |
|
Potassium-sparing diuretics |
|
Medications That Affect Stool Production
Hormones and nerves work together to control the digestive process. Hormones are released from cells within the stomach and small intestine to regulate production of digestive secretions, to control sensations of fullness (satiety), or to signal hunger. Nerves send signals to the brain to begin the process of salivation in preparation for eating. Nerves within the GI tract also detect the degree of stretch, allowing for the regulation of the speed of digestion.
External factors, such as medications, can affect motility, or movement through the GI tract. In particular, some medications and other dietary supplements can slow gastric motility and cause constipation, including the following agents.
Aluminum-containing antacids
Anticholinergics and antispasmodics—medications used to treat muscle spasms
Antiseizure medications
Calcium channel blockers—medications used to primarily treat elevated blood pressure
Diuretics—which increase urine production
Oral iron supplements—used to treat certain forms of anemia
Antiparkinsonian medications
Opiates—used to treat pain
Some antidepressants
Medications, especially systemic antibiotics and magnesium-containing antacids/laxatives can increase gastric motility and cause diarrhea. Antibiotics may disrupt the normal intestinal microbiota and allow overgrowth of pathogens, leading to chronic diarrhea. In clients with recent antibiotic use, testing for Clostridioides difficile toxin is recommended when watery diarrhea occurs three or more times per day. Magnesium hydroxide products act osmotically to increase stool water and frequency and can cause loose stools/diarrhea when used as antacids or laxatives.
Medications That Can Affect Elimination Patterns
Urinary Elimination | Bowel Elimination |
|
|
A nurse is reviewing medications for several clients and needs to determine how each may alter bowel elimination. Sort each medication based on whether it causes constipation or diarrhea.
Drag the options on the left to the corresponding category on the right (or click the option on the left and then the corresponding category on the right).
Constipation
Diarrhea
Physiological Conditions That Alter Urinary Elimination Patterns
Several physiological conditions can alter urinary elimination. The nurse’s understanding of these conditions, their risk factors, manifestations, and the appropriate interventions can enable the nurse to assist the client in becoming more comfortable. This section reviews the most common conditions affecting clients.
Dehydration
Dehydration occurs when fluid loss exceeds fluid intake (negative fluid balance). It is most commonly associated with excessive vomiting, diarrhea, sweating, increased urination, and inadequate fluid intake. Fever can contribute to dehydration due to sweating. Children are more prone to vomiting and diarrhea, and so are at risk for dehydration. Older adults are more vulnerable due to reduced thirst and decreased fluid intake. Clients with certain chronic conditions, such as diabetes mellitus, kidney disease, or cystic fibrosis, are at an increased risk.
Manifestations of dehydration include increased thirst; dry mouth, mucous membranes, or tongue; fatigue; fever; dizziness; dark-colored urine; and reduced or absent urine or sweat. Infants may have dry diapers for more than 3 hr or cry without tears. If severe, dehydration can be life-threatening and require immediate medical attention for rehydration with intravenous (IV) fluids; mild cases are generally treated with oral fluid replacement. Children should receive an oral rehydration solution (ORS), a balanced mixture of glucose and electrolytes designed to enhance absorption. Adults may begin with water or clear liquids and may use ORS or, when appropriate, sports drinks to replace electrolyte losses.
Urinary Tract Infections
UTIs are most often lower urinary tract (bladder) infections caused by bacteria entering the urinary tract. UTIs are more common in females, and if left untreated may result in a kidney infection called pyelonephritis. UTIs can occur at any age, but females are at higher risk because they have a shorter urethra than males. Other risk factors include sexual activity, menopause, urinary retention/incomplete emptying, urinary obstruction (including stones), frequent urinary catheter use, diabetes mellitus, and urinary tract abnormalities. Children and older adults are recognized as higher-risk groups. Children often have anatomic or toileting-related factors that increase bacterial entry or urinary stasis. Older adults commonly experience age-related bladder changes and incomplete emptying that promote infection. Common causes across ages include urinary catheters, constipation, neurological conditions, pelvic floor dysfunction, and diabetes mellitus.
Manifestations of UTIs include burning or painful urination (dysuria), suprapubic discomfort, and urgency/frequency with small volumes. A urinalysis and urine culture are obtained to confirm the diagnosis and identify the causative bacteria to guide therapy. Medical interventions should be based on the type of bacteria causing the disorder. If the UTI is left untreated, clients may present with severe lower back/flank pain, fever, nausea, vomiting, or blood in the urine (hematuria). This is usually indicative of a kidney infection (pyelonephritis), which can lead to serious complications. Along with antibiotics, adequate fluid intake is recommended to manage manifestations and support urinary clearance.
Physiological Conditions that Alter Urinary Elimination Patterns
Video Transcript
Kidney Stones
Kidney stones (renal calculi, nephrolithiasis, or urolithiasis) are hard mineral formations that collect in the kidneys. They vary in size, shape, and severity. Small stones can pass through the urinary tract unnoticed by the client, but larger stones are of concern due to the risk that they may become stuck in the urinary tract, causing severe pain and bleeding (hematuria) and urinary obstruction. Kidney stones are more likely to develop in males than in females, as well as in clients who have had kidney stones in the past or who have a family history of kidney stones. Conditions that increase the risk of developing kidney stones include inadequate hydration/low urine volume, inflammatory conditions, cystic kidney disease, gout, hypercalciuria (excessive calcium in the urine), hyperparathyroidism (a condition that causes too much calcium in the blood), obesity, and recurrent UTIs. Certain medications increase risk (diuretics), and excessive calcium intake (including calcium-containing antacids) can promote hypercalciuria.
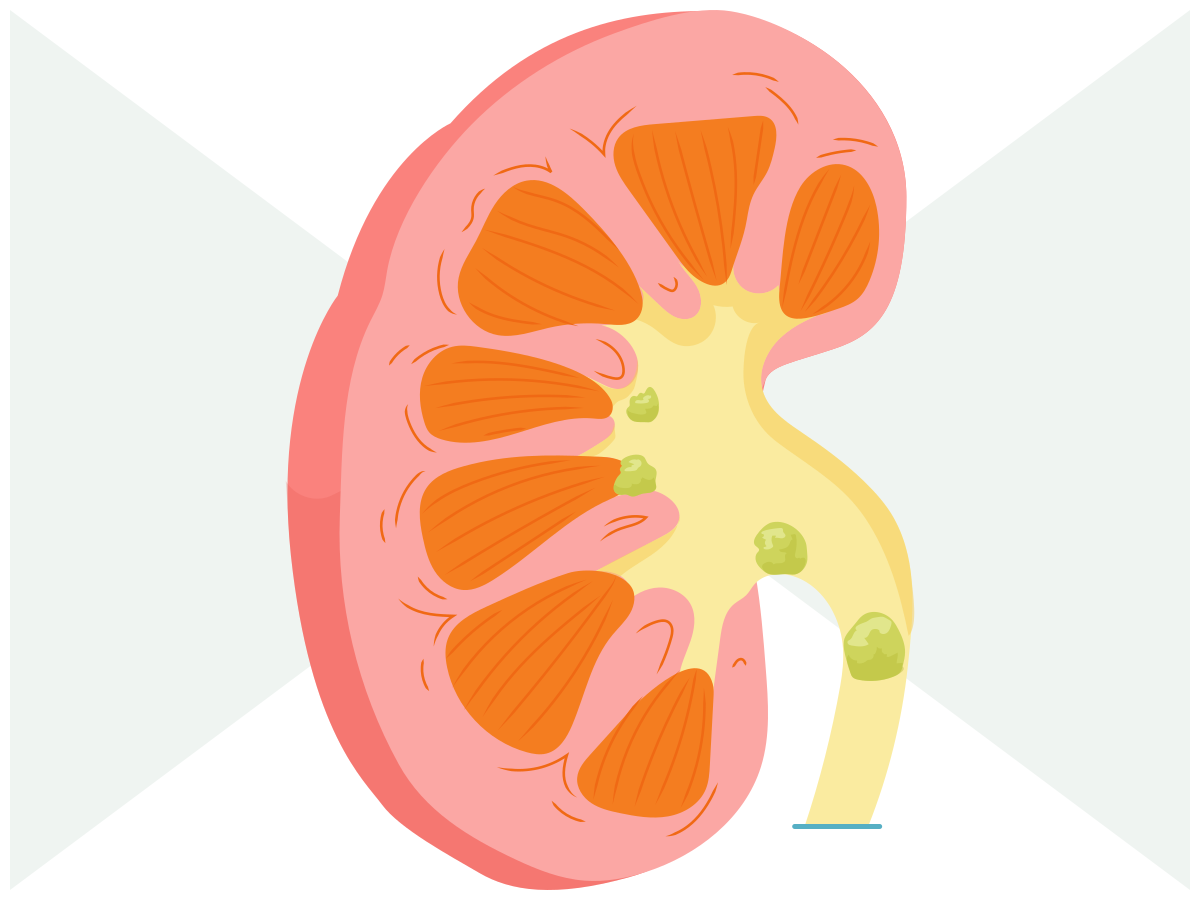
kidney stonesThese hard mineral formations collect in the kidneys and cause severe pain and bleeding and urinary obstruction.
Manifestations of kidney stones include sharp back/flank pain, which can travel along the side of the abdomen to the lower abdomen or to the groin; hematuria; urinary frequency/urgency; and dysuria. Nausea, vomiting, and fever or chills suggest infection or obstructive pyelonephritis. Interventions are based on the size, location, and type of stone present. Usually, if the stone is small enough to pass, the client will be instructed to filter the urine so that the type of stone can be identified. This is usually done in conjunction with increased fluid intake and pain medication. If the stone is too large to pass or has formed an obstruction, surgical interventions, such as extracorporeal shock wave lithotripsy (ESWL), may be used to break up the stone, or it may need to be physically removed from the urinary tract.
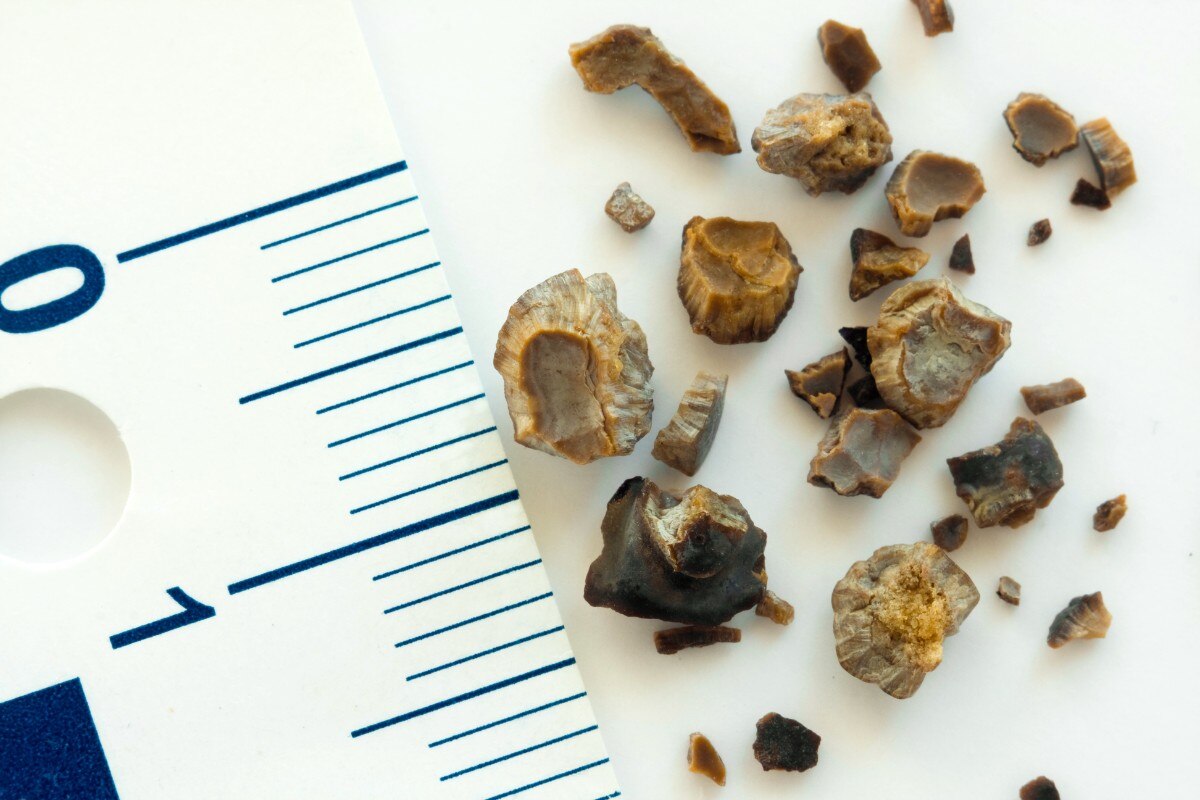
© Evan Lorne/Shutterstock
kidney stonesKidney stones vary in size and shape. Small stones can pass through the urinary tract unnoticed, but large stones may become stuck in the urinary tract.
Kidney Failure
Kidney failure means the kidneys cannot filter the blood well enough to keep the body in balance. Recall that the kidneys remove wastes and extra water, maintain fluids and electrolytes (sodium and potassium) in a safe range, control acid-base balance, regulate blood pressure, aid in red blood cell production, and play an important role in bone health. Thus, kidney failure has a severe impact on the body’s ability to function. A simple way to measure the kidneys’ ability to filter waste is the estimated glomerular filtration rate (eGFR). eGFR can be calculated from routine blood tests (creatinine) and estimates how much blood the kidneys filter each minute, adjusted for body size. Chronic kidney disease (CKD) typically progresses over time through defined stages. When eGFR falls below 15 mL/min/1.73 m² or treatment with dialysis is required, CKD has progressed to kidney failure. As kidney function declines, wastes and extra fluid accumulate, contributing to reduced urine production (oliguria), difficult-to-control hypertension, heart disease, anemia, itching (pruritus), and musculoskeletal discomfort.
Major risk factors for CKD and eventual kidney failure include diabetes mellitus, hypertension, heart disease/heart failure, family history of CKD, and lifestyle/metabolic factors such as obesity, smoking, dyslipidemia, and insulin resistance. Depending on the severity of kidney failure, interventions to assist the kidneys can include hemodialysis or peritoneal dialysis. If the kidneys are too impaired to function at all, a kidney transplant will be needed.
Kidney failure can also affect sleep quality and is associated with sexual dysfunction. Despite often having multiple comorbidities, clients who have kidney failure can utilize lifestyle interventions to improve their lives during treatment. Clients must take medications as prescribed, be consistent with treatments, eat a nutritious diet, and maintain physical activity to improve well-being.
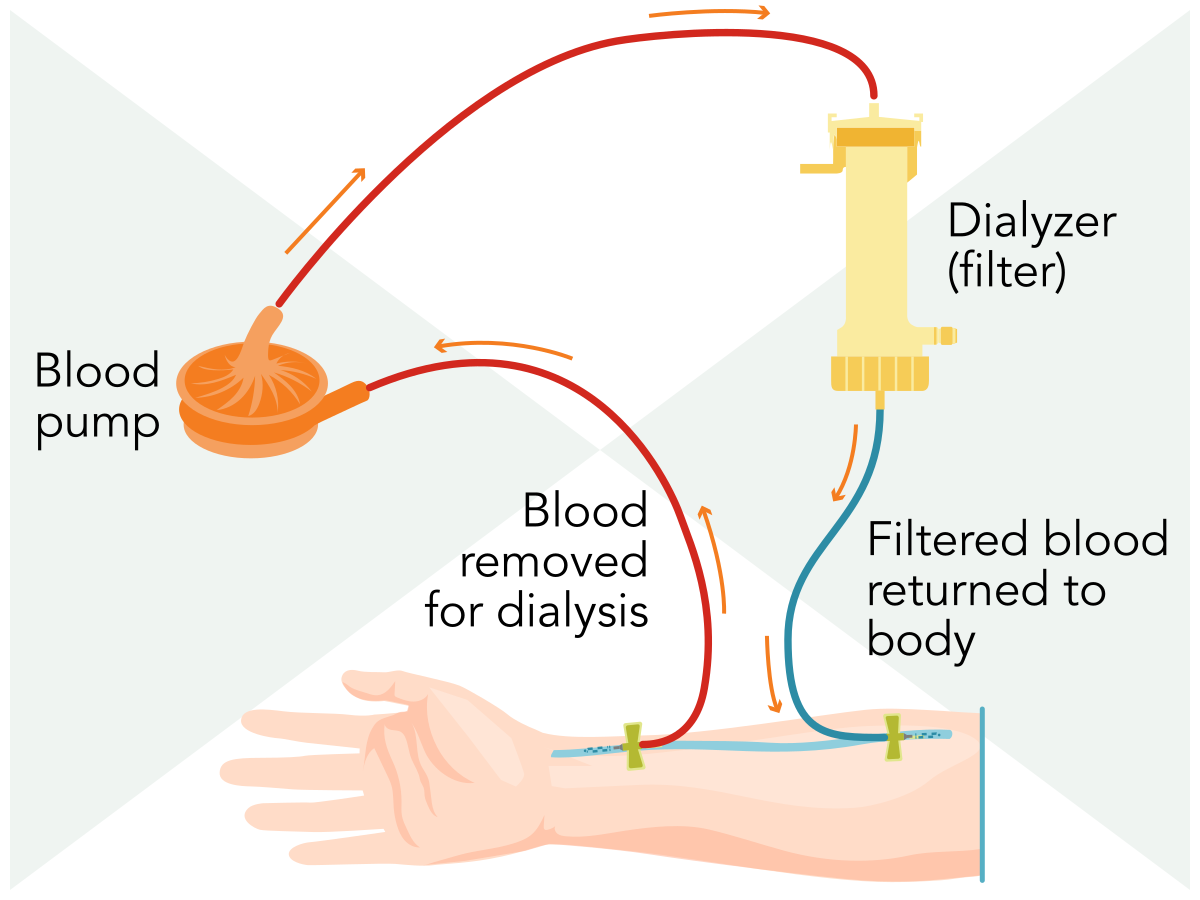
hemodialysisHemodialysis is a possible intervention for kidney failure.
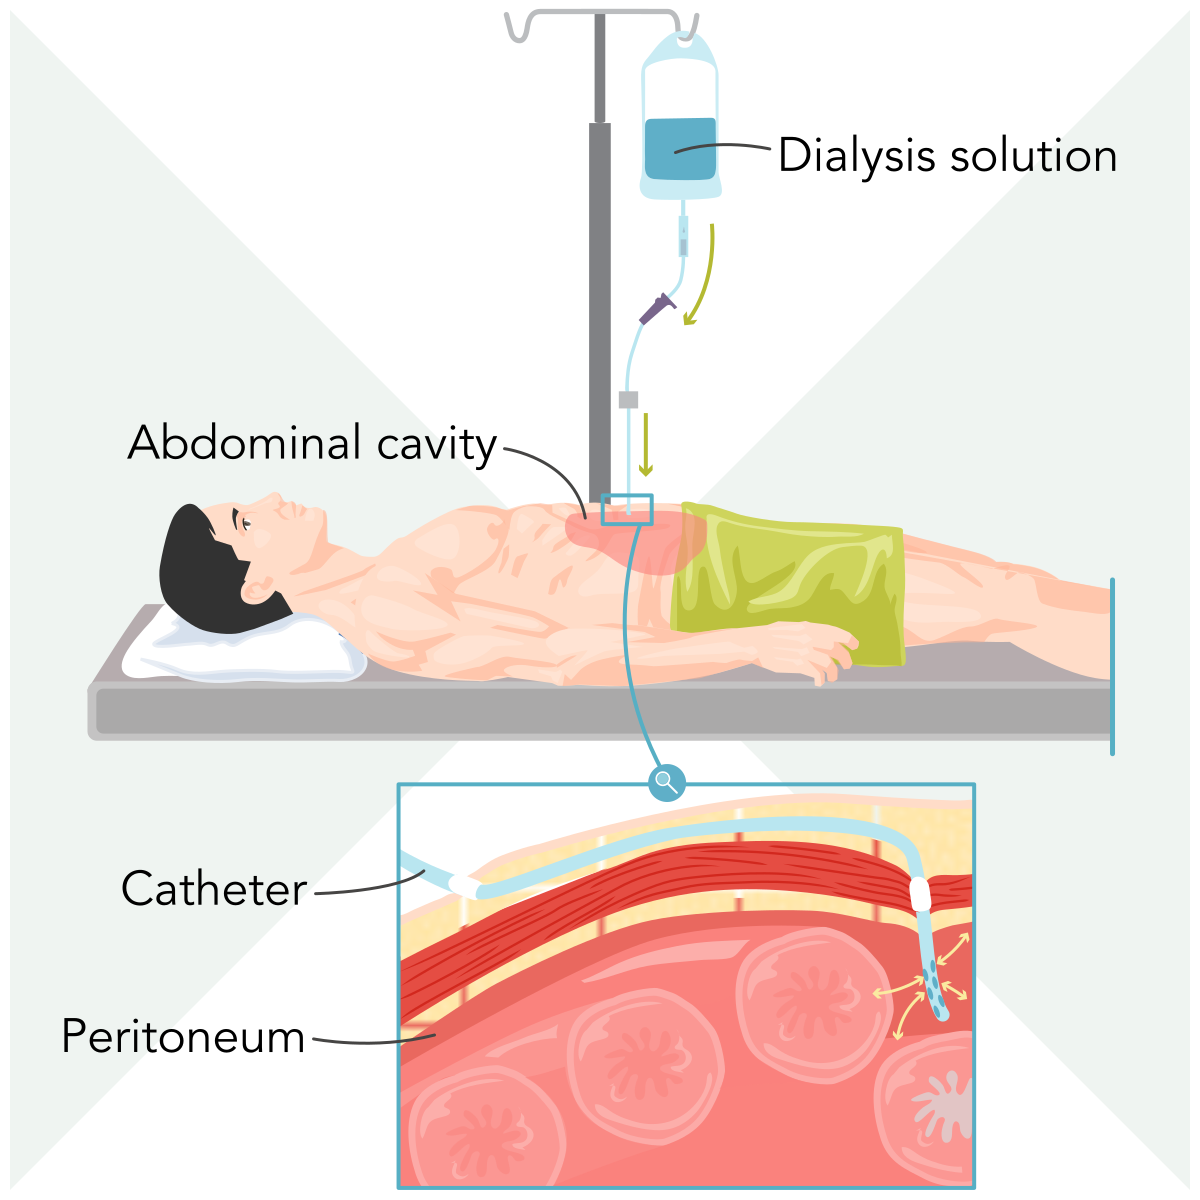
Peritoneal dialysisPeritoneal dialysis is another possible intervention for kidney failure.
Prostate Enlargement
Prostate enlargement is a condition that affects males as they age. BPH is a noncancerous condition that narrows the urethra, increasing urinary retention. A primary risk factor for developing BPH is age, and age-related hormonal changes are thought to contribute to BPH. As men age, the prostate keeps growing because a hormone in the prostate called dihydrotestosterone (DHT) (made from testosterone inside the prostate) encourages prostate cells to multiply. BPH is extremely common in older adults, and most men will develop some degree of prostate enlargement as they age.
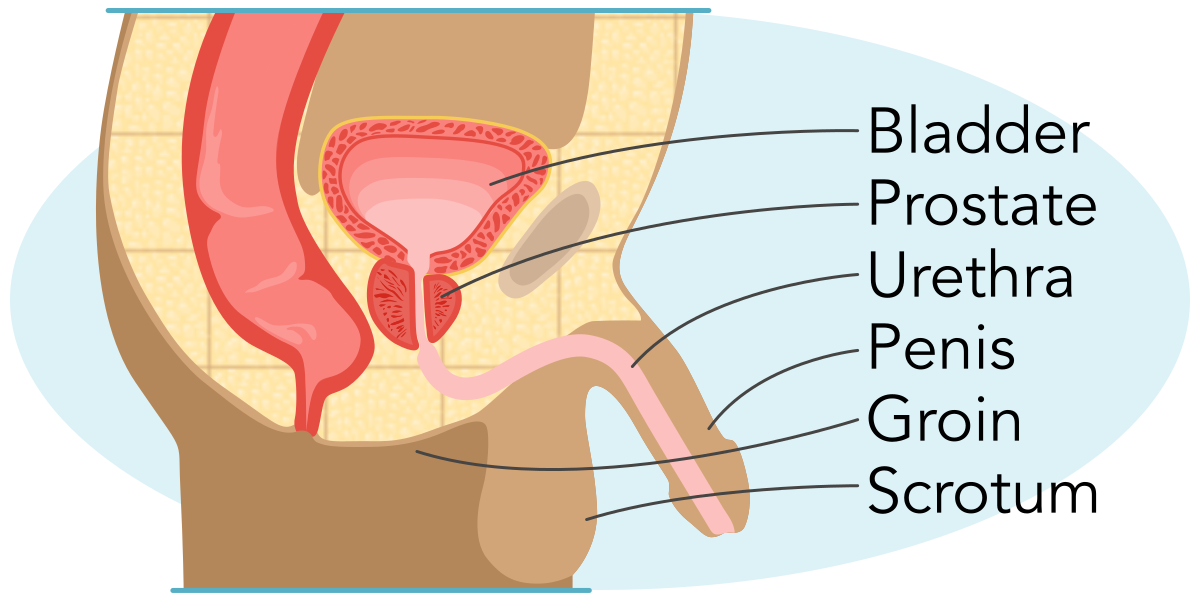
enlarged prostateProstate enlargement is a condition that affects males as they age.
Manifestations of BPH include urinary frequency, urinary urgency, frequent nighttime urination (nocturia), a weak or slow urinary stream, urinary incontinence, or urinary retention. If left untreated, it can lead to complications such as UTIs, bladder or kidney disease, or bladder stones. Treatment depends on the severity of findings and may include close monitoring over time, medications, and surgical interventions.
Conditions That Alter Bowel Elimination Patterns
Several conditions alter bowel elimination patterns. The nurse’s understanding of these conditions, their risk factors, manifestations, and the appropriate interventions can be applied to assist the client in becoming more comfortable. This section explores the most common conditions affecting clients.
Diverticulitis
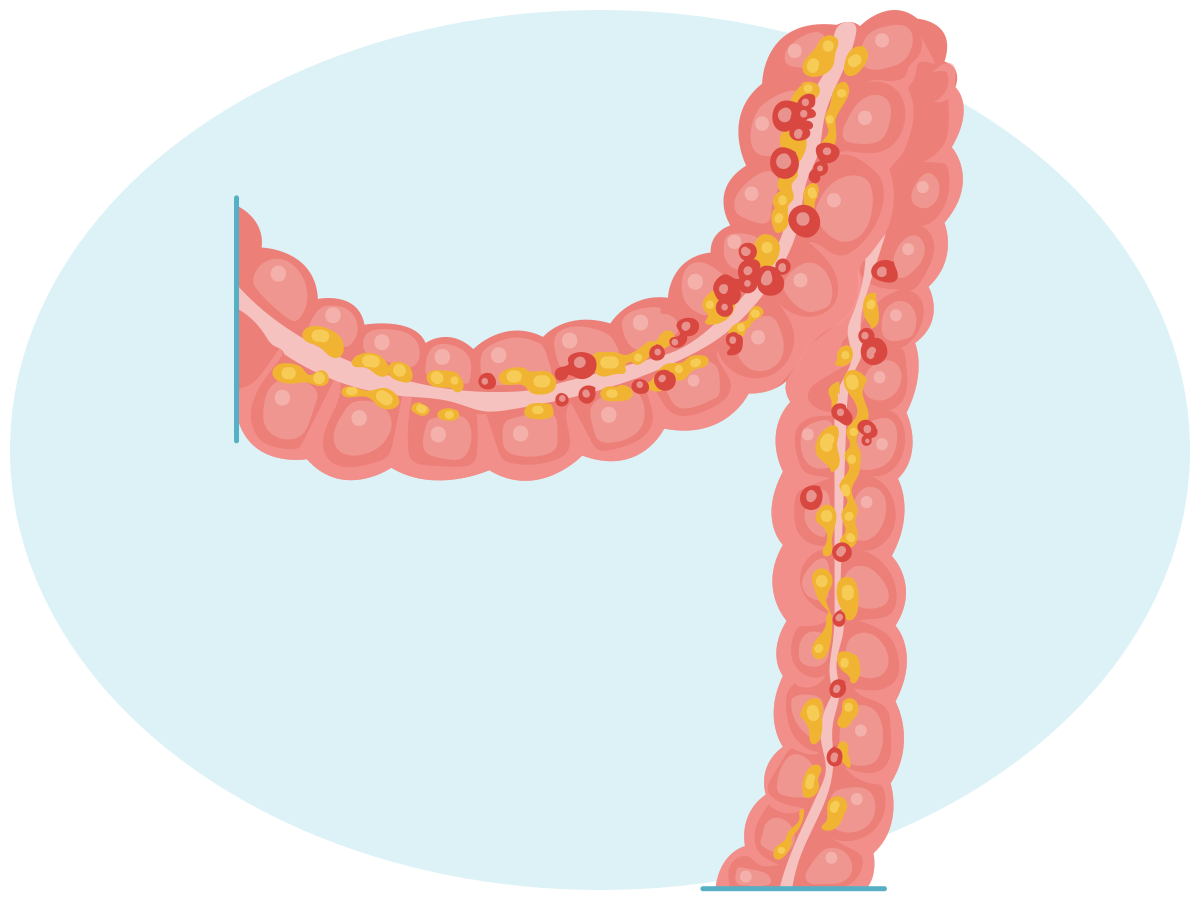
Diverticulosis is a condition in which small sacs or pouches, called diverticula, form in the colon. Diverticulosis is a common condition, and the risk increases with age. Diverticulitis develops when one or more of these pouches become inflamed. Current evidence shows that this inflammation does not result from a single cause. Instead, it results from several interrelated factors. Changes in the balance of usual gut bacteria can irritate the bowel, and some clients may have ongoing low-grade inflammation in the colon that puts them at higher risk for an episode. A person’s genetics can also predispose them to diverticular disease, and lifestyle factors, such as obesity, smoking, and certain dietary patterns (low-fiber diet and high red meat consumption), can further contribute to the development of inflammation.
diverticulosis
diverticulitis
When inflammation occurs, clients may experience fever; changes in bowel habits, such as constipation or diarrhea; and left lower-quadrant abdominal pain. If severe, the colon can perforate or tear, causing an intra-abdominal infection in the abdomen called peritonitis. Preventive measures after an episode, such as consuming a high-fiber diet, can reduce the risk of recurrent diverticulitis. Former recommendations included avoiding foods with nuts or seeds, but research has recently shown that these foods are not harmful for clients who have diverticulitis or diverticulosis. Treatment depends on the severity of the illness. Most clients who have mild diverticulitis can be treated at home. Providers usually recommend resting, drinking clear liquids at first, and then slowly returning to regular foods as manifestations improve. Many clients do not require antibiotics if they are otherwise healthy and their symptoms are mild, because research shows that mild cases can resolve on their own. However, some people do need antibiotics. Antibiotics are used when the client is sicker, not getting better, has more severe manifestations, or has health problems that make it harder for their body to fight infection, such as having a weakened immune system (immunocompromised). For serious cases, such as when there is an abscess, a perforation (a tear in the colon), or findings of a more dangerous infection, clients need hospital care, IV fluids, stronger antibiotics, and sometimes surgery.
© Jones & Bartlett Learning
A diverticulum bulges outward through weak spots in the colon. Diverticula can become inflamed or infected, a condition called diverticulitis.
DiverticulitisDiverticulitis develops when one or more of the small sacs or pouches in the colon, called diverticula, become inflamed.
Irritable Bowel Syndrome
Irritable bowel syndrome (IBS) is a term used to describe recurrent abdominal pain and changes to bowel elimination patterns that can include diarrhea, constipation, or a mixture of both. IBS with constipation (IBS-C) occurs when most of the daily bowel movements are hard or lumpy. IBS with diarrhea (IBS-D) occurs when most of the daily bowel movements are loose and watery. IBS with mixed bowel habits (IBS-M) is a combination of both diarrhea and constipation elimination throughout the day. IBS occurs when the gut and brain do not communicate as expected, which makes the intestines oversensitive (pain with normal stretching) and can cause irregular movement (too fast or too slow). Changes in gut bacteria, mild immune activation, and a leaky intestinal lining, along with stress and certain foods, can trigger or worsen manifestations. Thus, IBS is a gut–brain interaction disorder rather than damage to bowel tissue. Risk factors for IBS include a family history, female gender, stressful events, postinfectious onset after a GI infection, coexisting digestive disorders, and conditions such as anxiety, depression, and fibromyalgia.
irritable bowel syndrome (IBS)
Findings depend on the kind of IBS, but may include abdominal pain, bloating, mucus in the stool, and a sense of incomplete bowel emptying. Treatment starts with diet and lifestyle. Clients should be encouraged to increase their intake of soluble fiber (such as psyllium) and, when manifestations persist, to make simple dietary changes to limit foods that trigger manifestations. Nurses should also promote healthy habits, such as reducing stress, getting enough sleep, and staying active. Some clients may benefit from therapies that help manage the connection between stress and the gut (relaxation or cognitive behavior strategies) and from medications chosen based on whether the main problem is constipation, diarrhea, or both. Routine probiotics or long-term gluten-free diets are not consistently helpful. A short, structured trial of reducing certain fermentable carbohydrates (lowFODMAP) and then adding foods back stepwise has stronger support when guided by manifestation response.
Bowel Obstruction
Bowel obstruction is a partial or complete blockage of the small or large bowel. Manifestations include nausea, vomiting, abdominal pain and distention, and severe constipation. Prompt diagnosis is a critical factor in reducing morbidity and mortality. Computed tomography (CT) is the preferred imaging to identify the site/cause and guide treatment decisions. Hospital admission and early surgical assessment are recommended to determine the obstruction’s type, severity, and cause. Initial supportive care includes IV fluids, electrolyte correction, and placing a nasogastric (NG) tube when the client has persistent vomiting, profound distention, or has a high risk of aspiration.
bowel obstruction
A mechanical blockage—most commonly postsurgical adhesions, and less commonly hernias that trap a loop of bowel, tumors narrowing the lumen, inflammatory strictures (Crohn disease), twisting, other causes, such as volvulus or gallstone ileus—creates a transition point where bowel proximal (above) to the blockage distends with fluid and gas while the distal (below) bowel decompresses. The rising intraluminal pressure first impairs venous return (bowel wall edema). The swelling squeezes arterial blood vessels, preventing the bowel wall from getting enough blood or oxygen. This leads to mucosal ischemia and, if uncorrected, necrosis and perforation. Distention and mucosal injury also cause large third-space fluid/electrolyte losses (worsening dehydration) and allow bacteria from the bowel lumen to cross an injured mucosal barrier and enter the peritoneal cavity or bloodstream, which can progress to peritonitis and sepsis. Hence, the need for rapid imaging, resuscitation, and early surgical decision making.
Ileus
Ileus, also known as paralytic/functional ileus, is a condition where the nonmechanical flow of intestinal contents decreases or stops in the absence of a physical blockage. Ileus can be caused by several factors, including recent abdominal or retroperitoneal surgery, trauma, severe illness or infection (sepsis/peritonitis), medications (especially opioids), electrolyte disturbances (hypokalemia), and postoperative complications (pneumonia/abscess). Manifestations include an inability to tolerate food, nausea and vomiting, slow-onset abdominal distension and bloating, and inability to pass flatus. Bowel sounds are diminished or absent. Imaging helps distinguish ileus from a mechanical bowel obstruction. With an ileus, x-rays or CT scans usually show generalized intestinal swelling, with air seen throughout the bowel, even into the colon and rectum, without a clear area where the bowel is blocked. In a mechanical obstruction, imaging typically shows a more obvious blocked area where the bowel changes from swollen to collapsed, indicating a true blockage.
ileus
Treatment of ileus requires the active involvement of health care professionals, who ensure that the client receives nothing by mouth (NPO); decompress the stomach with an NG tube, when needed; provide IV fluid therapy; correct electrolytes; and address the underlying cause (reduce opioids, treat infection). However, if the client cannot tolerate an oral diet after 7 days, the provider will prescribe total parenteral nutrition (TPN).
Ulcerative Colitis
Ulcerative colitis (UC) is a chronic idiopathic inflammatory disease that causes continuous mucosal inflammation and ulcerations of the colon, typically beginning in the rectum and extending proximally. Onset is gradual, and the condition may worsen over time. However, clients also experience periods of remission that can last weeks or years. Risk factors include family history, Jewish ancestry, environmental influences, and an overactive intestinal immune system.
ulcerative colitis (UC)
Manifestations of UC include diarrhea with blood or pus, abdominal discomfort/pain, fatigue, nausea, fever, and iron-deficiency anemia. Interventions initially focus on medications to induce remission, followed by maintenance medications. If medications alone are unsuccessful at keeping a client in remission or cancerous lesions develop, surgery may be warranted. At times, surgery to remove the entire colon is required.
Crohn’s Disease
Crohn’s disease, like ulcerative colitis, is a chronic inflammatory bowel disease that causes full-thickness inflammation anywhere in the GI tract, but it most commonly affects the end of the small intestine and/or the colon, unlike ulcerative colitis, which is limited to the colon. Crohn’s disease begins gradually and can worsen over time. However, clients can experience periods of remission. Risk factors for developing Crohn’s disease include a family history of Crohn’s disease, autoimmune disorder, and tobacco use, although no definitive cause has been identified. Crohn’s disease can cause intestinal obstruction (from strictures), fistulas (tunnels that pass from the wall of the intestine to another organ), abscesses, ulcers, fissures or tears in the anus, malnutrition, and inflammatory processes elsewhere in the body.
Crohn’s disease
Manifestations of Crohn’s disease include diarrhea, abdominal pain or cramping (often right lower-quadrant when ileum is involved), weight loss, anemia (iron or B12 deficiency), fatigue, fever, joint pain (arthralgias), nausea/vomiting, and painful bumps under the skin. Care aims to stop a flare and then keep remission. Flares are treated with short courses of corticosteroids to quickly reduce inflammation and are not intended for long-term use. For maintenance, providers use steroid-sparing medicines, such as immunomodulators, and, when the disease is moderate–severe or refractory, biologic/targeted therapies. Surgery treats complications (strictures/obstruction, fistulas, abscess, perforation) or medication failure, often followed by a plan to reduce recurrence. Across all care, support includes nutrition (iron/B12 when the ileum is involved).
Urinary Diversions
When the expected flow of urine from the body is interrupted, a urinary diversion may be required. Urinary diversions may be temporary or permanent, depending on the causative factor. A diversion may be required if there is damage to the urinary tract from either an injury, a birth defect, a tumor, or bladder malfunction.
Six types of urinary diversions are discussed in this lesson. The most temporary form is urinary catheterization. Urinary diversions can also be more permanent and require surgical procedures to create them. These include an ileal conduit, nephrostomy, cystostomy, and neobladder. Ureteral stents are another form of urinary diversion used to keep the ureter open to allow for urine passage. These devices are usually temporary but can be permanent.
Urinary Catheterization
A client may have a urinary catheter placed into the bladder to allow urine to drain. This flexible tube can be placed into the bladder through the urethra or through a surgically created opening in the lower abdomen.
Ureteral Stent
Like a urinary catheterization, placement of ureteral stents can be a temporary procedure. In some cases, a stent may be needed for a longer period of time and may be replaced as needed. The primary purpose of the stent is to bypass a ureteral blockage, such as a stone or mass, postoperative scar tissue, or inflammation and swelling from an infection.
Urostomy
An ileal conduit, or urostomy, is a surgically created diversion that uses a short segment of the small intestine. Once a section of the small intestine is removed from the GI tract, it is repositioned with one end attached to the ureters and the other to the abdominal wall, forming a stoma that allows urine to pass into a pouch attached to the abdomen. Urine can drain continuously into an external urostomy pouch. Another type of urostomy is a cutaneous ureterostomy, in which the ureters are attached directly to the stoma. Nurses teach pouching, skin protection, hydration, and monitoring for complications (stoma ischemia/necrosis, peristomal skin issues, UTI).
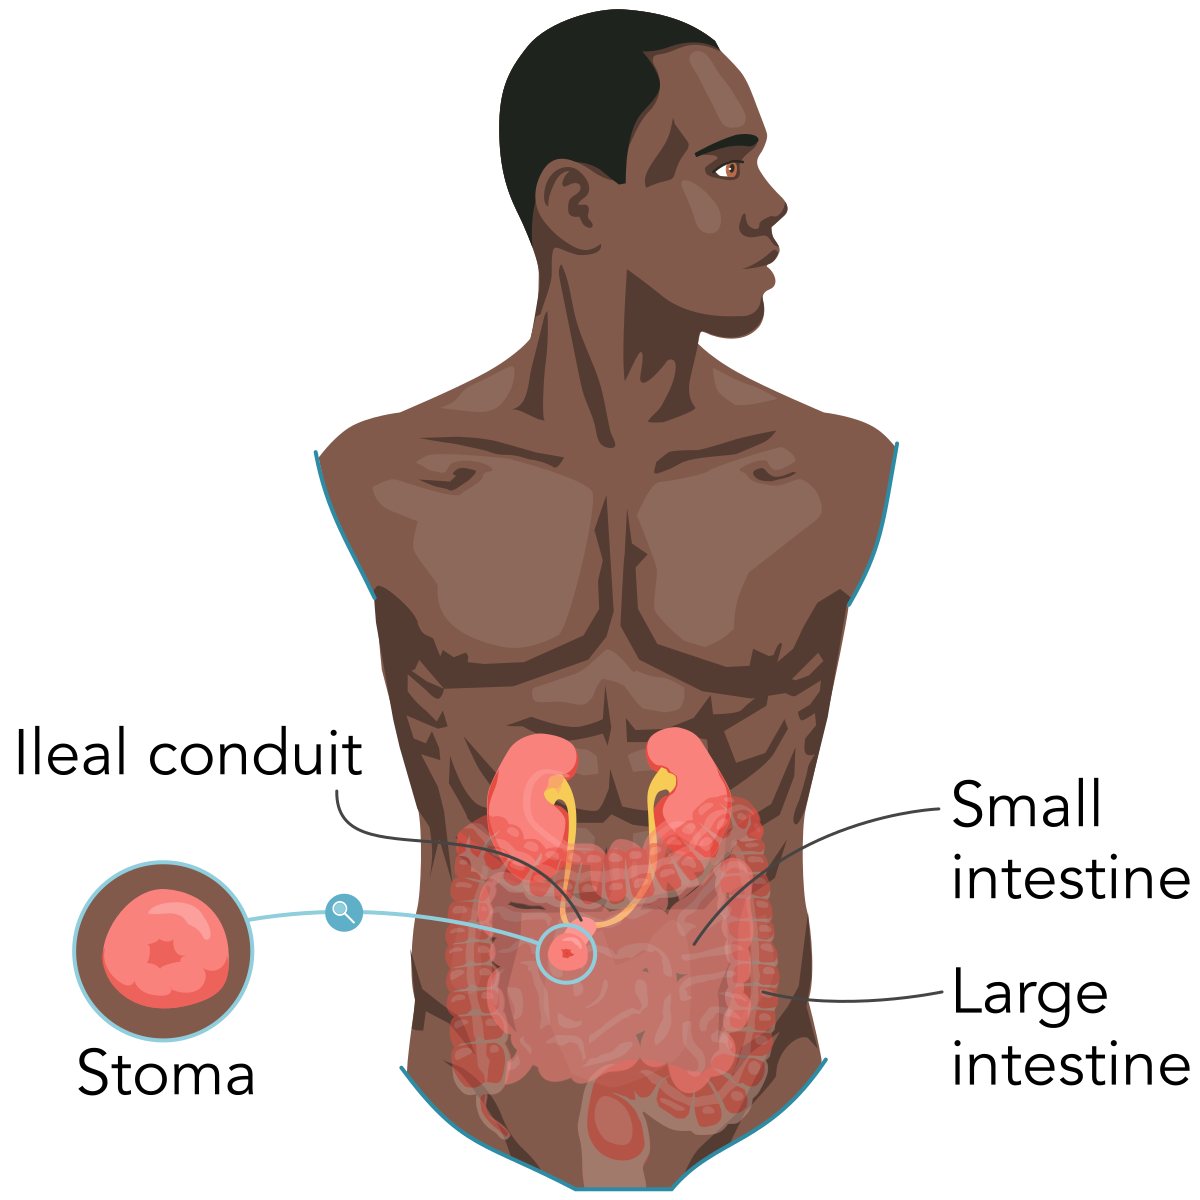
Ileal conduitAn ileal conduit, also called a urostomy, is a surgically created diversion that uses a short segment of the small intestine.
Nephrostomy
A nephrostomy tube drains urine directly from the kidney into an external collection bag/pouch. A tube is surgically inserted through the skin on the back and into the renal pelvis of the kidney. This procedure is usually performed following the removal of kidney stones. This type of diversion is usually temporary and is removed once the kidney has healed. Nursing priorities include aseptic dressing care, keeping the bag below kidney level, and flushing only as ordered (typically no more than 10 mL NS if flush is prescribed) to maintain patency and avoid kidney injury.
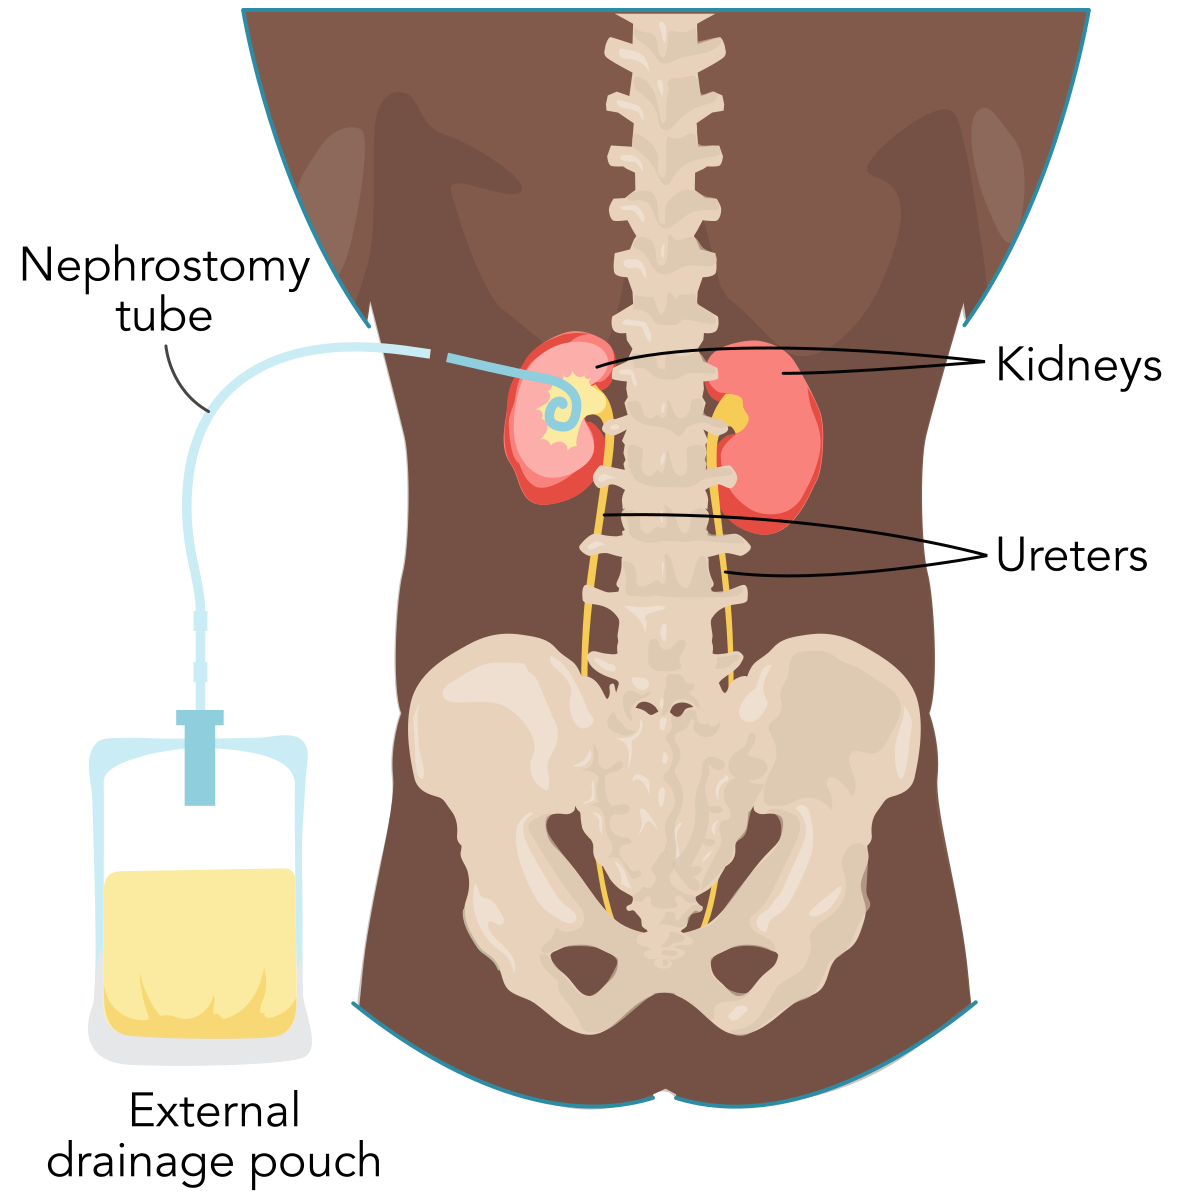
Nephrostomy tubeA nephrostomy tube drains urine directly from the kidney into an external collection bag.
Continent Urinary Diversion
Two forms of continent urinary diversions may be created: a neobladder and a continent cutaneous reservoir. As the prefix neo, meaning “new,” suggests, a neobladder is a new bladder. A neobladder is a reservoir surgically created from a piece of bowel. It is used to store urine before it is expelled from the body. Like the bladder, the neobladder is attached to the ureters and the urethra and placed in the pelvis. Sometimes the neobladder may not fully empty, so the client may need intermittent self-catheterization to empty the reservoir.
A continent cutaneous reservoir is similar to the neobladder but is placed in the abdomen rather than the pelvis. The reservoir is attached to the ureters at one end and the client’s stoma on the other end. A valve is utilized so the urine cannot flow out on its own but instead is drained on a schedule by catheterizing the stoma.
Cystostomy
A cystostomy is similar to urinary catheterization but is more invasive. A catheter is inserted directly through the lower abdominal wall into the bladder and attached to a drainage bag. This approach is used when urethral catheterization is contraindicated or not possible.
Complications of Urinary Diversion
Depending on the type of urinary diversion used, clients need to take the appropriate measures to avoid complications. Potential complications of urinary diversions include UTIs, kidney infection, stomal/peristomal complications (skin breakdown, hernia, necrosis), tube obstruction or dislodgement (for nephrostomy), hematuria, and quality-of-life impacts (body image, sexual function, anxiety). Performing good hand hygiene, correct pouching/skin care, adequate hydration, and aseptic technique for tube and dressing care reduce the risk of complications. Nurses provide teaching and psychosocial support. Many clients are able to resume their usual diet, relationships, and activities with appropriate guidance and follow up.
Fecal or Bowel Diversions
Like urinary diversions, fecal diversions, also known as bowel diversions, may be required when either part or all of the intestinal tract is not functioning properly. Surgery is performed to create a temporary or permanent diversion to redirect intestinal contents to exit through a stoma on the abdominal wall. Clients may require fecal diversion if they have colon or rectal cancer, traumatic injury to the intestine, inflammatory bowel disease such as Crohn’s disease or UC, an obstruction, or diverticular disease.
Incontinent diversions drain continuously into an external appliance/pouch (ileostomy, colostomy), whereas continent diversions store stool in an internal reservoir that the patient empties on demand, either from the anus after a J pouch or via intermittent catheterization of a Kock pouch (continent ileostomy). This section will cover the ileostomy, colostomy, J pouch, and Kock pouch.
Ileostomy
An ileostomy is a temporary or permanent fecal diversion that uses the terminal end of the small intestine, called the ileum, to form a stoma. Permanent ileostomies are created when the entire colon, including the rectum and anus, must be removed or bypassed. The surgeon redirects the ileum through a surgically created opening (stoma or ostomy) in the abdominal wall to allow for continuous drainage of stool (typically liquid). If the ileostomy is temporary, once the colon has healed, the stoma can be reversed by removing the ileum from the abdominal wall and reattaching it to the colon so bowel contents can continue to pass through the colon.
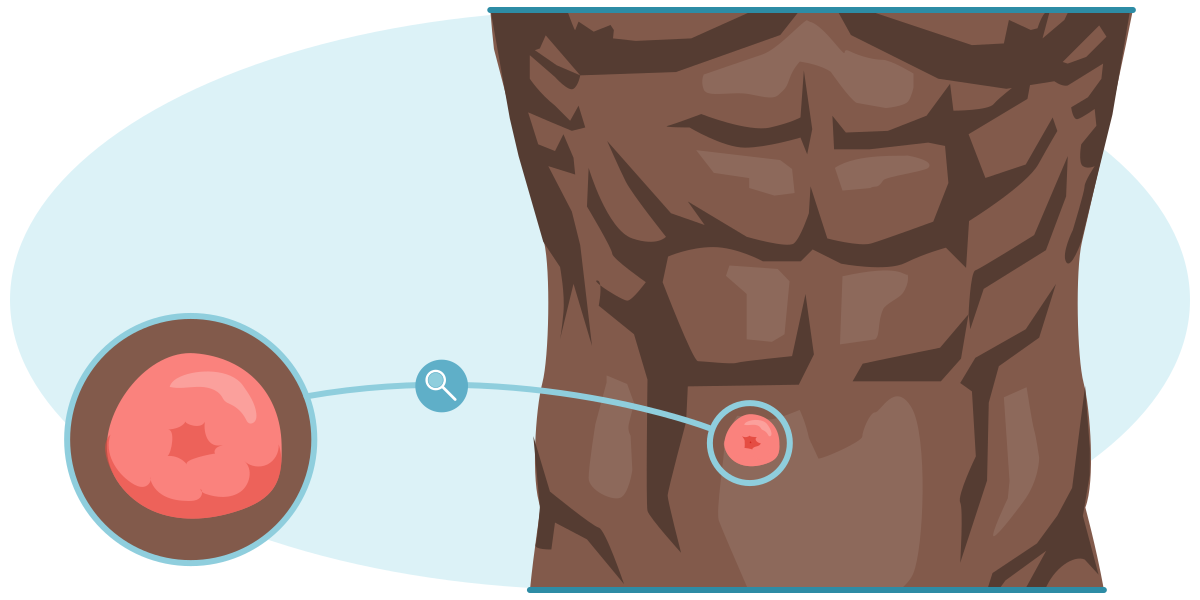
Ileostomy stomaAn ileostomy is a fecal diversion that uses the terminal end of the small intestine to form a stoma.
Colostomy
A colostomy is a fecal diversion in which part of the colon is used to form a stoma through the abdominal wall, allowing for the passage of stool. These diversions can be temporary, to allow the colon to heal and rest, or permanent. Once the colon is healed, the stoma may be reversed by removing the colon from the abdominal wall and reconnecting it to the rest of the colon, so that stool exits through the anus. Output consistency varies by location: ascending, liquid; transverse, loose/soft; descending/sigmoid, firmer.
Common Ostomy Locations Practice Activity
Drag the descriptions below to the correct location for labeling common ostomy locations.
Ileostomy
Sigmoid colostomy
Transverse colostomy
Colostomy irrigation is another method to remove stool from the colon. This technique is especially beneficial for clients with permanent colostomies who had expected bowel function prior to the colostomy procedure. To irrigate the colostomy, warm water is inserted into the colon via the stoma site to evacuate feces/gas on a schedule. This acts as a type of bowel training, helping to prevent passage of stool at other times and reducing the client’s need to wear a colostomy pouch. Colostomy irrigation can also help prevent constipation (Cleveland Clinic, 2021; Longo, 2025; Maria & Lieske, 2023; Schub & Woten, 2024). Refer to Skill: Irrigating a Colostomy.
Explore a 3D visualization of a colostomy.
Read the text in the left panel to gain important information.
Move through the different views by using the arrows.
Click a label to closely inspect an area. Click the label again to zoom out.
Scroll up and down or use touch gestures to zoom in and out.
Click and drag or use touch gestures to rotate the visual.
To experience the visualization, press the play button.
Click the icon with three dots to access additional information about navigating the 3D visual.
ColostomyA colostomy is a fecal diversion in which part of the colon is used to form a stoma through the abdominal wall, allowing for the passage of stool.
J-Pouch
A J-pouch is an internal ileal reservoir connected to the anus after removal of the rectum and colon. Body waste collects in the reservoir. Then, instead of passing through the colon and rectum, it directly passes through the anus during a bowel movement. Thus, it preserves sphincter function and continence without an external stoma. J-pouches are usually created with a staged approach that includes a temporary diverting ileostomy, so that the internal reservoir system can heal prior to its use. Once healed, the surgeon will reverse the ileostomy and connect the ileum to the J-pouch.
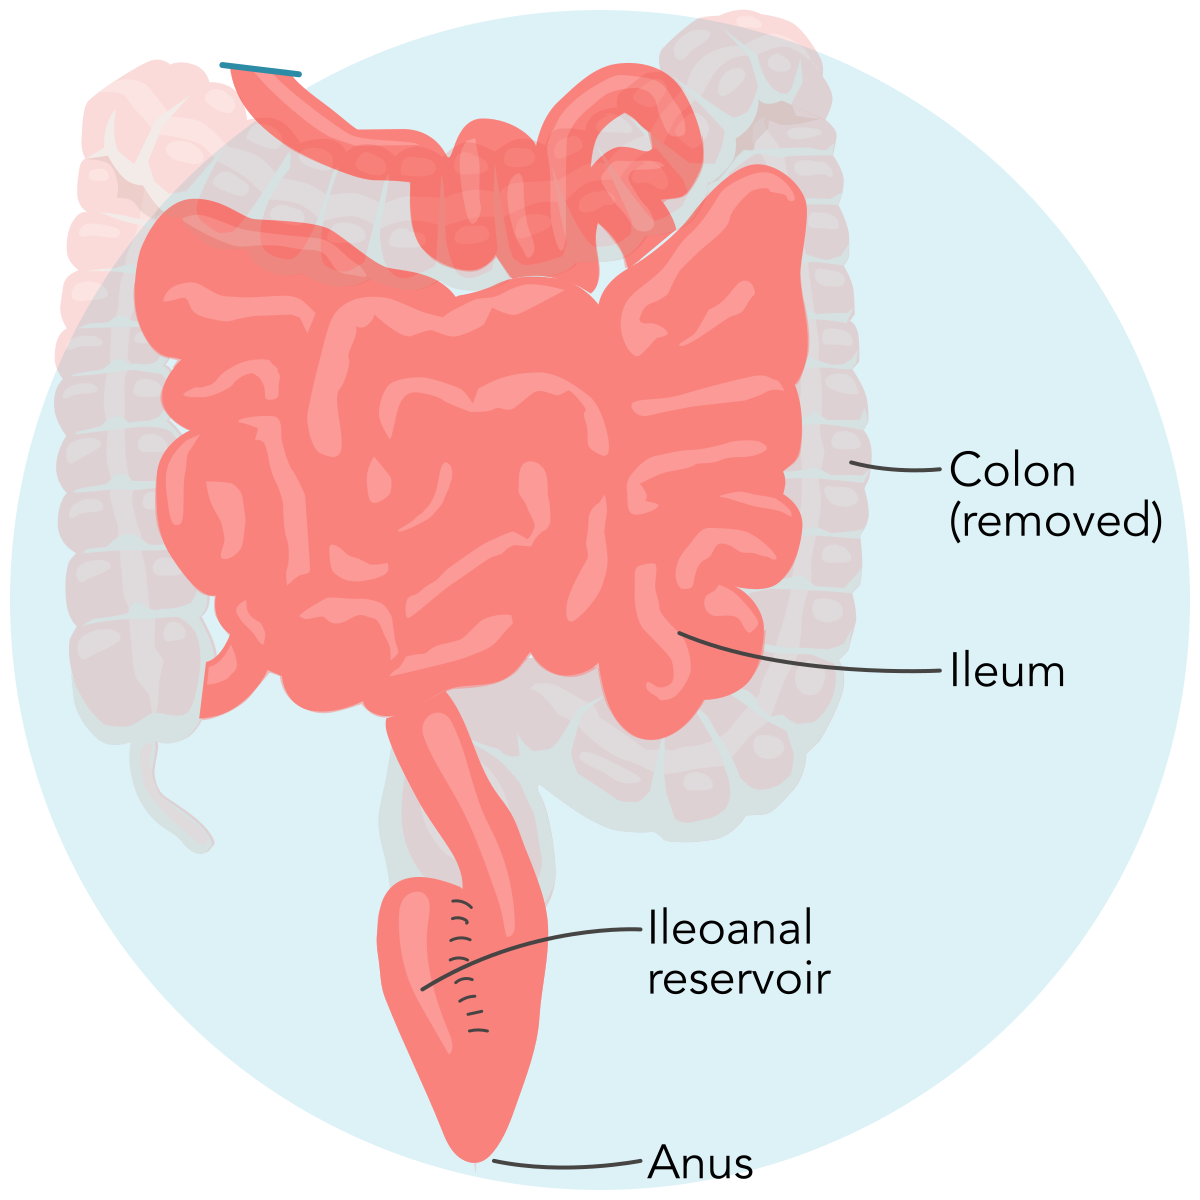
J-pouchA J-pouch is an internal ileal reservoir connected to the anus after removal of the rectum and colon.
Kock Pouch
A Kock pouch is a continent ileostomy system. Using the ileum, the surgeon forms an internal reservoir with a nipple-valve mechanism to maintain continence. Stool is emptied intermittently by inserting a catheter through the ileostomy stoma to empty the reservoir. The catheter is removed once emptying is complete. Thus, an external appliance need not be worn continuously.
Match each type of fecal diversion with its definition.
Drag the option from the left column to match it with the description in the right column.
J-pouch
Kock pouch
Colostomy
Ileostomy
Complications of Fecal Diversion
Depending on the kind of fecal diversion used, clients need to take appropriate measures to avoid complications. Complications may include peristomal skin irritation; stoma issues, such as hernias, prolapse, or narrowing (stenosis); blockages; diarrhea; bleeding; electrolyte imbalances; infections; and leakage. Vigilant assessment, correct pouch fit, and timely referral mitigate risks.
Ostomy Care for Urinary and Fecal Diversions
When surgical diversions are created, a wound, ostomy, and continence (WOC) nurse will often work with the clients to teach them how to care for their stomas or pouches. These specialized nurses assist clients in maintaining skin integrity around stoma sites, changing dressings, and troubleshooting common issues as they adjust to their new diversion. WOC nurses are also a vital resource in assisting clients in obtaining supplies for dressing changes and maintaining stoma health. Refer to Skill: Providing Ostomy Care and Skill: Draining an Ostomy Pouch.
Diagnostic Tests of the Urinary System
Clients may present with urinary findings that indicate a problem with the urinary tract. UTI findings may include complaints of urinary leaking, frequency, painful urination or dysuria, urgency, difficulty starting urination, or difficulty emptying the bladder fully. When this occurs, a provider may recommend diagnostic testing.
dysuria
Urodynamic testing includes a set of procedures that measure how effectively the bladder, urethra, and sphincter muscles store urine and allow it to pass from the body. Additionally, the provider may want to evaluate the urinary tract with cystoscopy or ureteroscopy.
Types of Diagnostic Tests of the Urinary System
Type of Test | What the Test Evaluates |
Uroflowmetry | Measures urine flow rate and volume |
Postvoid residual measurement | Measures the amount of urine left in the bladder after voiding |
Cystometric test | Measures bladder capacity, or the amount of fluid or pressure inside the bladder as it is filling, and its final capacity when the urge to urinate begins |
Leak point pressure measurement | Measures bladder pressure when the bladder begins to leak |
Electromyography | Calculates electrical impulses of the nerves and muscles of the bladder and sphincters |
Video urodynamic test | Takes pictures and video of the bladder while it is filling and emptying |
Cystoscopy | Uses an optical instrument to view the lining of the urethra and bladder (lower tract) |
Ureteroscopy | Uses an optical instrument to view the lining of the ureters and kidneys (upper tract) |
Pressure flow study | Measures how much pressure is needed in the bladder for urination to be initiated, and the flow rate of urination at that pressure |
Urine Specimen Collection
Urine specimen collection by the nurse is an important procedure to help determine the cause of urinary problems. In conjunction with diagnostic testing of the urinary system, a provider may order other urinary tests for the nurse to obtain. These tests are reviewed here.
Urinalysis
Urinalysis is a lab test commonly used by providers to evaluate for a variety of disorders, including bladder infections, UTIs, kidney infections, kidney disease, and diabetes. This test includes visual examination of the urine, dipstick testing, and microscopic examination. Visual examination of the urine includes assessing its overall appearance for clarity, color, and any unusual odor .
Dipstick evaluation uses a thin plastic strip, known as a reagent strip, that contains several chemical indicators for testing. The strip is quickly placed into the urine, removed and placed on its side on a clean surface, and then observed for changes in color. Reagent strip evaluation tests are used to determine the acidity or pH level of the urine. They may also assess for urine concentration and the presence of protein, glucose, ketones, bilirubin, leukocyte esterase, nitrites, and blood. Refer to Skill: Reagent Strip.

© AlexRaths/iStock/Getty Images Plus/Getty Images
Urine reagent stripReagent strip evaluation tests are used to determine the acidity or pH level of the urine.
If the urine reagent strip result is abnormal, the urine may be evaluated by adding a few drops to an exam slide and viewing under a microscope. Microscope examination further evaluates the urine sample for white blood cells or leukocytes for infection; red blood cells for indications of kidney disease or bladder cancer; bacteria, which may indicate infection; casts, which are proteins that may result from kidney problems; and crystals, which may indicate kidney stones.
Nurses need to ensure that urine for urinalysis is collected correctly. The nurse should gather all the necessary supplies for urine collection. The nurse will need a sterile specimen container for urine collection, gloves, a waterproof pad, and sanitary wipes for the client. The nurse must label the specimen in the client’s presence with two identifiers that match the lab order (name and date of birth) per facility policy.
Once ready, the nurse needs to explain the procedure to the client and provide the client with a sterile specimen collection cup with the client label affixed to it and sanitary wipes. In some cases, a urinary catheter may be inserted to obtain the urine sample. The sample must be processed and transported promptly. If delayed, refrigerate the sample per facility policy to preserve chemical and cellular integrity.
Urine Culture
A urine culture is used to evaluate urine for the presence of bacteria and yeast that may cause a UTI. It is commonly ordered with an urinalysis and is considered the gold standard for identifying the causative micro-organism when infection is suspected.
When collecting urine for urine culture, the nurse follows the same procedural steps for urinalysis, with attention to obtaining a clean, uncontaminated specimen. The clean-catch midstream method is the most commonly used approach because it is noninvasive and correlates well with catheterized or suprapubic specimens. The nurse will instruct the client to begin urinating into the toilet, stop quickly, and then continue to urinate into the sterile container to reduce distal urethral contamination.
Once collection is complete, the nurse secures and labels the specimen and sends it to the laboratory as soon as possible. If the lab cannot start the culture right away, the urine should be kept cold (refrigerated) or an approved preservative added. The sample should be sent promptly—ideally within 2 hr—to prevent bacterial overgrowth that can give false-positive results.
Prior to obtaining the specimen, the nurse should ask the client about current or recent antibiotic use, because antibiotics may alter the result and delay treatment. Recent antibiotic use can suppress growth and lead to false-negative cultures. Therefore, a urine specimen should be obtained for culture before antibiotics.
In the laboratory, a lab technician will place a urine sample on a medium conducive to bacterial growth and allow it to incubate for 24 to 48 hr. Once the appropriate incubation period has passed, the lab technician examines the media plate for bacterial growth and counts the number of bacteria, if any. The lab technician then identifies the type of bacteria under a microscope and performs susceptibility testing to determine which antibiotics are effective against that organism, guiding therapy and supporting antibiotic stewardship. This combined process is commonly referred to as culture & sensitivity (C&S).
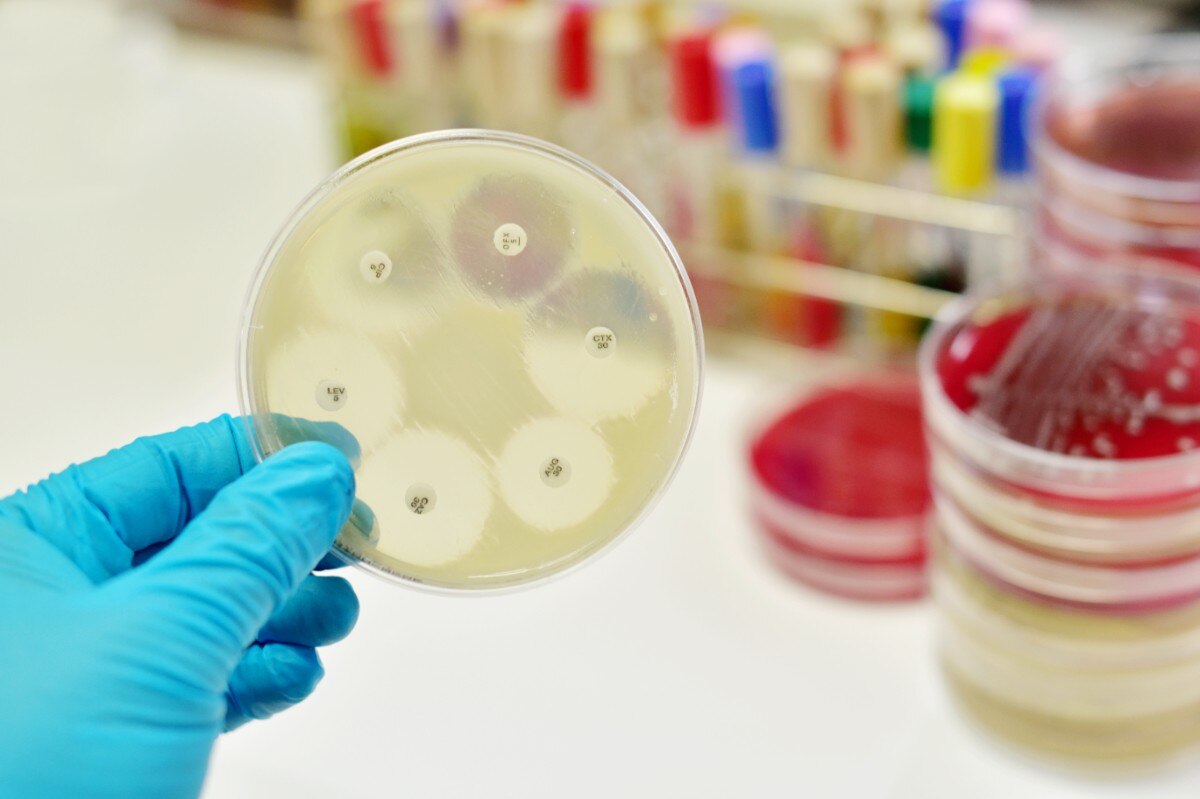
© Jarun Ontakrai/Shutterstock
culture and sensitivityA urine culture is considered the gold standard for identifying the causative micro-organism when infection is suspected.
24-Hour Urine Collection
Another diagnostic test for the urinary system is 24-hr urine collection, in which all urine is collected over a 24-hr period, in a special collection container and kept cold (refrigerated or on ice). The client can collect the urine at home after the nurse reviews how to perform the procedure. This test allows the provider to evaluate amounts of specific chemicals over a full day, which can be helpful in determining kidney function, kidney stone risk, and other conditions requiring timed measurements (24-hr protein, creatinine clearance, stone risk profile).
Prior to collection, the nurse confirms the order and any test-specific instructions (whether a preservative is needed) and provides clear instructions. The nurse reviews the client’s list of prescribed medications, vitamins, supplements, and any other over-the-counter medications with the client to ensure an accurate accounting of any substances that may affect the results. The nurse will then provide the client with the urine collection container, such as a urine tray that can be placed in the toilet or a urinal, and a 24-hr urine storage container. The nurse will instruct the client to date and time the container once the collection begins, as well as tell the client that the urine is to keep the container cold between collections.
The nurse must teach the client how to perform the 24-hr collection correctly to ensure accurate results. The client will start in the morning, void once, discard the urine, and then write the exact start time on the container. For the next 24 hr, the client will collect their urine at every urination, pouring each void into the container. The client must keep the lid sealed and store the container in a refrigerator or on ice, away from direct light, if no preservative was provided. The client will avoid contamination (no toilet paper, stool, menstrual blood, or pubic hair in the container). If menstruating, the client should postpone the test. If any urine is missed or discarded, the client should stop and restart on a new day. At exactly 24 hr, the client will void one last time within 15 min of the stop time, add it to the container, record the stop time, and then deliver the container to the lab as directed.

© ArtiGL/Shutterstock
24-Hour Urine Collection ContainerAll urine eliminated over a 24-hr period is collected in a special collection container and kept cold.
Methods to Collect Urine Specimens
Two methods are used to collect urine specimens: clean-catch midstream, which clients usually perform themselves, and catheterization. Each method has a specific collection process that must be followed to avoid contamination.
Clean Catch
Clean-catch urine collection is a method used for urinalysis and/or urine culture to evaluate for UTIs and other conditions. The midstream technique helps wash away urethral flora before collection, reducing contamination. The nurse must ensure that all supplies are gathered (specimen cup with lid, antiseptic wipes, labels/biohazard bag, gloves) and explain the procedure to the client (Caple, 2025b; National Library of Medicine, 2024b).
The collection process varies between females and males. The client must first wash their hands with soap and water. Female clients should be instructed to use sanitary wipes to clean the genital area from front to back. They should then be instructed to clean the inner labial folds (first wipe). The next step is to wipe the urethral opening with a second sanitary wipe to ensure all contaminants are removed prior to urination.
Next, the female client starts to urinate to flush out any contaminants and then stops. The client then holds the urine cup under the urethra and continues to urinate until the appropriate amount of urine is collected. The client finishes voiding into the toilet.
The process is similar for male clients except that they need to clean the opening of the penis with a sanitary wipe. If not circumcised, male clients will need to retract the foreskin to clean the area appropriately. Males also need to urinate a small amount of urine into the toilet before placing the sample into the urine specimen container .
Once complete, the client puts the cap on the urine specimen container without touching the inside of the cup or lid, then places the specimen container in the designated area so the nurse may begin initial testing or continue preparing the specimen for delivery to the lab for diagnostic testing. The client then washes their hands again. The nurse labels per policy (two identifiers, date/time; note menstruation if present) and either performs point-of-contact testing or prepares for lab transport. If testing/transport is not immediate, the specimen should be refrigerated to prevent bacterial overgrowth.
Catheterization
Urine catheterization utilizes a hollow tube, called a catheter, to collect urine. Because catheterization can introduce microorganisms, the procedure requires sterile technique to minimize the risk of UTI or kidney infection. Prior to collecting the appropriate supplies, the nurse ensures the appropriate procedure order is placed by the client’s provider. Most health care organizations have prepared catheterization kits available in each unit’s clean supply room.
The nurse obtains the catheterization kit, which typically contains a catheter, lubricating gel, sterile gloves, sterile water (for balloon inflation in indwelling catheters), a urine collection container, a collection bag, a waterproof pad, and antiseptic solution per facility protocol (povidone-betadine or chlorhexidine gluconate [CHG] when appropriate). Prior to performing the procedure, the nurse must ensure that the client does not have a povidone-betadine or iodine allergy. If the client has an allergy, the nurse should use the organization’s approved antimicrobial alternative.
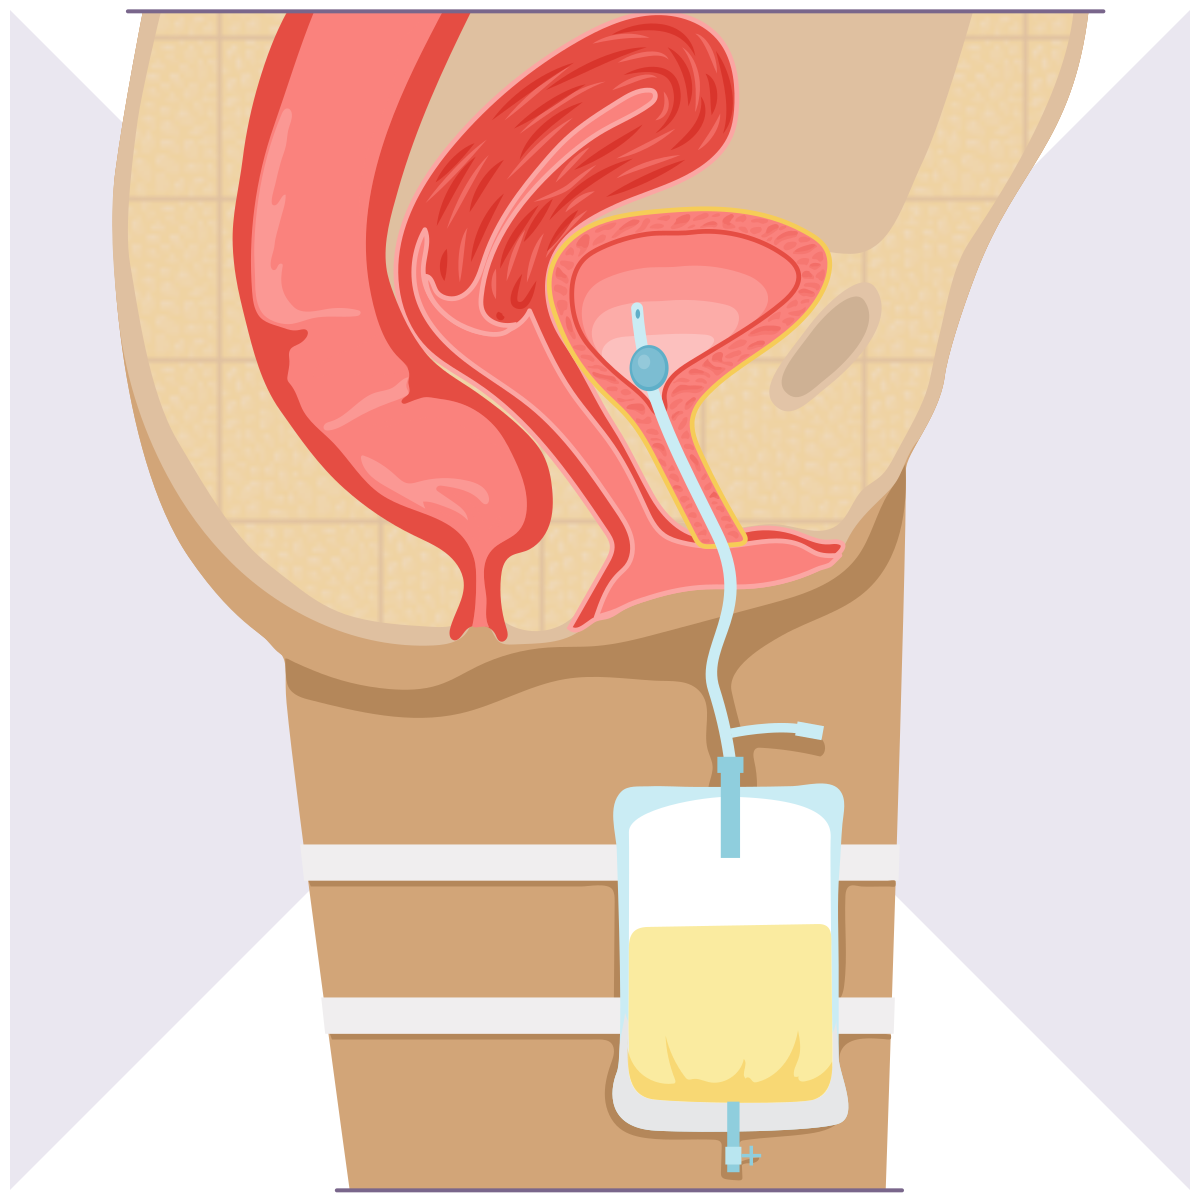
indwelling catheterThe catheter is kept in place by inflating the balloon.
The nurse explains the procedure to the client and what to expect. Once ready, the nurse performs hand hygiene with soap and water, assists the client into position, and places a clean, waterproof pad under the client in case of any leakage after the procedure. The nurse then opens the sterile kit, dons sterile gloves while maintaining sterile technique, preps the meatus with antiseptic, and applies lubricant to the catheter tip while maintaining sterility. Once the catheter is inserted, the nurse advances or pushes the catheter until urine begins to flow and inflates the balloon with sterile water per manufacturer instructions . Refer to Skill: Inserting an Indwelling Urinary Catheter and Skill: Removing an Indwelling Urinary Catheter.
When using a straight (intermittent) catheter (not connected to a collection bag), the nurse should keep the urine collection container close to the catheter tip to prevent urine from leaking onto the client’s bed. Once specimen collection is complete, the nurse removes the catheter.
If an indwelling catheter is used, the catheter is kept in place by inflating the balloon. For indwelling catheters, the nurse uses aseptic technique to collect the specimen from the catheter sampling port (not from the drainage bag): clamp distal to the port to allow fresh urine to collect, disinfect the port, access with a Luer lock syringe or approved access device, transfer urine into a sterile container, then unclamp the tubing. The nurse should not disconnect the catheter from the closed drainage system. Refer to Skill: Obtaining Urine Specimen from an Indwelling Catheter.
After the specimen is collected, the nurse assists the client with cleanup and getting back into a comfortable position before preparing the urine for lab delivery and diagnostic testing.
Diagnostic Tests of the Gastrointestinal System
Clients may present with findings that indicate a problem with the GI tract. GI manifestations may include complaints of bloating, bleeding, diarrhea, constipation, nausea and vomiting, abdominal pain, heartburn, incontinence, weight gain or weight loss, or difficulty with swallowing. When this occurs, a provider may recommend diagnostic testing.
A variety of diagnostic tests can be performed to assess the GI system. Diagnostic testing of the GI tract depends on the findings the client reports and can include celiac disease testing, colonoscopy, endoscopic retrograde cholangiopancreatography (ERCP), flexible sigmoidoscopy, lower GI series, upper GI series, or upper GI endoscopy.
Types of Diagnostic Tests of the Gastrointestinal System
Type of Test | What the Test Evaluates |
Celiac disease testing | Diagnoses celiac disease by blood tests and small-bowel biopsy via upper endoscopy |
Colonoscopy | Screening procedure for colon or rectal cancer; can also be used to evaluate for causes of GI bleeding, changes in bowel habits, abdominal pain, and unexplained weight loss; allows biopsy and polyp removal during the same procedure |
Endoscopic retrograde cholangiopancreatography (ERCP) | Diagnoses problems associated with pancreatic and bile ducts such as gallstones, infections, pancreatitis, and pancreatic masses |
Flexible sigmoidoscopy | Evaluates the rectum and left colon for causes for rectal bleeding, bowel habit changes, pain, weight loss, and for cancer screening |
Lower GI series (barium enema) | X-ray/fluoroscopy of the large intestine using barium to evaluate for bleeding, changes in bowel habits, chronic diarrhea, unexplained weight loss, abdominal pain, cancer, diverticula, fistulas, polyps, or ulcers |
Upper GI endoscopy (esophagogastroduodenoscopy [EGD]) | Visualizes the esophagus, stomach, and upper intestine to evaluate persistent heartburn, bleeding, nausea and vomiting, pain, issues with swallowing (dysphagia), unexplained weight loss, ulcers, cancer, precancerous conditions, celiac disease, narrowing of the esophagus, or blockages |
Upper GI series | X-ray/fluoroscopy with barium to evaluate for nausea and vomiting, abdominal pain, difficulties with swallowing (dysphagia), unexplained weight loss, cancerous growths, and injuries to the esophagus, reflux, hernias, scarring, or ulcers |
Stool Specimen Collection
Stool specimen collection by the nurse is an important procedure for determining the presence of hidden (occult) blood or abnormal bacteria in the digestive tract. In conjunction with diagnostic testing of the GI tract, a provider may order the nurse to obtain a stool specimen. The most common stool tests are described in this section.
Fecal Occult Blood Test
A fecal occult blood test (FOBT) checks for the presence of small amounts of occult blood in stool that cannot be seen with the naked eye. It is commonly used as part of colorectal cancer screening for adults who do not have manifestations and may also be ordered when clients report changes in bowel habits or possible bleeding. The test simply determines whether blood is present. It does not identify where the bleeding originates.
Clients may report blood in their stool or changes in bowel habits. Because certain foods and medicines can temporarily change stool color and mimic bleeding (beets can cause red stool; iron or bismuth can cause very dark/black stool), the nurse should ask about recent diet and medications before testing and still treat persistent red/black stools or red/black stools with warning signs as possible GI bleeding. Utilizing an FOBT to determine whether blood is present is usually the first step in investigating potential causes of these findings. However, when manifestations of active bleeding are present, providers often proceed directly to diagnostic evaluation to identify the source.
Once an FOBT is ordered, the nurse will educate the client on how to prepare and obtain a specimen according to the specific kit instructions and provider orders. Preparation varies by test type. Some guaiac-based tests (gFOBT) require short-term diet/medication adjustments, whereas fecal immunochemical tests (FIT) generally do not require diet changes. The nurse should follow the kit’s instructions and the provider’s orders. The two main types of fecal occult blood tests differ in how they detect blood and therefore have different preparation requirements. The fecal immunochemical test (FIT) uses antibodies to identify human hemoglobin and is generally more sensitive and specific than older guaiac-based methods. Because it targets human blood directly, it typically does not require clients to follow dietary restrictions before testing. In contrast, the guaiac-based fecal occult blood test (gFOBT) depends on a chemical color reaction involving the peroxidase activity of heme.
First, the nurse reviews dietary and medication restrictions required for the type of FBOT to avoid any issues with testing results. Some kits may require clients to temporarily avoid certain foods or medications that can interfere with this reaction. For instance, if a client consumes beets within the window of time that the test is to be performed, the results may indicate that there is blood in the stool when, in fact, no blood is present. This is called a false-positive result. In this case, the result is due to the chemicals used to screen for blood in stool. They identify the beet dye, not actual blood, in the sample. Other foods, such as red meat, broccoli, and turnips, can also affect the results of an FOBT. The nurse should also instruct the client to avoid medications such as aspirin and ibuprofen, as well as vitamin C supplements, because they may also lead to false positives.
false positive
Depending on the type of FOBT used, the nurse instructs the client on how to obtain a specimen and provides the appropriate supplies so the collection can be done in the comfort of the client’s home. Collection supplies usually consist of a collection container that can be placed in the toilet; a collection spatula, such as a tongue depressor or collection spoon; the test container or test cards (also called hemoccult test slides); appropriate labels; and mailing containers.
Collecting a specimen is generally easy, given that it is done in the comfort of a client’s home. The client places the collection container in the toilet prior to a bowel movement, produces the bowel movement in the container, and then uses the collection spatula to place the specimen in the appropriate container as instructed for that kit. Next, the client affixes all the necessary labels to the specimen container and places it in the return or mailing container so it can be analyzed in a lab for the presence of blood. Depending on the results and the findings the client presents with, the provider may determine the need for further testing to rule out potentially serious conditions such as colon cancer. Refer to Skill: Obtaining Occult Blood Specimen.
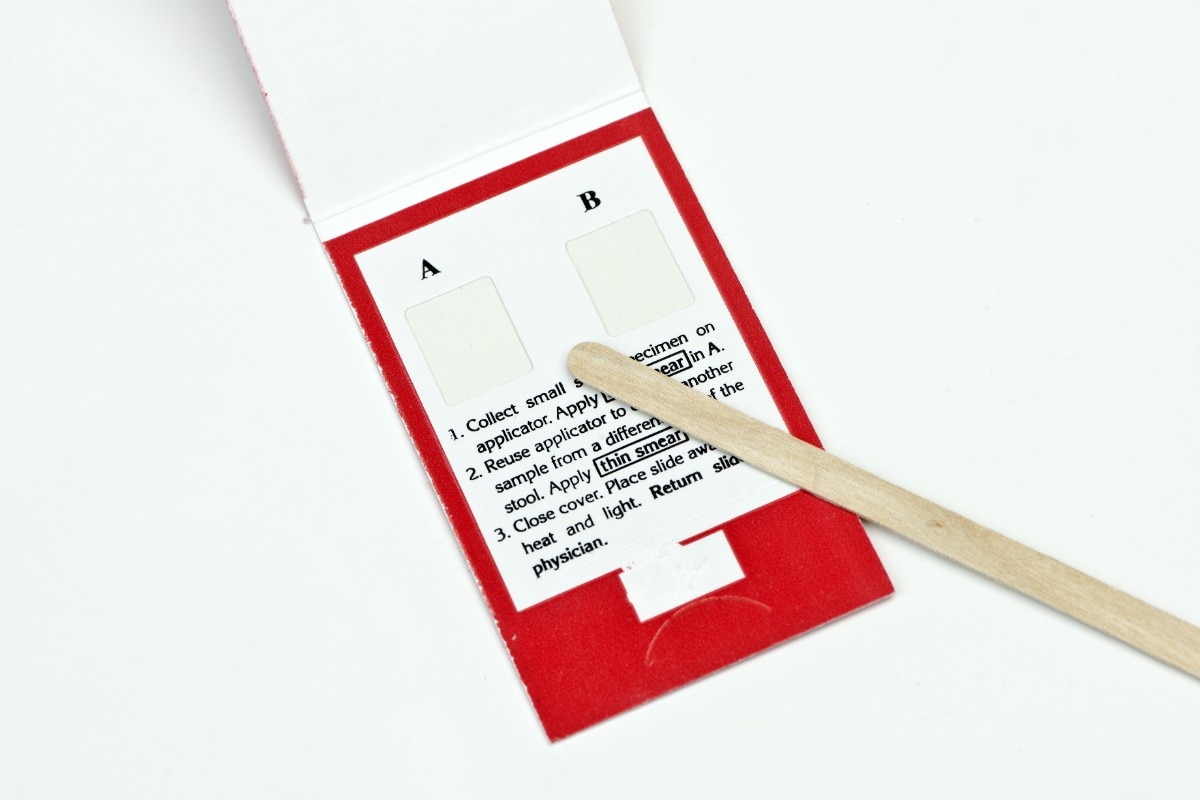
© MedstockPhotos/Shutterstock
fecal occult blood testingFOBT checks for the presence of small amounts of occult blood in stool that cannot be seen with the naked eye.
Obtaining Specimens Practice Activity
Obtaining Specimens Practice Activity
Video Transcript
What is the proper order of steps a nurse would take for fecal occult blood testing? (Consider your own answer, and then click the card to compare against an expert's response.)
The proper order for performing a fecal occult blood test is: Proper hand hygiene. Donning clean gloves. Open the front flap of test book. With tongue depressor apply a small smear to test window 1. With another tongue depressor obtain a small sample from a different area of the stool sample and apply to test window 2. Cover front flap. Turn test book over. Open back flap. Apply 2 drops on each smear. Apply drops to control panel. Wait 30 to 60 seconds for result.
A nurse is instructing a client how to collect a fecal occult blood test. Which of the following responses by the client indicates understanding?
a
“I will make sure to hold my vitamin C supplements.”
b
“I will collect a sample that has a little blood.”
c
“I will smear the stool with a cotton swab.”
d
“I will collect three samples and then call the nurse.”
A client asks a nurse why a fecal occult blood test is necessary when they have not experienced any bleeding when they have a bowel movement. Which of the following responses from the nurse best answers the client?
a
“I will need to check your chart again.”
b
“This is a test we do on all clients your age.”
c
“The physician ordered it based on your recent blood work.”
d
“Sometimes we can’t see blood in the stool.”
Stool Culture
A stool (fecal) culture is a laboratory test used to detect organisms in stool that may be the cause of severe or persistent diarrhea. A provider may order a stool culture if the client reports severe or persistent diarrhea and has recently traveled outside the United States to areas that may be prone to water contamination. A client may also become infected with bacteria that cause severe diarrhea by eating or drinking something that may have become contaminated; by consuming raw or undercooked eggs or meat, or unpasteurized milk; or by drinking untreated water from sources such as lakes or streams. At other times, a provider will investigate for the presence of fecal bacteria if the client reports recent or prolonged antibiotic use.
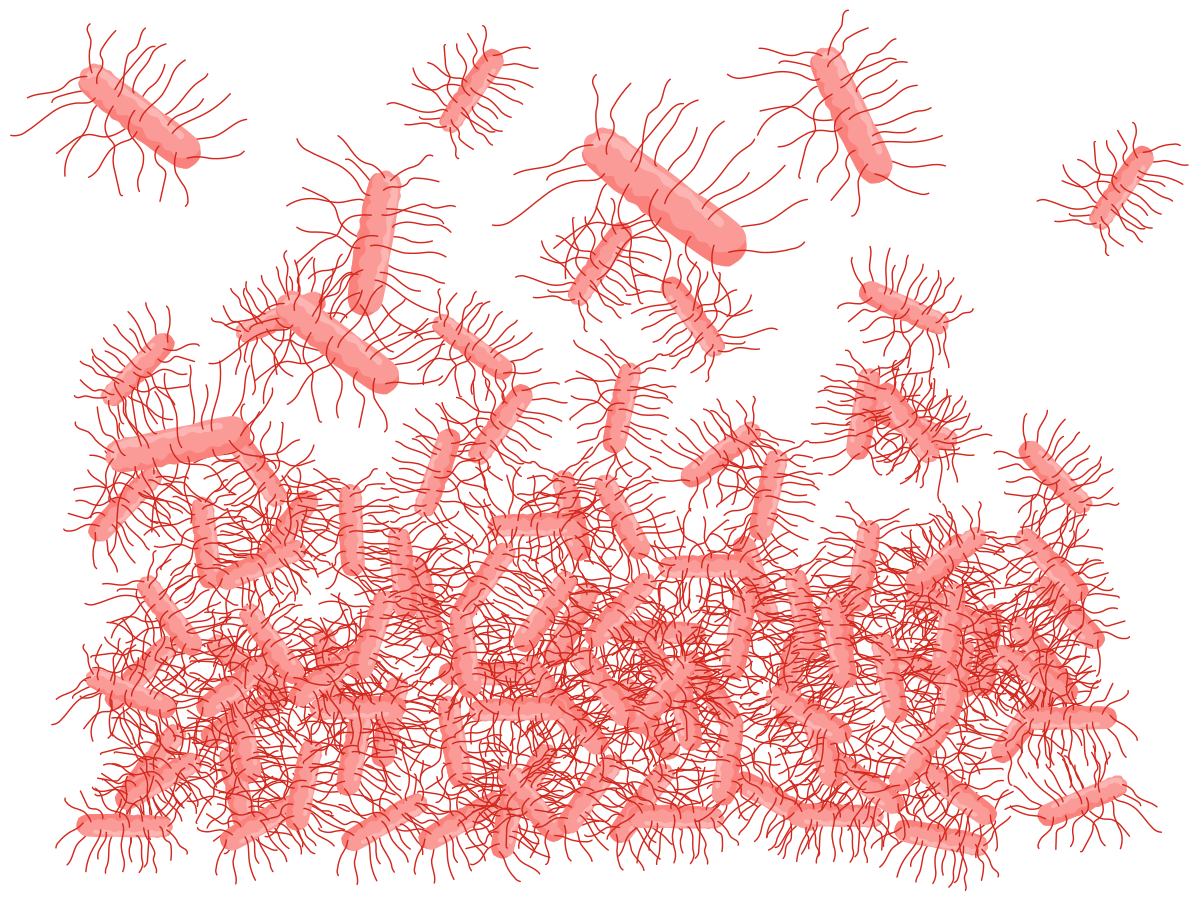
Stool cultureA stool culture is a laboratory test used to detect organisms, such as bacteria, in stool.
Once the provider orders a stool culture, the nurse will educate the client about how to prepare and obtain a specimen for analysis based on the specific kit and instructions provided. Unlike with the FOBT, there are no routine dietary or medication restrictions prior to obtaining a stool specimen. The nurse will provide the client with the appropriate collection supplies, which usually include a collection container that can be placed in the toilet, a collection spatula, such as a tongue depressor or collection spoon, the test container, appropriate labels, and mailing containers. Instruct the client to avoid contaminating the specimen with urine, toilet water, or tissue with the sample.
Collecting a specimen is generally easy, given that it is usually done in the comfort of the client’s home. The client places the collection container in the toilet prior to a bowel movement, produces the bowel movement in the container, and then uses the collection spatula to place the specimen in the appropriate container. The client then affixes all necessary labels to the specimen container, places it in the return or mailing container, and returns the specimen to the laboratory as soon as possible so it can be analyzed in a lab for the presence of infectious bacteria. Results usually take a few days. Depending on the results and the client’s presenting manifestations, the provider may determine the need for further testing, such as ova and parasite testing, gram stain, or fecal smear to rule out other nonbacterial pathogens.
A nurse is instructing a client how to collect a stool specimen for a stool culture. Place the following steps in the correct order that the client should perform them.
Nursing Interventions to Facilitate Urinary Elimination Patterns
Alterations in urinary elimination are usually treatable or manageable. A few nursing interventions may be implemented to assist the client with a return to expected urinary elimination patterns. For example, nurses can assist clients with making lifestyle changes, provide bladder training, and instruct clients on how to perform pelvic floor muscle exercises. There is also urinary catheterization, which the client can be instructed to do if necessary.
Urinal and Bedpan Use
Both bedpans and urinals are useful when clients have limited mobility or other restrictions that prevent them from using a traditional toilet. Different types and sizes of bedpans are available to accommodate clients’ conditions, such as regular, fracture, and bariatric bedpans. Nursing interventions for bedpan placement will vary according to the type of bedpan used, whether the client can assist by lifting the hips, and whether the client has medical restrictions, such as a hip fracture. Urinals are primarily used for male urination and are generally easier to place. If the client can assist, the nurse can simply provide the client with the urinal. If not, the nurse may need to open the client’s legs apart, then place and hold the urinal until the client is finished. Refer to Skill: Positioning and Removing a Bedpan and Skill: Assisting with the Use of a Urinal.

Shutterstock/Banana Walking
UrinalUrinals are primarily used for male urination.
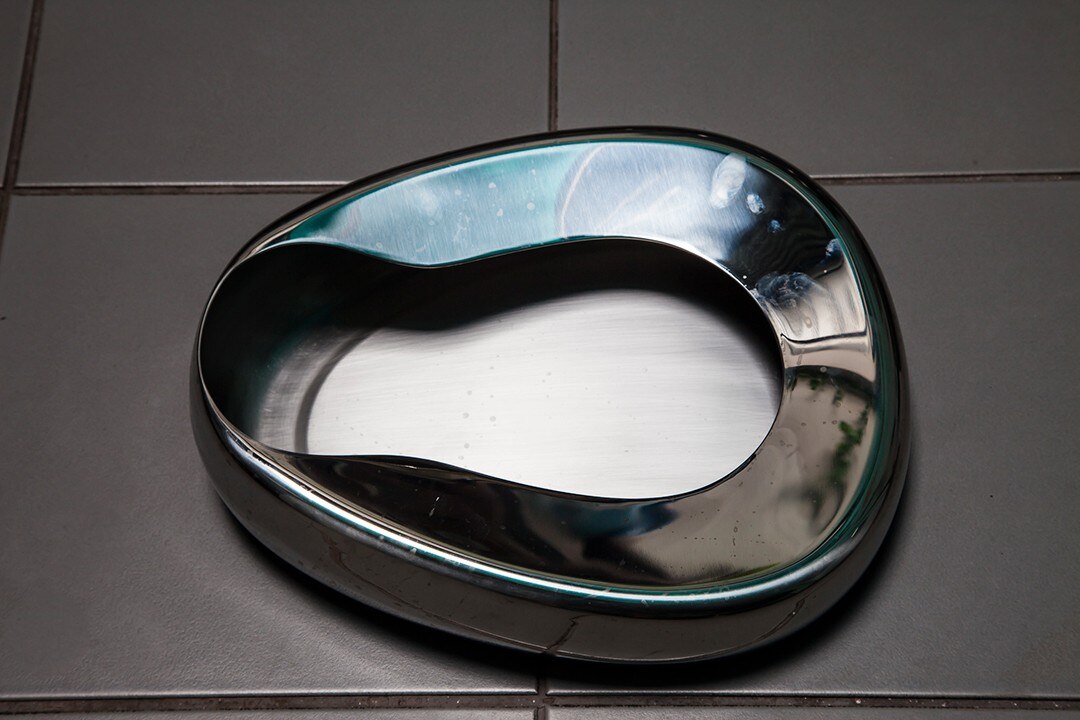
© peterkai/iStock/Getty Images Plus/Getty Images
BedpanBedpans are useful when clients have limited mobility or other restrictions that prevent them from using a traditional toilet.
In addition to proper placement and removal of bedpans and urinals, the nurse should accurately record any urine or feces output measurements and assess the client’s skin for signs of breakdown. When providing privacy for the client, always ensure the nurse call light is within reach, the bed is low and locked when finished, and the environment is safe (adequate lighting, side rails/alarms as ordered). When the client is finished, the nurse should ensure the client is clean and dry and remove and replace any sheets or garments that were soiled.
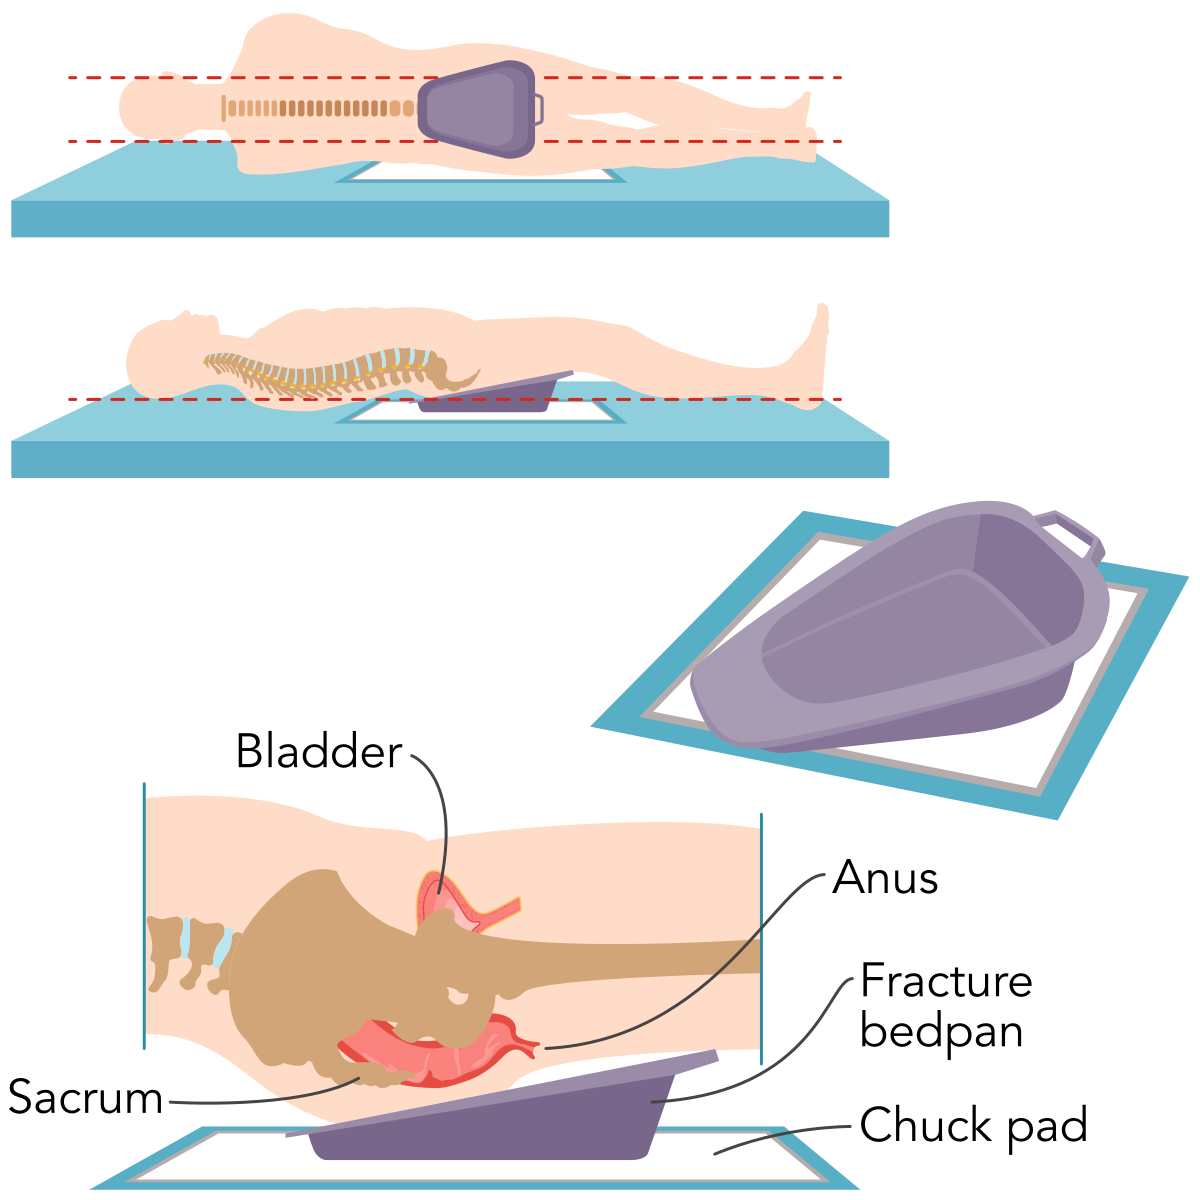
©ATI Nursing
The fracture bedpan should be placed below the bottom, with the narrow end under the sacrum and ensuring the bladder and anus is centered. A chuck pan should be placed under the bedpan.
Fracture panThe fracture bedpan is designed for clients who must limit hip movement during toileting.
Bladder Irrigation
Bladder irrigation is another nursing intervention that promotes elimination. To perform bladder irrigation, a prescribed solution is connected to a urinary catheter as ordered by the client’s provider. This intervention is intended to prevent blood clots from forming in the bladder or to remove any clots/tissue/sediment that may be present and to maintain catheter patency so urine can drain freely. The nurse should explain to the client what to expect and what to report to the provider. It is not unusual for bladder irrigation to be uncomfortable due to the urinary catheter and filling of the bladder, but pain is not an expected finding and should be reported immediately to the provider as it may indicate bladder spasms, catheter obstruction, or bladder distention. Refer to Skill: Irrigating the Bladder or Urinary Catheter.
Lifestyle Changes
Nurses can review lifestyle changes that clients can make to help restore usual urinary elimination patterns. Dietary changes, such as reducing foods and beverages that might be bladder irritants, such as coffee, tea, carbonated beverages, alcohol, acidic fruits, and chocolate, can be helpful. Reviewing what to monitor for will help the client make more informed choices. Consuming too many fluids can worsen urinary manifestations or lead to more frequent urination, whereas consuming too little fluids will increase urine concentration, which irritates the bladder and stimulates the need to urinate. Other lifestyle changes, such as smoking cessation and weight loss, may also be beneficial in restoring expected urinary elimination patterns.
Bladder Training
Bladder training assists with retraining the bladder by setting a schedule to use the bathroom. This technique focuses on accident avoidance in clients with overactive bladders by gradually increasing the time between bathroom visits to urinate. Clients with overactive bladders tend to visit the bathroom more frequently, whether or not they actually feel the need to void, in an effort to prevent accidents. Over time, this pattern reinforces urgency and contributes to increased urinary frequency. Bladder training helps interrupt this cycle by reteaching the bladder when to signal the brain to void and by promoting longer intervals between voids.
Successful bladder training programs focus on attempting to urinate at set, scheduled times with or without the urge and slowly increasing the time between these sessions. They generally involve three steps. First, the client must know their current pattern or schedule. Keeping an elimination journal to record the time of each bathroom visit is one way to evaluate this pattern. Next, once the current schedule has been established, the client attempts to extend the time between bathroom trips—first by about 5 to 15 min, and then advancing the time slowly. This slow progression helps the client be successful and stick with the program. Finally, once an appropriate elimination schedule has been determined, the client is encouraged to maintain it.
Bladder Scanning
Bladder scanning is a technique that nurses commonly utilize to determine the need for catheterization. In this procedure, the nurse places a portable ultrasound device/scanner over the client’s bladder to estimate the volume of urine in the bladder. If too little urine is present in the bladder, the nurse can avoid unnecessary catheterization to empty the bladder. If the volume is elevated, the results help determine timing/need for catheterization per protocol or provider orders. Not only are bladder scans portable, easy-to-use, and painless procedures, but their use reduces avoidable catheterization, thereby reducing the risk for lower catheter-associated UTIs (CAUTIs) by minimizing indwelling catheter exposure.
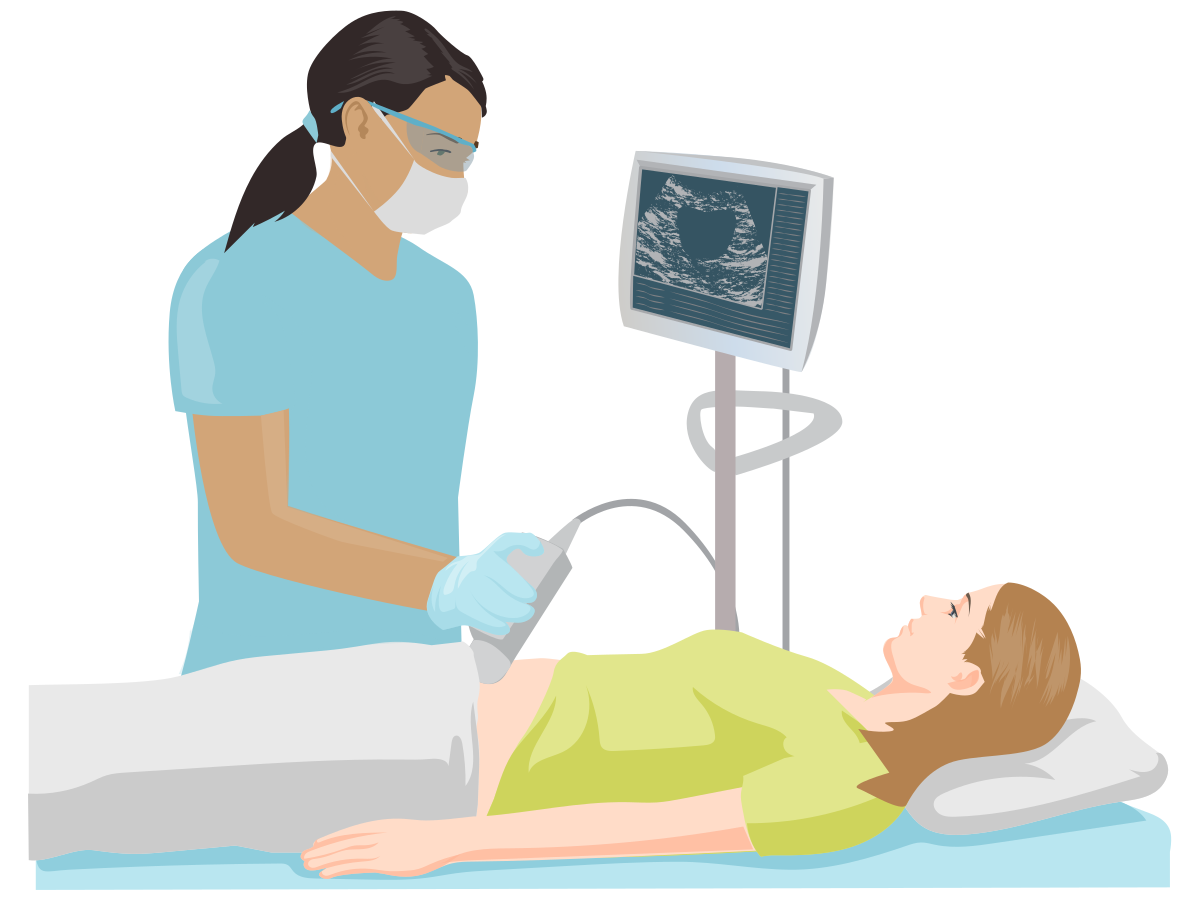
Nurse using a bladder scannerA nurse places a portable ultrasound device/scanner over the client’s bladder to estimate the volume of urine in the bladder to determine if catheterization is needed.
Catheterization
A urinary catheter is a flexible tube that is placed into the bladder (if internal) or a device placed over the genitals (if external) to allow urine to drain. The catheter can be placed into the urethra until it reaches the bladder, or into a surgically created passage in the skin, usually the lower abdomen (suprapubic catheter).
Explore a 3D visualization of indwelling urinary catheter insertion.
Read the text in the left panel to gain important information.
Move through the different views by using the arrows.
Click a label to closely inspect an area. Click the label again to zoom out.
Scroll up and down or use touch gestures to zoom in and out.
Click and drag or use touch gestures to rotate the visual.
To experience the visualization, press the play button.
Click the icon with three dots to access additional information about navigating the 3D visual.
Indwelling Urinary Catheter Insertion
Four kinds of urinary catheters are used: straight (intermittent) catheters, indwelling catheters (urethral or suprapubic), condom catheters (external male), and external female catheters. Straight or intermittent catheters are used as needed to empty the bladder, and then removed when bladder emptying is complete. This is usually done when placement of an indwelling catheter is not necessary, or when the client does not wish to wear a urine collection bag. Clients who have spinal cord injury/paraplegia will often utilize intermittent catheters in conjunction with bladder training to avoid urinary accidents when bladder sensation is impaired. Frequency is guided by how much urine is in the bladder or the individualized schedule.
Catheter-associated urinary tract infection (CAUTI) occurs when micro-organisms enter the urinary system through an indwelling urinary catheter and lead to an infection. CAUTIs are among the most frequent health care-associated infections and can result in harm that is often avoidable. Key nursing actions that lower the likelihood of CAUTI include using a catheter only when there is a clear clinical reason, performing insertion with sterile technique and equipment, keeping the drainage system closed and free of kinks with the collection bag positioned below the bladder, and cleaning hands before and after handling any part of the catheter or drainage setup. Nurses should also evaluate the ongoing need for the catheter every day and remove it as soon as it is no longer clinically necessary. Many organizations apply a CAUTI prevention bundle—a set of evidence-based practices performed together, such as limiting catheter use, ensuring sterile insertion, maintaining the closed system, and removing the catheter promptly when appropriate.
External Catheters

Condom catheterInstead of the invasive tube used in an indwelling catheter, a condom-like device is placed on the penis, with a collection system attached to a urine bag.
Because many CAUTIs occur simply because a catheter remains in place longer than needed, nurses are encouraged to use noninvasive options whenever appropriate. External catheters provide a way to manage urine safely while lowering the infection risk compared with placing a device inside the bladder.
Condom catheters are intended for male clients with incontinence. Instead of an invasive tube, a condom-like device is placed on the penis, with a collection system attached to a urine bag. Care must be taken with condom catheters to ensure that no urine leaks around the device, that the client is clean and dry, that the condom catheter is changed daily, and that the collection bag is maintained below the level of the bladder. Refer to Skill: Applying an External Male Catheter.
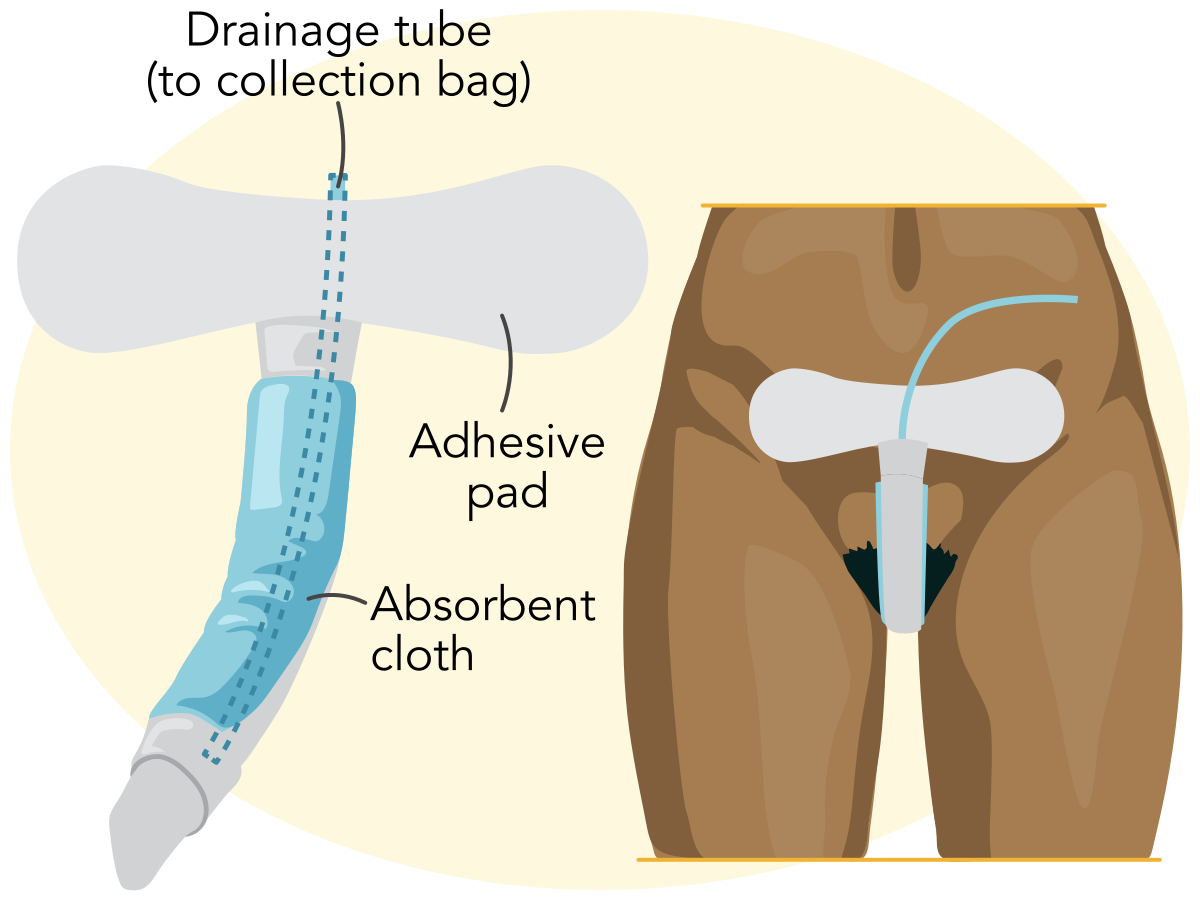
Female external catheterThis noninvasive urine collection device uses a soft, flexible wick placed between the labia majora with the wicking surface aligned toward the urethra and connected to low, continuous wall suction to draw urine from the perineum into a drainage canister.
A female external urinary catheter is a noninvasive urine collection device that uses a soft, flexible wick placed between the labia majora with the wicking surface aligned toward the urethra and connected to low, continuous wall suction to draw urine from the perineum into a drainage canister to reduce perineal moisture. These devices are an alternative to indwelling catheters. Their use can reduce indwelling catheter utilization, lowering the risk of CAUTIs. They can also protect the skin from moisture-associated damage due to urinary incontinence and support overnight management when toileting is not feasible. Because device-related skin problems can occur with misplacement, excessive suction, leakage, or prolonged soiling, nurses should verify correct placement, reassess device position and the perineum on a regular schedule and after position changes, and replace the device per facility policy or sooner if soiled. Standard perineal cleansing and moisture-barrier care should be continued as well.
A male external (condom-type) catheter is a noninvasive sheath placed over the penis and connected to a urine drainage bag. When sized and applied correctly, it offers a lower infection risk than an indwelling urethral catheter. However, poor fit/adhesive failure can lead to leakage or trapped moisture with skin maceration and incontinence-associated dermatitis. Best practice is to perform perineal hygiene, ensure the correct size and securement without constriction, change the device at least daily and when soiled, and keep the drainage bag below bladder level with unobstructed tubing. Nurses should monitor the penile and perineal skin routinely and replace or refit the device if leakage or irritation occurs. Refer to Skill: Applying and Removing an External Female Catheter.
Indwelling catheters resemble intermittent catheters except that they have a small inflatable balloon at the end of the catheter to hold the catheter in place inside the bladder for continuous drainage. Insertion into the urethra is performed using sterile (aseptic) technique. A collection system is attached to a urine collection bag (leg bag or standard bag). The drainage bag should be secured and kept below the level of the bladder to prevent backflow and accidental traction on the catheter.
Catheter Care
Catheter care is important both to prevent CAUTIs and to keep drainage unobstructed. Catheters inserted into the urethra need to be placed using sterile (aseptic) technique and maintained as a closed, unobstructed system. By contrast, external devices (male condom and female external wick catheters) are applied with clean technique because nothing is being inserted into the urethra. For indwelling catheters, clean the meatal area daily with soap and water (antiseptic or alcohol-based solutions are not recommended for routine care). The system should not be broken unless clinically necessary, and drainage bags should be emptied regularly using a clean container without contaminating the spigot. Clients and nurses also need to ensure that the area around indwelling catheters remains clean following bowel movements. Other ways to prevent CAUTIs include proper hydration and hand hygiene before and after handling the catheter.
Common causes of urine leakage around indwelling catheters are issues with balloon size or integrity. Leakage can also occur if bladder spasms force urine around the catheter, or if the catheter becomes obstructed due to either blood clots or a kink in the tubing.
Medications
In a healthy person, urine production occurs throughout the day without any intervention. However, certain clinical situations call for medications that intentionally modify urine production. Physiologically, the body limits water loss during dehydration by releasing antidiuretic hormone (ADH/vasopressin), which increases water reabsorption in the renal collecting ducts, thereby reducing urine output. This antidiuretic response works together with the renin–angiotensin–aldosterone system to conserve volume and maintain perfusion. Clinically, this mechanism is mirrored by antidiuretic medications such as desmopressin, an ADH analogue that enhances collecting-duct water reabsorption to decrease urine volume in selected indications. By contrast, a range of therapies can increase urine production. For example, loop and thiazide diuretics promote diuresis.
Nursing Interventions to Facilitate Bowel Elimination Patterns
Alterations in bowel elimination are usually treatable or manageable. A few nursing interventions can be implemented to assist clients with a return to expected bowel elimination patterns. Nurses can assist clients with making lifestyle changes by providing bowel training and by providing them with agents to stimulate a bowel movement.
Lifestyle Changes
Nurses can review lifestyle changes that clients can make to help restore usual bowel elimination patterns, such as dietary modifications. Diets higher in fiber, such as those rich in fruits and vegetables, can help clients maintain expected bowel elimination patterns. Stress reduction techniques can be reviewed with clients, and clients can be instructed to listen to their bodies and use the bathroom when they feel the urge to have a bowel movement. Ensuring adequate hydration, staying active, and getting regular exercise are other lifestyle changes nurses can review with clients to promote usual bowel elimination.
Enema
An enema is the instillation of a liquid solution into the rectum and sigmoid colon through the anus to stimulate peristalsis and defecation or to empty the bowel in preparation for diagnostic testing, procedure, or surgery. Enema administration is not a sterile procedure. The nurse follows standard precautions and adheres to medication administration rights throughout the process. For safe and effective administration, the client is positioned in the left lateral (Sims’) position with the right knee flexed, which aligns the rectum and sigmoid colon to promote proper flow of the solution.
Several types of enemas are used clinically. The solution and volume selected are based on the purpose of the enema. A cleansing enema is instilled into the client, retained for a short time (commonly within about 15 min), and then expelled. In contrast, a retention enema requires the client to retain the fluid for 15 to 30 min, depending on the type of solution instilled, before expelling it. Enema solutions contain bowel irritants that stimulate the bowel. Common solutions used in enemas for medical purposes are tap water (hypotonic), mineral oil, 0.9% sodium chloride (isotonic), a sodium phosphate solution (hypertonic), and soap suds. Hypertonic preparations draw water into the lumen, thereby distending the colon. Large-volume hypotonic/isotonic solutions rely on volumetric stimulation. Because repeated hypotonic enemas (tap water) can shift fluid and electrolyte levels, solutions and volumes should be administered only as ordered, with monitoring for electrolyte imbalance and other adverse effects.
Medications
Other substances used to treat constipation prior to enema use are laxatives or stool softeners. Laxatives and stool softeners work more slowly than enemas and are intended for less severe forms of constipation. Clients taking medications that slow bowel transit may need to use laxatives or stool softeners to encourage bowel movements. Clients need to be instructed on proper laxative and stool softener use, as they can interact with certain medications. These agents may be harmful to clients who are pregnant or who are younger than 6 years of age. Use of these agents can complicate serious medical conditions such as appendicitis or bowel obstructions.
Laxatives – Classification, Mechanism of Action, and Therapeutic Response
Classification | Mechanism of Action | Therapeutic Response |
|---|---|---|
Bulk forming
| Softens stool by absorbing water/retaining water; increases stool bulk and promotes peristalsis. | Bowel movement in 12 to 72 hr |
Surfactant
| Softens stool by lowering stool surface tension to allow water and lipids to penetrate. | Bowel movement in 12 to 72 hr |
Stimulant
| Stimulates peristalsis and increases intestinal secretion; decreases water reabsorption. | Suppository: 15 to 60 min Oral: 6 to 12 hr |
Osmotic
| Retains water osmotically, softening the stool and promoting peristalsis. | Oral: Within 24 to 72 hr Rectal/enema: Acts rapidly, within minutes |
Rectal Tube
Fecal management systems and rectal tubes are devices placed into the rectum to prevent incontinent clients from soiling themselves. They are typically used in intensive care units to help protect the client’s skin from breakdown and infection when there is no bowel control. They are also used (albeit rarely) for clients with chronic fecal incontinence or diarrhea.
Bowel Training
Bowel training, like bladder training, assists clients with gaining control of their elimination schedule. Clients may be incontinent for a variety of reasons, including spinal cord injury, multiple sclerosis, surgery, laxative abuse, childbirth, or other emotional problems. Bowel training allows clients to gain control of their bowel movement schedule to avoid unexpected accidents and the embarrassment associated with such events. Bowel training may include the use of laxatives to assist with bowel stimulation. Clients must ensure they follow a high-fiber diet and stay adequately hydrated to promote proper bowel elimination.
Diversions and Ostomies
Diversions and ostomies are surgical interventions that are performed when nursing interventions are no longer sufficient to ensure safe elimination or protect renal function. Several types of diversions and ostomies are possible, and selection depends on the underlying pathology, client factors, and surgeon expertise.
When the usual flow of urine from the body is interrupted, surgery may be required to form a urinary diversion. Urinary diversions may be either temporary or permanent, depending on the causative factor. A diversion may be required if urine is blocked, if the urethra is damaged from either injury or a birth defect, because of tumors, or in case of bladder malfunction. Conditions such as bladder cancer, radiation damage, chronic infections, congenital disorders (spina bifida), neurological conditions, or severe incontinence often necessitate diversion when the bladder cannot function properly. Surgical interventions can create neobladders, ileal conduits, cutaneous reservoirs, or nephrostomies, depending on the client’s anatomy and health status and the surgeon’s experience.
Nursing interventions for clients with urinary diversions include teaching the client proper hand hygiene, stoma and peristomal care, and use of a collection pouch and barrier device, if applicable. Clients should be instructed to cleanse the peristomal skin with warm water. If soap is preferred, choose a mild, residue-free soap (no moisturizers, oils, or fragrance) to maintain skin barrier adhesion and reduce irritation. The opening of the wafer/skin barrier should be cut no more than about 3 mm (1/8 in) larger than the stoma to minimize leakage and protect skin.
If the client has a ureterostomy or ileal conduit, education is also needed regarding the collection pouch and barrier wafer, including how to empty the bag, how to measure the wafer to fit the stoma when it is replaced, and how to change out the system if it is a single-piece or two-piece device.
Other urinary diversions, such as continent cutaneous reservoirs, may require irrigation and clean intermittent catheterization, which may be scheduled (about every 4 hr) to maintain drainage and clear mucus, as instructed. Encourage adequate hydration (typically about 2 L/day unless contraindicated) to help flush mucus and reduce the risk of UTIs.
The nurse should also instruct the client to report findings such as pain with urination (for those voiding through a neobladder or performing clean intermittent catheterization) or changes in urine color or odor, as these may indicate infection; fever, chills, nausea/vomiting, back or abdominal pain, cloudy/foul urine, or increased confusion in older adults are concerning for UTI and warrant evaluation. Finally, changes in stoma color (dusky, cyanotic, or brown/black) or inability to pass a catheter or to drain a continent pouch require prompt provider notification due to the risk of ischemia/necrosis or reservoir overdistension.
Fecal or bowel diversions are surgical procedures that reroute intestinal contents to stomas formed on the abdominal wall. Such surgical interventions can be implemented to create ileostomies, J-pouches, Kock pouches, or colostomies.
Nursing interventions for clients with bowel diversions include many of the same tasks as are carried out when educating clients with urinary diversions. Clients should understand manifestations of possible problems, such as skin or pouch irritation, stoma issues (retraction/prolapse), blockages/obstructions, changes in stool output/consistency, and postoperative bleeding through the stoma or rectum.
Skin irritation from stool exposure is one of the most common findings reported by clients who have bowel diversions and is often due to a poorly fitted collection system (incorrectly sized barrier opening or inadequate seal). The nurse or wound, ostomy, and continence (WOC) nurse should teach peristomal skin cleansing (warm water; if soap is used, a mild, residue-free option) and accurate stoma measurement with cutting the barrier about 3 mm (1/8 in) larger than the stoma to reduce leakage and protect the skin. Clients should also be shown how and when to change/empty the pouch to prevent undermining. Clients should avoid perfumes, deodorants, and other scented products on or around the stoma to reduce irritation and preserve wafer adhesion; fragrance-free options are preferred.
In addition, the stoma itself can develop parastomal hernias, adhesions, or retraction, which may then cause obstruction (reduced or absent output, cramping pain, abdominal distention). These situations warrant prompt evaluation. Bowel obstruction and strangulation may rapidly progress to life-threatening complications and require urgent surgical assessment. Clients should be instructed to promptly report pain, bleeding, or any change in stoma color (dusky, cyanotic, brown/black), as these may indicate impaired perfusion, infection, or other complications requiring urgent evaluation.
Finally, teaching the client pelvic floor strengthening exercises, such as Kegel exercises, may be helpful with certain types of bowel diversions, such as an ileoanal reservoir, to help control incontinence and reduce seepage after surgery as bowel function adapts. Refer to Skill: Providing Ostomy Care and Skill: Draining an Ostomy Pouch.
A nurse is assessing a group of clients on a medical-surgical unit who have urinary or bowel diversions. Which of the following findings should the nurse report to the provider?
Select all that apply.
a
Stoma that appears dusky or cyanotic
b
Pink, moist stoma with intact peristomal skin
c
Small amount of mucus in urine from an ileal conduit
d
Audible bowel sounds after meals
e
Inability to pass a catheter into a continent cutaneous reservoir
f
New-onset abdominal distention and cramping with absent ostomy output
Nasogastric Decompression
Nasogastric (NG) tubes are flexible tubes that are inserted into a nostril and advanced down to the stomach to remove gastric contents and decompress the upper GI area. NG tubes are most frequently placed for bowel obstructions to reduce abdominal distention and subsequent nausea and vomiting, thereby decreasing the risk of aspiration. NG tubes also may be used for enteral feedings and/or medication administration (called nasoenteric tubes), but these uses are distinct from decompression and are not performed at the same time.
When placing the tube, the nurse should encourage the client to sit upright, if possible, to reduce the chance of vomiting and aspiration during insertion. NG tube length should be measured from the tip of the client’s nose to the tragus of the ear, to the xiphoid process, which is a standard estimation method to approximate the required length. The tube should be advanced as the client swallows or sips water to facilitate passage through the oropharynx.
Do not use the NG tube until placement is verified. Current safety guidance supports a combination of evidence-based methods—typically abdominal/chest X-ray (the initial gold standard and required before using the tube for enteral medications or nutrition or any time placement is uncertain), pH testing of gastric aspirate (an acidic pH supports gastric placement, noting that acid-suppressing medications and continuous feeds can alter results), and capnography/capnometry (useful to detect airway placement by identifying CO₂, though absence of CO₂ does not confirm gastric location). These recommendations reflect ongoing patient-safety events when tubes are used before radiographic verification is obtained and read. Importantly, the traditional air-bolus “whoosh” test is unreliable and should not be used.
Once the tube's location is confirmed, it should be secured to the nose with tape or a commercial device, connected to suction as ordered, and monitored for migration by regularly checking the external tube length and tube markings, because movement can occur with coughing, vomiting, repositioning, or loosening of the securement device. Refer to Skill: Nasogastric Decompression.
Providing Skin Care to Incontinent Clients
Clients who are incontinent are at risk for impaired skin integrity as a result of increased skin moisture and prolonged contact with urine and stool. For this reason, clients’ skin should be kept clean and dry. Nurses play an important role in protecting clients’ skin from breakdown and infection. Clients who have impaired mobility are at increased risk of incontinence, and frequent skin assessments are important to maintain skin integrity. Nurses should observe for areas of redness that do not blanch or turn white when pressed, as well as peeling/irritation, blisters, open wounds, and areas of ulceration. These problems most often occur on the buttocks, hips, genitals, and perineum, where moisture and irritants are greatest.
To maintain skin integrity, it is important to cleanse the affected areas promptly after each episode of incontinence. The skin can be cleaned with mild, diluted soap and water, then rinsed thoroughly, or with a soap-free perineal cleanser designed to minimize dryness and irritation. Regardless of the cleansing method, the area should be gently patted dry rather than rubbed. Alcohol-containing products should be avoided because they can dry or damage the skin.
After cleansing, the skin should be moisturized using alcohol-free creams to support the natural skin barrier. Applying a moisture-barrier product, such as ointments or creams containing zinc oxide, lanolin, or petrolatum, or a clear, protective sealant helps shield the skin from further exposure to urine or stool. Even when barrier products or absorbent briefs are used, the barrier must be reapplied after every episode of incontinence to maintain effectiveness.
For clients who spend long periods in bed or in a wheelchair, nurses should also reinforce regular repositioning, timely changes of soiled linens or clothing, and adequate nutrition to support healthy skin. These strategies, combined with consistent cleansing and protection, help reduce the risk of skin breakdown and maintain comfort and dignity for clients living who have incontinence.

Getty Images/Stefan_Alfonso
Skin Barrier CreamAfter cleansing skin, moisturize it using an alcohol-free cream to support the natural skin barrier.
A nurse is caring for a client who has incontinence and impaired mobility. Which of the following interventions should the nurse implement to maintain the client's skin integrity?
Select all that apply.
a
Clean the skin with a mild soap and water after each episode of incontinence.
b
Apply alcohol-based moisturizing creams to maintain skin moisture.
c
Assess the skin in areas of incontinence daily.
d
Pat the skin dry gently after cleansing rather than rubbing vigorously.
e
Use skin barriers such as ointments and sealants.
Overview
An enema is the introduction of a solution through the anus into the rectum and sigmoid colon to promote the evacuation of stool. Enemas may be used to alleviate constipation or to prepare the bowel for surgery or diagnostic procedures such as a colonoscopy.
Laws and policies regarding the delegation of client care tasks vary by state and facility. When delegating tasks, the nurse must follow their state’s Nurse Practice Act and the NCSBN’s 5 Rights of Delegation. The 5 Rights of Delegation include determining the right task, the right circumstance, and the right person, providing the right directions and communication, and performing the right supervision and evaluation.
Overview of Steps
Click to download this file.
Equipment
Stethoscope
Prescribed enema solution, warmed to the appropriate temperature
Container for the enema solution and tubing
Water-soluble lubricant
Absorbent pad
Bedpan/bedside commode
Supplies for pericare
Rationale: A stethoscope is needed to assess for bowel sounds. An enema can be prescribed to be cleansing, oil retention, carminative, or medicated. The type of enema solution prescribed is based on the client’s health issue. A container is needed to hold the solution and the tubing that is used to introduce the solution into the client’s anus and rectum. Water-soluble lubricant is needed to lubricate the tube before introducing it into the client’s anus and rectum. An absorbent pad is used to protect the bed linen on the client’s bed. |
Skill Demonstrations
Select from the menu to watch each demonstration. Each video transcript is available in the Transcript section.
Enema: Cleansing
09:16
Enema: Retention
03:49
Administering Enemas
Transcripts
Enema: Cleansing: Transcript
Enema: Retention: Transcript
Skills and the Nursing Process
Skill Steps With Rationales provide step-by-step instruction on skill performance according to best practice guidelines. Each skill step is identified by a phase of the nursing process. Because the nursing process is continuous and dynamic, skill steps may move back and forth between phases as the nurse progresses through the performance of the skill.
Skill Steps With Rationales
Required Initial Steps
Step 1: Gather supplies.
Nursing Process: Implementation
Rationale: Gathering supplies and ensuring they are clean and properly working prior to beginning the technique helps ensure the nurse is prepared to perform the procedure. |
Step 2: Provide privacy as needed.
Nursing Process: Implementation
Rationale: Providing privacy is a part of maintaining client confidentiality. The nurse should respect a client’s right to physical privacy by closing the door to the client’s room or closing the curtain if one is present. |
Step 3: Introduce yourself.
Nursing Process: Implementation
Rationale: Introducing yourself promotes a therapeutic nurse-client relationship. |
Step 4: Perform hand hygiene and apply PPE (when applicable).
Nursing Process: Implementation
Rationale: Performing hand hygiene prior to client care is an important infection control measure. The nurse should practice standard precautions by applying nonsterile gloves and other PPE if there is a possibility of contact with blood or body fluids. |
Step 5: Identify the client using two identifiers.
Nursing Process: Implementation
Rationale: Identifying the client according to facility protocol is a safety measure to ensure that the correct procedure is being performed on the correct client. |
Step 6: Determine any allergies or contraindications.
Nursing Process: Assessment/Data Collection
Rationale: Determining allergies and/or contraindications ensures client safety by preventing adverse reactions and ensuring that treatments are safe and effective. |
Step 7: Provide client education as needed.
Nursing Process: Implementation
Rationale: Client education decreases client anxiety and promotes the nurse-client relationship. After explaining the procedure, the nurse should determine if the client has any questions or concerns and verify the client’s understanding. |
Step 8: Verify prescriptions and orders.
Nursing Process: Implementation
Rationale: Verifying prescriptions and orders is crucial to ensure client safety, prevent errors, and provide effective care. The verification process ensures that any discrepancies or issues are identified and addressed before they impact the client’s care. |
Next Steps
Step 9: Adjust the bed height to a comfortable working level.
Nursing Process: Implementation
Rationale: Raising the height of the bed provides optimal access to the client’s rectum. |
Step 10: Place client in a left side-lying position, with upper thigh flexed to chest, if appropriate, for client condition and comfort. Drape client to allow visualization of rectal area. Place waterproof pad under client buttocks.
Nursing Process: Implementation
Rationale: The left-lateral position is used to visualize the anus and facilitates the flow of the enema solution through the anus into the rectum and sigmoid colon. The drape provides privacy for the client. The absorbent pad protects the bed linens from soiling. |
Step 11: Administer the enema.
a. Cleansing Enema
Nursing Process: Implementation
1. Warm enema solution to room temperature or slightly higher, checking temperature with a thermometer.
Rationale: Warming the solution so that it is warm or slightly above room temperature prevents cramping when the solution is instilled through the client’s anus into the rectum. |
2. Add enema solution to bag and prime tubing.
Rationale: The enema bag or container holds the prescribed amount of solution to instill. Priming the tubing removes any air from the tubing. |
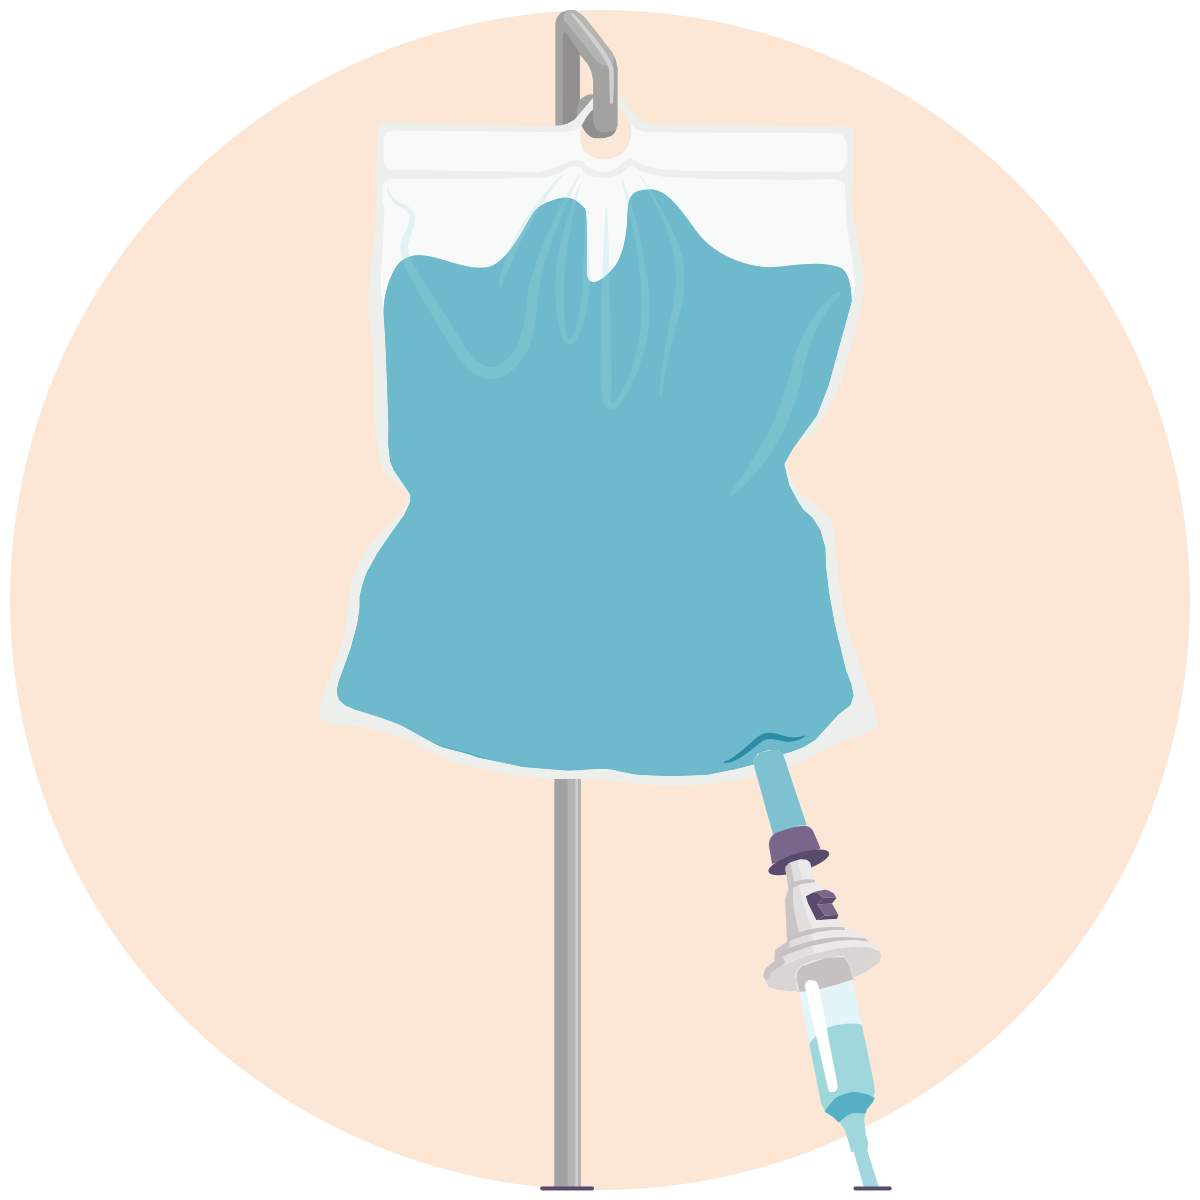
Enema bagAdd enema solution to bag and prime tubing.
3. Elevate the bag of solution no higher than 45 cm (18 in) above the level of the client’s anus.
Rationale: Raising the bag to this level ensures that the solution can be instilled into the client by gravity and prevents the client from developing cramps. |
4. Apply a generous amount of lubricant to the end of the rectal tube about 5 to 7 cm (2 to 3 in).
Rationale: Lubrication is needed to facilitate insertion of the enema tubing into the client’s anus and rectum. |
5. Explain to the client what you are doing and then lift the client’s buttock to expose the anus. Instruct the client to take several, slow deep breaths. Slowly and gently, begin to insert the rectal tube into the anus, pointing toward the umbilicus, advancing 7 to 10 cm (3 to 4 in) for an adult.
Rationale: Slow and gentle insertion at the correct angle ensures that the enema tube is inserted correctly and safely into the client’s anus and rectum. |
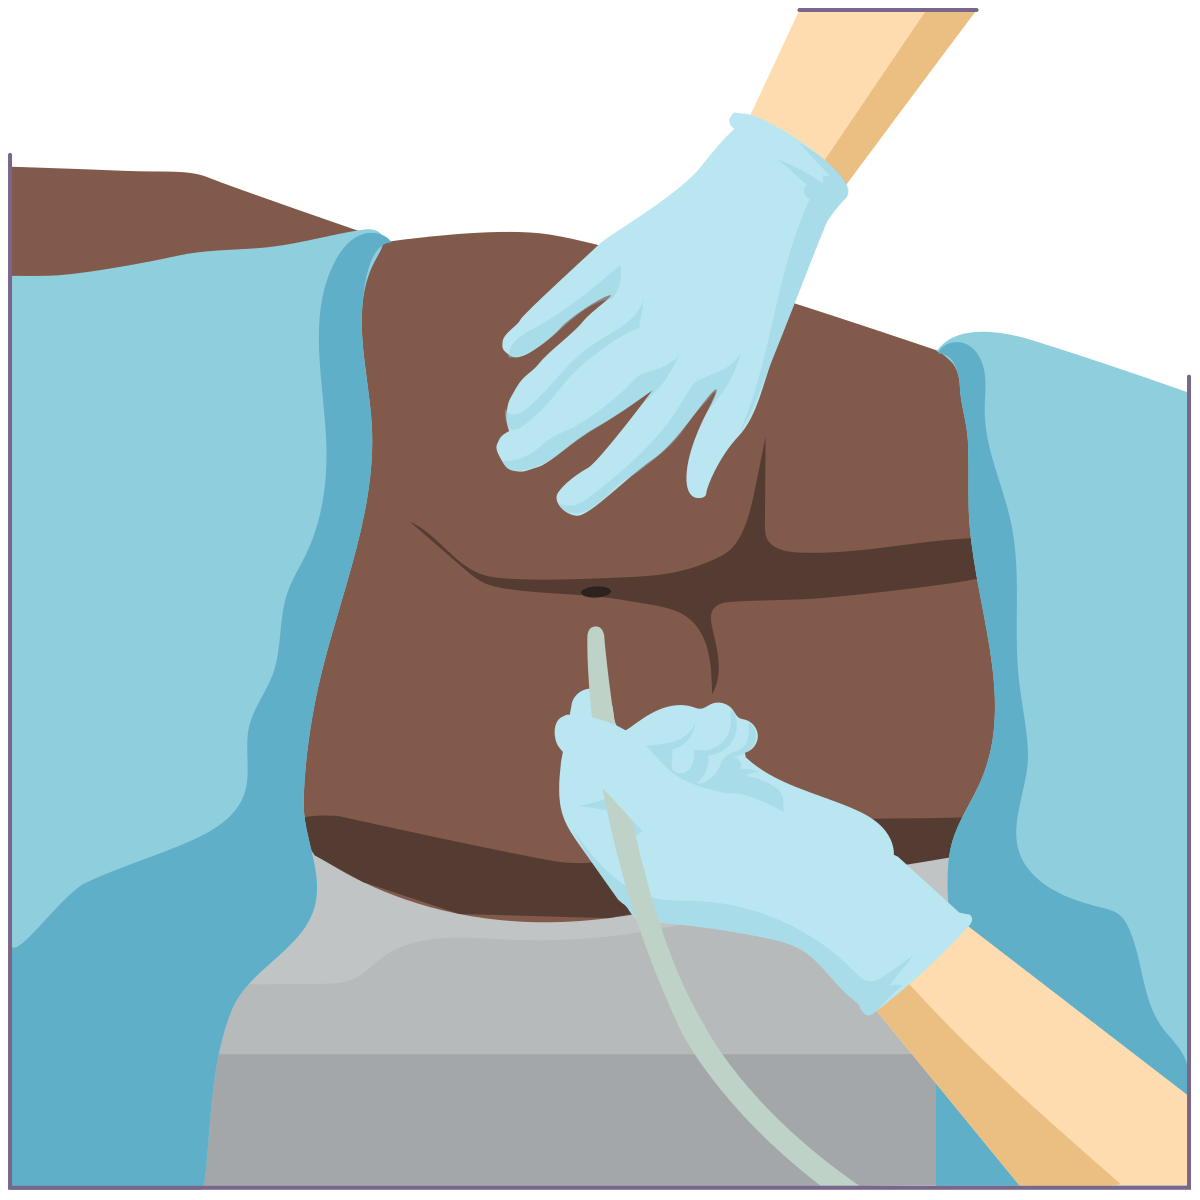
Inserting TubeLift the client’s buttock to expose the anus, and slowly and gently, begin to insert the rectal tube into the anus, pointing toward the umbilicus.
6. While holding the tube continuously in place, begin to instill the solution over 5 to 10 min.
Rationale: For a cleansing enema, the rate to instill the solution is 75 to 100 mL for an adult. Holding the tube in place ensures that the tube is not accidentally dislodged. |
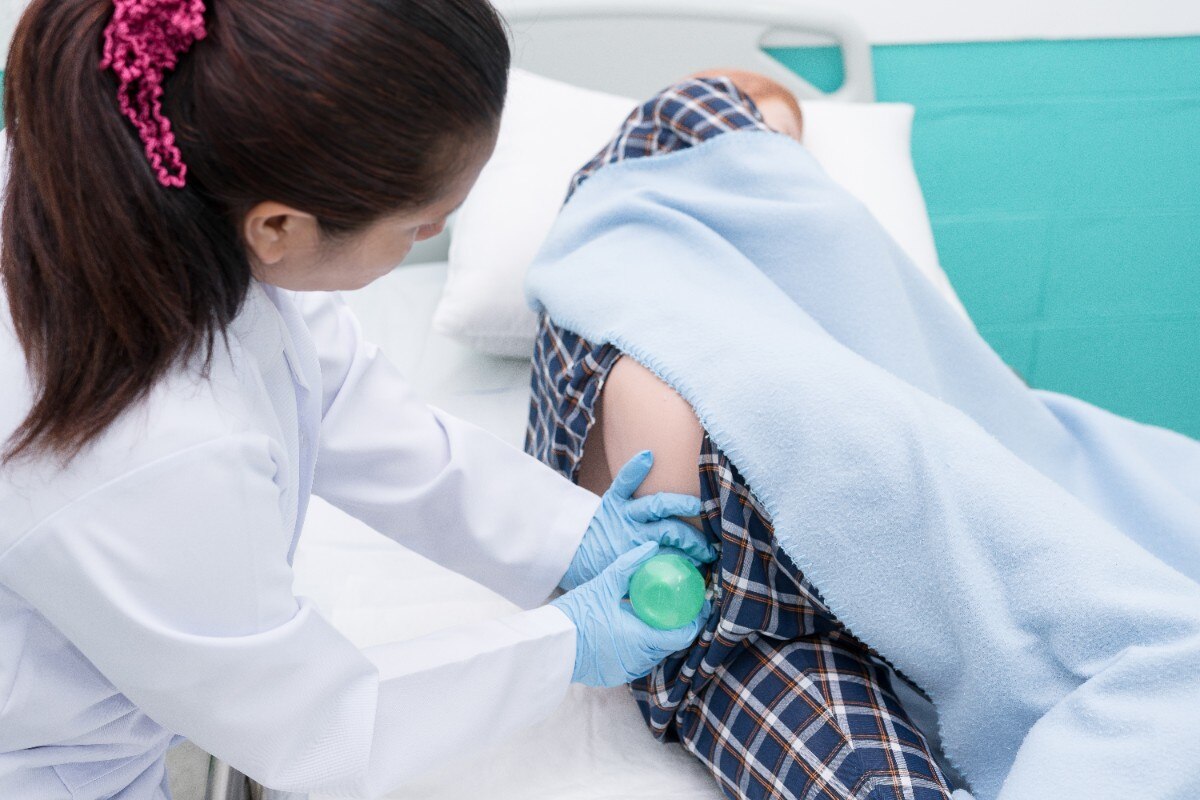
© Bangkoker/Shutterstock
Administering enemaWhile holding the tube in place, begin to instill the solution over 5 to 10 min.
7. Assess for dizziness, lightheadedness, nausea, diaphoresis, and clammy skin, stopping the solution immediately if observed.
Nursing Process: Assessment/Data Collection
Rationale: These manifestations could indicate an adverse response to the solution and procedure. |
8. If the client verbalizes the urge to defecate or is experiencing cramping, clamp the rectal tube and lower the bag. Encourage the client to pant or take small, fast breaths.
Nursing Process: Implementation
Rationale: Lowering the bag slows the flow of the solution and reduces client discomfort. |
9. Once the solution has been administered, clamp rectal tube and remove, wrapping in a paper towel.
Rationale: The tube should be removed after the solution is instilled to promote comfort by preventing the introduction of air into the colon. The end of the tube is wrapped in a paper towel to prevent the spread of microorganisms. |
b. Retention or Prepackaged Small-Volume Enema
Nursing Process: Implementation
1. Remove cap from the commercially packaged enema bottle. Apply generous amount of lubricant to the end of the rectal about 5 to 7 cm (2 to 3 in).
Rationale: Lubrication is needed to facilitate insertion of the tip of the container into the client’s anus and rectum. |
2. Tell client and then lift the client’s buttock to expose the anus. Instruct the client to take several, slow deep breaths. Slowly and gently, begin to insert the rectal tube into the anus, pointing toward the umbilicus, advancing 7 to 10 cm (3 to 4 in) for an adult.
Rationale: Slow and gentle insertion at the correct angle ensures that the enema tube is inserted correctly and safely into the client’s anus and rectum. |
inserting retention enemaSlowly and gently, begin to insert the rectal tube into the anus, pointing toward the umbilicus, advancing 7 to 10 cm (3 to 4 in) for an adult.
3. Holding the bottle in your hand, compress the container towards the rectal tip. Administer all the solution in the container by rolling the end of the container up towards the tip.
Rationale: Compressing and rolling the container ensures that all of the enema solution is instilled into the client’s anus and rectum. |
4. Assess for dizziness, lightheadedness, nausea, diaphoresis, and clammy skin during administration. Discontinue procedure if these manifestations occur.
Nursing Process: Assessment/Data Collection
Rationale: These manifestations could indicate an adverse response to the solution and procedure. |
5. Once the solution has been administered, keep the container collapsed and slowly remove the rectal tube from the anus. Wrap tip in a paper towel.
Nursing Process: Implementation
Rationale: The enema container should be removed after the solution is instilled to promote client comfort. The tip of the container is wrapped in a paper towel to prevent the spread of microorganisms. |
6. Encourage the client to retain the fluid for 5 to 10 min for a small-volume hypertonic enema and a minimum of 30 min for an oil-retention enema. Lower the bed height.
Rationale: The enema solution must be retained long enough to be effective. Lowering the bed height allows the client to safely access the toilet/commode or bedpan when needed. |
7. When the client has the urge to defecate, assist the client to a sitting position on the bedpan or to the bedside commode or bathroom. Ensure the call bell is in reach or stay with the client.
Rationale: The client must be able to safely expel the results of the enema. |
8. Instruct the client to avoid flushing the toilet or emptying the commode before you observe the results of the enema.
Rationale: The results from the enema should be available so that the enema can be evaluated for effectiveness. |
9. Provide perineal hygiene care and assist the client in performing hand hygiene.
Rationale: This is done to ensure the client’s hygiene and comfort. |
10. Return the client to a comfortable position, covering with bed linens.
Rationale: This is done to ensure the client’s comfort. |
Final Steps
Step 12: Prioritize the safety and well-being of the client and adhere to all safety guidelines and facility policies.
Nursing Process: Implementation
Rationale: The nurse should prioritize client safety, according to the client’s individual needs, before leaving the client’s room to reduce the risk of falls and client injury. |
Step 13: Remove and discard of supplies as needed.
Nursing Process: Implementation
Rationale: Disposing of supplies immediately, especially those containing bodily fluids, decreases the risk of contamination and the spread of germs. |
Step 14: Perform hand hygiene.
Nursing Process: Implementation
Rationale: Performing hand hygiene following client care is an important infection control measure. |
Step 15: Document the care provided as applicable.
Document the following.
Date and time of enema administration
Client assessment findings, including pain, bowel sounds, and amount and characteristics of fecal output
Client’s toleration of the enema
Nursing Process: Implementation
Rationale: As part of the implementation phase of the nursing process, the nurse should document the findings for the client’s bowel sounds and results from the enema. Accurate and timely documentation allows for immediate access of client data by members of the client’s health care team. |
Client Considerations (general, age-related, home care)
Older adults
Rationale: Older adults are more susceptible to complications from the use of enemas, including electrolyte imbalances or injury. |
Interventions for Unexpected Outcomes
Evaluate the client for pain, abdominal distention, or bleeding after the enema.
Rationale: An enema can cause bowel perforation or rupture, leading to infection. |
Evaluate the client for development of cardiac arrhythmias.
Rationale: Electrolyte imbalances can occur with repeated enemas and result in cardiac arrhythmias. |
Draining an Ostomy Pouch
Page 1
Overview
An ostomy, or stoma, is a surgical opening through the abdominal wall to the colon (colostomy), small intestines (ileostomy), or ileal conduit (urostomy) that allows for the drainage of stool or urine. Emptying the appliance, or bag, is part of the routine care for clients who have an ostomy. The ostomy appliance is generally emptied when it is one-third to one-half full to prevent accidental leakage.
Laws and policies regarding the delegation of client care tasks vary by state and facility. When delegating tasks, the nurse must follow their state’s Nurse Practice Act and the NCSBN’s 5 Rights of Delegation. The 5 Rights of Delegation include determining the right task, the right circumstance, and the right person, providing the right directions and communication, and performing the right supervision and evaluation.
Overview of Steps
Click to download this file.
Equipment
Washcloth or disposable towel
Container to collect drainage
Rationale: The end of the pouch will need to be cleaned to prevent leakage of contents and odor. |
Skill Demonstration
Draining an Ostomy Pouch
Ostomy: Draining a Pouch: Transcript
Skills and the Nursing Process
Skill Steps With Rationales provide step-by-step instruction on skill performance according to best practice guidelines. Each skill step is identified by a phase of the nursing process. Because the nursing process is continuous and dynamic, skill steps may move back and forth between phases as the nurse progresses through the performance of the skill.
Skill Steps With Rationales
Required Initial Steps
Step 1: Gather supplies.
Nursing Process: Implementation
Rationale: Gathering supplies and making sure they are clean and working properly prior to beginning the technique helps to ensure that the nurse is prepared to perform the procedure. |
Step 2: Provide privacy as needed.
Nursing Process: Implementation
Rationale: Providing privacy is a part of maintaining client confidentiality. The nurse should respect a client’s right to physical privacy by closing the door to the client’s room or closing the curtain if one is present. |
Step 3: Introduce yourself.
Nursing Process: Implementation
Rationale: Introducing yourself promotes a therapeutic nurse-client relationship. |
Step 4: Perform hand hygiene and apply PPE (when applicable).
Nursing Process: Implementation
Rationale: Performing hand hygiene prior to client care is an important infection control measure. The nurse should practice standard precautions by applying nonsterile gloves and other PPE if there is a possibility of contact with blood or body fluids. |
Step 5: Identify the client using two identifiers.
Nursing Process: Implementation
Rationale: Identifying the client according to facility protocol is a safety measure to ensure that the correct procedure is being performed on the correct client. |
Step 6: Determine any allergies or contraindications.
Nursing Process: Assessment/Data Collection
Rationale: Determining allergies and/or contraindications ensures client safety by preventing adverse reactions and ensuring that treatments are safe and effective. |
Step 7: Provide education as needed.
Nursing Process: Implementation
Rationale: Client education decreases client anxiety and promotes the nurse-client relationship. After explaining the procedure, the nurse should determine if the client has any questions or concerns and verify the client’s understanding. |
Step 8: Verify prescriptions and orders.
Nursing Process: Implementation
Rationale: Verifying prescriptions and orders is crucial to ensure client safety, prevent errors, and provide effective care. The verification process ensures that any discrepancies or issues are identified and addressed before they impact the client’s care. |
Next Steps
Step 9: Assist the client into a sitting or standing position.
Nursing Process: Implementation
Rationale: The ostomy pouch will be drained directly into the toilet for disposing. Some clients prefer to sit on a chair facing the toilet. |
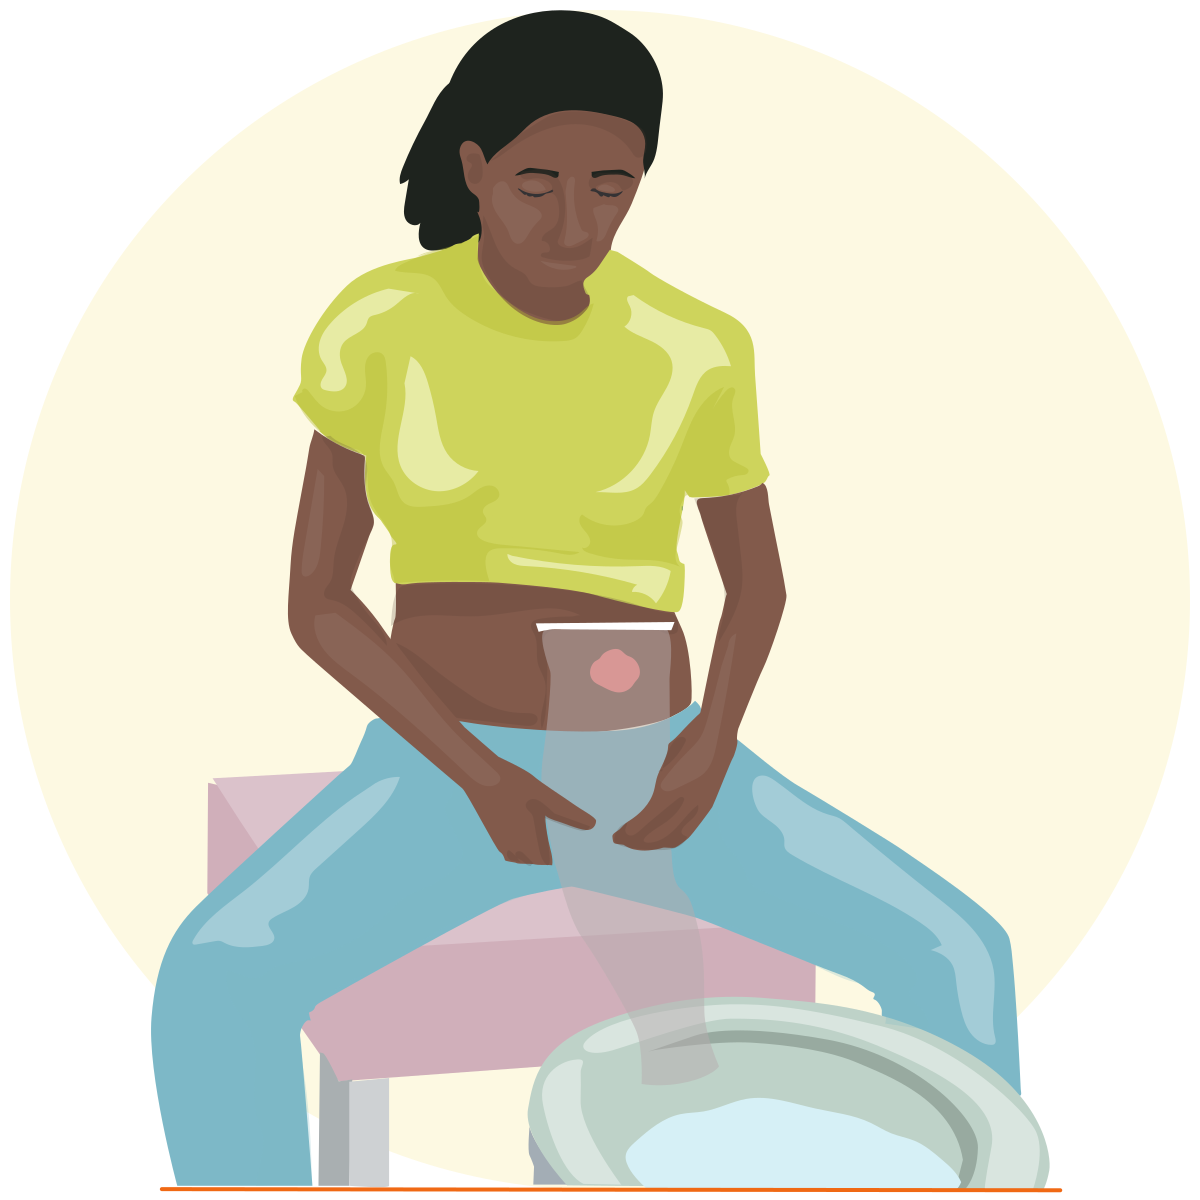
Preparing to Drain an Ostomy PouchAssist the client to sit on the toilet. Some clients prefer to sit on a chair facing the toilet.
Step 10: Place a waterproof barrier under the stoma appliance.
Nursing Process: Implementation
Rationale: A waterproof barrier prevents ostomy drainage from leaking onto the surrounding tissue. |
Step 11: View the stoma appliance. Note if leakage is present around the skin barrier.
Nursing Process: Implementation
Rationale: The skin barrier will need to be replaced if the adhesive has become loose. Skin that is red, sore, or weeping can interfere with the seal around the stoma. |
Step 12: Remove, clamp, and cuff the end of the appliance.
Nursing Process: Implementation
Rationale: Cuffing, or folding over, the end of the pouch will make it easier to clean the appliance and prevent the ostomy drainage from leaking. |
Step 13: Empty the bag carefully into the graduated container.
Nursing Process: Implementation
Rationale: Emptying the bag into the graduated container allows for measurement of the amount of ostomy drainage and an assessment of its consistency and color. |
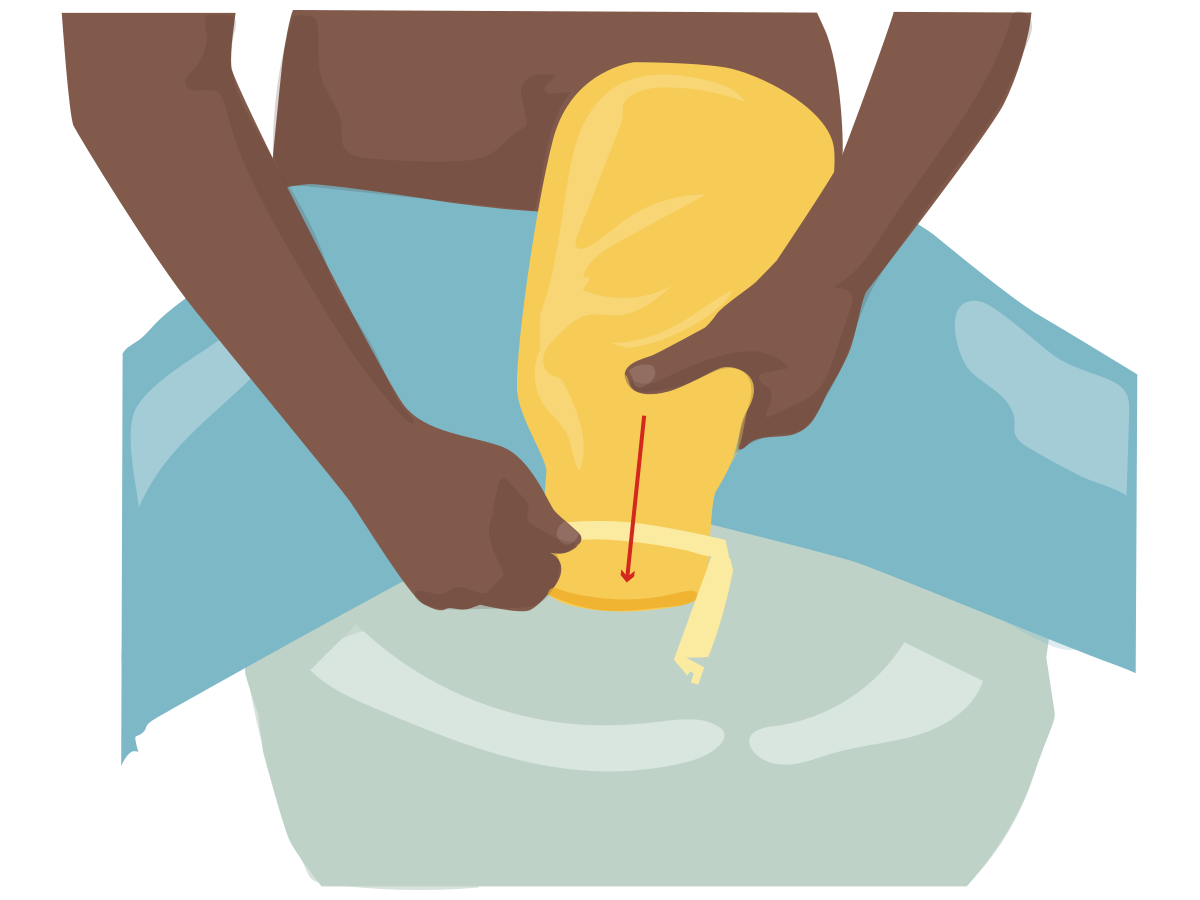
Graduated containerThe ostomy contents can be emptied into a collection container to measure
Step 14: Uncuff the appliance and reapply the clamp.
Nursing Process: Implementation
Rationale: Ensure that the clamp is completely closed to prevent leakage of ostomy contents. |
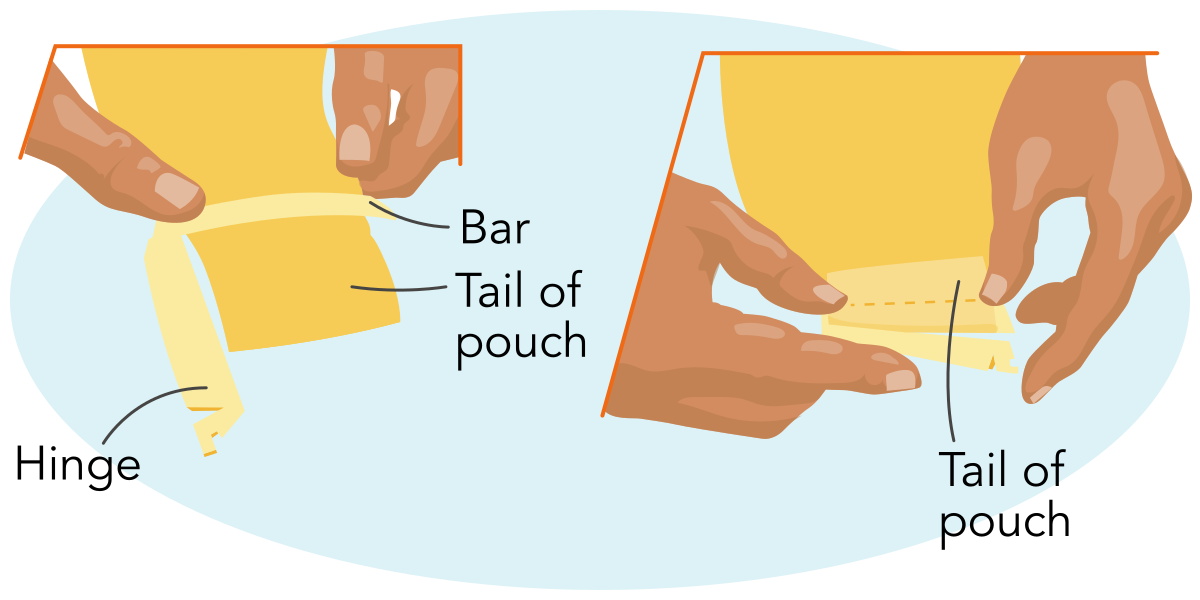
Preventing leakageEnsure that the clamp is securely closed to prevent accidental leakage.
Step 15: Measure and dispose of contents into the toilet.
Nursing Process: Implementation
Rationale: Odor-reducing sprays or drops can increase client comfort. |
Final Steps
Step 16: Prioritize the safety and well-being of the client and adhere to all safety guidelines and facility policies.
Nursing Process: Implementation
Rationale: The nurse should prioritize client safety, according to the client’s individual needs, before leaving the client’s room to reduce the risk of falls and client injury. |
Step 17: Remove and discard of supplies as needed.
Nursing Process: Implementation
Rationale: Disposing of supplies immediately, especially those containing bodily fluids, decreases the risk of contamination and the spread of germs. |
Step 18: Perform hand hygiene.
Nursing Process: Implementation
Rationale: Performing hand hygiene following client care is an important infection control measure. |
Step 19: Document the care provided as applicable.
Document the following.
Assessment of the ostomy appliance
Amount, color, and consistency of the ostomy drainage
Any complications or interventions
Nursing Process: Implementation
Rationale: As part of the implementation phase of the nursing process, the nurse should document the findings following the procedure. Accurate and timely documentation allows for immediate access of client data by members of the client’s health care team. |
Client Considerations (general, age-related, home care)
Consider the client’s feelings toward the ostomy.
Rationale: Some clients may experience disturbed body image related to the ostomy. Encourage the client to discuss feelings and actively participate in the procedure. |
Interventions for Unexpected Outcomes
Perform stoma care and replace the ostomy appliance if the adhesive seal around the skin barrier is compromised.
Rationale: Excessive leaking can weaken the adhesive seal for the skin barrier. If the adhesive seal becomes compromised, the entire skin barrier will need to be replaced. |
Remove excessive amount of air in the bag.
Rationale: Gas can collect in the ostomy bag, which can cause discomfort and increase pressure on the skin barrier. |
References
Draining an Ostomy Pouch
Page 1
Overview
An ostomy, or stoma, is a surgical opening through the abdominal wall to the colon (colostomy), small intestines (ileostomy), or ileal conduit (urostomy) that allows for the drainage of stool or urine. Emptying the appliance, or bag, is part of the routine care for clients who have an ostomy. The ostomy appliance is generally emptied when it is one-third to one-half full to prevent accidental leakage.
Laws and policies regarding the delegation of client care tasks vary by state and facility. When delegating tasks, the nurse must follow their state’s Nurse Practice Act and the NCSBN’s 5 Rights of Delegation. The 5 Rights of Delegation include determining the right task, the right circumstance, and the right person, providing the right directions and communication, and performing the right supervision and evaluation.
Overview of Steps
Click to download this file.
Equipment
Washcloth or disposable towel
Container to collect drainage
Rationale: The end of the pouch will need to be cleaned to prevent leakage of contents and odor. |
Skill Demonstration
Draining an Ostomy Pouch
Ostomy: Draining a Pouch: Transcript
Skills and the Nursing Process
Skill Steps With Rationales provide step-by-step instruction on skill performance according to best practice guidelines. Each skill step is identified by a phase of the nursing process. Because the nursing process is continuous and dynamic, skill steps may move back and forth between phases as the nurse progresses through the performance of the skill.
Skill Steps With Rationales
Required Initial Steps
Step 1: Gather supplies.
Nursing Process: Implementation
Rationale: Gathering supplies and making sure they are clean and working properly prior to beginning the technique helps to ensure that the nurse is prepared to perform the procedure. |
Step 2: Provide privacy as needed.
Nursing Process: Implementation
Rationale: Providing privacy is a part of maintaining client confidentiality. The nurse should respect a client’s right to physical privacy by closing the door to the client’s room or closing the curtain if one is present. |
Step 3: Introduce yourself.
Nursing Process: Implementation
Rationale: Introducing yourself promotes a therapeutic nurse-client relationship. |
Step 4: Perform hand hygiene and apply PPE (when applicable).
Nursing Process: Implementation
Rationale: Performing hand hygiene prior to client care is an important infection control measure. The nurse should practice standard precautions by applying nonsterile gloves and other PPE if there is a possibility of contact with blood or body fluids. |
Step 5: Identify the client using two identifiers.
Nursing Process: Implementation
Rationale: Identifying the client according to facility protocol is a safety measure to ensure that the correct procedure is being performed on the correct client. |
Step 6: Determine any allergies or contraindications.
Nursing Process: Assessment/Data Collection
Rationale: Determining allergies and/or contraindications ensures client safety by preventing adverse reactions and ensuring that treatments are safe and effective. |
Step 7: Provide education as needed.
Nursing Process: Implementation
Rationale: Client education decreases client anxiety and promotes the nurse-client relationship. After explaining the procedure, the nurse should determine if the client has any questions or concerns and verify the client’s understanding. |
Step 8: Verify prescriptions and orders.
Nursing Process: Implementation
Rationale: Verifying prescriptions and orders is crucial to ensure client safety, prevent errors, and provide effective care. The verification process ensures that any discrepancies or issues are identified and addressed before they impact the client’s care. |
Next Steps
Step 9: Assist the client into a sitting or standing position.
Nursing Process: Implementation
Rationale: The ostomy pouch will be drained directly into the toilet for disposing. Some clients prefer to sit on a chair facing the toilet. |
Preparing to Drain an Ostomy PouchAssist the client to sit on the toilet. Some clients prefer to sit on a chair facing the toilet.
Step 10: Place a waterproof barrier under the stoma appliance.
Nursing Process: Implementation
Rationale: A waterproof barrier prevents ostomy drainage from leaking onto the surrounding tissue. |
Step 11: View the stoma appliance. Note if leakage is present around the skin barrier.
Nursing Process: Implementation
Rationale: The skin barrier will need to be replaced if the adhesive has become loose. Skin that is red, sore, or weeping can interfere with the seal around the stoma. |
Step 12: Remove, clamp, and cuff the end of the appliance.
Nursing Process: Implementation
Rationale: Cuffing, or folding over, the end of the pouch will make it easier to clean the appliance and prevent the ostomy drainage from leaking. |
Step 13: Empty the bag carefully into the graduated container.
Nursing Process: Implementation
Rationale: Emptying the bag into the graduated container allows for measurement of the amount of ostomy drainage and an assessment of its consistency and color. |
Graduated containerThe ostomy contents can be emptied into a collection container to measure
Step 14: Uncuff the appliance and reapply the clamp.
Nursing Process: Implementation
Rationale: Ensure that the clamp is completely closed to prevent leakage of ostomy contents. |
Preventing leakageEnsure that the clamp is securely closed to prevent accidental leakage.
Step 15: Measure and dispose of contents into the toilet.
Nursing Process: Implementation
Rationale: Odor-reducing sprays or drops can increase client comfort. |
Final Steps
Step 16: Prioritize the safety and well-being of the client and adhere to all safety guidelines and facility policies.
Nursing Process: Implementation
Rationale: The nurse should prioritize client safety, according to the client’s individual needs, before leaving the client’s room to reduce the risk of falls and client injury. |
Step 17: Remove and discard of supplies as needed.
Nursing Process: Implementation
Rationale: Disposing of supplies immediately, especially those containing bodily fluids, decreases the risk of contamination and the spread of germs. |
Step 18: Perform hand hygiene.
Nursing Process: Implementation
Rationale: Performing hand hygiene following client care is an important infection control measure. |
Step 19: Document the care provided as applicable.
Document the following.
Assessment of the ostomy appliance
Amount, color, and consistency of the ostomy drainage
Any complications or interventions
Nursing Process: Implementation
Rationale: As part of the implementation phase of the nursing process, the nurse should document the findings following the procedure. Accurate and timely documentation allows for immediate access of client data by members of the client’s health care team. |
Client Considerations (general, age-related, home care)
Consider the client’s feelings toward the ostomy.
Rationale: Some clients may experience disturbed body image related to the ostomy. Encourage the client to discuss feelings and actively participate in the procedure. |
Interventions for Unexpected Outcomes
Perform stoma care and replace the ostomy appliance if the adhesive seal around the skin barrier is compromised.
Rationale: Excessive leaking can weaken the adhesive seal for the skin barrier. If the adhesive seal becomes compromised, the entire skin barrier will need to be replaced. |
Remove excessive amount of air in the bag.
Rationale: Gas can collect in the ostomy bag, which can cause discomfort and increase pressure on the skin barrier. |
References
Inserting an Indwelling Urinary Catheter
Page 1
Overview
The insertion of an indwelling urinary catheter is done to continuously drain the bladder or perform bladder irrigation. It also provides a mechanism to accurately measure urinary output or to treat urinary retention, obstruction, or incontinence.
Laws and policies regarding the delegation of client care tasks vary by state and facility. When delegating tasks, the nurse must follow their state’s Nurse Practice Act and the NCSBN’s 5 Rights of Delegation. The 5 Rights of Delegation include determining the right task, the right circumstance, and the right person, providing the right directions and communication, and performing the right supervision and evaluation.
Overview of Steps
Click to download this file.
Equipment
Bath blanket or clean sheet; waterproof pad
Perineal care supplies
Topical anesthetic 2% lidocaine, if prescribed
Commercially available sterile catheter kit
Rationale: A bath blanket and clean sheets assist with providing privacy. A bath basin with soap and water is used for performing perineal care following insertion. Topical anesthetic may be prescribed to lessen discomfort. Commercially prepared catheter kits include necessary sterile supplies. Perineal care can be completed with soap and water or perineal wipes, based on facility policy. |
Skill Demonstration
Inserting Indwelling Retention Catheter: Client Who Has a Vagina
Inserting Indwelling Retention Catheter: Female Reproductive System
Skills and the Nursing Process
Skill Steps With Rationales provide step-by-step instruction on skill performance according to best practice guidelines. Each skill step is identified by a phase of the nursing process. Because the nursing process is continuous and dynamic, skill steps may move back and forth between phases as the nurse progresses through the performance of the skill.
Skill Steps With Rationales
Required Initial Steps
Step 1: Gather supplies.
Nursing Process: Implementation
Rationale: Gathering supplies and ensuring they are clean and properly working prior to beginning the technique helps ensure the nurse is prepared to perform the procedure. |
Step 2: Provide privacy as needed.
Nursing Process: Implementation
Rationale: Providing privacy is a part of maintaining client confidentiality. The nurse should respect a client’s right to physical privacy by closing the door to the client’s room or closing the curtain if one is present. |
Step 3: Introduce yourself.
Nursing Process: Implementation
Rationale: Introducing yourself promotes a therapeutic nurse-client relationship. |
Step 4: Perform hand hygiene and apply PPE (when applicable).
Nursing Process: Implementation
Rationale: Performing hand hygiene prior to inserting an indwelling urinary catheter is an important infection control measure. The nurse should practice standard precautions by applying nonsterile gloves and other PPE if there is a possibility of contact with blood or body fluids. |
Step 5: Identify the client using two identifiers.
Nursing Process: Implementation
Rationale: Identifying the client according to facility protocol is a safety measure to ensure the correct procedure is being performed on the correct client. |
Step 6: Determine any allergies or contraindications.
Nursing Process: Assessment/Data Collection
Rationale: Determining allergies and/or contraindications ensures client safety by preventing adverse reactions and ensuring that treatments are safe and effective. |
Step 7: Provide education as needed.
Nursing Process: Implementation
Rationale: Client education decreases client anxiety and promotes the nurse-client relationship. After explaining the procedure, the nurse should determine if the client has any questions or concerns and verify client understanding. |
Step 8: Verify prescriptions and orders.
Nursing Process: Implementation
Rationale: Verifying prescriptions and orders is crucial to ensure client safety, prevent errors, and provide effective care. The verification process ensures that any discrepancies or issues are identified and addressed before they impact the client’s care. |
Next Steps
Step 9: Place the equipment on a stable surface within reach (such as a bedside table).
Nursing Process: Implementation
Rationale: Placing the equipment on a bedside table offers easy access to the items. |
Step 10: Adjust the environment for convenience, ergonomics, and lighting.
Nursing Process: Implementation
Rationale: Raising the height of the bed provides optimal access to the client’s perineum; lowering the side rail provides easier access to this area. |
Step 11: Assist the client to a position that accounts for their physical limitations and allows for performance of the catheterization.
Nursing Process: Implementation
Rationale: Positioning the client provides the nurse with access to the perineal area. |
Step 12: Place a waterproof pad under the client.
Nursing Process: Implementation
Rationale: Placing a waterproof pad under the client prevents contamination of the bed linens during the procedure. |
Step 13: Open the sterile catheterization kit using aseptic technique.
Nursing Process: Implementation
Rationale: The sterile kit should be opened using aseptic technique to ensure that the equipment remains sterile and uncontaminated. |
Step 14: Apply sterile gloves.
Nursing Process: Implementation
Rationale: Insertion of a urinary catheter is a sterile procedure to reduce the risk of introducing bacteria into the urinary tract. |
Step 15: Open the facility-approved antiseptic solution and pour it onto the cotton balls.
Nursing Process: Implementation
Rationale: The aseptic solution is used to clean the meatus prior to catheter insertion. |
Step 16: Apply lubricant to the catheter.
Nursing Process: Implementation
Rationale: Lubricating the catheter allows for easier insertion and reduces discomfort for the client. This also minimizes trauma to the ureteral mucosa. |
Step 17: Insert the catheter.
a. Female Reproductive System
Nursing Process: Implementation
1. Use the nondominant hand to separate the labia and expose the meatus.
Rationale: This is done in preparation to cleanse the urinary meatus. The nondominant hand will now be nonsterile for the remainder of the procedure. |
2. Use the dominant hand to clean from the clitoris to the anus using three separate cotton balls.
Along both of the labia folds
Down the center of the urinary meatus
Rationale: Cleaning the urinary meatus and surrounding area is essential to prevent the introduction of bacteria into the urinary tract. |
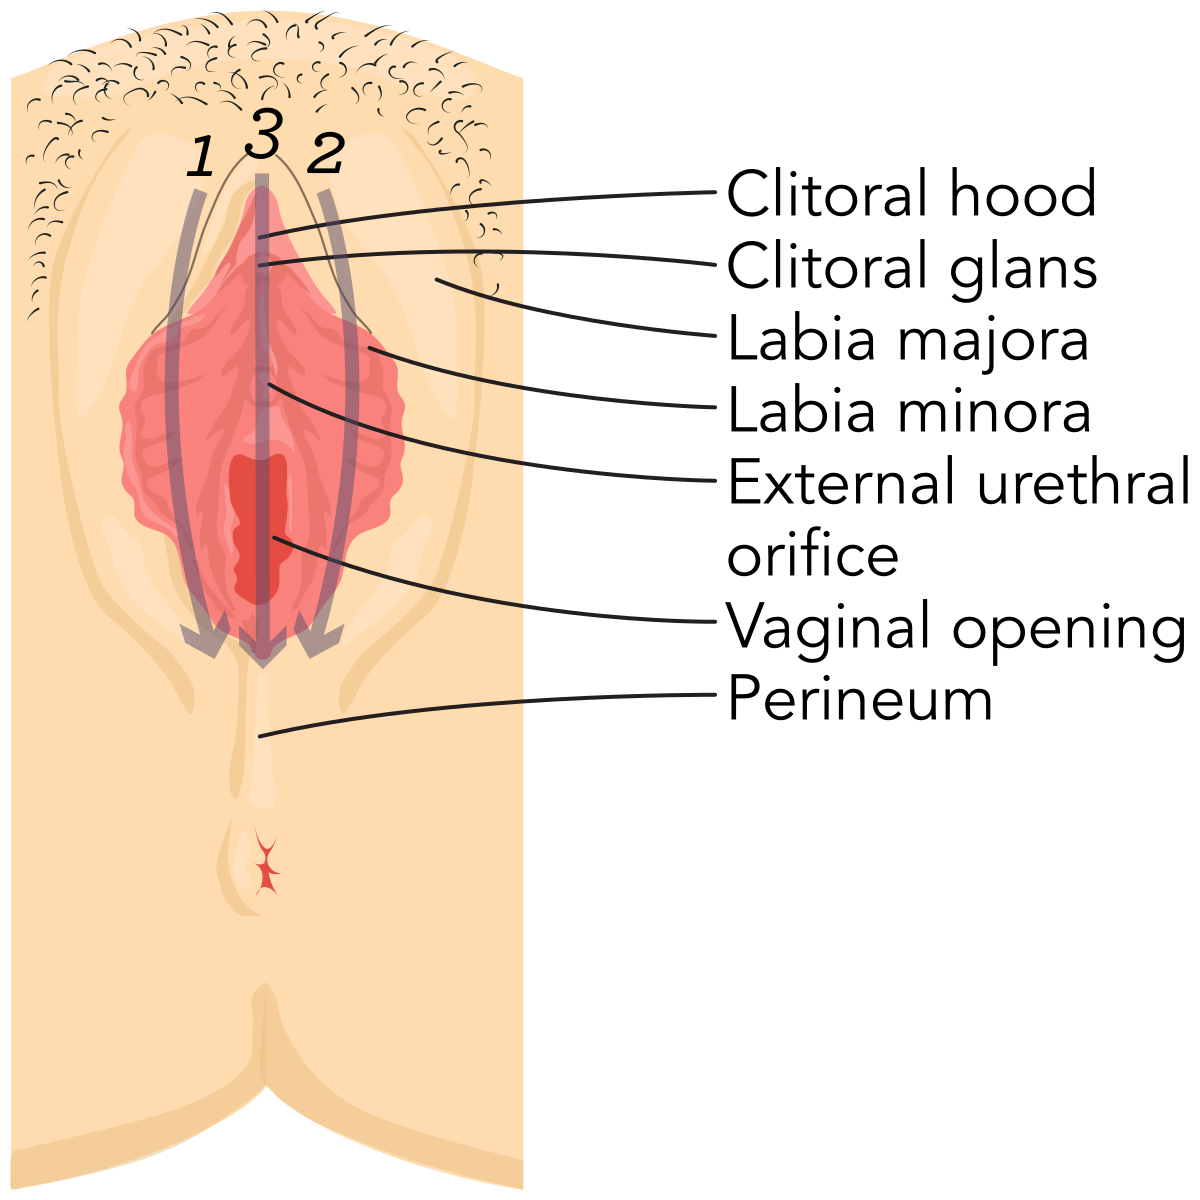
Cleansing the Urinary MeatusClean down the center of the urinary meatus and along both of the labia folds.
3. Hold the catheter with the dominant hand. Use the nondominant hand to spread the labia minora to expose the meatus.
Rationale: The catheter is held in the dominant, sterile hand to avoid contamination. The nondominant, nonsterile hand is used to hold the labia open so that the meatus is exposed. |
4. Insert the catheter until there is a flash of urine, then advance the catheter approximately 5 cm (2 in).
Rationale: Advancing the catheter after obtaining urine return ensures that the tip of the catheter is resting in the bladder and not in the urethra. |
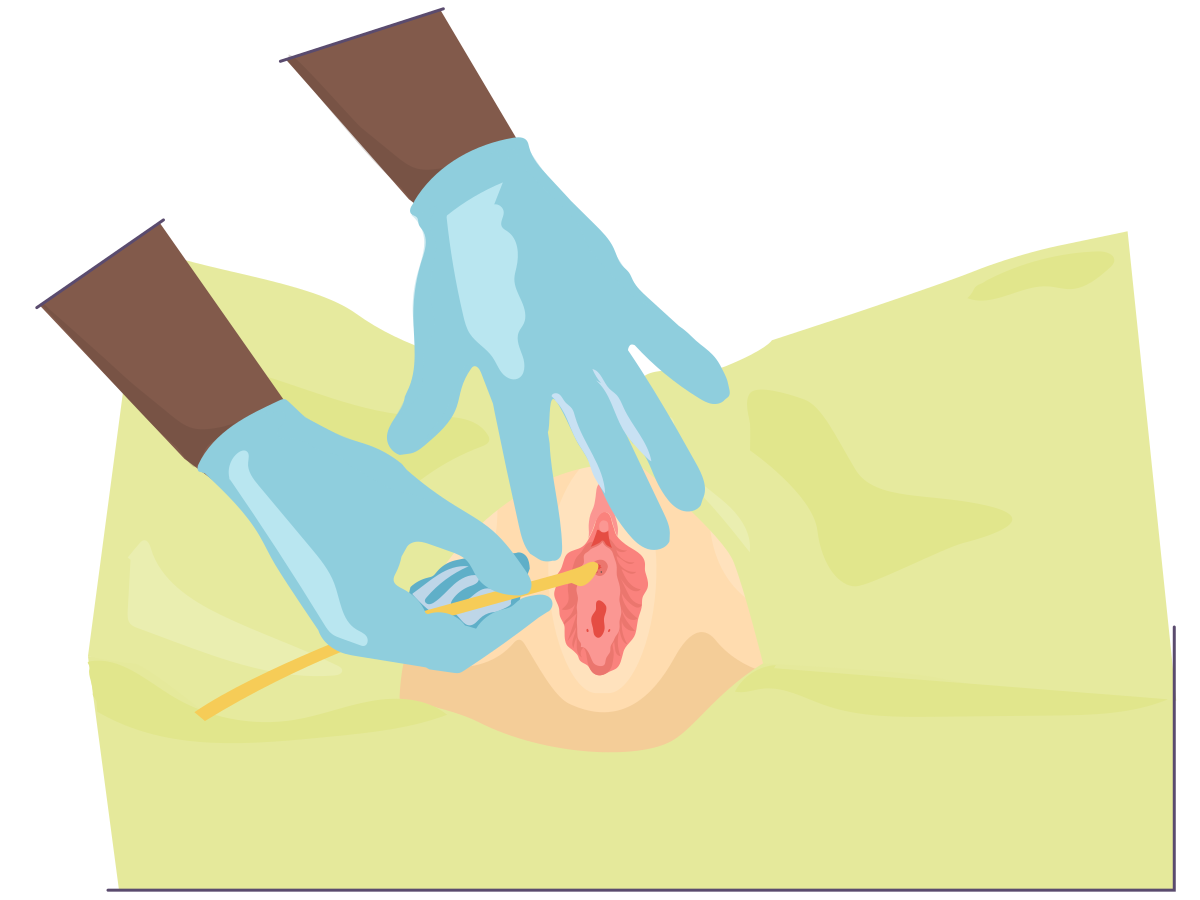
Inserting a Catheter into a Female ClientInsert the catheter until there is a flash of urine, then advance the catheter approximately 5 cm (2 in).
b. Male Reproductive System
Nursing Process: Implementation
1. Using the nondominant hand, hold the penis and gently retract the foreskin, if present.
Rationale: This is done in preparation to cleanse the urinary meatus. The nondominant hand will now be nonsterile for the remainder of the procedure. |
2. Clean the urinary meatus with sterile antiseptic, using a circular motion. Repeat at least three times, using one cotton swab or cotton ball each time.
Rationale: Cleaning the urinary meatus and surrounding area is essential to prevent the introduction of bacteria into the urinary tract. |
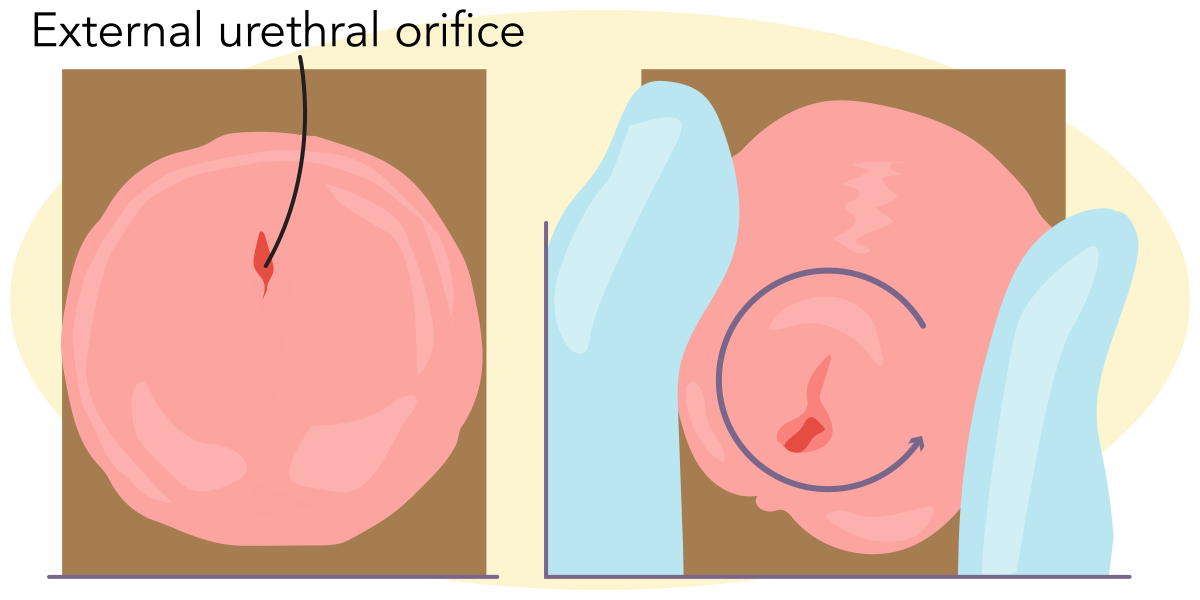
Cleansing the PenisClean the external urethral orifice in a circular motion and repeat at least three times.
3. Insert the catheter until there is a flash of urine, then advance the catheter approximately 5 cm (2 in).
Rationale: Advancing the catheter after obtaining urine return ensures that the tip of the catheter is resting in the bladder and not in the urethra. |
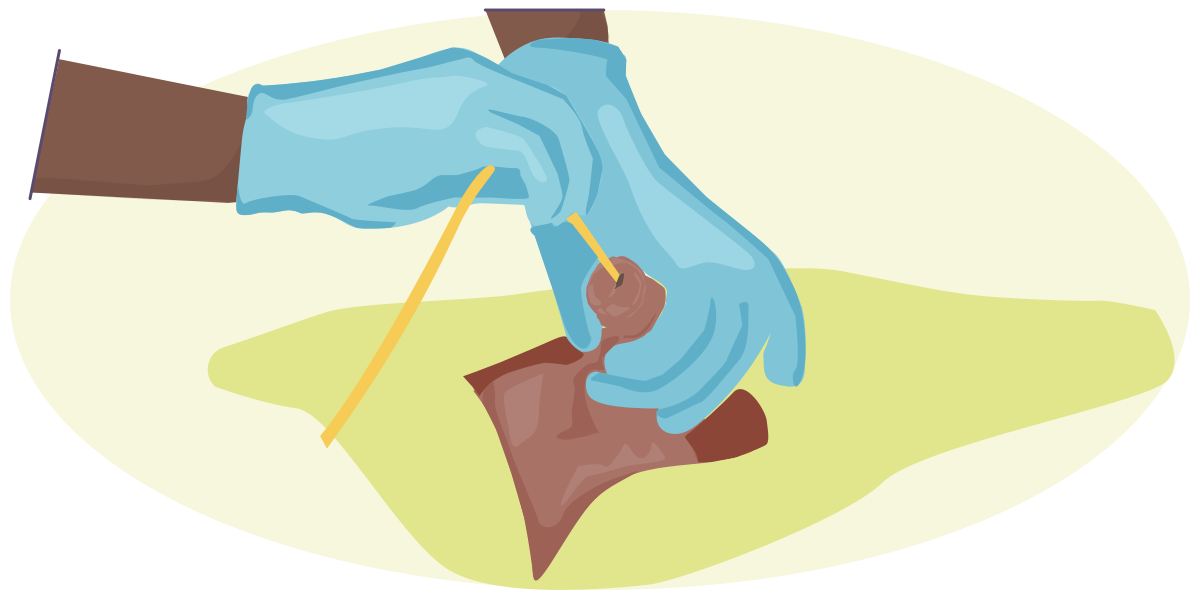
Inserting a catheter into a male client.Insert the catheter until there is a flash of urine, then advance the catheter approximately 5 cm (2 in).
Step 18: Hold catheter securely with nondominant hand while inflating catheter balloon.
Nursing Process: Implementation
Rationale: Inflating the balloon in the bladder ensures that the catheter stays in place within the bladder. |
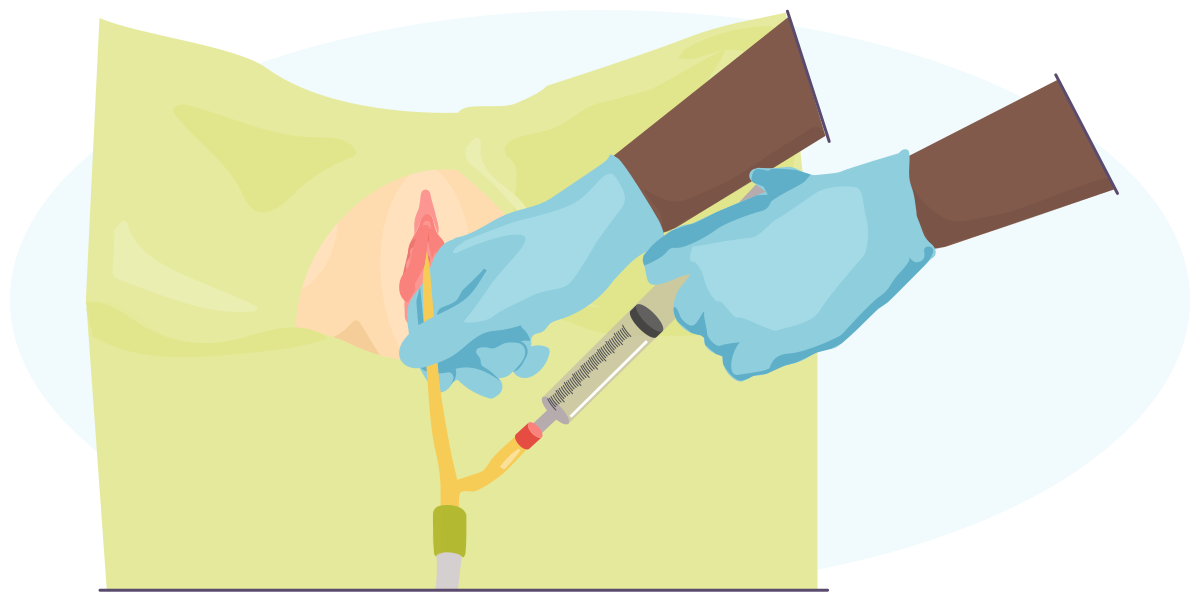
Inflating the BalloonInflate the catheter balloon in the bladder to secure the catheter.
Step 19: Gently tug on the catheter to ensure that it is secure and in place.
Nursing Process: Implementation
Rationale: Gently pulling on the catheter until resistance is met indicates that the balloon is inflated and that the catheter will not be accidently expelled. |
Step 20: For client who has a penis: If client is uncircumcised, replace the foreskin.
Nursing Process: Implementation
Rationale: Failure to replace the foreskin may compromise circulation to the penis and cause painful swelling. |
Step 21: Secure the catheter with a securement device.
Nursing Process: Implementation
Rationale: Securing the catheter and tubing ensures that movement and traction against the urethra does not occur. |
Step 22: Place the drainage bag below the level of the bladder.
Nursing Process: Implementation
Rationale: Placing the drainage bag below the level of the bladder ensures that the urine flows from the bladder by gravity and prevents urine from flowing back into the bladder. |
Step 23: Perform perineal care.
Nursing Process: Implementation
Rationale: Cleansing the perineum after inserting the catheter reduces the risk of skin irritation. |
Final Steps
Step 24: Prioritize the safety and well-being of the client and adhere to all safety guidelines and facility policies.
Nursing Process: Implementation
Rationale: The nurse should prioritize client safety, according to the client’s individual needs, before leaving the client’s room to reduce the risk of falls and client injury. |
Step 25: Remove and discard of supplies as needed.
Nursing Process: Implementation
Rationale: Disposing of supplies immediately, especially those containing bodily fluids, decreases the risk of contamination and the spread of germs. |
Step 26: Remove gloves and perform hand hygiene.
Nursing Process: Implementation
Rationale: Performing hand hygiene after client care is an important infection control measure. |
Step 27: Document the care provided as applicable.
Accurately document the following.
Date and time the catheter was inserted
Size of the catheter inserted
Volume of sterile water instilled in the balloon
Volume and characteristics of urine drainage
Output of urine after catheter insertion
Education provided to the client
Nursing Process: Implementation
Rationale: As part of the implementation phase of the nursing processs, the nurse should document the findings for the client’s insertion of an indwelling urinary catheter. Accurate and timely documentation allows for immediate access of client data by members of the client’s health care team. |
Client Considerations (general, age-related, home care)
Educate clients who will be discharged home with an indwelling urinary catheter about proper hygiene, care of the catheter, and manifestations of complications, including:
Urinary tract infections
Ureteral injury
Bladder spasms
Failure of urine to drain into the collection bag
Leaking around the catheter
Rationale: Clients should be educated about proper hygiene and care of the catheter to prevent a catheter-associated urinary tract infection (CAUTI). It is important for clients to be able to identify complications in order to seek quick and timely treatment. |
Interventions for Unexpected Outcomes
Unable to insert the catheter due to resistance.
Rationale: Stop the procedure and notify the provider. |
Sterile technique is broken.
Rationale: In the event that sterile technique is broken, stop the procedure and take corrective action. Corrective action will depend on what step the nurse is performing in the procedure as well as what has been contaminated. |
Removing an Indwelling Urinary Catheter
Page 1
Overview
Indwelling urinary catheters should be removed as soon as they are no longer necessary, to prevent the development of a catheter-associated urinary tract infection (CAUTI).
Laws and policies regarding the delegation of client care tasks vary by state and facility. When delegating tasks, the nurse must follow their state’s Nurse Practice Act and the NCSBN’s 5 Rights of Delegation. The 5 Rights of Delegation include determining the right task, the right circumstance, and the right person, providing the right directions and communication, and performing the right supervision and evaluation.
Overview of Steps
Click to download this file.
Equipment
Nonsterile gloves and other PPE (if indicated)
Adhesive remover
10-mL Luer-lock syringe
Graduated container
Waterproof pad
Paper towels
Perineal care supplies
Rationale: Adhesive remover may be needed to remove adhesive residue left from the securement device. A 10-mL Luer-lock syringe is used to remove the sterile water used to inflate the catheter balloon. A graduated container is used to measure the urine in the collection bag before the catheter is removed. A waterproof pad is placed under the client to protect the linen from being soiled. Paper towels or a disposable pad is used to wrap the proximal end of the catheter once it is removed. Perineal care can be completed with soap and water or perineal wipes, based on facility policy. |
Skill Demonstration
Removing an Indwelling Catheter: Female Reproductive System
Removing an Indwelling Catheter: Female Reproductive System: Transcript
Skills and the Nursing Process
Skill Steps With Rationales provide step-by-step instruction on skill performance according to best practice guidelines. Each skill step is identified by a phase of the nursing process. Because the nursing process is continuous and dynamic, skill steps may move back and forth between phases as the nurse progresses through the performance of the skill.
Skill Steps With Rationales
Required Initial Steps
Step 1: Gather supplies.
Nursing Process: Implementation
Rationale: Gathering supplies and ensuring they are clean and properly working prior to beginning the technique helps ensure the nurse is prepared to perform the procedure. |
Step 2: Provide privacy as needed.
Nursing Process: Implementation
Rationale: Providing privacy is a part of maintaining client confidentiality. The nurse should respect a client’s right to physical privacy by closing the door to the client’s room or closing the curtain if one is present. |
Step 3: Introduce yourself.
Nursing Process: Implementation
Rationale: Introducing yourself promotes a therapeutic nurse-client relationship. |
Step 4: Perform hand hygiene and apply PPE (when applicable).
Nursing Process: Implementation
Rationale: Performing hand hygiene prior to removing an indwelling catheter is an important infection control measure. The nurse should practice standard precautions by applying nonsterile gloves and other PPE if there is a possibility of contact with blood or body fluids. |
Step 5: Identify the client using two identifiers.
Nursing Process: Implementation
Rationale: Identifying the client according to facility protocol is a safety measure to ensure that the correct procedure is being performed on the correct client. |
Step 6: Determine any allergies or contraindications.
Nursing Process: Assessment/Data Collection
Rationale: Determining allergies and/or contraindications ensures client safety by preventing adverse reactions and ensuring that treatments are safe and effective. |
Step 7: Provide client education as needed.
Nursing Process: Implementation
Rationale: Client education decreases client anxiety and promotes the nurse-client relationship. After explaining the procedure, the nurse should determine if the client has any questions or concerns and verify the client’s understanding. |
Step 8: Verify prescriptions and orders.
Nursing Process: Implementation
Rationale: Verifying prescriptions and orders is crucial to ensure client safety, prevent errors, and provide effective care. The verification process ensures that any discrepancies or issues are identified and addressed before they impact the client’s care. |
Next Steps
Step 9: Empty the collection bag into the graduated container and record the volume.
Nursing Process: Implementation
Rationale: Emptying the collection bag into the graduated container allows for accurate output to be measured and recorded. Emptying the urine collection bag also provides the nurse the opportunity to assess the characteristics of the urine in the collection bag. |
Step 10: Assist the female client into the dorsal recumbent position; assist the male client into the supine position.
Nursing Process: Implementation
Rationale: Placing the client in the proper position facilitates access to the perineum for catheter removal. |
Step 11: Place a waterproof pad beneath the client.
Nursing Process: Implementation
Rationale: Using a waterproof pad ensures that the bed linens do not become soiled. |
Step 12: Drape the client for warmth and privacy while exposing the perineal area.
Nursing Process: Implementation
Rationale: Covering all parts of the body except the perineal area promotes client privacy and comfort. |
Step 13: Assess the client’s perineum for irritation or drainage.
Nursing Process: Implementation
Rationale: Assessing the perineum for irritation or drainage allows the nurse to identify complications that should be reported to the provider. |
Step 14: Remove any tape or securing device holding the catheter to the client.
Nursing Process: Implementation
Rationale: Removing the tape or securing device before taking the catheter out facilitates removal. |
Step 15: Attach the Luer-lock syringe to the balloon port of the catheter using the dominant hand.
Nursing Process: Implementation
Rationale: The Luer-lock syringe is used to remove the sterile water that is keeping the balloon of the catheter inflated in the bladder. |
Step 16: Allow fluid from the inflated balloon to passively fill the syringe.
Nursing Process: Implementation
Rationale: The fluid should be allowed to passively drain into the syringe. Aggressively aspirating the sterile water into the syringe may cause collapse of the inflation lumen of the catheter. Collapse of the inflation lumen prevents the balloon inside the bladder from deflating completely, resulting in trauma to the urethra when the catheter is removed. |
Step 17: Grasp the catheter close to the urinary meatus and gently withdraw the catheter.
Nursing Process: Implementation
Rationale: Gently withdrawing the catheter allows the nurse to detect resistance that might indicate that the balloon of the catheter has not been fully deflated. |
Step 18: Wrap the proximal end of the catheter in a paper towel or disposable waterproof pad.
Nursing Process: Implementation
Rationale: Covering the catheter prevents the client from reacting to the sight or smell of the tube. Wrapping the end of the catheter in a paper towel or waterproof pad also prevents leakage onto the client or bed linen. |
Step 19: Dispose of the catheter and drainage bag.
Nursing Process: Implementation
Rationale: The removed catheter and collection bag contain body fluids and should be discarded in a facility-approved container. |
Step 20: Provide perineal care.
Nursing Process: Implementation
Rationale: Cleansing the perineal area after removal prevents the spread of microorganisms and promotes cleanliness and client comfort. |
Final Steps
Step 21: Prioritize the safety and well-being of the client and adhere to all safety guidelines and facility policies.
Nursing Process: Implementation
Rationale: The nurse should ensure client safety, according to the client’s individual needs, before leaving the client’s room to reduce the risk of falls and client injury. |
Step 22: Remove and discard of supplies as needed.
Nursing Process: Implementation
Rationale: Disposing of supplies immediately, especially those containing bodily fluids, decreases the risk of contamination and the spread of germs. |
Step 23: Remove gloves and perform hand hygiene.
Nursing Process: Implementation
Rationale: Performing hand hygiene following client care is an important infection control measure. |
Step 24: Document the care provided as applicable.
Accurately document the following.
Date and time of catheter removal
Client tolerance of the procedure
Volume and characteristics of urine output
Anomalies in the catheter or balloon
Nursing Process: Implementation
Rationale: As part of the implementation phase of the nursing process, the nurse should document removal of the indwelling catheter as quickly as possible after implementation. Accurate and timely documentation allows for immediate access of client data by members of the client’s health care team. |
Interventions for Unexpected Outcomes
If resistance occurs when the fluid has been removed from the balloon, stop the procedure and contact the health care provider.
Rationale: Pulling on the catheter could cause injury to the urinary meatus and eventually cause strictures to develop. |
References
Irrigating a Colostomy
Page 1
Overview
Colostomy irrigation is the process of instilling water into the colon through the stoma to remove fecal content. Colostomy irrigation is often performed to promote fecal continence by emptying the bowels at routine intervals.
Laws and policies regarding the delegation of client care tasks vary by state and facility. When delegating tasks, the nurse must follow their state’s Nurse Practice Act and the NCSBN’s 5 Rights of Delegation. The 5 Rights of Delegation include determining the right task, the right circumstance, and the right person, providing the right directions and communication, and performing the right supervision and evaluation.
Overview of Steps
Click to download this file.
Equipment
Irrigation kit
Water-based lubrication
Tap water or bottled water
Ostomy bag or stoma cap
Soap and water or cleansing wipes
Rationale: Irrigation kits should include a reservoir to collect the irrigation fluid, a hook, a tube with a cone-shaped tip that will connect the reservoir to the stoma, and an irrigation sleeve. A water-based lubricant will prevent tissue damage to the stoma. Bottled water is used when the irrigation is being performed where tap water is unavailable. The ostomy bag or stoma cap prevents fecal drainage from leaking and potentially causing skin irritation. The stoma can be cleaned with mild soap and water. |
Skill Demonstration
Ostomy: Irrigation
Ostomy: Irrigation: Transcript
Skills and the Nursing Process
Skill Steps With Rationales provide step-by-step instruction on skill performance according to best practice guidelines. Each skill step is identified by a phase of the nursing process. Because the nursing process is continuous and dynamic, skill steps may move back and forth between phases as the nurse progresses through the performance of the skill.
Skill Steps With Rationales
Required Initial Steps
Step 1: Gather supplies.
Nursing Process: Implementation
Rationale: Gathering supplies and making sure they are clean and working properly prior to beginning the technique helps to ensure that the nurse is prepared to perform the procedure. |
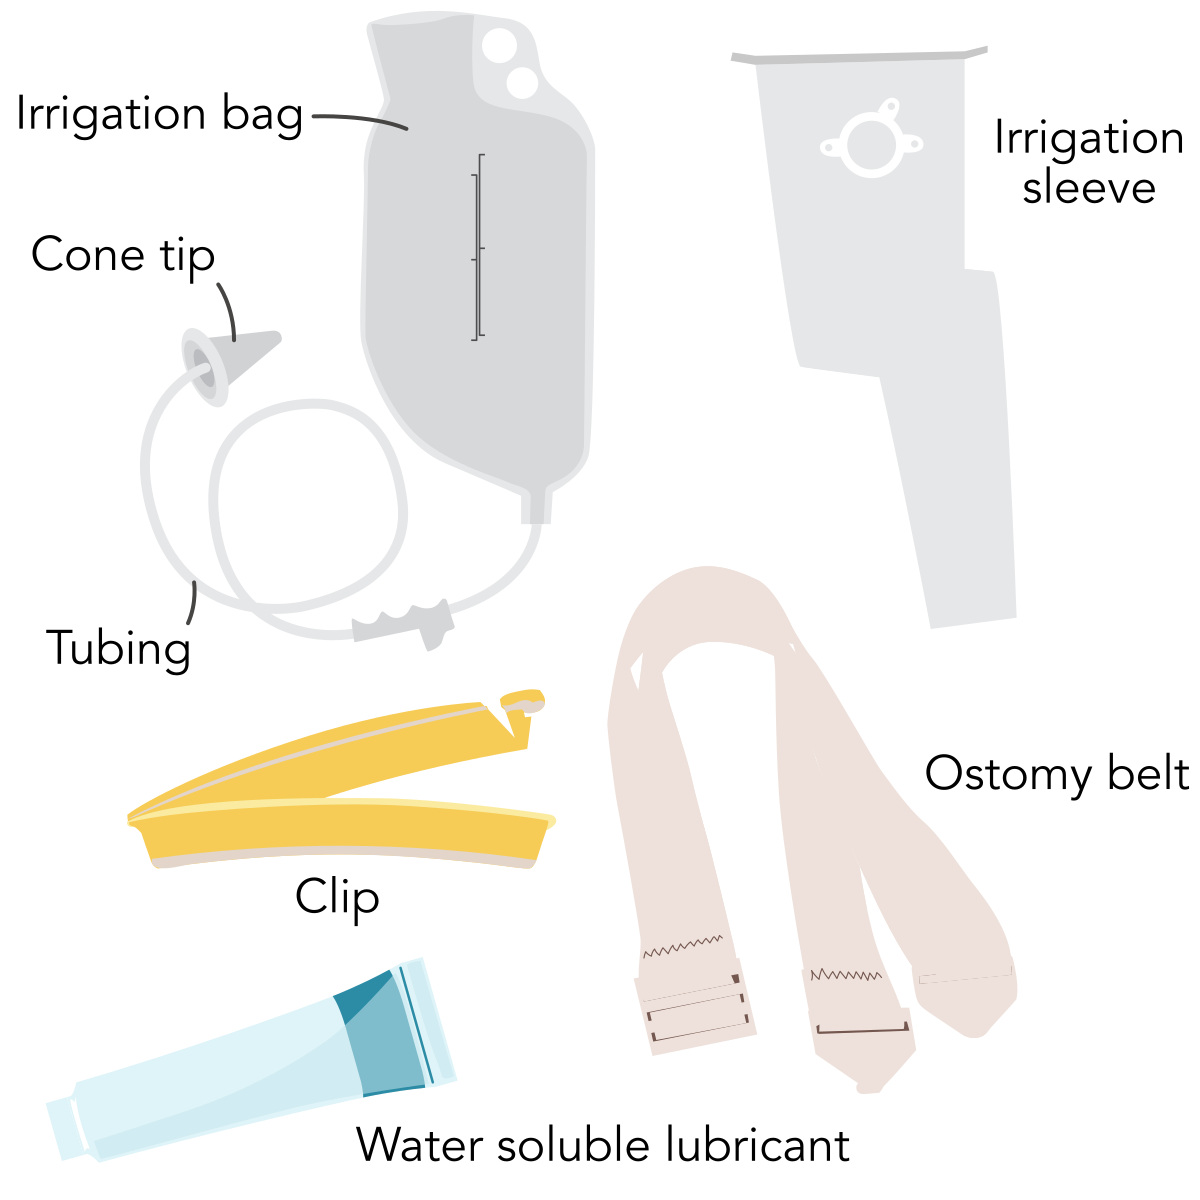
Colostomy suppliesGather the needed supplies.
Step 2: Provide privacy as needed.
Nursing Process: Implementation
Rationale: Providing privacy is a part of maintaining client confidentiality. The nurse should respect a client’s right to physical privacy by closing the door to the client’s room or closing the curtain if one is present. |
Step 3: Introduce yourself.
Nursing Process: Implementation
Rationale: Introducing yourself promotes a therapeutic nurse-client relationship. |
Step 4: Perform hand hygiene and apply PPE (when applicable).
Nursing Process: Implementation
Rationale: Performing hand hygiene prior to client care is an important infection control measure. The nurse should practice standard precautions by applying nonsterile gloves and other PPE if there is a possibility of contact with blood or body fluids. |
Step 5: Identify the client using two identifiers.
Nursing Process: Implementation
Rationale: Identifying the client according to facility protocol is a safety measure to ensure that the correct procedure is being performed on the correct client. |
Step 6: Determine any allergies or contraindications.
Nursing Process: Assessment/Data Collection
Rationale: Determining allergies and/or contraindications ensures client safety by preventing adverse reactions and ensuring that treatments are safe and effective. |
Step 7: Provide education as needed.
Nursing Process: Implementation
Rationale: Client education decreases client anxiety and promotes the nurse-client relationship. After explaining the procedure, the nurse should determine if the client has any questions or concerns and verify the client’s understanding. |
Step 8: Verify prescriptions and orders.
Nursing Process: Implementation
Rationale: Verifying prescriptions and orders is crucial to ensure client safety, prevent errors, and provide effective care. The verification process ensures that any discrepancies or issues are identified and addressed before they impact the client’s care. |
Next Steps
Step 9: Assist the client to a seated position on the toilet/commode.
Nursing Process: Implementation
Rationale: Seating the client on a toilet/commode will allow the fecal contents irrigated from the client’s colon to flow into the toilet. |
Step 10: Remove pouch or covering from the skin barrier surrounding the stoma.
Nursing Process: Implementation
Rationale: Removing the pouch or covering surrounding the stoma will provide direct access to the stoma. Assess the stoma for color and bleeding. |
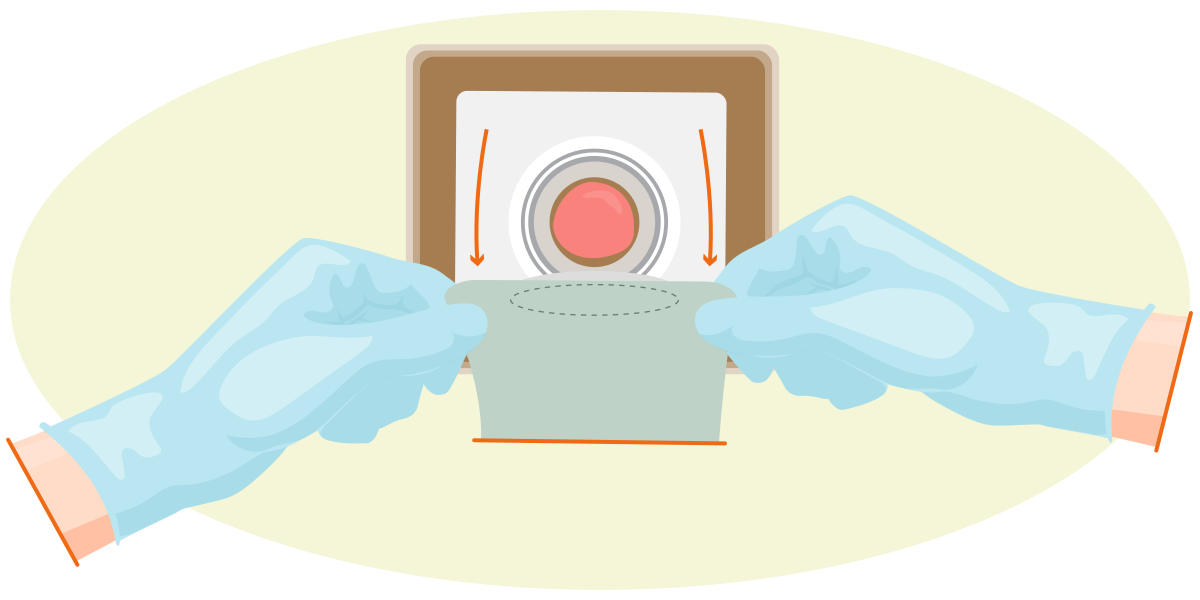
Removing PouchRemoving the pouch will provide direct access to the stoma. Assess the stoma for color and bleeding.
Step 11: Connect the colostomy irrigation sleeve to the ostomy skin barrier.
Nursing Process: Implementation
Rationale: Some irrigation sleeves use a belt to securely attach the sleeve to the body to prevent accidental removal. |
Step 12: Drape the bottom of the colostomy irrigation sleeve over the rim of the toilet/commode.
Nursing Process: Implementation
Rationale: The irrigation sleeve will promote drainage of the irrigant and fecal contents directly into the toilet. |
Step 13: Ensure that the tubing is clamped and fill the irrigation reservoir with 500 to 1,000 mL of water as prescribed.
Nursing Process: Implementation
Rationale: Clients will often titrate the amount of irrigation fluid used, beginning with 250 to 500 mL the first time. The water should be warm. |
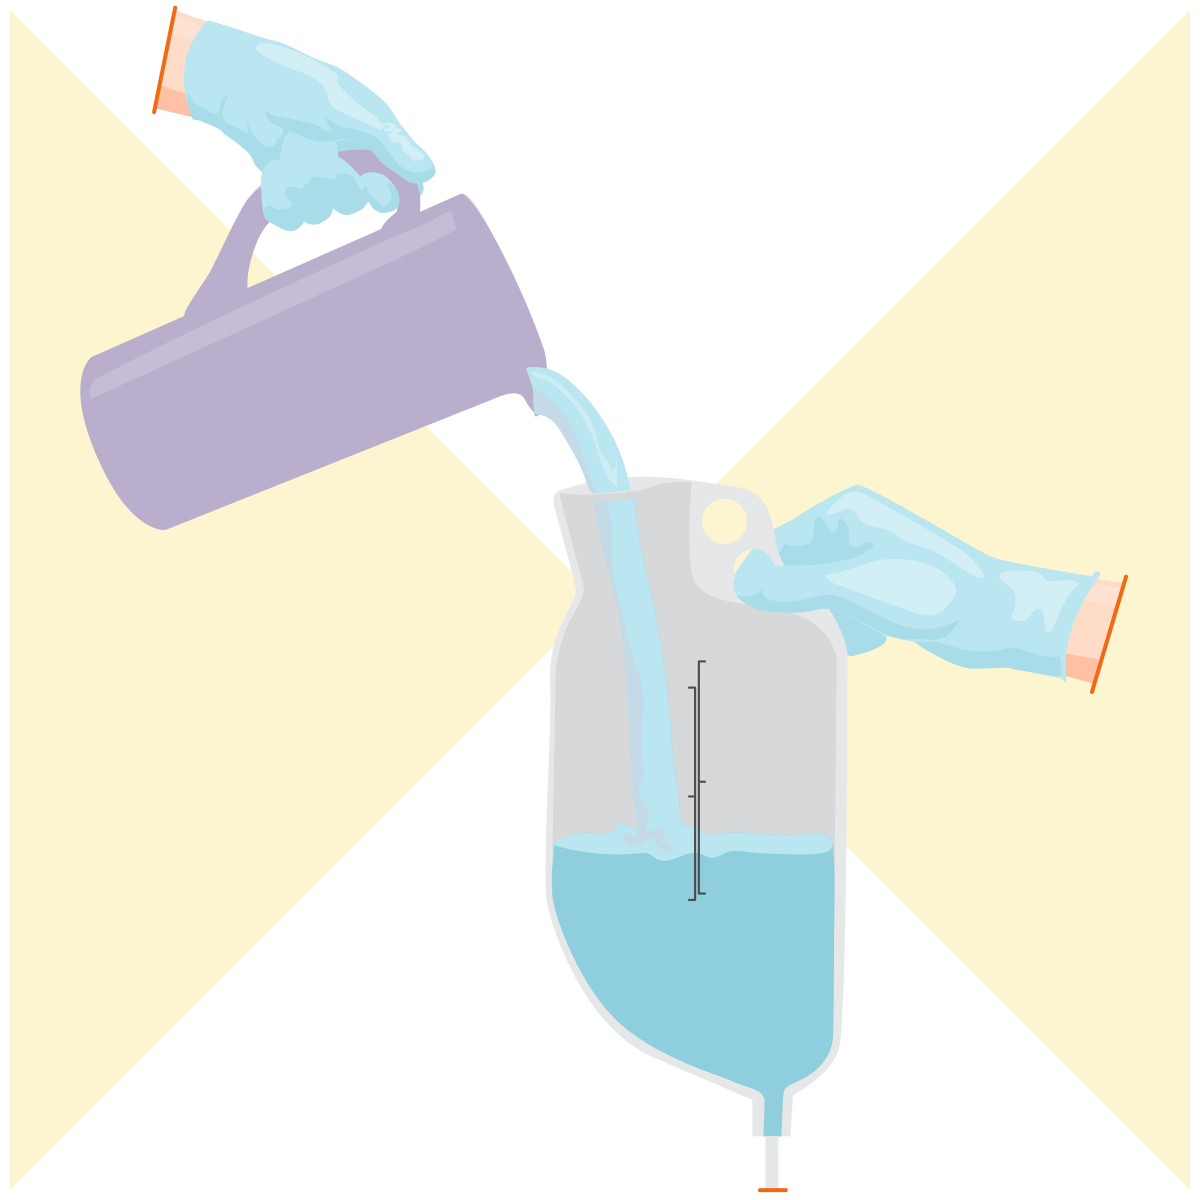
Irrigation reservoirFill the reservoir with water.
Step 14: Hang the reservoir so that the client’s shoulder is level with the bottom of the bag.
Nursing Process: Implementation
Rationale: The height of the bag will determine the pressure of the irrigation fluid. |
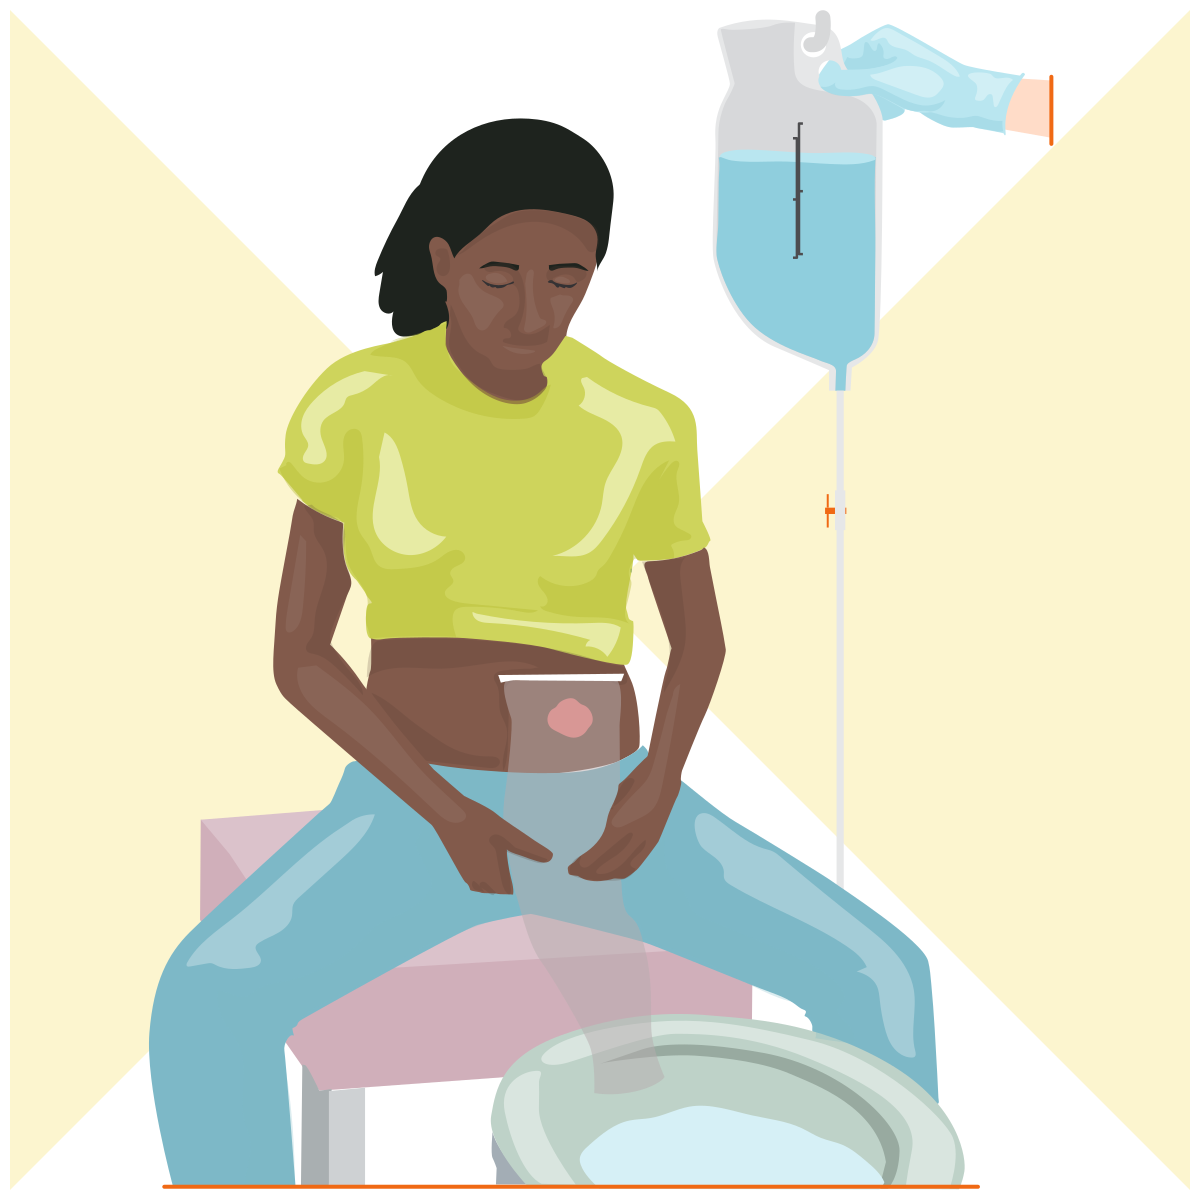
Hanging reservoirHang irrigation bag with client sitting by toilet.
Step 15: Apply a water-soluble lubricant to the cone-shaped irrigation tip.
Nursing Process: Implementation
Rationale: Using water-based lubricant and a cone-shaped irrigation tip will prevent tissue trauma to the stoma. |
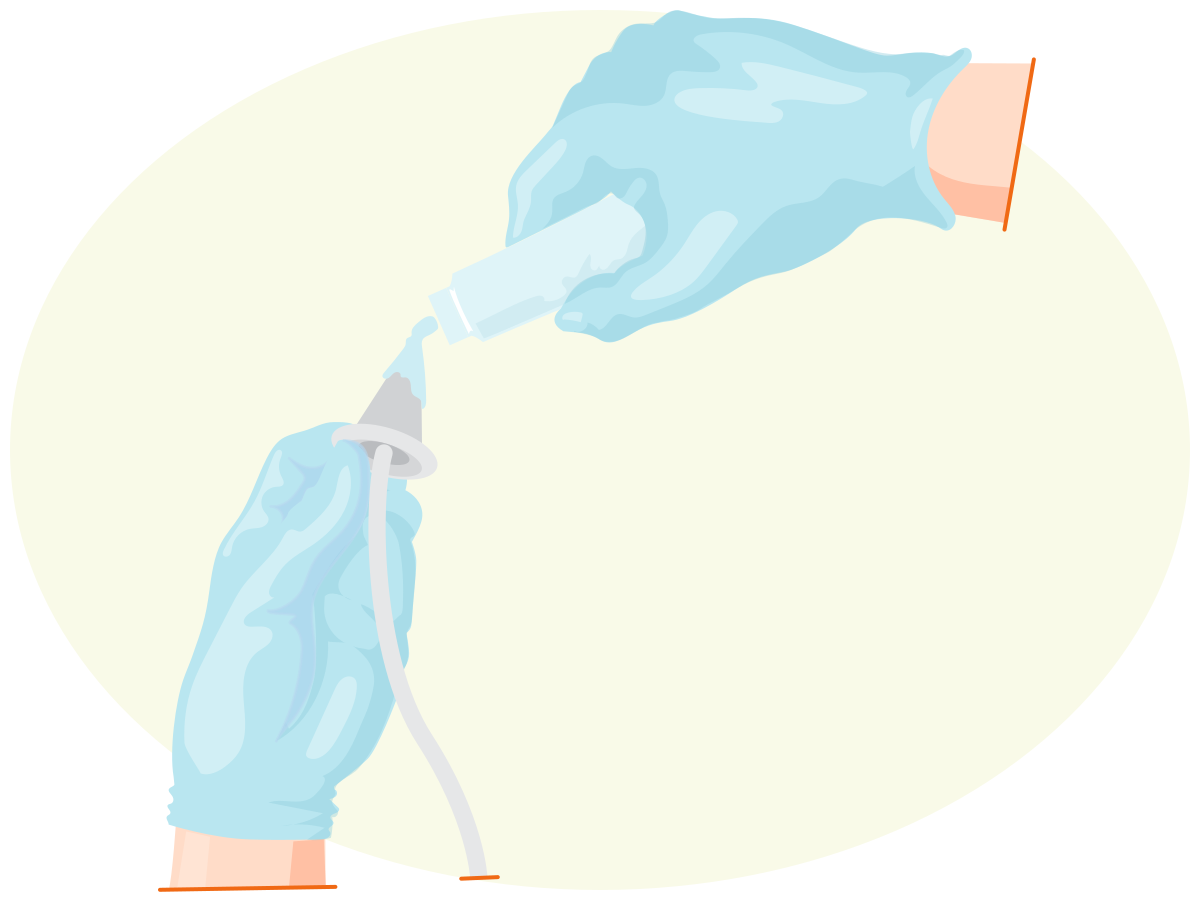
Water-Soluble LubricantApply lubricant to the cone-shaped irrigation tip.
Step 16: Eliminate air bubbles from the irrigation tubing by running a small amount of fluid into the toilet/commode by opening the clamp on the tubing.
Nursing Process: Implementation
Rationale: Removing air from irrigation tubing will prevent air from entering the colon, which could cause cramping. |
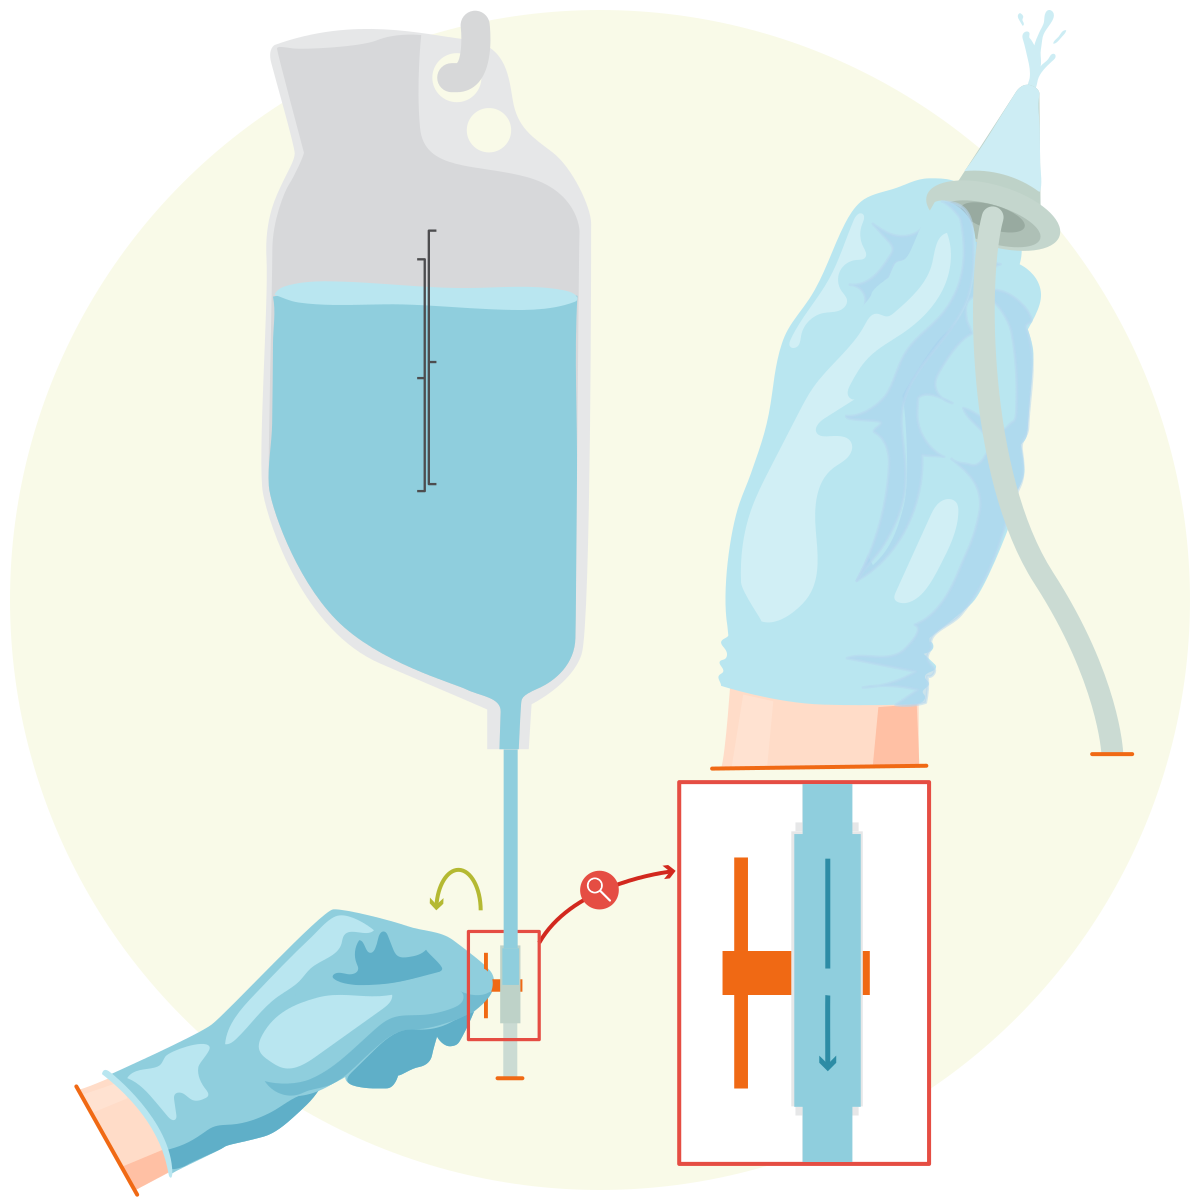
Removing air bubblesEliminate air bubbles from the irrigation tubing by running a small amount of fluid into the toilet by opening the clamp on the tubing.
Step 17: Reapply the clamp.
Nursing Process: Implementation
Rationale: Clamping the tube maintains the fluid in the reservoir. |
Step 18: Insert the irrigation cone tip into the stoma.
Nursing Process: Implementation
Rationale: The irrigation tube should be inserted gently, but firmly. Colon perforation can occur if the irrigation tube is inserted with force or beyond the widest part of the stoma. |
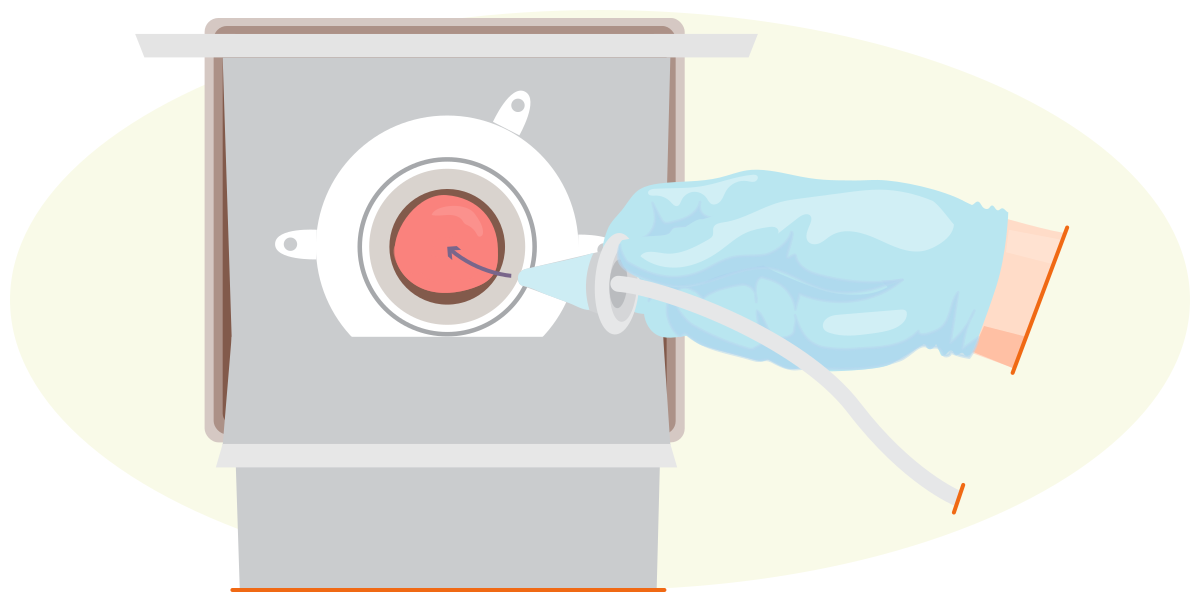
Inserting irrigation cone tipInsert the irrigation cone tip into the stoma.
Step 19: Unclamp the tubing and allow the irrigation fluid to slowly enter the colon over 5 to 10 min.
Nursing Process: Implementation
Rationale: If irrigation fluid begins to leak around the cone-shaped tip, rotate the angle of the tip. |
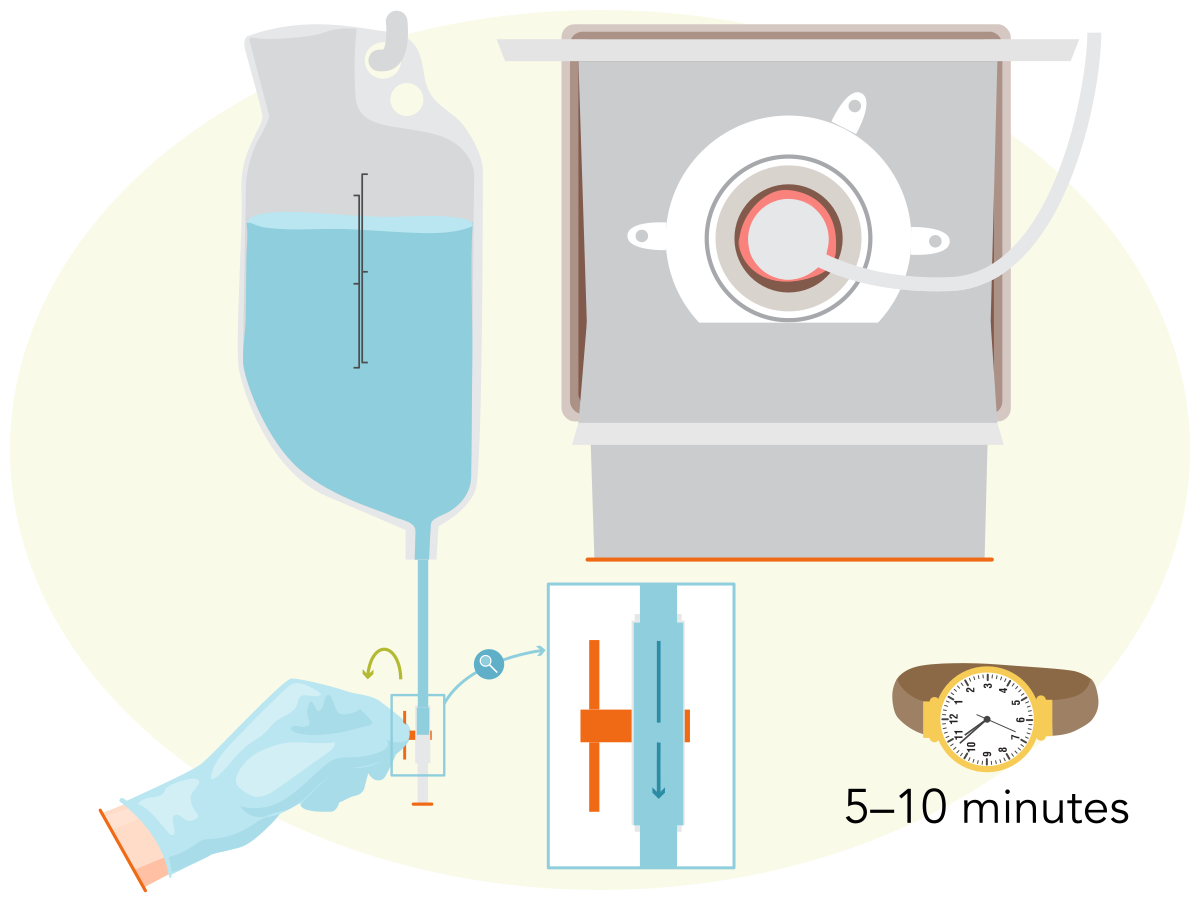
Flowing fluidUnclamp tubing and allow fluid to flow.
Step 20: If cramping occurs, slow the irrigation fluid rate.
Nursing Process: Implementation
Rationale: Lower the reservoir bag to slow the administration rate. If cramping continues with the slower rate, stop irrigation temporarily and instruct the client to take slow deep breaths. |
Step 21: After all fluid has instilled, hold the irrigation tip in place for 10 seconds before removing the cone tip from the client’s stoma.
Nursing Process: Implementation
Rationale: Waiting to remove the tube from the stoma ensures that the irrigation fluid has flowed into the colon. |
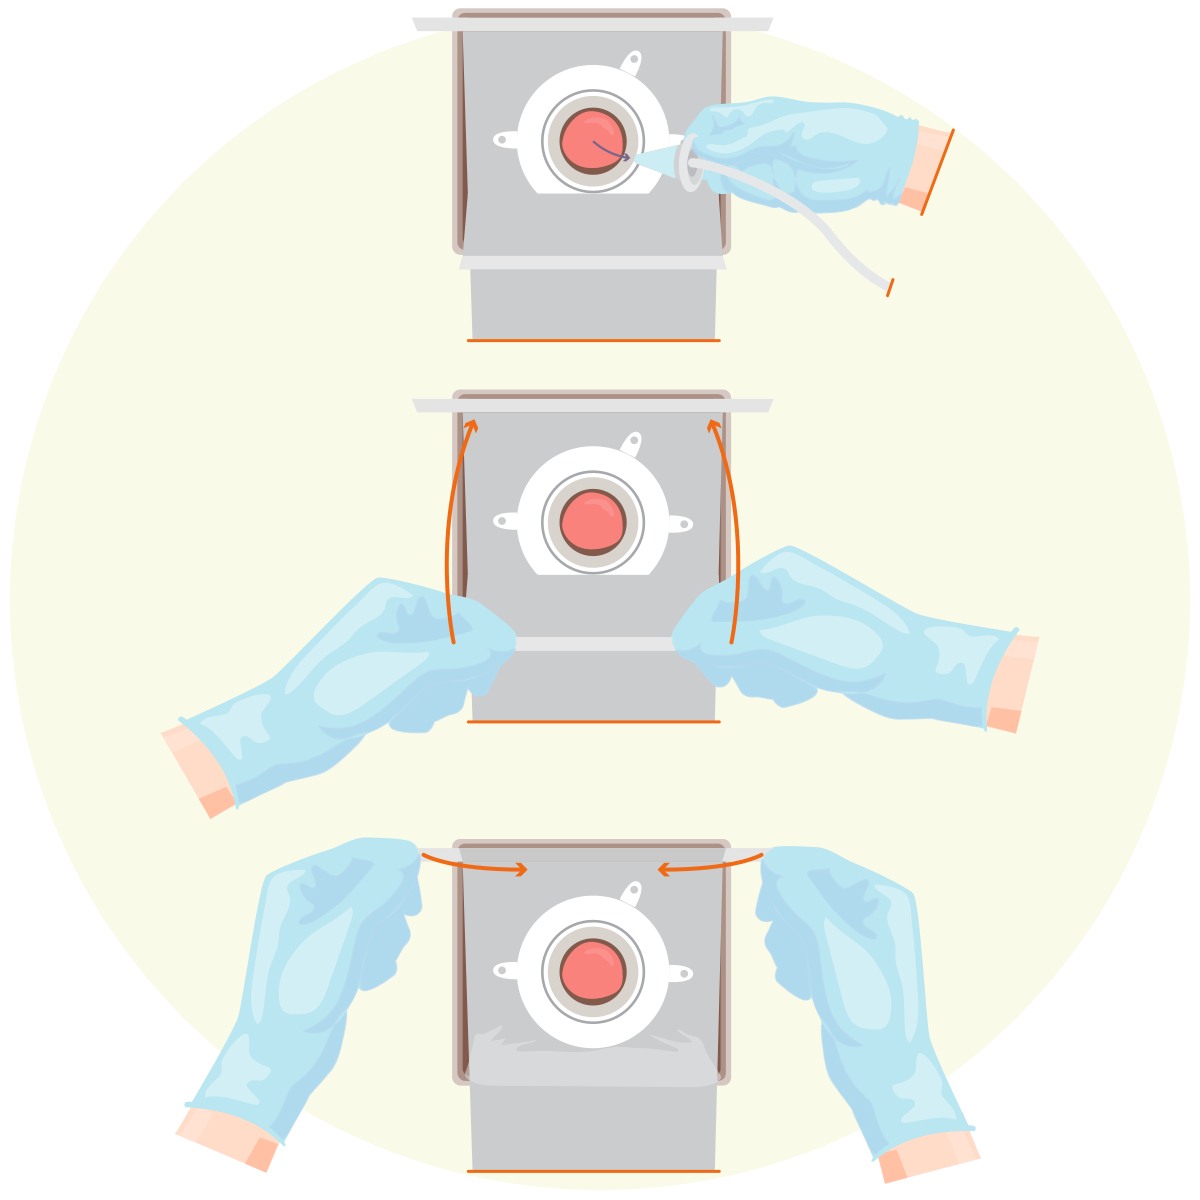
Removing Cone TipRemove cone and apply irrigation bag.
Step 22: Allow 10 to 15 min for irrigation fluid and feces to flow into the sleeve and then into the toilet/commode.
Nursing Process: Implementation
Rationale: Irrigation fluid and feces will begin to flow within 5 to 10 min. After 15 min, close the bottom of the sleeve. |
Step 23: Maintain the sleeve in place for an additional 30 to 45 min.
Nursing Process: Implementation
Rationale: Keeping the sleeve in place allows for complete bowel evacuation. |
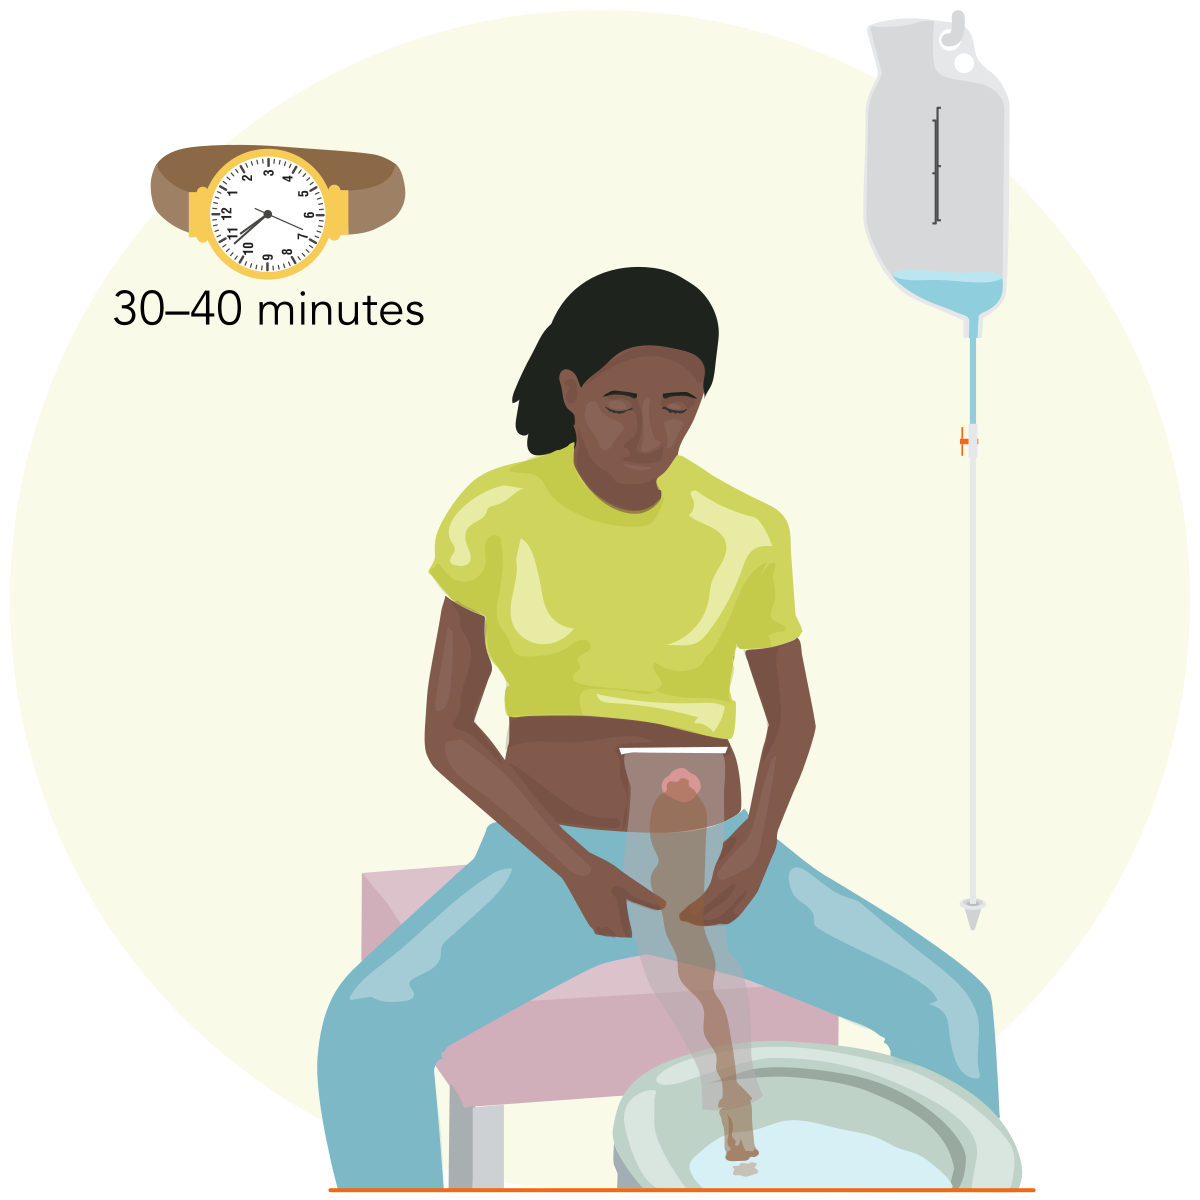
Sleeve in PlaceMaintain the sleeve in place for an additional 30 to 45 min.
Step 24: For the client who is ambulatory: Clean and dry the end of the sleeve, roll the edge, and apply a pouch clamp.
Nursing Process: Implementation
Rationale: A client who is ambulatory can be encouraged to walk, which will promote peristalsis. Clients can complete hygiene activities but should be advised to stay close to the toilet. |
Step 25: For the client who remains seated on the commode/toilet: Permit all remaining irrigant and feces to drain from the stoma.
Nursing Process: Implementation
Rationale: Permitting all remaining irrigant and feces to drain from the stoma while the client remains seated on the commode allows for complete bowel emptying triggered by the irrigation. |
Step 26: When all fluid and feces has drained, flush the contents down the toilet.
Nursing Process: Implementation
Rationale: During drainage of fluid and feces, use of odor-neutralizing sprays can increase comfort to the client. |
Step 27: Remove the sleeve from the client.
Nursing Process: Implementation
Rationale: Hold the sleeve to prevent accidental leakage of residual fluid or feces. |
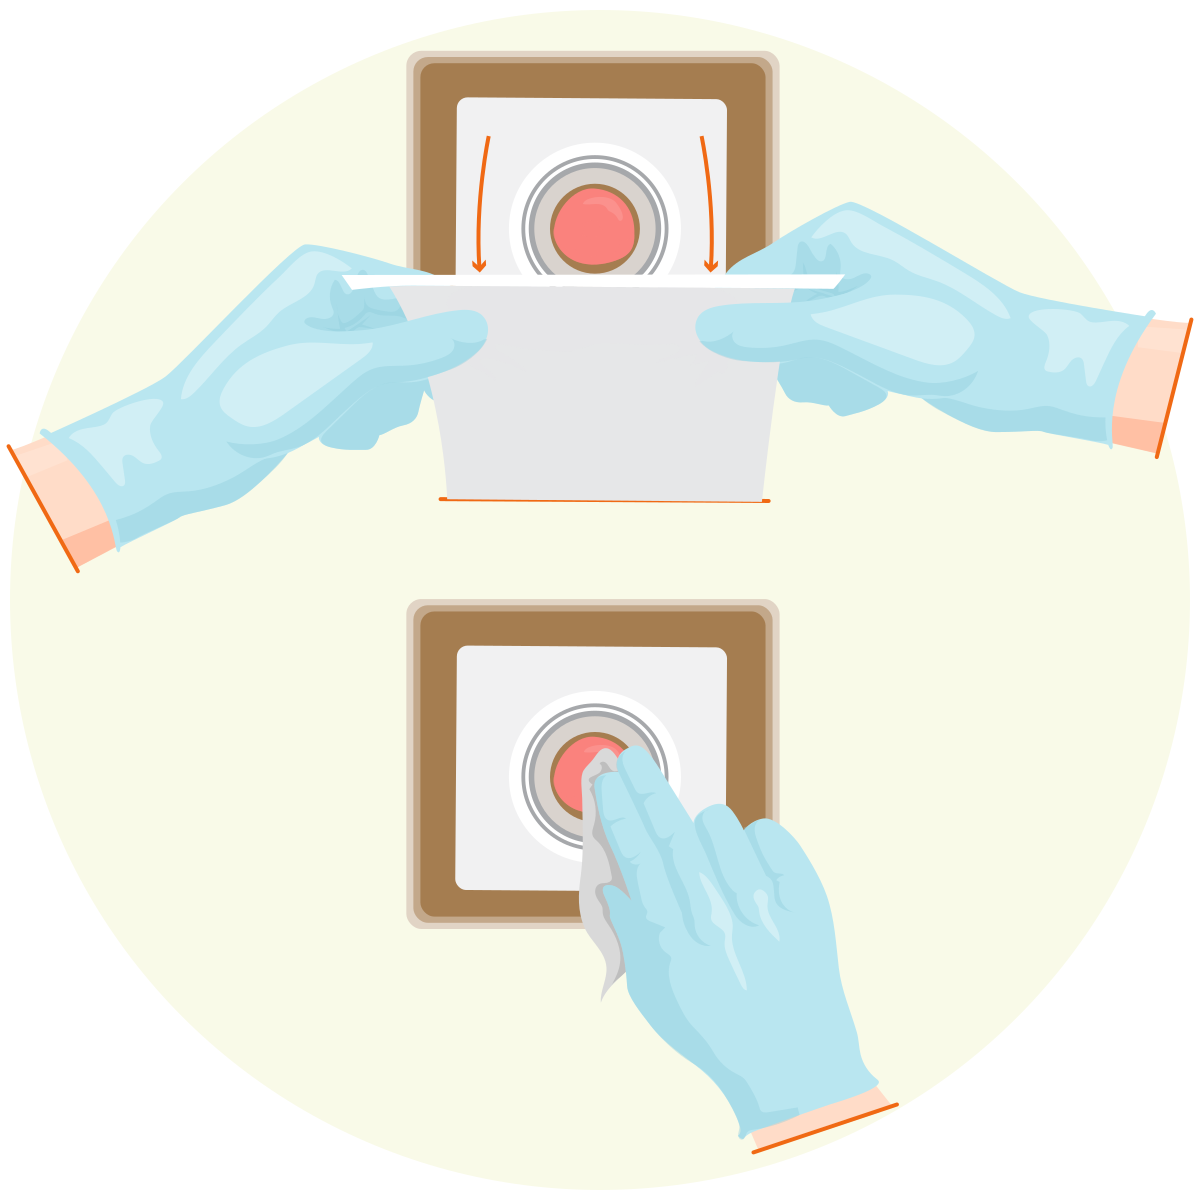
Removing SleeveRemove sleeve and cleanse stoma.
Step 28: Cleanse the stomal area. Pat the stomal area dry.
Nursing Process: Implementation
Rationale: Feces contains digestive enzymes that can cause irritation to the stoma and the surrounding tissue. |
Step 29: Replace the ostomy pouch or stomal covering.
Nursing Process: Implementation
Rationale: For clients who have not achieved fecal continence, reapply the ostomy appliance to prevent leakage of feces. |
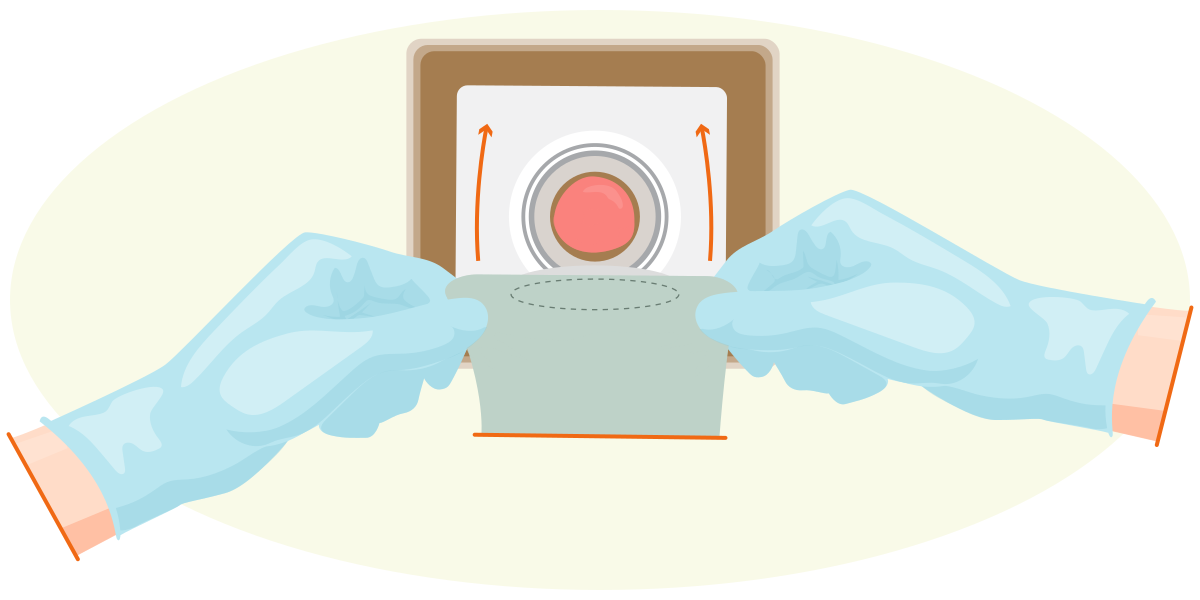
Applying New PouchPlace a new pouch over the stoma.
Final Steps
Step 30: Prioritize the safety and well-being of the client and adhere to all safety guidelines and facility policies.
Nursing Process: Implementation
Rationale: The nurse should prioritize client safety according to the client’s individual needs before leaving the client’s room to reduce the risk of falls and client injury. |
Step 31: Remove and discard of supplies as needed.
Nursing Process: Implementation
Rationale: Disposing of supplies immediately, especially those containing bodily fluids, decreases the risk of contamination and the spread of germs. |
Step 32: Perform hand hygiene.
Nursing Process: Implementation
Rationale: Performing hand hygiene following client care is an important infection control measure. |
Step 33: Document the care provided as applicable.
Document the following.
Date and time of irrigation
Amount of fluid instilled
Assessment of the stoma and surrounding tissue
Color and consistency of fecal drainage
Any complications or interventions
Nursing Process: Implementation
Rationale: As part of the implementation phase of the nursing process, the nurse should document the findings for the client’s peripheral pulses. Accurate and timely documentation allows for immediate access of client data by members of the client’s health care team. |
Client Considerations (general, age-related, home care)
Consider the client’s schedule for optimal time to perform colostomy irrigation.
Rationale: For the best results, irrigation should be performed once daily at the same time of day. Performing irrigation 1 hr following meals may increase successful outcomes. |
Consider the client’s feelings toward the colostomy.
Rationale: Some clients may experience disturbed body image related to the colostomy. |
Interventions for Unexpected Outcomes
Notify the provider if retention of irrigation fluid occurs or manifestations of bleeding are noted.
Rationale: The colon is distended during irrigation, which could cause bowel perforation. |
Discontinue irrigation if the client experiences dizziness, bradycardia, or hypotension.
Rationale: A vasovagal response can occur with straining or peristalsis. |
Nasogastric Decompression
Page 1
Overview
Nasogastric decompression is the skill of using a nasogastric tube to remove a client’s stomach contents in order to prevent nausea, vomiting, and/or gastric distention. If prescribed, the nasogastric tube can be attached to a suction source.
Laws and policies regarding the delegation of client care tasks vary by state and facility. When delegating tasks, the nurse must follow their state’s Nurse Practice Act and the NCSBN’s 5 Rights of Delegation. The 5 Rights of Delegation include determining the right task, the right circumstance, and the right person, providing the right directions and communication, and performing the right supervision and evaluation.
Overview of Steps
Click to download this file.
Equipment
pH paper
60 mL irrigation syringe
Suction tubing
Suction device
Rationale: Analysis of the pH drainage from the nasogastric tube is done to validate placement of the tube before attaching it to suction. A 60 mL irrigation syringe is needed to aspirate the gastric contents. One end of the suction tubing is attached to the nasogastric tube and the other end is attached to the suction machine. A suction device is required if suction is to be maintained. The equipment should be checked to ensure that it is working properly. |
Skill Demonstration
Nasogastric Tube: Decompression
Nasogastric Tube: Decompression: Transcript
Skills and the Nursing Process
Skill Steps With Rationales provide step-by-step instruction on skill performance according to best practice guidelines. Each skill step is identified by a phase of the nursing process. Because the nursing process is continuous and dynamic, skill steps may move back and forth between phases as the nurse progresses through the performance of the skill.
Skill Steps With Rationales
Required Initial Steps
Step 1: Gather supplies.
Nursing Process: Implementation
Rationale: Gathering supplies and ensuring they are clean and properly working prior to beginning the technique helps ensure the nurse is prepared to perform the procedure. |
Step 2: Provide privacy as needed.
Nursing Process: Implementation
Rationale: Providing privacy is a part of maintaining client confidentiality. The nurse should respect a client’s right to physical privacy by closing the door to the client’s room or closing the curtain if one is present. |
Step 3: Introduce yourself.
Nursing Process: Implementation
Rationale: Introducing yourself promotes a therapeutic nurse-client relationship. |
Step 4: Perform hand hygiene and apply PPE (when applicable).
Nursing Process: Implementation
Rationale: Performing hand hygiene prior to client care is an important infection control measure. The nurse should practice standard precautions by applying nonsterile gloves and other PPE if there is a possibility of contact with blood or body fluids. |
Step 5: Identify the client using two identifiers.
Nursing Process: Implementation
Rationale: Identifying the client according to facility protocol is a safety measure to ensure that the correct procedure is being performed on the correct client. |
Step 6: Determine any allergies or contraindications.
Nursing Process: Assessment/Data Collection
Rationale: Determining allergies and/or contraindications ensures client safety by preventing adverse reactions and ensuring that treatments are safe and effective. |
Step 7: Provide education as needed.
Nursing Process: Implementation
Rationale: Client education decreases client anxiety and promotes the nurse-client relationship. After explaining the procedure, the nurse should determine if the client has any questions or concerns and verify the client’s understanding. |
Step 8: Verify prescriptions and orders.
Nursing Process: Implementation
Rationale: Verifying prescriptions and orders is crucial to ensure client safety, prevent errors, and provide effective care. The verification process ensures that any discrepancies or issues are identified and addressed before they impact the client’s care. |
Next Steps
Step 9: Confirm placement of the nasogastric tube.
Nursing Process: Assessment/Data Collection
Rationale: Due to the expense of routine x-rays and concerns regarding exposure to radiation, some facilities recommend several bedside methods for ongoing verification (prior to each instance of instilling fluids, medications, and nutrition) after the initial radiological confirmation. |
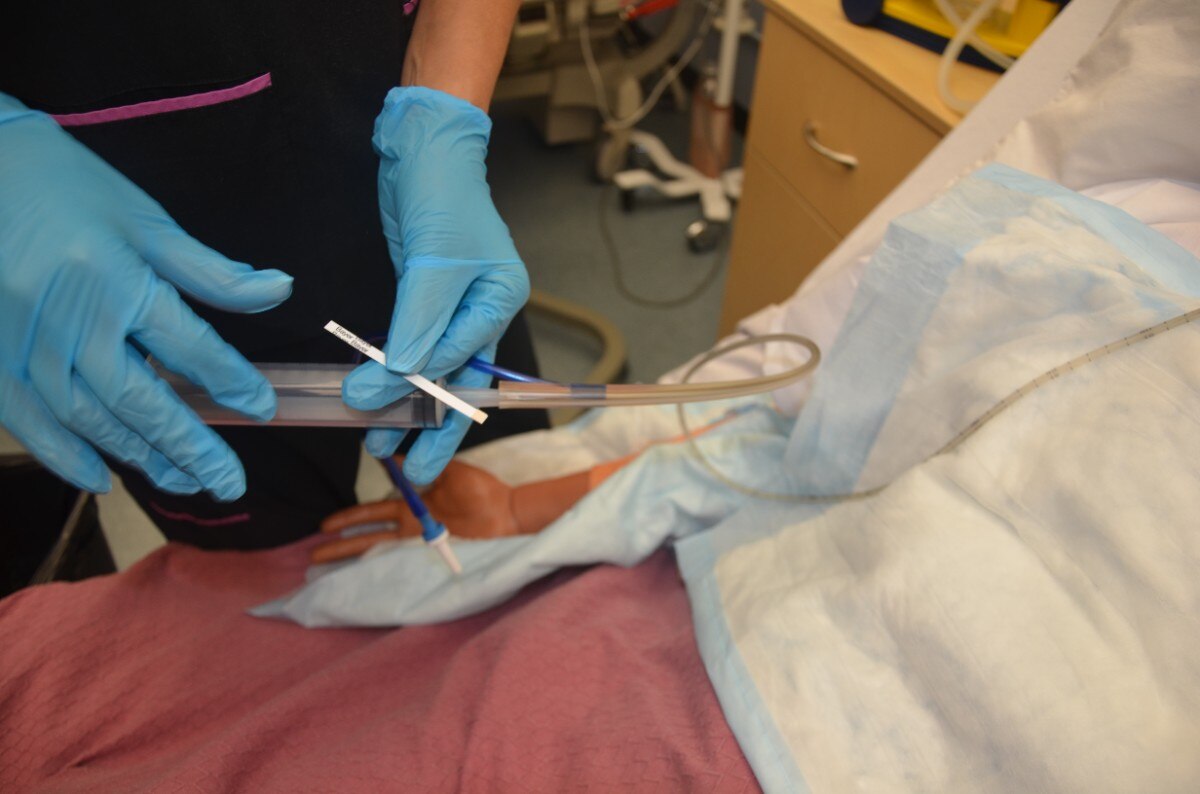
Clinical Procedures for Safer Patient Care – Thompson Rivers University Edition, 2018
Confirming NG tube placementApply a small amount of the gastric fluid to the pH paper to determine the pH of the contents
Step 10: Assemble and connect the drainage suction equipment to the wall suction.
Nursing Process: Implementation
Rationale: Use of the proper settings on a properly functioning suction system is essential to achieve the goals of gastric decompression in a safe and effective manner. |
Step 11: Adjust the suction regulator per the provider's order.
Nursing Process: Implementation
Rationale: The suction should be checked prior to connecting the connection tubing to the client. |
Step 12: Connect the nasogastric tube to the suction tubing.
Nursing Process: Implementation
Rationale: Tubing from the suction canister is attached to the end of the nasogastric tube to remove the stomach contents. |
Final Steps
Step 13: Prioritize the safety and well-being of the client and adhere to all safety guidelines and facility policies.
Nursing Process: Implementation
Rationale: The nurse should prioritize client safety, according to the client’s individual needs, before leaving the client’s room to reduce the risk of falls and client injury. |
Step 14: Remove and discard of supplies as needed.
Nursing Process: Implementation
Rationale: Disposing of supplies immediately, especially those containing bodily fluids, decreases the risk of contamination and the spread of germs. |
Step 15: Perform hand hygiene.
Nursing Process: Implementation
Rationale: Performing hand hygiene following client care is an important infection control measure. |
Step 16: Document the care provided as applicable.
Document the following.
Type of suction used
pH of gastric contents
Amount of gastric contents
Client’s tolerance of the procedure
Nursing Process: Implementation
Rationale: As part of the implementation phase of the nursing process, the nurse should document the findings for the client’s peripheral pulses. Accurate and timely documentation allows for immediate access of client data by members of the client’s health care team. |
Client Considerations (general, age-related, home care)
Consider the client’s level of discomfort.
Rationale: A nasogastric tube can cause discomfort to the client. The tube should be removed as soon as it is no longer needed for therapeutic function. |
Provide oral and nasal hygiene.
Rationale: The nurse should provide lubricant for lips and external nares to reduce the risk of skin breakdown. |
Interventions for Unexpected Outcomes
Monitor the client for reports of pain, difficulty breathing, coughing, choking, or vomiting.
Rationale: Pain, coughing, or vomiting can indicate that the tube is occluded or has migrated. |
Monitor the client for dehydration and electrolyte imbalances.
Rationale: Due to the removal of gastric contents via suctioning, the client is at risk for developing dehydration and electrolyte imbalances. |