phlebotomy
its the proccess of taking blood via vein/ artery.
in some cases blood is taken for specific tests.
legal and professional responsibilities:
before venepuncture midwife should check the local trust policy.
check how many supervised pratices are needed before performing alone
should check w practice supervisor
check if any exclusions to performing skill on certain client groups.
should get consent
remember to sign and date correctly sample
indications for venepuncture:
antinatal booking for bloods or for repeats during pregnancy- blood groups/ diseases (HIV)/ blood count/ random blood glucose
additional bloods booked if existing disease- diabetes/ pre-existing hypertention/ liver disease.
if pregnancy induced conditions are suspected- hyperdermis gravidarum/ pre-eclampsia
antenatal screening tests for fertility
maternal blood transfusion
suspected maternal infections
post-delivery indications
choosing a vein:
position
identify a good vein
veins in antcubical fossa
radius bone supports lateral (thumb) movement of forearm while ulna supports medial (little finger) side.
soft and bouncy
refills
be visible
feels round
well supported surrounding structures
be straight and free of valvs for easy advancement of needle in vein
valvs arefelt as small lumps or can be visual and can be more commonly seen in certain vessels
vein layers:
inner- tunica intima- an elastic endothelial lining which forms semi lunar folds of valves
middle- tunica media- muscular elastic tissue maintains tone and allow contraction and relaxation of vein
outer- tunica adventitia- connective collagen contains nerves and lymphatic tissue, surrounds and support vein.
considerations before procedure:
informed consent
client identification
position and comfort
collect required equipment and request blood forms/ card
know blood specimen tube and needles are in date.
components of needles:
different sizes
higher gauge= smaller needle diameter
21-22 gauge needle usually used.
equipment:
blood bottles
tourniquet
vacutainer
needle
70% alcohol based wipe
cotton wool/ gauze
plaster (check for allergy)
sharps bin
tray/ container
gloves
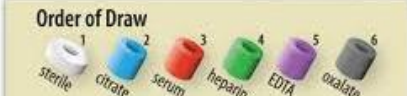
blood collection tubes:
plastic/ glass with rubber stopper
rubber stopper of blood collection tubes colour coded for specific type of blood
each stopper show diff anticoagulants/ other chemical activity
each tube vacuum designed to draw predetermined volume of blood.
anseptic non-touch technique (ANTT):
when taking blood the needle hold bypasses all natural barriers and so the area needs to be as sterile as possible.
wash hands before
wear gloves
clean skin of area before
dispose of sharps properly
ensure the needle isnt broken/ bent/ been recapped
be aware of common blood born pathogens- hepatitis B/ C and HIV.
during transportation forms kept seperate from blood sample to prevent contamination.
how to perform:
apply torniquet 3-4 inches (10 cm) above elbow
torniquet need enough tension to compress vein but not too tight as can effect calcium levels
ask patient before applying torniquet and ask patent to make fist to elp make veins prominent
feel vein
select appropriate vein
clean site (30 seconds) after dont touch site
leave to dry
release torniquet
put on gloves and re-apply torniquet
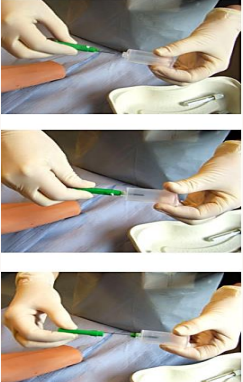
twist needle seal open and remove plastic cover
insert grey end in vacutainer device ad twist to ensure secure.
remove green/ blue plastic cover to expose needle
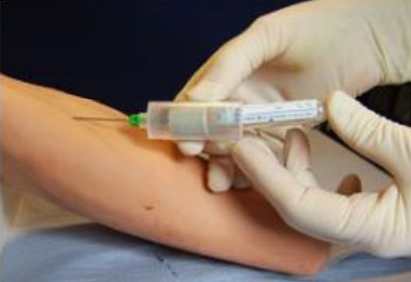
position with arm extended in straight line and w non-dominant hand grasp arm and use thumb to draw skin and anchor the vein- avoiding trauma beneath puncture site
insert swiftly through skin into lumen of vein
hold needle inline with vein and ensure bevel points upward
insert at 30-40 degree angle
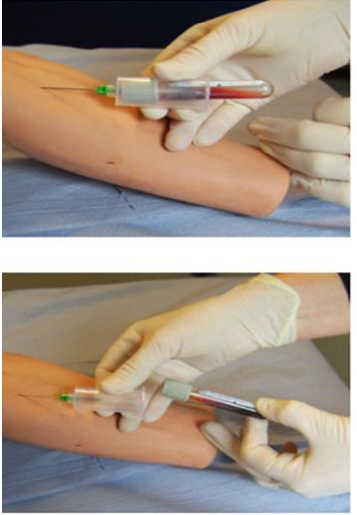
hold needle and mush specimine tube into needle holder that grey spike inside needle holder penetrates the tube
should have visible blood flow as vacuum in bottle cause blood flow into tube
blood flow stop at right amount needed
keep vacutainer with needle in vein and remove tube with free hand
if doing multiple collections- use other hand to interchange tubes and repeat.
put sample in container
release torniquet
place clean gauze over site and remove needle in quick movement
apply pressure for 2-3 mins after to prevet haematoma
can ask patient to keep applying pressure
apply dressing/ plaster
put sharps in sharps bin
rotate bottles to mix blood
label sample and complete request form
ensure details on sample are correct
disguard waste and gloves and wash hands
send sample to labortary
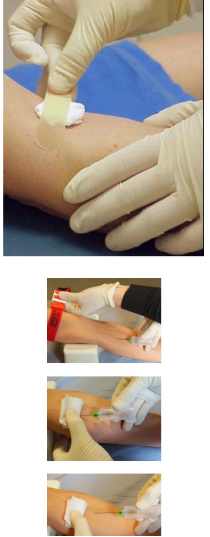
if blood doesnt flow:
needle may not be in vein
may passed through vein
may be pushed against side of vein
torniquet not loose enough
no vaccum
potential complications:
haematoma formation- apply pressure 2-3 mins after withdraw of needle
puncture of artery- withdraw needle and press firmly for 5 mins
thromboplebitis/ infections- follow infection control procedures
extravasation- where canular enter tissue, flushing hard and can have swelling. remove cannular asap
if not get in ask senior member of staff.