Blood Lab - Hematocrit
Key Concepts
Hematocrit (HCT) is the percentage of erythrocytes, or red blood cells (RBCs), in a whole blood sample.
Hematocrit (HCT) is determined by separating the formed elements from the plasma and measuring the packed red blood cell volume.
Normal hematocrit varies depending on many factors, but generally accepted ranges are:
Adult males: 42–52%
Adult females: 37–47%
An abnormally elevated hematocrit can occur for several reasons, such as being at a high altitude, having an elevated testosterone level, with certain diseases, and if the person is "blood doping."
Blood doping refers to any of several methods used to increase the blood oxygen-carrying capacity.
Overview
In this simulation, you will measure the hematocrit of three blood samples from athletes.
Your task is to determine if any of the athletes are blood doping.
You have blood samples of known values to compare. Positive control represents a doped sample. Negative control represents a sample that is not doped.
Take a moment to reflect on personal safety precautions. Working with blood is a potentially hazardous situation. In real life, you should:
Wash the laboratory lab benches before and after the procedures with an appropriate disinfectant.
Wear disposable gloves and goggles when handling blood samples.
Wash your hands after the laboratory.
Only use a blood lancet once.
Dispose of used lancets, pipettes, and other blood contaminated items in the appropriate hazardous waste container, never a regular trash container
Before you begin
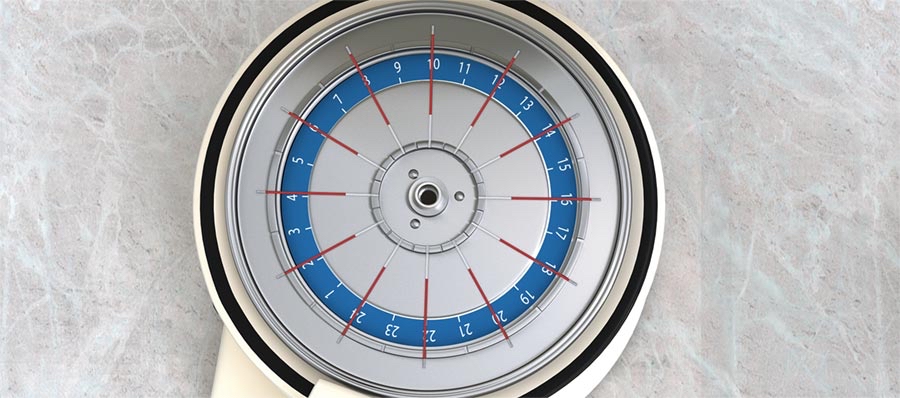
Loading the Centrifuge
Centrifuge must be balanced to run properly. Remember to make sure each capillary tube has another directly across from it in the centrifuge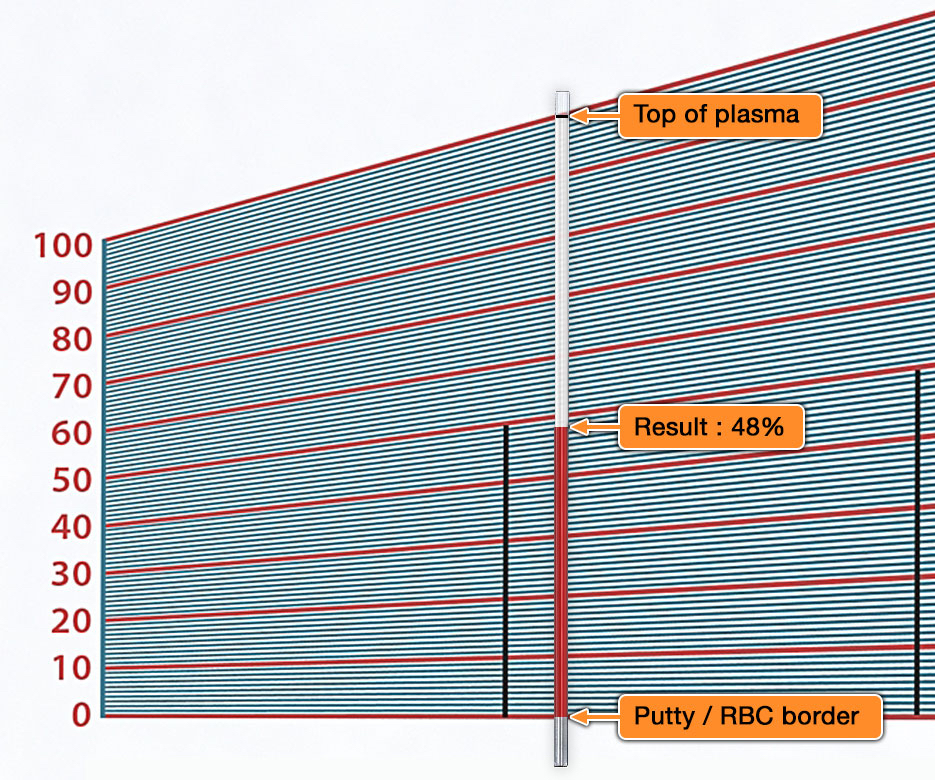
How to Measure
Measurement of the hematocrit is made simple by aligning the capillary tube to the hematocrit chart. To do this, move the capillary tube left or right along the chart such that the blood and clay are even with the bottom of the chart, and the top of the plasma is even with the top of the chart. Once you have aligned the capillary tube, click and you will see the measurement.
Laboratory Simulation
Steps
Phase 1: Identify lab equipment
Identify equipment in lab
Phase 2: Positive control sample
Pick up capillary tube and touch tube to positive sample to fill tube with blood
Use alcohol wipe to clean tube
Click clay to seal tube at one end
Place tube in centrifuge at position 4
Phase 3: Negative control sample
Pick up capillary tube and touch tube to negative sample to fill tube with blood
Use alcohol wipe to clean tube
Click clay to seal tube at one end
Place tube in centrifuge
Phase 4: Sample A
Pick up capillary tube and touch tube to sample A to fill tube with blood
Use alcohol wipe to clean tube
Click clay to seal tube at one end
Place tube in centrifuge at position 8
Phase 5: Sample B
Pick up capillary tube and touch tube to sample B to fill tube with blood
Use alcohol wipe to clean tube
Click clay to seal tube at one end
Place tube in centrifuge at position 20
Phase 6: Sample C
Pick up capillary tube and touch tube to sample C to fill tube with blood
Use alcohol wipe to clean tube
Click clay to seal tube at one end
Place tube in centrifuge at position 12
Phase 7: Balance and run the centrifuge
Pick up capillary tube and click clay to seal tube at one end
Place tube in centrifuge
Turn on centrifuge and run for 4 minutes
Turn off centrifuge
Measure each tube with blood by aligning it on the hematocrit chart and then click to display the measurement. Record in Lab Data
Dispose of each capillary tube in sharps container after measurements are recorded
Dispose of capillary tube used to balance centrifuge in sharps container
Phase 8: Lab wrap-up
Select your answer to the question
Phase 9: Apply what you have learned
Select your answer to the question
Phase 10: Save Lab Data
Relevant Lab Data is available to be saved for personal reference. Data will be available if you return to this laboratory simulation
Supplies
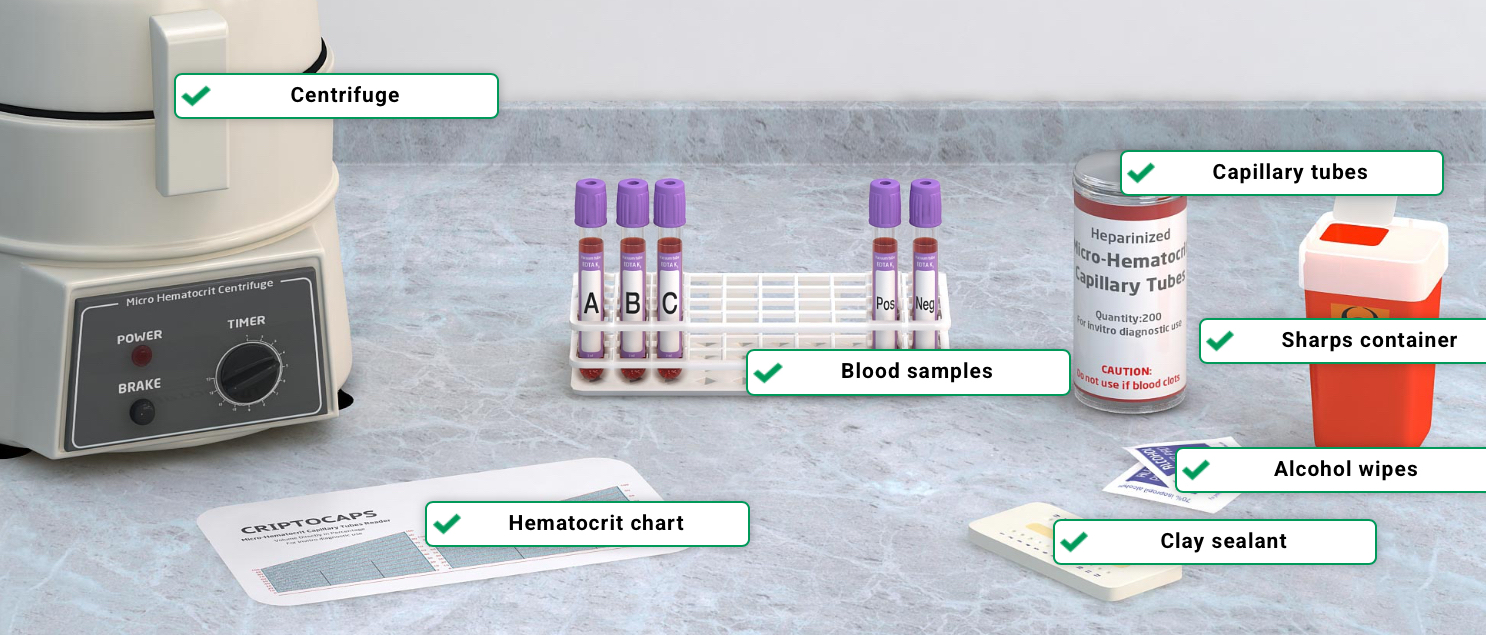
Collected Lab Data
