Advanced Incisor Build-up
Shine Theory
"I don't shine if you don't shine.“
It's a term coined to describe a commitment to collaborating with rather than competing against other people.
Shine Theory is an investment, over the long term, in helping someone be their best self—and relying on their help in return. It is a conscious decision to bring your full self to your friendships and to not let insecurity or envy ravage them. Shine Theory is a commitment to asking, “Would we be better as collaborators than as competitors?” The answer is almost always yes.
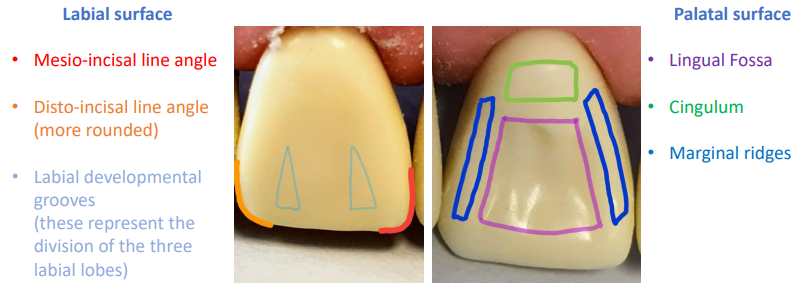
Dental morphology revision
Bonding Steps
• Etch
• Apply 37% orthophosphoric acid gel
• Enamel margins first for 5s followed by dentine for a further 15s (total-etch technique)
• Wash off (10s) using 3 in 1 spray
• Air dry for 2-3s leaving surface moist (moist bonding)
• Prime and bond
• Adhesive and solvent are already mixed in the bottle
• Actively rub into the cavity using micro-brush (5s)
• Air dry (5s) to evaporate off the solvent and thin adhesive layer
• Check surface shiny – if not, repeat
• Light cure @470nm for 20 seconds
Simplified layering technique
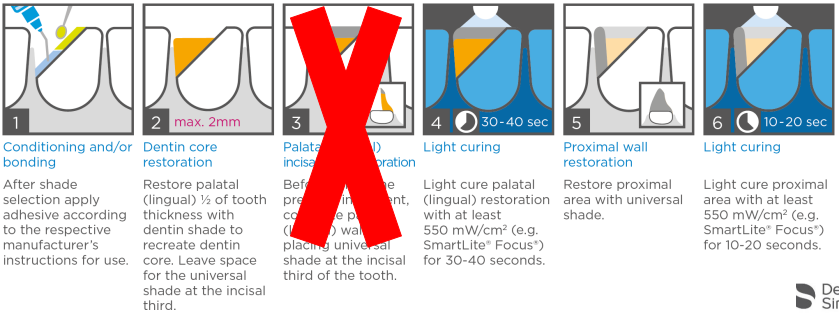
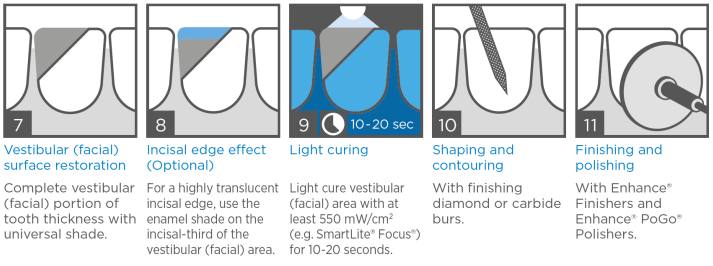
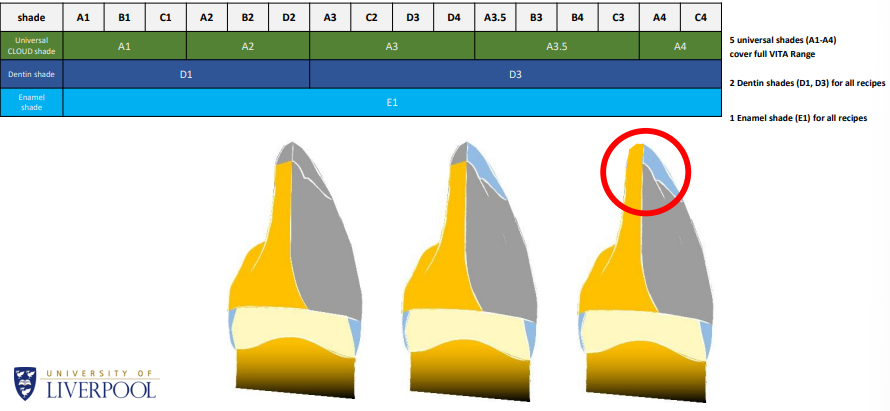
Simplified Composite Layering System (SLS)
UR1 Incisal edge
1. Take a silicone putty index and trim (finger width beyond the incisal edge)
• Homogenous mix of material
• No voids, good detail of palatal surface
• Seats correctly
• JUST lips the incisal edge to give width
• Does not cover any of the labial surface
• Finger width of material beyond the incisal edge
2. Simulate defect on UR1 - #629 (blue) chamfer bur
3. Remove unsupported enamel and labial bevel 2mm at 45 degree angle scalloped bevel margin – #629 (red) chamfer bur
4. Air abrasion
5. Etch and bond
6. Palatal wall – Shade D1 (VERY THIN!)
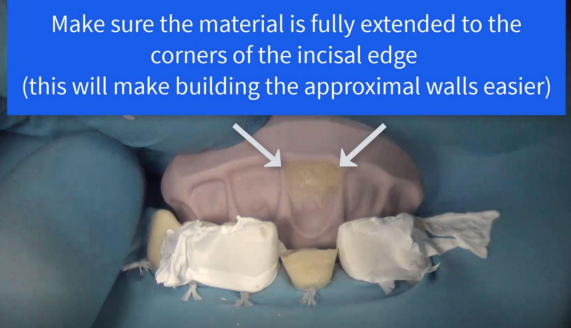
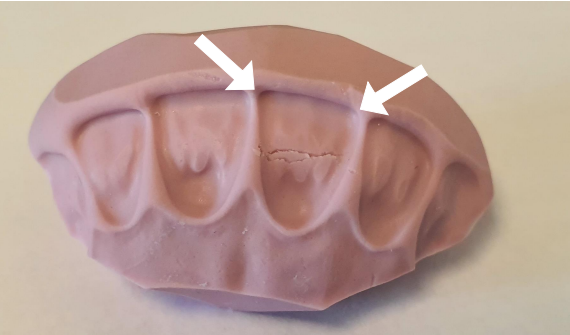
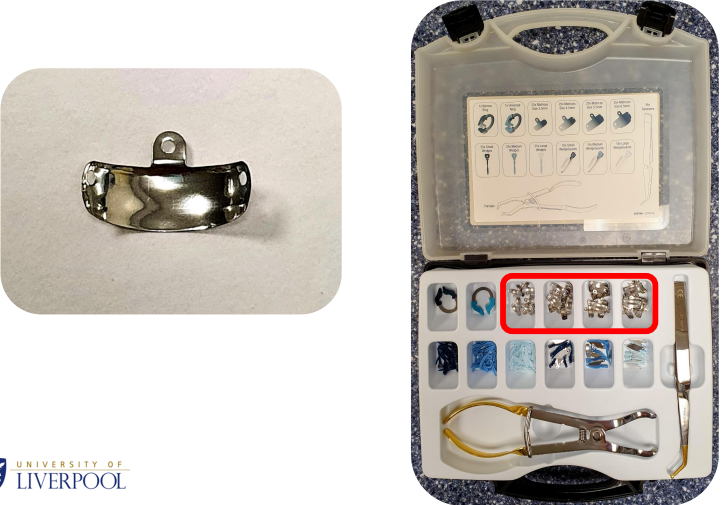
7. Mesial wall – Shade A2
8. Distal wall – Shade A2
9. Body – Shade D1 (stay 1-2mm from incisal edge)
10. Labial increment – Shade A2 and E1 in incisal 1-2mm
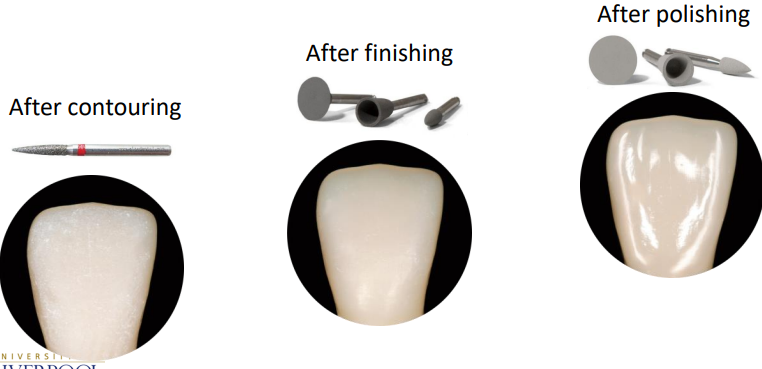
11. Finish and polish
Ceram.x Spectra ST
Enhance/Enhance PoGo
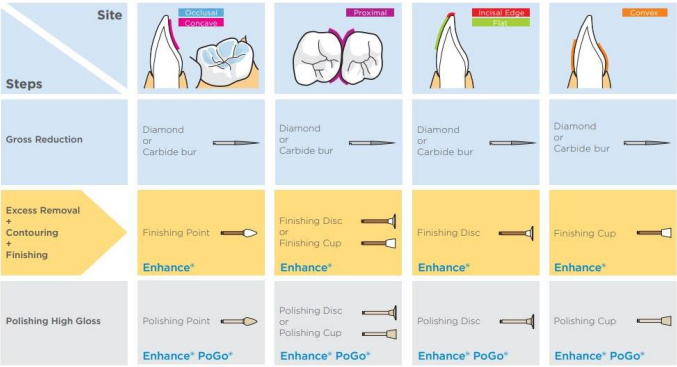
Suggested MolyDenBoo Protocol
1. Occlusion, ledges
2. Incisal edge, embrasures, proximal surfaces
3. Labial surface – 3 planes
• Sof-Lex discs Medium/Fine/Superfine
• Enhance bur
• Enhance PoGo OR Beige polishing wheel & White polishing wheel
4. Palatal surface
Ensure light pressure!
There is always more to learn . . .
“Polishing will highlight what you have done earlier if there are voids or a poor surface texture present these faults will be highlighted”
UR1 Incisal edge - Stages to be checked
1. Trimmed putty index
2. Simulated defect & bevel 2mm 45 degree angle (aim for scalloped bevel)
3. Palatal wall (shade D1)
4. After mesial and distal walls (shade A2)
5. Dentine body increment (Shade D1)
6. Finished restoration (after finishing & polishing)
Use the resources on Canvas (lectures and videos) to assist you
Pay particular attention to recreating the labial anatomy!
Ensure to work on the correct tooth!
Take care with the scalpel!